| Optional Objective/s |
|---|
| 1. Knock out policemen (4 policemen). |
| Reward/s | . | . | . |
|---|---|---|---|
| Money: | 660 £ | Bonus: | 75 £ |
| XP: | 350 XP | Bonus: | 100 XP |
| Gear: | N/A. |
Part 1: Hide the Evidence
As soon as we begin the memory we’ll see a carriage with a green objective marker parked on the road ahead. Approach the target carriage for a short scene.
Following the scene, if you look at your map, you’ll find three new objective markers. Each of these is located inside a separate restricted area and will transition into a search zone when approached. Our goal is to enter each of the three search areas, use Eagle Vision to locate a piece of evidence in each and then sneak up and interact with it to destroy it.

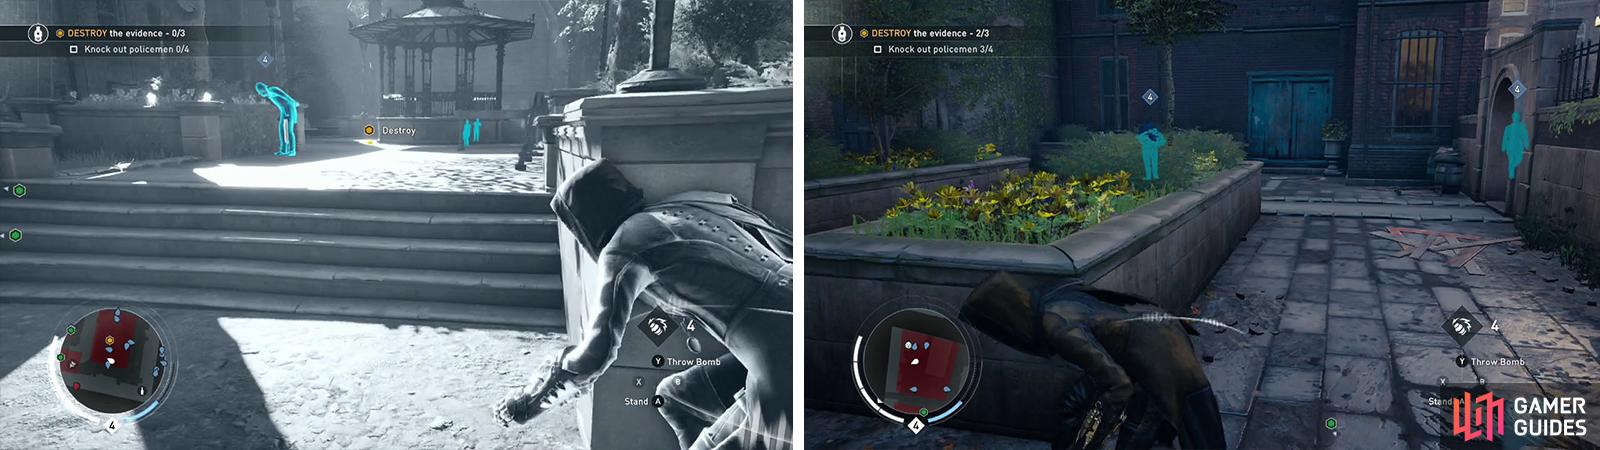
Approach the marked carriage (left) to speak with Nigel. be sure to knock out four policemen (right) for the optional objective.
Let’s head for the closest objective marker first. This is a large courtyard area with a gazebo in its center. There are several stationary police officers standing at barricades around the outside of the area keeping people out. Within the restricted area itself there are three police officers patrolling around. The piece of evidence we are looking for is located on the ground by the gazebo structure in the center of the area. Unfortunately, two of the three patrolling policemen will pass by it.
Use the Rope launcher and string a rope up between a pair of rooftops to observe and tag the enemies in the area below. Find the rooftop closest to the objective and drop down into the restricted area on foot when you are ready to proceed. Sneak over to the objective marker and either avoid the patrolling policemen, or knocking them out. Interact with the Hat [Evidence 1/3] at the gazebo. Return back to the rooftops.
At this point, there are two more pieces of evidence to collect and the southernmost should be closer – so let’s do that one first.
The second piece of evidence can be found in a small walled are in the southeast corner of the restricted area. There are two policemen here – one will patrol around the immediate area of the evidence, whilst the other will patrol from the western entrance, out and up the street and back again.
The first piece of evidence is by the gazebo (left). Grab the second piece of evidence when the policemen are not looking (right).
If you stick to the rooftops, you’ll find a conveniently located rope strung between buildings above this. From here we can drop down into the area when there is only one policeman about, sneak up and knock him out (or alternatively you could use the nearby haystacks or curtains as hiding spots to time your run). Destroy the evidence [Evidence 2/3] before the other patroller returns.
The final piece of evidence can be found in a small, rectangular restricted area just to the north. This area consists of two, walled square garden areas, each patrolled by a single policeman. The evidence can be found in the eastern walled garden on the ground near the center garden. Drop down into either garden when you see an opening and knock out the policeman before destroying the evidence [Evidence 3/3] .
Part 2: Hide the Body
After destroying all of the evidence, the objectives will be updated. We’ll now need to find the body and take it to a hiding place to hide it.
The body itself can be found on the ground by a small structure in the small, north of the church in the walled-off graveyard type area (In the same restricted area where we found the second piece of evidence). This area has a pair of guards who’ll patrol it pretty much constantly – one from the east and another form the west.
Sneak up using the walls as cover and take them out one at a time (if you haven’t knocked out four policemen yet for the optional objective, this is your last chance!), or if you spot an opening run in and grab the body.
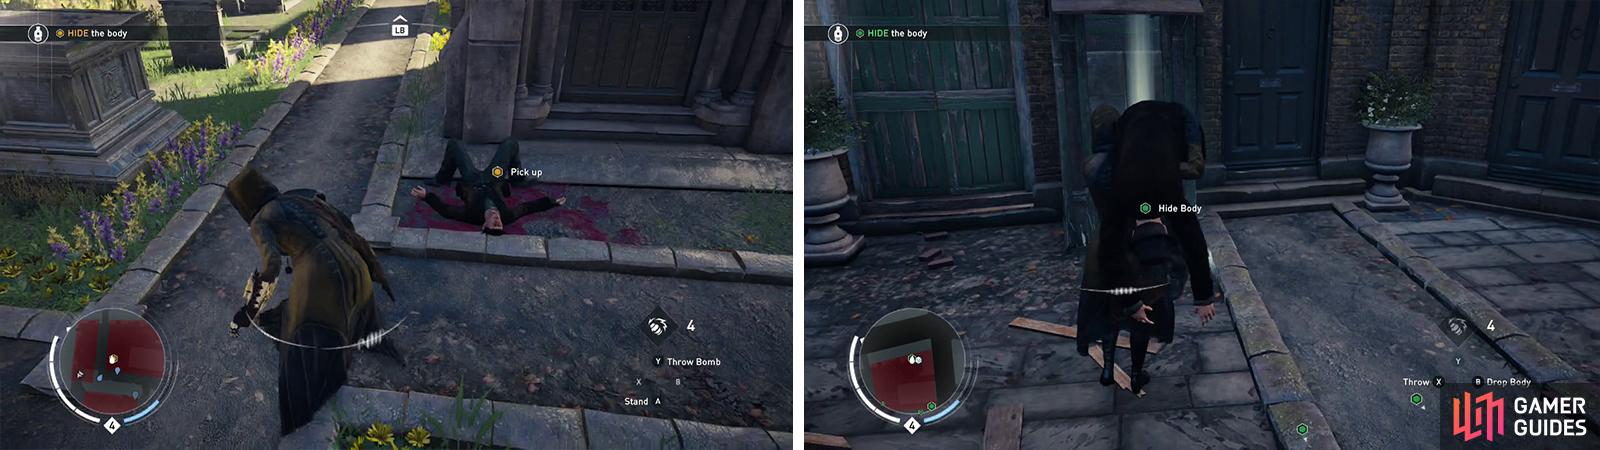
Grab the body from the cemetary (left) and take it to one of the hiding spots (right).
There are several hiding places around and you can use Eagle Vision to see their locations. The closest one is a haystack that can be found along the wall to the right of the church. The next closest is a curtained shack that can be found in the same walled area where we destroyed the second piece of evidence.
Once you have concealed the body, return to the cart with our friend inside for a scene to end the memory.
 Sign up
No Comments