Objective: Head to Wayne Tower
With our new objective in hand, we’ll need to head to Wayne Tower which can be found in the south-eastern corner of Miagani Island. As you arrive, grapple your way up to the balcony near the top and interact with the shuttered door. Head inside for a scene.
After a brief chat with Lucius, use the computer behind the desk here. This will update our objectives and give us a new location in investigate.
At this point you’ll also be given the opportunity to equip a new upgrade to the Batmobile, you have a choice between the following options:
- CPU Virus – This will allow you to hack an opposing Drone Tank, causing it to become a temporary ally.
-
Weapon Generator MKIII – This will increase the Batmobile’s weapon damage slightly.
When you are done, it’s time to exit Wayne Tower and continue with our adventure.
Objective: Infiltrate the tunnel network under Miagani Island
Make your way to the waypoint in the distance by the entrance to the tunnel network. Use the rooftops or raised train track to approach the location as there is a large number of Drone Tanks guarding the immediate area surrounding the objective marker.
Due to the large Drone tank presence, we are going to have to use our Batmobile to clear it out. When you are ready, drop to the ground and summon your vehicle. Approach the tunnel entrance to start the vehicular fight.
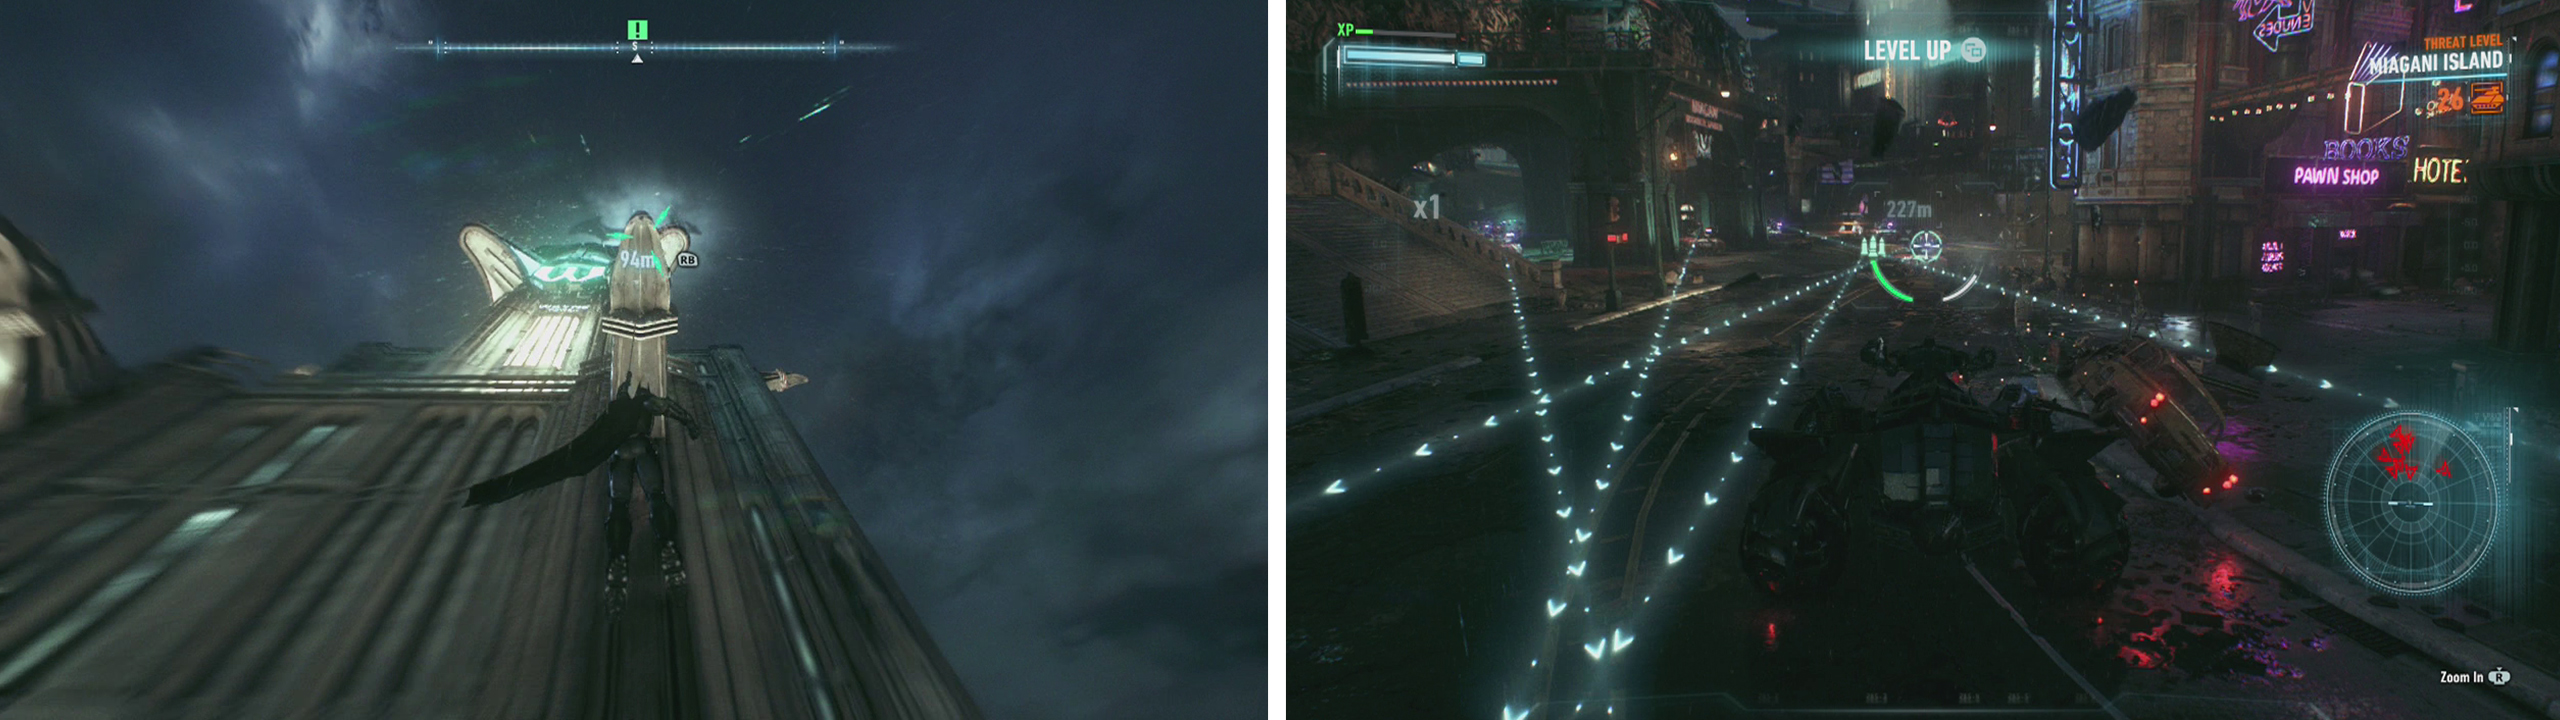
Fly to the top of Wayne Tower (left) for a Batmobile upgrade. Clear out the Drone Tanks from the entrance to the tunnel (right).
This group of 28 Drone Tanks is probably the largest you’ve had to fight so far (and may be bigger if you are unfortunate with enemy Drone Tank patrol locations). It consists of 23 of the basic Rattler units, two Diamondbacks and three Mamba units. Remember to prioritise shooting down Mamba missiles with the machine gun when the Batmobile has been locked on, continue to use your dash move to avoiding incoming fire, getting critical hits on turrets and using your Missile Barrage when available.
After clearing out the Drone Tank presence from the entrance to the tunnel, approach and park in the Batmobile marker to open the door to the tunnels.
Enter the tunnel and after a short distance you’ll come across a door blocking the way. Back up slightly in Battle Mode and look to the roof to spot a ventilation fan with an anchor point. Target this with the Power Winch and pull it down.
Exit your vehicle and use the Batclaw to grapple up into the new opening. Use your Explosive Gel on the pair of weak walls as you move through the passage here and pull the grating off the wall at the end before continuing inside. Proceed through until you exit into a room with a large spinning fan.
Use your Line Launcher gadget to cross the gap safely. We’ll then be encouraged by the game to use our Remote Controlled Batarang , which we can use to fly into the hole in the wall on the left hand side of the room and hit a button on the wall above a set of toilets (that seems an odd location doesn’t it?). This will open a gate.
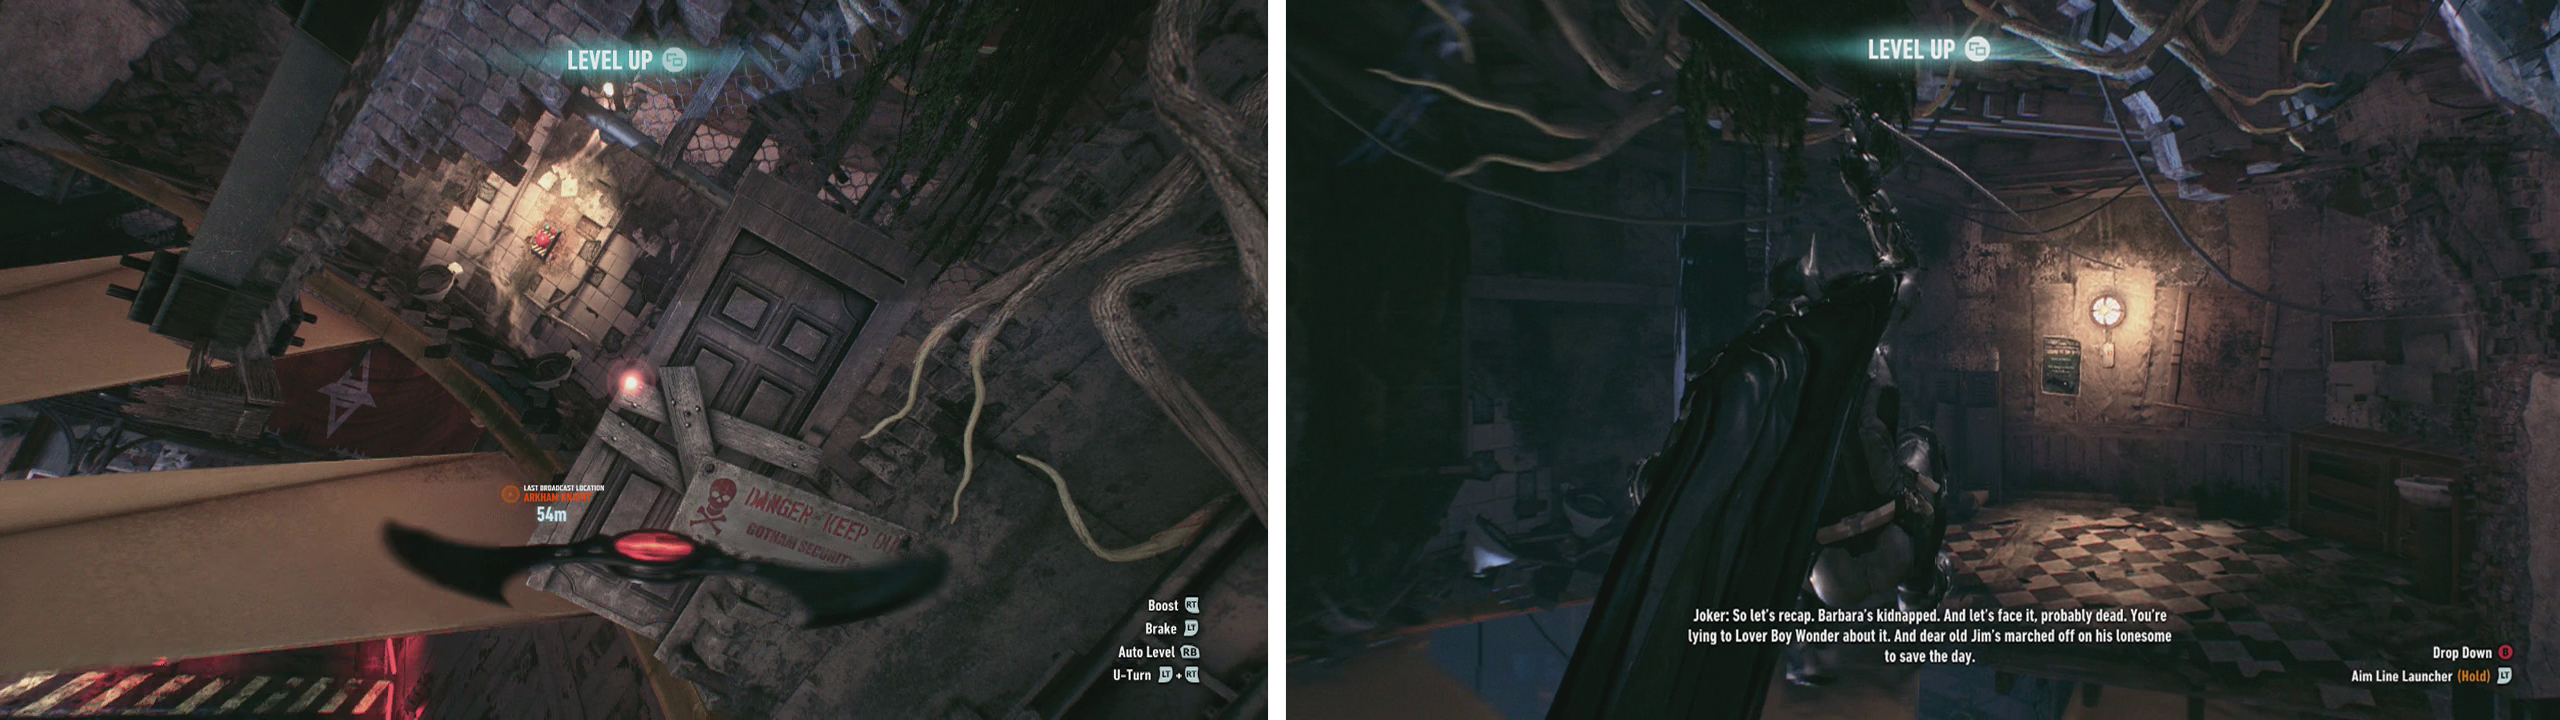
Use the Remote Batarang to hit the button (left) and ues the Line Launcher (right) to cross the gap.
Use the Line Launcher to access the hallway behind the now open gate and continue through the set passage. Until you reach another fan room.
In this room, as you enter you’ll see another gate to your left and a small hole in the wall just beyond it. Equip the Remote Controlled Batarang and fly it through the hole in the wall and hit the button inside to open the gate. Now the tricky part – we need to target the far wall with the Line Launcher , but as Batman travels across the fan, you’ll need to look to the left and fire the Line Launcher a second time through the open gate.
Continue through the short passage here and as soon as you exit into the larger room, immediately look to the right to find a Riddler Trophy . Approach the railing to observe the room below.
Note that touching the floor in this room will result in almost instant death due to the large presence of Drone Tanks and armed soldiers. As such, we’ll need to stay off the ground!
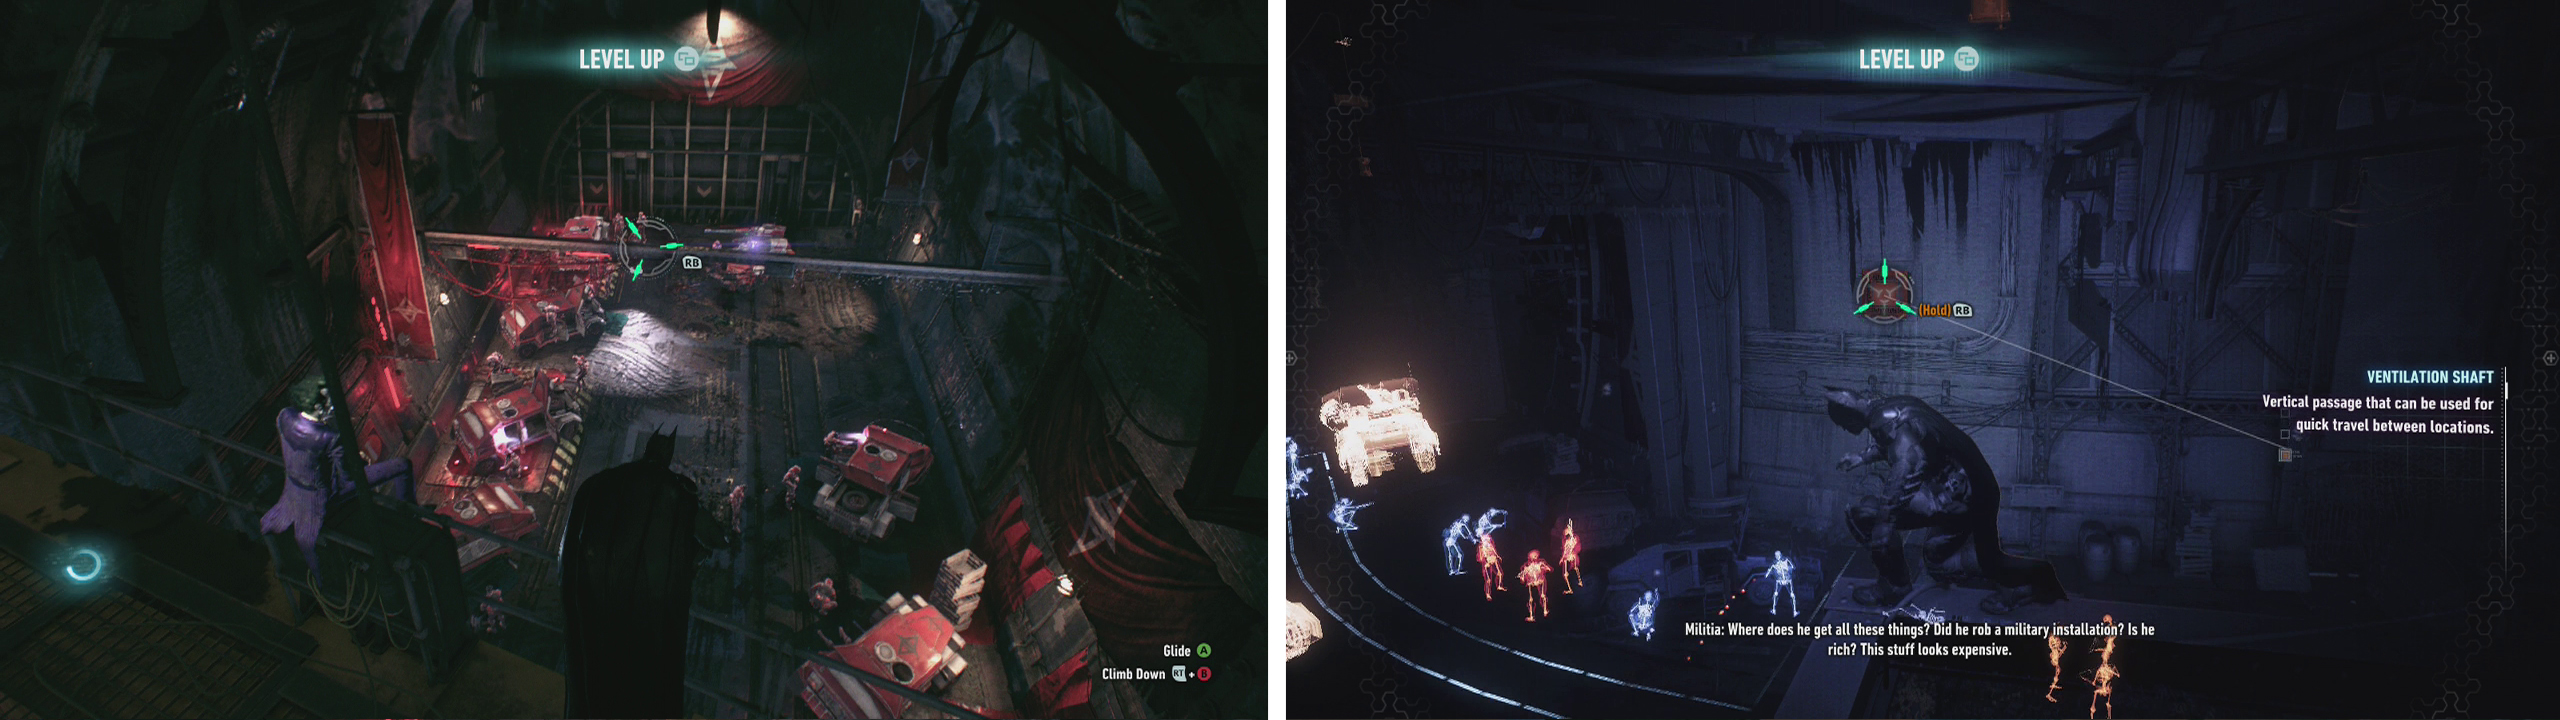
Hop to the girder below (left). Stay off the ground and find the vent on the right hand wall (right) to access the floor vent to the next area.
Grapple down to the girder ahead, turn to look back towards the balcony we came in from and use the girders beneath it and other high points to move across the top of the room until we can proceed no further. At this point, look across to the opposite wall and use the Batclaw to enter the vent on the wall, slide down to a passage beneath the floor. Follow this a short distance, beneath a metal gate to the end and exit into a waiting room of sorts for a scene.
As soon as you regain control, you’ll find yourself in a combat situation against a new type of enemy – a Brute.
The Brutes in Arkham Knight are pretty much the same as those previously encountered in Arkham City, Arkham Origins and Arkham Asylum. They are large, heavily armoured and can deal some serious damage with their punches. Unfortunately our usual attacks will have no effect on them (although melee weapons that you can pick up will). Instead, you’ll need to hit your stun button (B or Circle) until you see stars above their head – at this point you can attack and damage them as per usual. The most effective way to take down a Brute is via use of environmental takedowns – look for glowing blue objects in the environment, lure them in close, stun them and then perform the takedown to eliminate them in a hurry.
Unfortunately, whilst you are in the process of fighting the Brute, some additional reinforcements will arrive and they again will be reinforced with a third wave of enemies. In total you’ll have to eliminate two Brutes, four Combat Experts, a Medic and 12 Soldiers (two of whom have melee weapons).
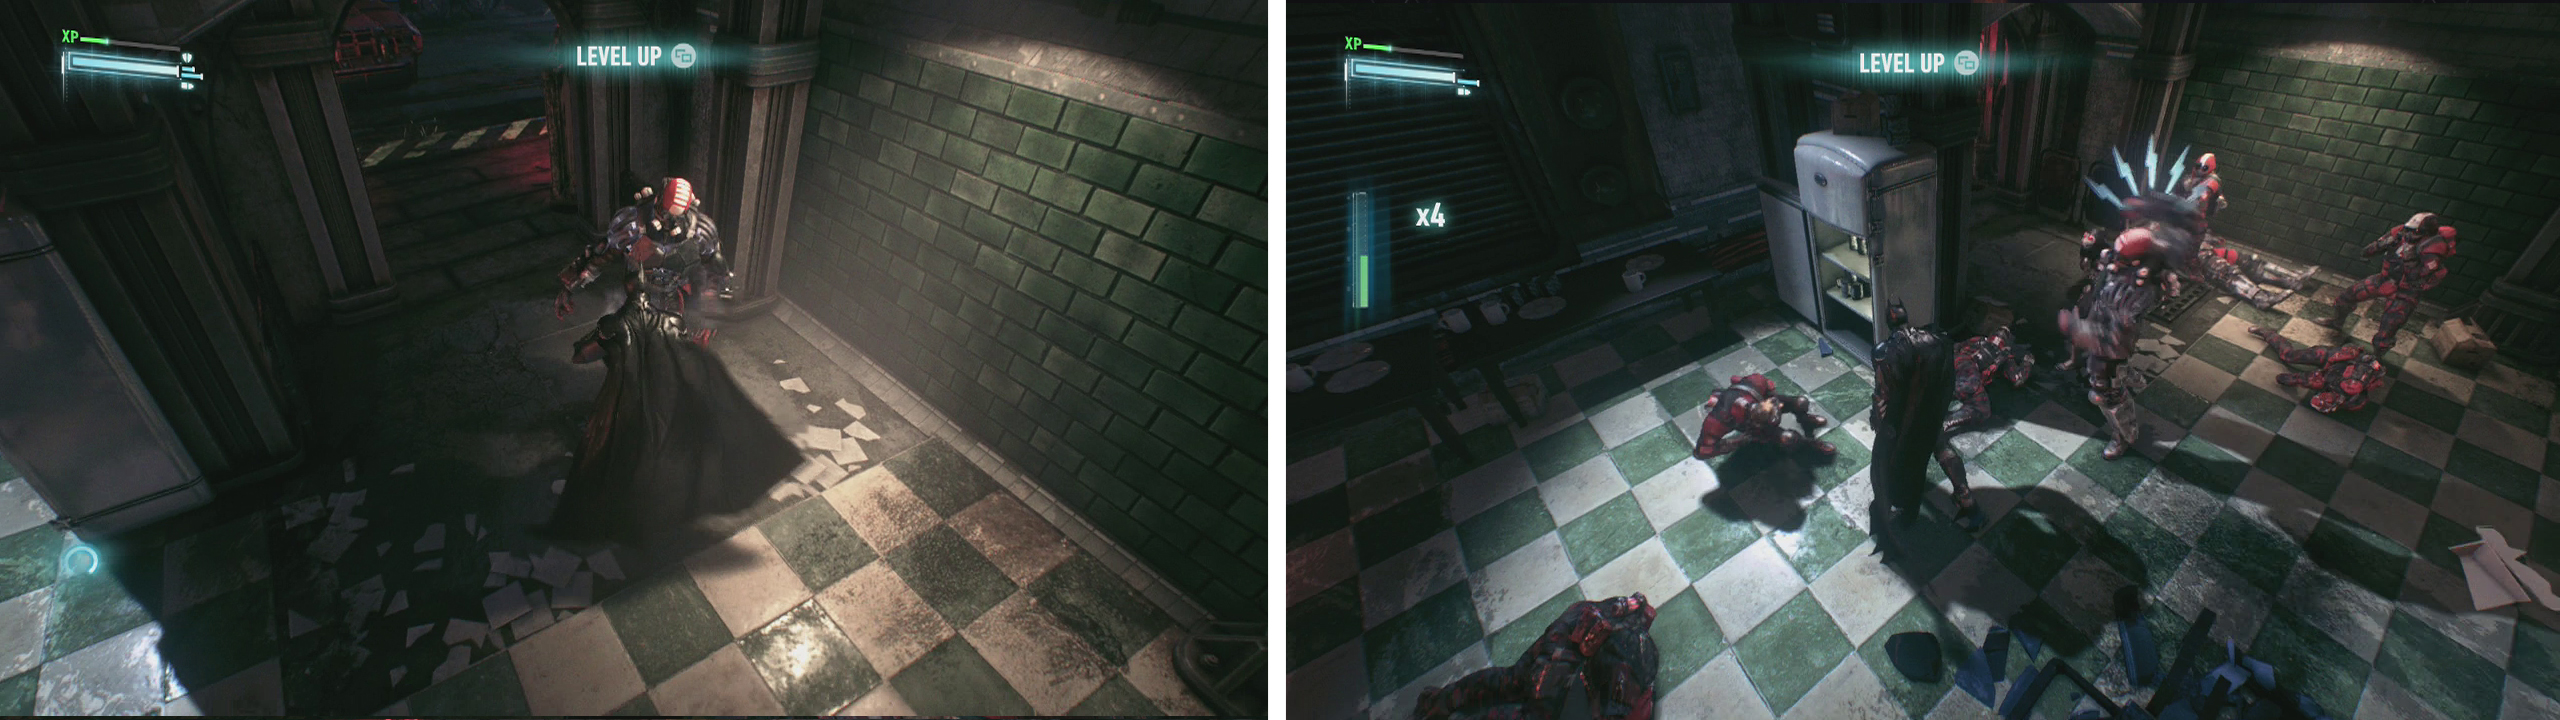
The Brutes (left) are tough - use environmental takedowns to deal with them quickly. Fight off the other enemies (right) to complete the seciton.
This is a tough fight and one that will last a few minutes to complete, try to be patient and defeat the brutes with the environmental takedowns, watch out for attacks coming from everywhere with the Combat Experts active and most definitely prioritise the Medic when he shows up – you really don’t want to have to take down more enemies than necessary!
As the fight ends, a Drone Tank will wedge itself in the doorway to prevent your escape.
Objective: Rescue Oracle
Look along the wall to the left of this to find a panel we can interact with to open the gate outside. Do so and switch to Remote Batmobile Control mode.
Destroy the weak wall ahead before attacking and taking down the group of Drone Tanks just beyond it consisting of three Rattlers (one is wedged in the wall) and a Diamondback. Once the area is clear return to controlling Batman and have him hop in the Batmobile to continue.
Drive to the next shuttered door and as Batman interact with the electrical panel to the right of the door to have it open. Return to the Batmobile.
Boss: Militia APC
This sequence is a boss fight of sorts that has us chasing after a militia APC through the streets of Miagani Island. You can monitor the remaining health of the APC using the health meter located on the top right corner of the screen.
The goal of this sequence is to stay on the tail of the APC in close enough proximity so that we can use the Batmobile’s Immobiliser missiles to stop the vehicle. Needless to say, the APC driver isn’t too happy about it. The APC will fire RPGs back at us intermittently so keep an eye out for and stay away from the holographic lines that appear to avoid incoming fire.
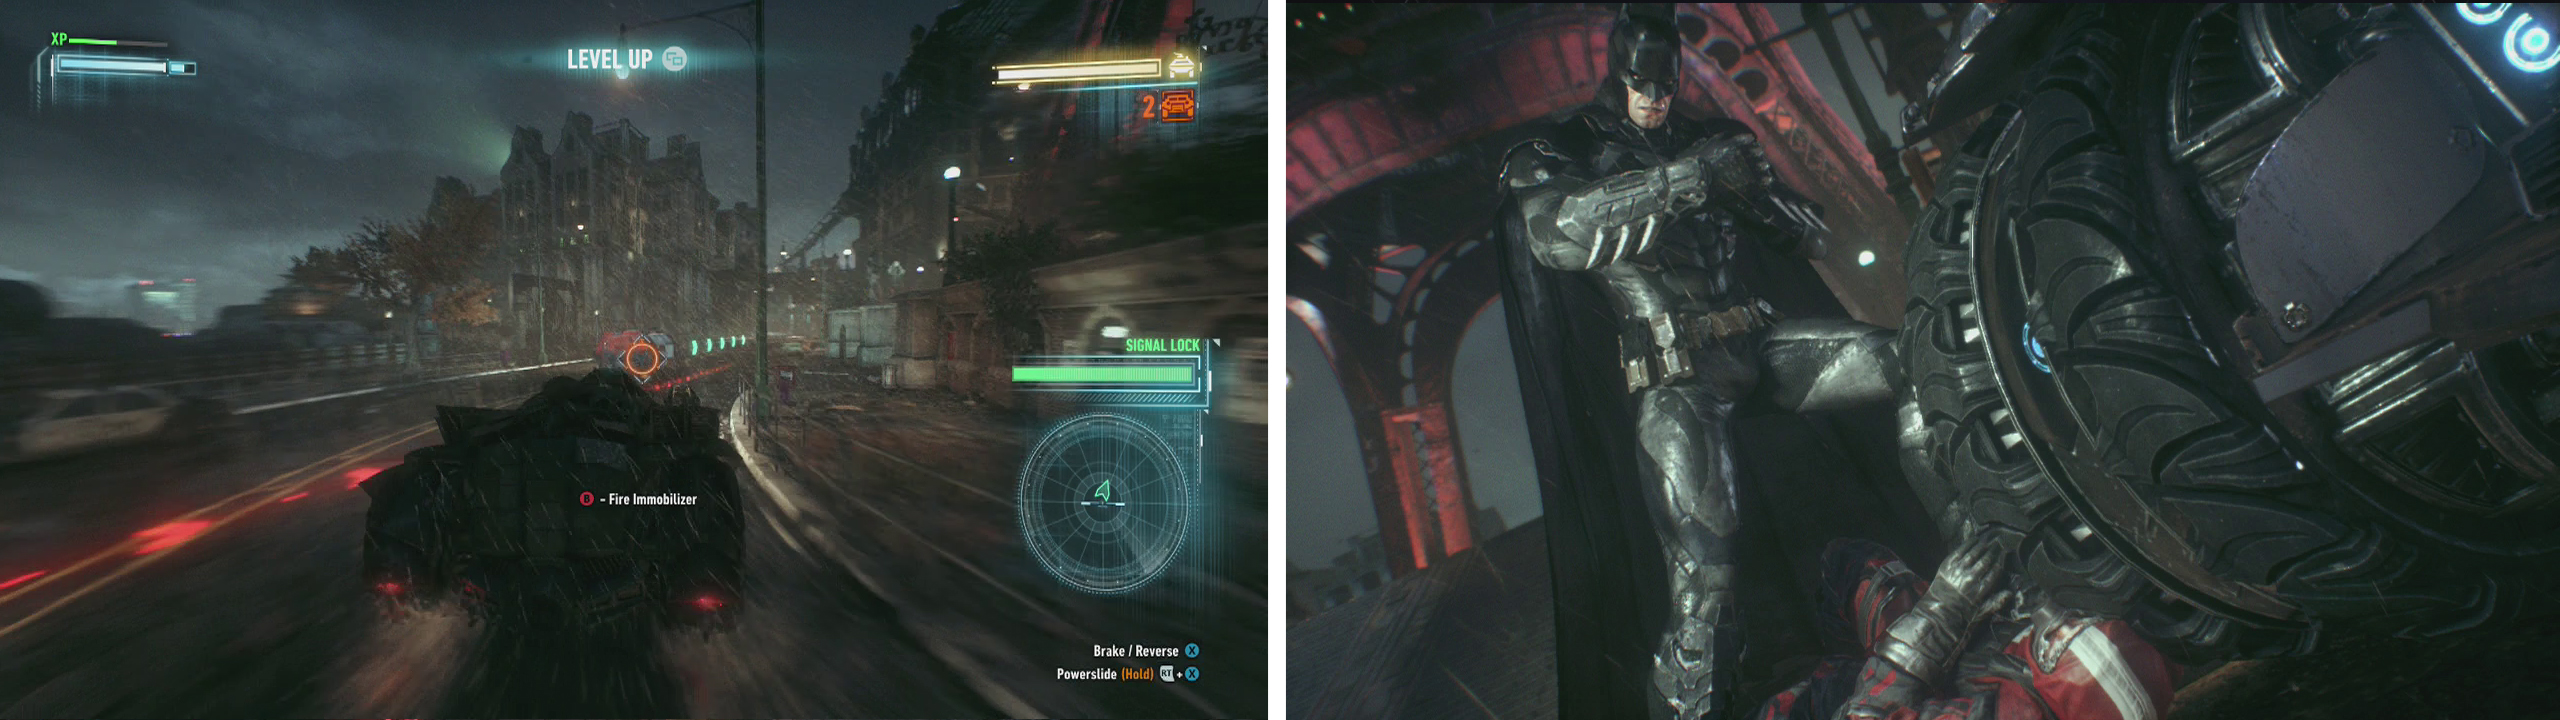
Race after and use Immobilisers to stop the APC (left). make sure to hit the rev button during the interrogation (right).
In addition to the target vehicle, the APC also comes with three armoured militia vehicles in support that will all also shoot RPGs at us, so as the chase precedes you need to be ready to avoid incoming projectiles from multiple sources. It’s a good idea to shunt/side-swipe and utilise the Immobiliser missiles on these other vehicles to make things much less hectic before focusing on the APC.
You’ll need to the APC with anywhere between 5-10 shots from the Batmobile’s Immobiliser in order to bring it to a halt.
After stopping the vehicle, walk over to the crashed APC and interrogate the driver for a scene. During the scene, rev the accelerator on the Batmobile to elicit some additional information from the driver.
Once Batman has enough information, he’ll knock the Soldier out and our objectives will be updated.


 Sign up
No Comments