| **Collectibles** | # |
|---|---|
| Voxophones | 1 |
| Kinetoscopes | 0 |
| Telescopes | 0 |
| Infusion Upgrades | 1 |
| Equippable Gear | 3 |
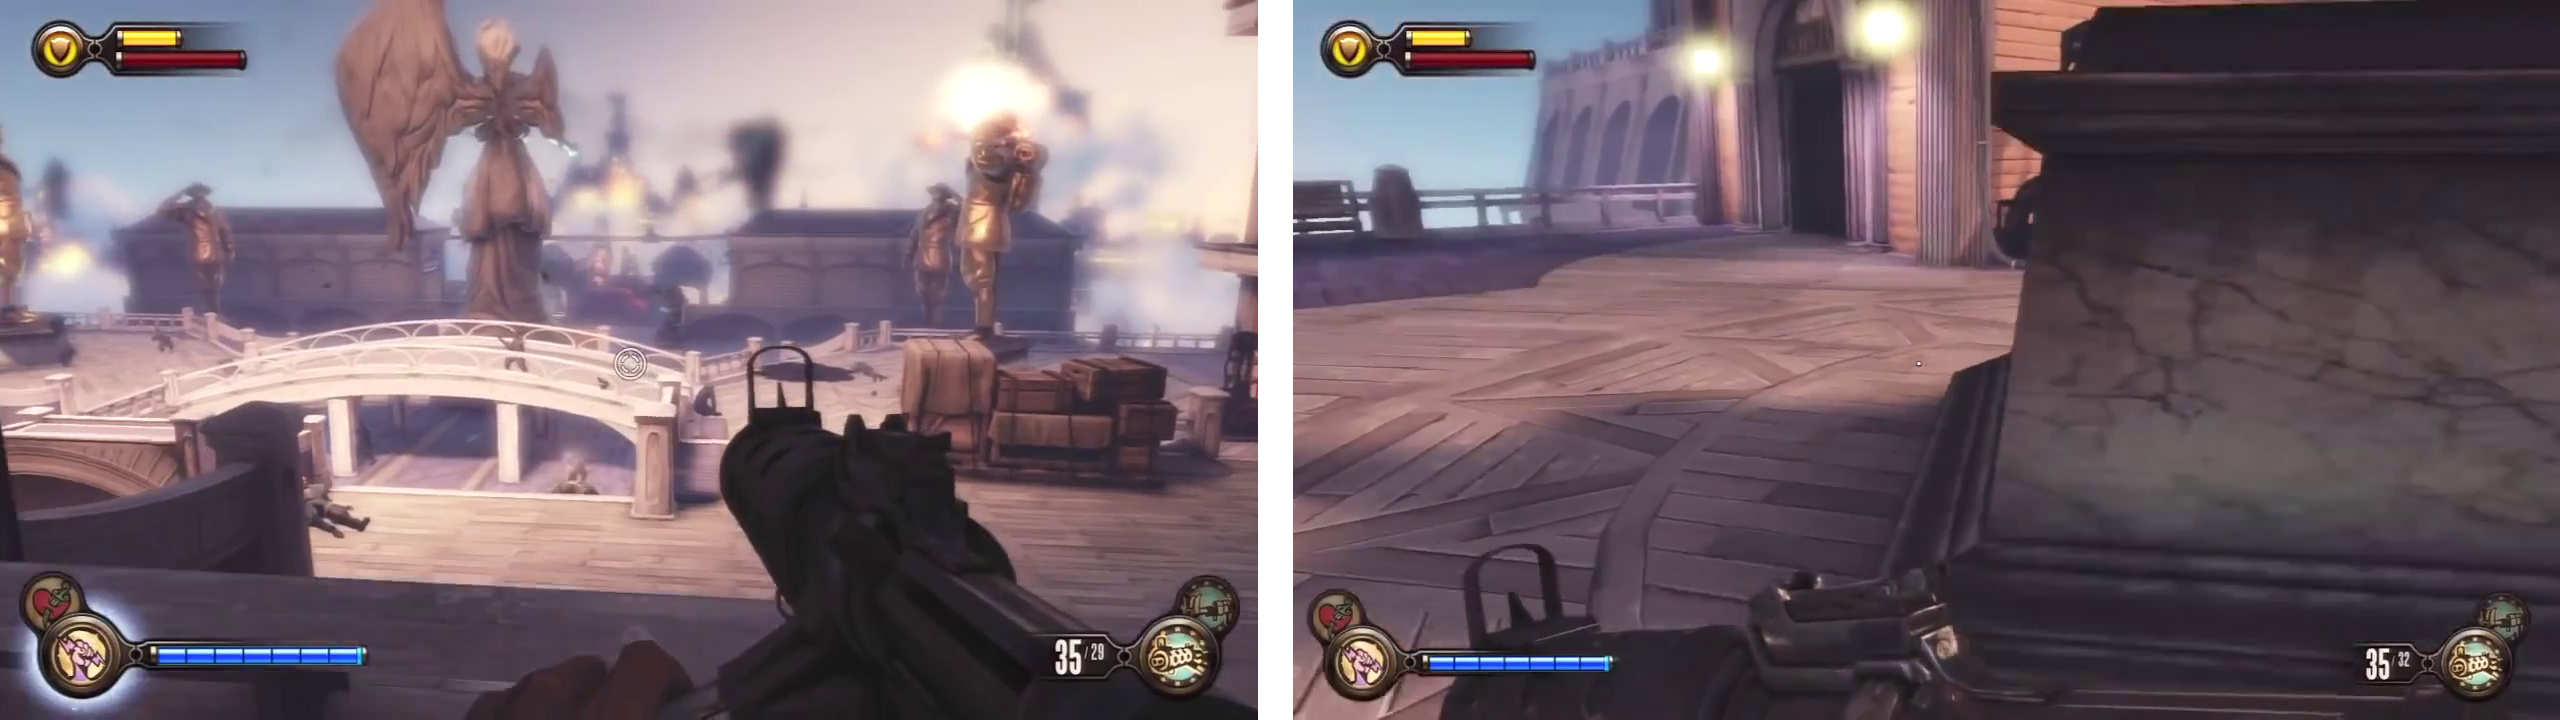
As you exit from the building, there will be 10-12 Founder soldiers waiting for you. Have Elizabeth
use the tear to bring in the mosquito (a flying auto-turret) in the distance and then help it clear up the rest of the plaza, there is also a tear just to the left of the starting position if you want a sniper rifle. Once the area is clear, check out the rightmost section of the main building (opposite the Dollar Bill vending machine). You will find another power conduit; hit this with Shock Jockey to unlock the nearby door.
Climb the stairs here and do a 180 degree turn at the top, head to the end of the walkway and grab the lock pick kit and gift containing a piece of Equippable Gear [1/3] from the table. Loot the rest of the balcony area and head down to where the gondola is docked.
After clearing the plaza (left). Hit the power conduit by the door (right) to access a piece of Gear.
Hop on to the sky-line to the right of the gondola and ride it down to the nearby building. Here we’ll encounter a new type of enemy – the rocketeer.
| **New Enemy: Rocketeer** |
|---|
| Rocketeers are tougher than your standard run of the mill soldier. They are heavily armoured, so are more durable to not only weapon damage, but explosive damage too. They are equipped with RPGs and grenade launchers and are quite accurate. Traps and headshots are the way to defeating these enemies. Note that vigors that cause increased damage for your weapons such as Murder of Crows, Bucking Bronco and Devil’s Kiss will make life a little easier against these guys. |
The platform we land on has two tiers. There is a rocketeer and 4 soldiers on the building itself and a second rocketeer and an additional 2-3 soldiers on a floating barge docked on the far side of the building. There are two tears that we can make use of here.
| **Tears in this Location** |
|---|
| Friendly Motorized Patriot on the lower level. Crate of Medical kits on the upper floor. |
Have Elizabeth bring in the patriot and then hop back up to the sky-line and attack the enemies on the upper level from above. When they are done, hop down to the upper platform and use the ledge overlooking the barge to take down any remaining enemies below. Once they are dead, loot the area, you can find a lock pick beneath the stairs leading to the upper level on the side of the building closest to the Hall of Heroes. When you are ready, jump onto the barge and ride the sky-line here down to the platform below.
Sky Road
Back here again! This time around, you will have to kill the 5 soldiers and a fireman that are now occupying the zone. The upper balcony of the ticket building accessible via freight hooks on the left side of the area will provide you with a nice vantage point over the area below. Remember that there is also an oil spill here we can ignite (or have the fireman ignite) with Devil’s Kiss which may help thin out numbers if you can get the standard soldiers to fall for it.
Once the area is clear, backtrack through the building at the far end of the area and kill the motorized patriot inside. Shocking it with Shock Jockey constantly to stun it and unloading on it with an upgraded weapon with a fast rate of fire (e.g Machine Gun, Carbine etc.) will take it down quite quickly.
Enter the elevator at the far end of the room and ride it back up to the previous area.
Soldier’s Field
After getting off the lift, use the Veni! Vidi! Vigor! vending machine to the left if you require it before heading down the stairs in front. Note that we are now able to use the sky-lines in this area. See the building with the ‘Hotel Soldier’s Field’ sign on it? Use the sky-line closest to this and the freight hooks nearby to access a balcony on the upper level of this building closest to the gondola platform.
Use the Shock Jockey vigor on the power conduit here to open the door. Proceed inside, here on a bed you can grab another Voxophone [1/1] . On the bed stand nearby, there is a gift wrapped new piece of Equippable Gear [2/3]. Look behind the nearby cabinet against the left hand wall for a lock pick.
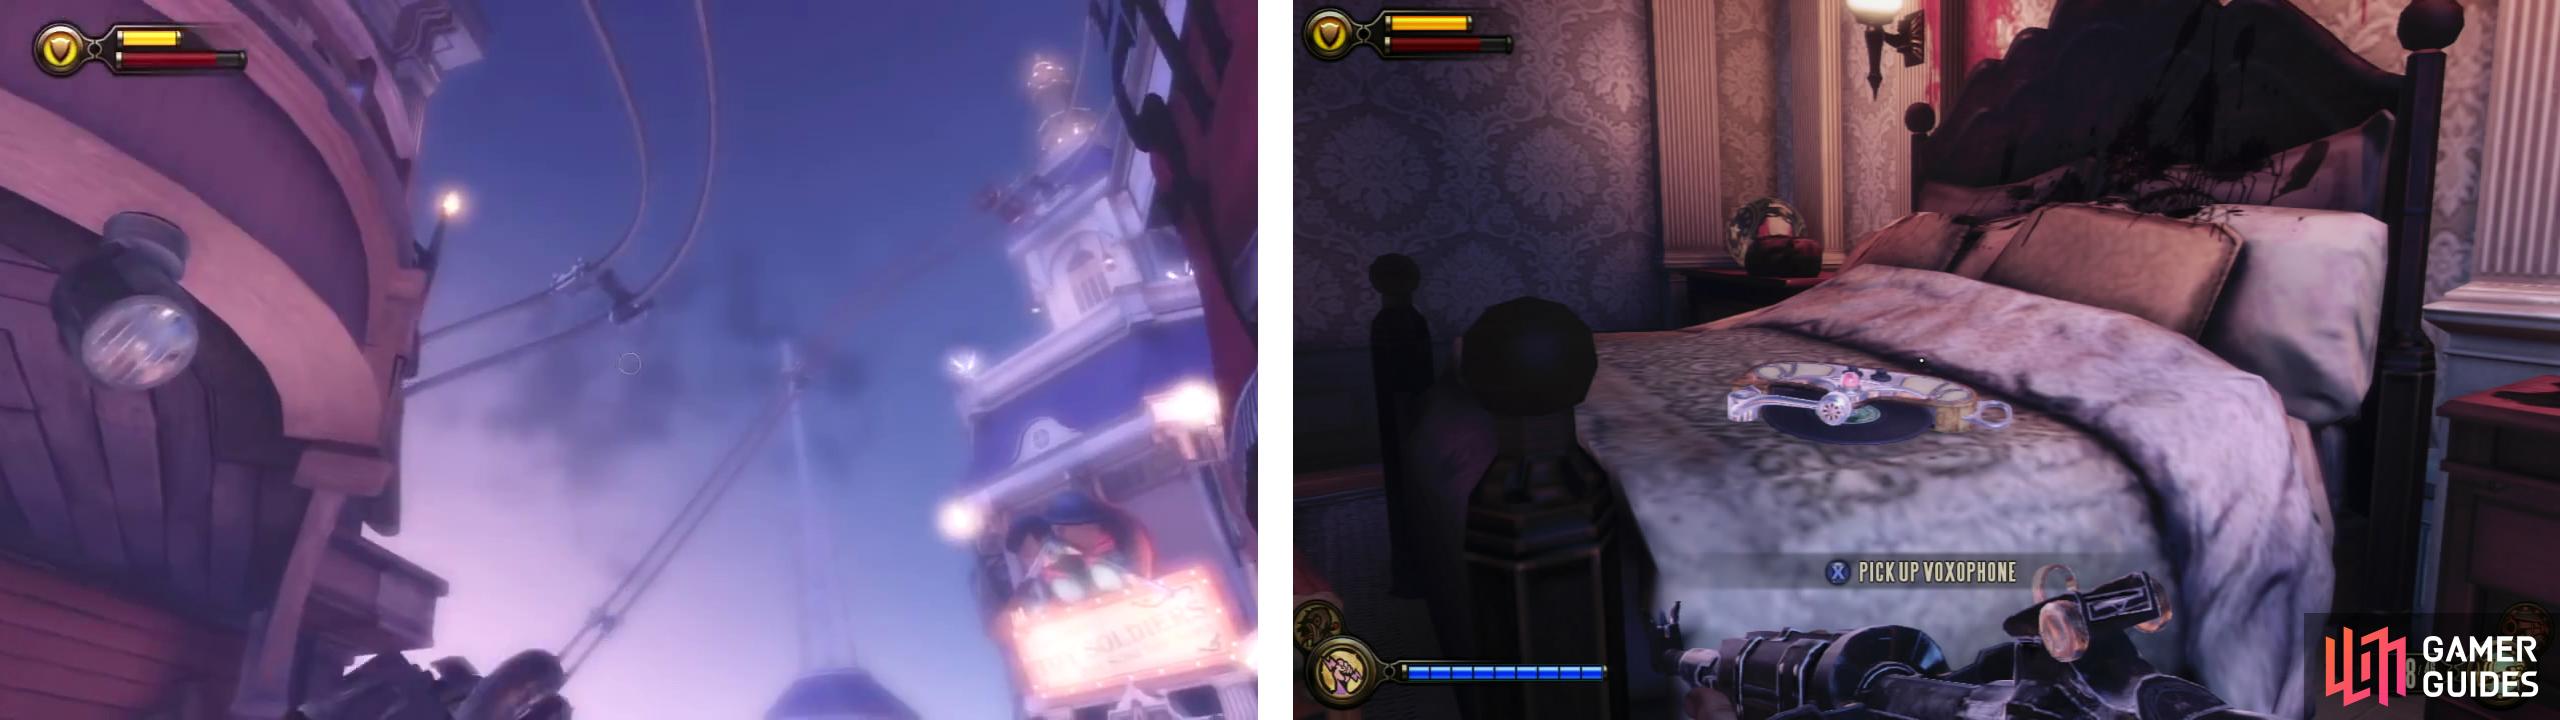
Use the skylines (left) to access the balcony of the central building, use shock jockey on the conduit and inside you’ll find a Voxophone (right).
Exit the building and work your way over to the carousel. To the right of this is a toy store you may have explored earlier. The door is now down, but interacting with this will allow you access. Inside you will find another power conduit. Hit this with Shock Jockey to open another locked door. Here you will find another new piece of Equippable Gear [3/3] , a sniper rifle (if you want one) and a bunch of containers to loot.
Exit back outside and make your way over to the gondola control lever. Before we hit this, know that when we do, we’ll have to protect the switch against an incoming horde of enemies. We also have an array of tears now scattered around the environment that we can use to help defend. You can find them at the following locations.
| **Tears in this Location** |
|---|
| Automated turret on the roof of the Ice Cream Shoppe. Piece of cover on the roof of the Ice Cream Shoppe. Crate of medical Kits on the lower roof of the ‘Patriot’s Pride Confections’ building. Automated turret on the roof of the Toy Store. Piece of cover on the roof of the Toy Store. Friendly motorized patriot on the boardwalk next to the carousel. A sniper rifle and ammunition on one of the hover barges that shows up once the sequence begins. |
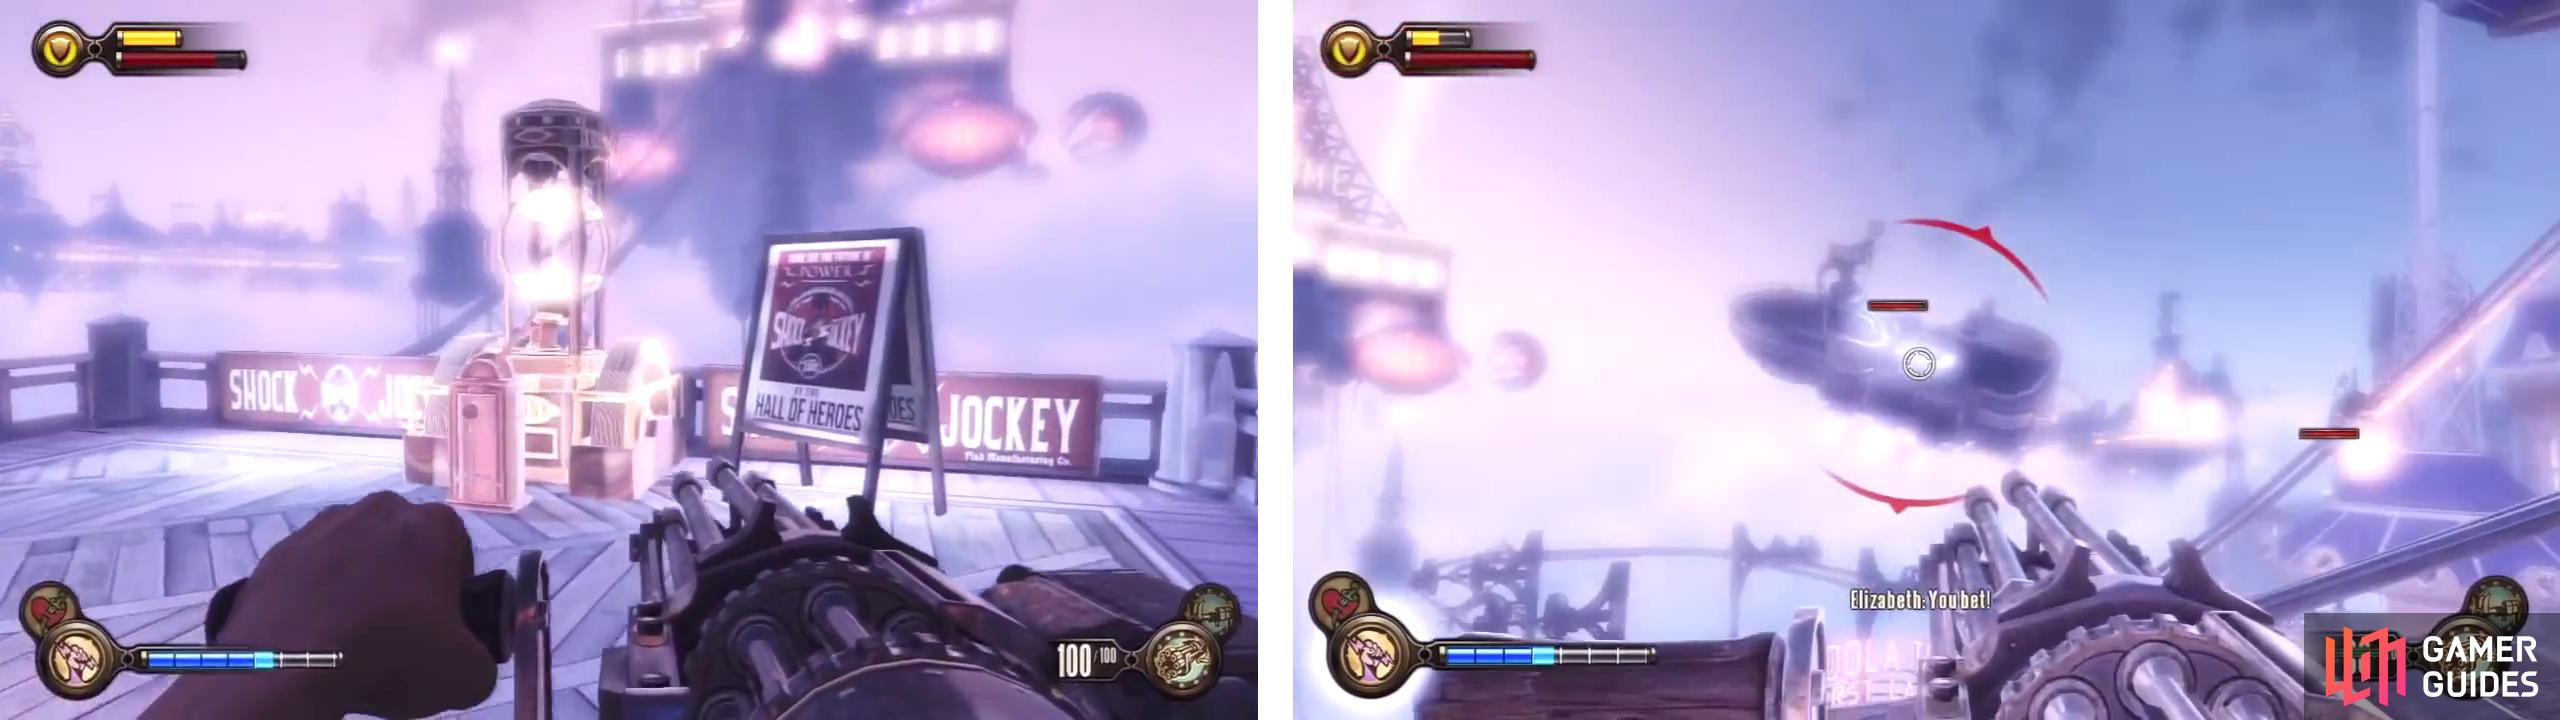
Activate the conduit by the gondola platform (left) and then fight off the enemy attackers (right).
All up there are around 10-15 soldiers, a pair of rocketeers and a motorized patriot to deal with. In most cases, a good number of soldiers will hang out on the roof of the Toy Store, more will use the barges and sky-lines to reach the ground and approach the gondola controls. Two barges show up once you have activated the gondola and each of these will act as a base of operations for a rocketeer. Once the majority of enemies have been defeated, the motorized patriot will activate and walk towards the gondola.
As such, the two most useful tears I found were the auto-turret on the roof of the Toy Store (although it won’t last long) and the friendly motorized patriot next to the carousel. Focus on killing the rocketeers first and then using a sniper rifle from the barge (it’s a good vantage point with cover) to eliminate the enemies below. Alternatively, you can go crazy on the sky-lines, which is infinitely more fun, if not a little riskier.
Once all the enemies have been dealt with, go to the gondola and have Elizabeth open the door. Grab the lock pick and some coins from a small shelf to the left and then throw the lever to activate the gondola.
The First Lady’s Aerodrome
After the gondola arrives, climb the stairs nearby and enter the main room. Kill the 5 soldiers waiting for you in here. At the back of the room between the two flights of stairs you can find a Kinetoscope ‘A City Mourns…’ this one is a repeat of one we found in the Hall of Heroes, so will not count towards your collectible totals. On the wall opposite this, behind a counter is a Dollar Bill vending machine we can use to replenish salts/ammo/health if required.
If you head back to the hallway we just entered from you will find a Veni! Vidi! Vigor! and a Minuteman’s Armory vending machine. Neither has any new upgrades, but you can upgrade your weapons using any existing ones if you require. When you are ready to go, climb the stairs and enter the lift. Hit the button to ride it up to a new area.
Run across the gangplank and enter the zeppelin at the end. As soon as you get inside, turn right and grab the Infusion Upgrade [1/1] from the table here.
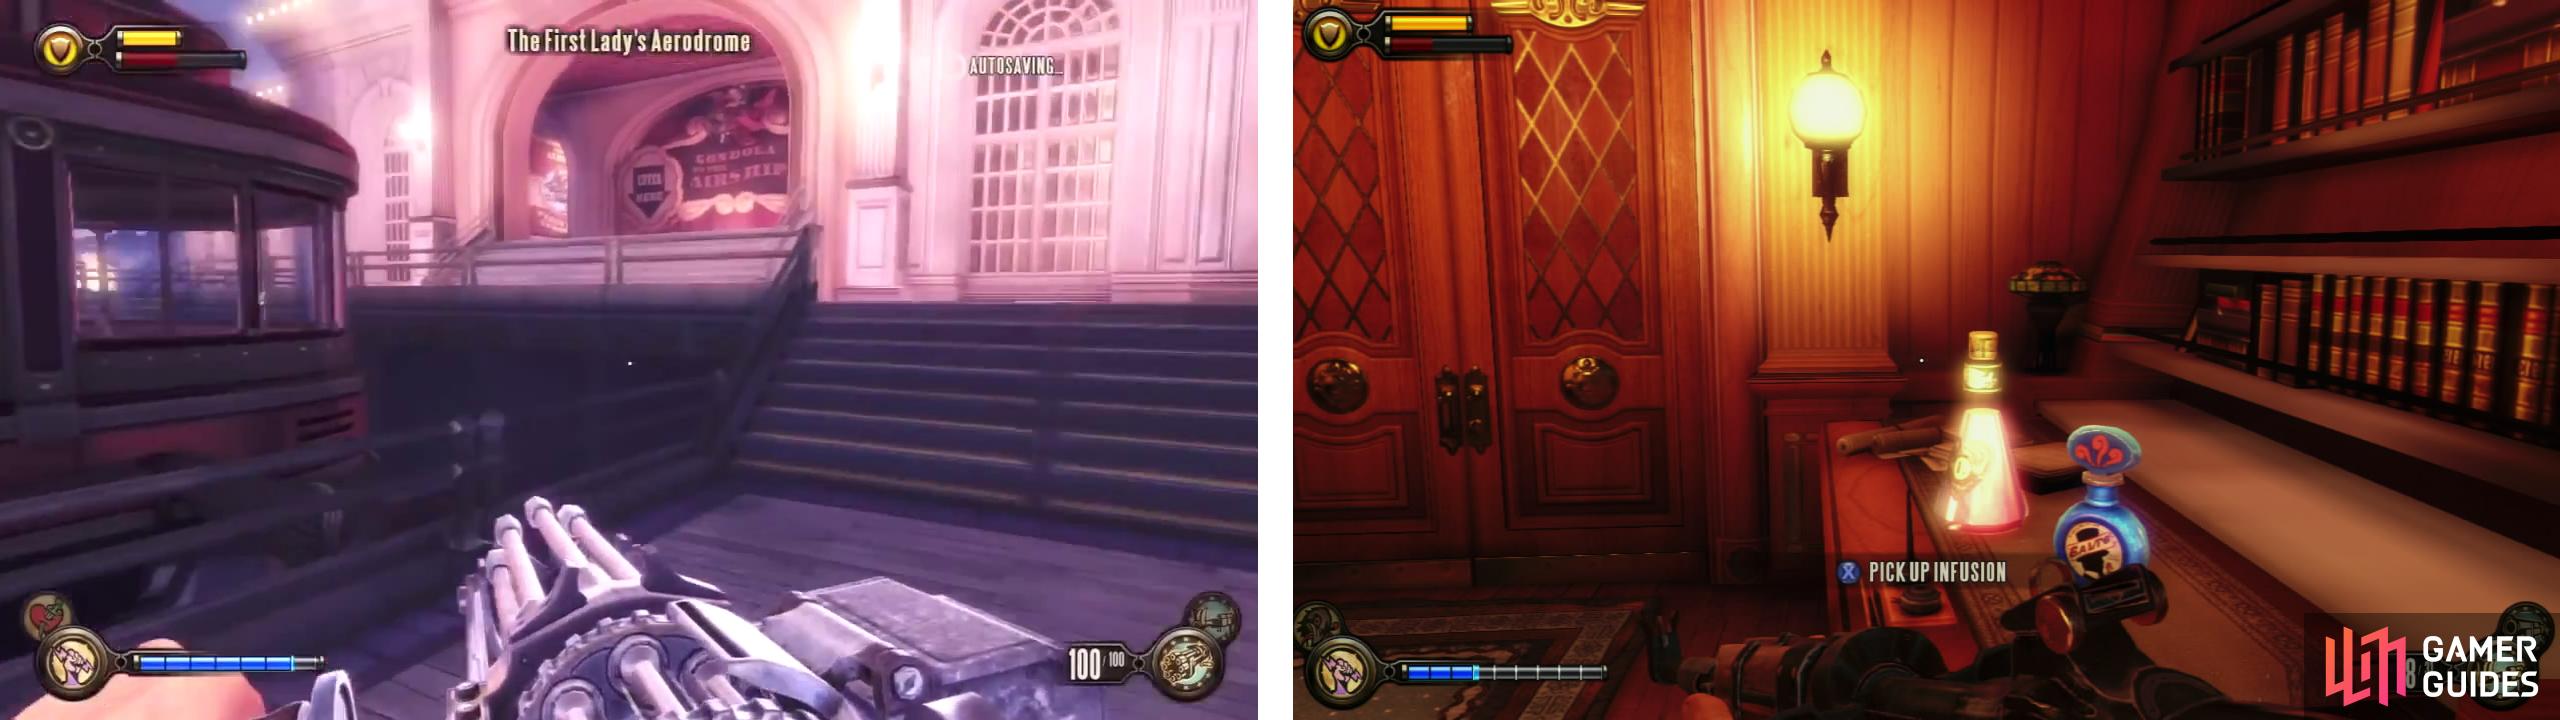
Work your way through the Aerodrome (left). When you reach the airship, grab the Infusion Upgrade from the right (right) before continuing.
Make your way over to the controls. Interact with them for a scene. During the scene walk over and interact with Elizabeth to complete the chapter.


 Sign up
No Comments