
Alternis and Khamer
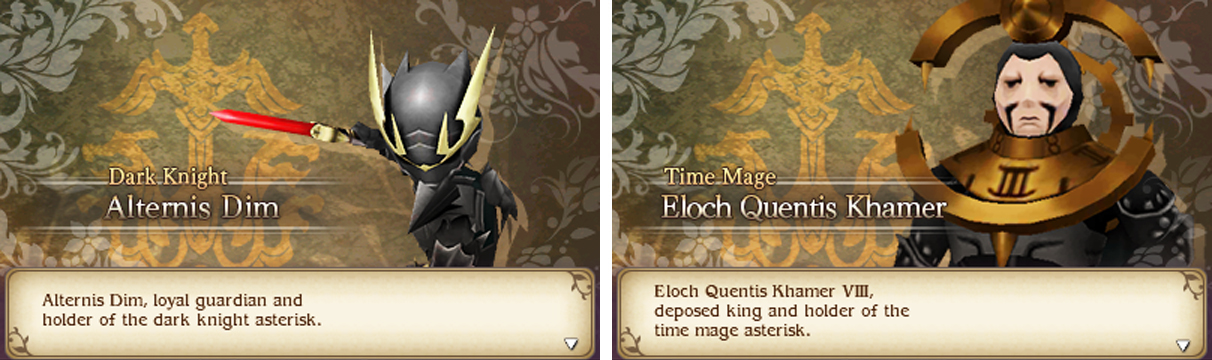
The final choice is here: Dark Knight or Time Mage?
In the moments before the Skyhold reaches its final destination, you’ve got just enough time to drop by some old friends that you couldn’t visit earlier. With the power of flight, head for Gathelio either manually or with the Rubadub’s Auto-Pilot capability.
From there, fly north-east towards the ominous dark circle on the bottom screen world map. Once you arrive, you’ll find the scary circle is just a lake inside a crater–and in the middle of the lake is a gigantic ship, which Bravely fans should recognise as Grandship.
Without further ado, land the Rubadub in the lake and sail next to Grandship to enter it. On the Upper Deck, immediately head for the corner to the south-east to pick up a Remedy . Next, go up the stairs near the centre, then check the bottom-right corner of the upper level for some Leviathan Sashimi .
There’s more to Grandship, but we’ll leave that for later. For now, head towards the west side of the Upper Deck to enter The Drunken Pig Tavern. Inside, there are more items to be found. Look behind the plant pot to the right of the entrance for some hidden Catnip .
After that, run towards the north-west corner of the tavern and search around the top-left corner of the stage for a Cat-Ear Hood . Meow! Before you get booted out for not buying a drink, hurry to the bar counter above the entrance and speak to either of the patrons.
Cue a happy reunion with Zatz, Datz and the Proprietress. In addition, Alternis the Dark Knight makes a surprise appearance. Afterwards, just like the good ol’ days, the hearty Proprietress treats our heroes to a delicious feast and then some.
Later, our heroes get the shock of their life when they see the astronomical bill, caused by the insane taxes set by Grandship’s council. Edea in particular won’t have any of this and storms out of the tavern to get some answers. You’d better follow her…
Back on the Upper Deck, go up the stairs near the centre and exit via the doorway to the north. In the Markets, run to the far west and check the corner below the Trader for an Ether . Then run to the opposite end and search the area below the Magics store for a Rod of Fire .
While you’re at the Markets, you may wish to do some shopping–y’know, before you go bankrupt from the tavern bill! Mainly, try to grab some equipment for the dungeon ahead and the Skyhold assault. You can also buy X-Potions from the Trader.
Once your shopping trip is over, head up the middle stairway to the next area. At the Bridge, inspect the area below the globe at the end of the east wing for a Gold Hourglass . Next, go around to the west wing and chat to the owl in front of the telescope.
The creepy fellow will give you directions to the secret village of the Chompers in the form of a riddle. Basically, you’ll want to navigate to a suspicious spot at the south edge of the Yulyana continent, north-east from the Harena continent (where Ancheim is).
After that, head for the middle area with the steering wheel and search the desk below for a Magnifying Glass . Finally, speak to the old man in front of the desk to voice your complaints about the terrible taxes. Sadly, the council refuses to help, but there’s a glimmer of hope.
Apparently a new councillor is currently holding a meeting with the aim to get rid of taxes outright. But it should come as little surprise by now that the location of the meeting is deep inside another dangerous dungeon. When you’re ready to depart, check the door along the south.
Engine Room - B27

This dungeon is mechanically similar to the Grand Mill Works. From the entrance, head east along the upper corridor. As you reach the north-east corner, you’ll find an elevator that’s currently out of operation. Like in the mill, you’ll need to locate two switches to deactivate the locks on the elevator.
To get to the first switch, continue south from the elevator, then go down the stairs in the south-east corner.
Floor B28

From the south-east corner, head north first to reach a chest containing a Pantheon’s Wrath . Handy for zapping any robots or fish you’re struggling to handle. Next, head west along the corridor you skipped by and go down the stairs at the end.
Floor B29

Starting from the south stairs, follow the path to the west. At the first junction, head east for a chest with a Phoenix Down inside. Back at the junction, head west and follow the path to the south to find a chest containing 1500 pg at the end.
From here, continue west from the junction, then up and around to the east. Just past the giant gear along the north, the Adventurer’s fox is waiting in the corner in case you need a breather. After resting or otherwise, head for the east side of this floor.
Beyond here, the path briefly splits in multiple directions. Heading directly north will take you to the stairs, so save that for last. Instead, carry on east and grab the Dried Remora shimmering on the floor above. Then head south and keep to the west for a chest containing 2500 pg .
Finally, in the most south-east corner, you’ll bump into the Anchorite of Death. If you have the Summoner asterisk, you can accept the Anchorite’s challenge to earn the Charybdis summon magic. However, unlike previous Anchorites, you’ll actually need to fight and defeat this one.
To reduce the risk of losing progress, you should save your game before accepting the challenge. You can do this by enabling Auto-Save and leaving the area (for example via the north-east stairs), causing the game to save for you.
Boss: Anchorite of Death
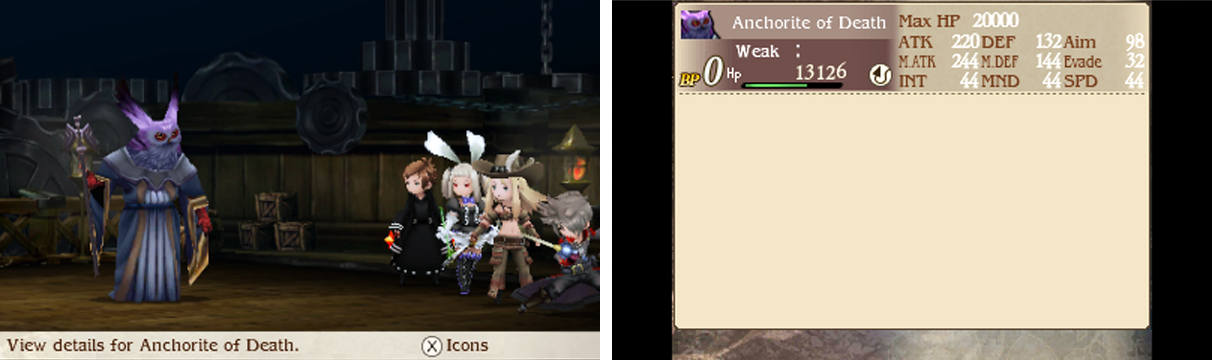
| Level | HP | Weakness |
|---|---|---|
| 44 | 20000 | Demon |
Well, this is new. Since the Charybdis summon doesn’t do any damage, simply surviving a hit isn’t enough of a challenge so you have to fight and win against the Anchorite himself.
The Anchorite starts by pre-emptively using Charybdis to drop your party’s physical and magical attack and he will cast it again every now and then. Having lowered attack isn’t good, so counter this with your Astrologian or Performer’s buffs.
Besides this, the Anchorite can attack with his staff, dealing pretty impressive damage, mind. Or he can break out the big guns and cast the Meteor spell to inflict four powerful random non-elemental hits on the party.
To reduce the impact from Meteor, you can boost your party’s magic defence like you did for your offences. Or if you have a Pirate, you can lower the Anchorite’s magic attack. Or you could do both!
Once you’ve got a grasp of the situation, you still need a plan of attack. Annoyingly, the Anchorite has high physical and magical defences, so he can take a long time to take down. That said, you can bypass his defences with the Hawkeye’s Harpoon or other means.
Floor B28 and B29 - To Switch A
Back up on Floor B28, assuming you came from the north-east stairs, head all the way west to retrieve some Tender Victuals from the floor. Next, follow the path to the south that you ran by to reach stairs going up. Upstairs, inspect the lever at the far end to disable the first lock.
Afterwards, use a Teleport Stone to return to the dungeon entrance.
Floor B27 and B28 - To Switch B
Your job is pretty much halfway done. From the south-east stairs of Floor B27, continue west through the lower corridor. Along the way, grab the shiny 2000 pg lying on the floor to the south. When you reach the south-west corner, go down the stairs at the end.
On the west side of Floor B28, head east first to identify a blue locked chest . Next, follow the northward path towards the north-west corner. Prise open the chest here for a handy X-Potion , then carry on east towards the giant moving gear. Finally exit via the central stairs below.
Back up on Floor B27, make your way west while keeping an eye above. Yank the lever along the way to deactivate the second lock, which will open the elevator doors. Finally, flip open the chest at the end for a Mage Shell and use a Teleport Stone to quickly return to the entrance.

 Sign up
No Comments