Sinner’s Rise is a pretty short area (leading to a - very difficult - Primal Boss); but it’s still pretty tough (and also a decent place to farm souls in - especially the lower half of the tower).
Start by going through the doorway on your right, look right and then climb the stairs. Activate the Bonfire here and then either kill the three archers or slide down the ladder and go down the stairs behind you.
There are four more Royal Swordsmen here (all of them will use a crossbow if you keep your distance before switching to their pointy sword once you get close). So get close, strafe behind the first one and kill it with a critical back attack or just hit it hard and fast.
Grab the [Human Effigy] form the corpse on the broken stairs by your right and then lure each Swordsman out one-by-one by getting close (with your shield up) and strafing back out the doorway (just be careful you don’t fall off the edge by mistake - easily done).
When they’re all dead; step on the switch in the middle of the lift to take it down. Keep your camera looking down as you’ll spot a corpse with an item on it near the bottom. Drop off once you’re just above it and pick up the [5 x Lacerating Knives] .
Begin by walking into the water and looking left for a new creature (called an Enhanced Undead) . These things are slow but very powerful; so we’re going to use a cheeky tactic to luring them into killing themselves!
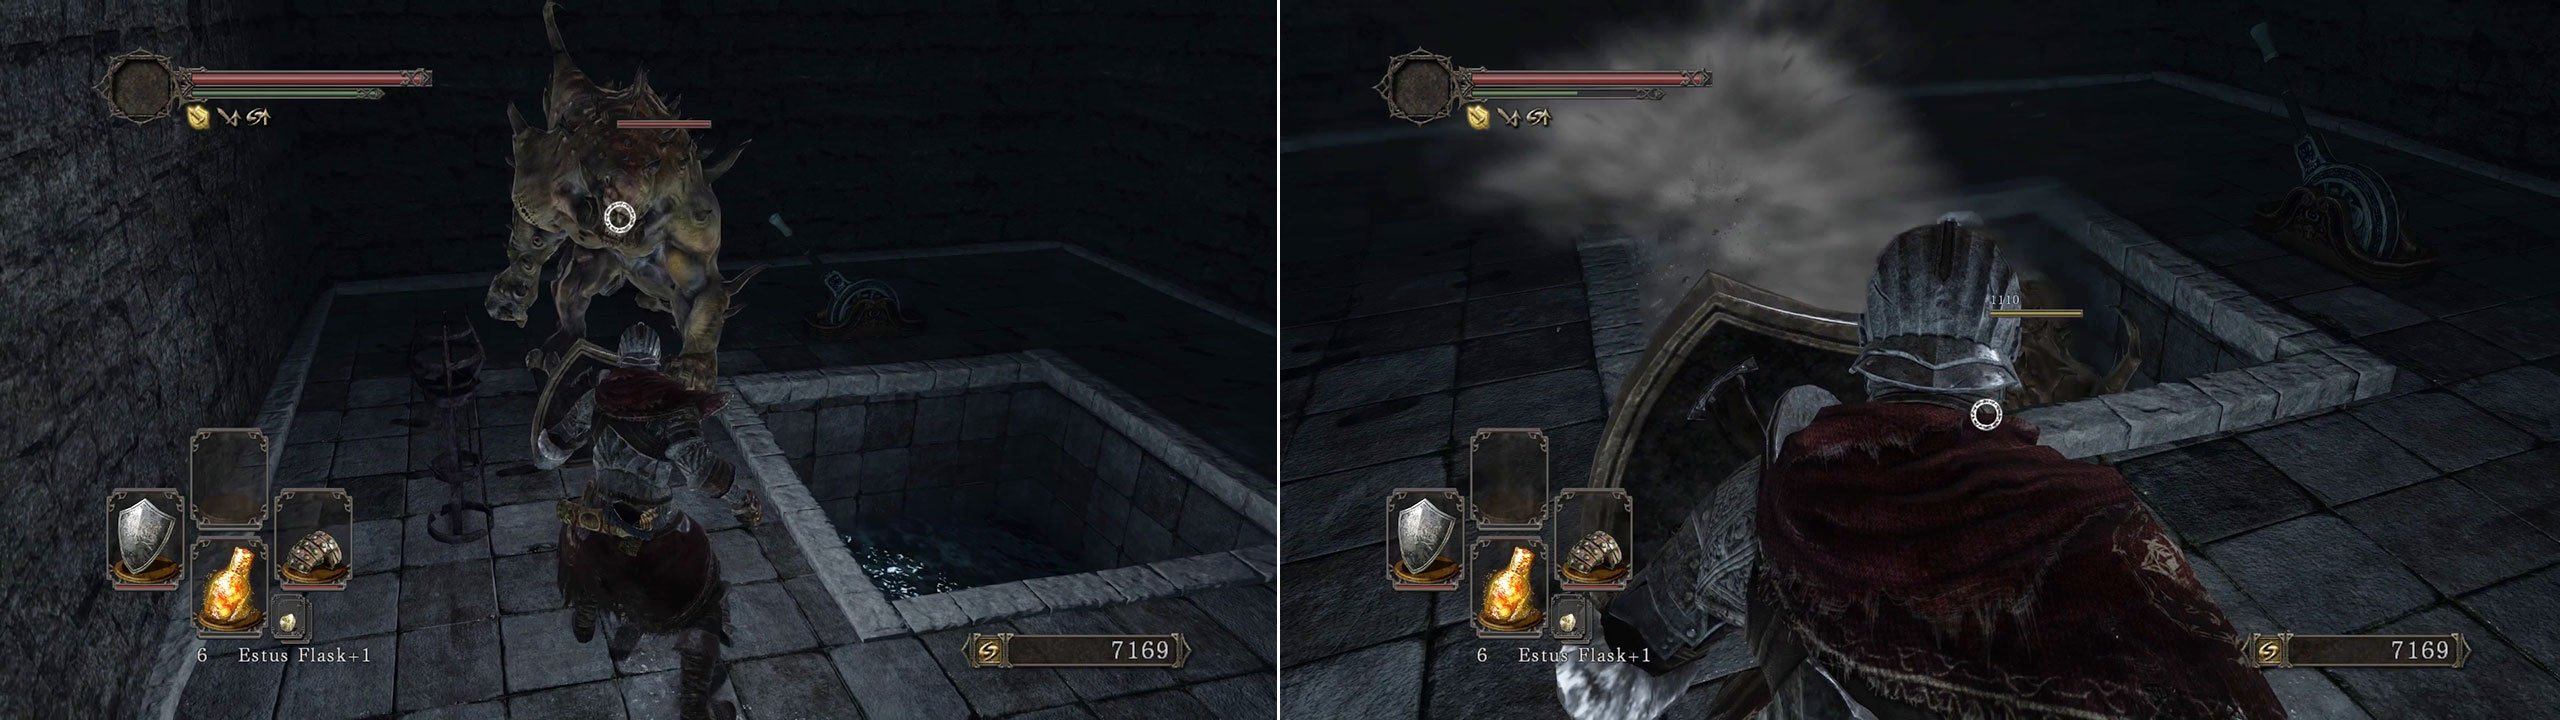
As long as you keep an eye on where you are in the room; you shouldn’t ever fall into the water yourself. Repeat this trick for all three Enhanced Undead’s to make this part much easier.
Lock on to the monster and start walking back up the stairs (slowly). Once you’re at the top, start walking back and to your left. Now keep baiting the monster so it follows you around the open water and then when you reach the side where Lucatel’s summon is; bait it into attacking you as it is right over the open area.
It’ll very likely roll or spin into the middle of the room and to a watery grave, giving you a near risk-free 1900 souls. Now head back down, left and grab the very rare Sublime Bone Dust from the corpse.
Turn around, walk forwards into the next area and look for the second monster to the left of you. Get its attention and then once again carefully walk back up to the water where the lift was. Repeat the trick of baiting it into attacking you (and falling into the water).
Go back down the steps, go right again and this time press the action button in the wall in front of you. It’ll open up a secret room, but stick to the left side (there’s a drop not far up ahead that you won’t see). Grab the [Northern Ritual Band] and [Bleed Stone] .
Walk back to the middle of the main room and as you move forwards slowly, look left again for the third - and final - Enhanced Undead. As before, lure it back to the water trap and let it kill itself for some easy souls.
Having a Wretched Time
You’ve now got an annoying number of Wretches to kill before you reach the boss (or summon Lucatel to ‘help’ you). It’s made extra tricky as the water here really slows your movement speed down, so it’s much safer to get up close ASAP and kill them before they even get a chance to dive down and explode at your feet.
There’s one on the right (just past the third Enhanced Undead), one at the top of each side of the upper platform and there’s four on the lower floor (one in each cell room). Be sure to lure them out one at a time and kill them before they can attack.
Once the area is cleared (and not before); run back to the lift area and summon Lucatel (or use a Human Effigy and summon her if you’re hollow). Don’t forget to equip your Red Eye Ring if you do summon Lucatel and run down to the gate at the far end and open it.
With the gate open, carefully run across the narrow path and proceed in between the left-hand staircase and the wall to find a corpse holding a useful [Radient Lifegem] .
Boss Fight - The Lost Sinner
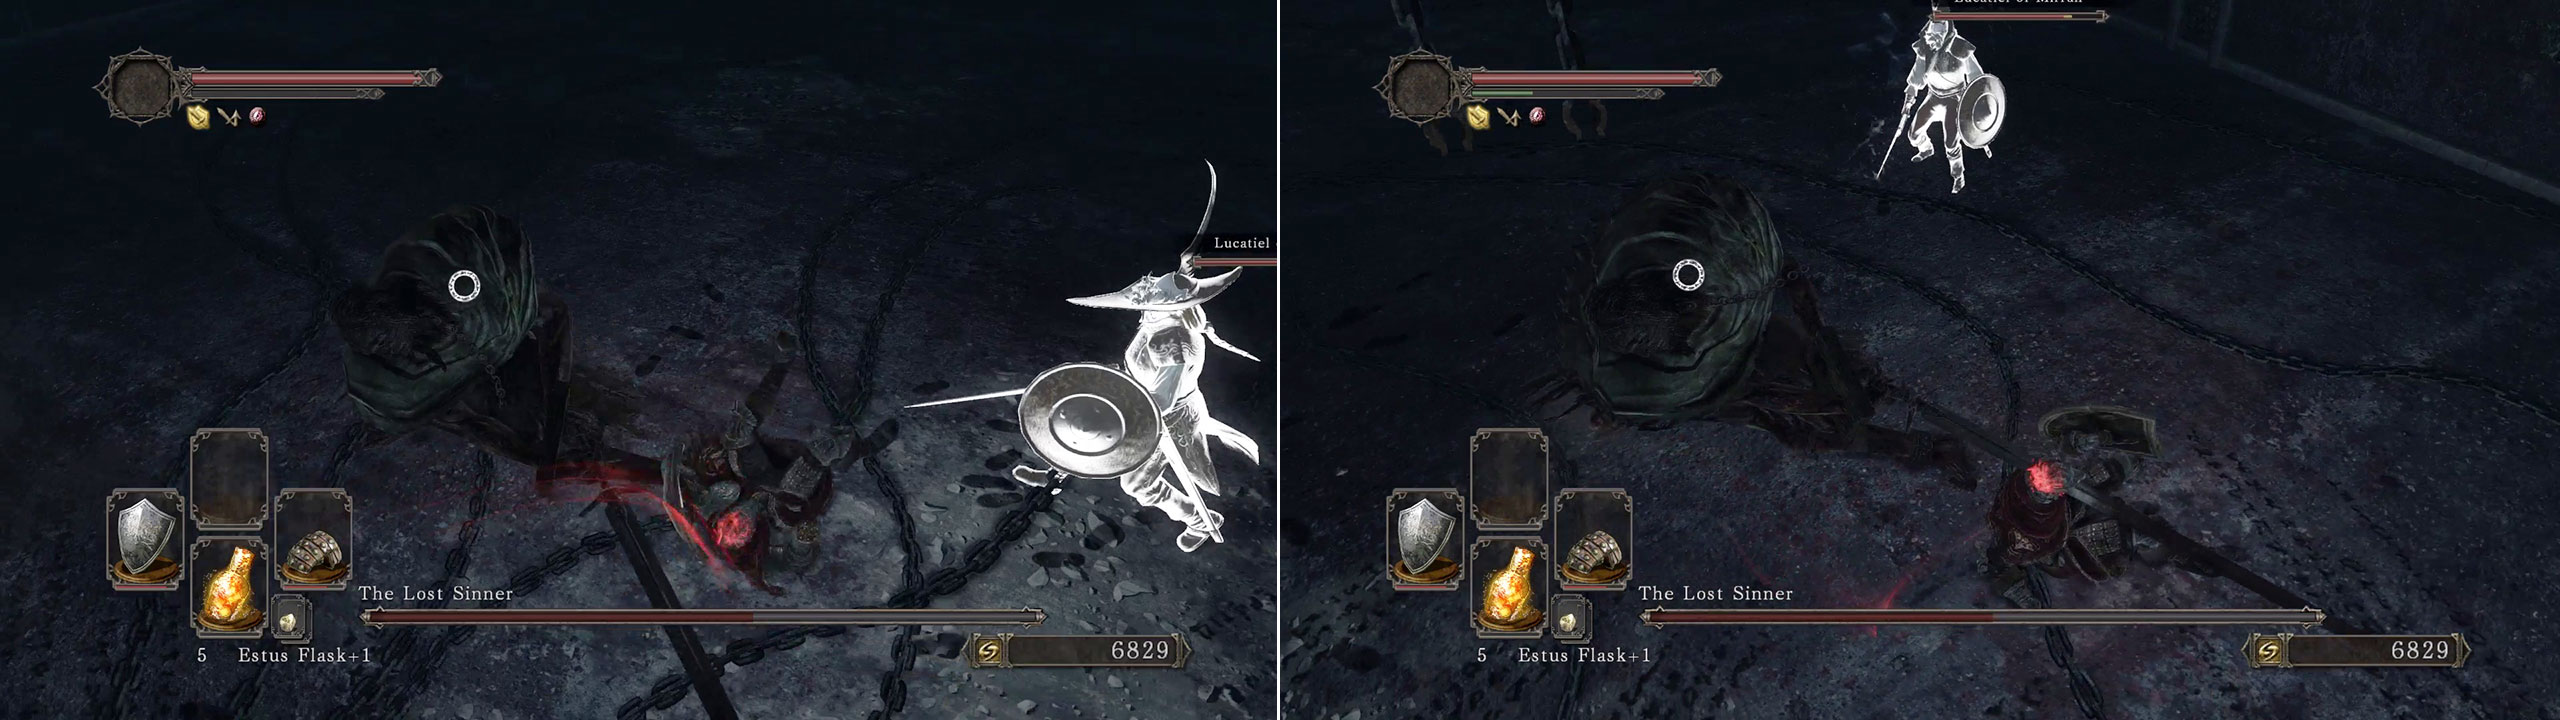
Keep your guard up at all times and if your Adaptability stat is pretty high then it’ll make rolling through her sword attacks even easier (and FAR less frustrating)!
This boss proves to be really, really difficult for a lot of people and that tends to be because she’s a super-fast mover with some very powerful moves and really long range (in an arena where your lock-on breaks often due to it being really dark as well).
Fear not though, as we’re going to make this battle much easier for you (as long as you prepare well and stay patient).
- Make sure you’ve got a 100% physical damage shield as her sword is really painful and she’s not afraid to use it (a lot).
- NEVER - EVER - attack her until she’s performed a two-hit combo (otherwise you’re likely to miss as she jumps away and counters almost immediately after). You might land a hit in if you don’t wait; but odds are you’ll be heavily punished if you miss.
- Waiting until she performs a combo means her attack cool down period is far greater; allowing you to actually get a hit or two in without fear of her jumping away.
- It’s worth rolling behind her if you see her dashing towards you (especially if she jumps up in the air).
- If you’re wearing the Red Eye Ring then The Lost Sinner will keep her focus solely on you for the whole fight. This means Lucatel can land blows in relative safety but it does mean that you need to be quick with your blocks, rolls and energy refills.
- Speaking of energy replenishing, don’t do it until she’s performed a combo and is in her cool down state. You’ll unlikely have enough time otherwise (especially with that ring on).
If you lock-on breaks, keep your shield up and get close again so you can lock back on and keep a track of her movements.
Once the Primal Boss is dead you can open the double doors ahead and then open the metal chest for a [Fragrant Branch of Yore] and an [Elizabeth Mushroom] . Complete this area by lighting the Primal Bonfire up ahead and then warp back to Majula from it.

 Sign up
No Comments