Rocketyard
This is the first Strike Mission and it starts in the Rocketyard. Fight through the Hive Acolytes and Knights that are scattered around this Public Area so you can reach the building at the far end. You’ll enter the Refinery when you get to the other end.
Refinery
Navigate the halls where you will find the Hive and Fallen battling it out once more. You should be able to surprise them from behind and keep your Fire Team together. Once you’ve taken back the Refinery you’ll need to deploy your Ghost at the console to remove the barrier. This will take some time, so of course there will be waves of enemies racing towards you. There are several openings so a back-to-back approach is often best to cover all the angles. Use the Radar to react to more furious attacks and you can also perch atop the cargo containers behind where the Ghost is working if you can snipe well enough, making sure to hit the Fallen snipers. After the third layer has been deactivated the waves will halt and allow you to collect any loot that has fallen and grant access to the opening on the right side.
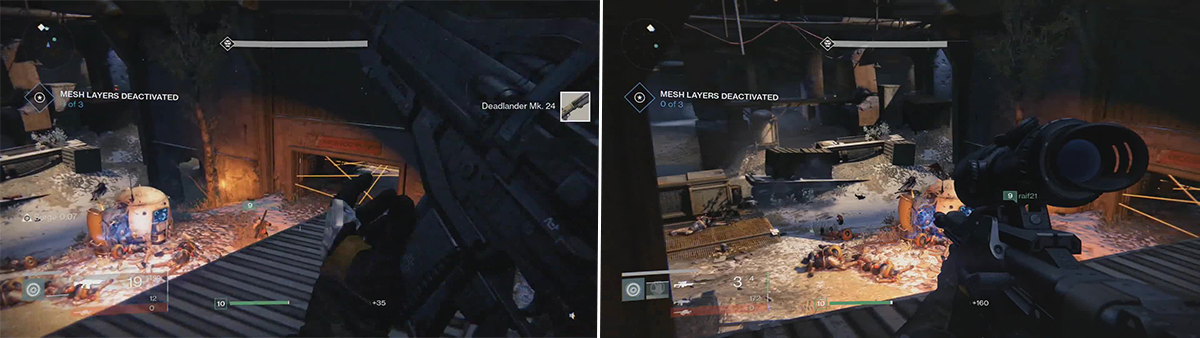
To the right (left) next to where the Ghost is hacking is your escape route. It is blocked off for now. Sniping from this position (right) is perfect to see the oncoming Fallen.
The Blast
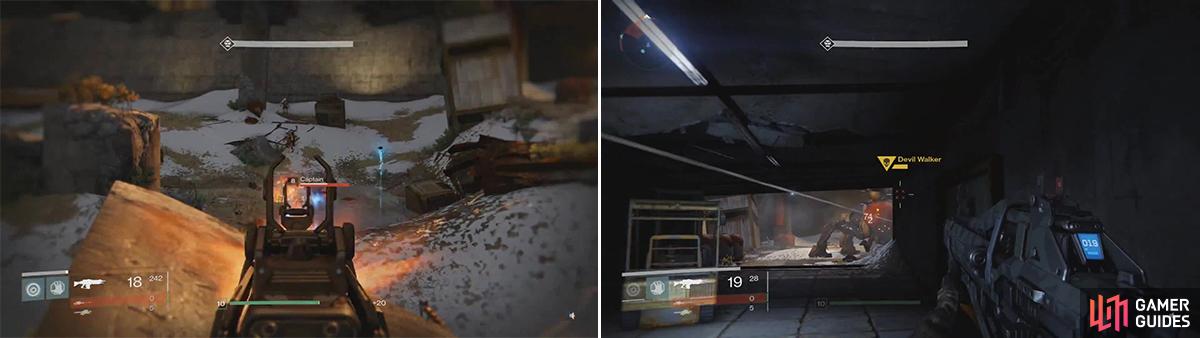
The entrance to The Devils’ Lair is across the zone and there is a large building along the way. There are Captains, Vandals, Dregs, and Shanks all along the pathway to The Devils’ Lair. You’ll want to start clearing them out as soon as you arrive because the Devil Walker will be arriving shortly and you don’t want to be fighting anything else.
The Devil Walker
This is a much different battle then any other that you’ve encountered thus far. The Devil Walker has an array of attacks and can be defeated multiple ways. The first attack is the Cannon Blast; it uses this attack often and it is easy to avoid because of the long charge up before firing, indicated by the red laser and a high-pitched noise. The area of effect is pretty large so you still need to move and take cover. Devil Walker also has a Chaingun at the front of its head and will follow up with it after a Cannon Blast. Take cover behind a wall or you’ll take heavy sustained damage.
The Laser Array is like the Cannon Blast and is indicated by blue sparks on the left weapon. It takes a second to charge up so take cover and get out of the way. If you get too close to the Devil Walker it will melee you back. Shock Grenades are released from the side of the Devil Walker and the grenades will bounce around seeking out a target. When the hatch is opened you’ll want to get a few shots in to disable it.
Beware the Fallen that respawn throughout the fight (left). This vantage point (right) offers some protection from the Devil Walker. Beware his cannon can hit you here though!
For all the attacks that the Devil Walker has, a good Fire Team should be able to take it down if you are able to clear the Fallen quickly before it arrives. Use the first building in the zone for cover and as a vantage point. With a team you’ll want to spread out or it can take out your entire squad in one shot, so the entrance and debris off to the left and right are also recommended, though the first large building is the safest if you are alone. The trick to the battle is focusing on a single leg, one of two weak points on the Devil Walker. With enough damage, a leg will go down and cause the Devil Walker to collapse and expose its neck, the second weak point.
When the tank collapses and exposes its weak spot is when you’ll want to use your Special and Grenades as well as Heavy Weapons. You likely cannot kill the tank in one go around so switch to another leg and force the Devil Walker back down to expose the neck once more. When all six legs are taken down you’ll defeat this mighty foe, but it can be done quicker if you hit the neck.
The Devils Lair
With the Devil Walker defeated you’ll be able to tear through some Dregs and Vandals enroute to the Devils’ Lair. Here you are met with the boss of this mission, Sepiks Prime . You’ll need to clear the area of Fallen first; it’s not hard to use the debris as cover to pick them off. Once cleared out, Sepiks Prime becomes vulnerable.
Sepiks Prime
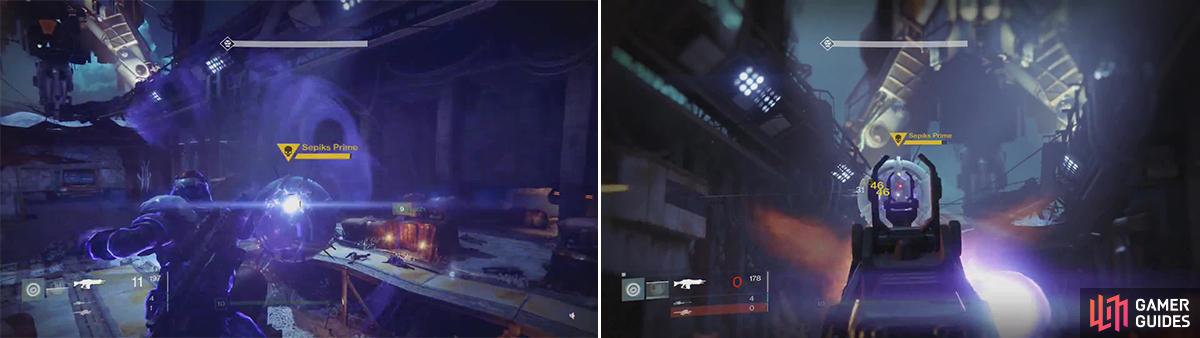
Once Sepiks Prime’s shields are down, unleash with Specials (left). As with all Servitors, shooting the eye offers critical damage (right).
The boss has one main attack, an Eye Blast that fires a dark explosive projectile that is highly accurate. The attack is not slow, you’ll need to react quickly to avoid it. Outside of this attack, Sepiks Prime will knock you back if you get too close. The difficulty of the battle comes from the other Fallen that join the fray and that Sepiks Prime will teleport around a lot. Be on alert for the drop ship because it will also fire at you if you’re not behind cover. Use Specials and Grenades that target this large Servitors “eye” after it has warped to deal the most damage.


 Sign up
No Comments