
Welcome to the final main story episode of the game! The Cheat Shop minimum is now set to 0, so you can dedicate all your precious points to EXP to help you level should you want. The only new thing that unlocks is a Quest that will unlock the Dragon King monster class upon completing it, which should be the final monster class (there’s still one more humanoid class to unlock) if you’ve unlocked every other one already. Note that Killia learns his final Unique Skill, Macrocosm , after the end of the last episode. This is a pretty powerful skill, although it only hits one enemy.
You can find the free chests in the following locations:
- On top of the fountain in the middle of the Netherworld
- Next to the Curry Shop
- In Seraphina’s Room
The following area, although mostly free of any trickery (like Geo Panels), will put your characters’ strength to the test. If you feel like you are barely squeaking by, then it’s not going to hurt to return to the Pocket Netherworld to grind a little bit.
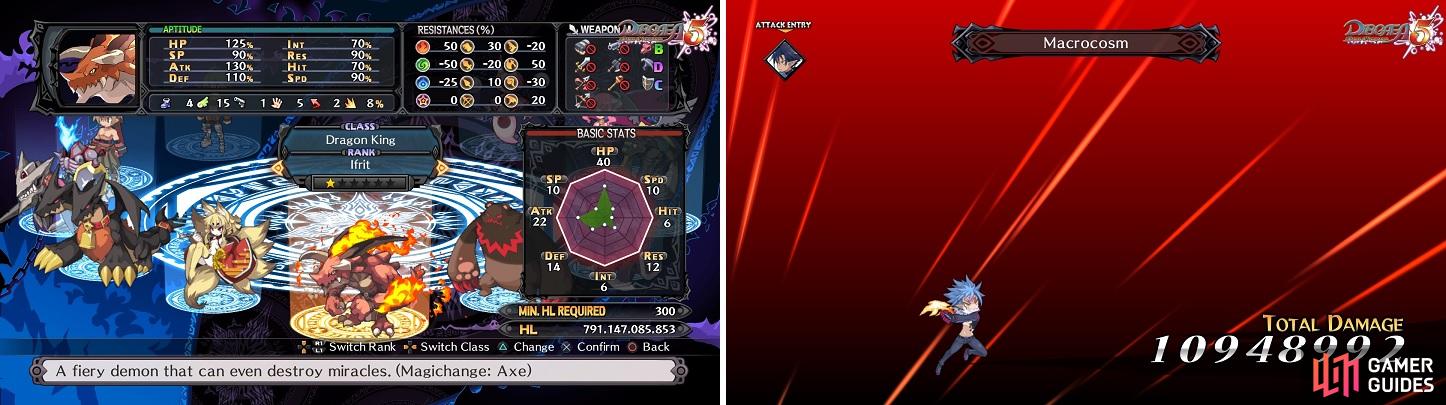
You can unlock the Dragon King monster class at the beginning of this Episode (left). Killia’s final Unique Skill, Macrocosm (right), is a powerful single-target move.
Floor of Darkness
| Enemies | Equipment | Evility |
|---|---|---|
| Lv. 105 Abyss Blade (x2) | Skeggiold, Hero Suit, Iron Mask | Ripple Impact |
| Lv. 105 Abyss Blade (x2) | Grasida, Hero Suit, Iron Mask | Ripple Impact |
| Lv. 105 Horus | Phantasmal Medal, Hero Suit, Iron Mask | Evil Eye |
| Lv. 105 Shaytan | Titan’s Fist, Hero Suit, Iron Mask | Anti-Element |
| Lv. 100 Sorceress (x3) | Aphrodite, Hero Suit, Iron Mask | Mass Blaster |
| Lv. 100 Shaytan (x2) | Titan’s Fist, Hero Suit, Iron Mask | Anti-Element |
This is your first encounter with Dark Knights, who have an interesting Evility. Ripple Impact makes it so that if they are next to you and attack, any characters adjacent to the one that was attacked will also receive some damage. At the beginning of the stage, the two Lv. 100 Shaytans will Magichange with the two axe-wielding Abyss Blades, giving them a fire-based Magichange Skill and their Evility, which isn’t too bad.
The stage itself is a little weird, as there’s only a single path at first, meaning you’re subjected to the two Sorceresses at the beginning of the level. You don’t want your characters next to each other, as this will increase the Sorceress’ attack power (their Evility has it so the more targets they hit at once, the more powerful their attacks are). Once you get to the first platform with the one Sorceress, all of the enemies, barring the Horus, will come at you.
Heartbreaking Slope
| Enemies | Equipment | Evility |
|---|---|---|
| Lv. 107 Raider | Titania, Hero Suit, Power Suit | Acceleration Shot |
| Lv. 105 Raider (x2) | Titania, Hero Suit, Power Suit | Acceleration Shot |
| Lv. 107 Abyss Blade | Lion King’s Edge, Hero Suit, Power Suit | Ripple Impact |
| Lv. 105 Abyss Blade (x2) | Lion King’s Edge, Hero Suit, Power Suit | Ripple Impact |
| Lv. 107 Sorceress (x2) | Aphrodite, Hero Suit, Power Suit | Mass Blaster |
| Lv. 105 Sorceress (x2) | Aphrodite, Hero Suit, Power Suit | Mass Blaster |
| Lv. 103 Sorceress (x2) | Aphrodite, Hero Suit, Power Suit | Mass Blaster |
| Lv. 100 Shogun (x4) | Titan’s Fist, Hero Suit | Immortal Body |
Welcome to the stairway to death! The stage is set up like some stairs, with enemies on either side and Abyss Blades near the top, as well as some Raiders at the top. There’s no trickery to this level, as you just need to take things slow and steady, luring the enemies to your position, if possible. You’ll need ranged attacks to take out the Sorceresses, as you can’t melee them due to them standing on one-panel islands. Start off by approaching the first two Shoguns and defeating them with ranged attacks (preferably elemental), then go onto their platforms to start working on the Sorceresses. Once you step onto the central platform, everyone else will come after you, so you will need to be prepared for that and hope you can live through it.

The “Stairway of Death” doesn’t leave a lot of room to space your characters (left). You’ll need ranged attacks to deal with the Sages (right).
Destroyers Beckon
| Enemies | Equipment | Evility |
|---|---|---|
| Lv. 110 Majorita | Alice’s Magic Wand, Alice’s Magic Wand, Valkyrie Dress, Dress Armor | Queen of Coffins, Double Bladed |
| Lv. 108 Corpse (x4; Pirate) | Crusade, Valkyrie Dress, Dress Armor | Acceleration Shot |
| Lv. 108 Corpse (x3; Twin Dragon) | Death’s Scythe, Valkyrie Dress, Dress Armor | Twin Heads |
| Lv. 108 Corpse (x2; Sage) | Goddess’ Starbow, Valkyrie Dress, Dress Armor | Mass Blaster |
| Lv. 108 Corpse (x3; Sage) | Holy Heaven Cane, Valkyrie Dress, Dress Armor | Mass Blaster |
| Lv. 108 Corpse (x2; Dark Knight) | Liquid Edge, Valkyrie Dress, Dress Armor | Ripple Impact |
| Geo Symbols | Geo Effect |
|---|---|
| Red | No Entry |
| Null | Enemy Boost +50% |
This is definitely the one true hard map that is a result of the layout than anything in this episode. Majorita has returned, but is now a corpse. She doesn’t have her Overload skill, but she still has her Evility, so you will need to be careful in regards to how many enemies you defeat on your way to her. The top part of the map is covered in Geo Panels that give the Enemy Boost +50% effect, with the three pillars that the Sorceresses are standing on near the beginning also containing the effect. The Geo Symbol for that effect is in the middle of the map, but the easy path to it is blocked off by some No Entry panels. The only path that you can take will result in you going through the Sorceress’ path, then through the Enemy Boost section, likely causing a few deaths.
However, there is a way to bypass this. Equip a throwaway character with as many Shoes as possible and toss him/her onto the area just underneath the Sorceress pillars. Once he/she lands, move them to the Geo Symbol and remove it. You probably need a movement of 9-10 to reach it with a Wrestler/Logan throwing the character, but you can use two characters if needed. If you used a strong character and he/she is still alive, get the No Entry symbol off its panel, too. From here on out, you can ignore the pillar enemies and go around to kill the others, including Majorita. This will allow you to not have to worry too much about her attack power increasing and can go back to defeat the remaining enemies after she’s gone.
Farthest End of Fate
| Enemies | Equipment | Evility |
|---|---|---|
| Lv. 110 Void Dark | Kagutsuchi Pike, Valkyrie Dress, Royal Ring | Endless Animosity, Turbo Boost |
| Lv. 105 Corpse (x2; Pirate) | Crusade, Valkyrie Dress, Dandy Gown | Acceleration Shot |
| Lv. 105 Corpse (x2; Dark Knight) | Samosek Sword, Valkyrie Dress, Dandy Gown | Ripple Impact |
| Lv. 105 Corpse (x2; Sage) | Holy Heaven Cane, Valkyrie Dress, Dandy Gown | Mass Blaster |
| Lv. 100 Corpse (x2; Dragon King) | Death’s Scythe, Valkyrie Dress, Dandy Gown | Anti-Element |
| Lv. 100 Corpse (x2; Twin Dragon) | Death’s Scythe, Valkyrie Dress, Dandy Gown | Twin Heads |
| Lv. 100 Shogun | Death’s Scythe, Valkyrie Dress, Dandy Gown | Immortal Body |
It’s finally time for the inevitable battle against Void Dark, who can be quite annoying. The Shogun behind him will Magichange with him on the first turn (the two Dragon Kings will Magichange with the Dark Knights), giving him Immortal Body, which is annoying if you’ve been using non-elemental damage a lot. Void has infinite Revenge Mode (due to Endless Animosity), so he’ll be stronger than usual and make use of his Overload skill right away (whenever he gets into range). Alma Ice Sculpture makes it so whoever he attacks while it’s active will be unable to act on the following turn, so try to not group your characters together whenever he comes after you.
However, that’s not the end of Void’s tricks, as he has other Overloads in his disposal, which will trigger as you lower his health. After Alma Ice Sculpture is Broken Faith Magia , which you know all too well by now. Next is Devouring Kris , which steals 50% of max SP from all enemy units within 3 panels, then after that is Mastema’s Hatred , increasing damage dealt by 10%. The last one is Torturous Apathy , inflicting Weaken on all enemy units within 3 panels. As you can see, you have plenty of things to worry about in this battle, mostly due to Void Dark.
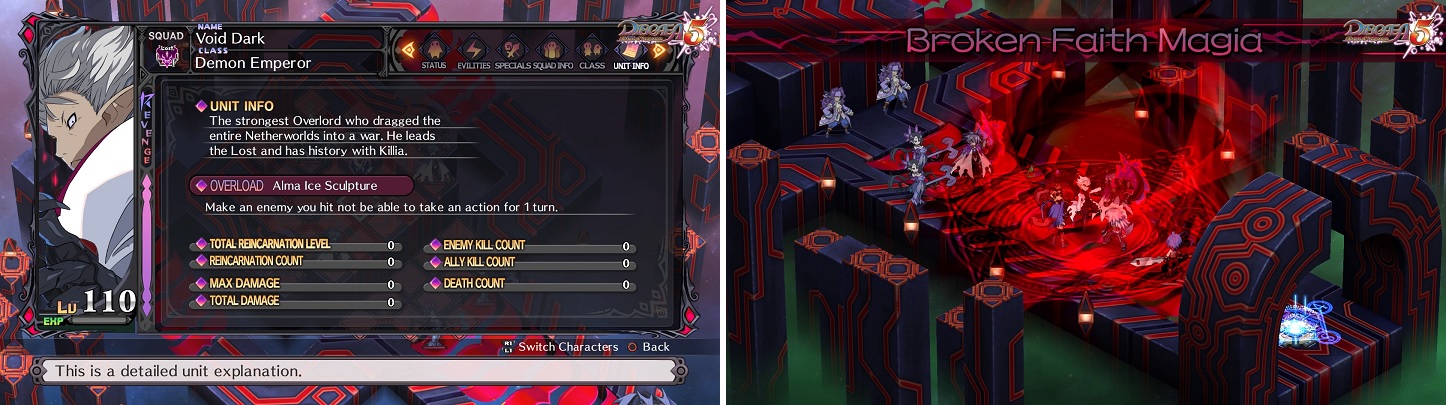
Void Dark has access to multiple Overloads in this battle, including an old favorite (right).
It might be a good idea, depending on your party’s strength, to go straight after Void Dark and make him trigger Broken Faith Magia. This will avoid the needless reviving of any enemies you defeat, making him waste that Overload skill. After triggering Broken Faith, you can go ham on the rest of the enemies while trying to avoid dying from their and Void’s attacks. From there, Devouring Kris isn’t too bad, but Mastema’s Hatred might be a little troublesome, so try to get him down far enough to trigger Torturous Apathy, preferably using a ranged attack outside of the 3 panels.
Beating of the End
| Enemies | Equipment | Evility |
|---|---|---|
| Lv. 120 Liezerota Dark | Death’s Scythe, Valkyrie Dress, Royal Ring | Distorted Feelings |
| Lv. 100 Dark Bit (x4) | Iron Man Medal | Restricted Guard |
As the last battle of the main story, there isn’t much in the terms of enemies, but their chemistry works very well together. There are four Dark Bits surrounding the actual boss, with their Evility mitigating the damage done against the boss by 25%. That means you can’t do any damage against the boss until you defeat at least one of those Dark Bits. However, there’s a catch, as each one you destroy will power up the boss’ attack by 25%, so you’re at a crossroads of sorts. Three of the Bits know an Omega-tier spell, with the last one knowing Omega Heal, and they all know either a debuff or an ailment spell. The boss itself only knows one skill, so check out its pattern and make sure that you space your characters out in the battle to avoid getting smacked around by it.
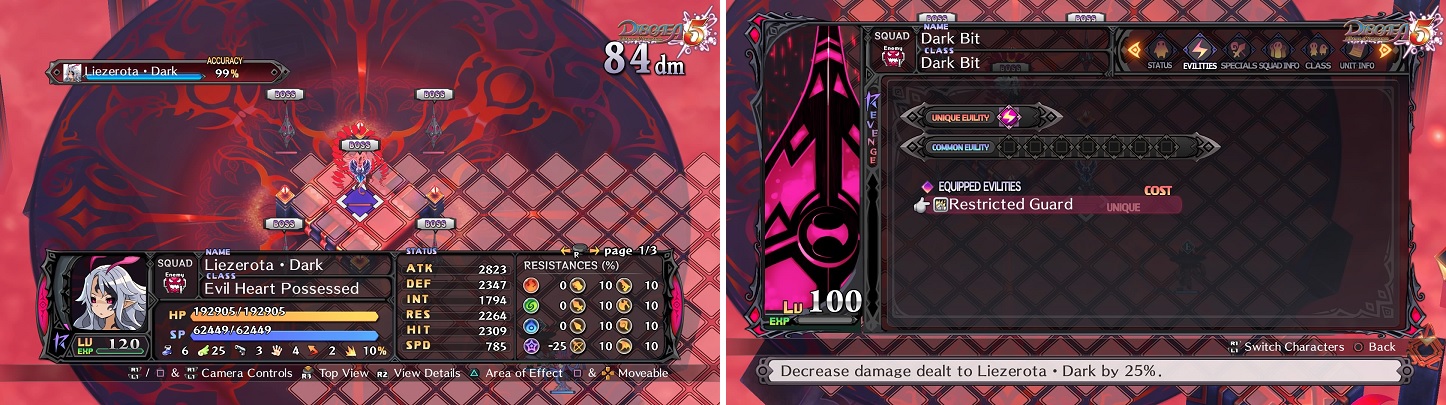
Liezerota Dark is immune to all damage, thanks to the Evility that is present on all of the Dark Bits.
Presumably, you want your main fighters to be around the same level as the boss itself, with fairly good weapons that have been leveled to around 10-20 or so. All of the enemies, including the boss itself, have 0 resistance against all elements and -25 resistance against Star, so if you do decide to use spells, use Star. The problem with the battle is if you want to deal with the Bits casting spells on you while you’re fighting the boss. If you defeat them all, then the boss is that much stronger, but if not, you will have those spells mentioned above whittling your characters down.


 Sign up
No Comments