Runes are special items that can be collected to purchase new supernatural powers for Corvo, as well as upgrade existing ones. Although there’s a total of 39 Runes in the game, you won’t be able to purchase every single power/upgrade. Runes don’t have any special function outside of being able to purchase/upgrade powers.
The Hound Pits Pub
Rune #1
You can buy one from Piero at his store. It will cost a total of 500 coins and he only carries one. If you can’t buy it straight away, you can wait until later on when you have the money.
Rune #2
The first Rune can be found right after you get your powers from The Outsider, upon visiting The Hound Pits for the first time. It is found on a small piece of land, along the shoreline. Use Blink to get to it, as you want to avoid become fish food.
Runes #3 & #4
After returning from finishing High Overseer Campbell, you will be asked to investigate some noises coming from the sewers underneath the building. Go down and you will run into two Weepers. The first Rune can be found behind a grating, underneath the water, at the end of the tunnel, while the other Rune is inside of the desk by the Weepers.
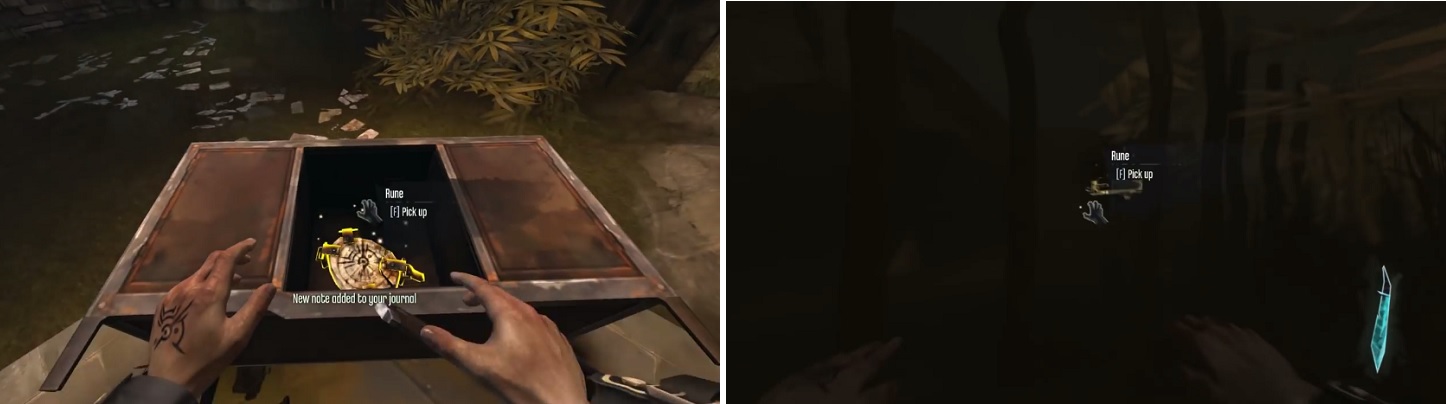
The two Runes underneath the Hounds Pit with the Weepers are easy to find. One’s inside of the desk by the one Weeper (left) and the other’s behind the large metal bar gate underwater (right).
Rune #5
If you finish the optional mission of dueling Lord Shaw during Lady Boyle’s Last Party, then Pendleton will give you a Rune upon returning to The Hound Pits.
Rune #6
If you dispatch Lady Boyle in a nonlethal manner during Lady Boyle’s Last Party, then you will receive a Rune from a letter that is on the table next to Corvo’s bed in his bedroom.
Rune #7
After Lady Boyle’s Last Party, speak to Callista who is sitting inside the pub, who tells you that Emily is hiding somewhere. Find her and Emily will give you a Rune.
High Overseer Campbell
Rune #1
In the first main area, there is a path to the right and you can see someone throwing something off of a balcony. Make your way to this balcony, head downstairs and go out the door next to Granny Rags. The Rune will be on the Outsider Shrine at the end of the path right outside the door.
Rune #2
You get a Rune as a reward for doing the first side mission for Granny Rags.
Rune #3
You get another Rune as a reward for doing the second side mission for Granny Rags.
Rune #4
In the area just past the second Wall of Light, there is a trailer-like building on the left side of the area. The Rune is located inside of this trailer.
Rune #5
Inside the Office of the High Overseer, there is a secret room that can only be opened by pushing a button on a certain statue. When you first arrive at the office, there will be two small rooms off to the sides, that lead to stairs that go to the second floor. At the base of the east set of stairs is a door that leads down to where the statue is. Push the eye to gain access to the secret room, where you’ll find the Rune inside of the glass case, which must be broken.
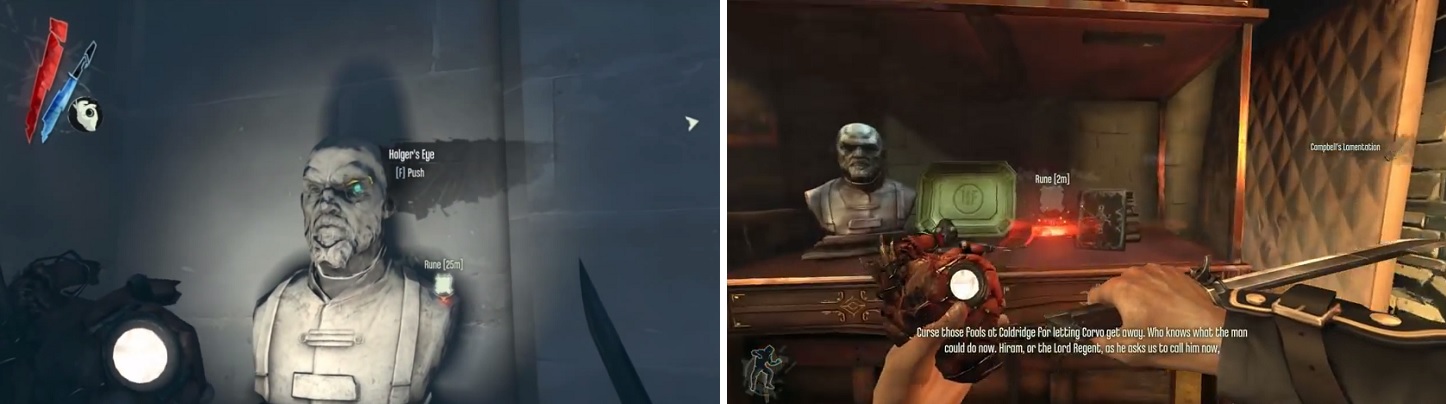
Find the stairs leading down to see a bust on a wall that allows you to access a hidden room (left), where you’ll find the Rune in a glass case (right).
Rune #6
This Rune is located in the Meeting Room in the Office of the High Overseer. It is hanging above the fireplace in the room.
Rune #7
The last Rune for this mission is located in the Back Yard area. It is inside of the Workshop building, on a table. You can enter the building by breaking the glass on the roof, then dropping down inside.
House of Pleasure
Rune #1
This one is located inside of Galvani’s Offices in the second area of the Distillery District, inside the secret lab where you found the rat poison item for Granny Rags side mission in High Overseer Campbell. You need to pull a certain book on the bookshelf in order for it to open, and the Rune will be right there.
Rune #2
This Rune is located inside of the Art Dealer’s Apartment, inside the safe. In order to get the combination for it, you need to be on the second side mission for Slackjaw within the overall mission. The Art Dealer is inside of the Golden Cat Bathhouse, and you need to keep electrocuting him until you can get the combination from him. Note that this combination changes on each playthrough, so it may vary.
Rune #3
There are three Runes located in the Golden Cat area. The first one is in a building located just to the right of the stairs leading up to the main entrance. The Rune is on the second floor, on a table.
Rune #4
This Rune is located on the second floor of the bathhouse. At the top of the stairs, with your back to them, go to the right and through the double doors. The Rune is hanging above the table on the wall.
Rune #5
This last Rune in The Golden Cat is located on the top floor. It’s in the room with the Courtesan, next to where Emily is being held.
The Royal Physician
Rune #1
Once you get past the initial area with the guards and through the area with the cart and Warehouse Key, you’ll come to a long street with more guards. On the right-hand side is a gateway that leads to some stairs and a chain. Climb this chain and go into the room to find the Rune on a table.
Rune #2
This Rune is located in a safe in Pratchett’s house in Drawbridge Way. The combination can be found by going to three paintings in a certain order, and finding the numbers in those paintings. The combination is 473 and the safe is on the top floor.
Rune #3
From #2, go upstairs and onto the roof of Pratchett’s house. You’ll see a balcony overlooking the waters, so Blink onto it. Inside this building you’ll find the next Rune, which is on the Outsider’s Shrine.
Rune #4
When you first arrive in the Midrow Substation area, there will be a Rune right in front of you on the table.
Rune #5
The last Rune for this mission is located right next to Sokolov on the table he’s working at, so you can’t miss it.
Lady Boyles Last Party
Rune #1
When the mission begins, go up to street level and go to the left, where you’ll find some stairs to some higher ground. To your right is a building and there’s a doorway where you can get inside. Go up the stairs until you get to an open doorway, so go inside. You will find a Weeper in the same room as the Outsider Shrine and Rune.
Rune #2
This Rune is located in the waters, on the far end from where you start. From Samuel’s boat, hop in the water and swim straight ahead, all the way until you find a set of stairs. You’ll find it in the water near the stairs.
Rune #3
This Rune is located inside of the Boyle Estate, in the basement and behind a locked door. The key for this door is located upstairs, in one of the bedrooms (it is random), which you can tell by the different looking doors. You can get upstairs by going in the ballroom (the one with all of the food), where you will see a doorway with stairs leading up and down. Once you have the key, go downstairs into the kitchen and into the basement; the first door can be unlocked by using the nearby switch. When you get to the door requiring the Basement Vault Key, open it up and you’ll find the Rune inside.
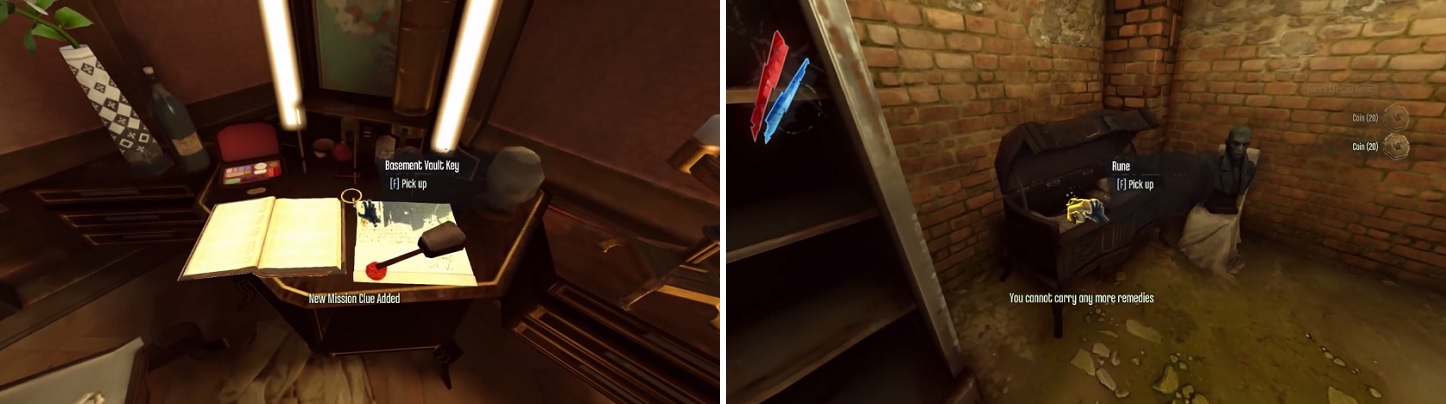
The key to the basement vault is randomly in one of the three Boyles’ bedrooms upstairs (left). Once you have it, the Rune will be in the chest in the room (right).
Return to the Tower
Rune #1
In the big courtyard, in the first big area, there is a statue of the Lord Regent, as well as a Tallboy walking around. Facing the stairs, go to the right and you’ll see an open doorway and a fairly large room (with closed, very big double doors). The Rune is underneath the bottom bed of the middle bunk beds.
Rune #2
This one is inside of the tower, inside the Lord Regent’s bedroom. In the main foyer, Blink onto the lights, then you can get onto the balcony overlooking the foyer. This is the Lord Regent’s bedroom and the Rune is inside the chest by his bed.
The Flooded District
Rune #1
This Rune is located in the Greaves Refinery area, which is the area where you go to get your gear back. It is on the ground, outside of the building where your gear is located, hidden in the bushes.
Rune #2
This one is located in the Central Rudshore area. After stealing Daud’s key, you will need to head to a door far below you that you get to by climbing down a chain. The Rune is right there at the bottom of the chain.
Rune #3
This Rune is located in the Gateward Tunnel area. You can get inside the second to last building before the train tracks (two balconies, you want the first balcony). The window in this building is connected to the adjacent one with a ramp. Keep going back and forth between these two buildings until you come out a window and onto the rooftops. The Rune is located on the highest rooftop you can climb to, right in the open.
Rune #4
In the room where you confront Granny Rags and Slackjaw, go upstairs and into the bedroom. There’s a door up here that leads to some stairs, where the Rune is resting on an Outsider Shrine.
Rune #5
This Rune is located in the sewers section of the Old Port District area. When you reach the area with the Weepers/Survivors (High/Low Chaos respectively), the Rune is underneath the walkways there.
The Loyalists
There is only one Rune in this mission and it’s found in Piero’s Workshop. However, you can’t in via normal ways, since it is locked up tight, so you’ll have to find another way inside. You have to get on the roof, then drop down to the balcony in order to get in, where you’ll find the Rune on the table on the second floor.
The Light at the End
As with the previous mission, there’s only one Rune in this one as well. One of the objective markers should be directed towards the Gatehouse Drainage, where you’ll find a valve that you can turn to open a drain. You’ll find the Rune in some sewage in a small room (between two drains).

 Sign up
No Comments