
An Alternate Route Through Moonsbit Pass
Head back up to the gate you opened that separates Moonsbit Pass from the Estan Plains… you remember? A lever, Goblins ambushed you? Right before the gate, on the Estan Plains side, are two side passages to the south. The eastern-most one leads to the Moonshower cliffs, of course, while the western one runs alongside the more conventional route through Moonsbit Pass, eventually linking up with the route you traveled along earlier just north of the Waycastle - a shortcut, in effect.
Either way you can potentially reach Manamia Trail (the area north of the Encampment) while treading new ground, if you care about such things… or you can just go back the way you came. You’ll have to fight some weaker Bandits if you take the new mountain pass, but it shouldn’t be anything you can’t handle.
The Brigands Book
If you take either of the two suggested paths mentioned earlier, you should make it back to the Waycastle. Follow the road leading to the Encampment, heading mostly south. Where the Bandits along the road first appear, at the bend where the road turns back north, you’ll find some Bandits attacking a robed man named Rowland. Do your best to save him, but be wary; he doesn’t have a great deal of health and the Bandits focus on him quite aggressively.
You don’t need to save him to advance the quest, but it’ll be assumed you managed it for the sake of this argument, in which case he’ll thank you when the Bandits are dead, and mention that the Bandits who were attacking him looked like the Southron Bandits, and that they stole a magick book he was carrying. Yes, this tome was none other than Salomet’s Grimoire, the book Steffen wanted. How fortunate! He’ll start to mention Salvation before cutting himself off, then he’ll finally, mercifully shut up. No sense in pursuing this quest further just yet, as the Southron Bandits can be quite rough… although you’ll be in the vicinity sooner rather than later…
Johnathans Pawn-Altering Drugs
Return to the Encampment and check out the Notice Board, which might have new quests if you’ve completed any old ones. Also, in the ‘Command Headquarters’ tent you can now find a Pawn named Johnathan, who’ll sell you a variety of goodies you cannot get anywhere else. These include new dyes for your hair, face/eye pigments, and skin pigments colors. He also sells Elixirs that change your Pawns inclinations (much more effectively than the superficial and limited changes that can be made at Knowledge Chairs.) Scather/Challenger Elixirs are good for making your Main Pawn more combat-savvy. Furthermore, as you complete quests that give DLC items as rewards (Aneled weapons, Solar Armor, etc.) he’ll get those items in stock as well Last and least, he also sells prestige items-eyeglasses and rings that have no purpose but to show how much of a vainglorious asshole you are to the rest of the gaming community.
New Quests in Cassardis
In any event, from the Encampment it should be a simple matter to head east to Cassardis. Once back home, you’ve got a number of things to do-again, check the Notice Board to pick up any new quests… just be sure to ignore the Escort Requests. The ones here are really not worth the trouble.
Turns out Pablos himself has a quest for us! Who knew? Talk to the diminutive innkeeper and he’ll ask you to hear him out-a matter of warding the village from crime. Apparently a Thief has been prowling around town, and has hit Heraldo’s grocery, Aestella’s apothecary, and Pablos himself. Before you can get down to business, however, you need to go around and talk to Heraldo and Aestella. Find Heraldo, usually loafing about outside the inn, then find Aestella, who usually can be found in her store-a rarity in Cassardis. Both complain uselessly about the thief, but they need to be consulted to advance the quest. Talking to Pablos again will prompt him to explain his masterful scheme-you have to wait for him at night and catch him in a foot race. Outstanding strategy, that! Talk to him again and he’ll ask if you’re ready to wait until night to confront the thief. Turn him down. This is a free rest, and why waste it? You’ve got other things to do, first.
Now, time for a trio of lengthy, roundabout quests that will take you far and wide, and ultimately end up with you back in Cassardis. Didn’t you just do that? Oh well, whatever. Talk to Adaro, the village chief to whom Quina talked to after the Dragon’s attack. Spot him out by his baldness and his big green question mark over his head. Apparently Quina’s been gone a while, and said she was heading off to the Witchwood to find a cure for your wound. Must be spare hearts in that forest. Anyways, Adaro asks you to find her and see her back safely. This quest is one of the most commonly missed quests in the game; trekking to the Witchwood at such a low level isn’t a terribly easy feat, and the quest expires after completing ‘Lure of the Abyss’. By following this guide, however, you should ensure that you’re relatively well-equipped, you’ve been able to change your Vocation, and in general you’re as ready to do this quest as you can be.
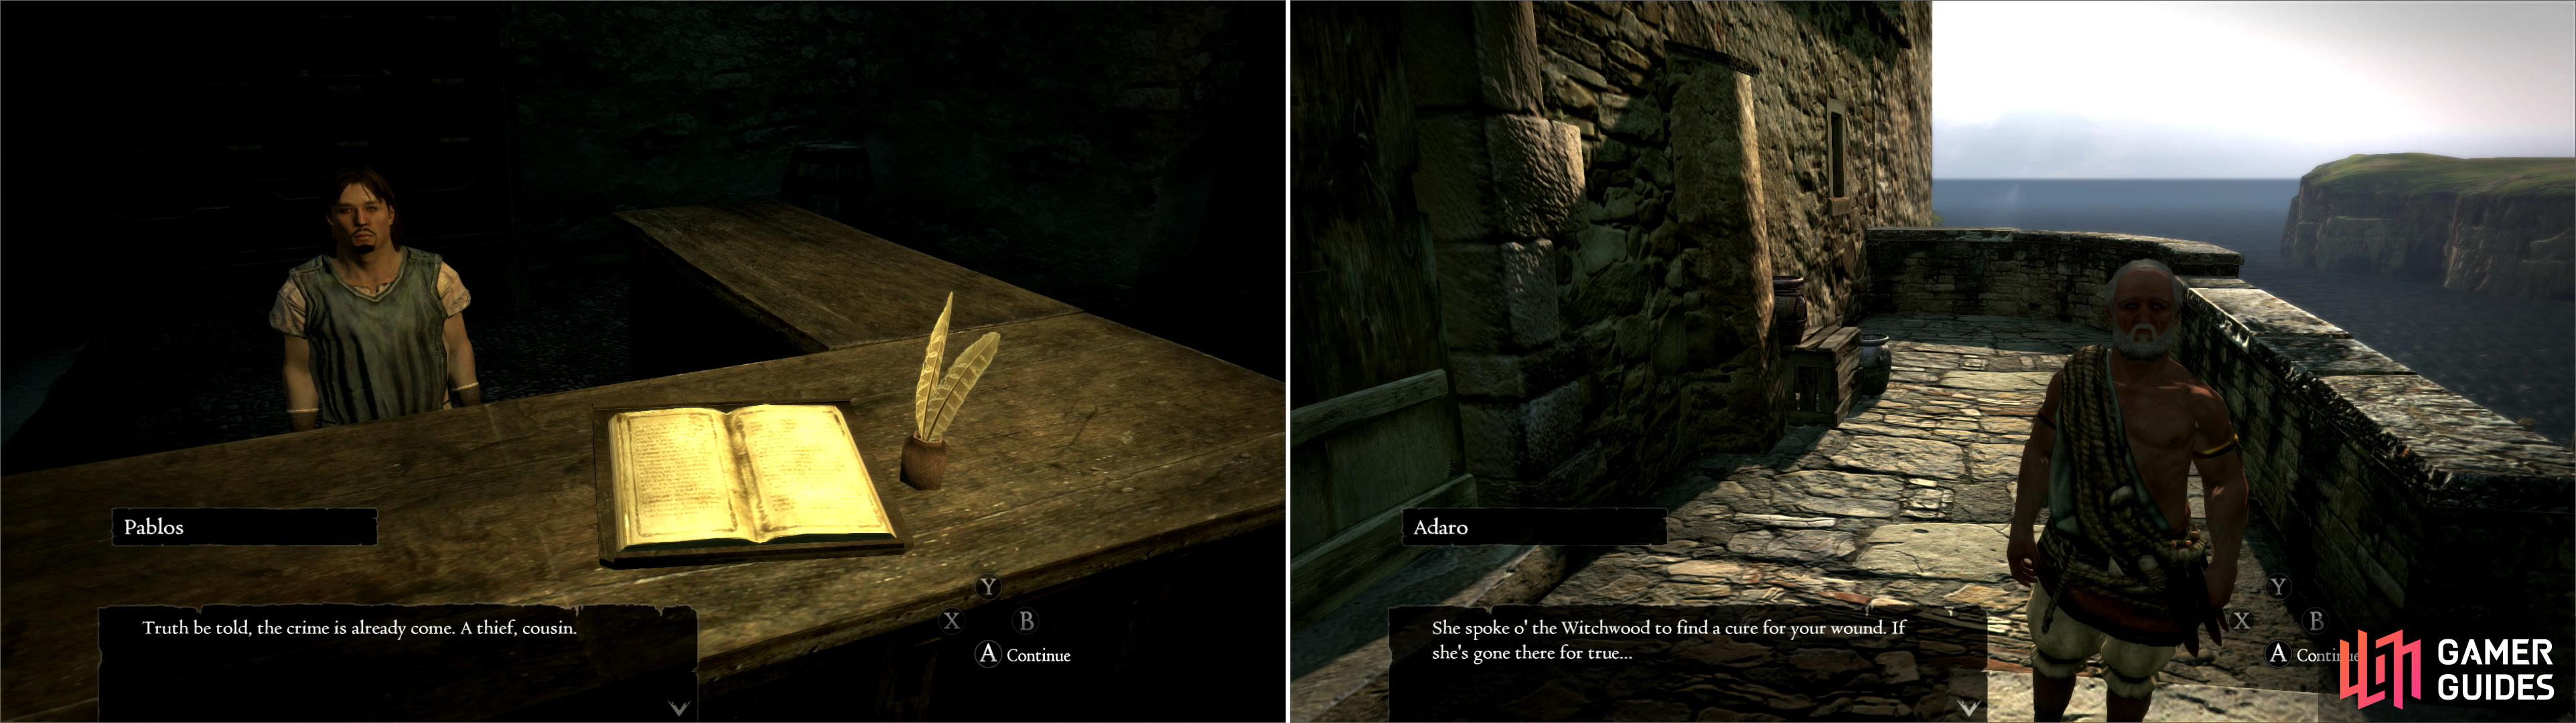
Back in Cassardis, Pablos will tell you of a thief on the prowl (left) while Adaro will ask you to go fetch Quina from the Witchwood (right).
Before you go running off anywhere, pick up another quest. From ‘Your House’ east of ‘Pablos’ Inn’ head north-east to find one of many buildings marked as a ‘Fisherman’s House’. Inside dwells Merin, Mayra, and Lewes. Merin is the one you want-you can find him waddling around his house early in the morning. Talk to him, as he’s got a quest for us. Apparently Valmiro, a fellow Cassardite, has gone missing, likely the victim of his own curiosity. You can ask fellow villagers for info if you wish… you know for story and flavor, or whatnot, but if you prefer to just dive into this quest head to Pablos’ Inn and withdraw six Greenwarish herbs.
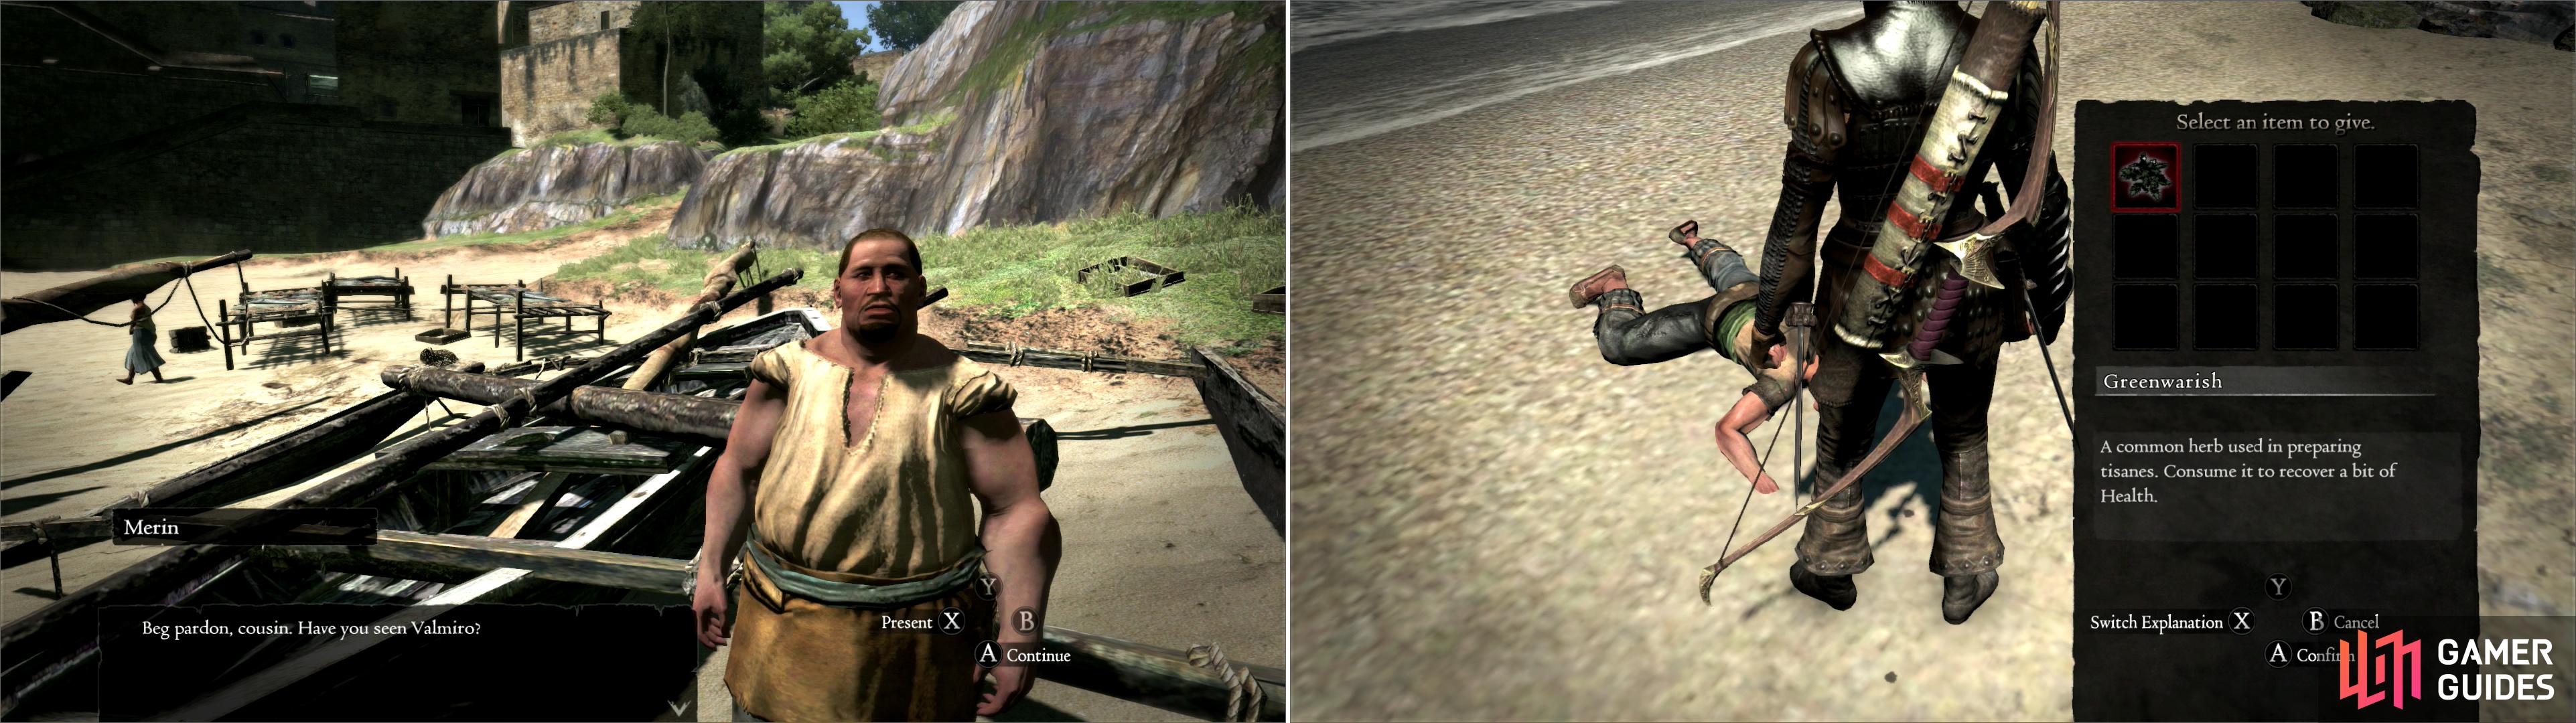
Find Merin around town and he’ll ask you to go find the wayward Valmiro (left). The reckless would-be explorer can be found first on the beach of Seabreeze Trail (right) and later near the Encampment. Provide him Greenwarish to revive him.
Dying of Curiousity
Let’s deal with the first parts of ‘Dying of Curiosity’ before you head off on any more serious expeditions. Head outside to Seabreeze Trail, and from the gates of Cassardis turn north and run down to the ‘Unusual Beach’ where you’ll find Valmiro languishing along the eastern shore. He’ll cry for aid, and reach out melodramatically. sigh Go up to him and talk to him, whereupon he’ll ask for herbs. By herbs, he means Greenwarish. Give him the aid he requests and he’ll recover in record time, apologize, and mention sticking near the Encampment next time.
So… head off towards the Encampment. South-west of the gate to the Encampment you’ll find Valmiro again, whining for aid and doing his canned ‘death reach’ animation. Talk to him again-this time it’ll take two Greenwarish herbs to cure his stupidity. Can you see where this is going? He’ll thank you and mention the Witchwood next… didn’t you just get a quest that requires you to go there? Yessir, it’s called killing two birds, the essence of guide-writing.
Dripstone Cave
But first, you’ve another quest to do, which was picked up a while ago, and promptly shelved. Remember talking to Poll, the wussy guard by the well? Yeah, he heard scary noises in the well, and wanted you to check it out. Now’s as good a time as any, so return to Cassardis and head into the well near which Poll still cowers to reach Dripstone Cave. Huzzah! Your first dungeon! Upon entering, you should get an Achievement/Trophy ‘Into Dripstone Cave’ for… hitting a button near a well. Good on you. Now, to briefly discuss what you’ll find down here; Giant Bats, Rats, Saurians, and Bandits. Brief enough, right? Don’t worry, nothing you’ll face here should be too troublesome, although you will come here again, and the monsters will change as the story advances, but that’s a concern for later.
From the entrance, head south-east until you reach a fork, where you’ll find some rats milling around in need of smiting… or ignoring. Whatever. If you go down the south-western fork, you should shortly come to a bridge spanning a steam. On the far side of the bridge lurks a Snake, which might give you your first taste of poison if you’re not careful. You’ll also be bothered by Giant Bats. Under the bridge you can find a chest, which dutifully drops a Leather Cap, if you care to grab it. From the bridge, you can follow the stream (east, initially) and grab two more square chests, exterminate a few more Giant Bats, and ultimately climb your way up to the main path, if you wish, but let’s proceed a different way. If you explore down the stream for loot, be sure to return to the bridge when you’re done.
| Square Chest |
|---|
| Leather Cap |
Return to the bridge and climb back up onto the eastern ledge, then return back to the fork where you killed some rats. Now explore down the south-eastern path. Follow the path south-east, then south-west, kill some more Giant Bats, and eventually you’ll come to a ledge overlooking a watery cavern, within which lurks several Saurians. It would be advisable to avoid them, especially around so much water, but unfortunately it turns out they’re the things that scared Poll so. Go down and fight them, but use extreme caution. If you’ve got spells or a bow, you can stay on the ledge and shoot at them in relative safety. Go for the tail to open them up, and try to stay dry. Water + Lantern = darkness. Darkness + Saurians = no fun.
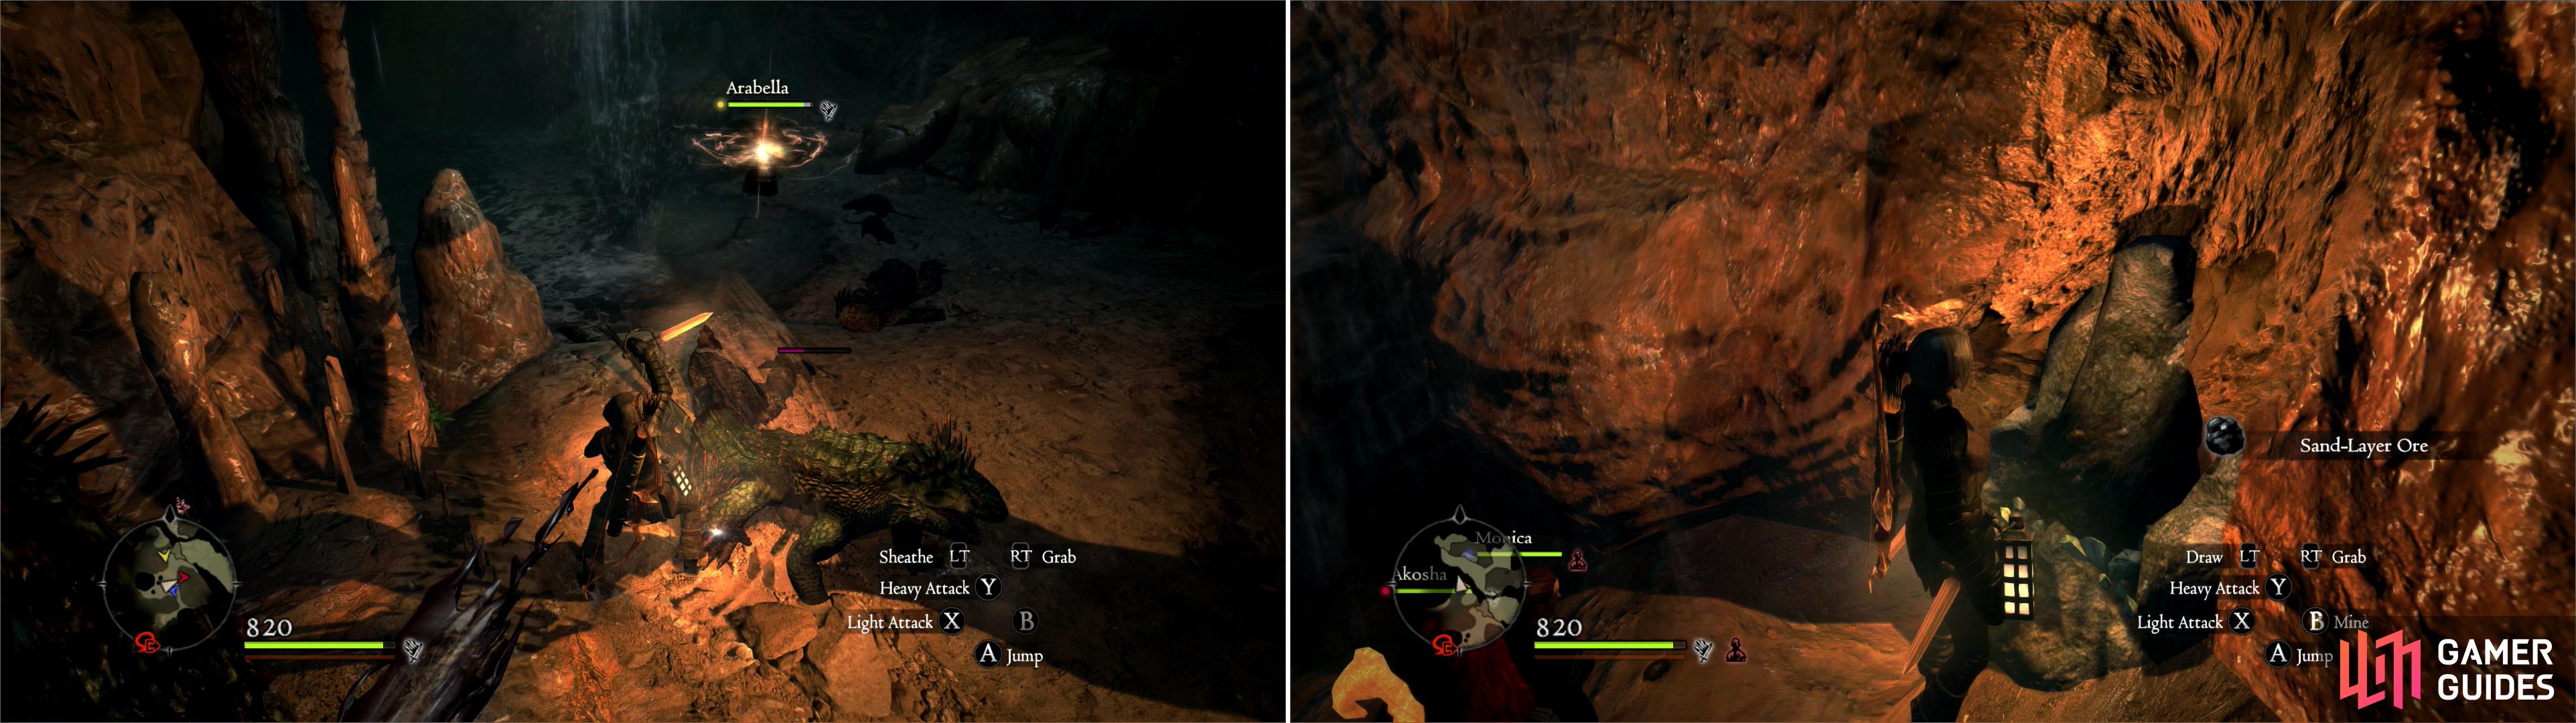
Hack apart the Saurians dwelling in the caves under Cassardis (left). While down here, mine the ore veins to obtain some rare Sand-Layer Ore (right).
Grab whatever Saurian Tails you’ve severed, and explore the cavern you’re in, and search the Warrior Remains near the ledge you jumped down, where you might find some goodies. In the middle is the ‘Emperor’s Pillar’, a useful landmark that makes writing about this place much simpler, as you will see. The western side of the cavern is water-filled, if you need to get wet or go fishing. South of the Emperor’s Pillar, however, are more productive, dry extensions of Dripstone Cave. A short ways to the south you will find a fork. Explore to the south-east to find some more Warrior Remains and a rounded chest before this tunnel ultimately dead-ends. You can score some Grangrapes here, which can be consumed for quick healing. Also, the ore veins here can commonly yield Sand-Layer Ore, which is uncommon elsewhere.
| Warrior Remains | Warrior Remains | Rounded Chest |
|---|---|---|
| Baleful Nails | Baleful Nails | Healer’s Robe |
| Trusty Sword | Scholar’s Boots | Sectional Armor |
| Shed Cape |
Now go down the southern tunnel, where you’ll enter a smaller chamber with a barred door to the west. Be wary of snakes here-there are about five of them lurking around the boxes here. Even more important, there are some rocks opposite the door to the east, upon which lies a square chest with more minor loot in it.
| Square Chest |
|---|
| Metal Greaves |
| Novice Bracers |
| Scholar’s Bangle |
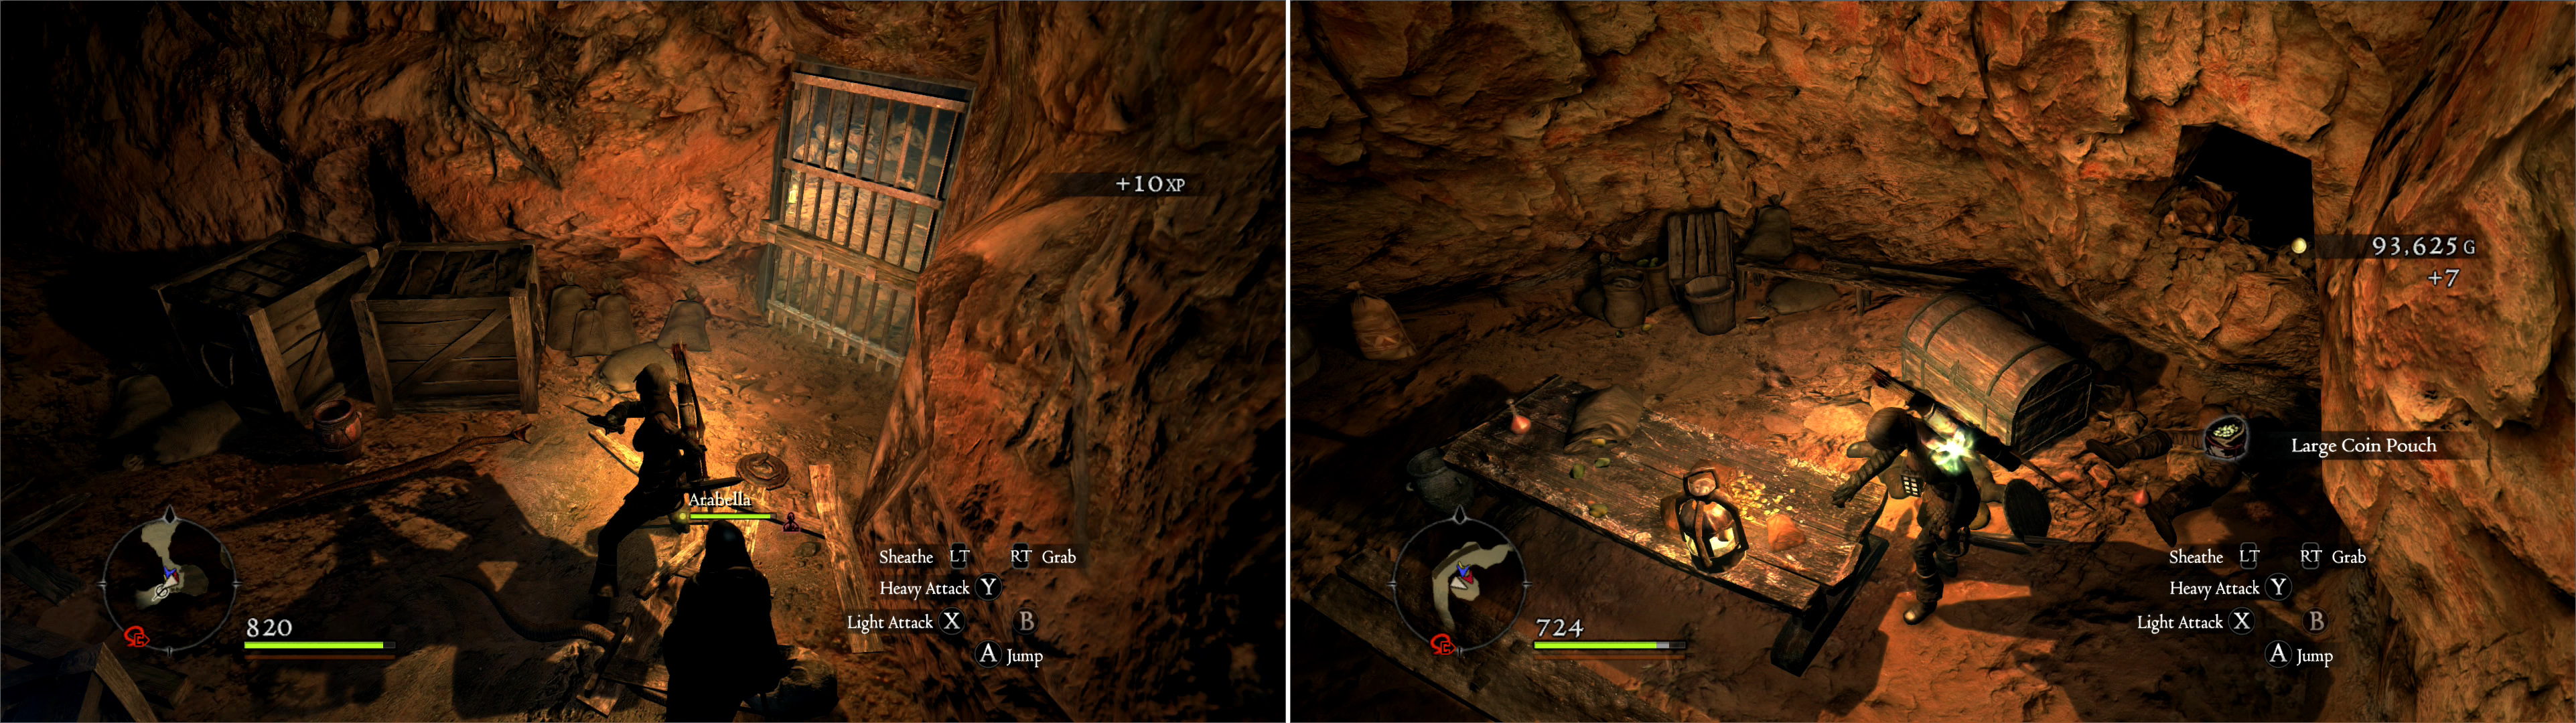
Near the door leading to the Station Room you can find several Snakes, a large concentration of such beasts, should you need to kill them (left). Loot the Station Room (after killing its resident Bandits) to obtain a good bit of coin (right).
It’s time to pay attention to the door to the west. Smack it with a melee weapon to break the wooden beam blocking the door. Congrats, now the way is open, you can use the northern entrance (near the Encampment) to traverse Dripstone Cave back to Cassardis. Of course, for most of the game this is more dangerous than just going over land, so… Anyways, go through the barred door, where you’ll find another door to the south to reach the ‘Station Room’, wherein you’ll find either Bandits, Spiders, or mice here. Kill whatever dares to oppose you and grab the money lying around. Once done, leave the Station Room and continue to the south-west to find an exit.

 Sign up
No Comments