
| Important Items in This Area |
|---|
| Astoundingly Awesome Tales |
| Eddie Winter Holotape 9 |
| Guns and Bullets |
| Hot Rodder |
| La Coiffe |
| Live & Love |
| Overdue Book x7 |
| Small Guns Bobblehead |
| Tumblers Today |
| Unstoppables |
| Wasteland Survival Guide |
Sinjin and his hostage, Kent, is at Milton General Hospital, which is south of Diamond City, but there are plenty of areas on the western and south-western part of the island upon which Diamond City is located that need to be explored, and they’re not part of any quest… or at least, any part of non-radiant quests.
Coast Guard Pier
Start out by fast-traveling to Westing Estate and from there head south-east along the coast to find the Coast Guard Pier. The first thing you’ll come across is a Vertibird on a helipad. Jump into the cockpit to find a First Aid Box and a Footlocker near a corpse, in the latter of which you’ll find the “USCG Holding Cell Key”. After you’ve looted that continue south to find a watch tower and a trailer with some minor loot inside. Your approach to the buildings will be opposed by Super Mutants, including some leveled varieties, some hounds and a Suicider. Dispose of them and continue south-east to find another trailer [Advanced]. Be cautious, though, as the door is trapped, and all you’ll find inside is a First Aid Box and some junk.
Now check out the large, red brick building here, heading through the door or the hole in the wall on the south-western side of the building. Activate a “Coast Guard Lockup Terminal” on a desk and pick the option “Winter Holotape Logs” to get some map markers then use the terminal to open the sealed cell door. If you investigate the cell you can find an issue of Astoundingly Awesome Tales on a toilet. Next, hack the “Evidence Room Terminal” in the previous room to open another sealed door. Beyond this door you’ll find a nice little cache of loot, including an Ammo Box, a Duffle Bag, two Safes [Novice] and [Expert] and plenty of chems.
Return to the previous room and head south, south-east through a doorway then go up some stairs. On the second floor you’ll find a Safe [Advanced] upon which you’ll find the “Eddie Winter Holotape 9” . If you go up a ramp in the north-eastern corner of the second floor you’ll reach the third floor, where you can find a door [Novice] beyond which is a First Aid Box and, across the level, you’ll find an Ammo Box. Continue up a final ramp to reach the roof, where you’ll find a Trunk full of goodies and a Nuka Cherry on a table.
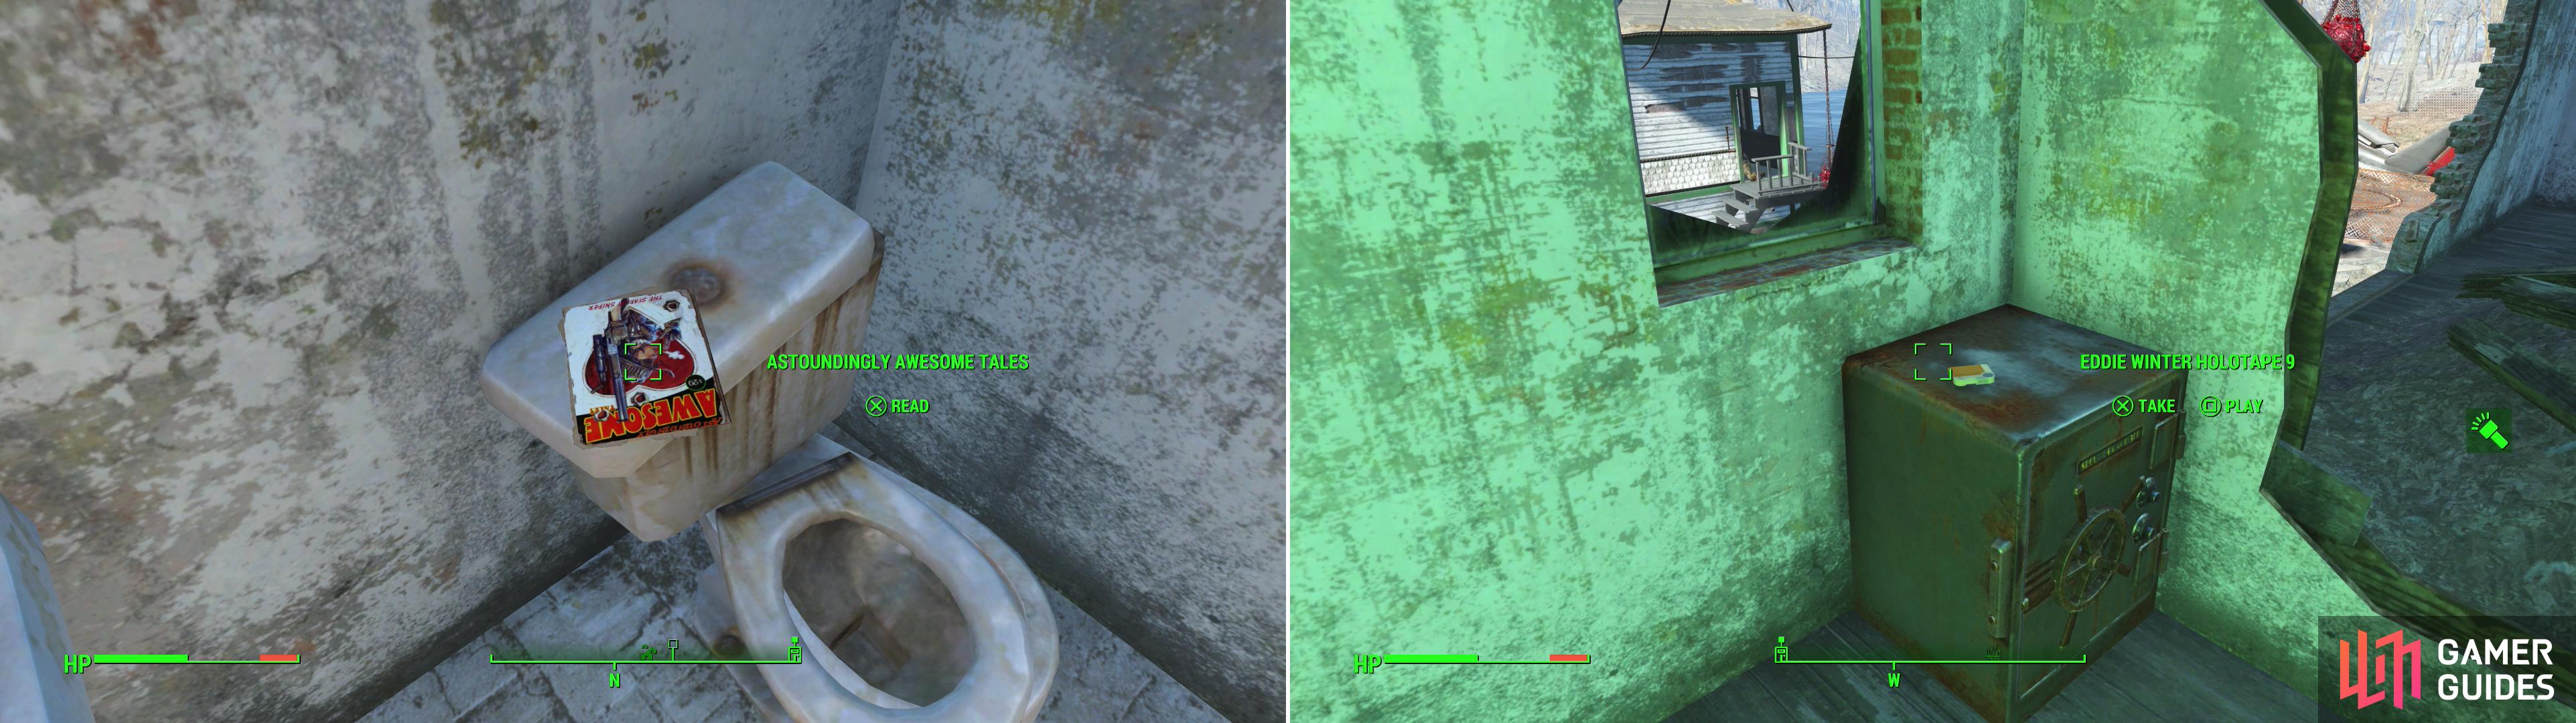
Easy reading material for when you’re sitting on the throne, grab the copy of Astoundingly Awesome Tales on a toilet (left) and be sure to also pick up the Eddie Winter Holotape 9 (right).
WRVR Broadcast Station
Leave the Coast Guard Pier behind and head south to find a road. Follow the road south until it bisects another road running east-west, where you’ll spot a bridge to the west. While it’s where you’re going to want to end up, there’s an unmarked area of interest to the east, so follow the road in that direction, first. Keep going until you find a road to the north, whereat you should look uphill to the east, north-east to spot a small building atop the hill, behind some trees. Head up to that building to find it occupied by a Sentry Bot - a nasty machine, indeed! - who will activate shortly. If you need some help, activate a Terminal [Expert] outside to turn on two Protectrons, who might just buy you some time. Destroy the Sentry Bot (they tend to drop two Fusion Cores), then loot the structure it was in to find a Safe [Novice].
Return downhill to the road and follow it back to the bridge, where you’ll find some Raiders picking at some dead Mirelurks on the bridge. Kill them and drop off the end of the bridge and swim to the western shore, where you’ll find the WRVR Broadcast Building north of the bridge. This will be a quick (but lucrative!) stop. Head inside the WRVR Broadcast Center to find Anna Hargraves, George Cooper and you old friend Rex Goodman, now back home after his close encounter with Fist and his Super Mutants. None of them have anything interesting to say at this point, but if you head into a room to the north you’ll find a copy of Live & Love on a desk.
Egret Tours Marina
Backtrack east across the river (elevation allows you to use the bridge on the way back!) and follow the eastern shore south to find Egret Tours Marina. Enter a boathouse [Novice] and head upstairs (be wary of a Tripwire in front of the stairs!) to find a Safe [Expert] and a Steamer Trunk in an suspended boat. Once the large boathouse is looted, you can loot a smaller, red-roofed boathouse nearby, although it contains little other than junk and Frag Mines. Next head to the end of a dock to find a small building, inside of which you’ll find a Tripwire rigged to a Makeshift Explosive, a Nuka Cola Quantum and a bit of junk. Most important, on the western counter you’ll find an issue of the Wasteland Survival Guide .
Make your way east off the dock then continue south and enter a brick building with a blue door to get a typical wasteland greeting from a nutter-butter named Phyllis Daily, who thinks she’s a Synth. Question her synthness, then pass a moderate speech check “What happened” to learn about her grandson Samuel. Failing that, you can pass an easy, then a moderate speech check, or otherwise end the conversation on good terms then head upstairs and check out “Phyllis’s Terminal”, where you can also learn about Samuel second-hand. After you learn about Samuel you can talk to her, be sympathetic, tell her about Shaun, then pass an easy speech check to get her to join the Minutemen. Or you can just kill her. Either way, activate the Workshop on the bottom floor to gain this as a new settlement, then be sure to use the terminal upstairs to unlock a nearby Safe.
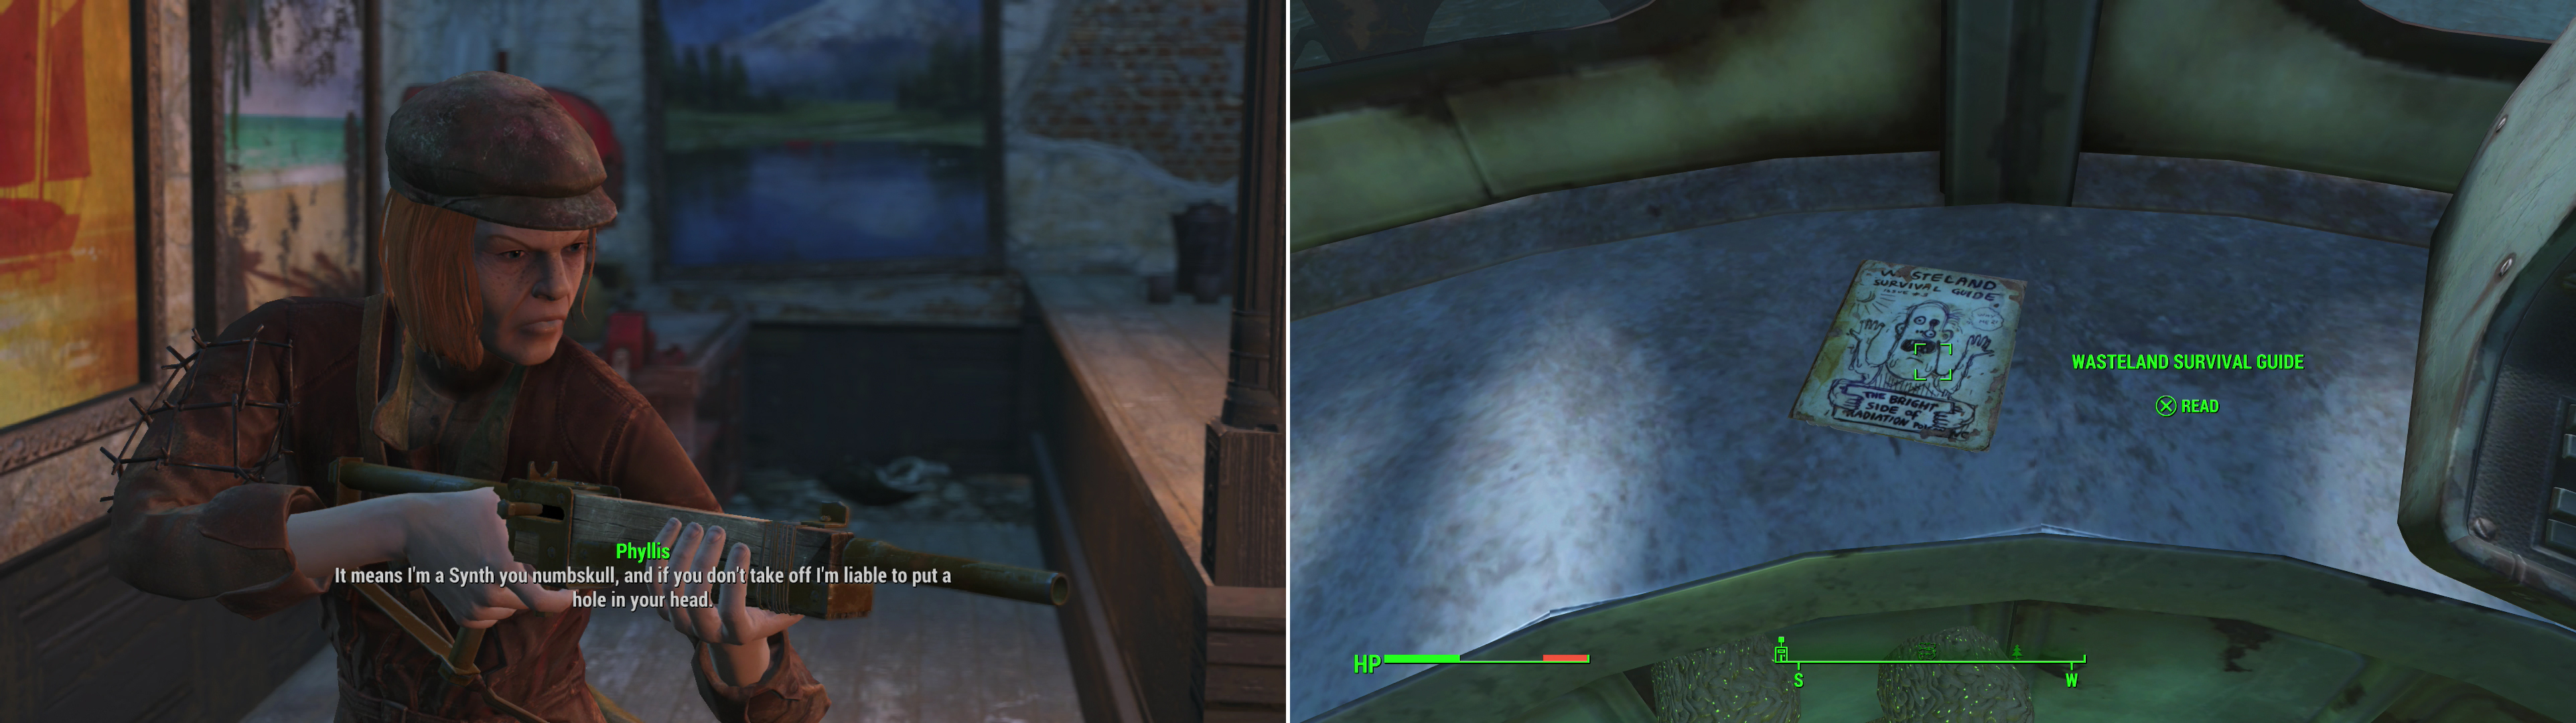
Phyllis is convinced she’s a Synth, and is rather violent in her desire to remain isolated in case she commits more violence. You read that right. (left) Grab an issue of the Wasteland Survival Guide in a structure on the dock (right).
Cutler Bend
Leave the Egret Tours Marina and head south to find another riverside area, the Cutler Bend map marker. This area is somewhat complicated and lacks a signal point of interest, but head to the shore and mop up any Mirelurks nearby, then head to a trailer [Advanced] on the beach, inside of which you’ll find a Duffle Bag, First Aid Box and Ammo Box. Leave the trailer and turn west to find a boat bridge to the west, making your way over boats and rubble to reach a white boat to the north, but be wary as you cross, as you’ll be attacked by a trio or Mirelurk Kings along the way. Faster and stronger than most Mirelurks, Kings lack the massive shells most have and can shoot sonic blasts at you. They also like to leap around, and generally are more agile, as well. In the white, northern boat you’ll find a Safe [Master] and an Industrial Trunk you can loot. You can also dive off the southern end of the boat bridge to find a submerged truck, whose trailer [Advanced] can be opened, inside of which you’ll find some Ammo Boxes and other containers full of goodies. Be prepared to catch plenty of RADS if you go for a swim, though. On the western shore you’ll find a shack, in which you’ll find an Ammo Box and some other goodies. Another Ammo Box awaits you in a higher part of the shack, which you can reach by taking a ramp, just be wary of Frag Mines.
Fallons Department Store
Now make a rather long trek to the north-east to find Fallon’s Department Store. As you approach you’ll come across an abandoned auto dealership along the way in which a random encounter may occur. If that’s not enough trouble, east of Fallon’s Department Store, outside of the nearby West Roxbury Station you’ll find a group of Super Mutants, including several Suiciders and some leveled specimens. You don’t have to deal with them yet if you want to circle around to the northern end of Fallon’s Department Store, but the West Roxbury Station is the next stop, so… why wait?
Assuming you brave the eastern entrance head west into a room with escalators criss-crossing the area. Loot a Safe [Master] in front of the escalators, then head down the escalators to reach a jewelry store. Kill two Super Mutants (you can hack a Terminal [Novice] to set loose a Protectron if you want a distraction) then loot another Safe [Master] behind a counter. Leave the jewelry store and head up the elevators until you reach the top floor, then waste two more Super Mutants in the store to the north, then head through some gates to the west to find another Super Mutant and its two hounds. Once they’re no longer amongst the living, make your way into a heptagonal room where you’ll find an issue of La Coiffe on a table, as well as a Steamer Trunk. If you head south you’ll find another door leading to a small room, but aside from a Bottlecap Mine waiting to blow you to bits, there’s nothing of interesting in here.
Return to the ground floor and make your way west through a doorway to reach a large chamber, complete with a fountain and everything. There are also tons of Super Mutants lurking around here, so wipe them out however you can. Continue west into a clothing store and make your way into a locked [Novice] dressing room to find a dead Trader and a Stealth Boy. In an office to the north you’ll find a floor Safe [Advanced] and if you head up some stairs (also north of the dressing rooms) you’ll find an Explosives Crate [Novice].
Make your way back east to the fountain room and continue north a bit, then east into another store with a Terminal inside of it which tries to sell office supplies. There’s also an Ammo Box [Novice] on a counter and a wall Safe [Advanced] behind the counter. The rest of the department store is less interesting, but if you want to clear it out, make your way back to the fountain room one more time and continue north up some stairs. You’ll find several Super Mutants near an elevated restaurant, but not much loot. In a bathroom to the east you can find a proximity bomb and a First Aid Box and in a bathroom furnishing store to the south you’ll encounter some Radroaches and a few Mutant Hounds.
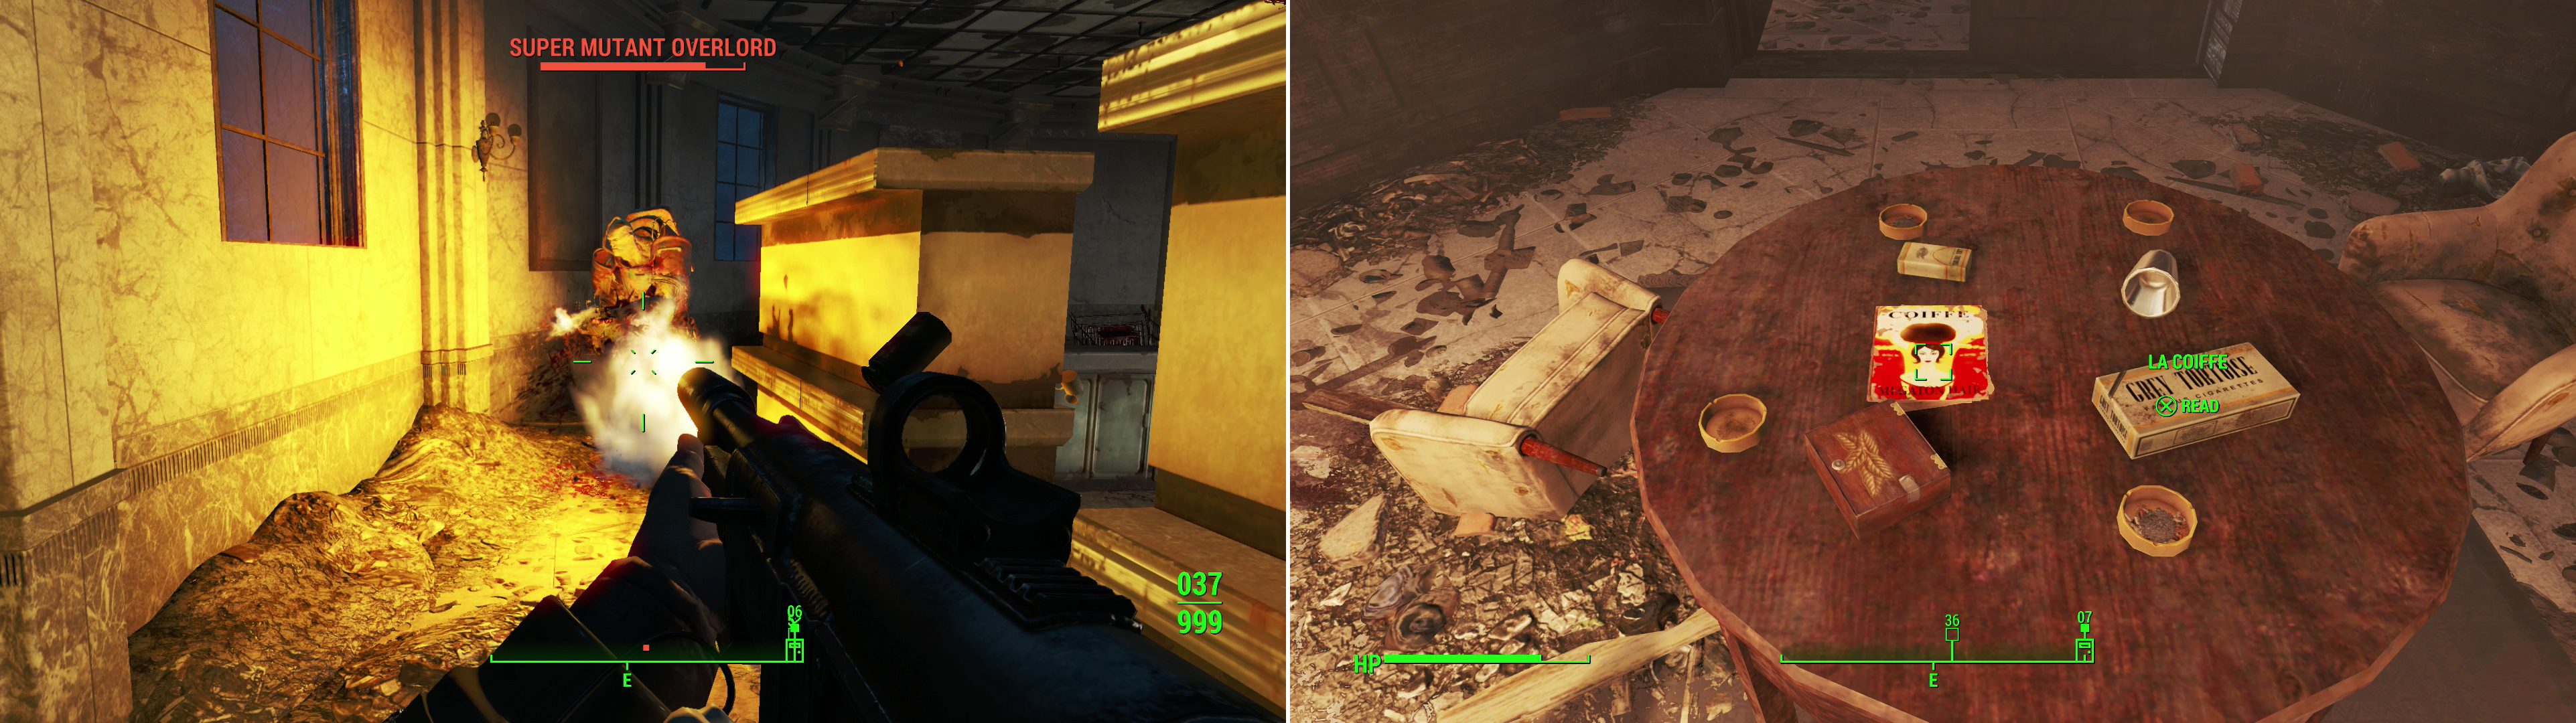
Fallon’s Department Store is occupied by Super Mutants, who will defend their home against all intrusion (left). In an enclosed heptagonal room you can find an issue of La Coiffe, in case your ’do needs an update (right).
West Roxbury Station
Leave the Fallon Department Store and make your way east to the West Roxbury Station, clearing out the Super Mutants outside before you head into the train station. Loot the… Meat Sacks hanging and lying around, then head through a door to the north to get into the ticket booths, where you’ll find a wall Safe [Advanced]. Back in the main chamber, to the east, you’ll find a Nuka Cola Vending Machine inside of which is a Nuka Cherry. more importantly, you’ll find the blue double doors leading into the subway tunnel.
Make your way down some stairs and through some doorways to the north to reach a small room with two Nuka Cola Machines to the north, two bathrooms to the east and a store to the west. Kill the two Super Mutants in here then loot the Nuka Cola Vending Machines for two Nuka Cola Quantums. In the southern of the two bathrooms you’ll find a Tension Trigger rigged to a Makeshift Explosive which guards a whopping… Caps Stash. 20ish Caps just doesn’t really seem like it’s worth the trouble anymore, does it? Beyond the door [Novice] leading to the northern bathroom you can find a First Aid Box and little else of interest. Behind the store counter to the west you’ll be able to loot an Ammo Box and a chained door. At least now you know where you’ll loop back around to, eh?
Continue down a hallway to the west and waste two Super Mutants, the search a store to the west to find a floor Safe [Expert]. Make the contents of the safe yours then head north down some stairs to finally find the subway tracks. Kill a lone Super Mutant standing around down here, then find a locked Security Door [Novice] to the north, which you can simply walk around. Press a button behind the Security door to cause the train to back up, which will give you access to a door on the train which was previously out of reach. Head through the train and turn north to find another Security Gate, beyond which is another button, which moves another train, which gives you access to another door. Not the most inspired “puzzle” but at least they tried.
Cross to the eastern end of the subway tunnel and loot a Nuka Cola Vending Machine for a Nuka Cherry, then pick the nearby locked door [Advanced]. Beyond this door you’ll find a Terminal (which contains some boring work chatter) and a wall Safe [Expert]. Leave the maintenance room and head through a doorway and into a tunnel to the north where you’ll find a copy of Tumblers Today on a metal shelf at the end of the hallway, kindly lit by a nearby candle. Head back south through a doorway and into a hallway opposite the one you were just in and, near the end of this hallway press a button to move the train, which will bring a doorway flush with an archway cut into the concrete, allowing you to pass west through the train and onto another train landing.
Open a Security Gate, press a button, jump onto the train via the door you just presented to yourself, then behold! An apparent dead end. Never fear, however, as you can squeeze your way south down the western end of the train tunnel between the concrete wall and the train, jumping when necessary to advance. Be cautious, however, as two leveled Super Mutants lurk in the hallway to the west, and they won’t think twice about shooting you through the metal gates along the way. Reach the hallway, kill the muties, then rest up on a mattress before continuing south into a small room where you can score a Super Mutant Bladed Helmet on a small dresser.
Make your way south up some stairs and at the landing where another flight continue up to the east disarm a Bathroom Scale which is rigged to a nasty triple Grenade Bouquet. Ascend a less interesting set of stairs to the north then go through a door to find the leader of these Super Mutants - an unnamed, leveled specimen - who is joined by two Mutant Hounds. Smite them, then loot the room for some Super Mutant Bracers on a collapsed locker, a First Aid Box and a Steamer Trunk. Finally, unchain the door to the east to find yourself back behind the counter of the store near the entrance to this area.
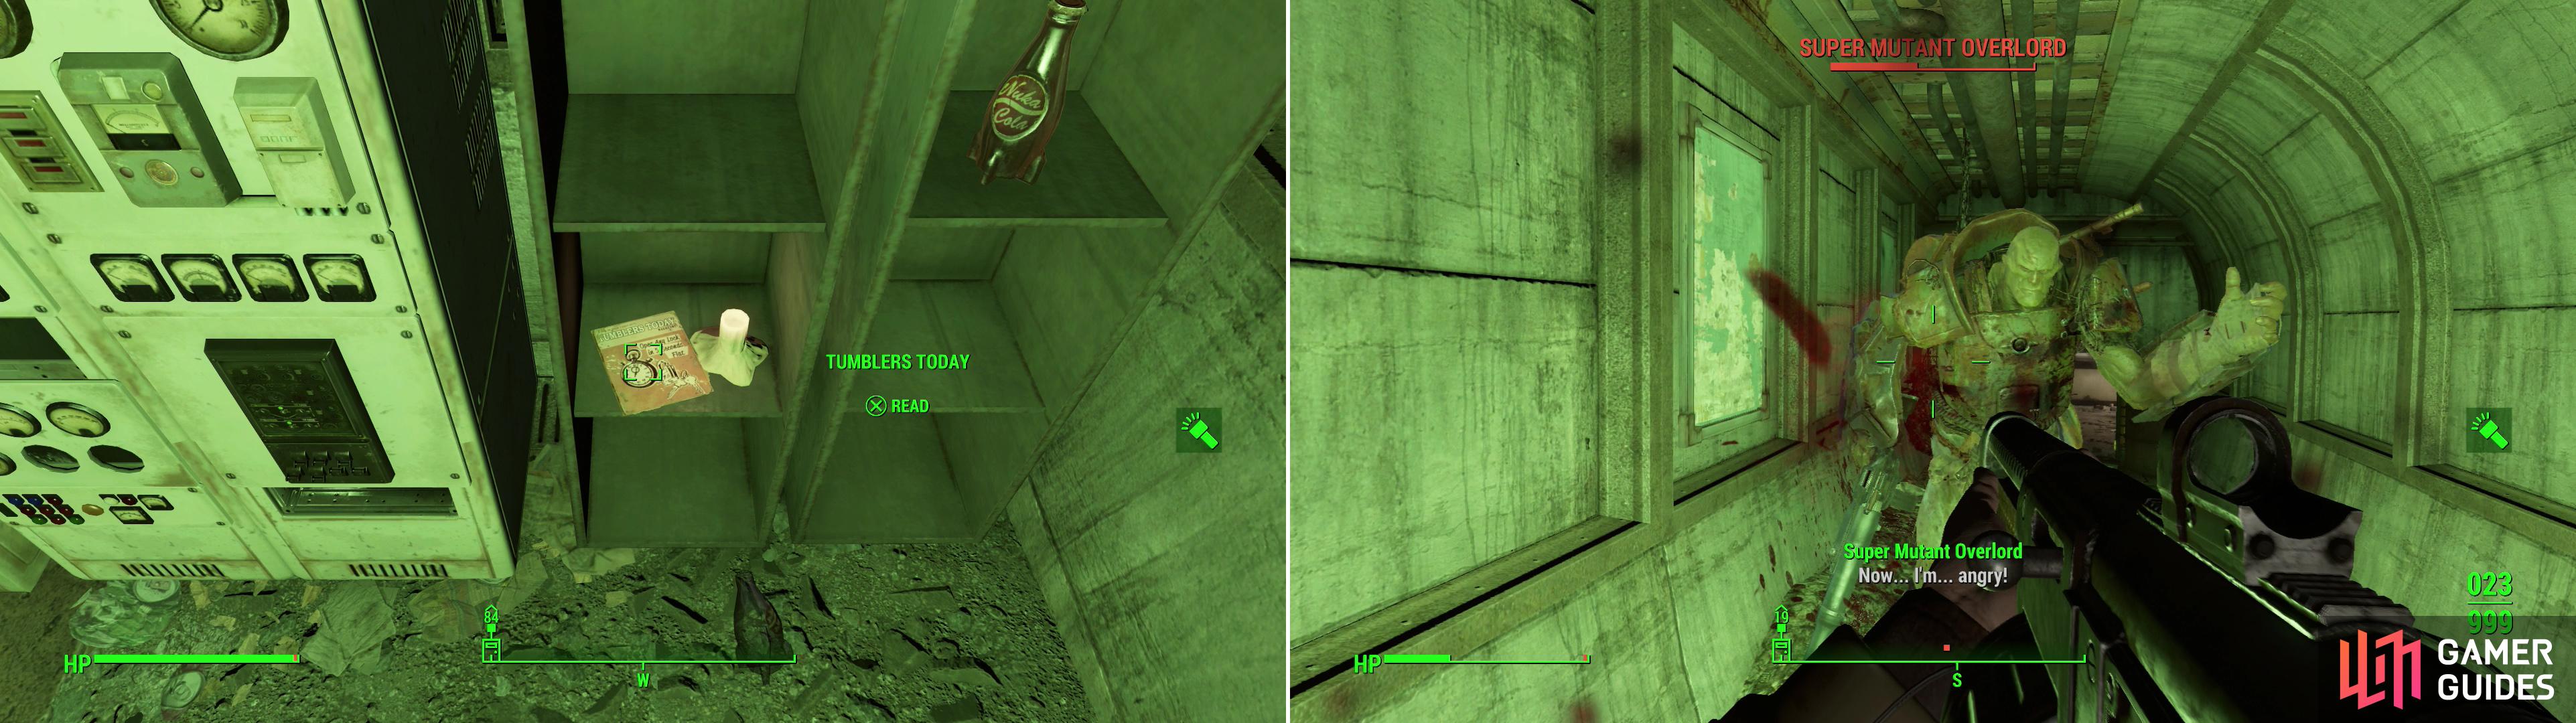
Be sure to pick up this copy of Tumblers Today on a locker, near a button (left). After manuevering through the movable train cars, continue to fight your way through the remaining Super Mutants in the West Roxbury Station (right).
Parking Garage Maze
Return to daylight and cross the street back west to Fallon’s Department Store. From here cross a street to the north and enter a parking garage via a humble door with many, many arrows pointing to it. Beyond the doorway you’ll find a little maze, made by some sociopath with too much time on their hands. The place is crawling with Radroaches, but the real bother are the traps lying around. Make your way west and, at a fork you can turn north to find a Tripwire to the east and west. Your reward for dealing with these hazards is a Wooden Crate. Wee. Backtrack south and go through a doorway with an arrow pointing through it, then turn north when you run out of west. Cross past some mannequins and you’ll see a doorway to the north with some arrows pointing to it, while to the east are three buttons with the numbers “1 2 3 4” over them.
If you insist on going through the doorway to the north, pop some Rad-X or put on a Hazmat Suit first, as you can catch some deathly RADS beyond there if you’re unprotected (up to 50 per second!). Your reward for braving the heat? Some RadAway and a few containers to loot. As for the buttons, this is another simple puzzle. The left button opens or closes doors #1 and #2, the middle buttons toggles doors #2 and #3 and the right button manipulates doors #3 and #4. Press the left button, then the right button, after which you can pass through the cages, all of which are opened now. Follow the linear path ahead (ignoring a dead-end to the north) until you have to pass between several crates. Disarm the Tripwire between the crates then continue east until you reach a fork.
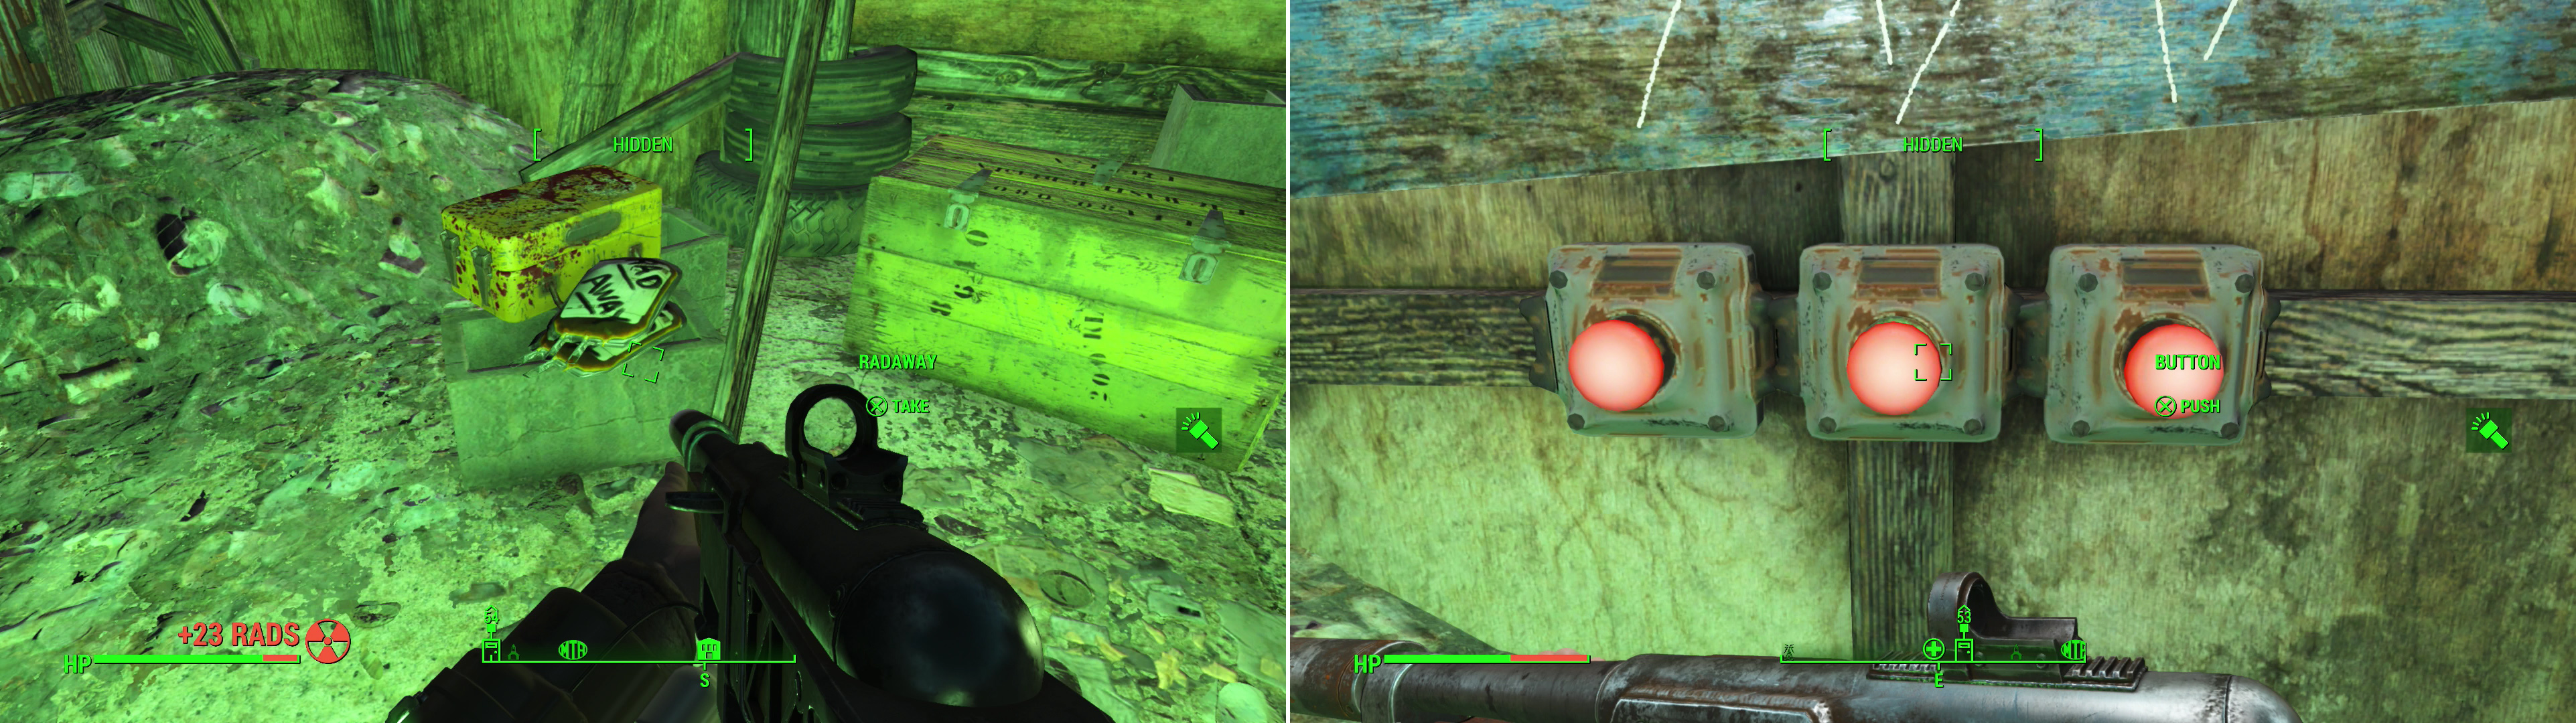
If you brave some heavy radiation you can find some… RadAway. Thanks (left). Press the three buttons in the correct order to get through a series of four gates nearby (right).
If you turn north here you’ll find a ramp, in front of which is another Tripwire and many, many Bathroom Scales rigged to numerous Grenade Bouquets, while if you go north you’ll find yourself being watched by several monkey dolls guarding a First Aid Box and a Tool Case. South-west of the monkey room, through a red door, you’ll find a festive turret waiting for you in a shopping card. Make your way up the ramp beyond the Bathrooms Scales (after disarming them all, of course) and turn south, being very careful to avoid and disarm a Tripwire between some wooden debris and some tires. This particular Tripwire is rigged to a Missile Launcher on the other side of the parking garage, and nobody wants to eat a missile.
Continue south to reach a fork. Go south first to find the rigged Missile Launcher (which now belongs to you) on the bed of a truck then backtrack and take the eastern fork, following the makeshift walls east until you get a chance to turn north. At this point go north to find a metal wall, then turn west and follow this wall to find the ramp leading up to the third floor.
This floor is less complicated than the previous two, mostly because whomever created this trial got lazy and decided to fill it with Ghouls instead of traps and twists. From the ramp head west to reach the outer parking garage wall. Follow this wall south, then east, then north to find the ramp to the fourth level to the west. Of course, be sure to kill all the Feral Ghouls you encounter along the way.
The maze-maker is back to form on the fourth level, as there are a myriad of Bathroom Scales and Tripwires lying on the path to the south, all rigged to Tesla Arcs on the roof and walls. Get past them and unlatch - but don’t go through - the barred door to the south for now, instead turning east to arrive at three doors numbered #1, #2 and #3. Beyond door #1 you’ll find a electricity trap and beyond door #3 you’ll get blasted by some rigged guns, so even numbers it is. Behind door #3 is a friendly mannequin. Pass by him and turn north, disarming two more Tripwires rigged to Makeshift Bombs.
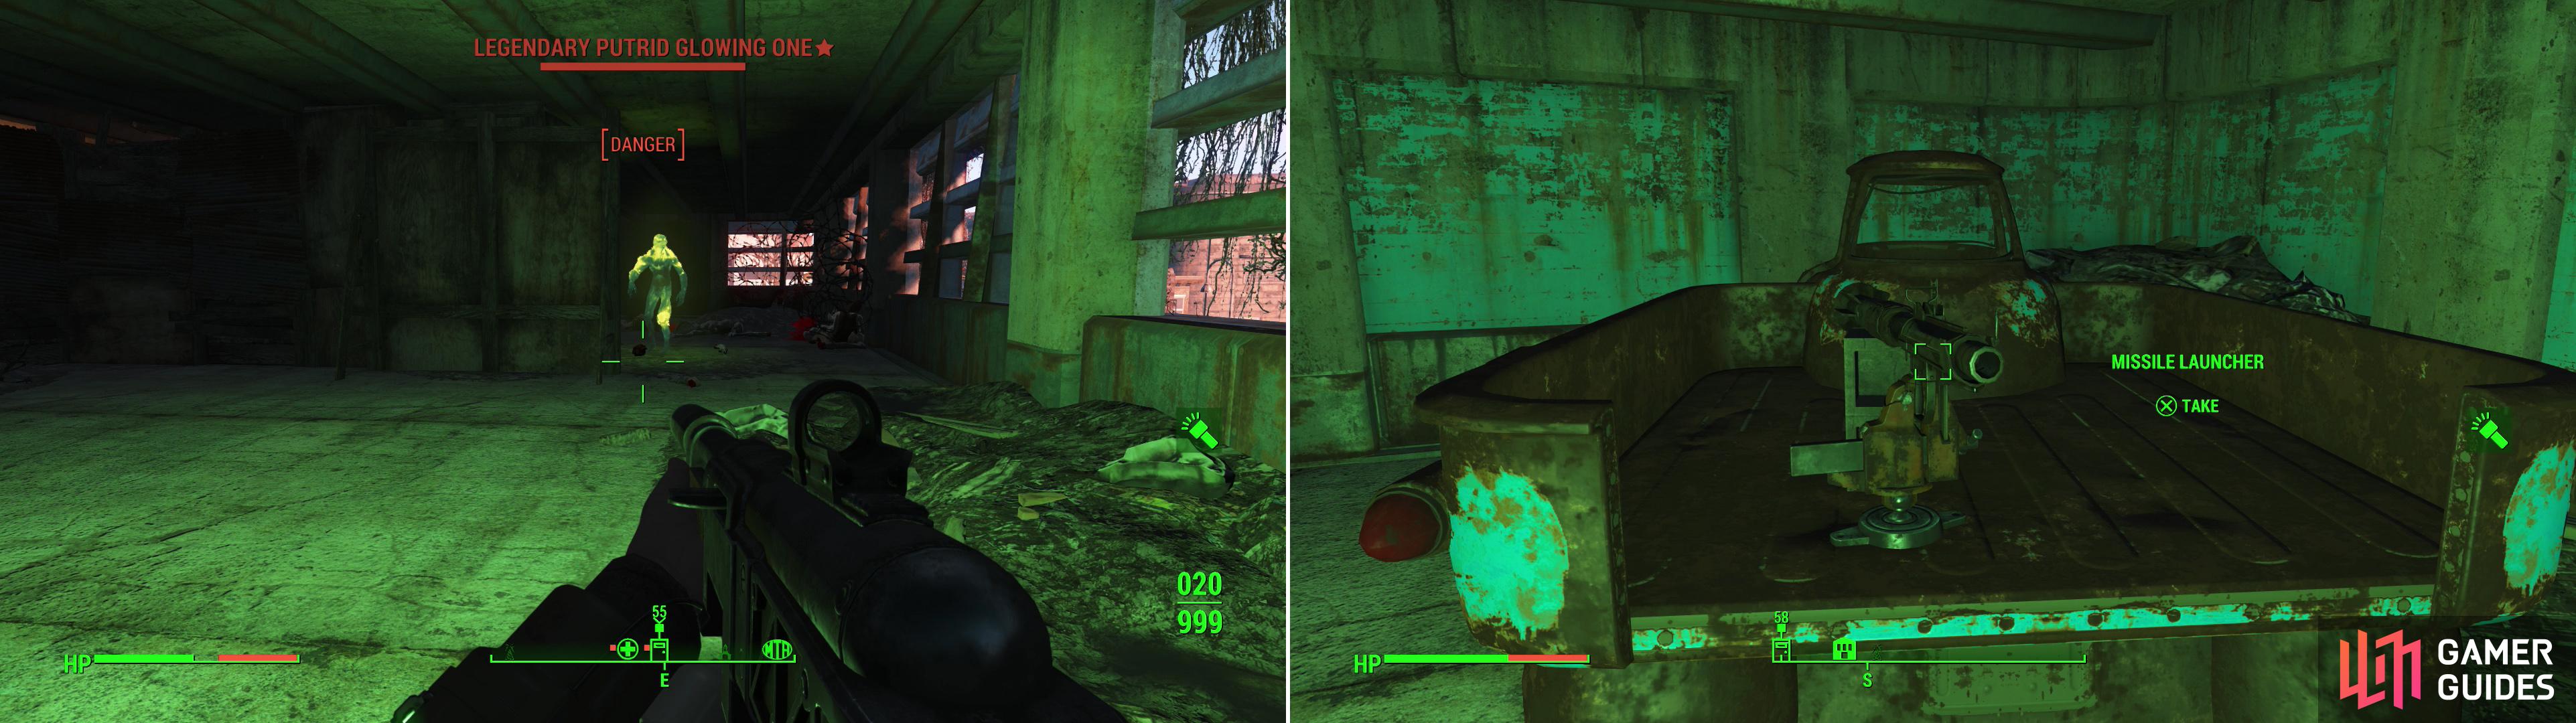
On the third floor your progress will be opposed by Feral Ghouls, including a Glowing One (left). To get here, however, you’ll need to navigate past a Tripwire rigged to a Missile Launcher. Ouch (right).
Finally you’ll reach the end of the maze. If you head east you’ll find the abode of the maze-maker. Disarm a Frag Mine on a metal shelf, then loot the place to find a Hot Rodder magazine near a bed, a Tool Case, a Tool Chest and a First Aid Box. Make your way west to find some cages with mystery buttons in front of them. Whichever one you press will open, but the contents of the other cell will be destroyed. In the right cell you’ll find a Steamer Trunk, some chems, two First Aid Boxes and a Chem Box, while in the left cell you can find a Trunk, a Mini Nuke, a Combat Armor Helmet and four Fusion Cores. For sheer value, the left cell is the clear winner. Continue west and you’ll find a double-latched door which will lead up one more ramp to the roof.
From the roof head south across a bridge to reach some stairs. Take them up as high as they’ll go to find a rooftop cafe with a Super Mutant guarding it. Dust the mutie scum then head up some stairs to the south and into a building to find a machine with a Fusion Core in it, near which will be a trapdoor leading back to Fallon Department Store, an area you have no reason to explore further. Instead, return back each the winding staircase connected to the elevated bridge and follow them down to the ground floor to find yourself just outside of Fallon’s Department Store again.
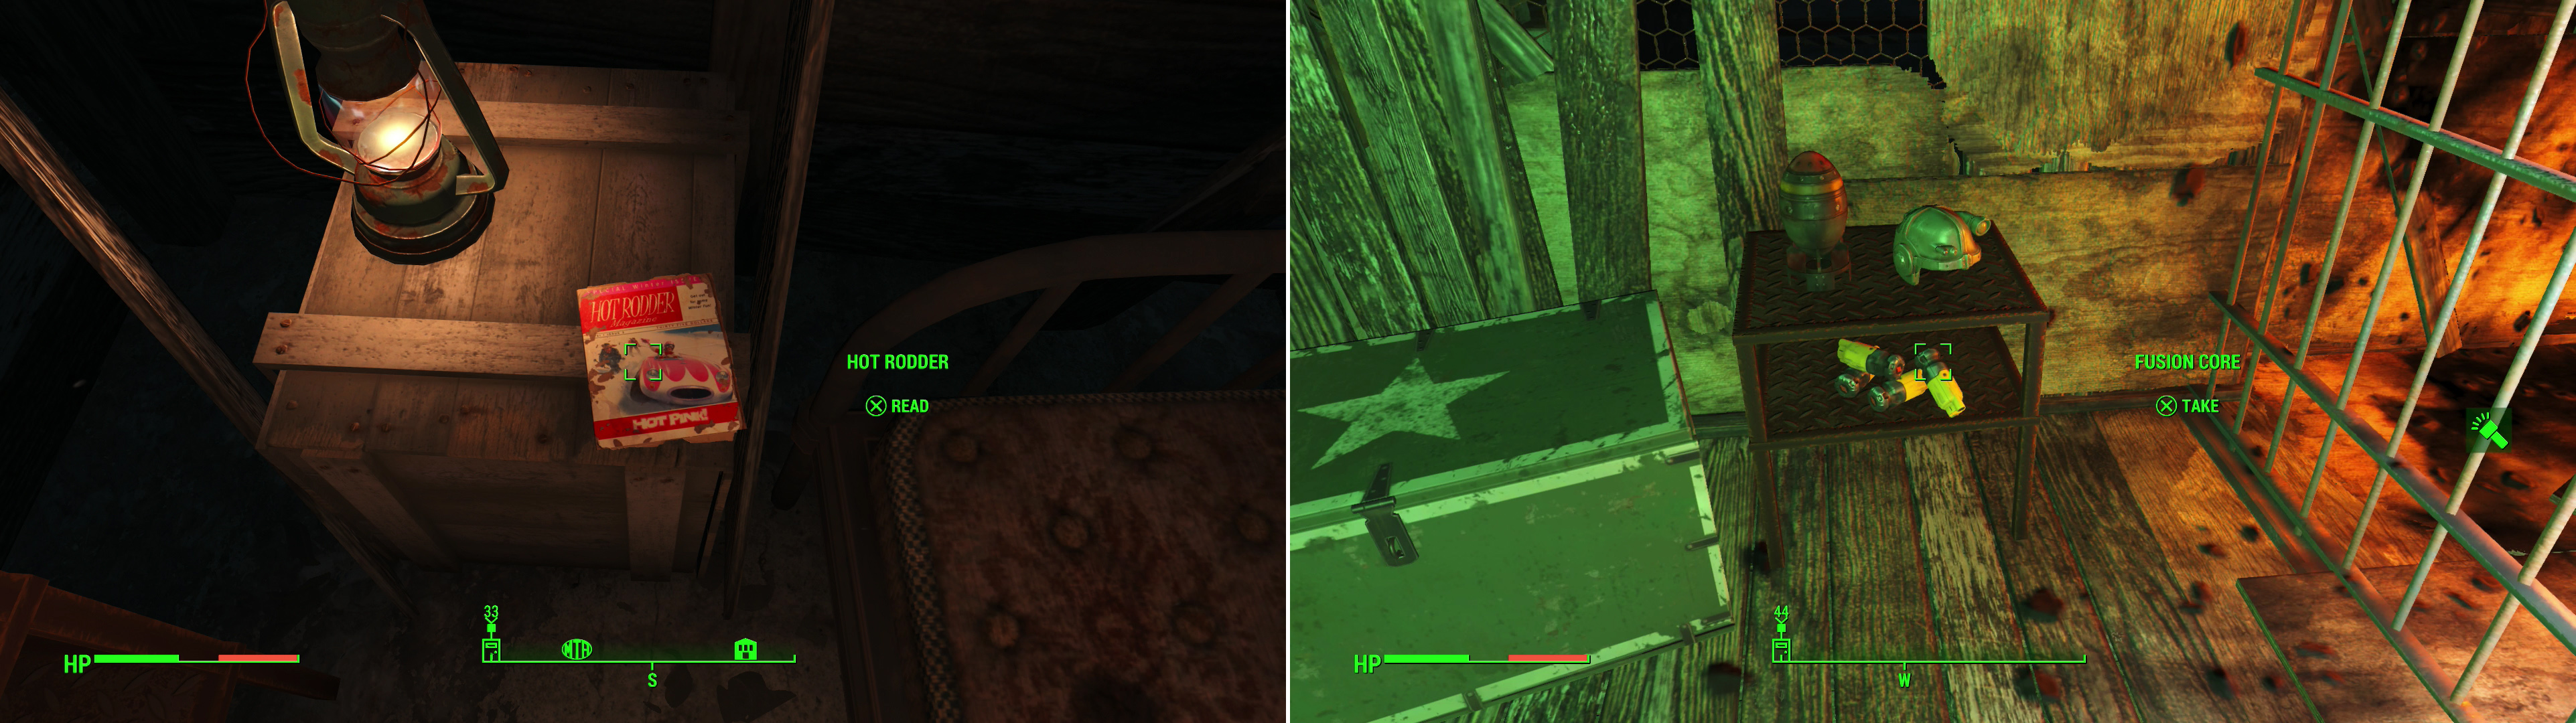
At the top of the parking garage you’ll find a Hot Rodder in the abode of the devious trickster (left). You’ll get a choice between two cells full of loot. Whichever you pick, the other stash will be destroyed (right).
Milton General Hospital
Well… that was a tedious diversion, but also a somewhat lucrative one. Head north-east now to find Milton General Hospital, just across the street from the door leading to the parking garage. Time to kill Sinjin, and perhaps rescue Kent while you’re at it. Head inside the doors on the western side of the building to reach the lobby, which is quiet. Too quiet, perhaps? Loot an Overdue Book off a small table in the lobby, then head through a door to the east. Disarm a Laser Tripwire, kill a Raider, then search two bathrooms for… well, nothing of any real note.
Return to the lobby and head north, kill some Raiders and scour a shower for some chems. Once done, head down an elevator to the basement. Once you get off the elevator turn north and picked a locked door [Advanced] to find a small storage room with a floor Safe [Expert] in the corner. Loot, leave and head down some stairs to the south. Disarm some Frag Mines on your way down then kill some Raiders (and perhaps a Nurse Handy) in the room beyond. Continue into a larger room to the west where you’ll find more Raiders and a turret. Destroy them, head up some stairs, then turn west and grab a Nuka Cherry out of a Nuka Cola Vending Machine and a Nuka Cola Quantum off a desk to the south.
Continue up some stairs to the west and take an elevator up to the second floor. Kill some Raiders and a turret and head into a room to the north to find a First Aid Box, then head into another room to the south with a Suitcase [Novice] in it. Proceed west through a hole in the wall, then drop down through a hole in the floor and go through a door to the north, beyond which you’ll find two turrets and a Raider. After they’ve been taken care of you can loot two rooms to the north (although there’s nothing worth mentioning in them) and a room to the north [Advanced] beyond which you’ll find a Bathroom Scale rigged to a Makeshift Bomb. After the traps are gone, grab a Syringer Rifle and some chems off a counter, then loot a First Aid Box. Once you’re done looting head through a doorway to the east. If you go north after this you’ll find a hole in the ground, which drops you back down on the first floor near the lobby. If you want to continue deeper into the hospital, however, head south, down a hallway to the east, then down an elevator, killing another pair of Raiders along the way.
Once you exit the elevator you’ll find Sinjin, Avery and a few Raiders. Sinjin claims he wants to “talk”, but all the guns pointing at you tell a somewhat more homicidal story. Despite this temporary cease-fire, you can, if you’re sneaky, kill Sinjin’s Raider buddies flanking the elevator without turning Sinjin and Avery hostile. If you’re extra sneak, you can even take out Sinjin and Avery from stealth… just be sure to target Sinjin first, and try to take them both out in one round of VATS, as Sinjin is only too eager to kill Kent once hostilities break out. This is the ideal way to handle things, as Sinjin’s “talking” only involves threats against you and Kent. Kill them, save Kent if possible, and talk to Kent afterwards if you save him. He seems little tired of all this dangerous hero business, and resolves to head back to Goodneigbhor. Loot an Explosives Box [Novice] by some stairs, scour the shelves for containers to plunder, then head up some stairs to the north and loot a Steamer Trunk in a small room, then head back up the elevator and drop down the aforementioned hole in the floor to return to near the entrance.
Shaw High School
Now, you can return to Hancock right away, but first, there’s a few more areas that should be explored down here. First stop, head south-east to find a blue building: Shaw High School. The Meat Bags decorating the exterior should let you know all you need to know about the inhabitants of this place. Enter via the northern end of the building and, once inside head north… wait… how did that happen? From the northern side of the building, head south, enter the building, and now you’re facing north? Um… Okay?
Somebody sucks at compasses. From the entrance head north and turn west and enter the first room to the south to find a small office with a “Faculty Terminal” [Novice], which you can hack to read a series of memos about a corrupt principal and a snarky hacker named Rusty Burton. Turn west and go through a door [Expert] to find the principals office. Pick the lock [Novice] on Principal Tanner’s desk to get the Library Key (which will help you bypass two locked doors later on) then interact with “Principal Tanner’s Terminal” to unlock another door to the west [Master] which contains a good number of Mentats.
Return north to the hallways outside, where you’ll have two ways to proceed. You can head north down a hallway on the eastern side of the building to find some stairs. Along the way you can loot two classrooms to the east as you go, for what little junk they have inside of them. Be wary of the southern-most room, however, as there’s a Tripwire Rigged to a Tesla Arc in it. There’s also a “Faculty Terminal” [Novice] in here, but nothing new is on it.
Alternatively you can head north through a cafeteria, where a Super Mutant and two Mutant Hounds lurk and some Super Mutant Light Body Armor can be found. Go north-west to find some stairs leading up to the second level, perhaps after going down some stairs to a basement, where you’ll find a trapdoor leading to a small Storage room where the Super Mutants prepare their grisly meals. Down in the Storage area be sure to turn off the Ham Radio, which is the source for the “Super Mutant Broadcast” signal that’s lured so many to their doom.
If you went up the eastern stairs, search a pair of joined classrooms to the north. In the first classroom you’ll find an Overdue Book on a desk, while in the other room you’ll find a “Student Terminal” where you’ll find that Rusty has struck again. Read his journal to see that the Mentats have caused a Flowers of Algernon effect in ol’ Rusty. You can now head west through two doorways - disabling some Can Chimes in the second - to reach the room where you’d have arrived at if you took the cafeteria route to get upstairs. Kill any Super Mutants lurking around here there head south onto a balcony (taking down more Can Chimes along the way). Here you can find two classrooms to explore. The northern-most one contains an Overdue Book on a desk while the southern one has a Frag Mine outside of it with an Overdue Book nearby and another “Faculty Terminal”. Further south is a storage closet with little of interest inside of it.
Make your way back into the room surrounded by Can Chimes and return to the balcony to the east. Turn north to find the door to the library [Master], which can be opened with the Library Key found earlier. Destroy a turret and kill a Super Mutant in the library below you, then head on down. Disarm a Frag Mine near the stairs and a Tripwire Rigged to a Makeshift Explosive between two bookshelves, then search the room to find an Overdue Book standing upright on a toppled bookshelf (guess it’s obvious who won that fight). In a room behind the turret [Novice] you’ll find the “Property of R. Burton” holotape, which details the encounter between Tanner and Rusty. More interesting is the room to the north, where you’ll find three Overdue Books , three Mentats and an issue of Unstoppables on a desk. A very, very generous desk. Loot a Steamer Trunk then return to the library to find a Book Return Terminal with some massively over-priced Mentats in it, and little else of interest.
| Item | Cost | Number |
|---|---|---|
| Mentats | 100 Tokens | 5 |
| Mentats | 100 Tokens | 1 |
| Mentats | 100 Tokens | 4 |
| Pen | 2 Tokens | 3 |
| Magnifying Glass | 16 Tokens | 1 |
| Magnifying Glass | 16 Tokens | 3 |
Gunner Plaza
Leave Shaw High School and travel south to find the Gunner’s Plaza area. As its name subtly implies, Gunners are crawling around here, in fact, it’s their headquarters in the Commonwealth. Be very careful as you approach this place, however, as there are turrets and Gunners all over the place, including a few Gunner on the roof with a Missile Launcher, and another with a Fat Man. Range, patience and a sniper rifle will work wonders here. If ranged isn’t your thing (how have you made it this far?!) you can ascend some stairs on the western end of the building to reach the roof, but with jerks lobbing Mini Nukes and missiles at you, you’ll still need to be sneaky.
Enter the Gunner’s Plaza with one of two front entrances on the ground floor. Either door will take you to an antechamber with a Terminal [Novice] you can hack to start up a Protectron… not that a Protectron will be of much help, as the Gunner resistance in the large room to the west is quite formidable. Several Gunners lurk in the two story room dominated by a large globe statue, bolstered by two turrets and many, many Frag Mines. Once the opposition is defeated you can loot the offices surrounding this area to obtain plenty of junk and the odd chem or bit of ammo. You can also find a Terminal [Novice] that controls the turrets, but honestly, it’s probably easier to destroy them than it is to sneak here without getting caught.
Make your way west across the statue room to find some double doors. Go through them to reach some hallways and turn north to find some bathrooms. From these bathrooms turn west to find a blue door [Novice] with a Tension Trigger attached to the front of it, which is rigged to a Grenade Bouquet behind the door. Make your way south and ignore a hallway to the west to reach an office room with several “GNN Employee Terminals”, #31, #68 and #118, where you can find some office interchange.
Gunner Plaza Basement
Leave the office room and head east to find an elevator, which will take you down the basement. From the elevator head north then turn west and make your way through a room where two Gunners lurk. Loot a Tool Chest [Novice] and continue west through a doorway, then turn south. There are, in technical terms, a crapton of Gunners on the southern end of this level, both on the ground floor and on metal walkways above you. Go through a door to the east (disarm a Frag Mine along the way!) and cross an oil slick to the east. Turn south when you can to find some stairs, which, if you ascend them, will take you to the aforementioned metal walkway.
Cross this walkway to the west and enter a small room where you’ll find Ryder, a powerful Gunner. Kill him and loot his body for the GNN Recording Room Key and Ryder’s Holotape, which is pretty uninteresting, save for the fact that it names some Gunner higher-ups. Loot a Tool Case [Novice] and a Trunk. Now make your way to the southern end of the chamber and wipe out the Gunners here, then be sure to loot two shelters to the west to find a Large Toolbox [Novice] and a shelter to the east to find a Terminal [Novice], which does nothing but control the spotlights. Once that’s done make your way through a door to the south then go through two more doors to the east to find a room two two more Gunners lurk. In a yellow cart you’ll find a Safe [Master] which, if you can open… well, kudos.
Gunner Plaza, Continued
Return back to the elevator and ride it back up to the main floor, then head north and turn west down a hallway occupied by sandbag barricades. At the end of this hallway you’ll find some red double doors [Master], which you can bypass with the GNN Recording Room Key. Go on inside to find the leader of the Gunners - Captain Wes - who will likely be joined by another Gunner and a pair of Turrets. Take them out, then loot Captain Wes for Captain Wes’ Safe Key, which opens a nearby Safe [Master] which contains “Wes’ Holotape”. After that, obtain the contents of a Trunk, then grab the Small Guns Bobblehead off a desk. Very nice. Loot several Footlockers, then spy on Captain Wes’ Terminal, if you can be bothered. Once done, leave the room and turn your attention to the two as-of-yet unexplored hallways branching off from outside of this room, one to the south-west and one to the north-west.
Down the south-western hallway head into the first room to the left to find a Stealth Boy, while down the north-western hallway you’ll find a room to the right with some stairs leading up to the second level. If you follow both hallways they’ll eventually link up in a large room with a staircase leading up the second floor, but you’ll face considerable Gunner opposition in the room and on the stairs. If you go up the more humble stairs found in a side-room along the north-western hallway you’ll a Tripwire at the top along with two rooms with a Gunner lurking around. Aside from a Terminal which unlocks a Wall Safe [Advanced], however, there’s little of interest up here.
Head up the stairs in the room both hallways lead to and kill any Gunners and turrets through the white double doors to the east. Once done, head east down a hallway, then turn south when you get the chance and turn a corner to the east to find another turret to the north. Destroy it, then turn south to find a blue door [Advanced] beyond which you’ll find a Fat Man on a metal shelf. Return north and pass by an uninteresting room to the east, then go through a hole in the wall to the north to find a Terminal [Novice] which controls the turrets you should already have disposed of.
Leave this room and head down a hallway to the east to reach the balconies overlooking the statue room near the beginning of the area. More Gunners likely persist here, so dispatch them, then explore the rooms along these balconies, generally heading east. Most of the rooms contain junk, but a relatively large room on the southern end of the balcony filled with bookshelves has interesting loot in the form of a copy of Guns and Bullets on a small table between three couches. Once this book is yours, continue to the eastern end of the balcony to find Cruz, a Gunner mentioned in Ryder’s Holotape. Kill him and loot him for another GNN Recording Room Key as well as “Cruz’s Holotape”.
If you continue east you’ll find a door leading to the lower part of the roof along the front of the building, which you may have already explored. If not, you can head to the highest part of the roof to find a structure with a Fusion Core inside of it. From here, head down some stairs to the south, south-west, then turn west, north-west at a dome to find a locked door [Novice], beyond which you’ll find a small room with four Footlockers, an Explosives Box and a Chem Box.
And with that, you’re done with this area. All that’s left to do is return to Goodneighbor and talk to Hancock (in character as the Silver Shroud, of course) to get your reward for killing Sinjin and put the whole Silver Shroud charade to rest. With that done, all that’s left to worry about in Goodneighbor is Bobbi’s quest, and Hancock’s desire for you to clear out Pickman Gallery.
| Objective | Reward |
|---|---|
| For killing Sinjin and reporting back to Hancock | 585 XP 750 Caps |

 Sign up
No Comments