Rounds 1 - 4
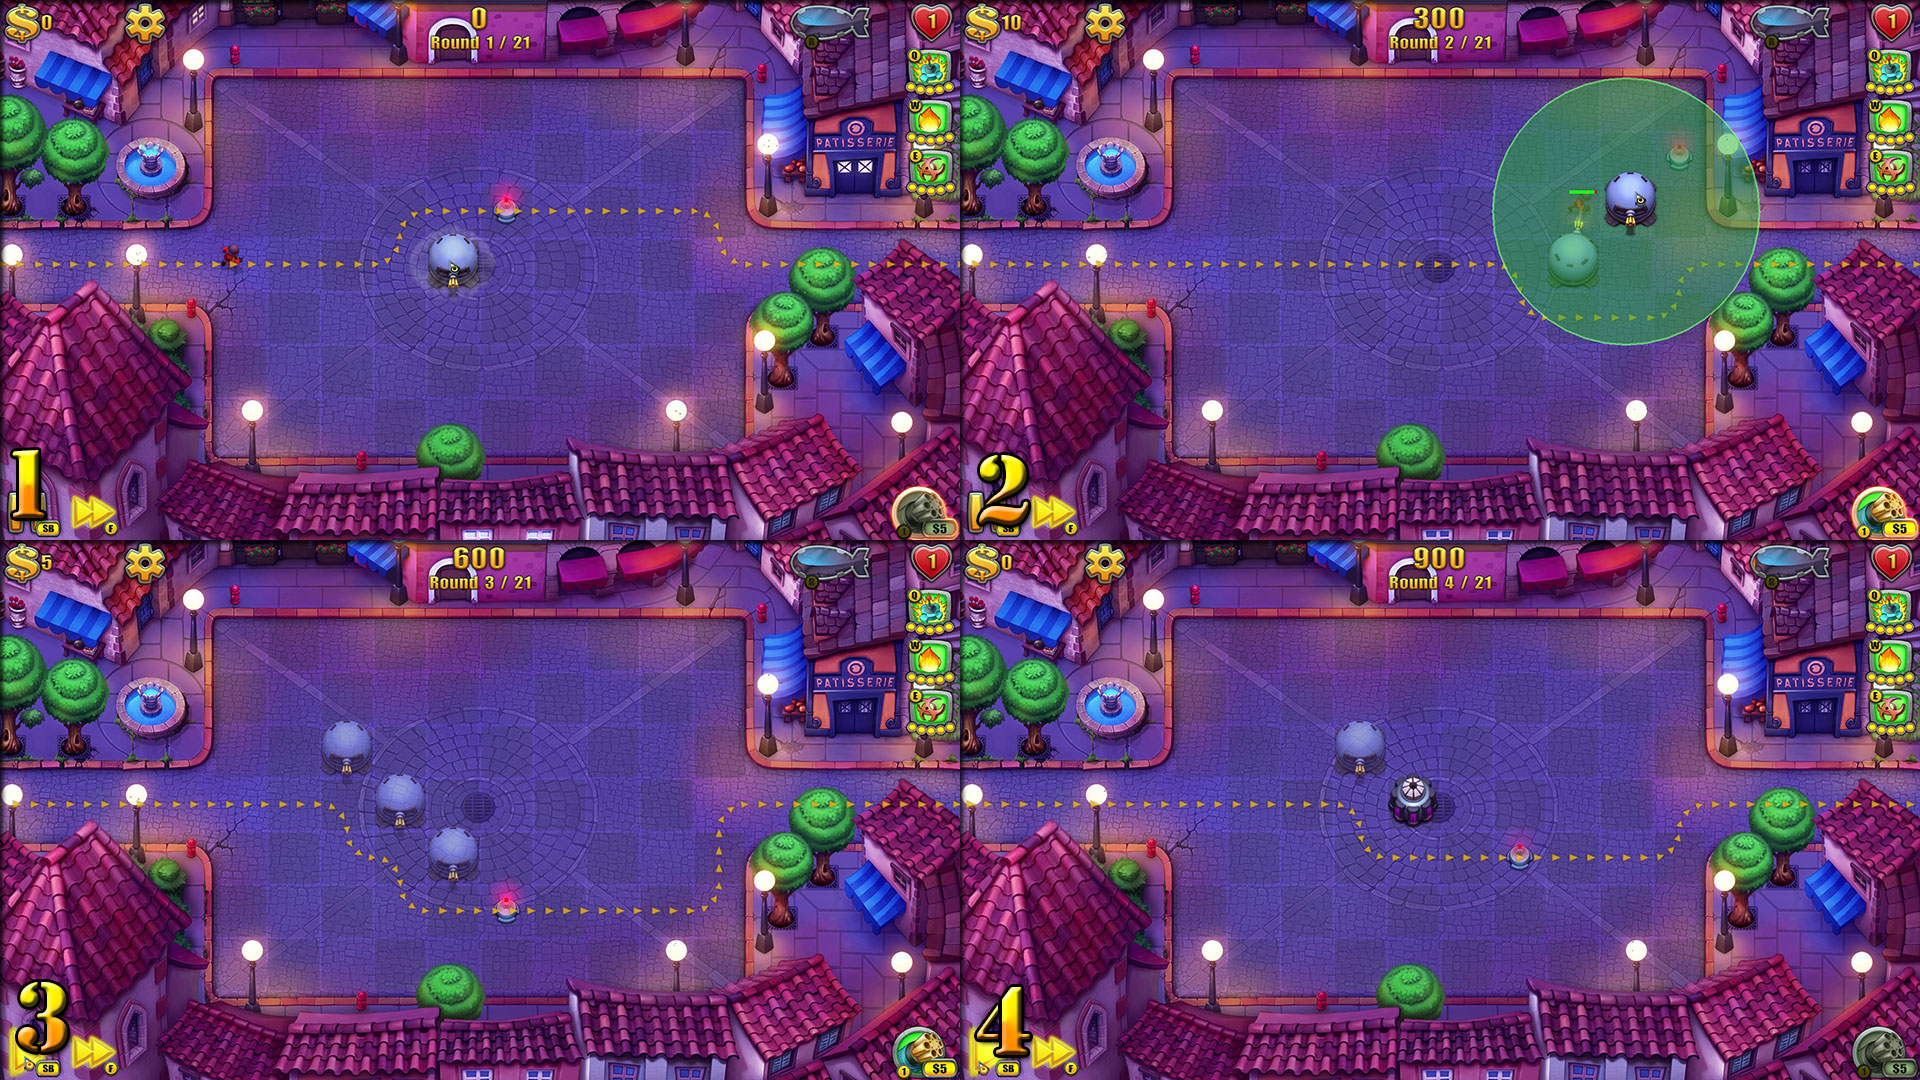
Key points to remember here is that the runners will always look for the shortest route and they’ll prefer to run up instead of down.
Round 1: Place it down south-west of the mine as early as you like.
Round 2: Create a diagonal ‘stairway’ leading up to the mine, leaving the last one until the runner has crossed the centre of the map (so they can’t change direction).
Round 3: Create another diagonal ‘stairway’ leading down to the mine.
Round 4: Drop the Gun Tower to the north-west of the Link Tower.
Rounds 5 - 8
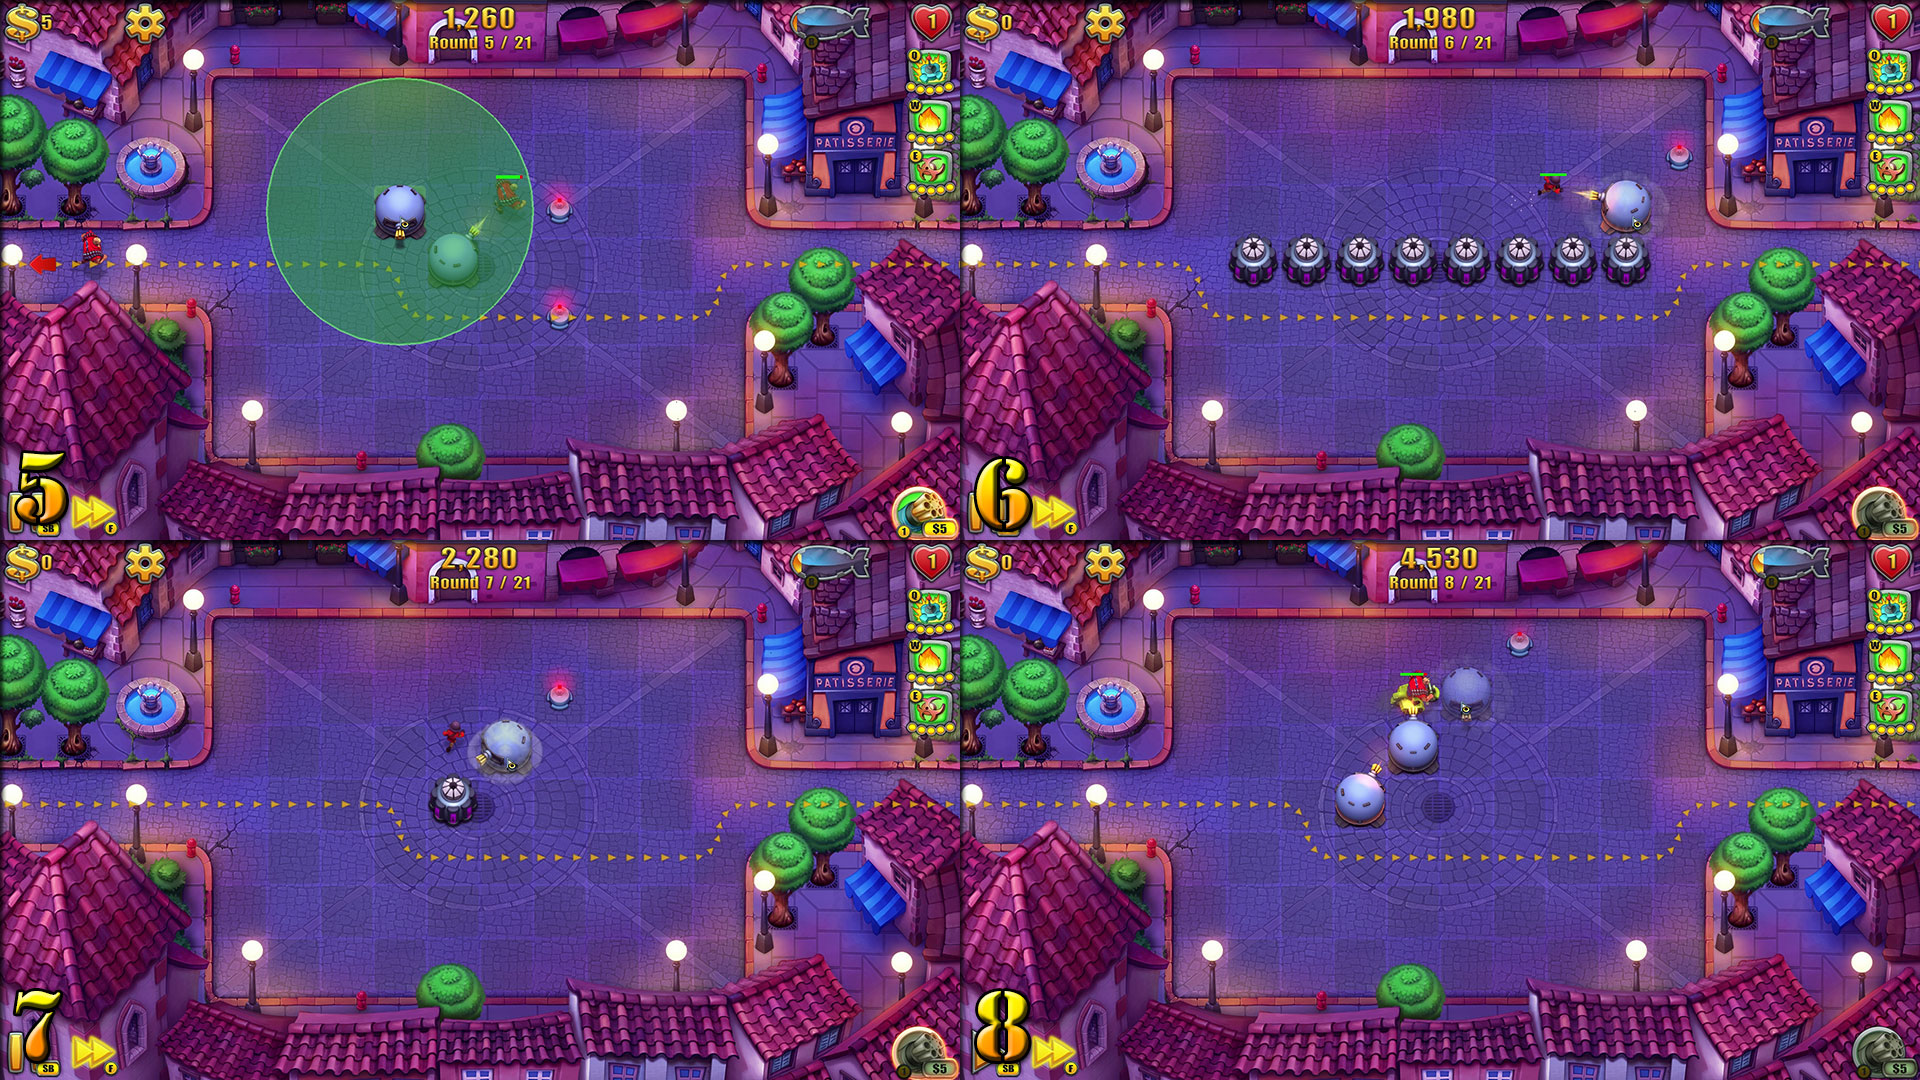
They’ll also run in the same direction as long as they’ve travelled more than half the distance to the exit (so on some puzzles you’ll need to wait for them to have ‘committed’ to that path before placing your Gun Tower), otherwise they’ll change direction. Therefore, these puzzles are all about using - and most definitely abusing - these facts to succeed.
Round 5: This requires two towers to be placed at separate times. The first one needs to be placed in the centre of the map (pushing the runner to the northern mine), then the second tower needs to be put to the north-west of the current tower to encourage the next runner to go into the southern mine.
Round 6: This requires waiting for the runner to pass the centre point of the map, before setting a tower down north of the last Link Tower.
Round 7: Timings for tower drops will now be much tighter as you’ll need to wait for the runner to have passed just over the half-way point of the Link Tower before dropping your Gun Tower down. Otherwise; he’ll just turn back around and go south.
Round 8: Multi-part puzzle time once again, this time set a tower down one tile left of the centre of the map (so the first unit goes into the lowest mine), then it’s time to start using the pause button! When the next unit crossed the top half of the Gun Tower, pause the game, set down the next tower to the north-east (creating a ‘step’), then un-pause the game.
Re-pause when the unit is just over halfway the new tower, drop down the final tower and un-pause to watch the unit ‘commit’ itself to the path with the mine on it!
Rounds 9 - 12
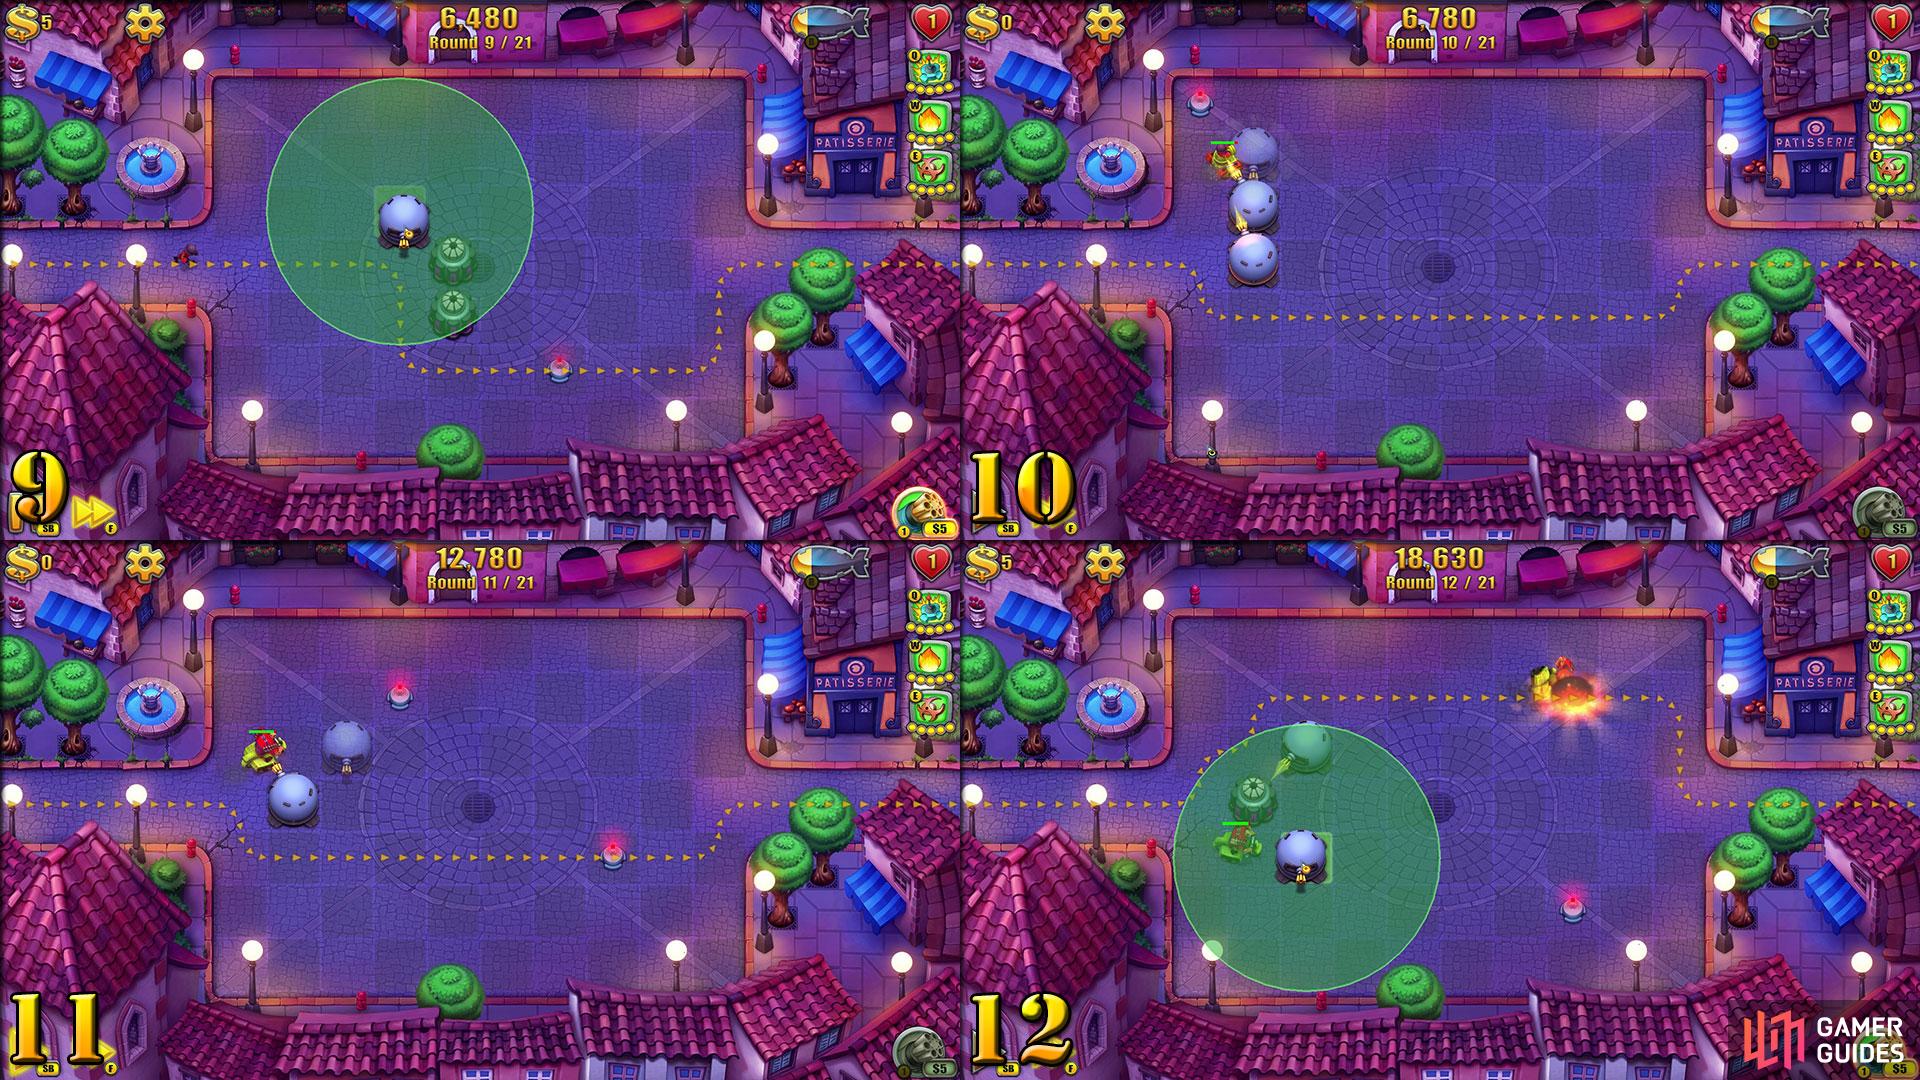
Don’t forget playing at the regular (non fast forward) speed will make the later puzzles much easier to get right first time.
Round 9: Drop your Gun Tower at any time to the north-west of the top Link Tower.
Round 10: Set the first tower directly opposite the entrance on the left. Once the tank has gone past the upper side of the tower (as it begins to turn right), drop the next tower down. This’ll force it upwards, and repeat this again so it runs into the mine.
Round 11: Drop the first tower directly opposite the entrance, then when the runner is passing over the top, drop the next tower north-east of it. This’ll send the first runner up here and the second runner automatically down to the lower mine.
Round 12: Time for a bit of multi-tasking here we’re afraid; you’ll first want to wait for the unit to reach the top of the Link Tower before setting your tower down north-east of it. Not far behind the next unit will turn up, so quickly switch your attention to it and do the same when it goes south of the Link Tower.
Rounds 13 - 16
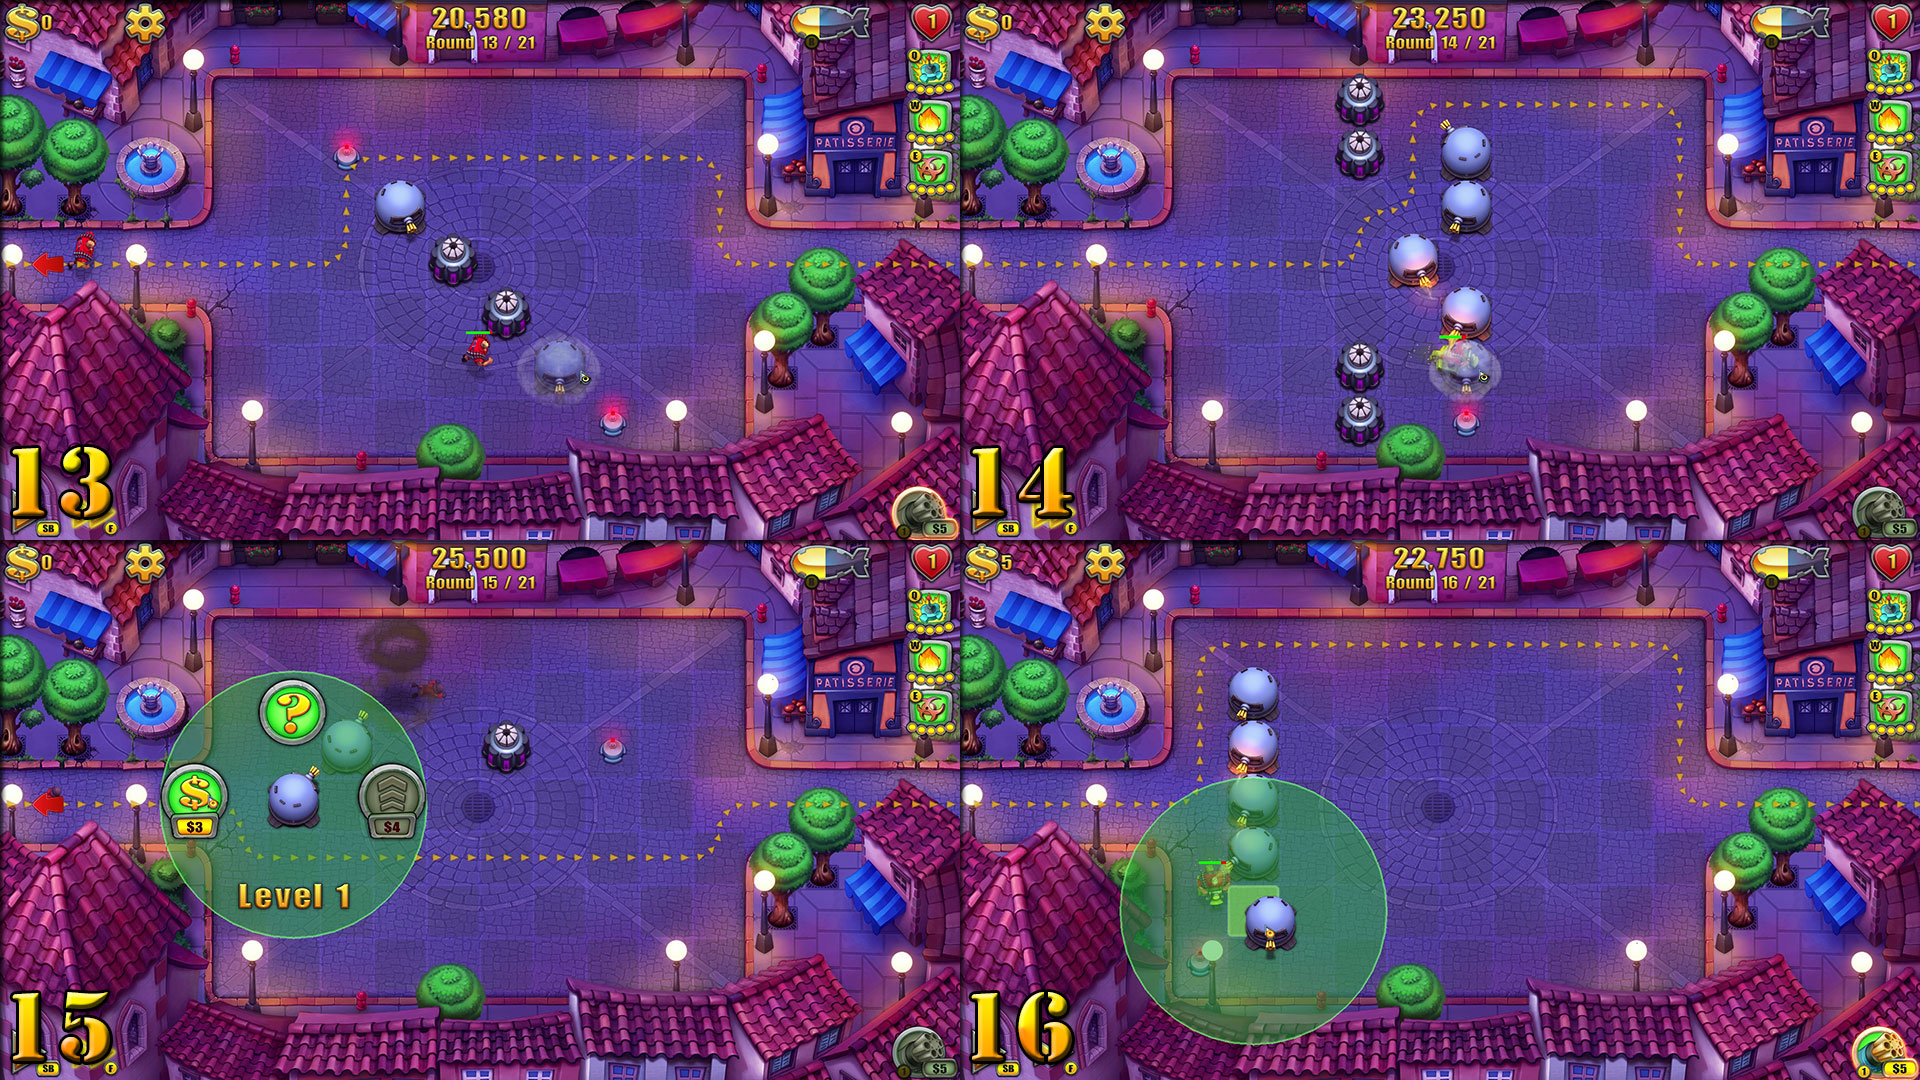
As long as the runners/units haven’t passed too far through the square they’re on, they’ll backtrack out again.
Round 13: Set a Gun Tower between the Mine and the Link Tower at the top of the map and then as the runner’s passing the second Link Tower , drop your second Gun Tower between the Link Tower and Mine down here. The second runner will now hit the top mine automatically.
Round 14: First tower should be placed in the middle of the map (just left of centre) and at normal speed wait for the unit to reach the top of the tower.
Drop the next one to the north-east and as it’s just starting to turn right past the second tower, pause and drop the third one down directly above it. Repeat these moves (placing your towers towards the southern Mine).
Round 15: Time to introduce the ‘buy-back’ into the puzzle-mix. Drop your first Gun Tower directly opposite the entrance, once the runner is at the top of it, drop the second tower to the north-east of it and once it hits the mine, pause and buy back the two towers. No drop a new tower right below the remaining mine and press play…
Round 16: Time to create a vertical wall using three towers. To do so, drop one tower opposite the entrance, then use the pause button to position the unit so that as it’s reaching the top of one tower, another one is dropped down, forcing it straight up (and then use the same method for the southern Mine).
Rounds 17 - 20
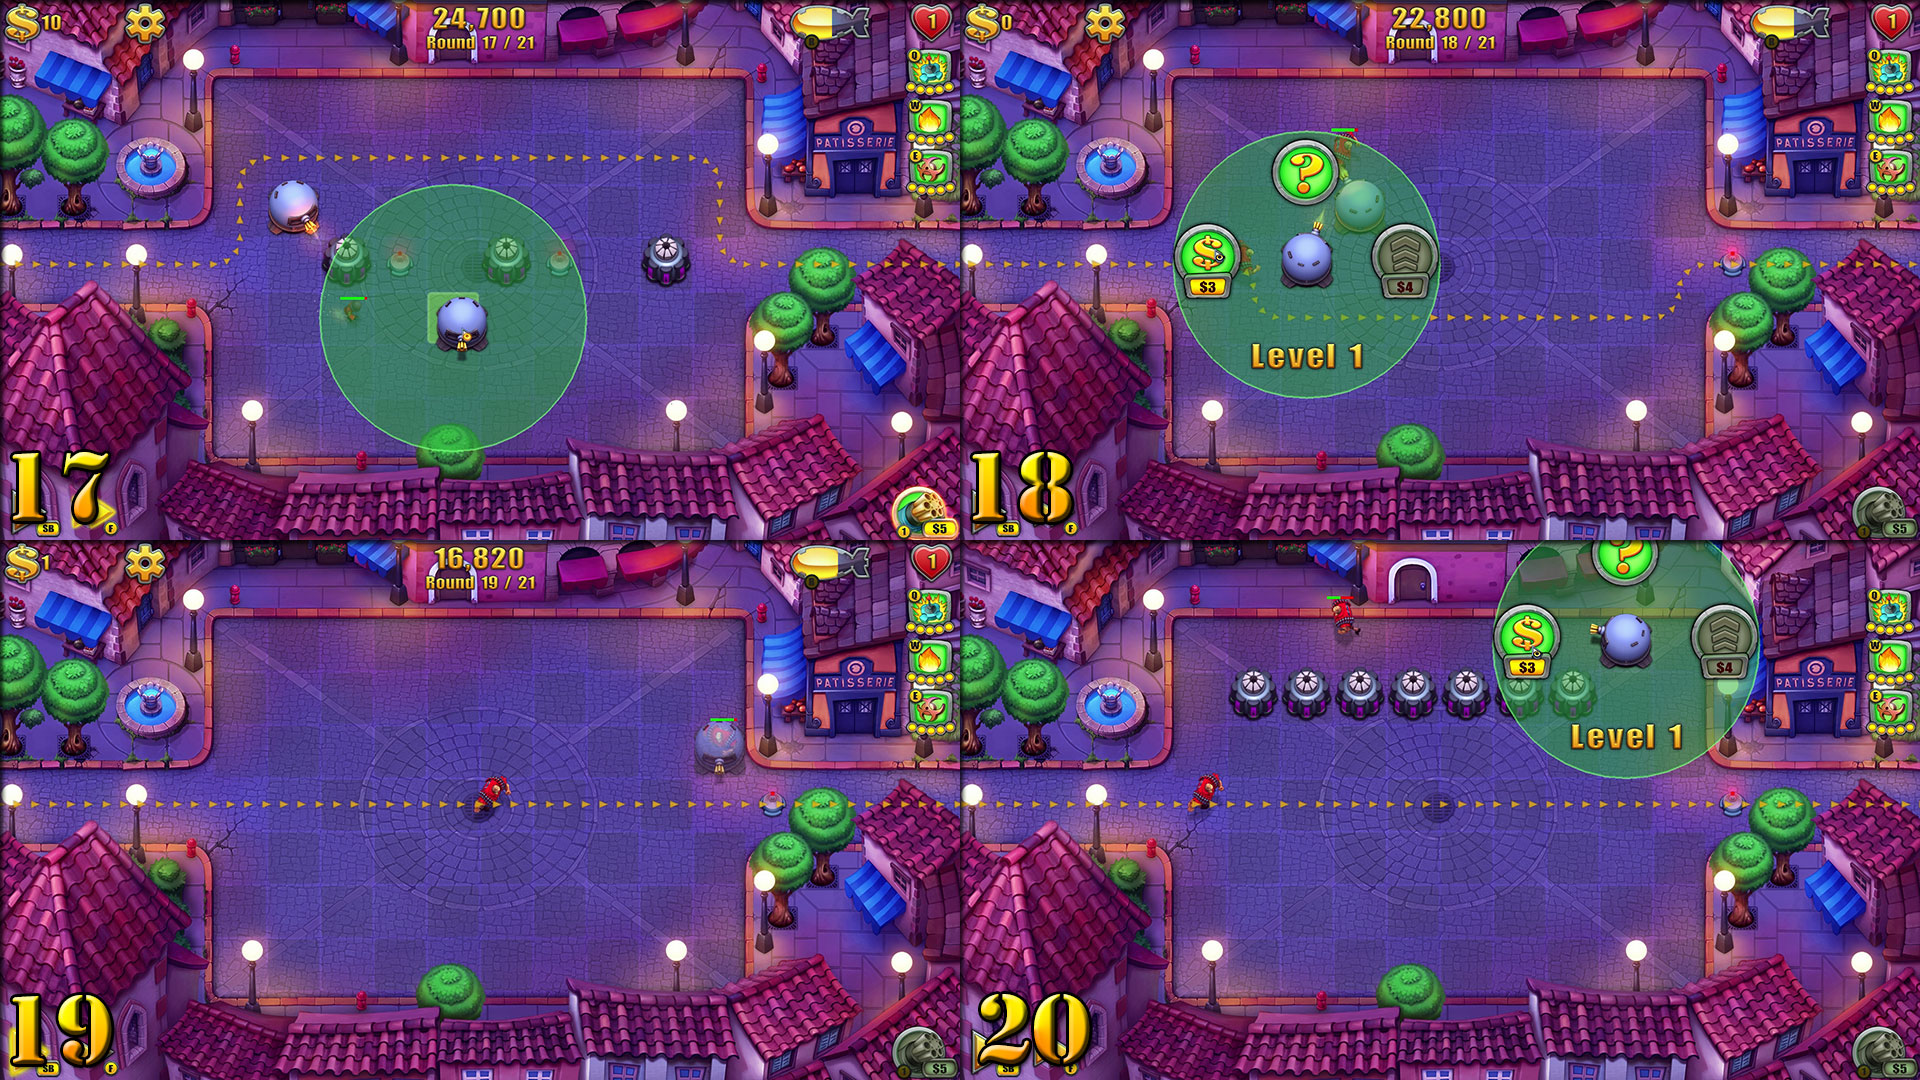
The puzzles are a refreshing change in pace.
Round 17: First tower should be dropped north-west of the far-left Link Tower, then as the runner reaches the Mine, drop another tower in the gap, forcing him up and into the Mine. Buy back this tower and when the second runner reaches the next Mine, repeat the last move by setting a tower down to block the gap and forcing him up into the final Mine.
Round 18: Time for some proper runner manipulation now. This puzzle requires you to effectively ‘slow down’ the first runner enough so that they both reach the Mine by the exit at the same time . To do this, set a tower down close to the entrance (but not directly in front), then at normal speed, wait for the first runner to reach the top of this tower. Drop the second tower down and as he reaches the top of this tower, buy back the first tower. Both runners should now reach the Mine at near enough the same time. Kaboom!
Round 19: A tricky level for many, as the second runner is quite a bit behind. So there’s two options for this puzzle. A). Let the first runner go straight into the Mine and then use a Gas or Flame item on the second, or…
B). You need to pause the runner near the entrance so when you drop your tower down on top of him, it’s covering most of him. This will force him to double-back on himself, and when he crosses the top of this tower, place another one right on top of him again.
Once he nips up and around a second time, buy back both turrets and then wait for him to reach the wall near the exit. Just before he gets too close to the mine, drop one final tower on his head and this will slow him down enough so the second runner will hit the mine at the same time.
Round 20: Ready for a fun one? Place two towers in front of the entrance so when the first runner tries to go down, place a third tower in front of him to direct him to the row of Link Towers at the top of the map. The trick now is to make him go back and forth enough times so that the second runner catches up.
To do this, wait for the first runner to reach the last Link Tower, pause the game and buy back the three towers. Now block the exit with a new tower and as he reaches the third Link Tower from the left (on his way back there), buy back the tower and he’ll make his way back again.
Once again block his path just as he reaches the final Link Tower and, as before, when he gets three Link Towers from the left, buy back the tower and this will now ensure both runners hit the mine at the same time. Granted, a Gas or Flame item on one of the runners will also work (should you be that way inclined).
Round 21
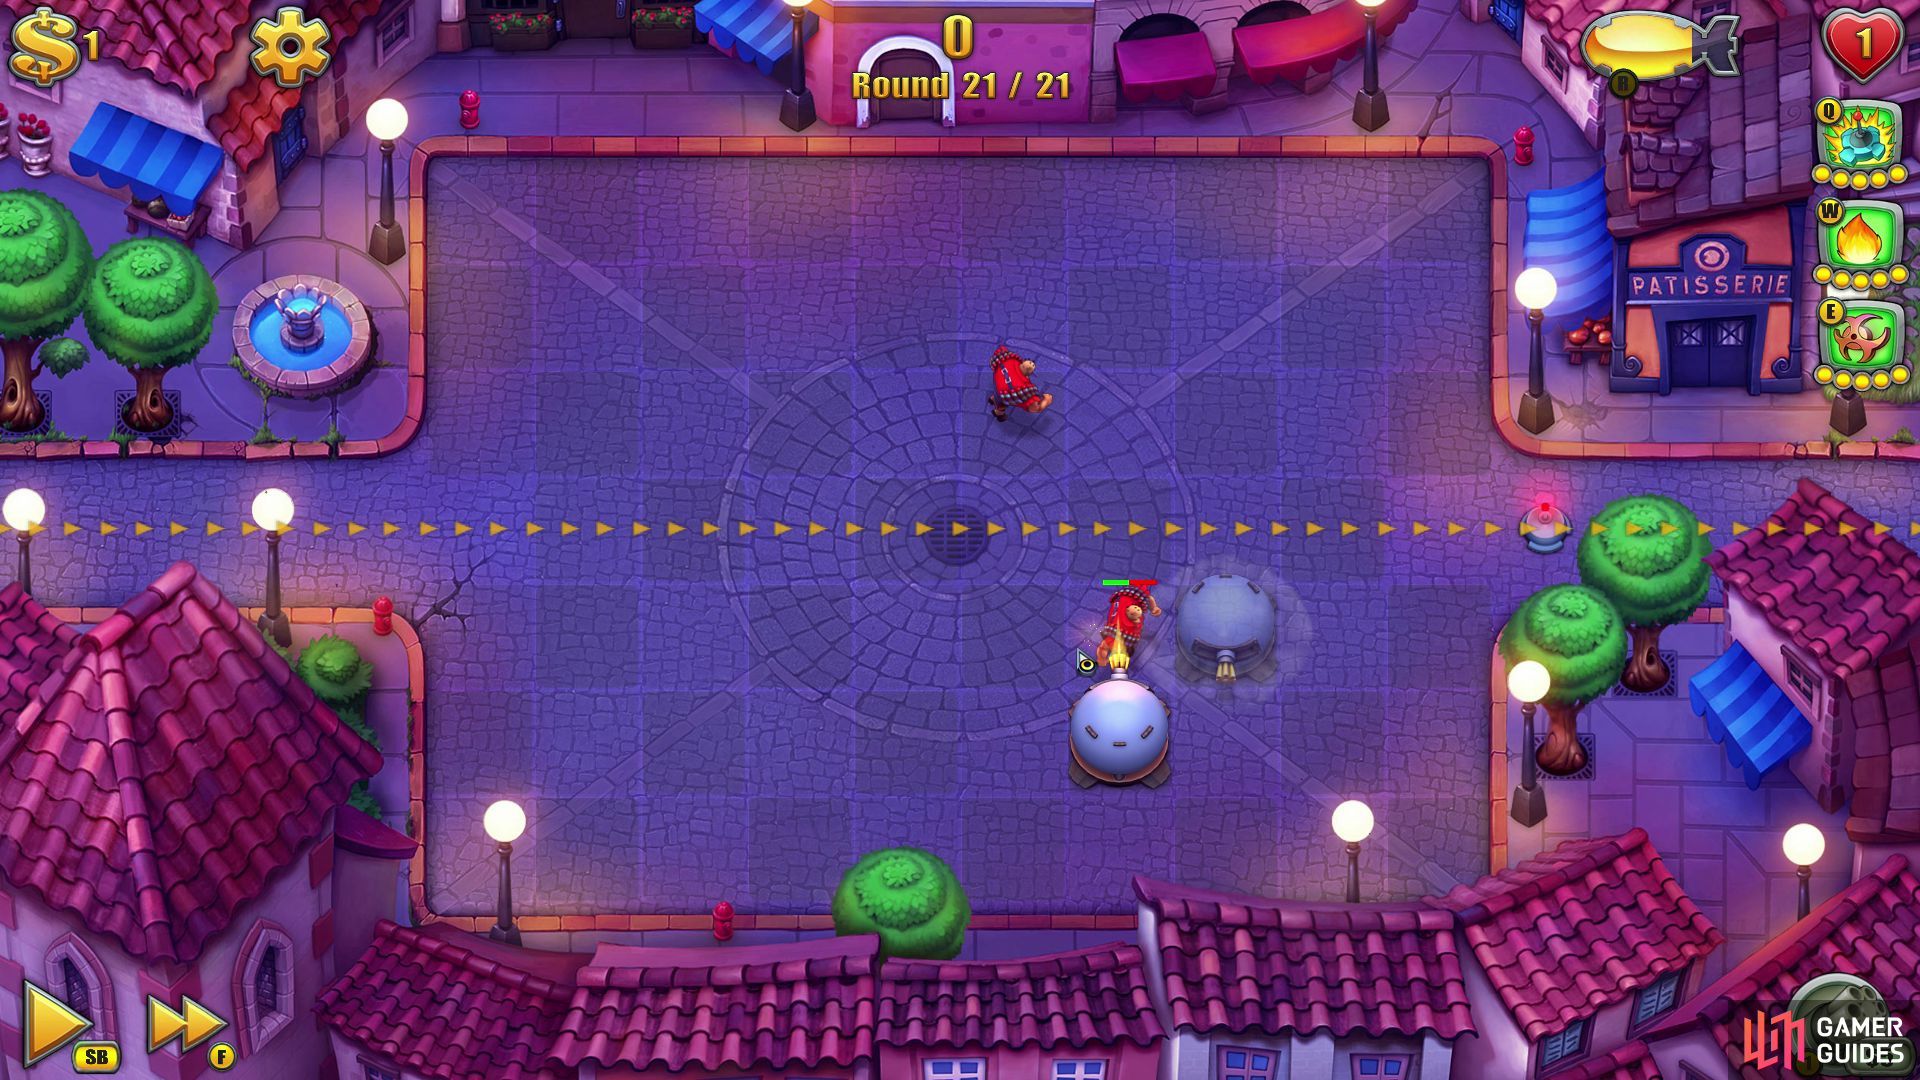
The final round of this puzzle map, you ready for it?
Round 21: They’re cheeky monkeys at Subatomic Studios, this puzzle will catch you out if you take it at face value. Whilst it looks like there’s the same number of runners as mines, there’s one more runner who’ll show up just as the last mine would normally go boom.
So for the initial six runners build ‘steps’ to each of the mines (should be simple enough by this stage) and then when the ‘final’ runner goes to the top of the map (towards the mine by the exit), block him off with a tower and he’ll double-back on himself towards the centre of the map again.
Once he reaches the southern side of the first Gun Tower again, pause the game and then buy back the other three towers. It’s now a case of dropping a new tower in front of his face, making him go back on himself, buying back both towers, dropping another tower in front of him and then create a ‘step’ up to another tower.

 Sign up
No Comments