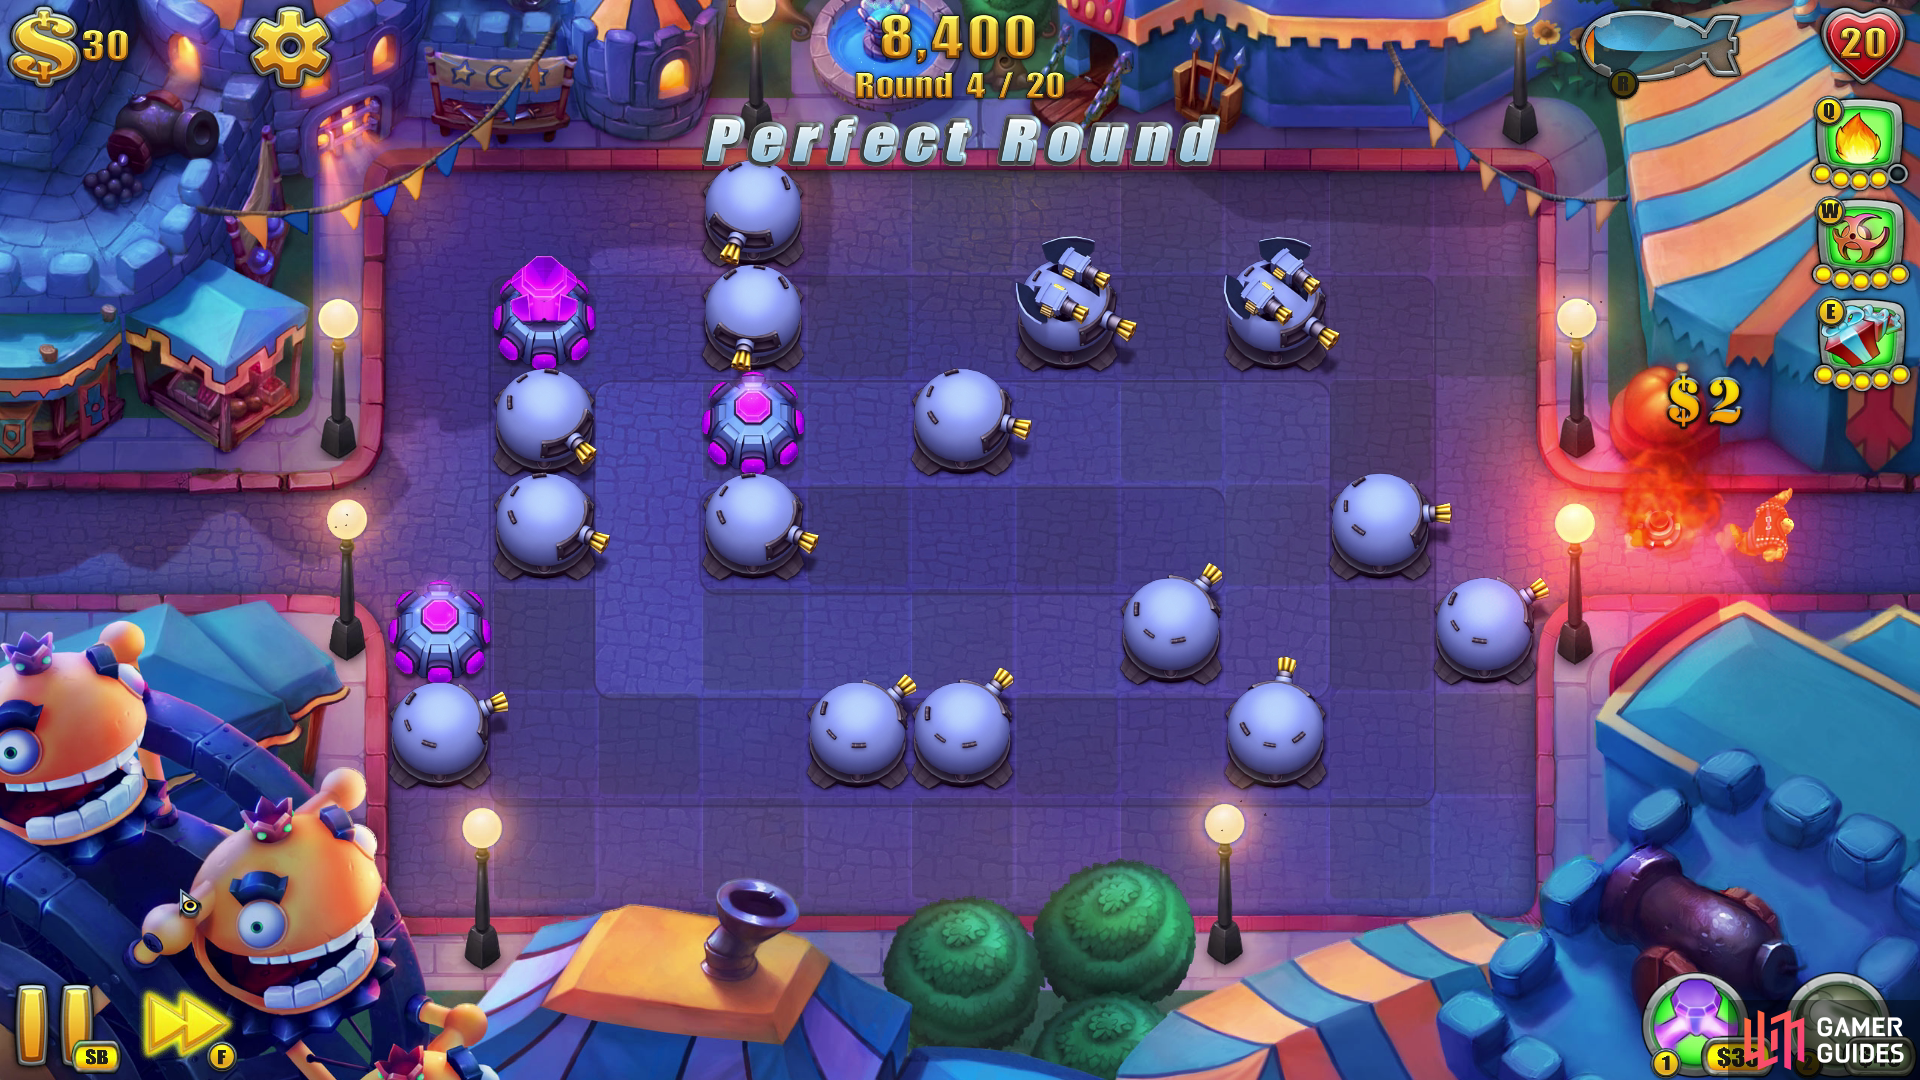
Rounds 1 - 4
Bear in mind you can’t upgrade any of the Gatling Gun Towers, so you can only place Spark or Laser Towers on this map (but to be honest, we’re only going to use the trusty Spark Tower).
Round 1: The placement of your Spark Towers is vital, so for the first one pause the game when the runners have just started to run south (after coming out of the entrance). Drop the Spark Tower on their heads, splitting them up and therefore maximising the damage caused.
Round 2: The runners will now be forced to go north, so set a Spark Tower down where the two Gatling Towers are.
Round 3: Fully upgrade this new Spark Tower to level three so no runners should make it through.
Round 4: You should see a gap in the third row of Gatling Gun Towers (if moving left to right). Set your next Spark Tower down in here. But note that this won’t stop all of the runners making it through. So if you want, you can let him through, or you can use an item to get that perfect round. Your choice (we went with the more violent option).
Rounds 5 - 8
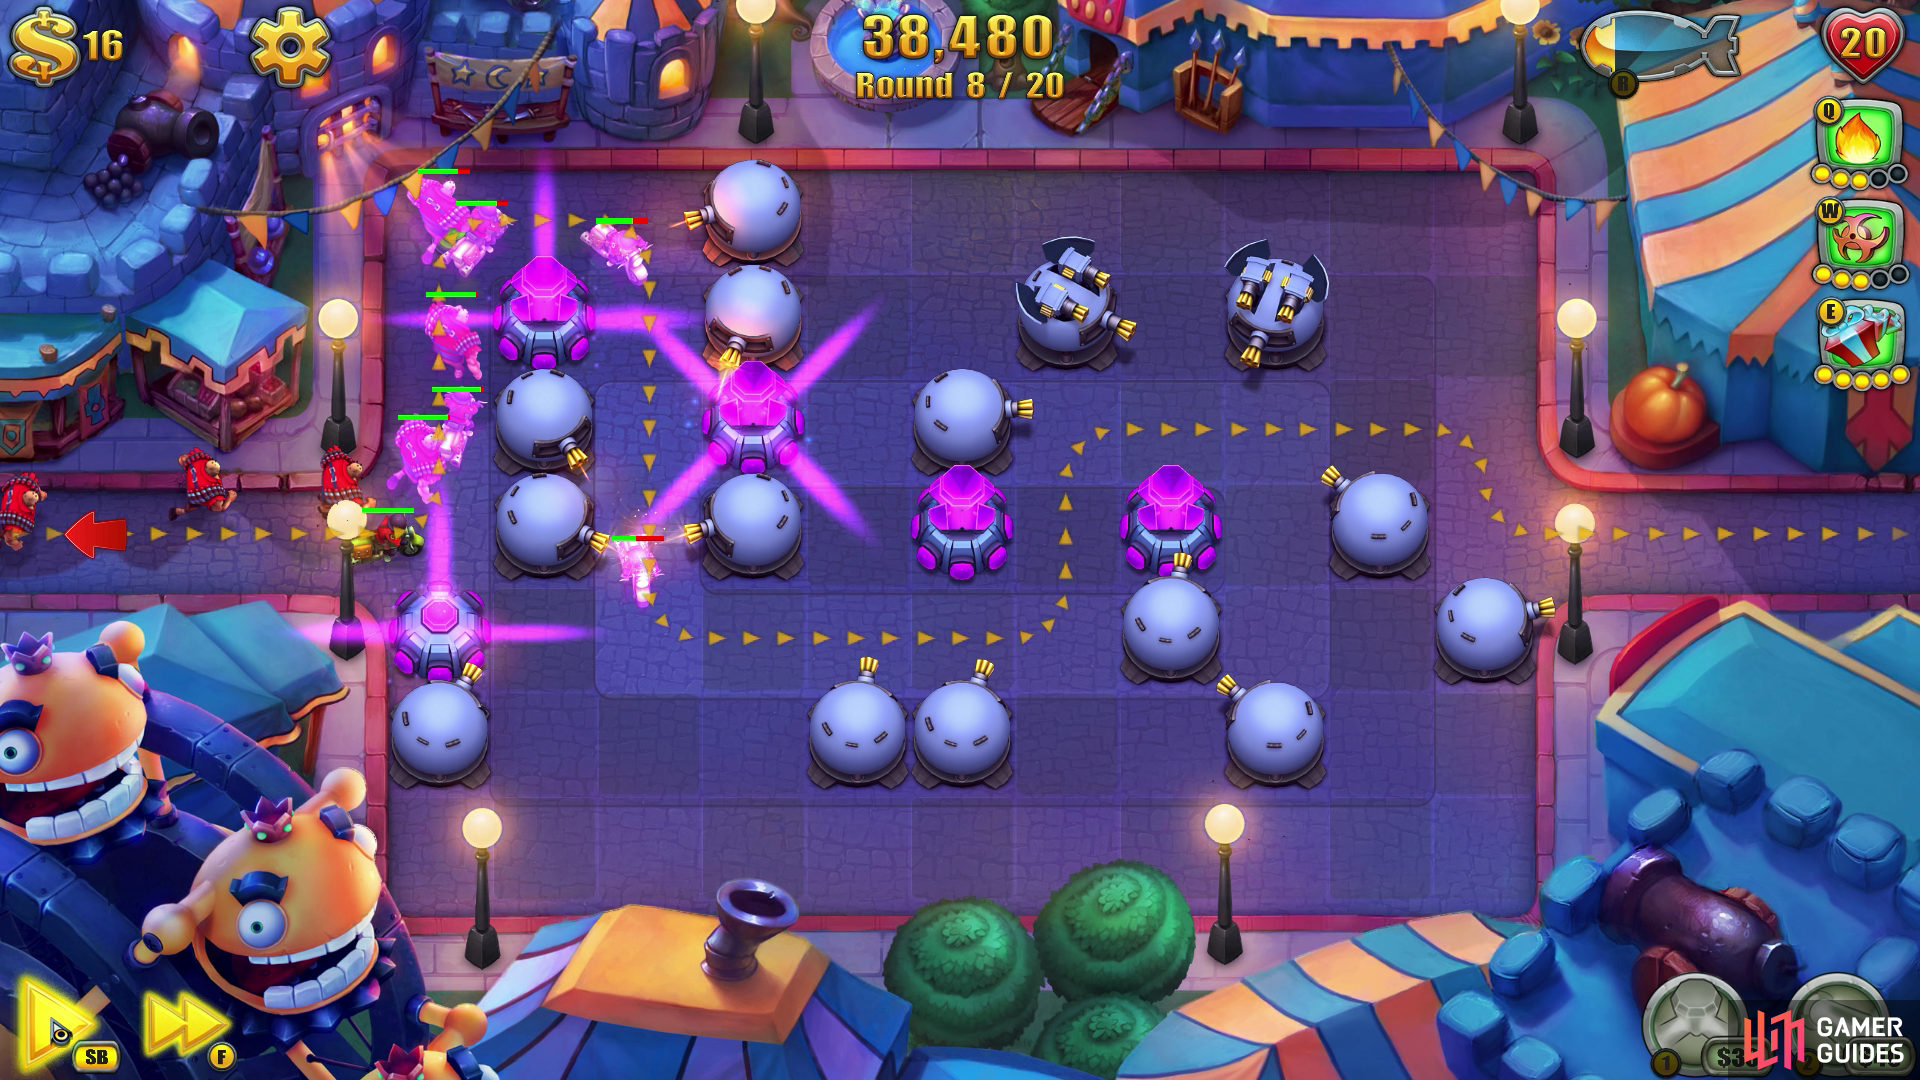
Fokker aeroplanes will now start to make an appearance and they’re fast. Usually, the last one in a wave will make it through, so be ready with an item (or two) by the exit path if you want to keep a clean sheet.
Round 5: Across the middle of the map (in line with the entrance and exit paths), there’s a gap six squares wide. On the second and fourth squares place a Spark Tower. This’ll make the runners weave about more.
Round 6: Use $20 to upgrade the left hand Spark Tower in the middle, leaving you with $16 left. Once you hit $20 mid-round, pause the game and upgrade the far right Spark Tower.
Round 7: With your $46, upgrade the two middle Spark Towers to level three (so no runners will make it through this round).
Round 8: With your $56 in hand, fully upgrade the Spark Tower that’s tucked away between those tree Gatling Gun Towers. There’s also quite a few runners this round that are bunched together. Perfect for a long-lasting Fire Fountain or similar long-lasting item.
Rounds 9 - 12
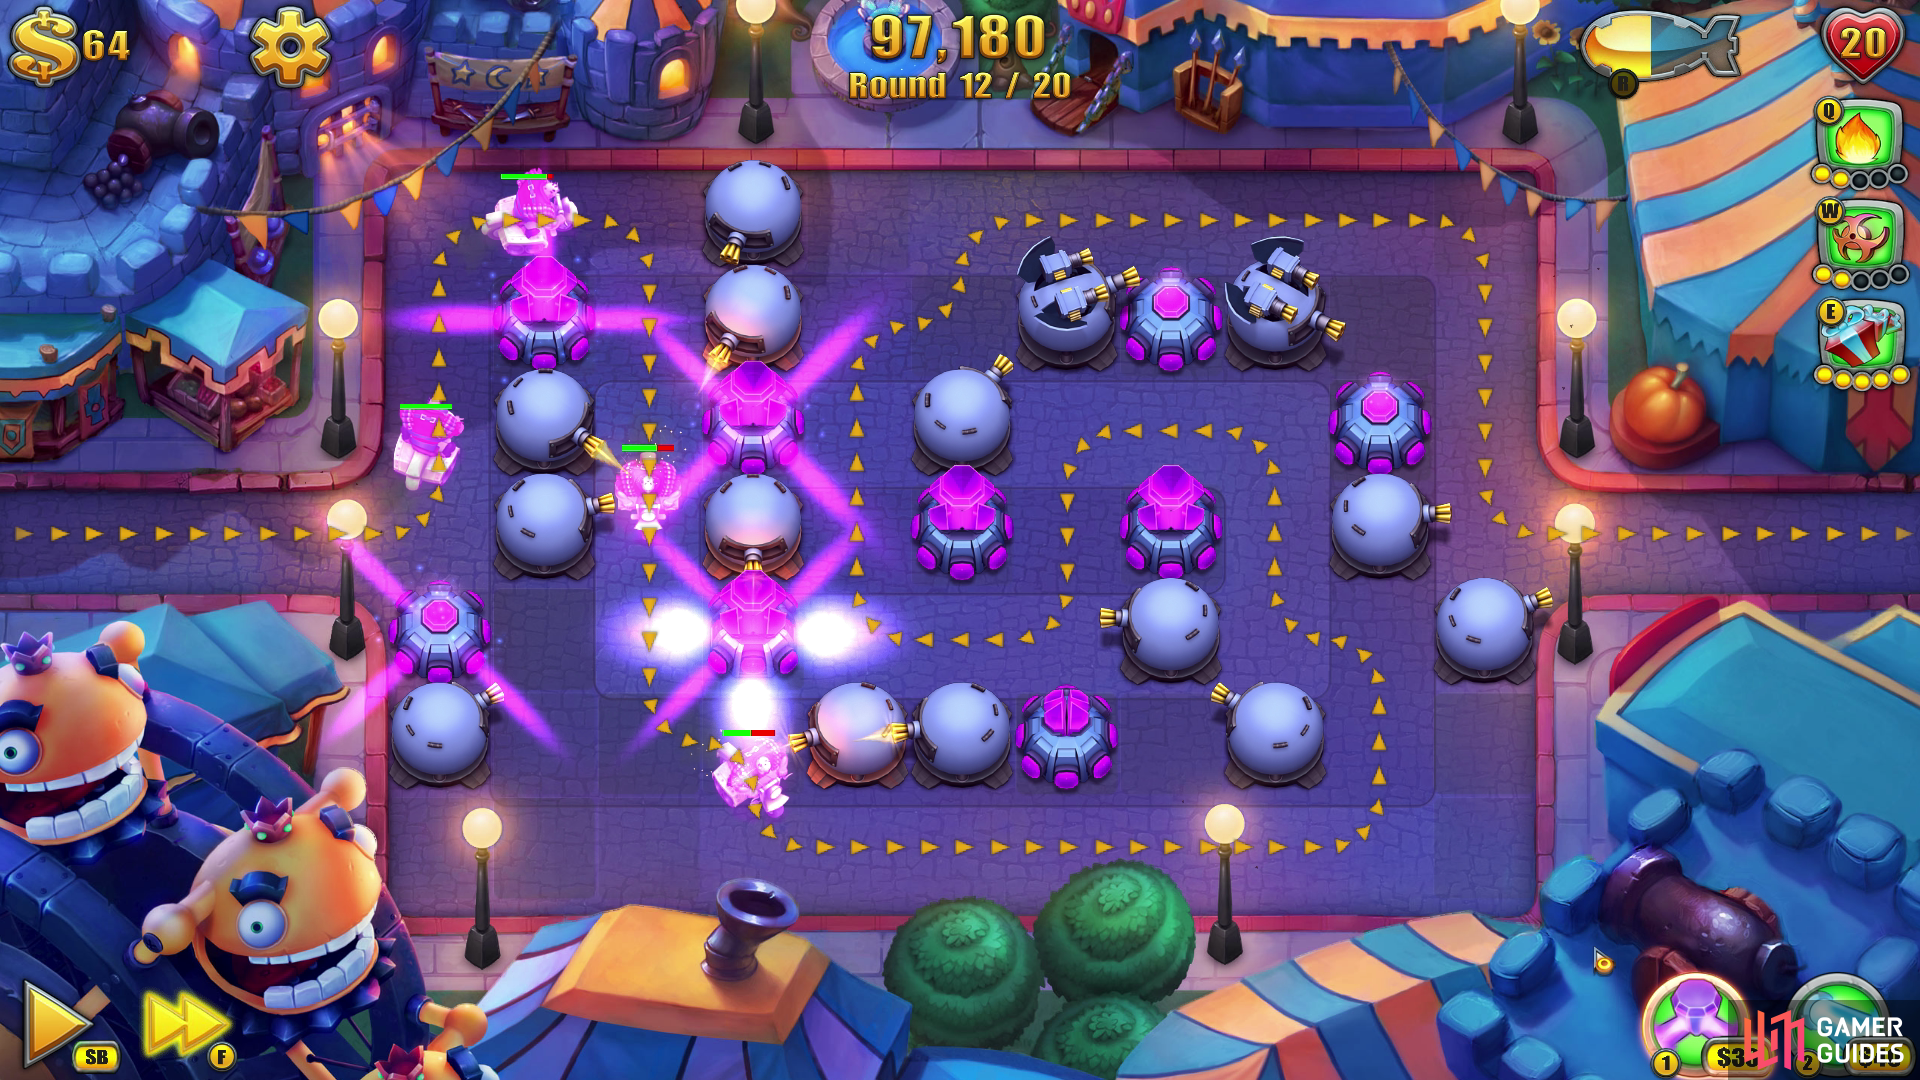
Time to place a few more Spark Towers down. The maze will start to take a bit more shape soon and if you’re letting units slip through, then you should still have 15 ‘hearts’ left.
Round 9: Open up that wallet and set a new Spark Tower in between the two fully upgraded Gun Towers, then, look south of the fully-upgraded Gun Tower on the left and set your next Spark Tower so it’s sitting to the right of the two level one Gun Towers. No runners will make it through.
Round 10: Time to extend the maze a bit more; so drop a Spark Tower three squares right of the Spark Tower by the entrance and then place your second one to the south-east of the fully-upgraded right hand Gatling Gun. No units will make it to the exit this round.
Round 11: Fully up upgrade the Spark Tower (that’s located two squares right of the entrance Spark Tower) and also upgrade the most southern Spark Tower by one level. One runner will make it to the exit, so have an item ready if you want to keep your scorecard clean.
Round 12: We start off this round with a fountain of fiery fury (by setting it down at the end of the path by the entrance), otherwise a couple of runners will make it through. For Spark Tower placements, set one down two squares right of the most south-western level one Gun Tower and also set one down to the right of the right hand fully-upgraded Gatling Gun Tower.
Rounds 13 - 16
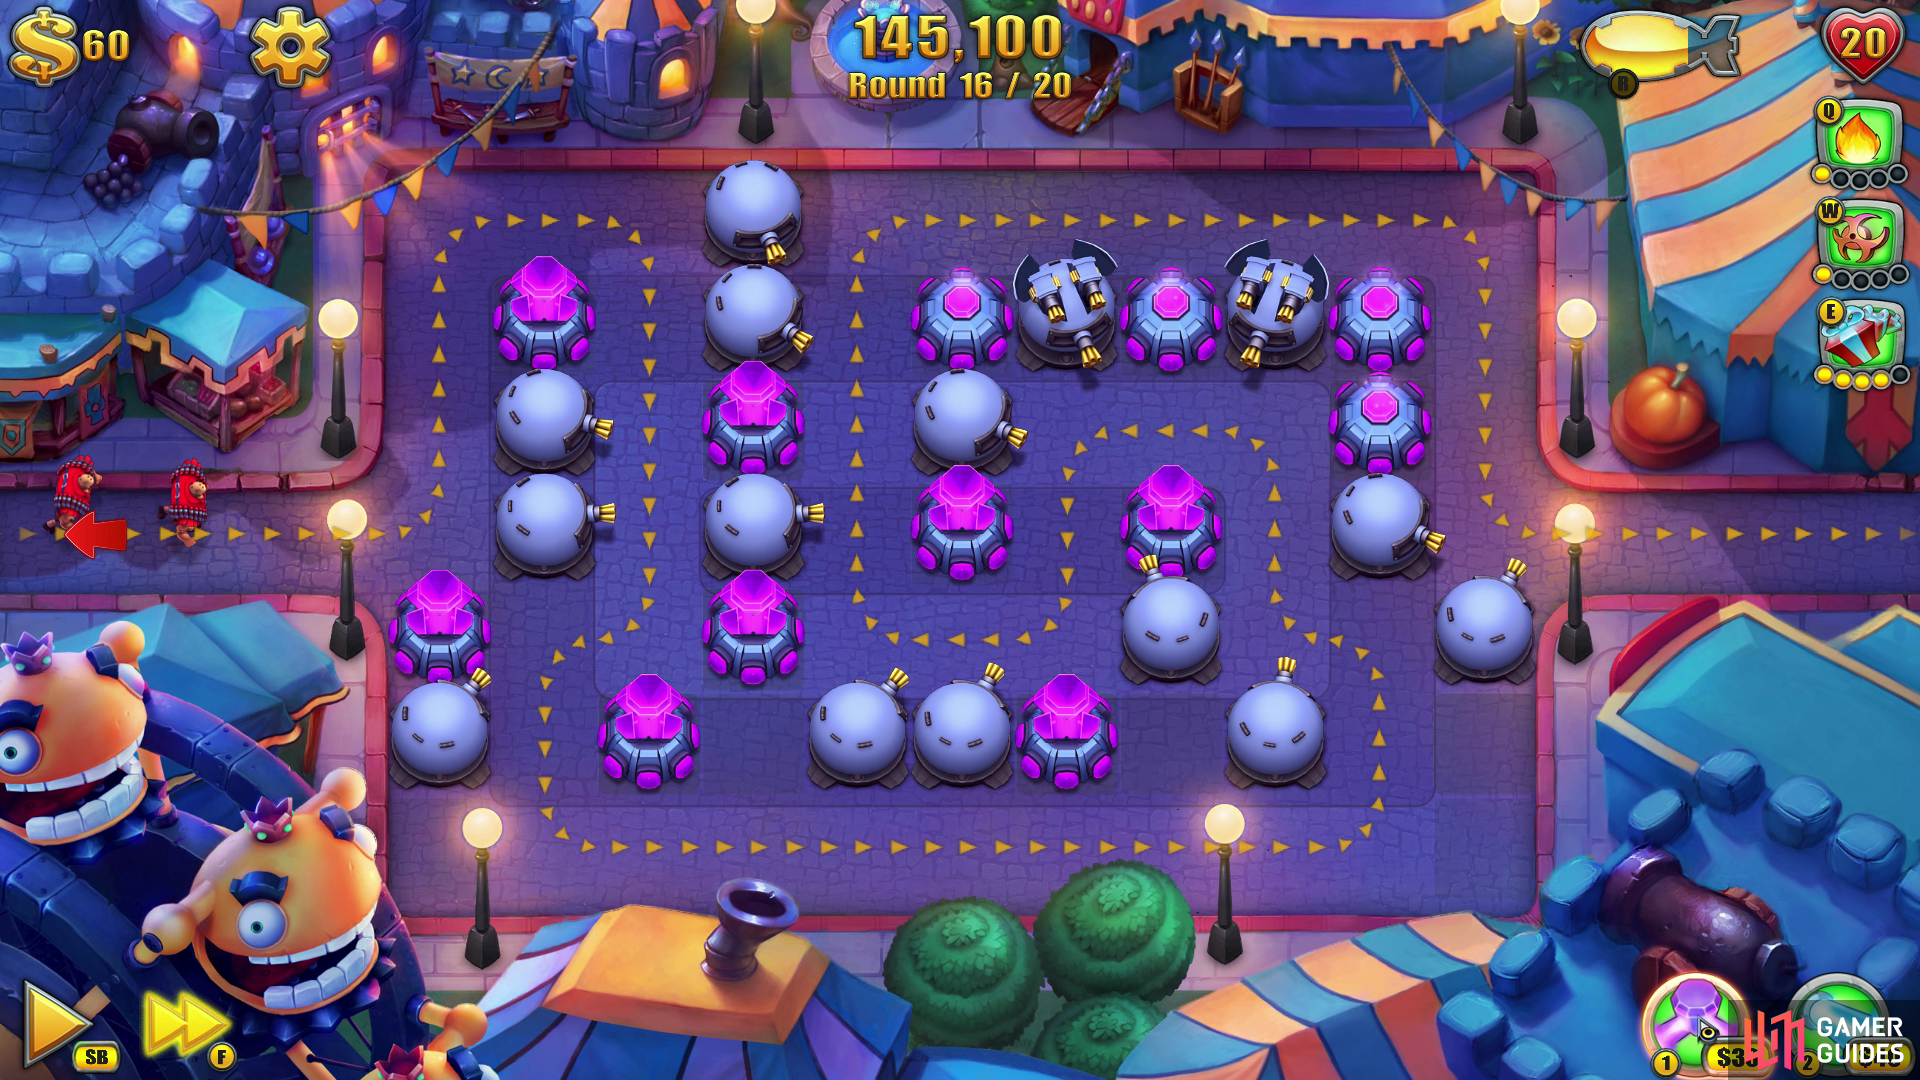
The maze should now almost be completed, so it’ll soon be a case of ensuring all Spark Towers are at level three.
Round 13: Upgrade the two most southern Spark Towers to level two before the round starts proper and no Fieldrunners will make it to the exit on this round.
Round 14: Upgrade the two Spark Towers in the south-west corner of the map (the one by the entrance to level two and the other one to level three). A couple of runners will make it through this round, so an item can be used in the central inverted ‘U-bend’ to ensure that doesn’t happen.
Round 15: Upgrade the Spark Tower by the entrance to level three and then drop one in the top-right corner of the map (beside the fully-upgraded Gatling Gun Tower). The last few Fokkers will also make it through, so use an item if letting no-one through is important to you. (We recommend the Santa Strike for this one as they’re bunched up close together in a line).
Round 16: Spend all remaining $$ and upgrade the top three Spark Towers to level two each and no runners will make it to the exit on this round.
Rounds 17 - 20
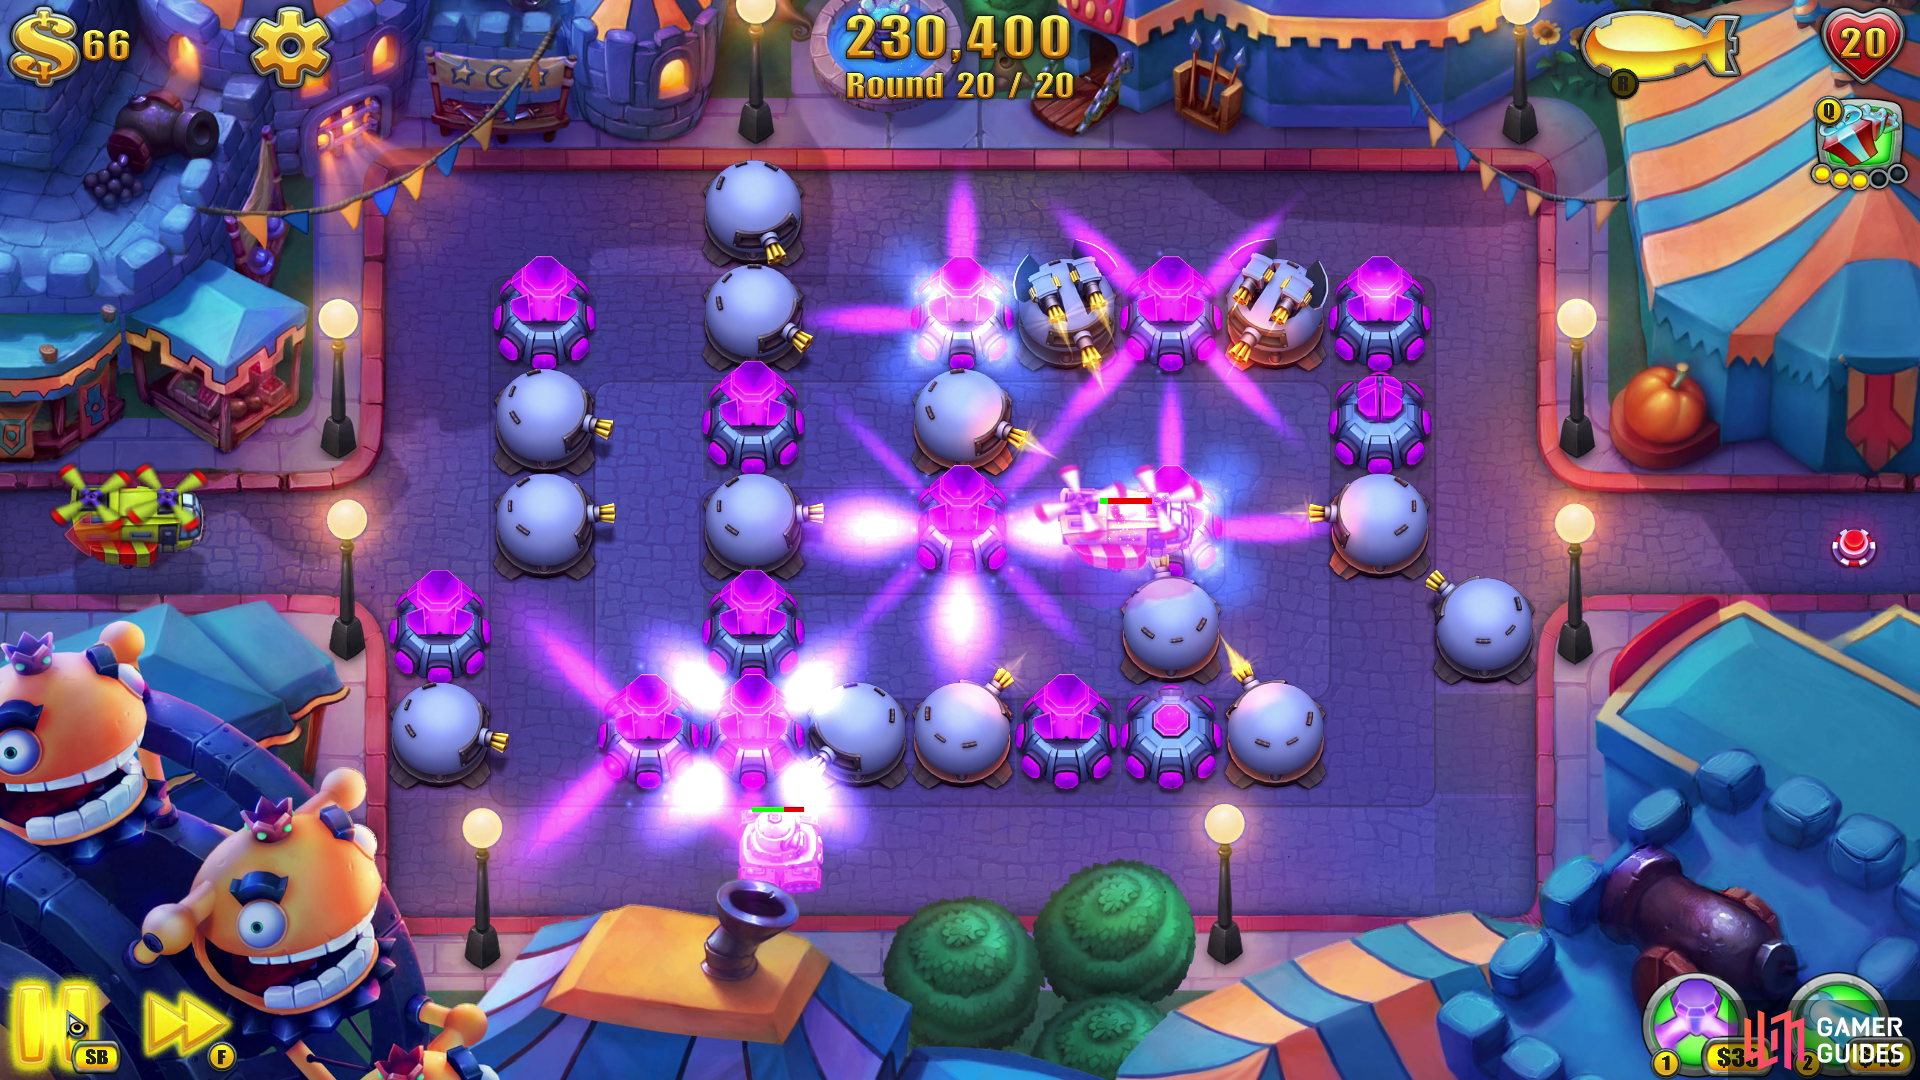
Final four rounds coming up now. Your maze is pretty much complete, so now it’s time to use the rest of the items if you’re using any. Otherwise, don’t worry how many make it through, you’ll have enough remaining hearts to make it to the end.
Round 17: There’s still a couple of empty squares you can fill with towers at the very bottom of the map, so on the left-hand side drop down a Spark Tower and pump it up to level two immediately. No items are needed on this round.
Round 18: Fully upgrade this new Spark Tower to level three now and then pick one of the northern Spark Towers to upgrade to level three also (one of the two corner ones are better). A Spanish Flu or Fire Fountain on the inverted ‘U-Bend’ will also work wonders here to keep a clean sheet.
Round 19: Place your final Spark Tower in the last available square at the very bottom of the map, then upgrade any Spark Tower you wish that’s not already at level three. When you hit $20 again, upgrade a Spark Tower near the exit, then when the next $20 is earned, upgrade another one.
Round 20: For the final round it’s all about tanks and helicopters, so if you’ve got any items left (we had a few Santa Strikes remaining), now’s a great time to use them and finish this map off in style. Kaboom! Three more stars…

 Sign up
No Comments