


| Bestiary |
|---|
| Bagoly • Imdugud (Rare Game) • Slime. |
| Items In This Area |
|---|
| Bhuj • Chainmail • Kogarasumaru • Lambent Hat • Musk Stick • Paramina Crossbow • Round Shield • Shielded Armor (Steal from Imdugud) • Sight Unseeing • Soldier’s Cap • Turtleshell Choker • Winged Helm • Winged Helm (Drop from Slime). |
Central Junction
The majority of this area, like most areas in the Ogir-Yensa Sandsea, is comprised of circular platforms surrounding massive tanks, but you’ll get a brief reprieve from that shortly. First, though, let’s clear the Central Junction. From the platform you start out near, follow a bridge to the southeast to reach a smaller, circular platform, which is just a junction between the previous large platform and another large platform to the east. Kill the Urutan-Yensa en-route to this eastern platform, which is located in the center of the area.
Off this platform three bridges branch out, one to the northwest, one to the east and one to the southwest. Take the southwestern bridge first to reach another platform, which is crawling with Alraune. Dice the tomatoes, then search the western end of this circular platform to find a chest. Inside, if you’re lucky, you might find a Lambent Hat (Mystic Armor 4), which is a worthy upgrade for your mages.
Return back northeast to the central platform, then turn east to reach yet another platform. From here you can continue east to return to the Platform 1 - Refinery area, which will let you reach another new area soon enough. Keep that in mind for later and instead cross a bridge to the southwest to reach a small, circular platform, which is occupied by Alraunes, then turn southeast to find another small platform, upon which are three chests. Two of them contain miscellaneous low-quality loot, but the chest along the southeastern end of the platform, near some crates and barrels, can drop a Soldier’s Cap (Light Armor 4).
Backtrack to the central plaform one more time, this time crossing the previously ignored bridge to the northwest. Smite any Urutan-Yensa in your way and when you reach another platform turn west for a change of scenery, as some ramps lead down to the desert floor. Descend the ramps and smack around another several Urutan-Yensa and perhaps their Yensa pet if you stray too near to the sandsea, then turn your attention to the south, where you may find a chest that may contain a Paramina Crossbow (Crossbows 2).
Climb back up the ramps to return to the platform above, then cross a bridge to the east to reach another platform, which also bears some ramps leading down to the desert, this time to the east. Down in this section of desert you’ll find some Speartongues and Danbania, who, like the Yensa earlier, will only expose themselves as you stroll along the northern edge of the area adjacent to the sandsea. Speaking of the northern edge of the area, here you’ll find a chest that can forfeit a Round Shield .
You’ll also note that along the cliffs to the east is a cave, another entrance to the Zertinan Caverns. Unlike the previous entrance, this one is worth exploring, so head down into the darkness.
Zertinan Caverns - Canopy of Clay
Like most fantasy game caverns, the Zertinan Caverns are massive, structurally unsound, oddly well-lit, even-floored geological structures. Not very realistic, but convenient as far as gameplay goes! Follow the linear, winding tunnel ahead of you, where you’ll find a new foe - a Slime.
Slime :
New area, new foe, time to get that bestiary entry done, then, eh? Slimes look and fight very similarly to Flan, but there are some important differences between the weaklings you fought earlier than these stronger foes. First, they are weak to Earth, not Fire, and they absorb Wind, so you might as well leave the Gladius at home. They can inflict Slow with their normal attacks, in addition casting Aero, Sleep and Blind magicks. If they feel threatened, they may use Divide, creating more Slimes. They can drop Green Liquid, a Wind Stone, a Water Mote, or a Winged Helm , (Heavy Armor 3), a very nice bit of Heavy Armor that may be worth grinding to get or you could just wait a bit and pluck it out of a chest. You can steal Green Liquid, a Wind Stone or a Sagittarius Gem, while using Poach will get you either a Pebble or Yellow Liquid.
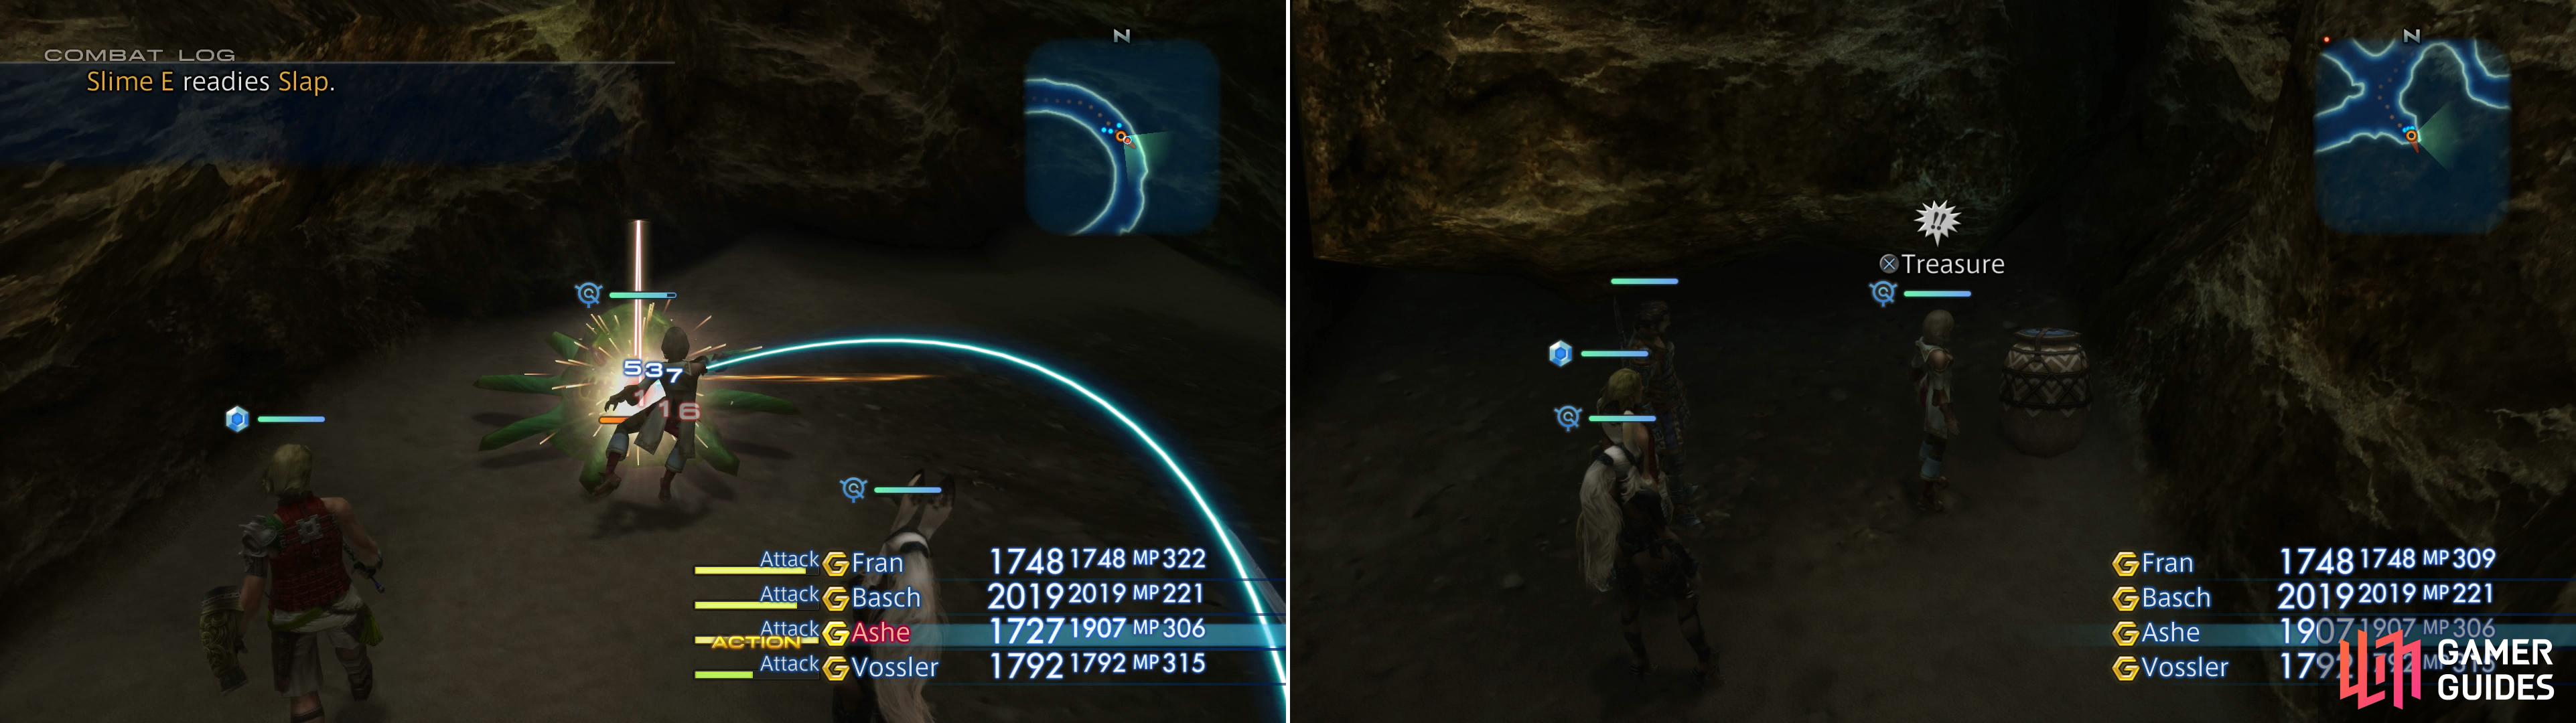
You’ll find stronger enemies in the Zertinan Cavern, like the Slime (left). Loot an urn to obtain the Sight Unseeing technick (right).
Fight your way down the tunnel and eventually the Slimes will be replaced by a trio of Speartongues, shortly after which you’ll reach a fork. Search a small dead-end to the southeast at this fork and you’ll find an urn, which always contains the Sight Unseeing technick. This technick can only be employed by characters who have been Blinded, and it allows them to work as a death-blow sort of attack, instantly dropping the target’s HP down to a random number between 0 and 8. If dropped to zero, it naturally kills the target. The chance of this working depends on the user’s level compared to the target’s level, so at first it might not seem terribly useful, and really, against foes that are much weaker than you anyway, this technick seems somewhat redundant. It is good for dropping monster’s HP low enough to be easily Poached, however, so keep that in mind. This ability won’t work on creatures that are immune to it, and this pretty much includes all Rare Game, Marks and undead.
While this is a treasure worth getting your hands on (even if it’s strictly for future use), it’s not the only reason you’re down here. Return to the fork and note the paths ahead of you. The northwestern route boasts two traps and not a lot of wiggle room around them, while the southwestern route is clear and pristine. This isn’t a trick, the southwestern path is simply safer, so go down that route, wrap around to the northwest and north and ascend a Slime-filled tunnel to reach an area transition. Well, you didn’t come this far to turn back now - head on to the new area.
Nam-Yensa Sandsea - Withering Shores (South)
The Nam-Yensa Sandsea, 80% fewer tank platforms, more scenic, more nature! Sadly, this isn’t quite your destination, as it’s a small side-area that can only be reached through that specific passage through the Zertinan Caverns, the otherwise unreachable southern half of the Withering Shores area. Now that your hopes have been quashed, continue west to reach a ramp leading to that oh-so-familiar feature of the sandseas: the tank enrounded by a circular platform. Before you ascend, however, continue west to search the base of the structure above, where you may find two chests. The chest on the right has a chance to contain a suit of Chainmail , while the chest on the left may possess a Winged Helm . Much easier than killing Slimes. When you’re done plundering, turn north and climb the ramp, and as you ascend you’ll run across another new foe, the Bagoly.
Bagoly :
The Urstrix finally gets a palette-swap in the form of the Bagoly. These owl-birds aren’t much stronger than the Urutan-Yensa or Alraunes you’ve been fighting in the Ogir-Yensa Sandsea, so not much needs to be made of them in that regard. They can cast a variety of magicks, however, including Aerora, Protect and Shell, and can make use of the Screech technick, which can inflict Confuse. Bagolys can drop a Wind Stone, a Large Feather, a Teleport Stone and an Aries Gem. You can steal a Large Feather, Echo Herbs or 480G, and they can be Poached for a Large Feather or Wind Magicite. They are weak to Earth.
Ascend the ramp to reach a platform, then turn down a short bridge to the west, killing Bagoly as you go. Across this bridge you’ll find a small, circular platform bearing only a single trap and a chest in the center. Might as well just trigger the trap, get it out of the way, then heal the resultant damage. Once done, loot the chest to obtain a Turtleshell Choker (guaranteed drop, will not respawn), then stand a character right where the chest was, in the center of the platform’s decorative, central six-pointed starburst and wait. After a while (Speed Mode will make this go faster) a massive avian foe will fly over from the north - the Imdugud.
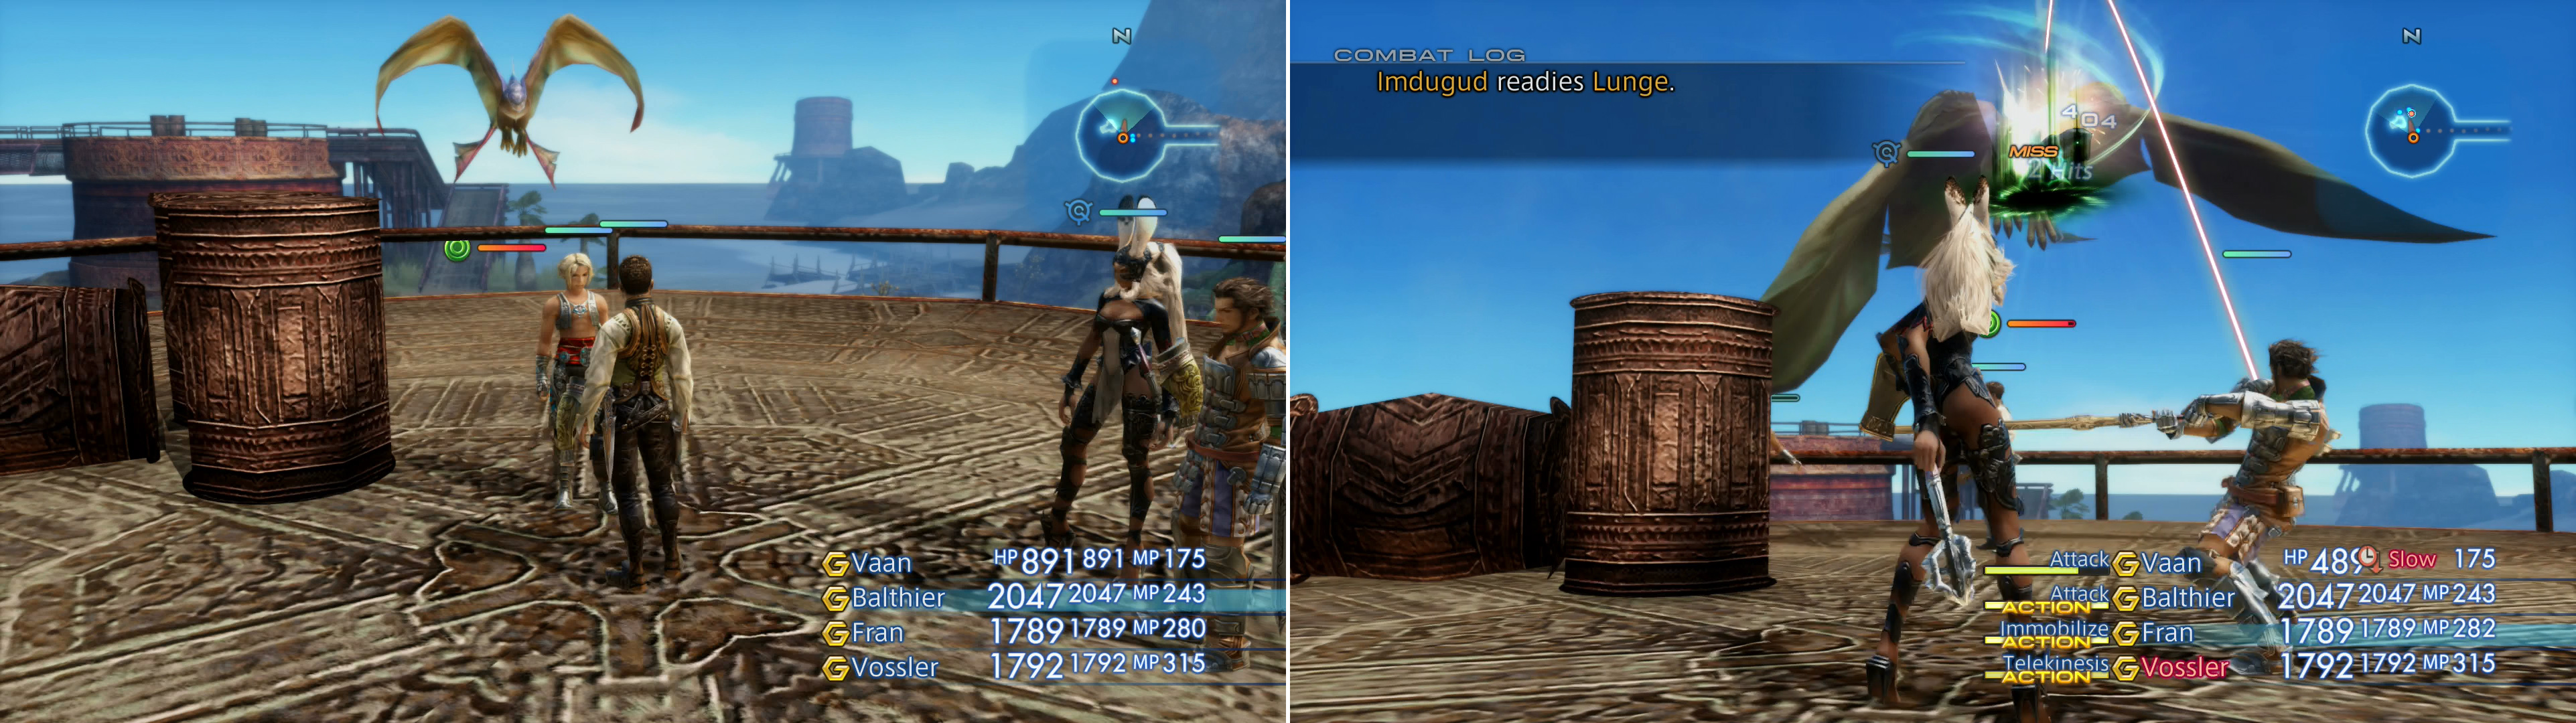
Stand on the center of a platform to lure Imdugud (left), which can be more easily defeated with the use of Immobilize (right).
Imdugud :
While it boasts plenty of HP (over 8,000) the Imdugud isn’t much stronger, physically, than the lesser foes of the sandseas. While its physical attacks can inflict Slow, it really doesn’t have any special attacks that should bother you, making it far easier to hunt than the Dive Talon back in the Westersand. It is, however, a flying beastie, so you’ll need a ranged weapon (Bomb, Bow, Crossbow, Gun) or magicks to hit it. You shouldn’t really be concerned with killing it as much as stealing from it, however, as you can pocket a suit of Shielded Armor (Heavy Armor 4) from it. How this works in practice, well, don’t think about it, it’s a video game. This armor is not only more protective than whatever else you’re likely wearing, but it gives its wearer the Protect status at all times, making it quite a useful defensive item, indeed.
Killing it after you’re done stealing might prove to be a bit of a challenge, as it will fly away after a set amount of time, and when it’s under 50% HP it also gains passive boosts that increase its evasion and reduces incoming damage. It’ll return in time after healing a great deal, but ideally steps will be taken to prevent it from getting away in the first place. To this end you can inflict Oil on it to make your Fire spells bite more, Blind will make it less capable of landing blows in return, which might come in handy as you steal its treasure, while it can also be Immobilized, preventing it from fleeing entirely. The only item you can steal from it is the Shield Armor, which is a good thing, as you’ll eventually get it if you try enough - it’s a rare steal, though, and at 3% success per attempt, expect to spend some time on it. In addition, however, Imdgud can also drop a Large Feather or a Windslicer Pinion, while it can be Poached for a Pebble or some White Incense. It’s immune to Wind and weak to Earth.
Platform 1 - South Tanks
Leave the Nam-Yensa Sandsea, trek back through the Zertinan Caverns, and return to the Ogir-Yensa Sandsea - Central Junction area. Once here, make your way west, then southeast to the eastern-most large platform, the one which bears a bridge leading back east to the Platform 1 - Refinery area. Cross said bridge into the aforementioned Platform 1 - Refinery area, and from there head south from the platform you start out on, pass over a smaller, circular platform and reach another large platform. From here head southwest to find a bridge leading to a new area, the Platform 1 - South Tanks area.
This area has little to recommend it, all the items you can find are old items you’ve already seen in the Ogir-Yensa Sandsea, as are all the foes, but it leads to a more interesting area, and for the sake of completion… well, let’s explore it. Clear the few Urutan-Yensa on the platform you start out on and cross a bridge to the southwest to reach a cluster of three small, circular platforms in the southeastern corner of the area. The central of the three (which you should now be standing on) is uninteresting, but the two to the southeast and southwest both have notable loot on them.
Both platforms are crawling with Alraune; in addition a Wyvern may roost near the southeastern platform may. Expel these pests and loot the sole chest on the southeastern platform to get a shot at a Kogarasumaru . The southwestern platform, on the other hand, bears two chests, the eastern-most of which (it sits in the shade of two barrels) may possess a Bhuj .
Return back northeast to the large platform, then cross a long bridge to the west to reach another platform. This particular platform is of little interest, so swat Urutan-Yensa out of your way and continue west to a second platform in the center of the area. This western of the two central platforms bears a chest which may contain a Musk Stick . Find it on a dead-end bridge to the northwest. There’s no more loot of note in this area, and while there’s another platform to the west, well, you’ll get to it shortly. For now, however, turn your attention to a bridge to the southwest, which leads to another area - the South Tank Approach.
South Tank Approach
Cross the area transition to reach the South Tank Approach, which has painfully little of interest in it. Kill the several Urutan-Yensa on the entry platform, then descend a ramp to reach the desert below. You can spawn the Danbania by walking near the edge of the sandsea in the southeastern corner of the area, but it’s otherwise uninteresting. Instead, continue west to reach yet another area, the Yensa Border Tunnel
Yensa Border Tunnel
There are no enemies in this small area, instead you’ll find a Gate Crystal and a merchant named Dyce. Don’t expect anything fancy out of him, however, as he’ll only sell you basic ammunition and the curatives you’ve acquired up to this point. This area is not, however, the way you’ll be going to reach the Nam-Yensa Sandsea, but it’s a good idea to hit the Gate Crystal and stock up on some curatives if necessary.
Time to finally leave the Ogir-Yensa Sandsea behind and travel to the Nam-Yensa Sandsea, more specifically the northern-most of the two entrances to the place. To get there you’ll want to return to where you fought the Urutan Exile in the Platform 2 - Refinery area. To do this, head back to - and through - the South Tank Approach area, returning to the Platform 1 - South Tanks area. From the center-west platform here head west to the previously neglected western-most platform, kill whatever Urutan-Yensa pester you, and cross a bridge to return to the Platform 2 - Refinery area.
From the platform you enter this onto, in the southeastern corner of the area, make your way across a bridge to the west to reach the structure on which the Urutan Exile spawns. Fight your way through the Urutan-Yensa here, make your way down some ramps to the west, then cross a short stretch of desert to reach a cave which leads to the Nam-Yensa Sandsea.

 Sign up
No Comments