


| Bestiary |
|---|
| Cassie • Deathclaw • Pallicant (Rare Game). |
| Items In This Area |
|---|
| Ame-no-Murakumo • Celebrant’s Miter • Chaperon (Steal from Cassie) • Cleric’s Robes • Gastrophetes • Gigas Chestplate • Gigas Hat • Gillie Boots • Greataxe • Holy Lance • Pheasant Netsuke • Save the Queen • Yoichi Bow • Zwill Crossblade (Steal from Cassie). |
Footfalls of the Past
When you arrive at Ridorana Cataract, Ashe and Reddas will have some words, as will Vaan and Balthier. When that’s done you’ll find yourself in the Footfalls of the Past area, which has little to offer except some stairs leading up to the next area, along the way to which you’ll find a Save Crystal. Note you can leave the area at any time by returning to the eastern end of this zone an examining the Strahl’s anchor.
Speaking of nautical equipment weighing you down (nice transition, right?) Reddas is probably under-powered in many ways. If you’re anywhere near the level of the foes you’re fighting (mid-40s by now) and have purchased most HP licenses, many of your characters will likely have nearly twice as many HP, not to mention he’s not using the most powerful of equipment, either. That said, he does have the Arise magick, which may come in handy from time to time… if he’s not too dead to cast it, anyway.
Echoes of Times Garden
Continue on to the next area, wherein you’ll find monsters, traps and chests. Everything that makes a place worth exploring! Aside from traps, anyways, who cares for those? There are two types of monsters in this area, and they’re the only two common monsters you’ll find in all of the Ridorana Cataract - the Deathclaw and the Cassie.
Deathclaw :
A palette-swap of the Preying Mantis (that didn’t take long, did it?), their one note-worthy attack is Pulsar Wave, which can inflict Disable in a circle around themselves. Otherwise they can Cannibalize each other to gain strength, or use physical attacks and Gnaw, the former of which can also inflict Disable. They can drop Charger Barding, a Storm Crystal, an X-Potion or a Cancer Gem, you can steal Charger Barding, Serum or a Zwill Crossblade , while they can be Poached for Charger Barding or a Cancer Gem. They are weak to Ice. Be sure to obtain five suits of Charger Barding from them in your trip through Ridorana Cataract, as they contribute to two Bazaar bundles. This shouldn’t be difficult, considering they’re common drop, steal and poach items.
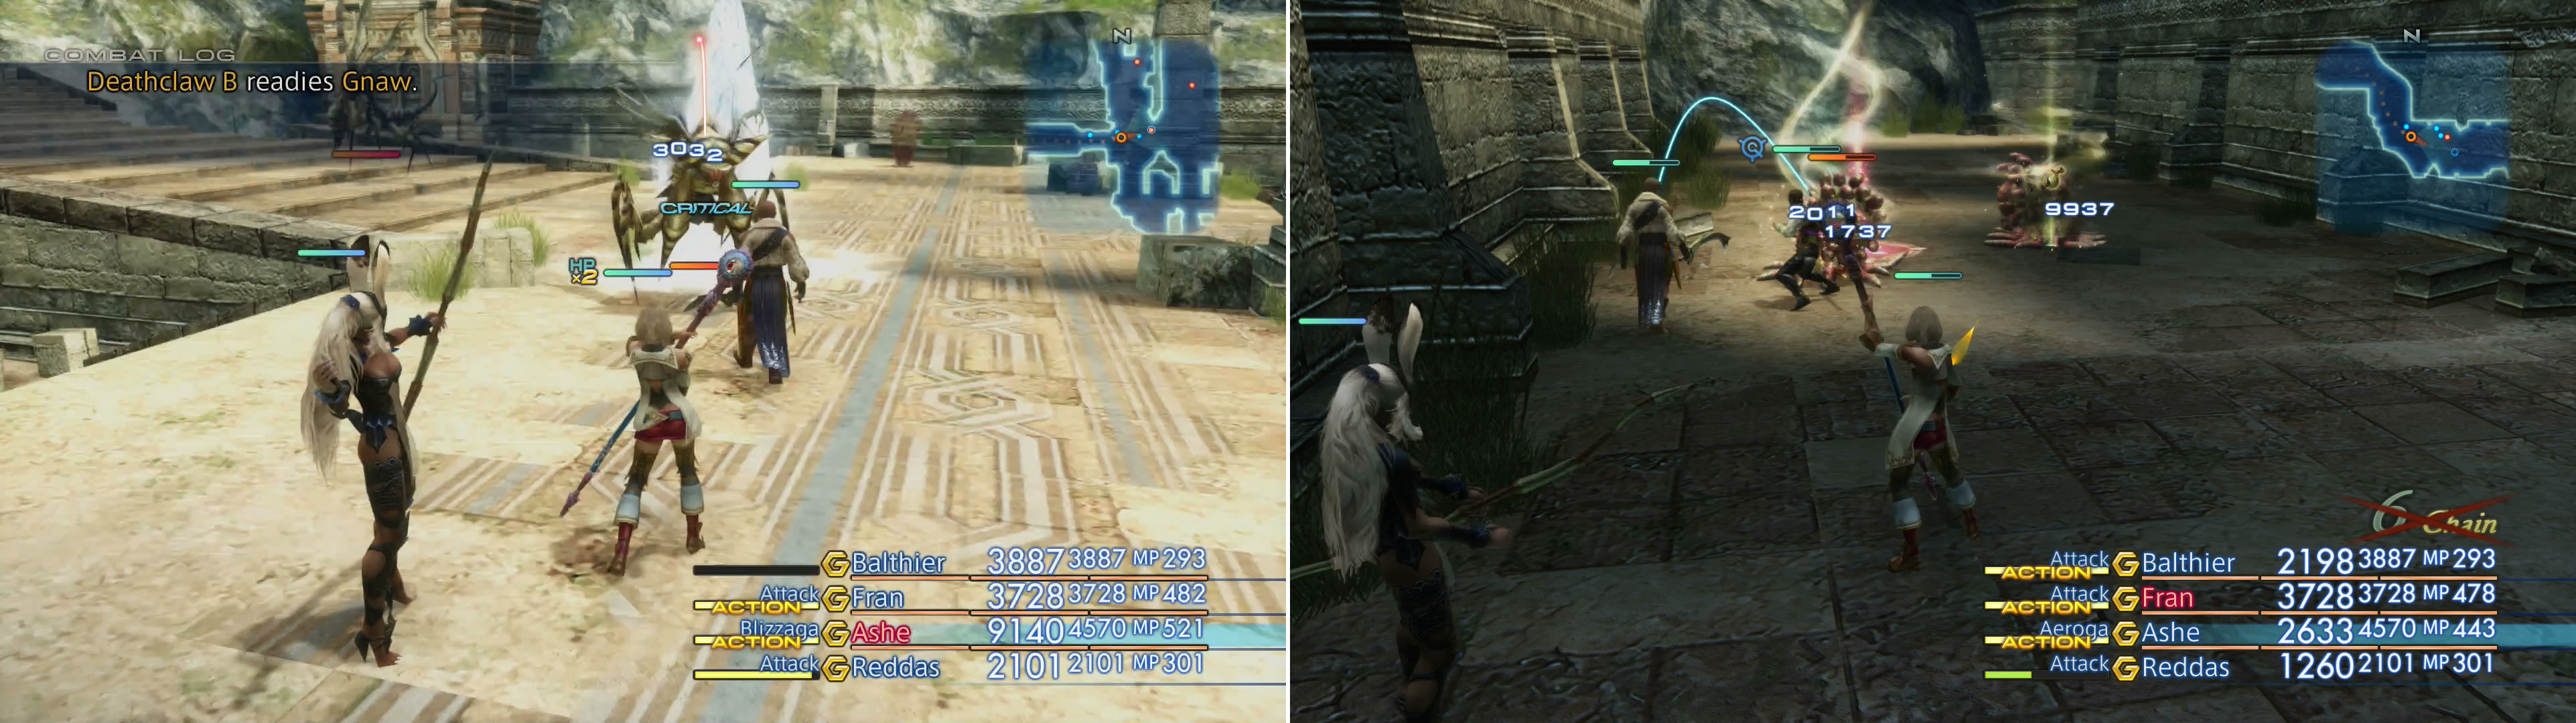
The Ridorana Cataract is infested with new critters, including the Deathclaw (left) and the Cassie (right).
Cassie :
Yet another palette-swap of the Malboro, the Cassie has all the annoying technicks the Vivian had - Bad Breath, Cloying Breath, Purify, Putrid Breath, Soul Etude and Time Requiem. They can drop an Earth Crystal, amphora of Bacchus’s Wine, a Malboro Flower or a Virgo Gem, you can steal a Malboro Flower, a Virgo Gem or a Chaperon , while they can be Poached for a Malboro Flower or a Ketu Board. They are weak to Wind.
The Ketu Board could be a chore to obtain from the Cassie, were it not a Monograph drop (Dragoon Monograph). Still, it’s pretty rare, and you actually have more of a chance to get one by Poaching, although given how much easier it is to rely on drops… just go for those. You can steal one during an encounter later on, but you need two, so endeavor to get one before continuing on.
Now that the monsters have been dealt with, onto the loot. Continue up some stairs to the east and pass between two pillars, after which turn north and head down more steps. Kill the Deathclaw here and note a trap to the northwest, beyond which is a chest. Carefully loot the chest and with any luck you’ll get some Cleric’s Robes . Return back up the stairs to the east, then turn north to find another chest near a pillar, inside of which you may find a Gigas Chestplate . Turn east and you’ll find some stairs going down - the central of three such short staircases. Descend them and search between the central and the eastern-most stairs to find another chest, which may yield a Gigas Hat. Can’t have the armor without the hat, right? Finally turn west and run along the stairs to find another chest near the western-most set of stairs, wherein you may find a Celebrant’s Miter.
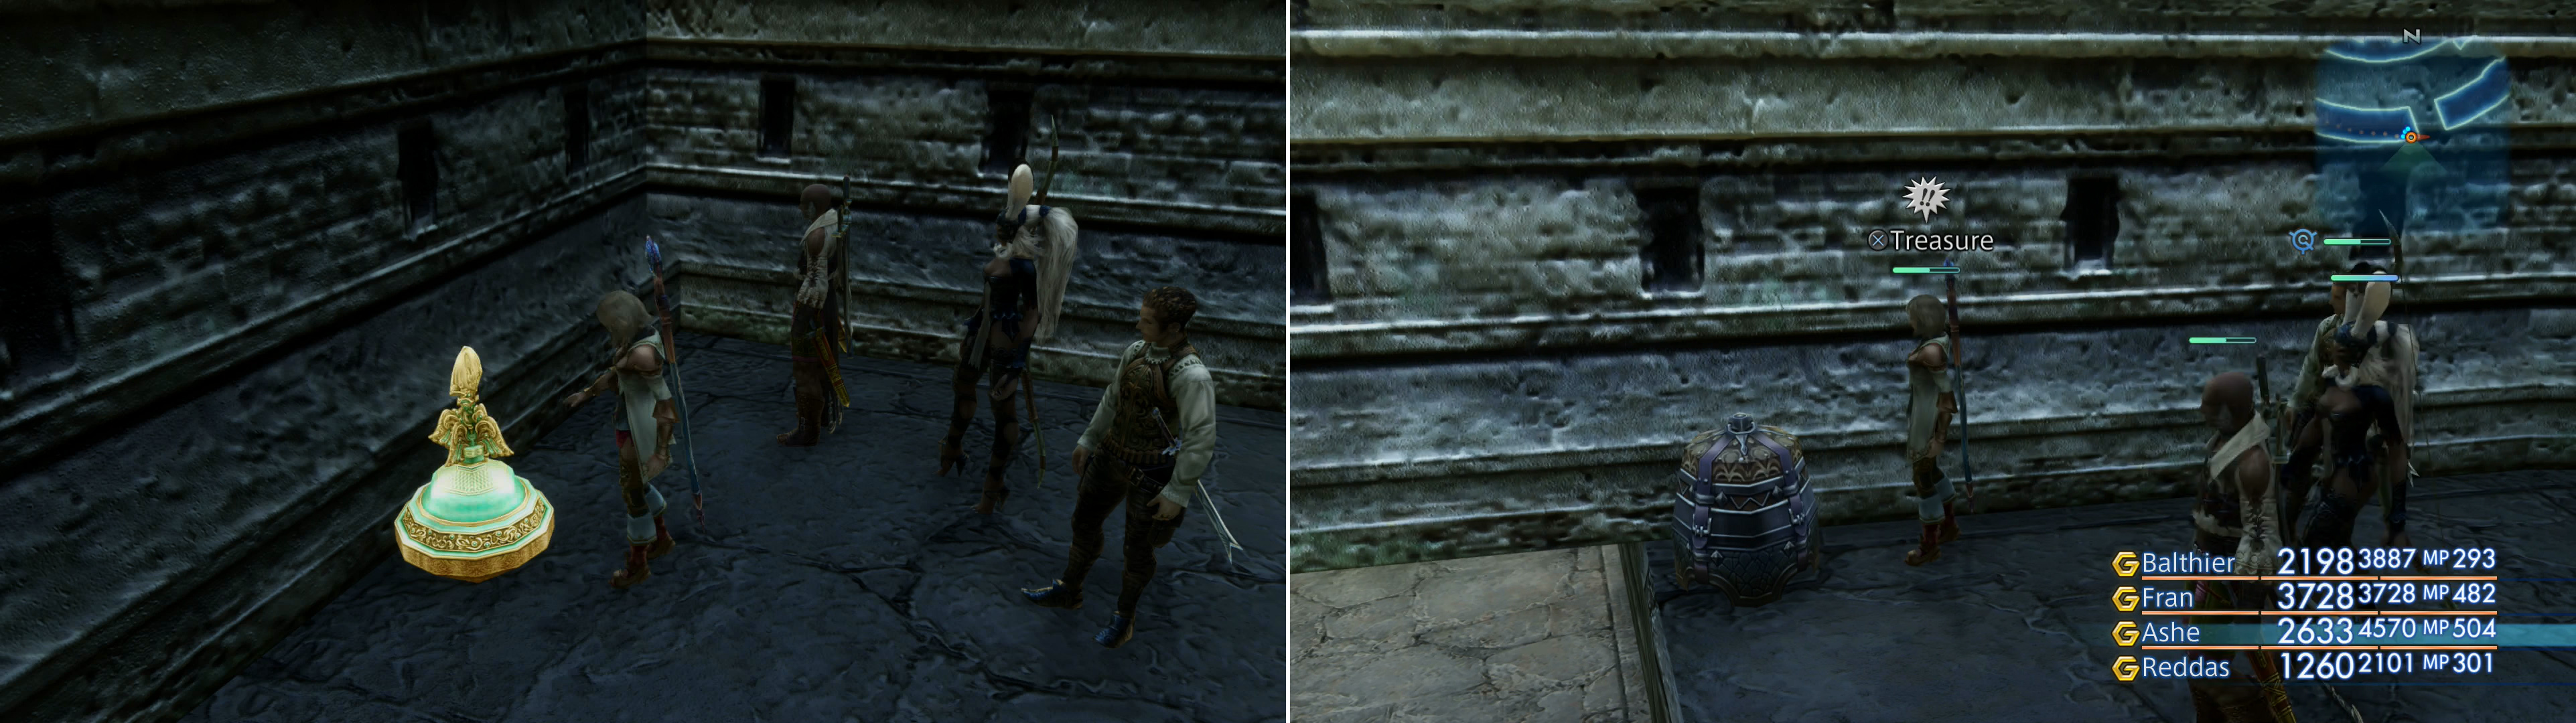
In the Colosseum area you can find a map of the Ridorana Cataract (left) as well as a bit of loot hidden away in the underwork (right).
Colosseum
Continue to the southeastern end of the area to find an area transition leading to the Colosseum area. When you arrive, continue east to find some stairs leading… well, to a colosseum. There are no foes up in the colosseum grounds (missed opportunity, right? Give it time), but plenty of traps. More importantly, off the sandy grounds of the colosseum are four tunnels leading under the seating areas.
Start out by heading south down some stairs, and when you reach a fork turn left (counter-clockwise) to reach a dead-end, near which are some stairs that are also blocked by rubble. On these stairs, however, you can find a chest, inside of which you may find an Ame-no-Murakumo . Backtrack to the fork and continue clockwise until rubble blocks your path, then head down a ramp to the southwest to find another fork. If you turn right (clockwise) you’ll find a chest that may contain a Greataxe while if you go left (counter-clockwise) you’ll find a chest which may hold a Holy Lance .
Return to the arena floor and this time head down a tunnel to the west and follow the linear passage beyond counter-clockwise, then down a ramp to the northeast. When you reach a fork, turn right (clockwise) until you reach another fork, with a broken section of wall to your left (southeast) wherein you may find a chest housing a Yoichi Bow . On the other hand if you continue heading down the passage clockwise to reach a dead-end where a chest resides. Plunder the chest and you may obtain a Save the Queen.
Make your way back to the Colosseum and finally take the northern passage, immediately reaching a fork after going down the stairs leading off the sand of the colosseum. Turn left (west) and continue a short distance until you find a ramp leading down to the northwest, which leads to another fork. If you turn right (northeast) you’ll find a decorative urn with the map of the Riordana Cataract in it. Grab it, then return back to the fork just off the colosseum’s northern stairs and continue north to reach the next area, the City of Other Days.
City of Other Days
You’ll begin this area - which links up with both the Colosseum and the Echoes of Time’s Garden areas - on the southern-most end. From where you appear head north down some stairs, then turn west down a corridor. Search the wall to the south to find a chest which will always gift you with a Pheasant Netsuke , but will not later respawn. Continue west, then north, following the linear path and heading upstairs, killing Cassies and Deathclaws as you go. When you reach the top of the stairs continue northeast and head north down another flight of stairs, after which turn east to find a chest containing a pair of Gillie Boots near the northeastern corner of this depression. This chest will not respawn.
That’s really all there is to see in this area, as far as loot goes. That being the case head back up the stairs to the south and continue southeast to reach the area transition to the next area, killing any monsters in your path. Speaking of which… there is one more thing you can do in this area before moving on for good. If you clear all the enemies out of this area, you’ll spawn the Rare Game Pallicant. So make your way back west and continue to the western end of the level (near the area transition to the Echoes of Time’s Garden area), then make sure nothing else respawned. When the place is cleared, exit the area and immediately return and make your way to the center of the area (where the stairs running north from the Colosseum connect to the larger walkway running through the area). Here you should find Pallicant waiting for you.
Pallicant :
Appearing to be some advanced form of Nightmare, Pallicant, like it’s more common brethren, is fond of blinking in an out of existence, teleporting as it does so. It’s got a great deal of hostile magicks to throw at you, including Aeroga, Aquaga, Blindga, Blizzaga, Firaga, Slow, Stop, Toxify and Thundaga. Its technicks are quite a bit more limited, consisting only of Kick and Snake Lash (chance to inflict poison to all enemies surrounding it). Cast Shell on every character and use Wind-elemental magicks and weapons (the Ame-no-Murakumo and Zwill Crossblade work wonders) and you should have little trouble whittling down its 50,000 HP. It can drop a Grimoire Togail, or a Scorpio Gem, you can steal a Gastrophetes (Crossbows 4) from it, and it can be Poached for a Pebble or a Snowfly. It is, of course, weak to Wind, and absorbs Earth.
Path of Hidden Blessing
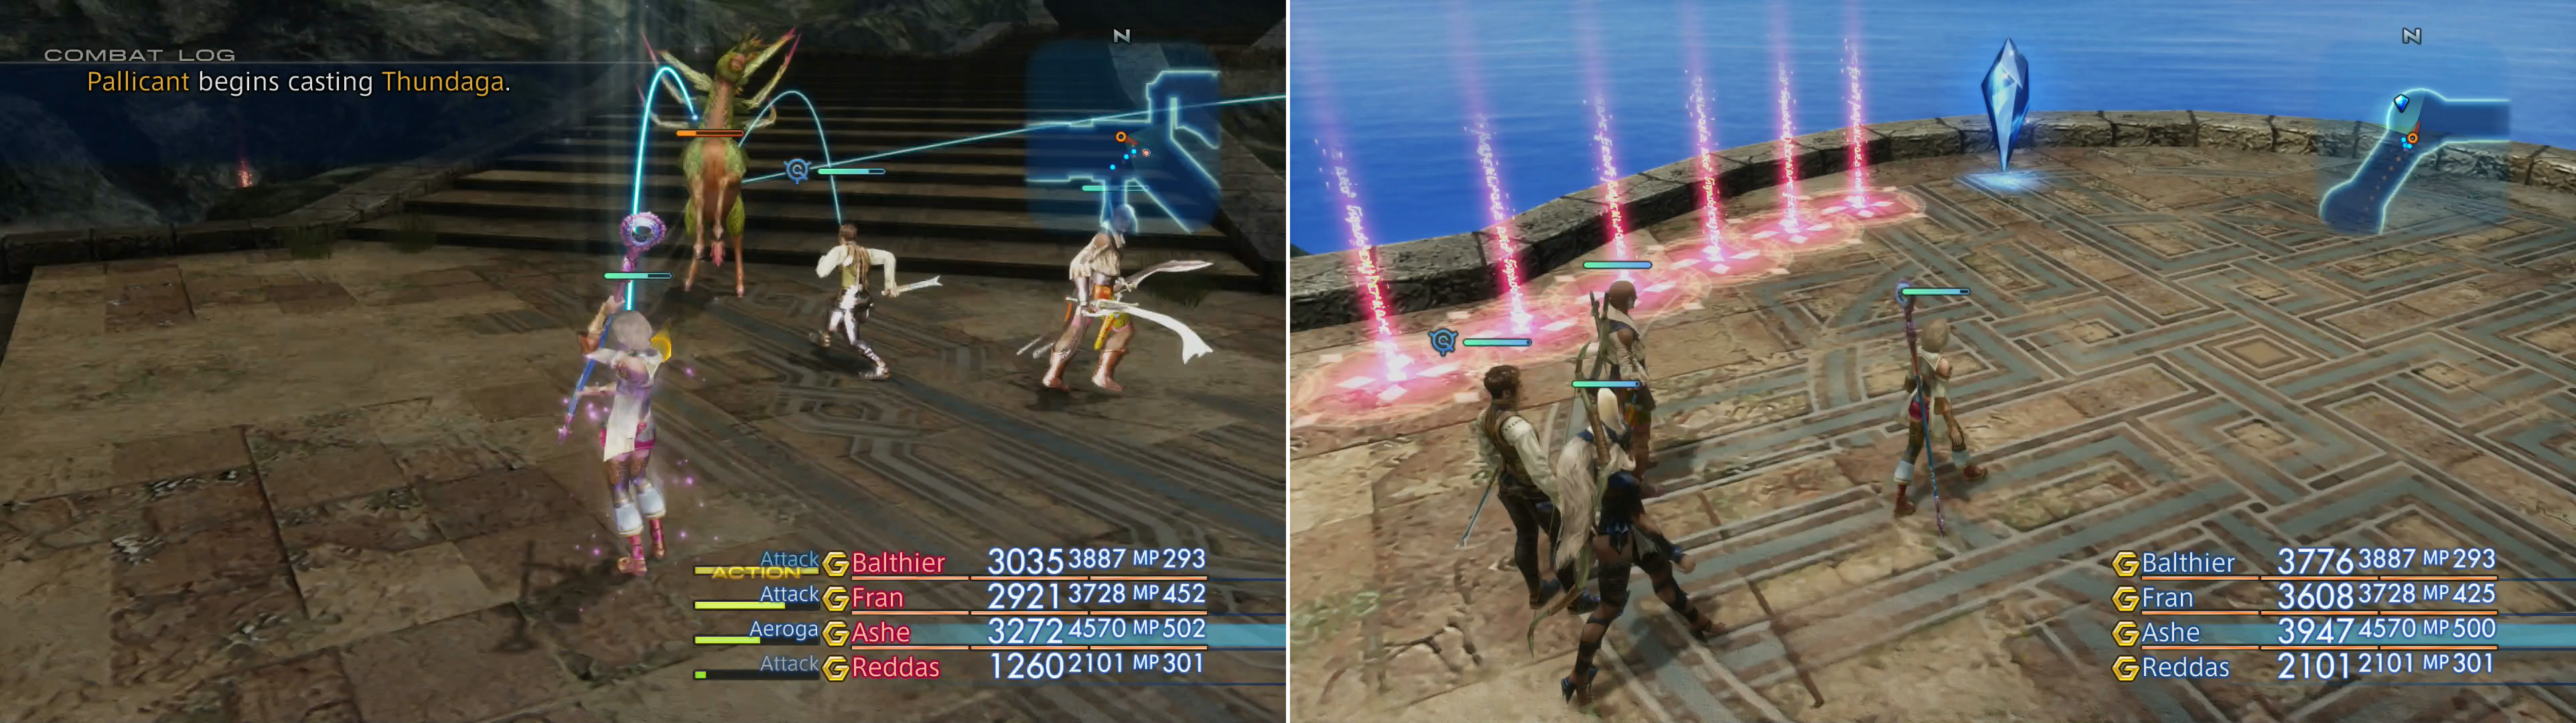
Clear all the monsters in the City of Other Days and the Pallicant will spawn (left). The last obstalce in the Ridorana Cataract are a series of traps before a Save Crystal - a reminder to keep Libra active! (right)
Now that you’ve picked on Pallicant, continue to the eastern edge of the City of Other Days area to find the transition to the next zone. Cross it to reach the Path of Hidden Blessing, which consists of little more than stairs leading up to a Save Crystal, in front of which are a line of nasty traps. Likely a warning to players who, for some reason, haven’t been keeping Libra in constant use. Save your game, then continue up the stairs to the east to find a chest, which always contains a Sweep (Poles 6). Neat. Grab it, then continue east to reach the area transition leading to the Pharos at Ridorana. Pharos, for short.

 Sign up
No Comments