
Messing with MyCastle XVIII
The final upgrade for the Einherjar Shop is now available, which will unlock more unique and stock characters for you to buy clones of, should you need to replenish your ranks. If you found the last battle challenging, you might want to spend some time grinding. That’s the beauty of the Birthright path of the game, after all, and it’s not going to get any easier from here on out. Getting your promoted units up to around level ten will put you on par with the enemy you’ll be facing soon.
Castle: Training Grounds
| Location | Objective |
|---|---|
| Castle: Training Grounds, Nohr | Defeat the boss. |
| Enemies |
|---|
| Berserker |
| Hero |
| Great Knight |
| General |
| Sorcerer |
| Wyvern Lord |
| Malig Knight |
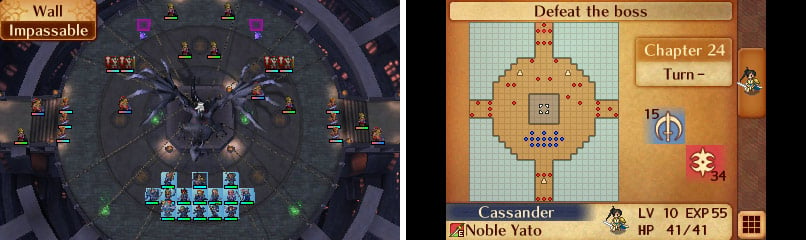
Map of Chapter 24.
You’ll rejoin the Hoshidans as they navigate the tunnels that will deliver them unto sweet, sweet regicide. Naturally, the protagonist will suggest you hold back some power as an excuse to explain why your entire army isn’t at your side, and set the stage for the next battle. Unfortunately, you surface at the exact worst spot (so much for sneaking in and dispatching Goran quickly and cleanly, eh?), but this does give you the chance to gain some long-delayed revenge…
This map has you facing… you guessed it, a wide variety of promoted Nohrian staples, including Berserkers, Sorcerers, Generals and Heroes, all led by Hans (Berserker). The foes and their tactics aren’t new, but these baddies are at higher levels than the last map, and you’re going to be in a wide open field. Not exactly to your advantage right now. To add further difficulty, everyone starts on extreme opposite ends of the map far away from each other!
Fortunately the environmental effects are toned-down this time, you need only fear a pair of Fire Orbs north of your starting position. These are relatively weak, but their position definitely serves to arm some Sorcerers nearby, who can then harass a massive area. A third Fire Orb waits south of your starting position, only guarded by a General and a Sorcerer, and it should probably be your first goal. This also nets you a Venge Naginata and 10,000G , dropped by the General and Sorcerer, respectively.
You won’t get long to enjoy your victory, though, as units from the sides of the map will start to close in on you. It should be noted that fliers can operate around this map with impunity, since the enemy has no bow-wielding units at their disposal. You might want to fall back to the south to put some distance between the more aggressive units to the east and west, and let the aggressive ones detach themselves enough to be defeated in detail. Once these forces are routed, you’ll find yourself in possession of an Arms Scroll and a Wyrmslayer , not to mention you’ll be well on your way to victory.
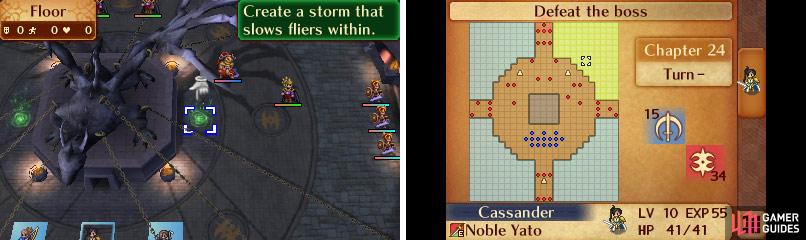
Four Veins activate four corners (one corners’ range is shown in yellow).
Now, you may be wondering two things: what about reinforcements, and what are those Dragon Veins for? They’re connected, you see. Shortly into the fight you may start seeing reinforcements in the way of Heroes and Sorcerers on the western and eastern ends of the map, respectively, and Wyvern Lords and Malig Knights to the southwestern/northeastern and southeastern/northwestern corners, respectively. Using the Dragon Veins here summons up storms that slow fliers down to the point where they may likely not even make it into the fray. Or at least, it’ll buy you plenty of time. Flying reinforcements will be spawning constantly, so make sure those storms are up.
Once the fliers have been impeded and the units along the eastern and western end of the map are gone, you need to focus on the Fire Orb Sorcerers to the north, who can be rushed, and the Berserkers attending Hans, who can be lured away and dealt with individually. As for Hans, he follows the early-game boss pattern of having a tiny movement range, and refusing to move until you attack him. This allows you to easily mass outside of his reach and dispatch him by rushing with ranged units. You’ll get a Chakram for your efforts.
After the battle…well…no spoilers!

 Sign up
No Comments