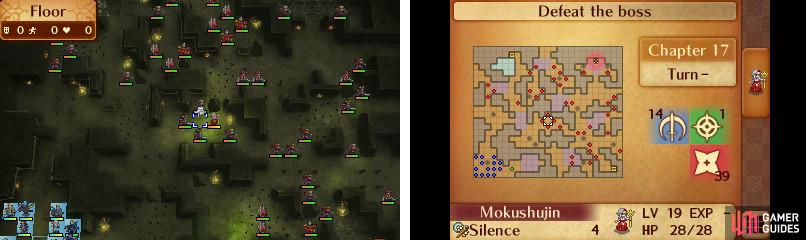
Map of Chapter 17
| Location | Objective |
|---|---|
| Cave in Mokushu | Defeat the boss. |
| Enemies Present |
|---|
| Samurai |
| Swordmaster |
| Ninja |
| Master Ninja |
| Automaton |
| Mechanist |
Two words: Ninjas. Everywhere . With their high speed and accuracy, they’re basically guaranteed to double-attack your units, and never miss. They have high resistance, but low defense. And the biggest reason they can become very painful is because Shurikens debuff your units. Once you get debuffed, other Ninjas love to gang up on you, laying on the hurt.
There are quite a few promoted enemies here as well (enemies that have hit an advanced class). So they have highly inflated stats. Play it safe, pair up, and never send out a unit alone.
On top of the quick, high Resistance units, Caltrops are scattered across this map. These tiles slow down movement, decrease Avoid, and do damage to any unit on them at the end of the turn. Units with Locktouch will not suffer any negative effects for stopping on Caltrop spaces. In addition, those units can use the “Clear” command to clear the traps. Since most of the enemy units have Locktouch, the Caltrops are meant to hinder you . However, Saizo is a temporary ally on this map, and he will happily disengage traps for you.
Saizo will continuously attempt to head to enemy Caltrops areas and disarm the traps. He will also fight with whoever gets in his way and he is rather strong, able to take out or nearly take out almost every enemy. It is a good idea to make sure allies follow Saizo as he travels, taking out enemies so he doesn’t steal all of our potential experience, but can still protect you. As a bonus, you can send slightly weaker units along to take out any enemies that Saizo may nearly kill but merely soften up for you instead.
Scattered on the map are numerous Dragon Veins. Activating them will change out pillars throughout the map, blocking and opening up areas. While you’ll need to play with these to access the northern chest, you will primarily use them to block certain groups of enemies, letting you take out groups of enemies in manageable numbers. They will also be useful in prolonging Saizo’s mission to disarm all the Caltrops. If a Dragon Vein is used and his current path to the next Caltrop is blocked, he will backtrack to take the quickest route possible at that point. Be sure to not block off your units! If that happens you might want to consider restarting the chapter, especially if they’re weak and surrounded by Ninjas.
This battle is best fought with patience. Also be prepared to use ranged units to take care of enclosed Ninja and Master Ninja. Send a group of units north from your starting point to take care of the units coming down towards you, then move them towards the center to take out the enemies in the northern chamber. With your other units, send them east. Your eastern team will need to be beefier, as it will get the bulk of the reinforcement rush. Position yourself carefully and heal as you endure.
The first time you will trigger the reinforcements is when you move into the southernmost chamber, as you head east. This will spawn a group of three enemies from the south, which is very close to where you might be, as well as three northwest enemies. Those northwest enemies can be blocked off using the environment but the southern enemies you’ll need to deal with immediately.
Take your eastern team north far enough and you run into the second set of reinforcements. This is triggered by just heading far northeast, towards the boss. This second wave of enemies includes three from the east (again, close to you) and three from the north. Your northern team can block and take these enemies out fairly easily while sending a unit to the south to kill off that pesky Shrine Maiden and the remaining foes.
After you clear up all the reinforcements and have the boss chamber remaining, don’t forget to open up the two chests! The top chest holds 5000 Gold , while the bottom chest holds a Master Seal .
Work your units towards the boss chamber and defeat the two Master Ninja, avoiding Kotaro’s range. Make sure your attacking units are suitable to fight Kotaro: his speed is going to put a lot of slower units to shame…and maybe even defeat them. However, like many bosses, Kotaro does not move and thus you can send someone in to deal damage during his turn, then move them out to heal. Azura’s Singing will work well here. If Saizo makes it to the boss chamber, he will also engage Kotaro (with some special dialogue to boot). You can use this to your advantage, letting Saizo soften up the boss so you can come in for an easy kill.
If Saizo is defeated at any point, you won’t lose, so don’t worry. But if he survives through the battle, he will leave you a Speedwing as a token of appreciation.

 Sign up
No Comments