

| Banuk Figurines |
|---|
| Banuk Artifact - I Name You |
| Metal Flowers |
|---|
| Metal Flower - Mark I (I) |
| Metal Flower - Mark I (J) |
| Training Dummies |
|---|
| Training Dummy XXI |
| Training Dummy XXII |
| Vantage Points |
|---|
| Vantage - Bridal Veil Falls |
Meeting Marea
Return to Mother’s Crown and talk to Marea, who will comment on your most recent exploits (her response to you varies depending on whether you’ve completed “Revenge or the Nora” or not) before getting down to business. Aloy asks about Meridian, only to be told that the Carja have sealed the border due to concerns about the corrupted machines lurking in the valley to the west. You’ll need to clear that corruption if you want to gain access to Carja land, and in fact, you may have already accomplished this task.
If you bee-lined this quest without exploring the map, the objective will update directing you to clear out two of the Corrupted Zones in the valley to the west, but in fact clearing out any two Corrupted Zones will do. Why the Carja would care about Corrupted Zones far away from their own borders is anyone’s guess, but apparently they do.
You can also ask Marea about some geography to learn about a forsaken village, Daytower, and Carja land beyond. She’ll also mention the one bastion of civilization between Mother’s Crown and Daytower, the watering hole of Hunter’s Gathering. She’s not above talking politics, either, pointing out that the valley to the west used to be Nora land, but after years of Red Raids by the Carja it has been left as neutral territory, a buffer between the two tribes.
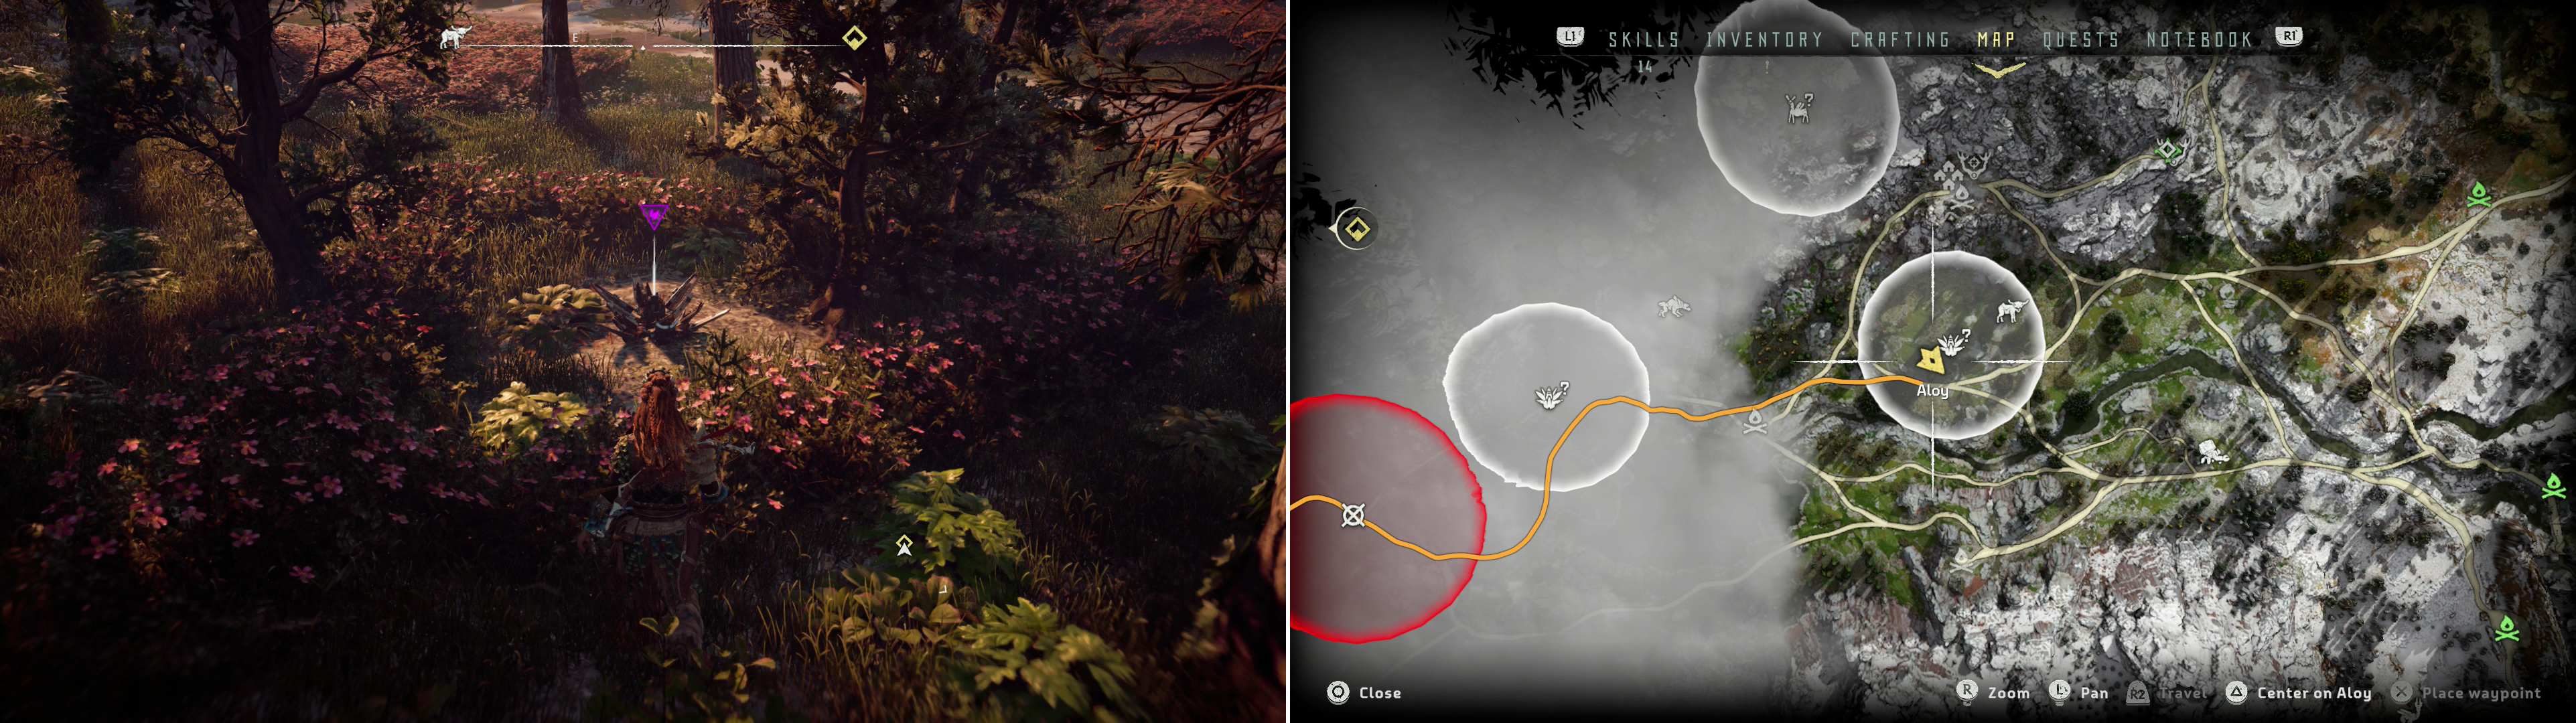
You’ll find Metal Flower - Mark I (I) (left) at the location indicated on the map (right).
Metal Flower - Mark I (I)
Exit out Mother’s Crown’s northern gate and pass by the Campfire and turn northwest and west as the trail dictates. Pass by a watch tower, then cross a bridge to the west and when you reach a fork (west of which is a Shell-Walker Site) turn northwest. Drop off a ledge and cross a stream and continue to the northwest until the road you’re on bisect another road just south of the Valleymeet Hunting Grounds. From here continue west until you come to another fork, which is where your interest in roads of any sort temporarily ends.
Instead, continue west into the grass, where you’ll find a Broadhead Site. There are numerous machines prowling about, both herbivore-mimics and Watchers, and they really should be thinned out before you get to the task at hand. Once you’re not in as much dangers of being pestered, make your way southwest of the Broadhead Site icon on your map to find a Metal Flower icon. Southwest of here you’ll find a scattering of trees west of a large rock, near which grows the tell-tale flower triangle that marks the site of a Metal Flower. Search the area to find Metal Flower - Mark I (I) .
Hunters Gathering
Make your way back northeast to the fork in the road, then follow the road northwest into the mountains to find the settlement of Hunter’s Gathering. Despite Aloy’s musing back in Mother’s Crown, there’s little information to be had here - you can talk to a woman named Gera, have a drink, and learn about the Oseram, Nora and the two types of warring Carja. While enlightening, it has little bearing on the tasks at hand.
There’s also a merchant and a Campfire to see to your needs here, as well as some Supply Crates to loot, but the most interesting things here are probably the Training Dummies. You’ll find Training Dummy XXI northeast of the merchant and Training Dummy XXII northeast of Gera.
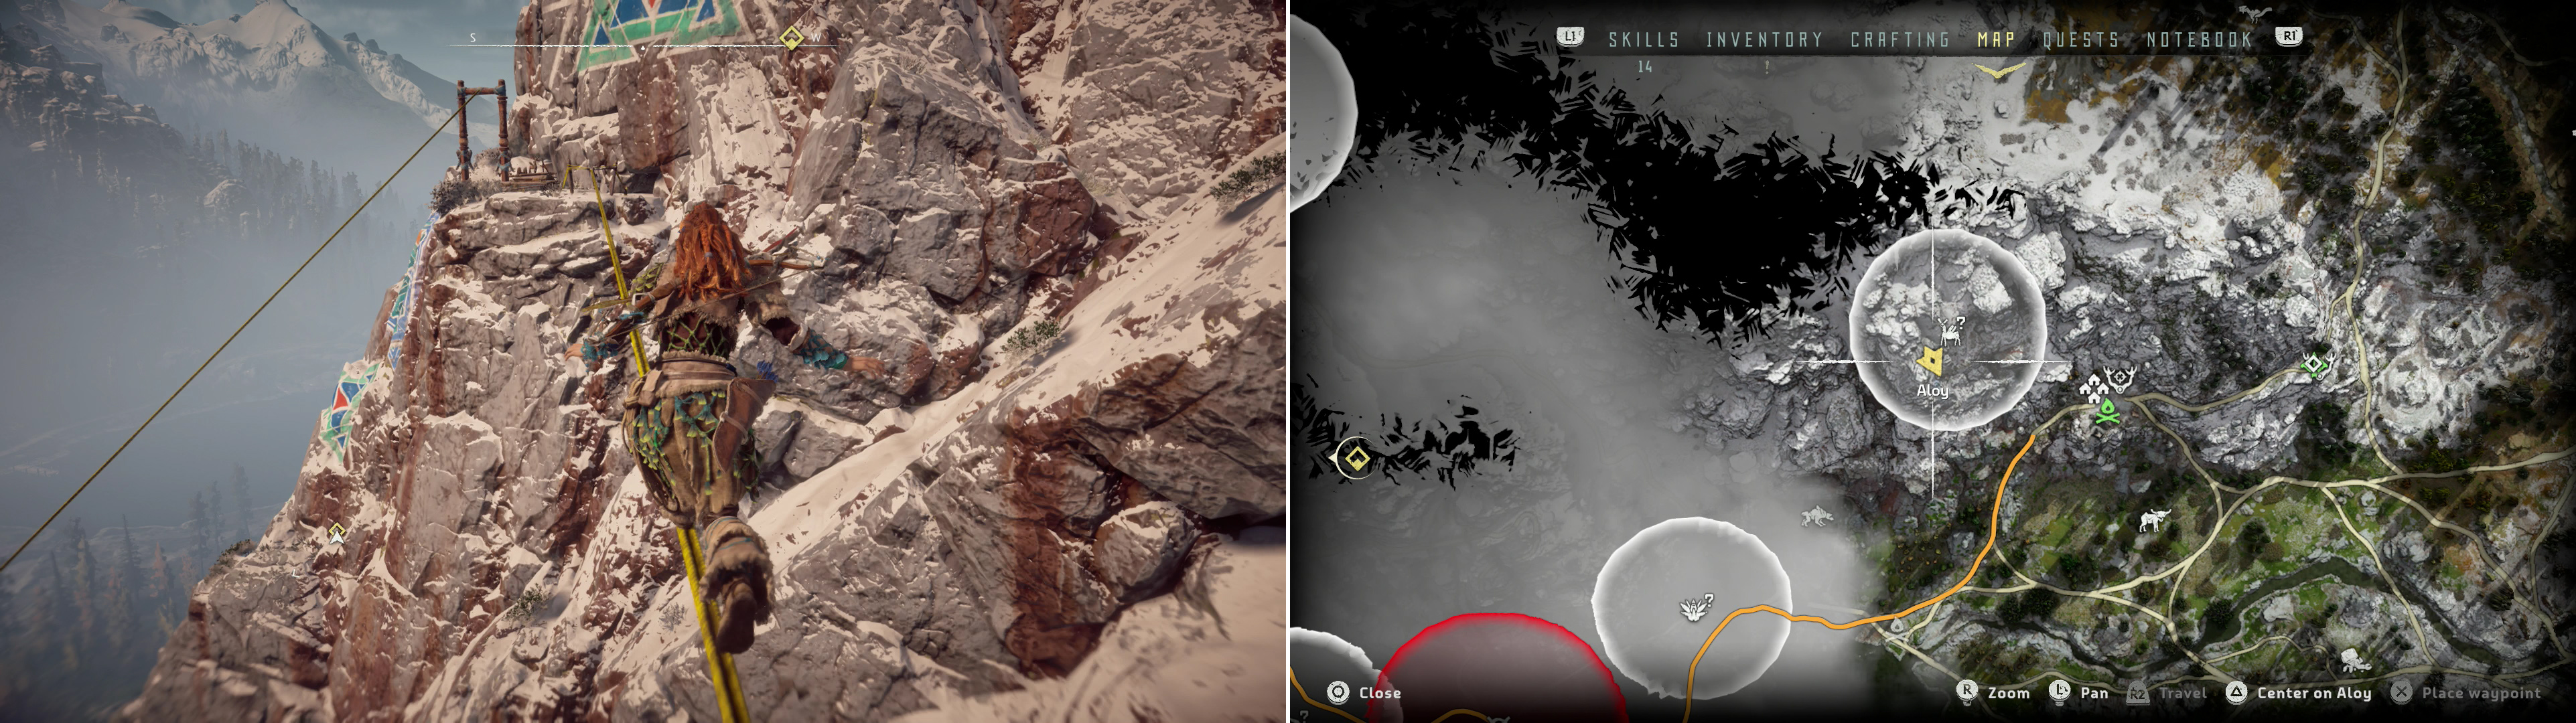
Brave a variety of obstacles to reach the Banuk Artifact - I Name You (left) at the location indicated on the map (right).
Banuk Figurine - I Name You
Near Training Dummy XXII, northeast of Gera, you’ll also see the signature Banuk painting on the cliffs, and sure enough there’s a pole you can climb nearby. Do so and scale the rocks nearby, then turn northeast to find the end of a zipline, and just beyond it, in a crevasse, you’ll find some hand-holds you can use to ascend. Climb the cliff and when you reach the top you’ll be at a taut rope you can cross, which will deposit you near the Banuk Figurine “Banuk Artifact: I Name You” . Grab it, then use the zipline to return back down the mountain.
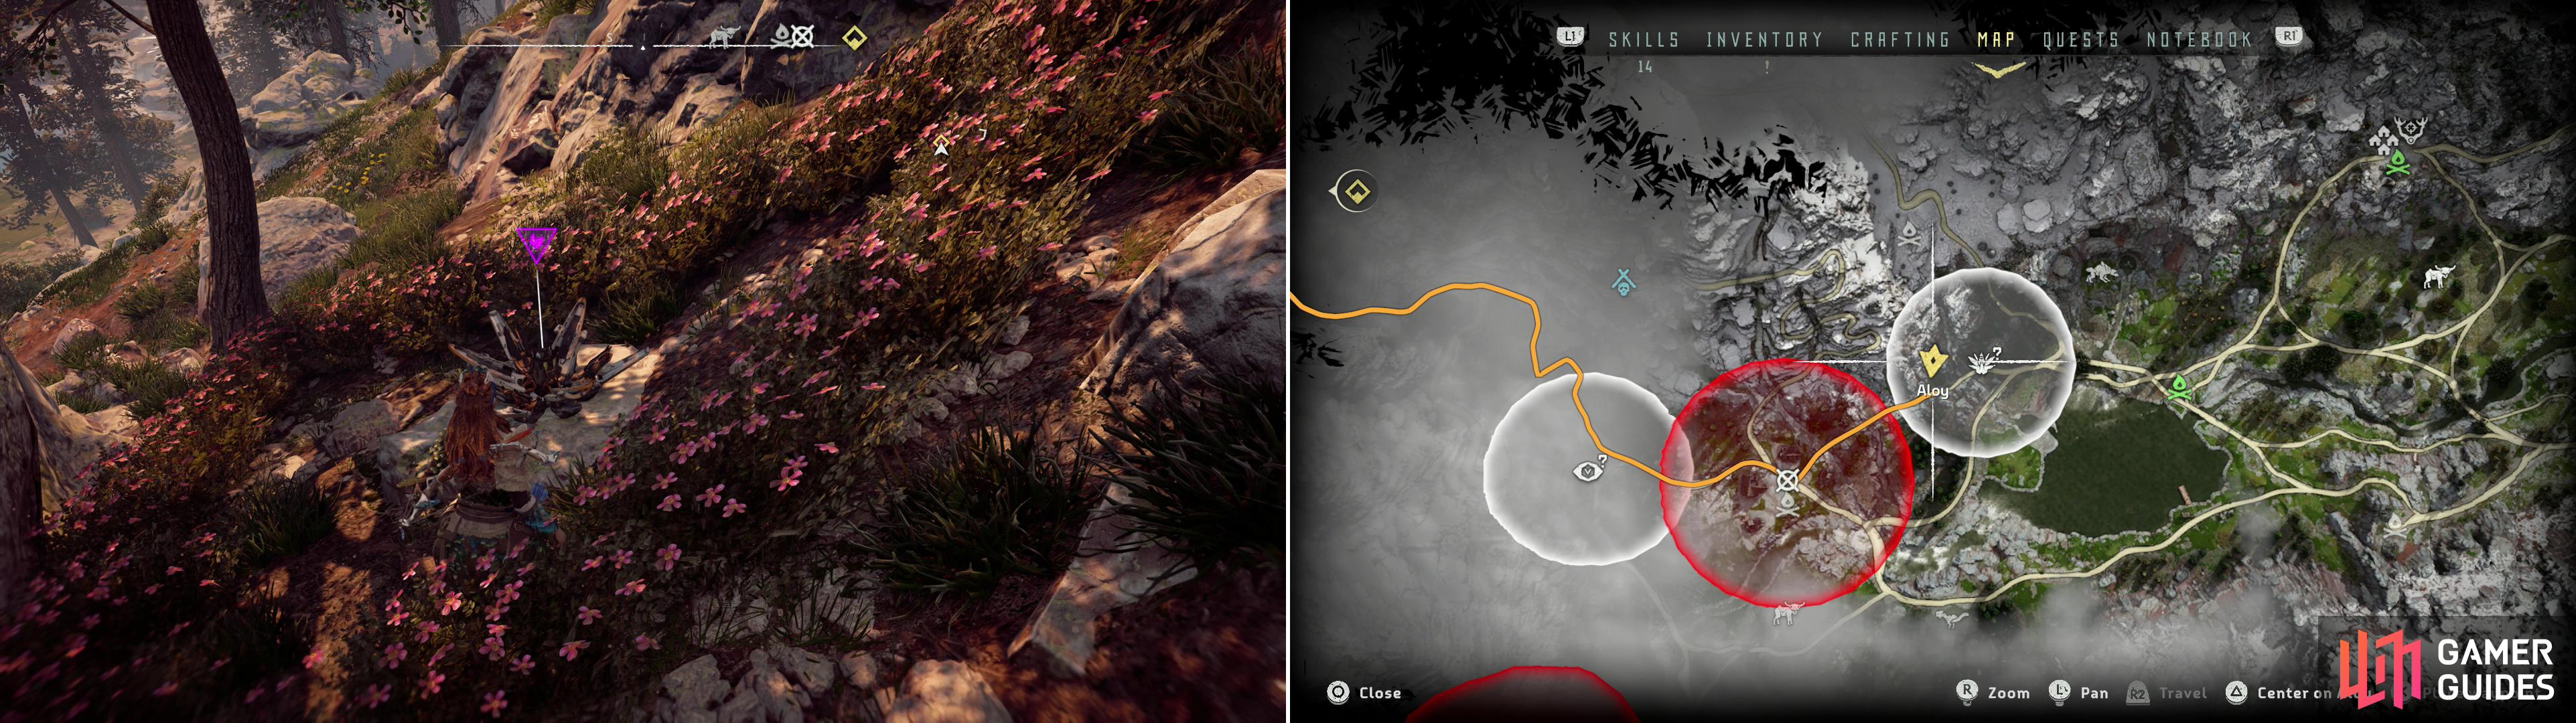
Grab Metal Flower - Mark I (J) (left) as indicated on the map (right).
Metal Flower - Mark I (J)
Return southwest to Hunter’s Gathering and exit the settlement opposite the direction you entered, then follow the road downhill to the southwest. The road will turn south before leading to a fork, at which continue southwest, then west to reach a Campfire. From here you can head southeast across a bridge and up a hill to find another Campfire, but aside from map completion, there’s no reason to bother with this.
From the previous Campfire, then, head west across a bridge to find two Sawtooths prowling about. By now, you should have no trouble dismantling or evading these machines, so do so, then continue in a westerly direction to a fork, at which point head uphill to the west, then cross a bridge to the southwest. After you cross the bridge turn uphill to the northwest to find Metal Flower - Mark I (J).
Corrupted Zone
Grab the Metal Flower and continue down the road to the southwest to reach a Corrupted Zone, where you’ll find several machines (Corrupted Watchers and Corrupted Scrappers) prowling about a village. The patches of tall grass here aren’t large, but they’re numerous, and should provide more than enough cover for you to Silent Strike your way to victory. As a bonus, if you haven’t cleared enough Corrupted Zones yet for “A Seeker at the Gates”, this will, of course, count towards it. Even if you have completed enough Corrupted Zones, Aloy will comment afterwards as if the matter was still in dispute.
| Objective | Rewards |
|---|---|
| For destroying the corrupted machines | 5,000 XP |
Vantage Point - Bridal Veil Falls
Exterminate the machines, then follow a road west and northwest until you reach a fork with a “Daytower” sign stone. From here, continue west to reach some cliffs, which you can search to find some hand holds (look for white ledges, not yellow rope). Climb your way up the cliffs to find the “Vantage Point - Bridal Veil Falls” , which is southwest of the Vantage Point icon on your map. Scan the Vantage Point to log it, play back the vantage audio, then loot the Supply Crate and climb back down the cliffs. This should be final Vantage Point in set #1.

Shoot Longleg machines in their rear-mounted Power Cells (left) to cause an impressive explosion (right).
Corrupted Zone
Find a road running along the edge of the cliff and follow it southeast until you find a merchant an a Campfire at a fork. The merchant sells nothing new, but you can drop off excess treasures here, if you wish. Continue south, then southwest from here to find the final Corrupted Zone in the area, which features two Corrupted Longlegs and a Corrupted Scrapper. Eliminate the annoying Scrapper first with Lure Call and Silent Strike, or, if you’re ambitious, try to shoot its Power Cell from stealth to cause a lightning explosion. In fact, if you can hit one Power Cell on any of the machines, and they’re close enough together, you can end up disabling all of them, leaving them sitting ducks for more strikes on their Power Cells. Your War Bow, some Shock Arrows, and some tall grass is all you really need to clear this place out.
| Objective | Rewards |
|---|---|
| For destroying the corrupted machines | 6,000 XP |

 Sign up
No Comments