

| Ancient Vessels |
|---|
| Ancient Vessel - Miriam |
| Ancient Vessel - USRC |
| Text Datapoints - World |
|---|
| Chocolate Box Log |
| To All Jessifans |
| Luna Here I Come |
| All the Same |
| China-Sick |
| Vantage Points |
|---|
| Vantage - Sterling-Malkeet Amphitheater |
| Vantage - Denver Stadium |
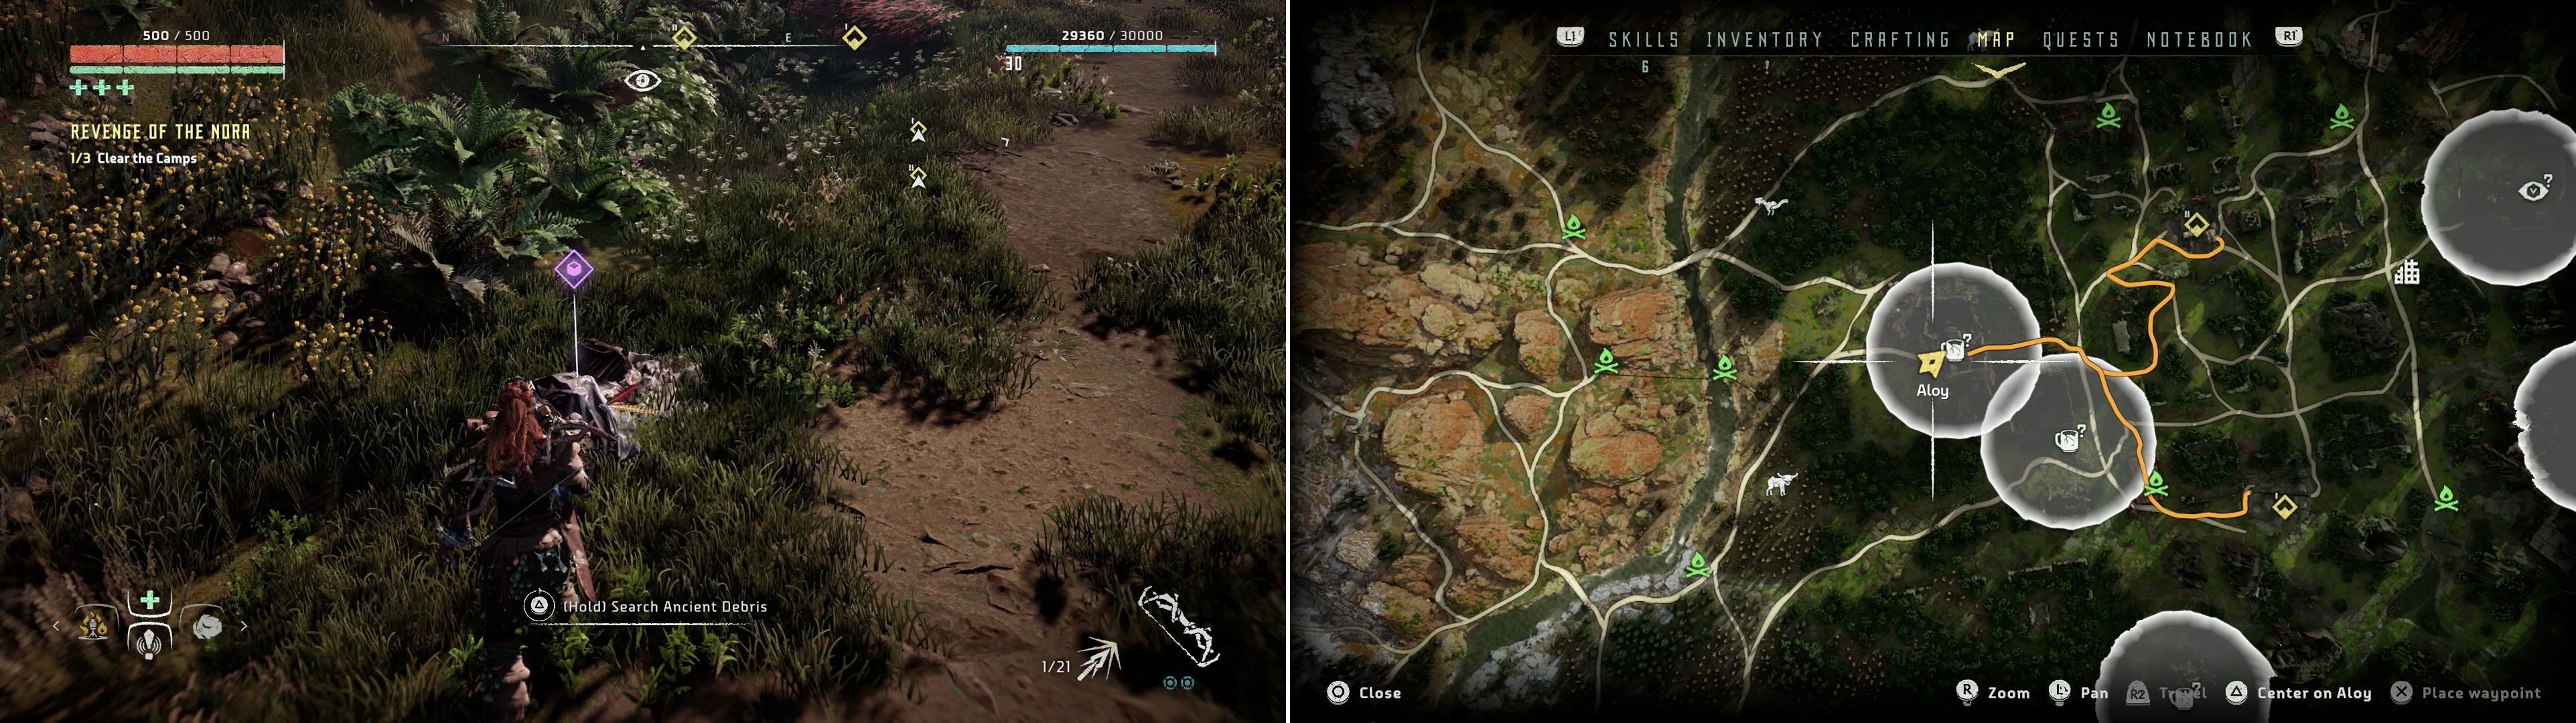
When you’re done questing and exploring the area south of Mother’s Crown, it’s time to turn your attention back north, and what better vehicle than a main quest to give you the motivation you need? Specifically, it’s time to follow up with Sona and start the quest “Revenge of the Nora”.
From Mother’s Crown you’ll want to head north to the Campfire near (southeast of) Cauldron SIGMA, near which the quest “Undereqipped” started. From there head uphill along a road through the mountains to the northeast, being wary of numerous large, dangerous machines as you go. It’s not impossible to face some Shell-Walkers, a pair of Sawtooths and a Fire Bellowback (among other, lesser robots) along the way. You’ll pass near a Strider Site and a Bellowback Site as you go, and southeast of the Strider Site you’ll find Campfire.
Corrupted Zone
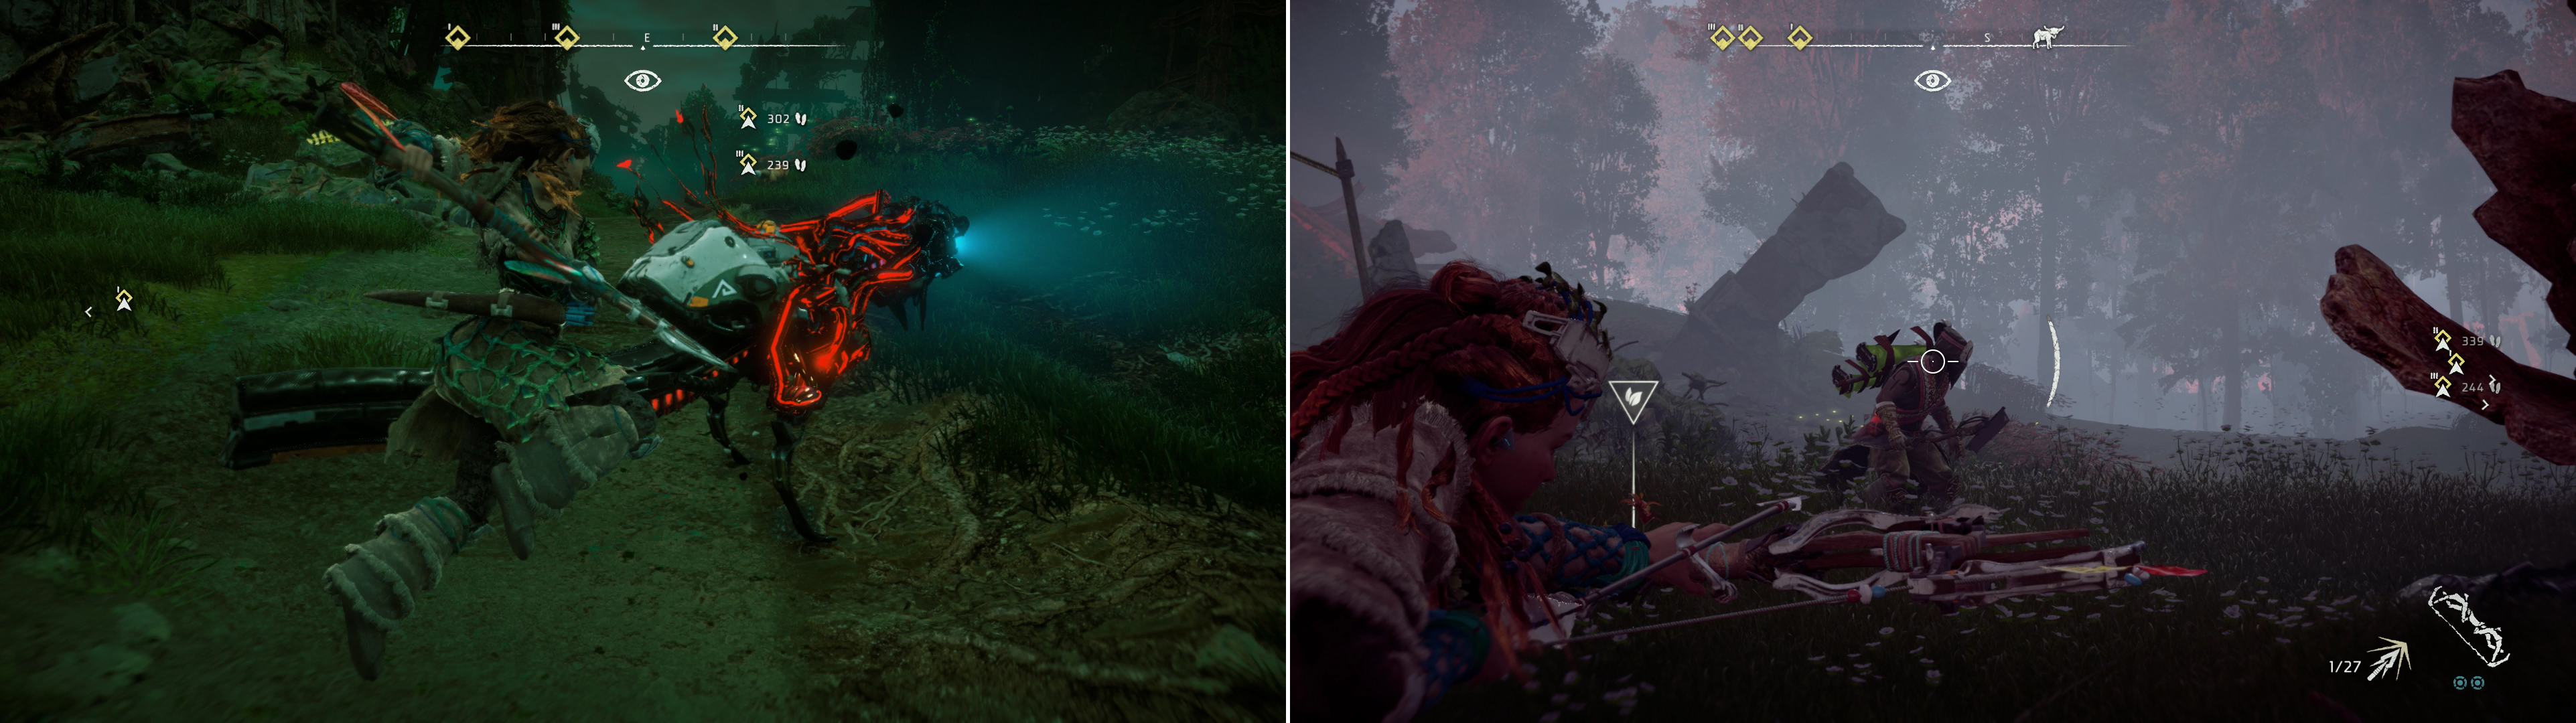
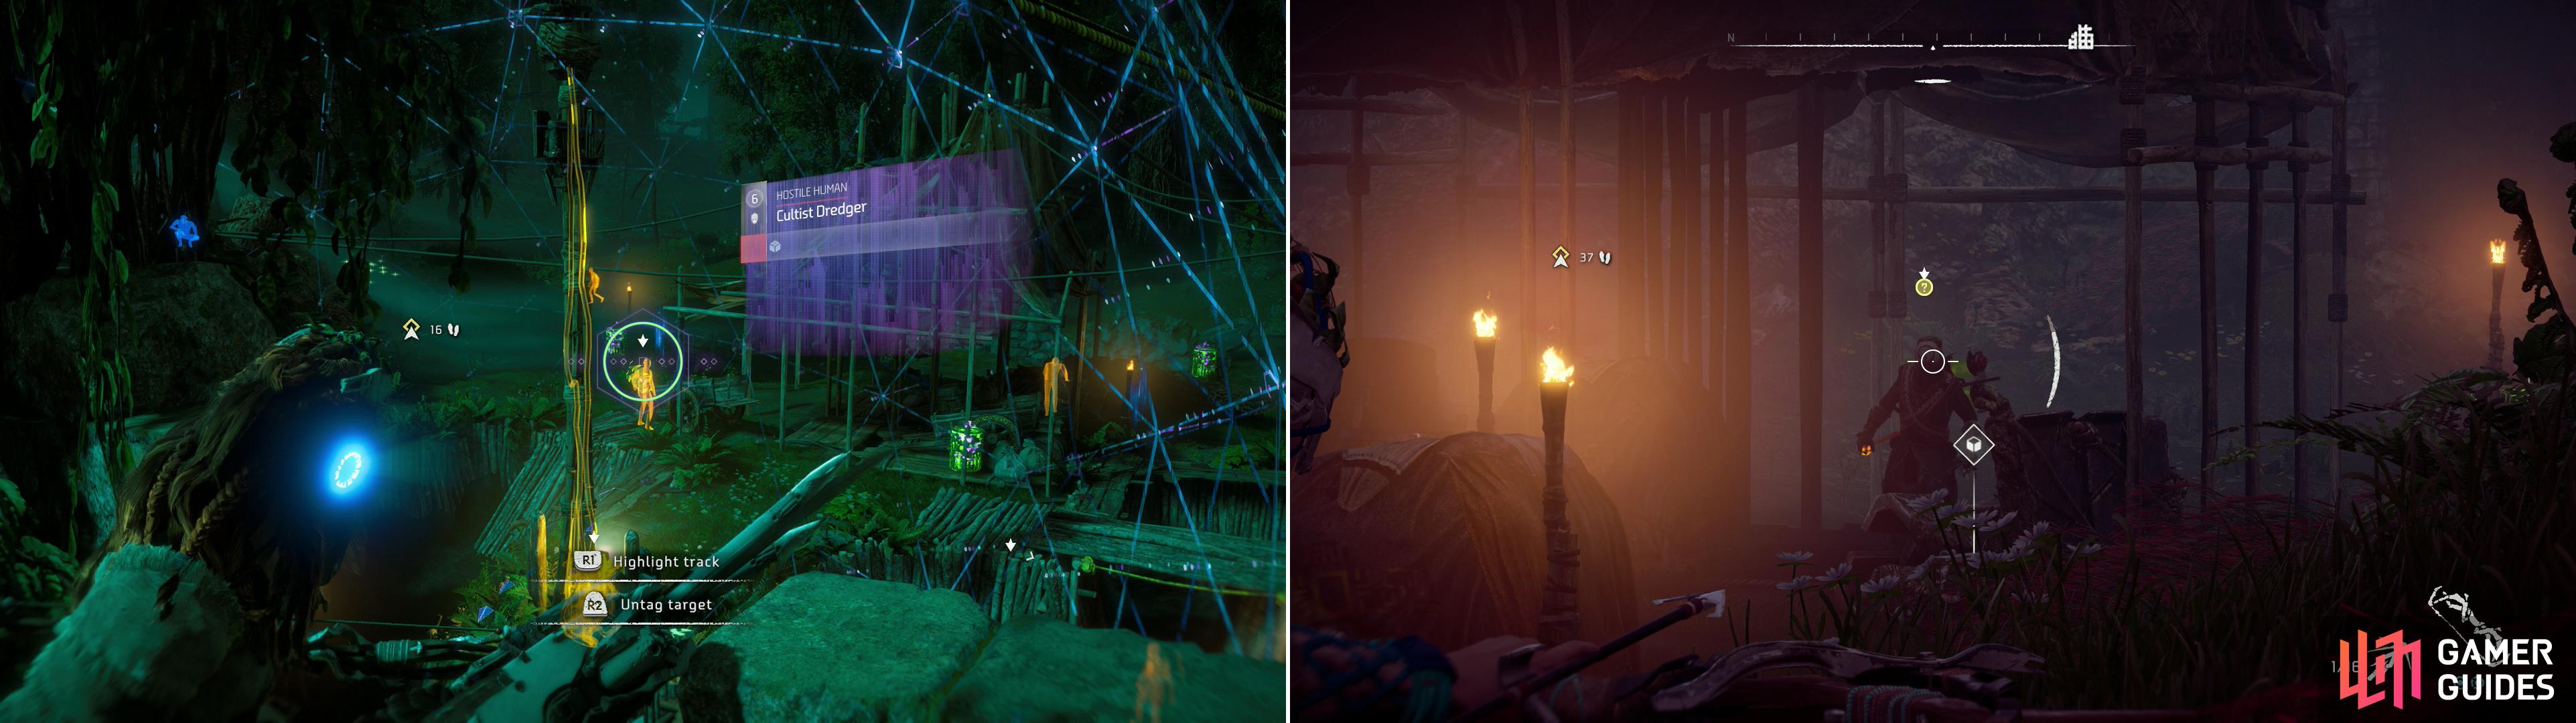
Unfortunately this Campfire is on the edge of a Corrupted Zone, which just so happens to be home to several machines: a Corrupted Fire Bellowback and four Corrupted Chargers. While the Bellowback is the larger target and dangerous enough in its own right, the Chargers may in fact be the greater threats. They’re also new enemies, and while there’s some truth in comparing them to very aggressive Striders, that’s a bit of an understatement.
Like Striders, Chargers can… well, charge. They will also unleash a frenzy of kicks if you’re nearby… again, much like Striders. They are much more aggressive however, and while they have a Blaze Canister on their back, it’s sturdy enough that you might as well ignore it. Instead you’ll find greater damage potential just by using the Sharpshot Bow and pumping arrows into their horns. As an added bonus, you’ll significantly neuter their offensive capacity if you dislodge their horns.

The Corrupted Fire Bellowback is tougher, but the strategy remains the same - aim for the Cargo Sac and Gullet with Tear-damage weapons (left). You can target the horns of Corrupted Chargers for more damage (right).
As for this particular encounter, note that by virtue of being Corrupted Chargers they’re much stronger than normal ones, so while you may be tempted to rely on the Silent Strike/Lure Call abilities, don’t expect such an attack to dispatch a Corrupted Charger in one go… although repeat hit-and-run attacks will work fine. In fact, you’ll likely be retreating often, and there’s plenty of ground to do so. First target the Bellowback, as it’s the larger target and it actually has ranged attacks. It’ll take more arrows from your Sharpshot Bow than usual to destroy the gullet and the sac - bonus points if you catch some Corrupted Chargers in their explosions - but otherwise it’s nothing you haven’t done before. Once the Bellowback has been defeated, go around picking off the Chargers: aim at the horns and retreat back uphill to the northwest until they lose interest, repeat as necessary.
| Objective | Rewards |
|---|---|
| For destroying the corrupted machines | 5,000 XP |
Vantage - Sterling-Malkeet Amphitheater
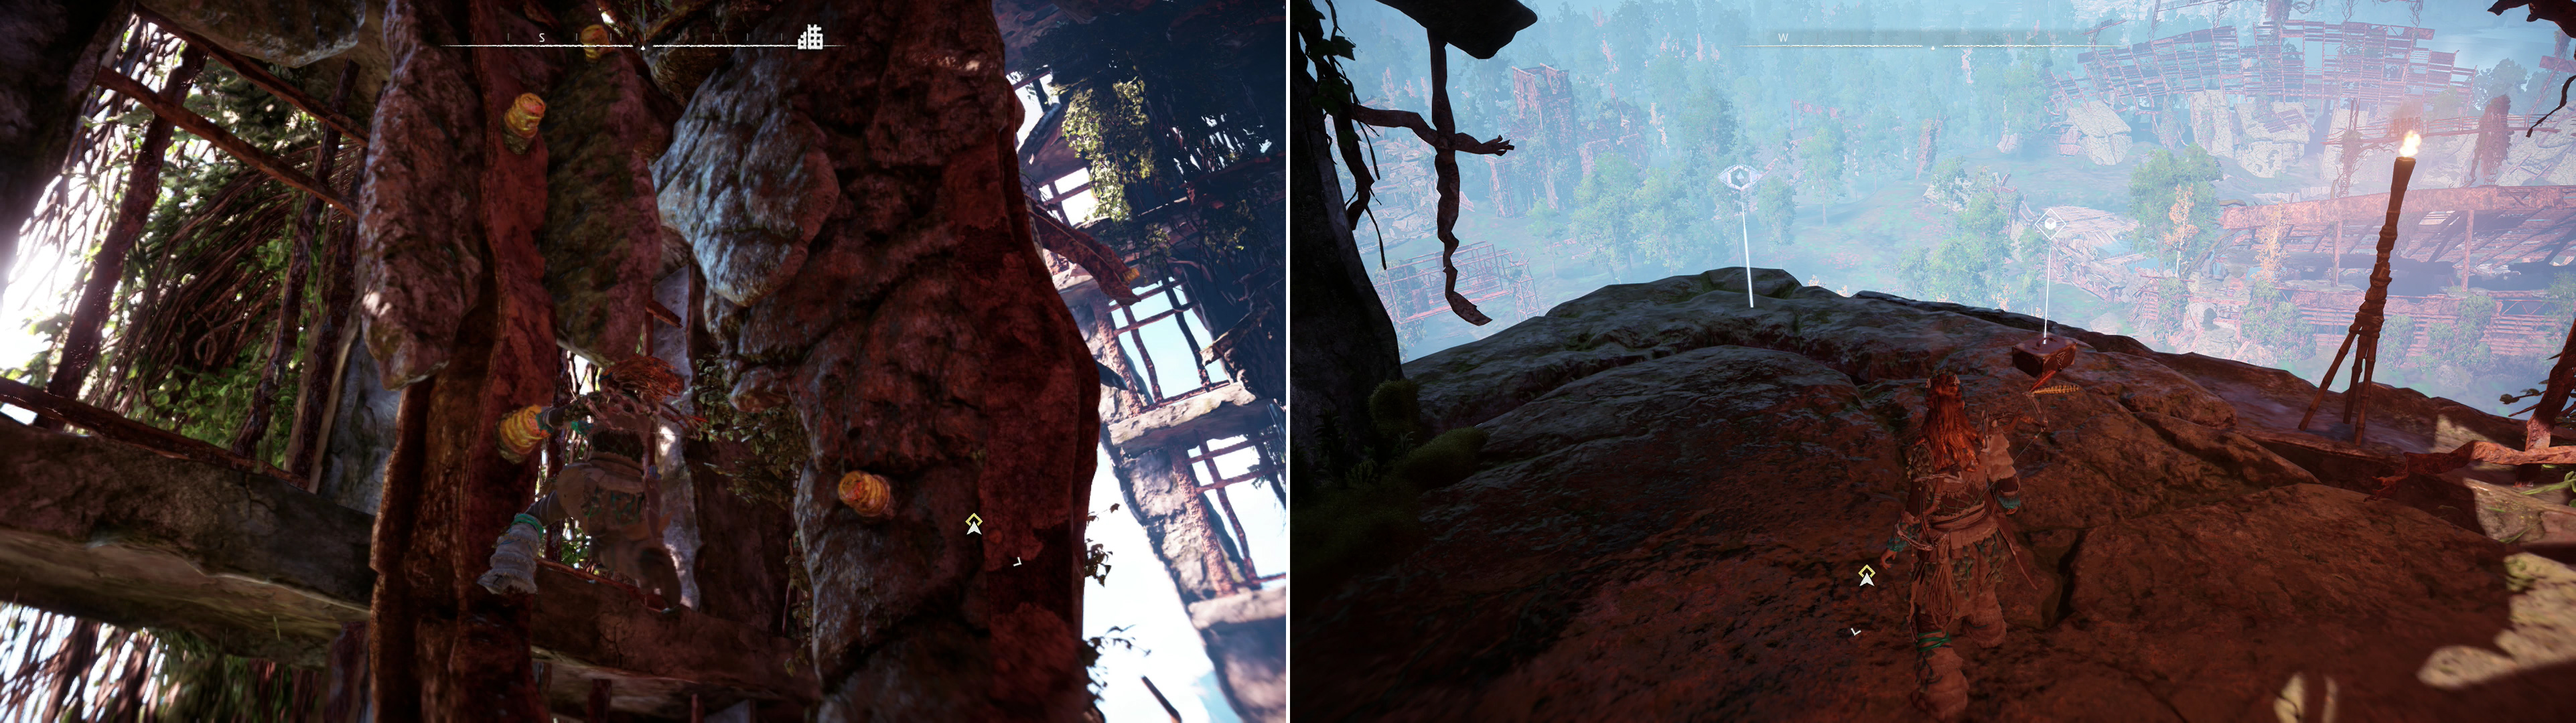
Once the machines are deactivated, claim the Campfire (if you haven’t already) to save your progress, then continue southeast past the ruined wall (which you may have used as cover earlier). This is a bit of a two-for-one area, as there’s a Vantage Point just beyond the wall, south, southeast of the Campfire. Use your Focus to scan it to get the “Sterling-Malkeet Amphitheater” Vantage, then plunder the nearby Supply Crate.
Rendezvous with the Warchief
Now that the Vantage Point is yours, make your way southeast down the ruined amphitheater stairs, along the way searching the southern edge of the ruins to find the Text Datapoint - World “Chocolate Box Log” . Once done, continue southeast down the stairs until you find the ruins of the stage, whereon you’ll find the Text Datapoint - World “To All Jessifans” . After you scan and log these two datapoints turn east to find a road, which you can follow in a more or less easterly direction, ignoring all the southern forks that present themselves along the way.
Eventually you’ll reach a Campfire near which some Nora are resting. Save your game at the Campfire to progress time and Varl will show up to make some small talk, after which Sona will show up, and the serious planning will begin. Your goal is to destroy the enemy camp near Devil’s Grief, a ways to the east, but around this camp, this “Ring of Metal” are three smaller camps, which need to be neutralized so that the Ring of Metal camp can be taken out. Stealth is preferable, but if things get messy, you’ll have some Braves waiting to assist you.
Disable the Corrupted Watchers near the first Cultist camp (left) then put the Cultists down (right).
Cultist Camp - Center
Sona will give her braves a pep-talk, after which you’ll largely be left to your own devices. When you’re ready make your way downhill to the east, crossing the river via a log you can balance on and resting at yet another Campfire (if necessary). When you’re ready to move on - really, really ready this time! - continue east to reach a road, then follow it northeast to reach the western-most (and hence closest) camp, which should naturally be your first target.
This camp is established in the ruins of an ancient skyscraper, the collapsing metal frame of which is all that remains. Expect to find some Corrupted Watchers patrolling the lowlands around the cement foundation of the tower, with the Cultists occupying the “tower” itself. Hide in the high grass and take out the Watchers quietly… a task that should be child’s play to you by now. After those are gone, sneak to the northern end of camp (where your braves are hiding) to get a vantage into the camp. Use your Focus to scan the enemies and aim for the head with the Sharpshot Bow - there’s only four Cultists, and honestly, it’s more trouble to get up to the alarm, which is a powered mechanical device this time - shooting it with arrows won’t work, you’ll have to get near it to disable it. Clear the camp as quietly as possible, then loot the Supply Crates inside and disable the alarm… just for fun.
Search near the central Cultist camp to find the Ancient Vessel - Miriam (left) at the area indicated on the map (right).
Ancient Vessel - Miriam
Now make your way south of the tower and search near a road to find a pile of Ancient Rubble, inside of which you’ll discover the “Ancient Vessel - Miriam” . Nothing more to it, just an easy collectible to pick up while you do your job. Speaking of which, follow the trail between the ruins to the east and scan some of the ruins to the north to find the Text Datapoint - World “Luna Here I Come” on an elevated metal support jutting out of the hill.
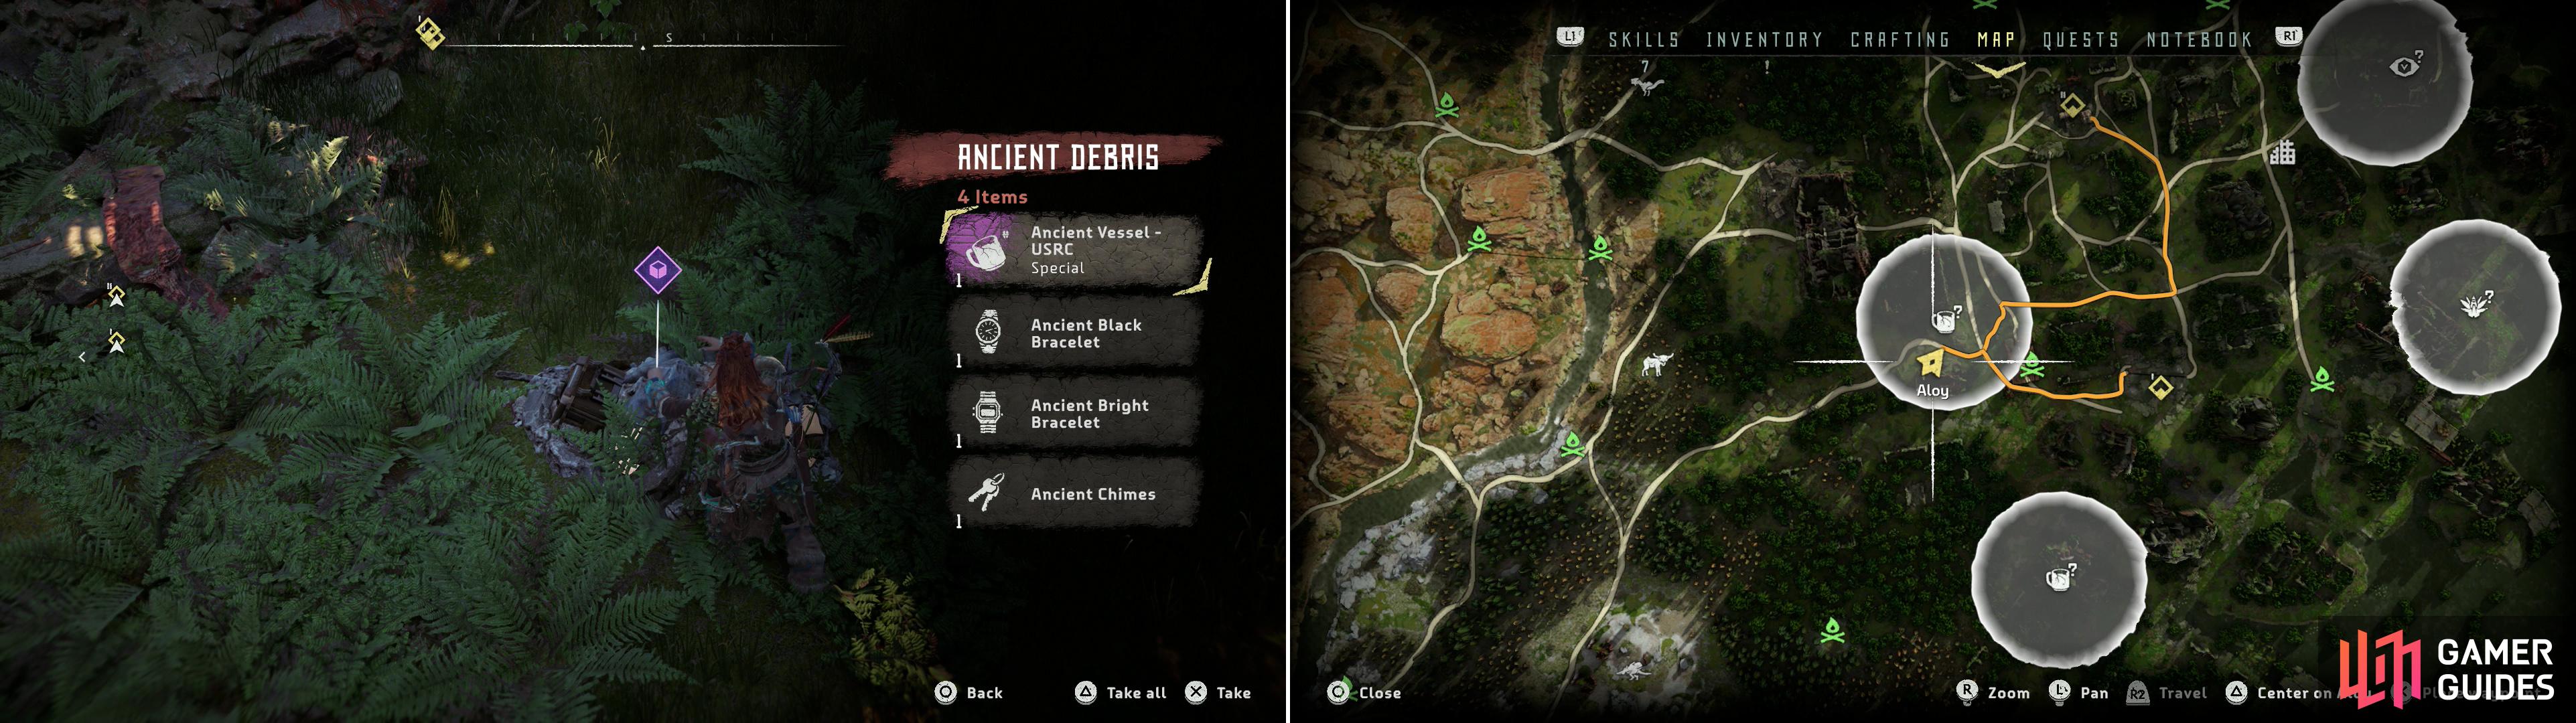
Search a pile of Ancient Debris to find Ancient Vessel - USRC (left) at the location indicated on the map (right).
Ancient Vessel - USRC
You now have two camps left, which are about equidistant from each other. There’s no real gameplay benefit to picking one over the other, but going to the southern one first allows you to nab another collectible along the way, so… south it is! From the last Ancient Vessel (the southern side of the first cultist camp) head south around some ruins and continue south through the woods until you find a road, which you should then follow northeast. When you see some ruins to the south, search near them to find a pile of Ancient Debris with that tell-tale purple loot icon above it. This should be just south of the “Ancient Vessel” icon on your map. This Ancient Debris pile contains the “Ancient Vessel - USRC” , but you shouldn’t expect to nab it unopposed - you may find Corrupted Watchers and Corrupted Scrappers wandering around nearby.
Just like the last Ancient Vessel there’s a datapoint near this one, too. Just follow the road uphill to the east to find the ruins of an ancient gas station and use your Focus to scan one of the pumps to obtain the Text Datapoint - World “All the Same” . You can find another Text Datapoint - World “China-Sick” in the northeastern corner of the ruined gas station. There’s also an pile of Ancient Debris (no Ancient Vessel, though) and a Campfire nearby.
Scan the southern Cultist camp and mark the locations of the Cultists (left) then take them out with whatever means present themselves (right).
Cultist Camp - South
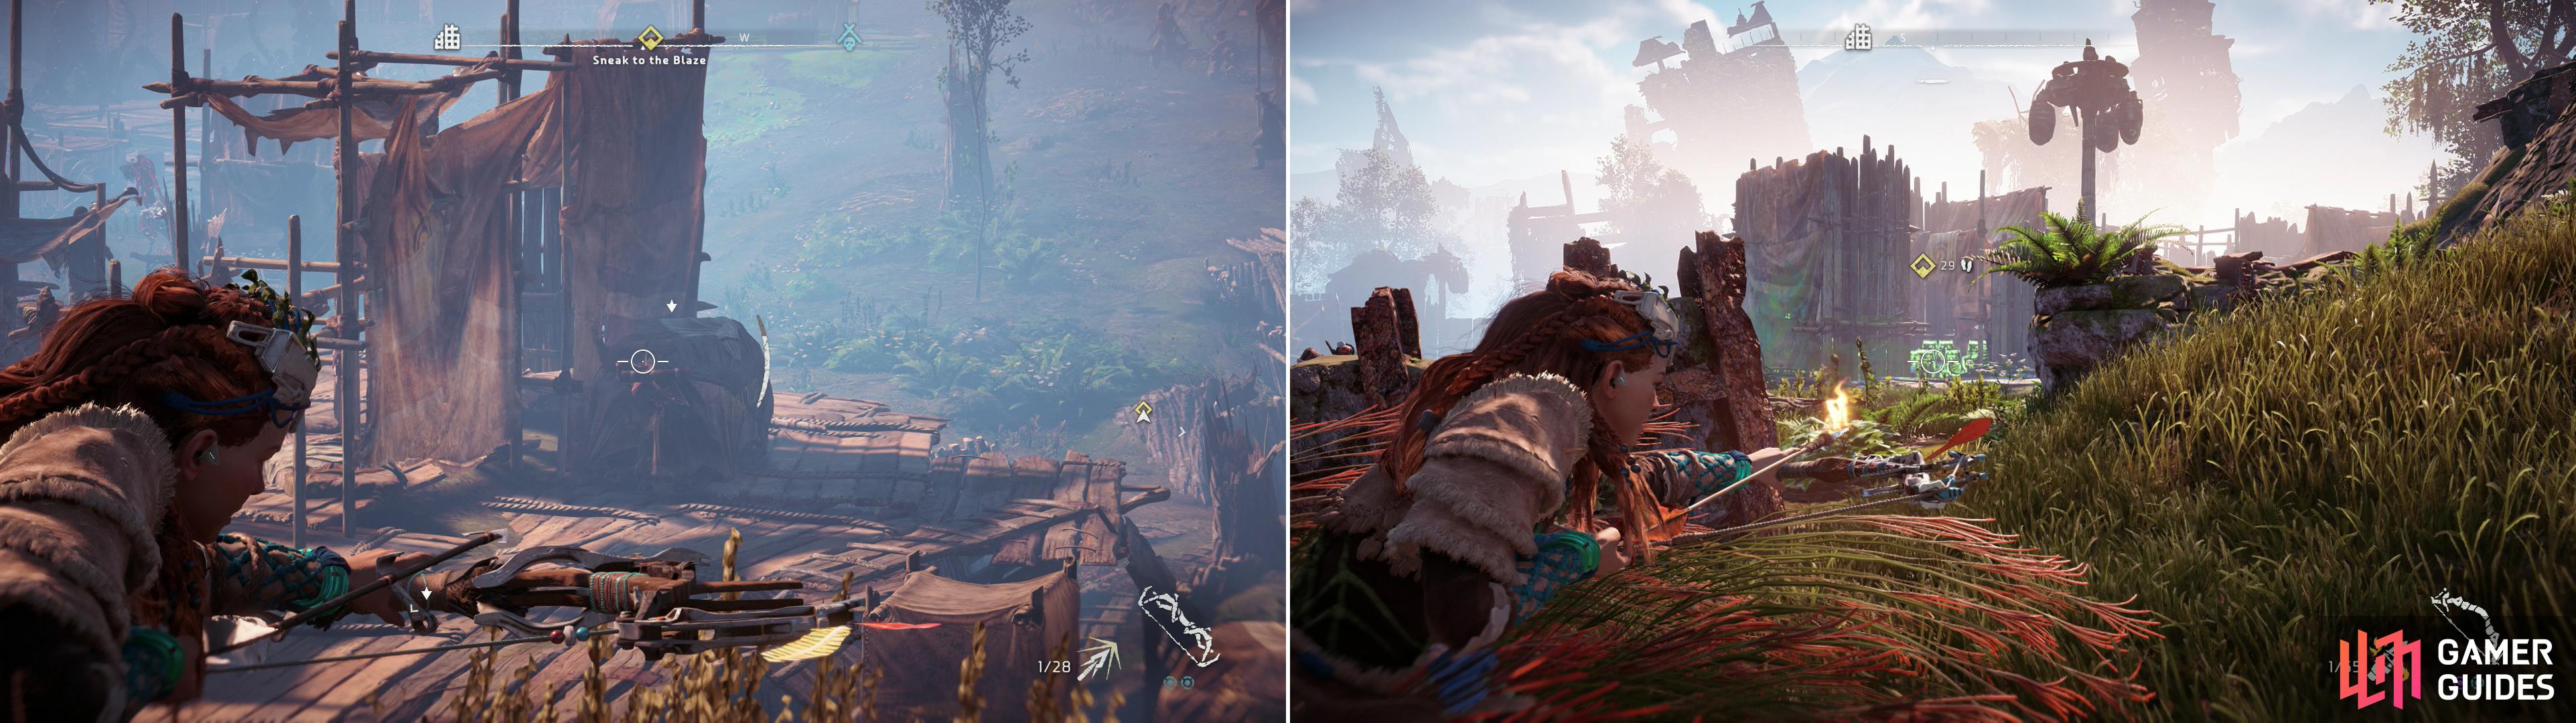
If you make your way east from the Campfire near the gas station you’ll find the southern Cultist camp, although this is arguably not the ideal approach. Instead, circle around some ruins to the south and approach from the south to reach a hill overlooking the camp (again, your braves have set themselves up in a wise position). There are no Watchers around this camp, but there are more Cultists to help make up for it, some of whom can be found a bit of a walk away from camp, so thoroughly apply your Focus and mark their locations to prevent any nasty surprises. Once you’re ready, if your aim is reliable you should be able to snipe most - if not all - of the Cultists from the hill the braves occupy. Failing that, there’s a bit of tall grass about… and one of the cultists along the eastern edge of the camp is just begging to be fragged by that Blaze Container he’s worrying over. However you manage it, loot the Supply Crates and disable the alarm, then set your sights north.
Once again, scan for and mark you foes (left) after which stealthily taking them out should be a trivial matter (right).
Cultist Camp - North
Exit the southern Cultist camp via the road to the east, which abruptly turns north, running through the ruins before turning northwest and leading to the final camp. Don’t be tempted by the first access you find, however, as there’s a better approach to the camp, and again, your braves have the right idea. Continue north along the road east of the camp until you find another road leading west to the camp through some ruined buildings. Your ultimate goal is a ruined building northwest of the camp, where you can join some braves on some high ground overlooking the camp.
From this elevated platform you should be able to safely decimate half the camp or more - if any of the Cultists get suspicious of the mysterious cases of arrow-to-the-face their friends suffer, just head into the tall grass to the west. When all visible targets are dead (be sure to scan with Focus to mark all your targets) use the high grass around the camp to eliminate the rest, either with headshots or with Silent Strike/Lure Call. There are fewer Cultists here than at the southern camp, although some of them may like to lurk in the ditch around their camp and in the tunnels running beneath it… again, using your Focus and tagging foes will prevent nasty surprises. Once they’re all dead, loot the Supply Crates lying about, then get ready to move on to your ultimate goal: the Ring of Metal.

The Tallest Tower
The three lesser camps are dispatched now you only have one goal left - meet up with Sona and Varl in the Tallest Tower. To reach this location, head along the road southeast from the northern camp and at a fork turn east, and following that trail east, northeast until you reach The Tallest Tower, which deserves its name. Enter the structure which gravity forgot and loot several Supply Crates scattered around a Campfire. Aren’t the Nora worried about their enemies seeing the flames? No? Oh well.
Use the hand holds on the interior of the tallest tower (left) to reach the Vantage - Denver Stadium (right).
While you’re here, you might as well try to get a Vantage Point. Make your way to the southeastern end of the tower’s interior to find those signature yellow hand-holds and scale your way up and across the tower and drop down onto a ledge along the southwestern corner of the tower. On the ledge turn north to find more hand-holds, reach a higher ledge, cross a narrow beam, then use a few more yellow-colored objects to propel yourself up to a ledge upon which you’ll find the “Vantage - Denver Stadium” Vantage Point. After scanning the Vantage Point turn east and rappel down to the floor of the tower.
Ring of Metal
Once you’ve claimed the Vantage Point and stocked up on Storage Crates, talk to Sona and she’ll lay out the dangerous plan of attack, after which Aloy will offer a compromise that naturally puts more weight on her shoulders. You’re not entirely free from bother, however, as Varl will insist on coming along. Oh well, one annoying companion is better than a group of them.
Follow Varl north a short distance to reach the Ring of Metal, which is perilously close to where the Nora are camped. He’ll ask some pertinent questions along the way, which Aloy brushes off, and when they reach the edge of the Ring of Metal they’ll help each other up into the building. Sneak your way northwest, then northeast, and when prompted by Varl shoot the southernmost Cultist in the head using your Sharpshot Bow, after which you’re supposed to drop down and help him wipe out the rest of the Cultists… but why not let him have his fun? Assist him from a distance and let him take the damage, then when all four Cultists are dead, drop down and follow Varl deeper into the complex.
Scale a ledge to the east, then continue down a grassy slope to the north until Varl directs you to kill the Cultist on the left. Sneak into the high grass and perform a Silent Strike and rely on Varl to exterminate the other one in a similar fashion. Once done, continue north, then scale a ledge to the west and Aloy and Varl will both point out a matter of concern in the camp. Looks like Aloy will have to sneak through the enemy camp and destroy the Blaze stockpile to exterminate several Corruptors and open the way up for the rest of the Nora.
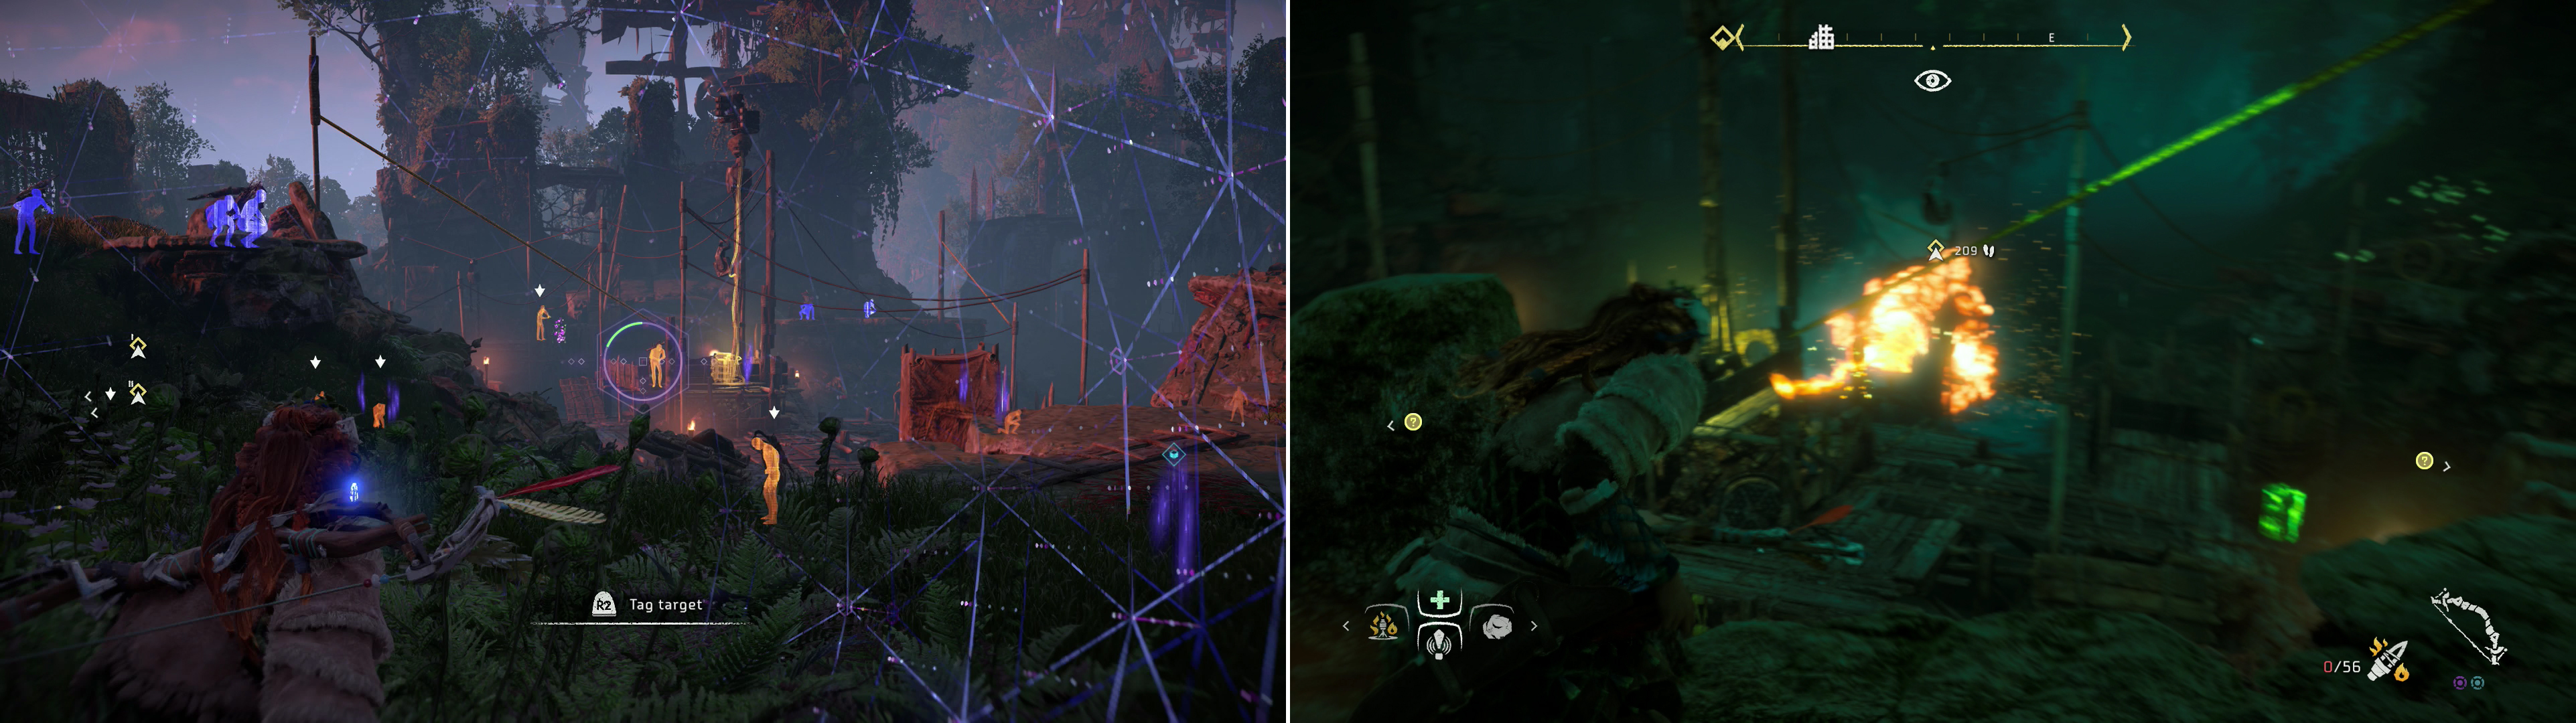
Take out the two Cultists that compromise your path through the base (left) then detonate their Blaze stockpile with Fire Arrows (right).
Never fear, this part isn’t too hard, especially if you bought that Nora Silent Hunter Heavy armor earlier. Good aim won’t hurt, either. Case in point, use your Focus to scan the wooden platform and wall to the west, southwest to find a Cultist near some tall grass digging away at something, while another Cultist will patrol between the wall itself and the pool near the Corrupted Fire Bellowback. Oh yeah, there’s a Fire Corrupted Bellowback here, too.
Ignore the machine (you’re not killing that without causing a commotion! and instead with for the mobile Cultist to mount the platform and start fussing over something. At this point, take him out with your Sharpshot Bow, then climb down the hill and take cover in the tall grass, from which you can eliminate the other, digging Cultist with Shadow Strike.
From this Cultist turn west and head through a ditch along the wall, using the nearby cargo as cover from the Bellowback. A wooden ramp will provide your last bit of cover for a while, and you need to be wary of a Cultist further west, the Bellowback to the northeast, and a Corrupted Watcher to the southwest. Scan them with your Focus, mark their locations, and wait for your opportunity - this sounds harder than it is, the Watcher has a generously long patrol path, the Cultist is stationary and unlikely to spot you unless you sprint past, and the Bellowback makes a rather obvious sentry.
Continue west into an enclosure with a pool in it and quickly turn north up a ramp, taking cover in some tall grass, then when the coast is clear head west into some ruins where you’ll find more shelter-giving tall grass. Turn southwest to find two more Cultists in these ruins, one of which is stationary, one of which patrols. Wait for the latter to come near the northern end of the tall grass and take him out, then sneak behind the stationary Cultist and punish him for his inattentiveness.
Now that the Cultists are gone, continue southwest until you find another exit to the southeast, outside of which is yet another patch of tall grass to hide in. Turn south and you’ll spot the glowing green Blaze Canisters in their depot, and from here you have a clear shot. First, however, use Silent Strike and Lure Call to dispose of two patrolling Cultists to prevent there being any… incidents, then equip your Hunter Bow and use some Fire Arrows to detonate the Blaze depot.

After destroying the Blaze stockpile, scrap the enraged Fire Bellowback (left) and the numerous alerted Cultists (right) to claim victory for the Nora.
If you thought this was the end of the fight… you were wrong. The Nora will come charging in, alerting the entire base, but also providing plenty of additional targets for the enemy. That said, you’ll likely draw the attention of the Bellowback, which should be your priority. Take out the Bellowback, then help the Nora wipe out the remaining Cultists and Corrupted Watchers, and when the last foe has fallen, Sona will give a speech, the Nora will celebrate, and Aloy will wrap up this quest with some external monologue. When that’s over with, loot the camp for some Supply Crates (and whatever loot you can pick off your enemies), then talk to Varl and Sona again, if you wish.
| Objective | Rewards |
|---|---|
| For sacking the Ring of Metal | 4,000 XP / +1 Skill Point |

Victorious with the War-Chief
Found the Nora War-Chief and defeated the killers in the Ring of Metal.


 Sign up
No Comments