

While you can go straight after Redmaw, there’s a little bit of exploration to do before you tackle the famed Thunderjaw. Fast travel to the campfire southeast of the Gatelands Bandit Camp and head straight south until you reach another campfire that’s right next to a Longleg Site on your map. Continue a little bit more south to a split, heading west and ignoring the fork you find not long after you venture on this path. You will come to another fork, this one being a four-way intersection. Ignore all other paths and keep going to the northwest to yet one more fork in the road. Here, you will want to go south to find Metal Flower - Mark III (A) .
The Spurflints Hunting Grounds’ trials focus on stealth, although only one really requires using it.
Spurflints Hunting Grounds
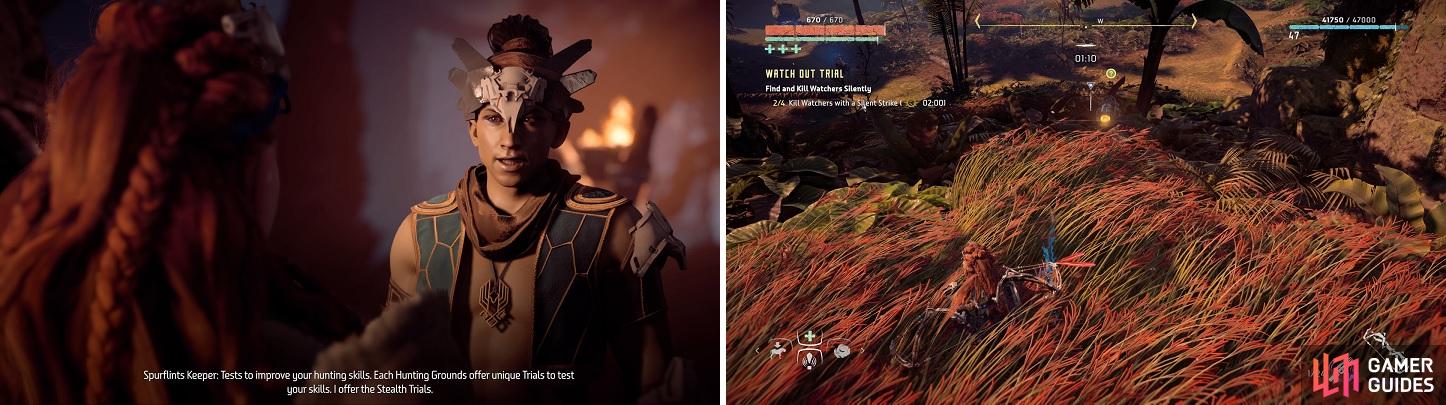
Return to the campfire to the east and venture straight south this time, following the mountain until you come upon the Spurflints Hunting Grounds. Talk to the Keeper and he will mention that these are the Stealth Trials. That means stealth is going to be a top priority here, at least for the one trial, since the other two don’t really revolve around your own stealthiness.
| Watch Out Trial Time | Reward |
|---|---|
| 20:00 | Half Sun Box |
| 3:00 | Full Sun Box |
| 2:00 | Blazing Sun Box |
| Stalker Kill Trial Time | Reward |
|---|---|
| 20:00 | Half Sun Box |
| 3:30 | Full Sun Box |
| 2:00 | Blazing Sun Box |
| Sleight of Crate Trial Time | Reward |
|---|---|
| 20:00 | Half Sun Box |
| 1:30 | Full Sun Box |
| 1:05 | Blazing Sun Box |
As already mentioned above, the theme of these trials is stealth, but only one trial actually requires stealth. In the grounds below the keeper, you will have three different enemies, Stalkers, Shell-Walkers and Watchers. Naturally, the Stalkers might be hard to find, since they can cloak, but if you start trouble, they will start attacking you (while still cloaked, of course). The Shell-Walkers don’t even need to be touched, as the one trial is a bit misleading.
Watch Out Trial
You might have a lot of trouble with this trial, although it fully depends on how well you do at stealth. You need to kill four Watchers with a Silent Strike, which means you need to get close enough without arising suspicion. Of course, the Watchers aren’t all in one place, so use the free time before using a rope to descend to scope out some locations for the Watchers. One should be right below you, another to the left of the one Stalker that’s on the tree, and the other two will be patrolling around the Shell-Walkers.
Stalker Kill Trial
Your goal in this trial is to find and kill two Stalkers, which is never an easy task. However, you can cheat a little bit, as you know time doesn’t start until you slide down one of the ropes. From where the Keeper is located, use your Focus to scan for any Stalkers. If you look on the tree in between the two southern ziplines, you should see a Stalker, so attack that one (use fire arrows to keep constant damage so it doesn’t cloak) and the other will likely come after you.
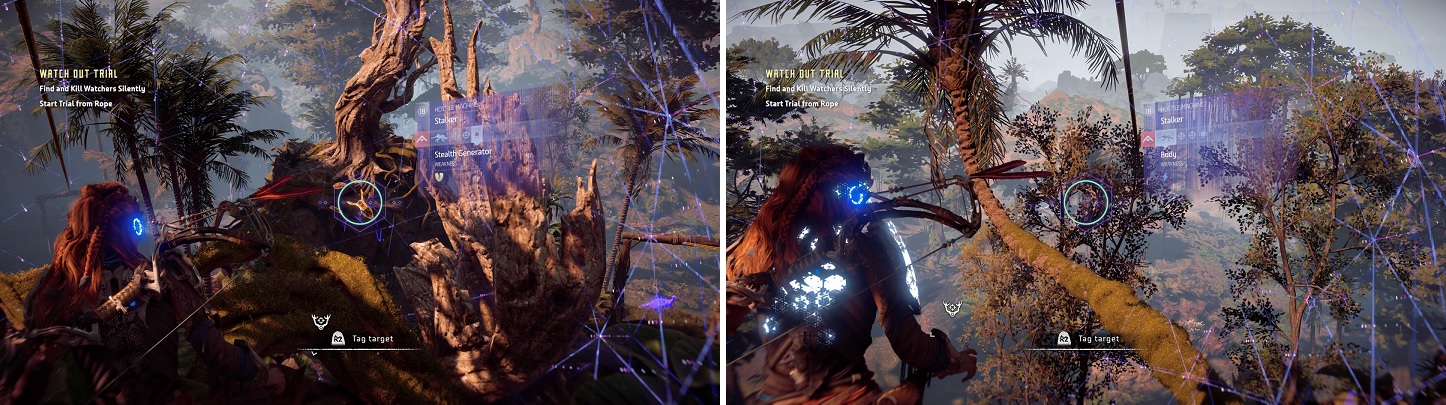
The locations of the two Stalkers at Spurflints Hunting Grounds.
Sleight of Crate Trial
This can be a troublesome trial, especially since it was changed in a patch. Before, there used to be two spots where there was three crates in each spot, so you could just run up to them and quickly loot them without any worries besides your health. Now, there is only one crate that isn’t attached in each location, so you need to shoot the other two off of the Shell-Walkers. Basically, try to keep stealth enough to knock off a crate from a Shell-Walker, then quickly run to loot that and the already loose crate. Once you do that, head on over to the other area and do the same thing.
| Objective | Reward |
|---|---|
| For earning a Blazing Sun rank in all three trials | 52,500 XP / +1 Skill Points |
Corrupted Zone
Now that you’ve gotten a bunch of experience and yet another Skill Point under your belt, it’s time to move on to the next activity in the area. Head straight southwest from the Spurflints Hunting Grounds, along the mountainside, and you will eventually run into a Corrupted Zone. You will be up against three fearsome Stalkers, which means you will need to track them down first. If you see any red lights on the ground, shoot them from a distance to set off a flare, which will make a Stalker usually uncloak to check out what happened.
Stalkers are weak to shock, so you will want to utilize that weakness against them, while also switching to fire arrows because they are corrupted. Considering it’s a three-on-one assault, especially once they know you’re there, you can approach this in a stealthy manner by not attacking the same one twice right away until their suspicion subsides. Once all three Stalkers are dead, you will have cleared the corrupted zone.
| Objective | Reward |
|---|---|
| For destroying the corrupted machines | 6,000 XP |
Tallneck - Spearshafts
Looking at your map, you might see a Tallneck to your west, which is going to be your next stop. Cross the river to the west and look for the path, following it west until you get to a campfire and possibly see the Tallneck roaming around a circular path. Now, there are a number of machines in the vicinity, including Longlegs, Redeye Watchers and possibly some Sawtooths. To get on the Tallneck, follow the southern side of the circular path to the west and you should see a ledge jutting out over it, which is where you will jump onto the Tallneck. Once you do, climb to the very top of the Tallneck and override it to get your typical reward.
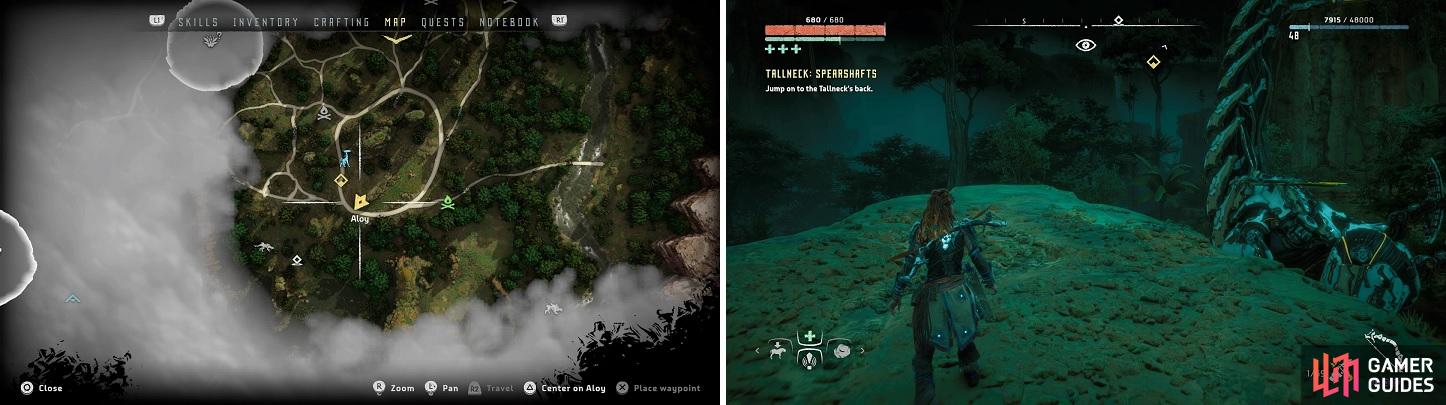
The location where to jump onto the Tallneck, both on the map (left) and in-game (right).
| Objective | Reward |
|---|---|
| For overriding the Spearshafts Tallneck | 7,500 XP / +1 Skill Points / Map Revealed |
The Legendary Thunderjaw
Alright, that’s one part of the jungle explored, so it’s time to get back to the task at hand, finding Talanah and finally bringing down this Redmaw. Luckily, you are very close, so from where the Tallneck was located, venture into the jungle to the southwest. When you get to the designated spot, you will find a bunch of outlanders in the area attacking Talanah. Being careful of the melee ones, snipe each one in the head with a precision to quickly rescue Talanah, then go and speak with her.
It seems that Ahsis sent the outlanders after her so he could confront Redmaw alone, since the fool wanted full credit for the kill. Follow Talanah until she can’t go on, then break out your Focus to pick up the trail, leading you right to Ahsis and Redmaw duking it out. Of course, Redmaw overpowers him and knocks him down, so it’s now up to you (and Talanah, of course) to end this battle once and for all. The first thing you should do is scan Redmaw, only to find out it only has a single disc launcher.
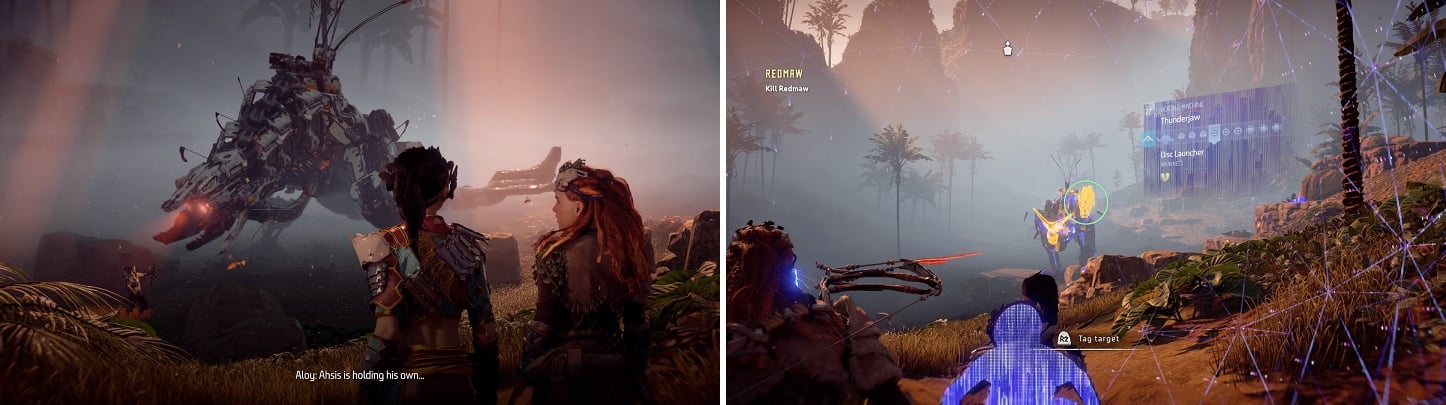
Redmaw may be menacing, but he’s a normal Thunderjaw (left). He only has one disc launcher when you fight it (right).
Despite the name and the little bit of hype surrounding the machine, Redmaw is really nothing more than a stronger Thunderjaw. It doesn’t have any new attacks, and the same tactics you used to kill Thunderjaws work here. So, use a Tearblast Arrow to knock off the disc launcher, then switch to freeze arrows to put Redmaw on ice. Pick up the disc launcher to deal some heavy damage, then refreeze when necessary to finish the machine. Loot for spoils, then talk with Talanah, who rushes off to Ahsis. Speak with him, then return to the Hunters Lodge in Meridian to one final conversation with the new Sunhawk, Talanah, and the end of the quest.
| Objective | Reward |
|---|---|
| For felling the legendary machine | 6,330 XP / +1 Skill Points / +1 Extraordinary Reward Box |

 Sign up
No Comments