Objective: Cross the walls into the inner city
Follow the ledge to the right, grab the crate of Salvage here and then proceed towards the nearby camp fire to unlock an additional Base Camp ‘Icy Bluff’. You can use the Base Camp here to apply any upgrades you require and spend any skill points you have. Exit the Base Camp menu when you are ready to continue.
To the right of the camp fire is a small passage leading down to a recess holding two boxes of reagents. There is a basket of Herbs and a nest for Feathers on the way.
To continue, use the zip line by the camp fire to reach the next area. Press the button prompt when it appears above Lara’s head to trigger a short scene. When it is safe to do so, shimmy to the left and use the handholds, swing bars and pickaxe climbable wall to reach the top.
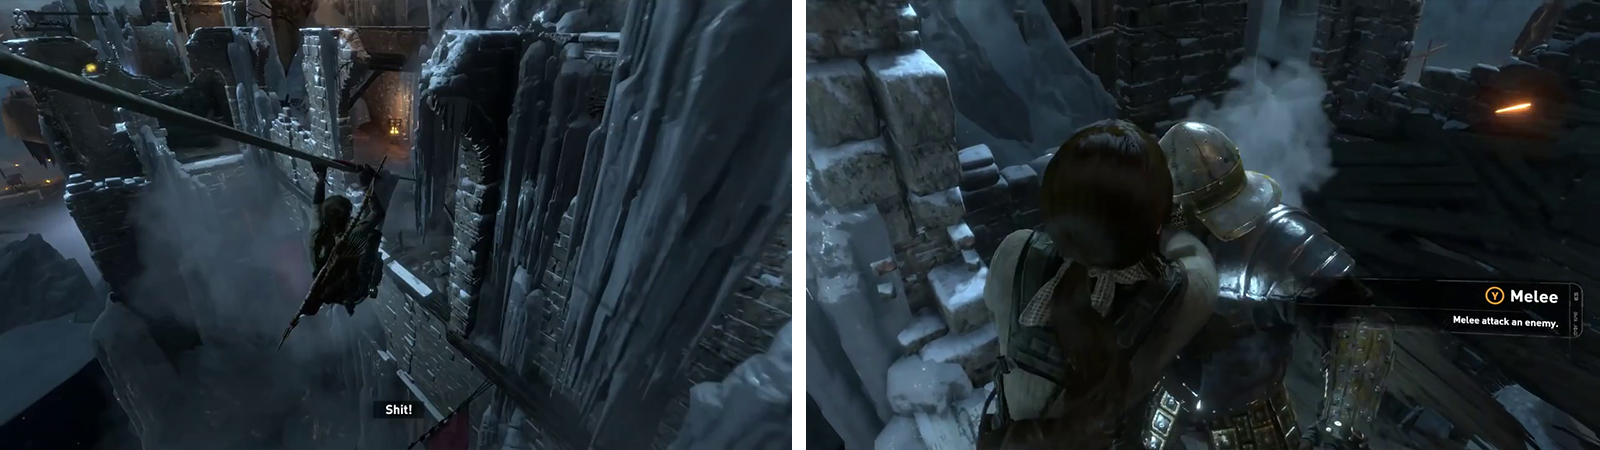
Zipline down to the wall (left) and climb to the top. Mash the melee button during the scene (right) to continue.
As soon as you reach the top, mash the melee button during the scene and if successful, you’ll end up in a new location again.
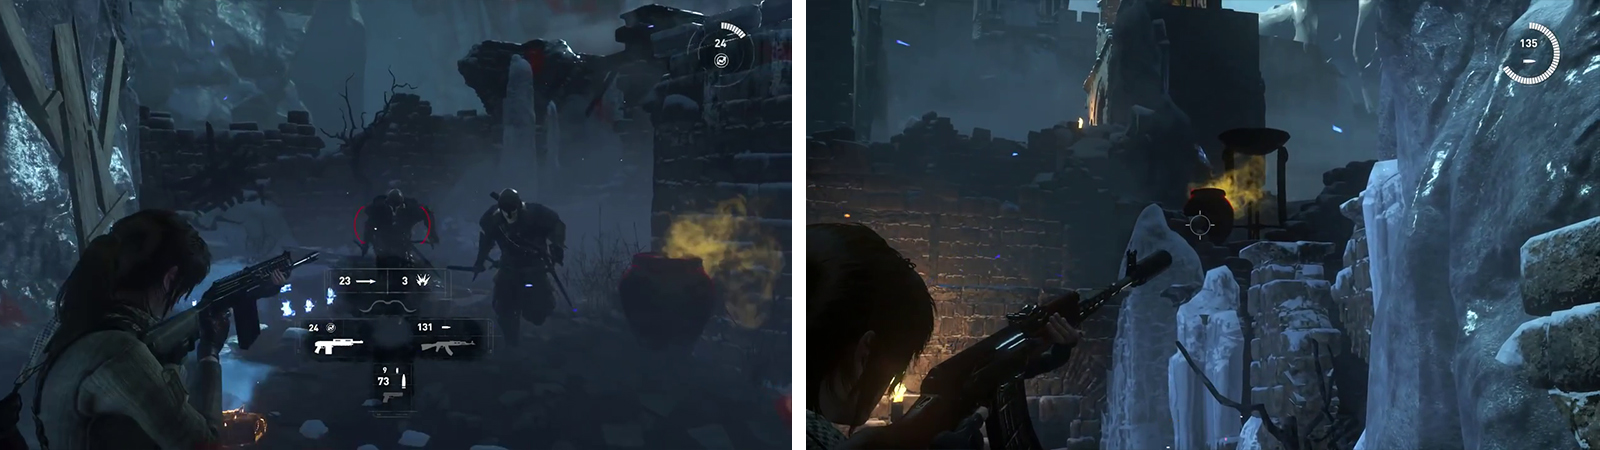
When we regain control of Lara we’ll immediately be under attack from a group of Deathless Soldiers. These guys are much bigger and more heavily armored than the Trinity operatives that we have been fighting thus far and they come in a couple of varieties – melee enemies that will charge at you with an oversized sword, Shield enemies who will block your attacks whilst moving close to you before attacking and archers who will pepper your location with magical fire arrows.
There are 5-6 melee enemies and 3-4 Archers in this area and they’ll successively enter the zone as you eliminate their buddies. This is an extremely tough fight and whilst the enemies seem quite durable early on, there are several explosive barrels of Greek Fire around the room that we can lure the melee enemies past before detonating to make things a little easier. In terms of weaponry, the Assault Rifles are quite effective at stripping their armor and delivering damage whilst the Grenade Arrows and the grenade attachment to the assault rifle are also great for dishing out some serious damage. Poison Arrows are pretty much a guaranteed kill as well, so be sure to save them for the toughest situations (unless you have a Mushroom surplus!).
Once the initial area is clear, head for the far right corner from the entry point to trigger another pair of enemies to enter the area. Use your Grenade Arrows to hit the shield bearer from behind and kill his melee friend to give yourself some quiet time.
Now that it is safe to do so, you’ll want loot the area. There is a basket of Herbs by a blue fire just to the right of the exit and a pair of Salvage crates located in the small, tunnel areas beneath the ruin structures within the immediate area. A third crate of Salvage is on the middle level of the main, central ruin.
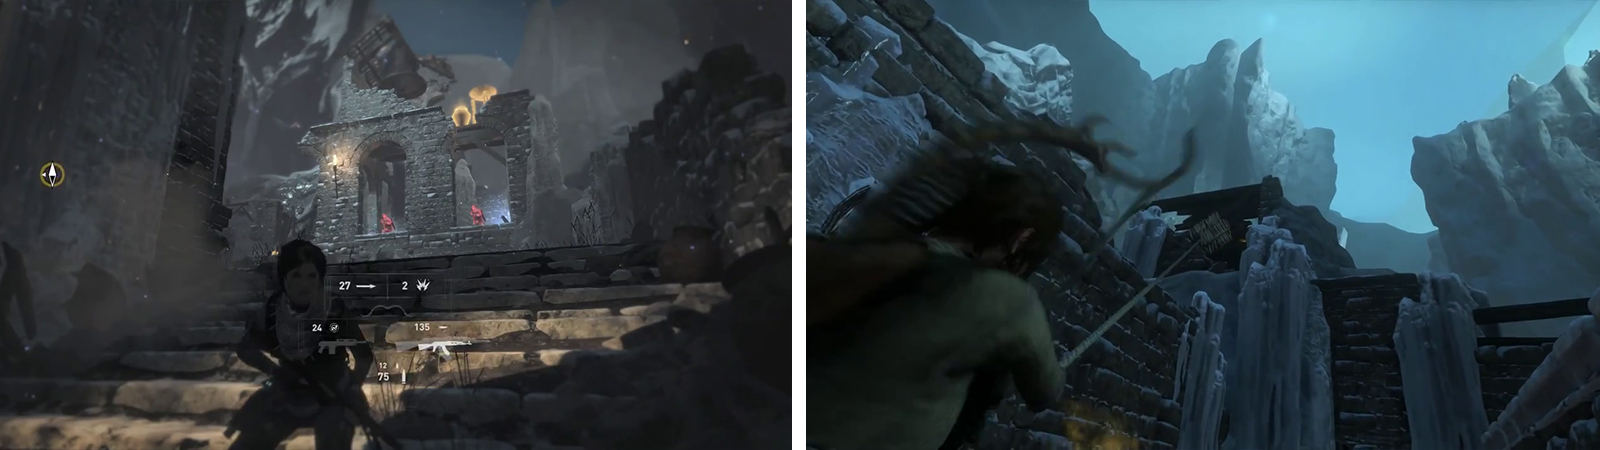
Use your weapons of choice to eliminate the Deathless soldiers (left). When the area is clear, look for the signal pyres (right) shoot these for the ‘Enemy of my Enemy’ area challenge.
Climb to the very top of the central ruin and loot the Feathers if necessary. From here, look to the southeast (right hand side from the intial entry point) and atop the building ahead you’ll be able to find a Signal Brazier this is for the ‘Enemy of my Enemy’ area Challenge. Shoot the explosive barrel beside the Brazier to light it [Enemy of my Enemy 01/06] . From the top of the ruin, if you orient Lara towards the exit, look atop the broken wall to the right to find a second Brazier [Enemy of my Enemy 02/06] .
Drop down to the ground level and continue through the exit door.
At the top of the stairs, a pair of enemies will attack from the left. Quickly run to the right and take cover behind one of the ruined sections of wall here. Shoot and kill the melee fellow as he approaches before taking out the archer in the distance. Loot the crate of Salvage .
Move up the stairs from where the pair of enemies came from and when you reach the top, turn around and look back towards where you came from. Look on top of the building just to the left (and below the bell) to spot another Brazier , shoot the barrel beside it [Enemy of my Enemy 03/06] . The Archer’s platform has a basket of Herbs and some Magnesite Ore if you are interested in either.
Proceed up the next set of stairs and as you near the top, a pair of Archers will appear in the windows of the building ahead (this is the building with the bell on the roof with the brazier we just lit). Quickly shoot them both before continuing to the top of the stairs.
In the small room below the pair of Archers, there is a crate of Salvage and a basket of Herbs . Loot these before returning outside and scrambling up the wall and through one of the windows to where the Archers were positioned. From here, look above the stairs we just climbed up to see a rope barrier. Use the Rope Arrows to pull this down and shoot the barrel by the Brazier behind the barricade [Enemy of my Enemy 04/06] .
Eliminate the Archers before lighting the pyre on the roof (left). From their location, turn around and pull down the rope barrier for another signal pyre (right).
Drop down and move to the right. As you approach the courtyard before the gate here a short scene will play.
When you regain control, there will be a pair of Deathless soldiers approaching you, one with a melee weapon and the other with a shield. If you have some available, immediately unload a Poison Arrow/Grenade arrow/grenade from the rifle attachment or two to take them out ASAP. If you don’t have either on hand, retreat up the nearby stairs and shoot the barrel of Greek Fire at the base when the enemies approach it.
With the two melee fellows out of the way, at the top of the stairs take cover behind the corner – from here take out the pair of Archers using either the Greek Fire barrels beside them or wait for them to drop down into the courtyard behind you and shoot them in the head a few times as they approach your position.
Return to the courtyard once all of the enemies have been dealt with and another brief scene will play to show a doorway opening. Once the fire has subsided a little, in the small alcoves either side of the main gate you’ll find a crate of Salvage .
Move through the hole in the wooden gate and as soon as you reach the far side, turn around and look above the entrance. On top of the wall to the right there is a Brazier in an archway [Enemy of my Enemy 05/06] and on the left a Brazier behind a barricade (shoot this with an explosive to set it off) [Enemy of my Enemy 06/06] .
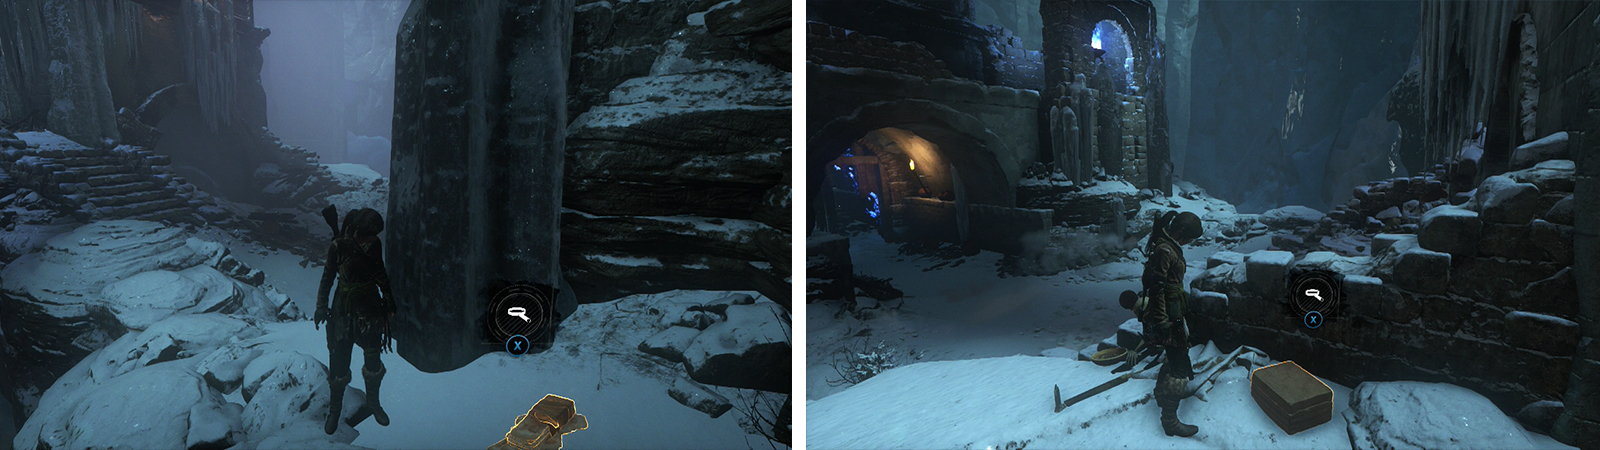
After destroying the gate, look for a ledge to the left with Document 03 (left). At the top of the ramp to the right of the archway is Relic 01 (right).
With your back to the gate we came from, follow the wall to the left. At the end there is a small, icy ledge with a Document [03/04 - Mongolian] . Just in front of the large archway you’ll find a basket of Herbs and another Document [04/04 - Mongolian] . Climb the small ramp to the right of the archway to find a chest containing a Relic [01/01 – Mysterious Figurine] at the top.
To continue, make your way up the stairs to the left of the giant archway. From the end of the platform leap across to the ice wall and use your axes to climb to the top. Proceed through the gap in the ice here.
Move forward a short distance and slide down the slope ahead. At the end, jump and use the grapple axes to swing from the overhanging beam. A scene will play.

 Sign up
No Comments