
When you’re ready, transport to Sohma and head north to the Signesilica entrance, although it’s a good idea to go around and loot the chests in the area if you haven’t already (wasn’t described in the guide), although you should have gotten some of the chests here from the limited visit earlier in the story. By the way, you should have noticed that the enemies in the region have been upgraded to some tough enemies (nowhere else), so make sure you get all of the new bestiary entries while you’re here. Also, the Dinosaurus enemy has a chance to drop Meteorite, which you know can be used to create some nice equipment.
Anyway, from where you landed, go north, then east and south as soon as possible to find a locked chest ( Purification Signets, Vol 2 ). From there, go south to the winding path and you’ll come across another chest, which contains a Riot Potion . Go back to where the locked chest is and head north, then follow the path to the northeast (towards the Signesilica), grabbing the chest just south of you ( Mentality Seeds ). Return to the little split just west and go straight north, opening the chest just to your west ( Anti-freezing Amulet ). Go straight west and to the edge of the map to find another chest ( Shadestone ), then head to the northwest corner to find another chest there ( Ebony x2 ) in a small alcove on the southern side. There is one last chest just outside the front entrance of the Signesilica ( Greater Demon’s Fetish ), so open it before heading inside.
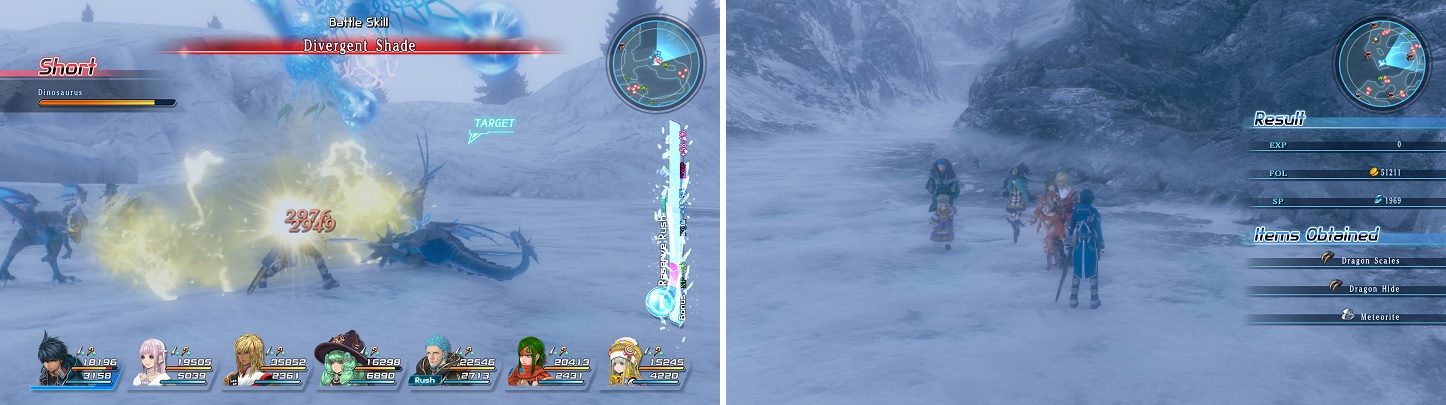
Dinosaurus enemies drop Meteorite, which can be used to synthesize Laser Weapons!
Signesilica
| Enemy | Species | Items |
|---|---|---|
| Chaotic Cell | Plant | Gerel Secretion, Gelatinous Slime |
| Dark Material | Corrupt | Darkness Gem, Crystal, Mythril, Platinum |
| Little Satan | Corrupt | Shadow Roses, Lesser Fiend’s Tail, Signet Card+, Darkness Gem |
| Sacred Guard | Machine | Silver, Gold, Platinum, Mythril |
Heal up and save inside, then climb the stairs on the eastern side to find a chest at the end of the path there ( Anti-death Amulet ). The door at the top of the western stairs is blocked, so you’ll need to use the northern exit in the room to continue. Once you start going east, head north through the first door, then venture west into a room with a treasure chest ( CQC Program Eta ). Follow the only path going north on the eastern edge and go into the eastern of the two small rooms for another chest ( Mental Stimulant x2 ).
Continue on and you’ll come to a room with a single enemy in it. This is a Ravenne and is similar to the Vidofnir you should’ve fought in the second iteration of Cathedral portals. It isn’t too tough, but it does have a move you should be careful of, called Explosion. It is literally as the name suggests, as the enemy will cause an explosion around it, doing some good damage. Once you finish it off, open the chest in the southeast corner of the room for a Signet Card: Angel Feather .
Run west two rooms and you should see a room to your north with two chests in it, so go in and open them ( Attack Seeds and Intelligence Seeds ). Continue west and you’ll come to another mini-boss, a big dragon called Ash Dragon. It is a bit meaty and can buff itself with Angel Feather, so have Fiore remove it with Void, if she has the spell. Go all the way south and then east one room to find another chest with a Mythril Rod in it, which should be an upgrade for Miki, if you don’t have her Cathedral of Oblivion weapon or Laser Weapon equipped.
There will be another Ravenne to your west, and another chest in the room to the north of it ( Moonlight Signets, Vol 2 ). You can’t go south, so head west to a blocked door, which will open up as you approach it. Head inside and you’ll see something waiting for you!
BOSS - Crystal Guardian
Even with Laser Weapons on some characters, this boss has a lot of health, so be prepared for a long fight. You have a pretty big arena here, so there’s a lot of room to move around and some of the Guardian’s attacks are fairly easy to dodge. Also, a majority of its attacks seem to focus only on a single character, which means it’ll be easy for Miki to heal, even if some of the moves deal some good damage.
Static Storm will see the boss sticking its sword out and running straight ahead, damaging whoever happens to be in the way. Knee Thrust will launch whoever is in front of the Guardian into the air, where it will hit them with its sword. It also has access to two spells, Radiant Lancer and Sunflare, so you might know these if you have Miki using offensive spells. The latter can be especially painful, so be ready to heal. Lastly, it can perform a move called Trinal Spur, where it will shoot some big lasers from its body that could absolutely kill characters caught in it.
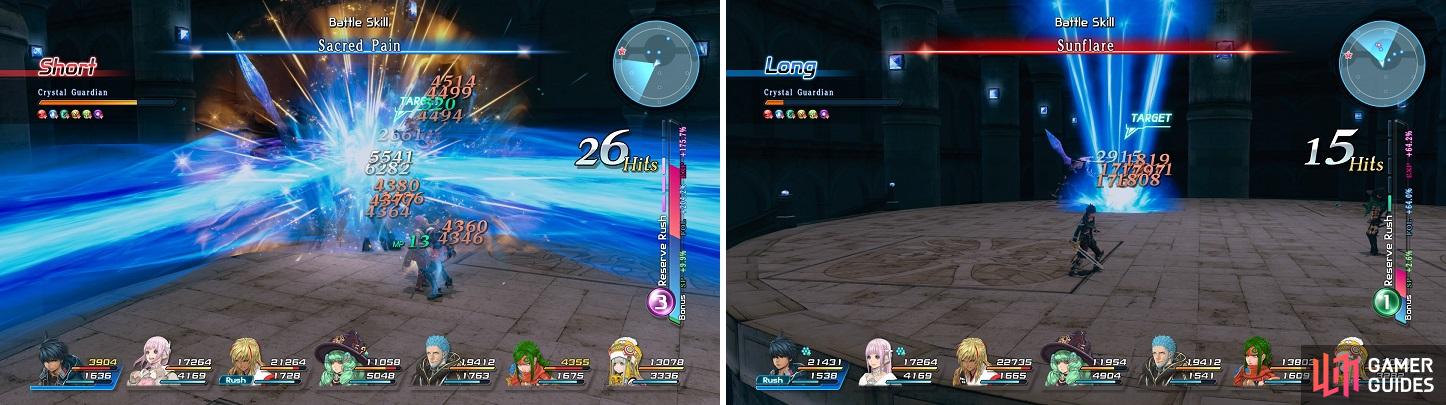
Trinal Spur (left) is a move that can kill whoever is caught in it. Sunflare (right) can also do a lot of damage.
After the battle is over, walk down to the western end of the room to initiate a scene. Relia will go running off, so chase after her and you’ll end up in some strange place. Ignore the chest for now and head straight until you trigger some cutscenes. When they’re over, you can loot the chests before leaving. There are two by the structure at the top ( Parchment and The Founder’s Signets, Vol 2 ), as well as the one by where you entered ( Orb of Antiquity ). Exit this mysterious area and start heading back to the entrance of the Signesilica, using the one door that wouldn’t open before and grabbing the one chest along the way ( Pneuma Signets, Vol 2 ).
Teleport to the ship once you get outside, then go to the bridge to meet up with Delacroix, who mentions the situation. Watch the scene that plays out, then you’ll be moved to the private quarters. Walk outside, listen to the conversation, then return to the bridge for more scenes. Continue into the bridge room again for one more set of scenes, with Emmerson saying it’ll be good to rest before you head after General Alma. This is a good time to go around the world, viewing PAs and doing some more quests. There shouldn’t be many PAs left, but you can get one on the Goale ( Anne’s First Mission ) that grants you the Instructor Role , which grants extra experience.

 Sign up
No Comments