
When you’re ready to continue with the story, go to the Goale and rest in the private quarters. Note the warning about being unable to return to Faykreed, as you won’t be able to do anything else until you finish the first part of the final area. It’s not too bad, but you might want a separate save in case you need to do some grinding or have unfinished business elsewhere. Once you’ve rested, go to the transport room to find someone standing on the side of the room.
Once the cutscene is over, you’ll be on the bridge and some more scenes will play out. Eventually, you will have to move to the transporter, where your plan doesn’t work out, so you’ll need to head to the cargo bay next. Go into the shuttle and after more cutscenes, you’ll be inside the enemy base, Alcazar of the Golden Age.
Alcazar of the Golden Age
| Enemy | Species | Items |
|---|---|---|
| Avenger | Machine | Diffusion Device, Quantum Processor, Blank Disk |
| Blutgang | Machine | Rivets, Micro Circuits, Carbon Fiber, Hadron Collider |
| Kronos Authority | Humanoid | Vitalitea, Wire |
| Kronos Commander | Humanoid | Heroism Potion, Wire |
| Kronos Scholar | Humanoid | Acuity Potion, Signet Card: Shadow Needles+, Signet Card: Dark Devourer+ |
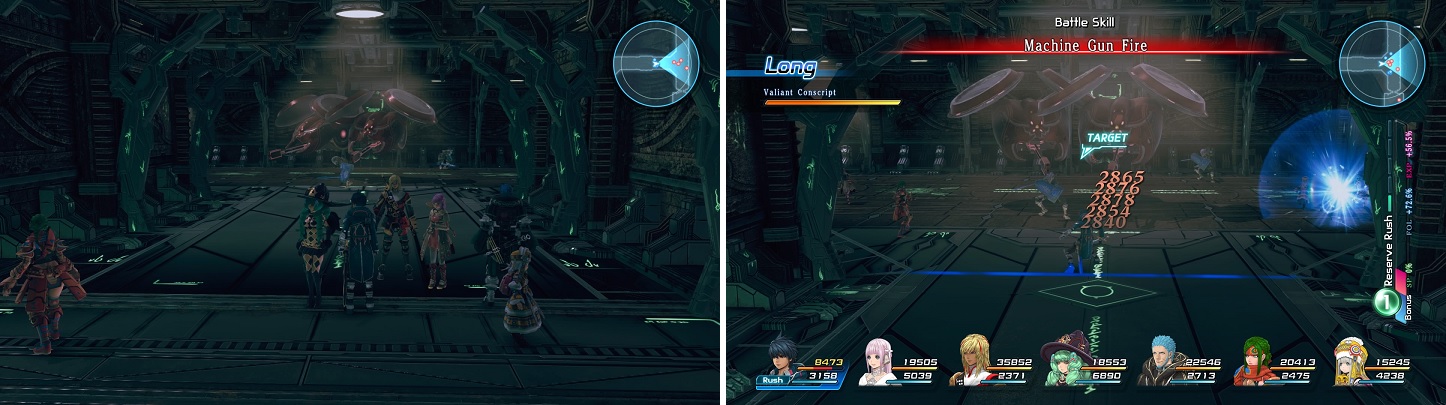
| Valiant Conscript | Machine | Quantum Processor, Laser Oscillator |
There’s nothing in the main area where you land, so go north into the next room, where you’ll find a merchant that sells some equipment upgrades (provided you didn’t craft something stronger), as well as some basic items. Feel free to save, then head north into the first hallway, where you can find a chest in the small room to your west ( Meteorite x2 ). You will want to be careful with the Avenger enemies, as they can quickly down characters with their attacks, but they don’t have a lot of health.
Avengers are the enemies that can deal A LOT of quick damage, but they don’t have a lot of health.
In the north/south hallway, go into the room in the southeast to find another chest ( CQC Program Theta ). Head straight north to find a teleporter that goes to the second floor. At the four-way intersection, go into the northern room to find two chests ( Arcana Sword and Blank Disk ). Start heading east and go straight down the hallway and into the small room at the end, where there will be a chest ( Valiant Mail ). Go into the next room and venture southwest, where you’ll find a chest in one of the small rooms ( Solar Signets, Vol 4 ).
Return to the previous room and head toward the northeastern path, where you’ll find another chest before going through the door ( Swordsman’s Manual VIII ). There’s nothing else on this floor, so take the teleporter to get to the third floor. In the first hallway, enter the room to the south to grab a Fae Signets, Vol 3 book from the chest. This skill book will allow Miki to learn the best party heal, Faerie Star. Head north and save, then get ready for a mini-boss fight.
BOSS - Shrouded Gaze
If you’ve fought the Eyebalone in the first iteration of the Cathedral portals earlier in the game, then this boss is nothing new to you. It can be particularly annoying with Eye of the Beholder, as it can do some heavy damage to the target it hits if it connects from the beginning. If it’s targeting your controlled character, then you can simply run around to avoid getting hit by it. It does know Radiant Lancer, but that’s nothing to fear. Another attack that can be annoying, not because of the damage, is when it will spin around, knocking your melee characters into the air for a few seconds. There is one more laser attack, but it doesn’t track the character and only hits a little bit in front of the monster.
Once you’ve poked the eyeball monster out of commission, go through the western door and make a U-turn to enter the southeastern door to access the chest you probably saw during the battle ( Dojikiri-Yasutsuna ). Return to the previous room and go west, then follow the hallway south to a horseshoe-shaped room. The small room in the northern section of this room has a treasure ( Extrication Ring ), and you’ll find another right by the southwestern exit ( CQC Program Delta ). At the final intersection before the fourth floor, there will be a chest in the small room to the west ( Straightshooter ).
Take the teleporter to the fourth floor and head straight south to find a treasure in the small room ( Swordsman’s Manual VII ). There will be another chest in the room at the western end of the long hallway ( Tiger Fangs ), so grab it and make your way to the room with the save point. There’s also a healing spot and merchant here, so replenish any items you may have used, and feel free to upgrade your equipment if you need it. Go into the next room for another mini-boss fight.
BOSS - Ferias Clone
When you’re ready, go into the next room and prepare to fight another mini-boss, Feria’s Clone. She is quite skilled and does have a few damaging attacks, one of which is Revolution, where she will delay a bit and launch a small energy ball towards her target, dealing a moderate amount of damage. While not high on damage, Expulse is a quick attack that is designed to knock down your characters at melee range. Reaping Spark is a spell you should be used to by now, especially if you’ve gotten it for Fiore. The clone’s most dangerous attack is called Oppressive Effulgence, which not only hits for high health, but it can also silence those it does hit. Despite what you may think, Feria’s Clone is a humanoid, so Warrior Slayer is good here.
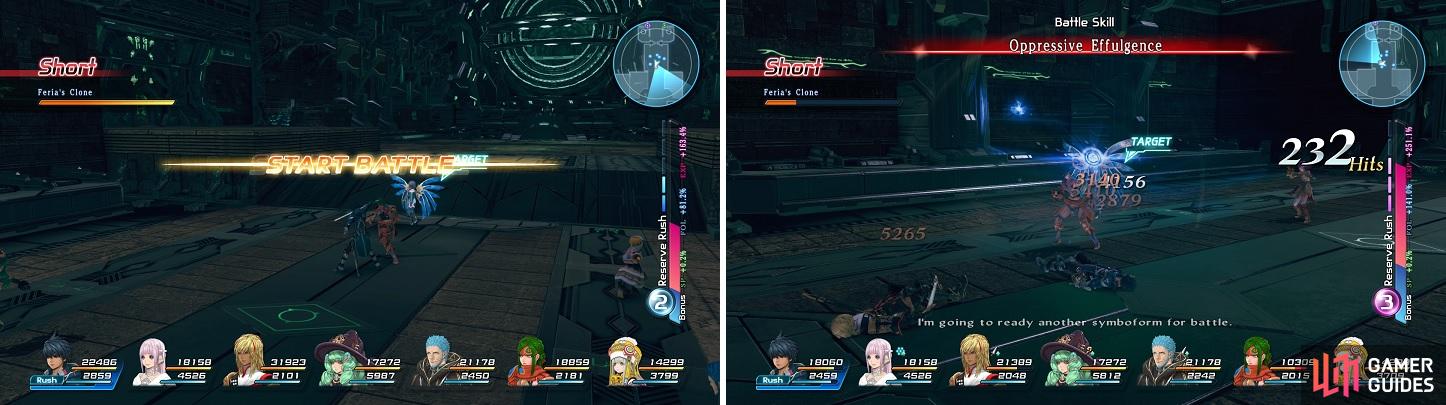
Feria’s Clone is not a difficult fight, but be careful of Oppressive Effulgence (right).
As soon as the battle is over, a scene will take place and you’ll be thrown into another boss battle.
BOSS - Thoras the Abomination
At first glance, this boss is not that challenging, as not only is he slow, but he only seems to spam one attack, called Flagellant Tendril Furor. This is nothing more than a two-hit physical attack at melee range (it can hit more than one character), which doesn’t even do much damage. However, once his health gets under 50%, the action starts getting real, as he will begin using a lot of signeturgy.
First and foremost, he can buff himself with Enhance, which boosts his attack, so you will want to Void this as soon as possible. Divine Wave is probably the most dangerous of the spells, especially since it can do a lot of damage to your melee characters (can even hit more than once), as well as those it might hit when the “pillars” spread out. Sunflare really only hits one target, unless they are grouped tightly together, while Tornado is annoying because it launches characters into the air. Dark Devourer can do a lot of damage, but it seems to be quite rare.
Thoras is plant-based, so Plant Slayer is ideal for your main attacker. Also, Thoras is weak to fire and darkness, so you can turn off all other spells on Fiore except for those (she doesn’t have fire, but has plenty of darkness ones). Actually, the only spells she needs are Shadow Needles, Dark Devourer, Vampiric Blade and Void. As usual, Miki should be on healing/resurrection duty and everyone else should be attacking.
Kronos Sickle
Looks like you’re stuck here in another dimension…or so it seems, as you will see in a short bit. The first thing you will notice is that you don’t have a map or mini-map available, but the path is straightforward and there are no chests here. Head straight and you should see a portal at the end of the path, which leads back to…Fidel’s house? That is certainly strange, but you can use this opportunity to rest, save your game and even finish up any outstanding quests you may not have finished.
Once you’re ready, go back to Kronos’ Sickle and stand in the middle of the big circle just by the portal to see a prompt to teleport. In this new area, you’ll see a big monster on the path ahead of you, which is a Forsaken Beast. It’s not too bad, but be careful of its big laser that it will shoot, so stay to its sides. Teleport to the next area and you’ll encounter two creatures known as Harbingers of the Apocalypse. These are the same as the Crystal Guardian inside of the Signesilica, so be extremely careful of its Trinal Spur attack.
There will be another teleport to a small area, with some Valiant Conscripts, then one more teleport leading to another big creature. This is the Bane Dragon and it does have a lot of health, as well as access to an area-of-effect spell around it that can dish out some punishment. After defeating it, make your way along the path until you get to a save point. This is the final save spot before the final boss, so make sure you save your game here (for two more reasons listed below).
BOSS - General Alma
The fight with Alma starts out with all of your attacks dealing no damage at all, so you simply need to not die from his attacks until a scene happens that will make him vulnerable. Now you can start working on dwindling his health. He will usually start the battle with Divine Bullet, where Alma will charge up and then teleport dash a bit forward, delivering a punch at the end. If he’s targeting your controlled character, you can easily dodge this just by stepping off to either side.
Ground Wave is a short combo where he’ll do some sweeping hooks and they can actually be guarded against, so that means you can actually counter them if you should choose to do it. One particular nasty move Alma has is called Bosom Blow, which seems to be a counterattack to someone using normal attacks whenever he’s guarding. It is a shockwave at short range, emitted from his body that will knock you back and onto the ground.
Once he gets down to 75% HP, he’ll undergo a minor transformation and get all of his health back. Alma will also gain a few new moves in this form, one of which is called Transitory Shock, where he’ll teleport forward a bit and into the air, then smash his fist into the ground. Bloody Blight is another new move, which will cause Alma to perform an uppercut. His most dangerous move is called Hammergeddon, where he’ll jump high into the air and smash into the ground, dishing out a fair bit of damage. The fight will end once you get his health is around 25% or so, with Alma getting another form…
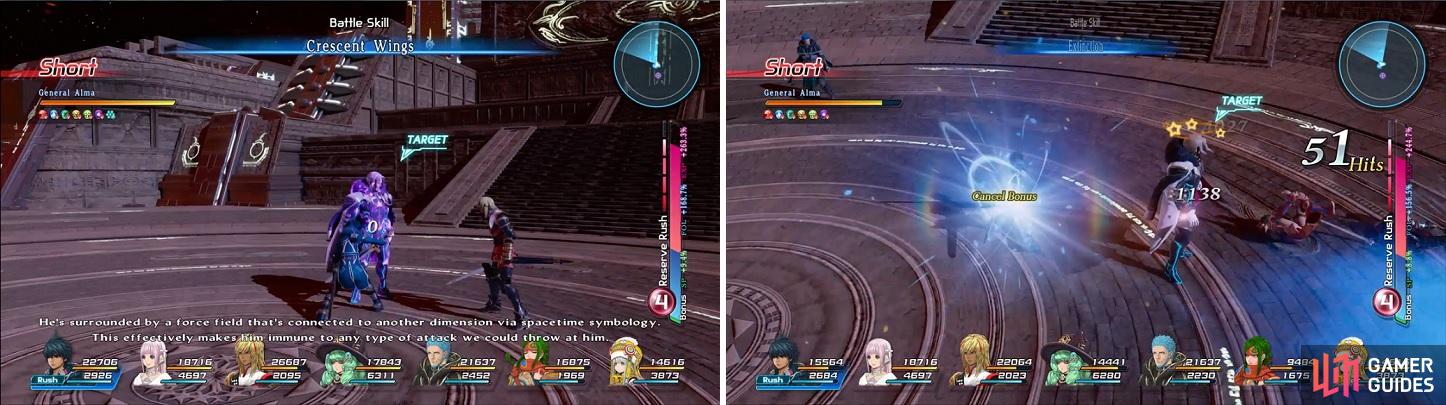
Alma is impervious to damage at the beginning (left). Only after an event later in the battle is he open to damage (right).
BOSS - Transmogrified Alma
Just like the beginning of the previous round, Alma is immune to all damage at the start of this round as well. That means you simply need to survive until Alma unleashes a skill called Annihilation, which will kill all of your party members. This triggers another cutscene that will make Alma susceptible to damage, so get ready for a lengthy fight, as he has a lot of health. You likely saw this during the invincibility stage, but Alma has a move called Seraphic Rebuke. This skill sends out a bunch of large projectiles that will home in on the intended target, dealing some big damage, but they can all be guarded against.
He still has Bosom Blow in this form, but it is much more powerful this time, as it deals multiple hits and can do a lot of damage. Ogrefall is another devastating attack, with Alma rising straight into the air, then crashing into the ground and following it up by spinning his body. If you see his body going into the air, move away from him as quickly as possible. You will also want to be careful with Baleful Winds, as Alma will rear back and then “stomp” his way across the arena, dishing out some extreme damage.
If the fight lasts long enough, you might see Alma use Annihilation. Should this happen, move as far away as possible and just block, hoping you survive the attack. It’s very possible this move will wipe out your entire party, so get ready to revive if you happen to survive. This move is usually followed with Aggravation, which is a debuff to all of your elemental resistances for the survivors (it also envelops the field with a purple aura). If you see Alma using Angel Feather, quickly switch to Fiore and use Void to get rid of his buffs.
So, it’s going to take a bit to work through the upgraded Alma’s almost 2.5 million HP (Galaxy difficulty). He has resistances against every element and is of the Divinity species, so the only slayer role that works here is God Slayer. It’s highly likely that your melee characters might perish once or twice during the battle, so try to equip them with some HP or DEF boosts if you have any. It should go without saying that Miki should be solely healing, with access to only Faerie Star, Cure Condition and Resurrection, as she doesn’t need anything else.

 Sign up
No Comments