
Once you’re done with everything you have to do, go back to the Central Resulia and trigger the story event in the northern part of the town. It appears that Fiore isn’t here, so you’re going to be going to the front lines. You are now allowed to use the other exit in the southwest corner of Central Resulia, where you’ll be on the western side of the Resulian Plains. There is a chest in this small area, which contains a Cerulean Orb Signets, Vol 1 skill book, that can be found directly east of the red star on the map (teaches Earth Glaive to Miki).
Upon going to the red star marker, Victor will leave the party and you’re left to fend for yourselves against the enemies ahead. Just think of the enemies as upgraded versions of the Eitalon bandits, as you have mages, ranged ones and melee enemies. By the first tent you come across, there will be a chest, which contains Physical Stimulant x2 (you need one for the Mother’s Medicine quest in Central Resulia). Just go around the next bend and you’ll meet up with Fiore, then keep fighting the Trei’Kur until your little friend butts in, ending the battle.
It’s time to head to Santeroule, the capital for signeturgy, but before returning to Central Resulia, go northwest of where you met up with Fiore in the battle to find another chest along the northern wall ( Coal ). Also, when you go back to Central Resulia, you’ll find some new Quests at the bulletin board (four of them). Since you’ll be going back on the Resulian Plains, head to the southwest portion to find Dek for the Subjugation Directive: Dek quest (it’s some kind of lava-looking monster; you should have no problems defeating him).
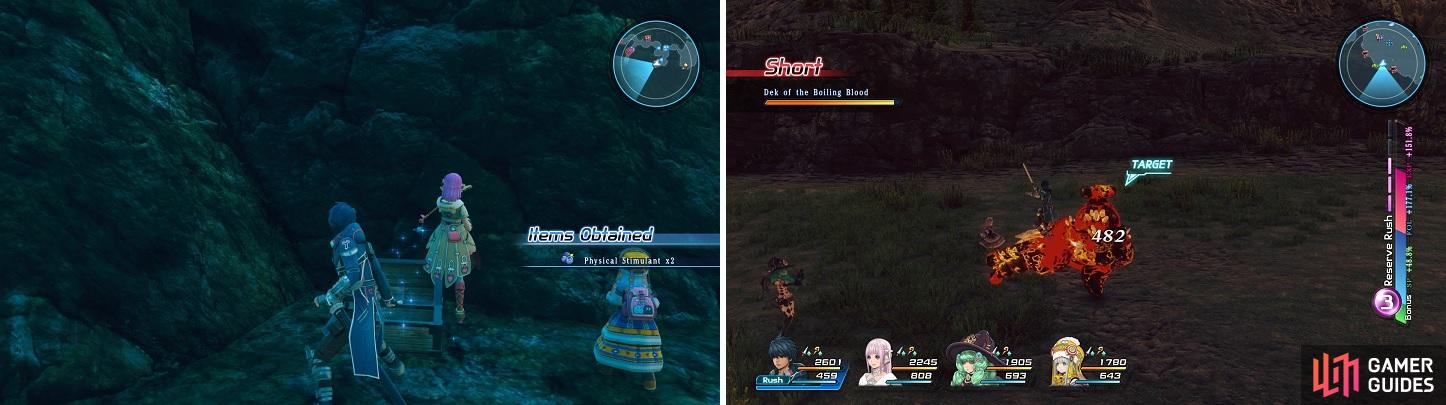
The Physical Stimulant (left) is used for the Mother’s Medicine quest. Dek of the Boiling Blood is pretty easy to find (right).
When you’re ready, head for Myiddok, where you’ll be forced to go to the inn. Fiore will pay for the night’s rest, so you don’t have to worry about it. However, things aren’t so nice, as some men come after you, so you end up going out the window. Escape them by head towards the eastern exit, leading to West of the Eastern Eihieds.
West of the Eastern Eihieds
| Enemy | Species | Items |
|---|---|---|
| Axe Beak | Avian | Peryton Droppings, Giant Bird Feather, Common Eggs |
| Carnivorous Plant | Plant | Zephyr Lily, Jasmine, Chamomile, Olive Oil |
| Harpyia | Avian | Wind Gem, Ruby, Giant Bird Feather |
| Stone Golem | Corrupt | Iron, Fire Gem |
| Succubus | Humanoid | Signet Card, Taffeta Ribbon, Signet Card: Silence |
The path here is fairly linear at first, but will split early on. Take the southern path to find a chest, which contains Blueberry Potion x2 and Blackberry Potion x2 . Continue north and follow the path until you come to another split. Once again, take the southern path and check the chest on the small cliff to find Purification Signets, Vol 1 . If you jump over the edge, you will see a rainbow-looking circle, which you can use to heal.
Do that and save, then keep heading north to run into another chest ( Ruby ). Go west and then south to find one more chest on the edge of a cliff ( Fire Charm x2 ), so grab the contents and head north until you get ambushed by some familiar-looking foes. These ones will be glowing red from the start, so there’s nothing you can do to hurt them, so you’ll just need to survive until some strangers show up to help you out.
They will neutralize their shields so the enemies are susceptible to damage, as well as join you in the fight. They’re not particularly difficult, but they do have a lot of health, so keep pressuring them to whittle it down to nothing. After the battle is over, the people who helped will introduce themselves as Emmerson and Anne, and end up joining your party. There’s not much else to do than keep heading towards Santaroule, only taking a detour to nab the chest ( Alchemist’s Water ).

You won’t be able to damage the mysterious foes (left) until two friendly strangers arrive to help (right).
Santeroule, Capital of Signeturgy
Welcome to the capital of signeturgy, and boy is it a beautiful place! Follow Fiore at first until you can freely move, then make sure to check out both the bulletin board for new Quests, as well as the equipment shop for new stuff. When you’re ready, go inside the Royal Institute. Your goal is the room on the far right side, but there’s a chest in the second roundish room ( Magic Seeds ). There’s one more in one of the side rooms ( Anti-Silence Amulet ), but you can’t get it right now.
Walk into Ceisus’ office and listen to the conversation between him and Fiore, then exit the institute (grab the chest mentioned before). The inn is now open, so feel free to head there and rest up/save before venturing to your next objective. There is a large amount of PAs in the city, although none of them will reward you with any new Roles, so view them at your own leisure. To continue, take the North of the Eastern Eihieds exit.
North of the Eastern Eihieds
| Enemy | Species | Items |
|---|---|---|
| Axe Beak | Avian | Peryton Droppings, Giant Bird Feather, Common Eggs |
| Carnivorous Plant | Plant | Zephyr Lily, Jasmine, Chamomile, Olive Oil |
| Demon Imp | Corrupt | Demon’s Tail, Wolf Fang, Signet Card |
| Harpyia | Avian | Wind Gem, Ruby, Giant Bird Feather |
| Stone Golem | Corrupt | Iron, Fire Gem |
As you can see from the map, this is a fairly linear path without any large deviations. Right by the first set of enemies on the map will be a treasure chest, with a Fae Signets Vol 1 skill book. Luckily for you, this is only usable by Miki, with it teaching her Faerie Healing (party heal). If you have the Open Season on Ostharks quest, then you’ll find four of them in the large clearing, where the path splits.
Also at where the path splits, take the short one going west to find another treasure ( CQC Program Alpha ). Since Emmerson already has a skill with this book, use it to teach Anne a new skill, Electric Fists. Ignore the locked chest you see on the map and keep going until you finally reach the Ancient Institute. Follow Fiore until you are finally able to freely move, then search the room to the left to find two chests ( Wind Armlet and Parchment ). Watch the event that unfolds in the northern room, then make sure you open the chest before you leave to find a Founder’s Signets Vol 1 .
Central Resulia
You’re told to head back to Central Resulia to talk with Victor about getting to Trei’Kur. The trek back is uneventful, with nothing new, although you are likely to run into Lancing Hodos if you have the related quest in your log. Once you finally arrive, you see the townspeople are on edge. Before stopping by the castle, check the bulletin board to find more quests are available, then head to the castle to meet up with Victor.
It seems things have turned for the worst in the war with Trei’Kur, so you offer to help out. Victor brings you inside of Castle Bariff, so follow up to the upper room on the left side. Listen to Victor’s advice and open the chests in the room for Blueberry Potion x5 , Blackberry Potion x5 , and a Signet Card: Faerie Light . Walk around the room, listening to the conversations of your allies, then you’ll finally get word that some enemy troops are incoming.
Rush downstairs and before you are able to exit the castle, go into the lower right room to find a chest with a Strength Potion and a Perception Potion . Finally, exit the castle and get ready to fight. The enemies that the Resulian forces are fighting will keep on respawning, so either do some battles with them if you feel like it, or ignore them and head to the central path to find it blocked. You’ll notice that your father is fighting with someone named Der-Suul, so listen to what your father says and get out of there.
Lancing Hodos are a good source of experience and SP (left). The Trei’kurans will infinitely respawning in Central Resulia (right).
There is only path you can take, which leads to the southwestern exit, where you’ll happen upon a group of Trei’kuran Arquebusiers. These enemies are armed with guns, so try to guard your way to where you can get into melee range (assuming you’re using one of the melee characters). After defeating them all, continue to the exit and get ready to watch a very interesting, and equally confusing, scene play out.
Northern Territory of Sohma
| Enemy | Species | Items |
|---|---|---|
| Saber-Toothed Tiger | Beast | Wolf Fang |
| Snow Mermaid | Corrupt | Ice Gem, Fish Scales |
Well, that was certainly something. It turns out you were teleported to Sohma, which is covered in snow. Once you can finally move, head forward on the path until you come to a small cave, where your party will rest and talk over things. You can continue talking to your party members, but to continue, you’ll have to exit the cave. There will be another scene once you exit the cave, then you’re free to move about the area.
Just north of the excavation point, which you should have if you’ve been following this guide, is a chest that contains Cinnamon x2 . Keep going to the west and you’ll reach a small clearing where Victor will leave the party. Instead of going north, go south and you should see a merchant’s icon on the screen. The poor guy is out in the middle of the freezing cold, so look through his wares, upgrading anyone’s equipment that might need it. There’s also a chest straight across from him that contains a Mind Bracelet .
You can’t trek further south, so you’re stuck with going the northern path you saw earlier. You’ll find a locked chest right by the next group of enemies you encounter, but you still won’t be able to open it yet. If you have Treasure Sense, you probably see two chests to the north of you, but trying to go that way will elicit a “Not that way, doofus” response from Relia, so head straight west to find a chest there ( Moonlight Signets, Vol 1 ). Before heading south, heal up your party, as there will be a boss fight!
BOSS - Pavine
Pavine is definitely a very challenging fight, as he can dish out quite a lot of damage and comes with a lot of cronies. Speaking of his cronies, they should be taken out first, as they might concentrate on going after Miki, who should be your healer in this battle. And yes, they will go after her quite a lot, so if you see her health getting too low, toss her a healing item. All of the grunts are equipped with pistols/rifles, so they are able to attack from anywhere.
Once you manage to take out all of the fodder, you can now concentrate on Pavine, who has a few annoying moves. Ignition X has him tossing out some grenade-like projectiles in front of him, which will explode in a second or two. Ignition Burst will cause him to fire his pistols in a rapid-fire fashion. Another move that can be quite devastating is Lightning Blast, where Pavine will shoot a lightning “beam” straight in front of his body.
To make the battle even more annoying, Pavine will use Redeployment to teleport to another location, meaning you’ll have to chase after him somewhat, especially if you were in the middle of attacking him. He has the one spell that’s the same as Fiore’s, called Wind Blade. One final move is called Ignition Y, where Pavine will cause an explosion on the ground in front of him.
Once his health reaches below 50% (somewhere around 35% or so), there will be a cutscene that triggers, where he’ll shoot Miki and incapacitate her for the rest of the battle, along with Relia. This is very bad news, as she is the only character with healing spells, so you’ll have to do the healing for the remainder of the battle with items. Luckily, Pavine doesn’t gain any new moves after this and will continue using his arsenal outlined above. Remember to use your Reserve Rush if you need it. Keep on him and he’ll eventually go down.
Charles D. Goale
After the battle is over, you’ll end up being transported to the Charles D. Goale, a spaceship used by Emmerson and Anne. Once you regain control, use the healing spot and open the chest next to it to receive a Restorative Signets, Vol 1 . Make Fiore use this to give her a healing spell. Ignore everything else for now and go with Anne to the sick bay to keep up with Miki’s condition. It turns out that she’ll be fine and will recover in a few days.
With that weight off of your shoulders, follow Anne to the bridge and you’ll learn a tiny bit about the ship. Emmerson seems to have pinpointed a possible location to learn about Relia’s mysterious nature, which happens to be in the Trei’kuran Dunes. He’ll bring you to the teleporter and beam you down there. Once you regain control, move around until you get the Communicator item, which lets you come and go as you please to the D. Goale. Use it now and get ready to do some sidequesting!

 Sign up
No Comments