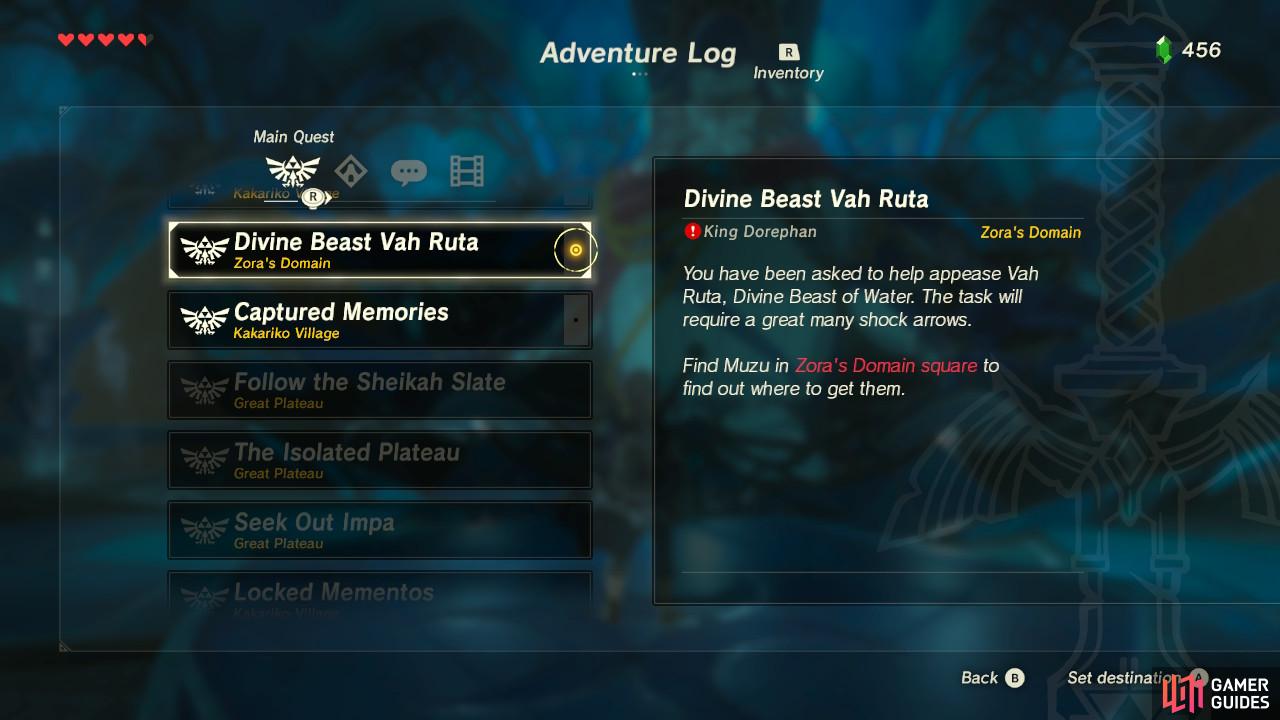
Main Quest: Divine Beast Vah Ruta
To kick off this quest, Muzu will tell you that twenty Shock Arrows are needed. Prince Sidon will go to the nearby East Reservoir Lake to await you while you collect them, and point out a shortcut you can use for easy access to the mountain with the Lynel.
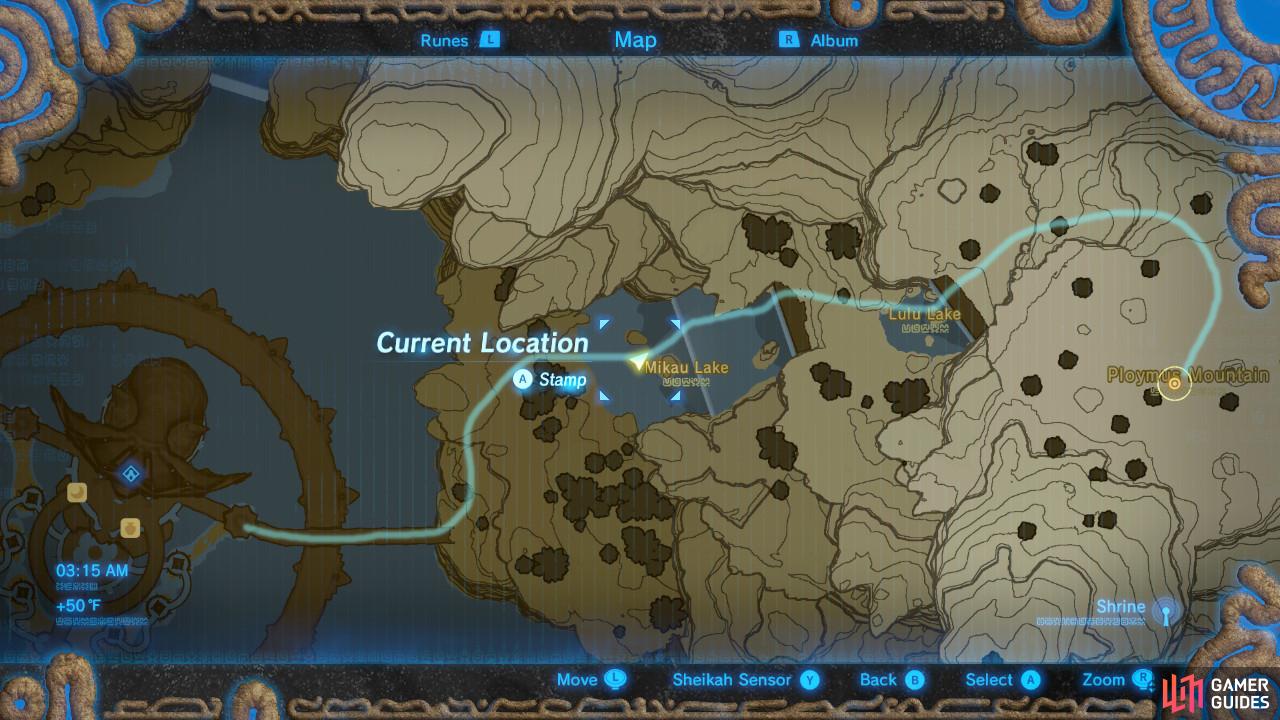
Exit the Zora’s Domain via the east bridge. Go left and you will run into a sign that you can read to see that the shortcut Prince Sidon mentioned is to your left. The image above shows you the general path you will want to follow to make use of the shortcut.
Mikau Lake
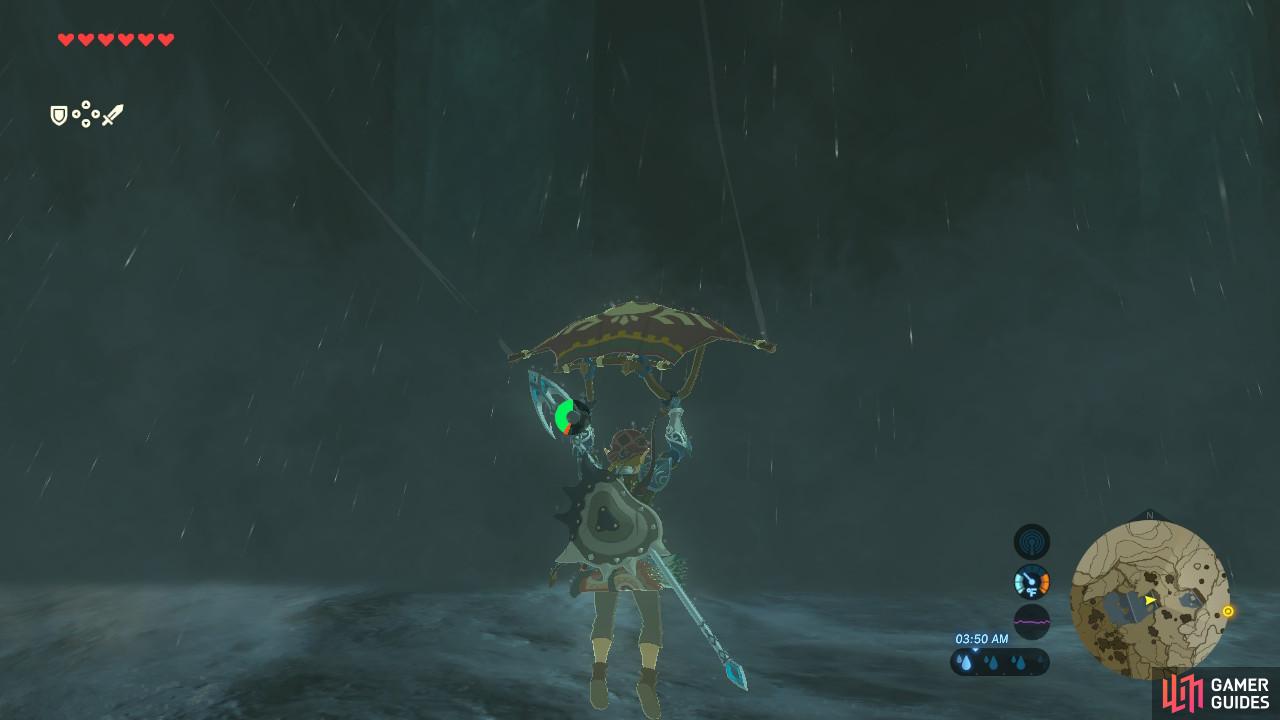
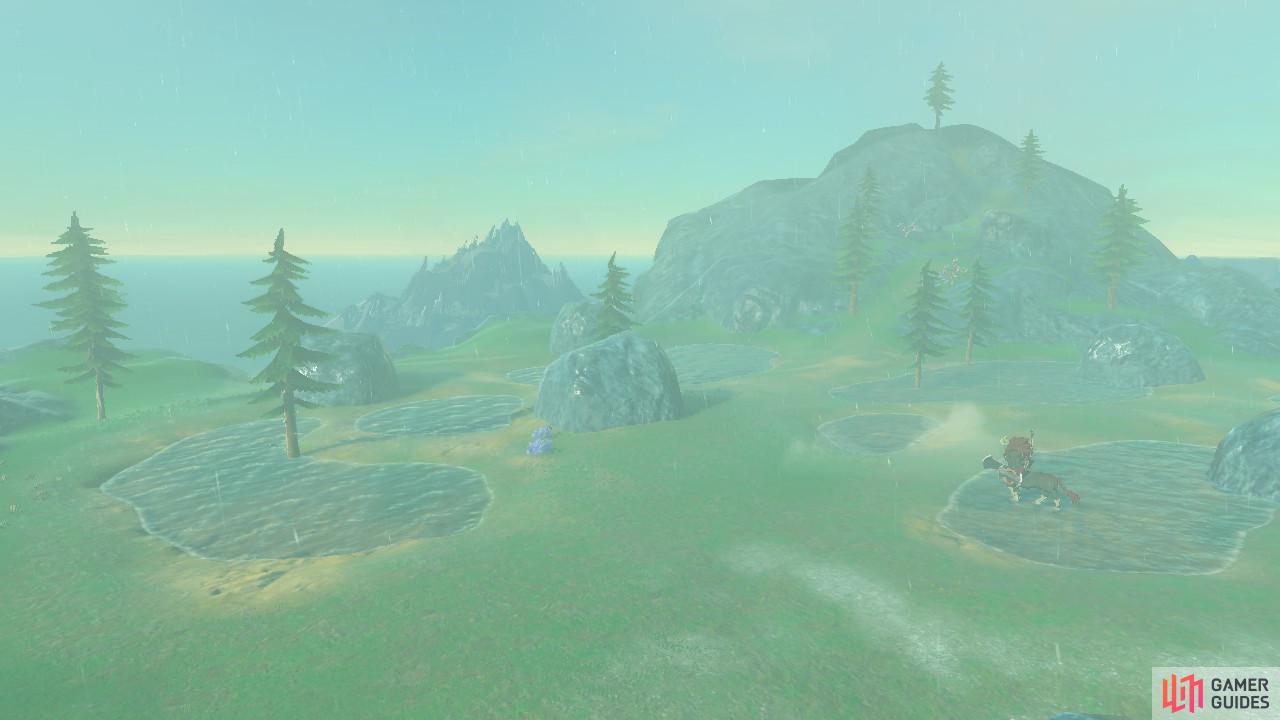
(1 of 2) Link will automatically deploy his Paraglider after clearing the waterfall.
Link will automatically deploy his Paraglider after clearing the waterfall. (left), Climbing up the waterfall consumes stamina (right)
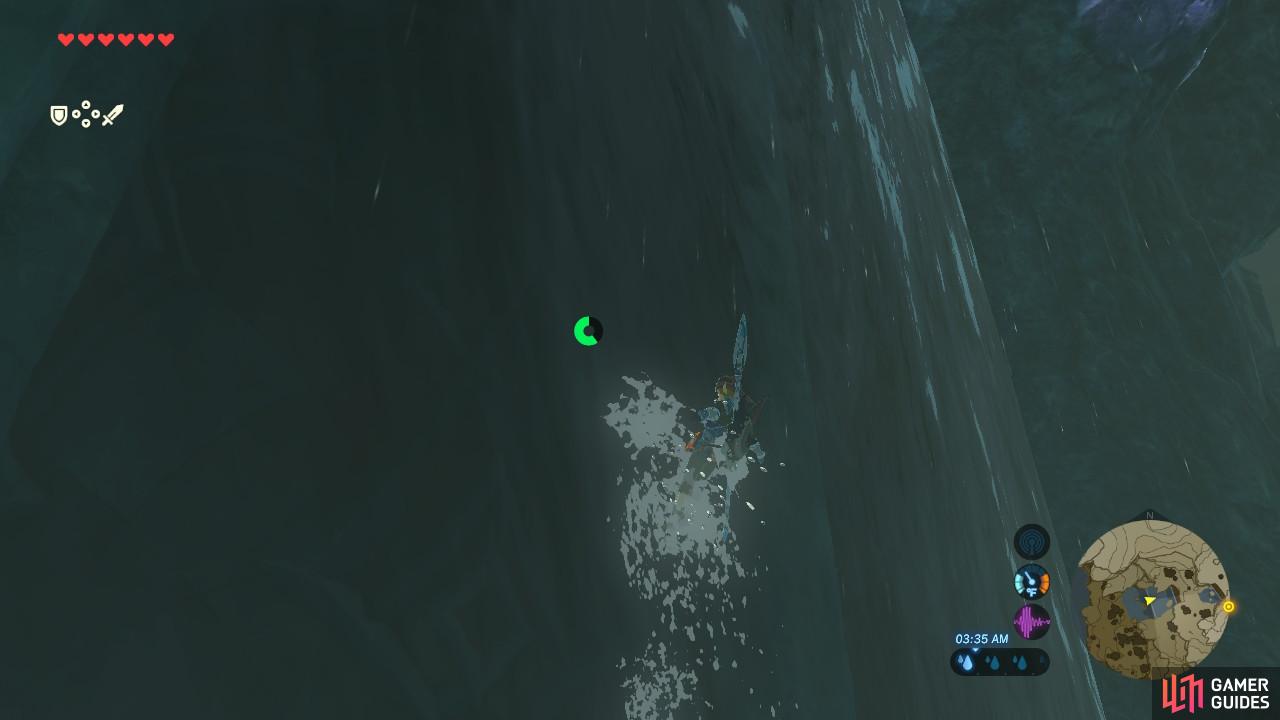
Once you are here, swim forward and then press [A] when prompted. The Zora armor will let you ascend the vast waterfall. As you reach the top, Link will launch into the air and automatically activate the Paraglider.
Paraglide forward as far as you can, and then repeat the process for a second time to ascend the second waterfall. Stamina-replenishing food will help if you run low, but this process is doable with one wheel. You will finally land on solid ground, having reached the top of the waterfalls. Make your way a short bit forward over the rocks for the next leg of our shortcut.
Lulu Lake
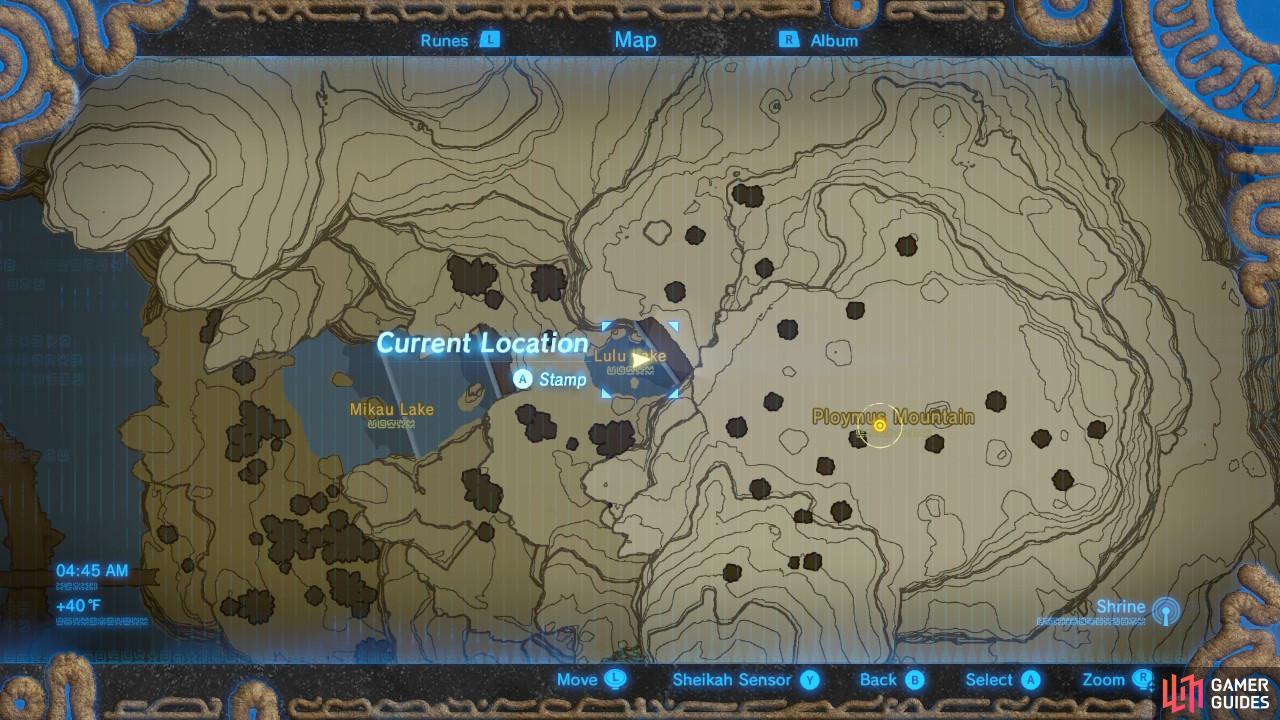
(1 of 2) Once you reach the top of Mikau Lake, go forward over the rocks
Once you reach the top of Mikau Lake, go forward over the rocks (left), Lulu Lake is this smaller lake marked here. (right)
This smaller lake has another waterfall in front of it. Clear it and you will finally arrive at the mountain.
Ploymus Mountain
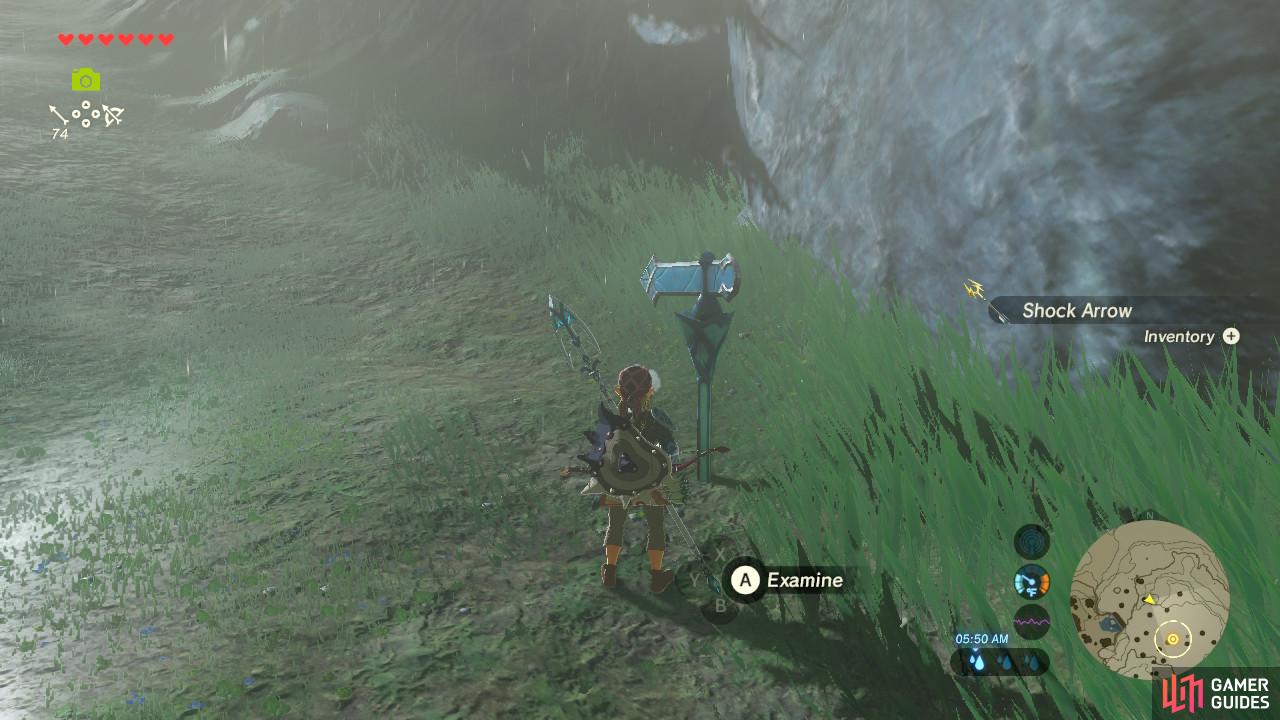
(1 of 2) This signpost is a sign that you are nearing where the supposed Lynel is
This signpost is a sign that you are nearing where the supposed Lynel is (left), The Lynel will appear during this cutscene. (right)
Work your way up the winding path. If you pass any trees with Shock Arrows sticking out of them, feel free to pluck them. You will need twenty to complete this section of the main quest, after all.
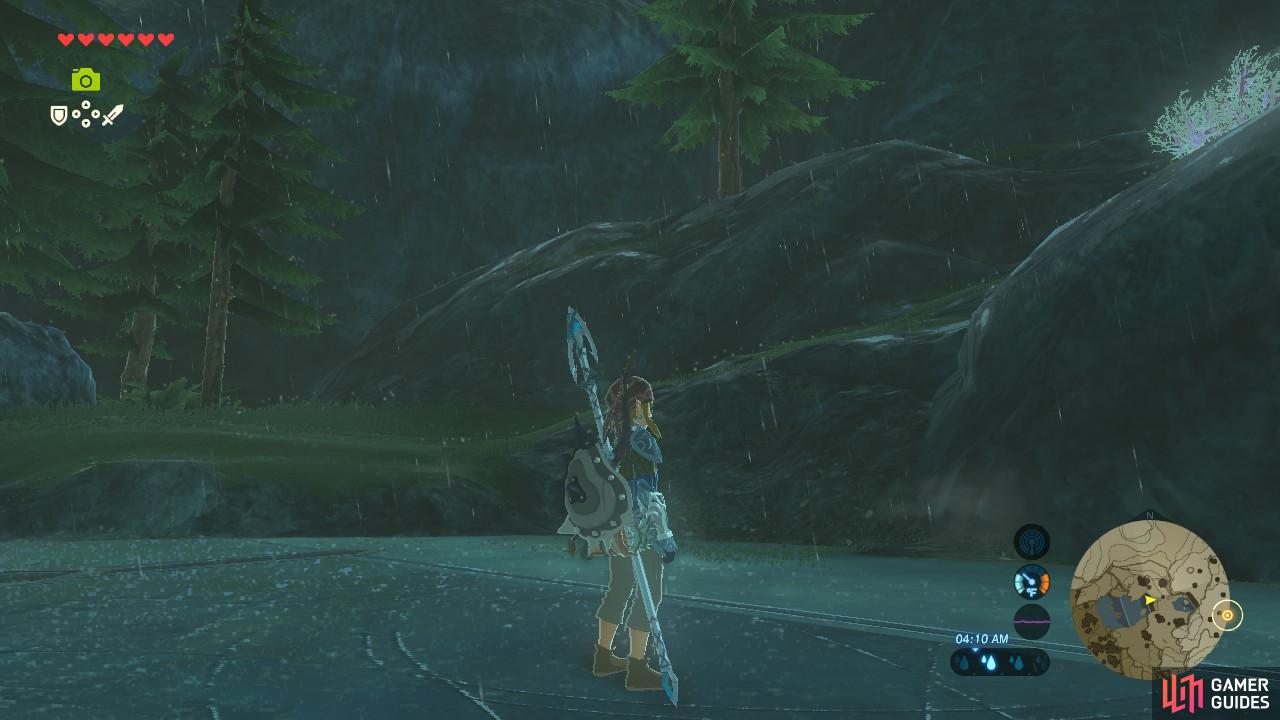
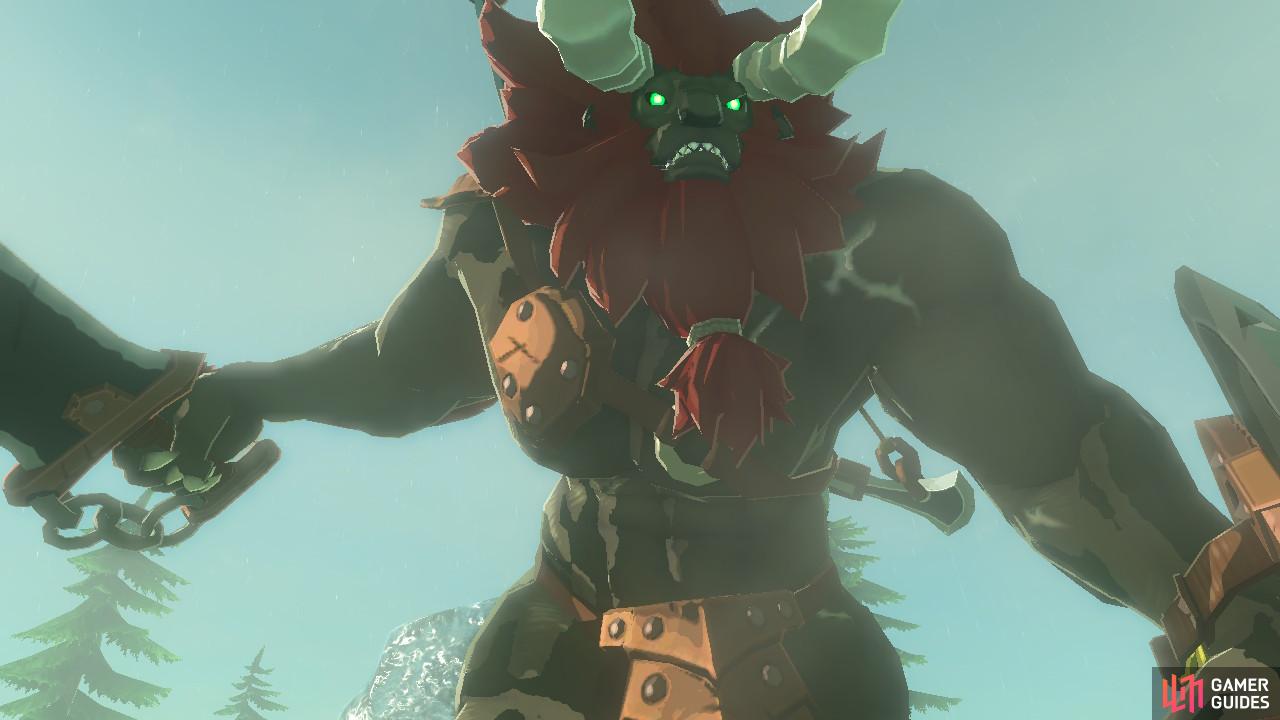
Once you have reached the top, you will trigger a cutscene that shows a Lynel appearing. After the cutscene, the Lynel will just be hanging around. It will not be aware of your presence unless you make a lot of noise or begin running towards it, or if it gets close to you. If you love taking photos for your Compedium, grab a few shots and then save your game.
Boss Fight: Lynel
The Lynel has a ton of health. You are definitely underpowered for this fight, but clearly the game has no qualms throwing a bunch of stuff at you that is way too strong for your gear.
Fighting the Lynel is actually a fairly cut and dried process. Its attacks are clearly scripted and it only uses a few of them, making it an excellent enemy to practice your combat skills on. If you die, hopefully you saved before engaging so that you can simply try again.
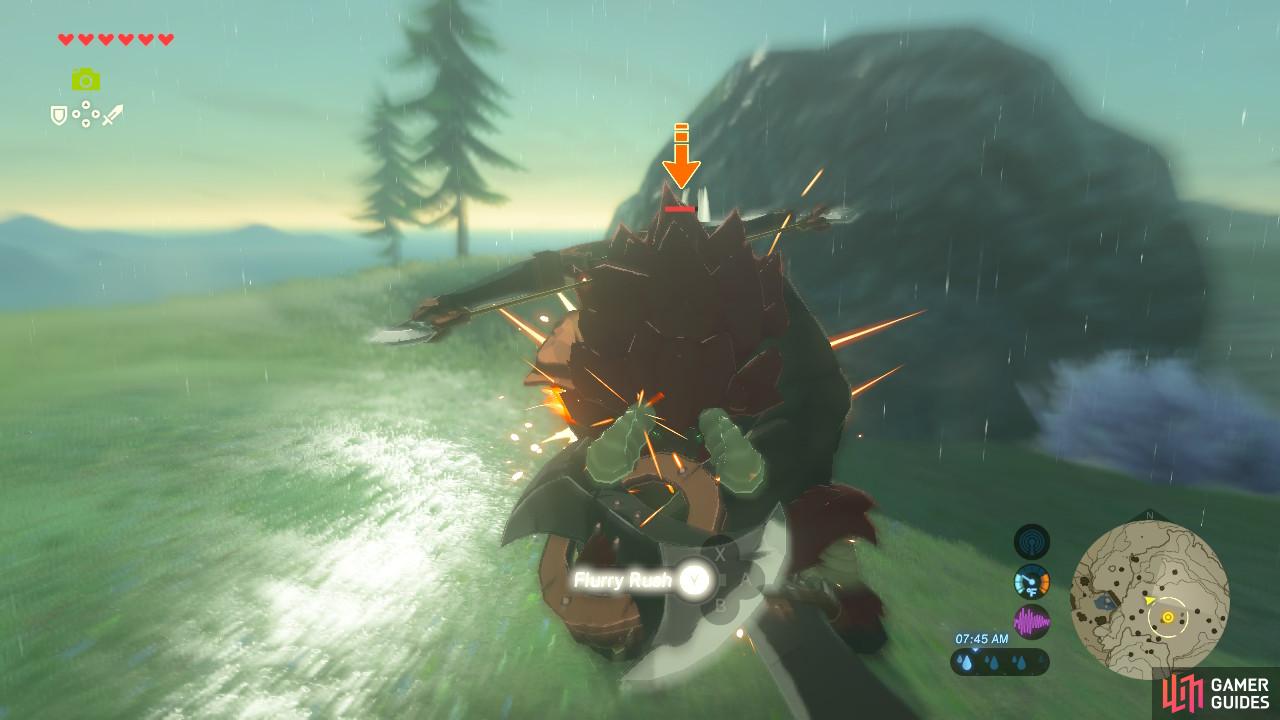
The Lynel will use its sword to slash at you or will use its sword and shield to double-slash at you. These can be easily dodged using a backflip to activate Flurry Rush and deal damage. The Lynel will also charge frequently. Side hop or run to get out of the way. Note that its charges can be dodged with perfect timing for Flurry Rush, it’s just more difficult.
As the fight wears on, the Lynel will start breathing fire at you. The projectiles are slow-moving so just keep running to the side. The Lynel will always shoot fireballs at you in sets of three, and the burning grass will create an updraft you can use to Paraglide into the air.
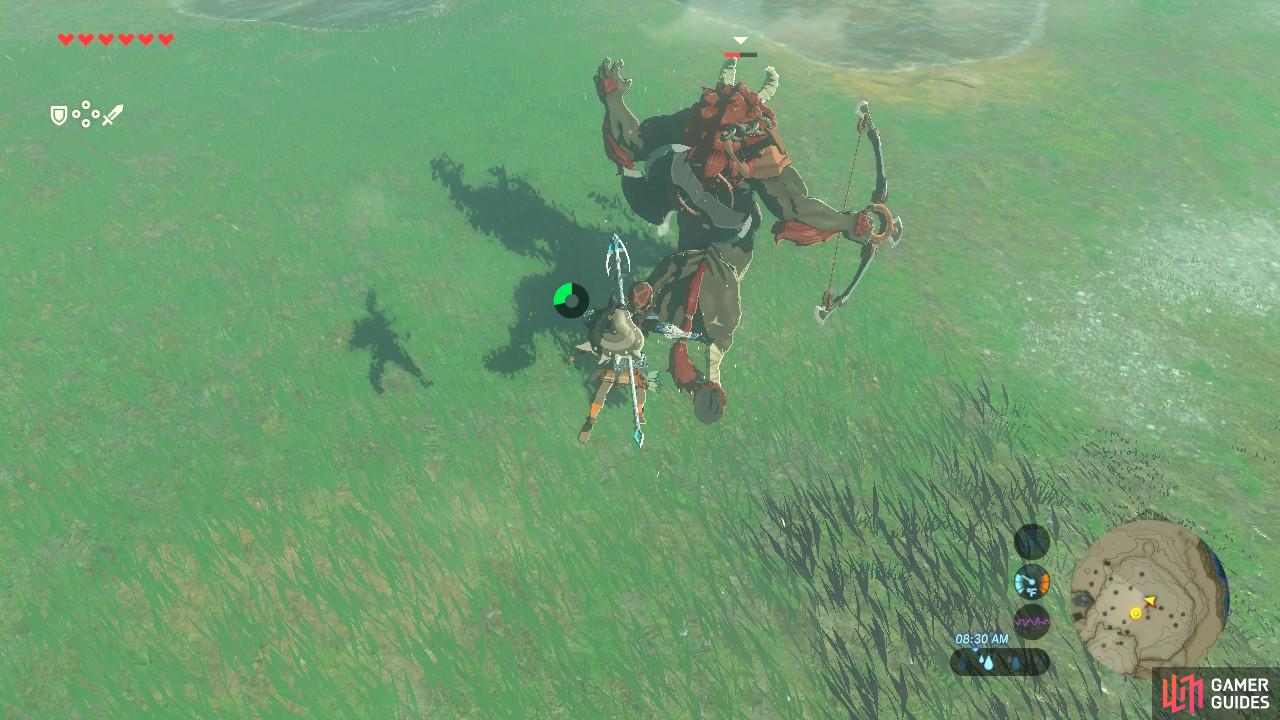
Then you can either shoot it from the air, or you can even descend upon its rump and ride it, dealing damage all the while. Be careful, while up in the air the Lynel might shoot at you with its Shock Arrows.
The fight is long and can easily wear you out. Hang in there and finish the fight. The Lynel will drop 10 Shock Arrows, along with an assorted variety of gear that you definitely want to grab.
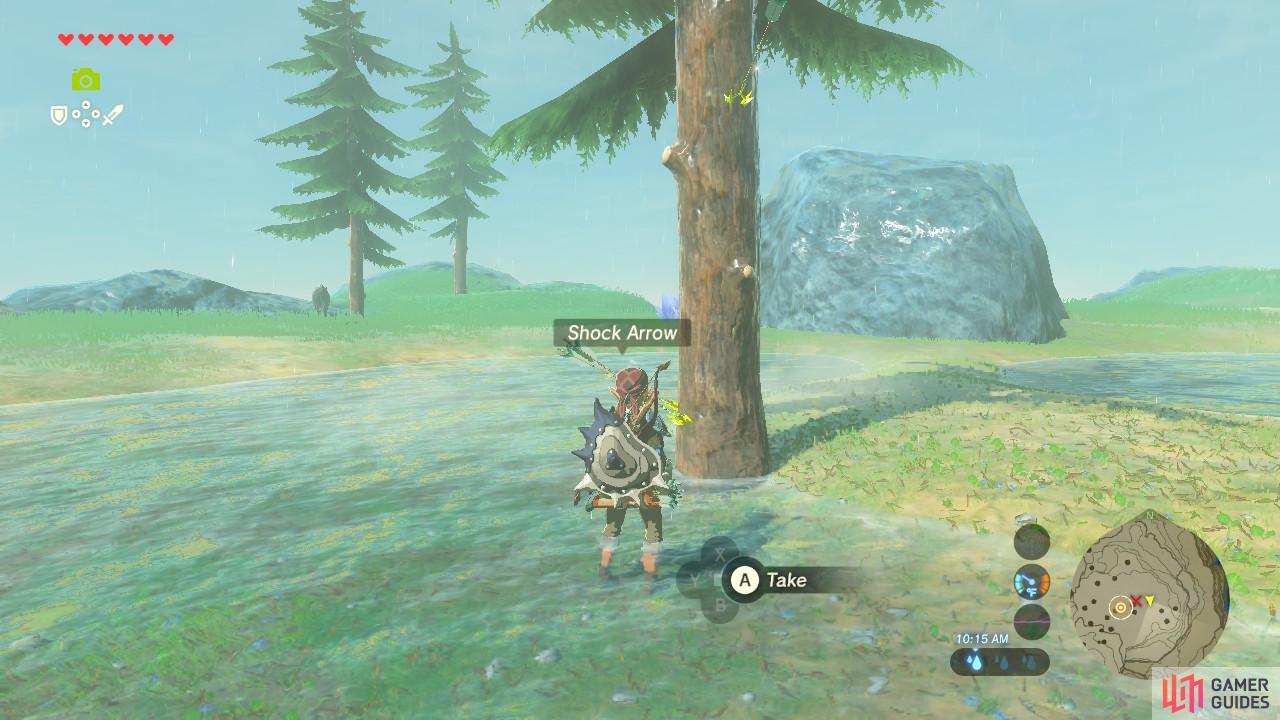
You might not have twenty Shock Arrows from just the Lynel, so run around the area where you fought it. There will be Shock Arrows sticking out of trees, laying on the ground, embedded in rocks, everywhere. Grab them all and once you hit twenty, the main quest will update and your destination will change to the East Reservoir Lake, where Prince Sidon awaits you.
![Definitely mind your stamina here. Press [X] to drop, then press [X] again to glide to the ground safely](/assets/guides/144/The_Legend_of_Zelda_Breath_of_the_Wild_To_East_Reservoir.jpg)
![Definitely mind your stamina here. Press [X] to drop, then press [X] again to glide to the ground safely](/assets/guides/resize550x-/144/The_Legend_of_Zelda_Breath_of_the_Wild_To_East_Reservoir.jpg)
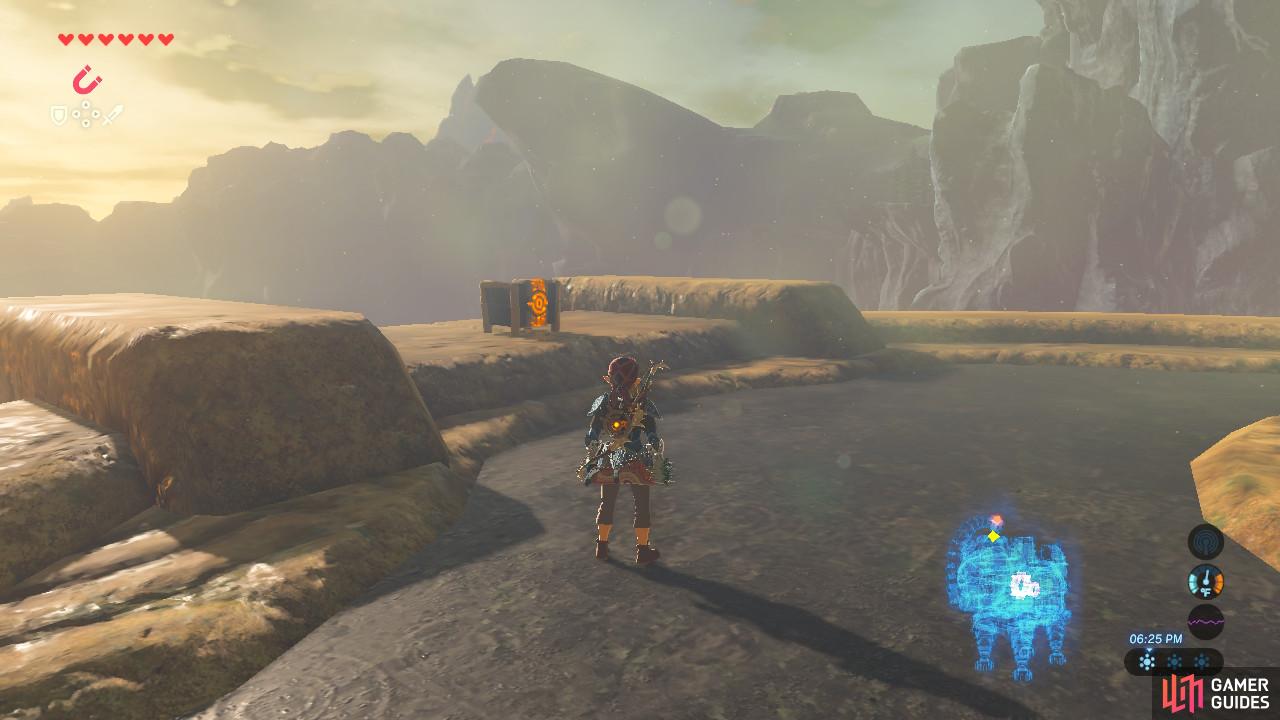
(1 of 2) Definitely mind your stamina here. Press [X] to drop, then press [X] again to glide to the ground safely
Definitely mind your stamina here. Press [X] to drop, then press [X] again to glide to the ground safely (left), This staircase will take you right up to the East Reservoir Lake. (right)
Jump off the top of Lulu Lake’s waterfall and just Paraglide down back to the fork in the road with the signpost. This time, hang a right and climb up the staircase.
East Reservoir Lake

Speak with Prince Sidon and tell him that you are ready. It is now time to gain access to Divine Beast Vah Ruta, and calm it down in the process to stop a potentially disastrous flood.
Divine Beast Vah Ruta
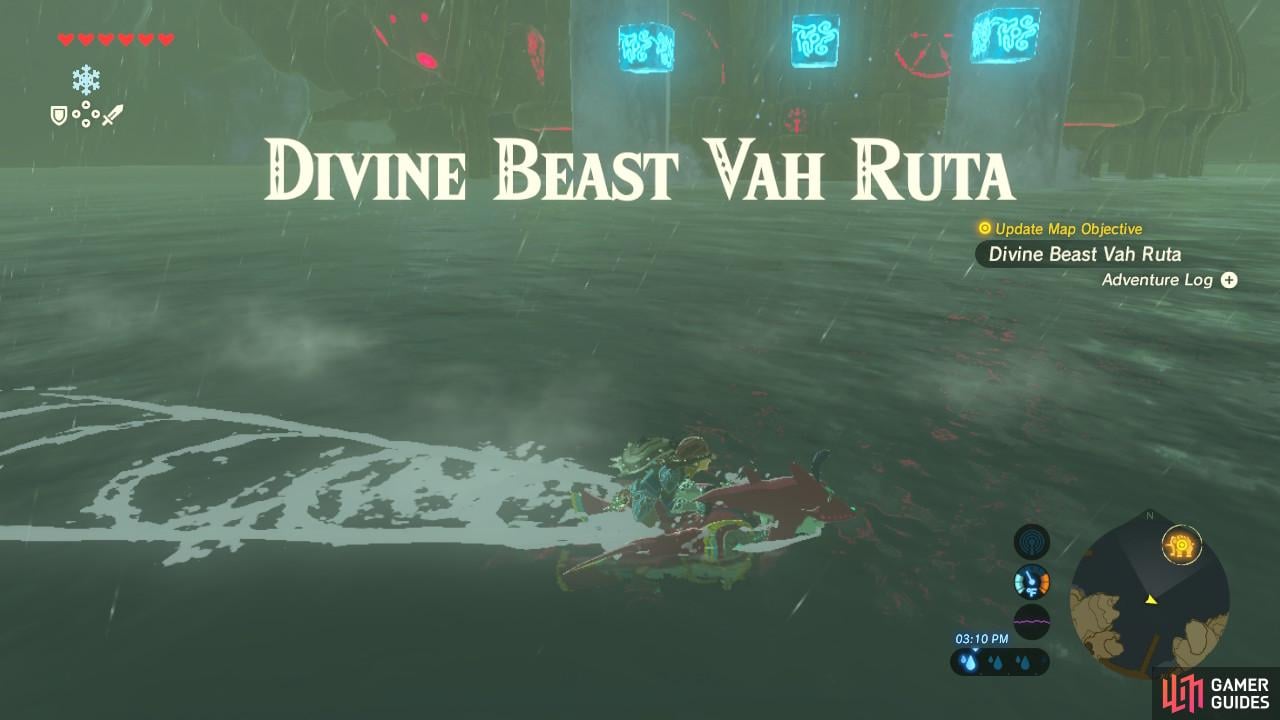
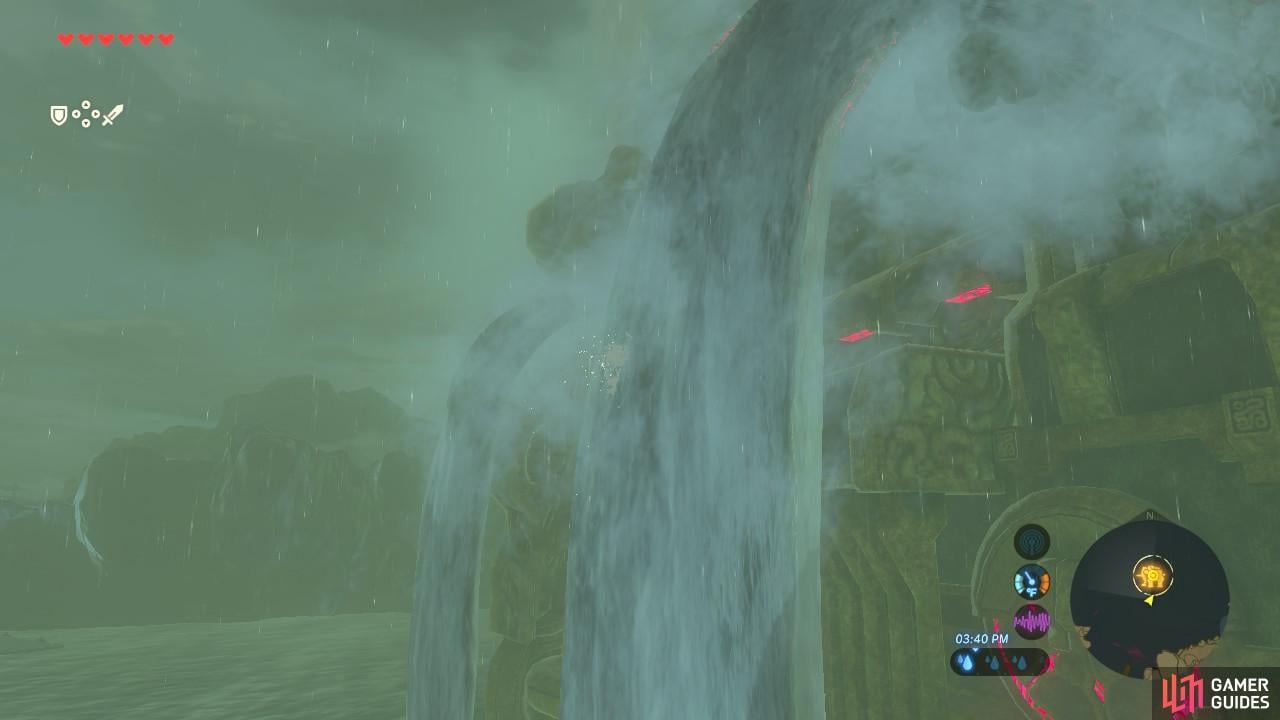
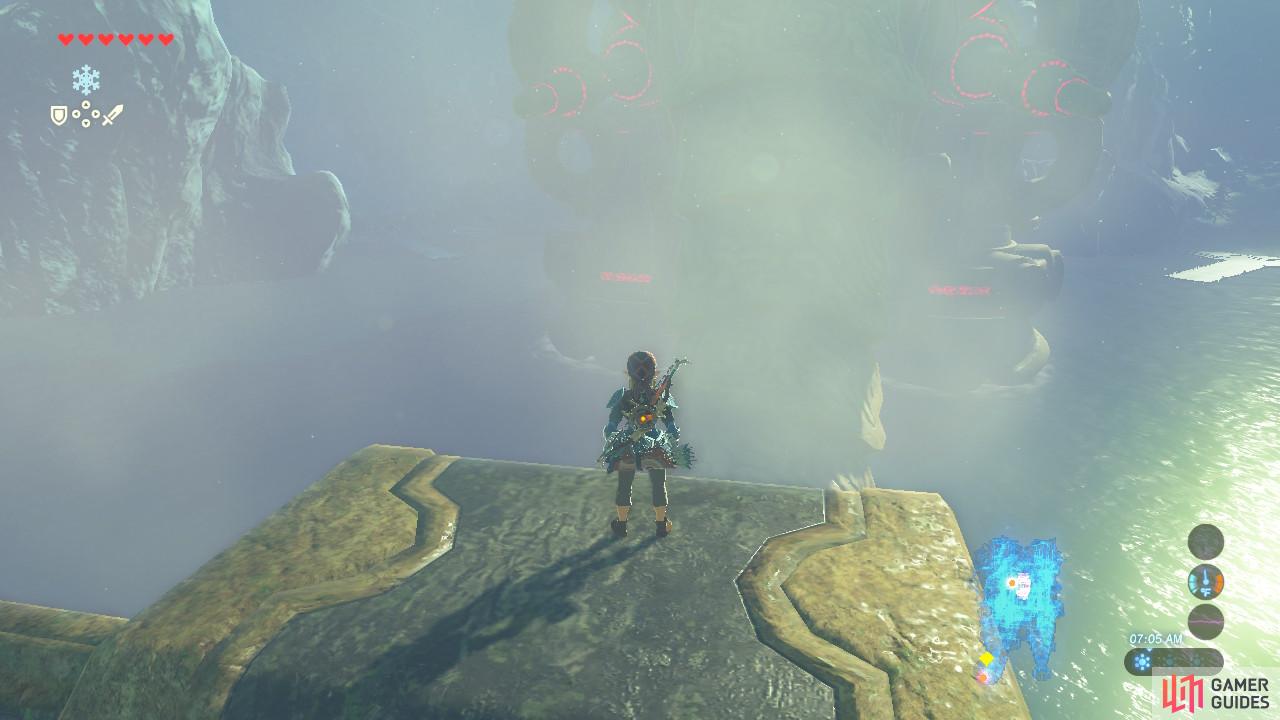
You will be riding on Prince Sidon’s back, and once he gets close to the waterfalls spouting from Vah Ruta’s sides, you can climb up them and then fire an arrow at the weak points all along its body.
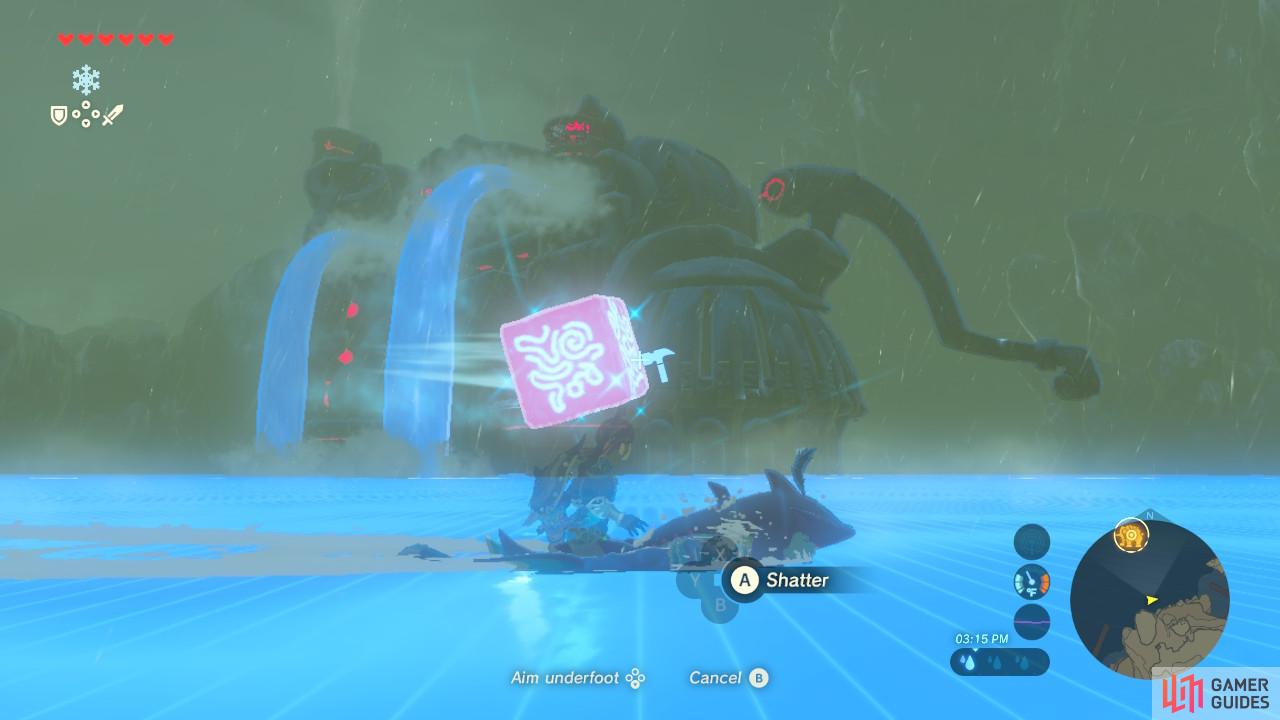
(1 of 2) Use Cryonis to shatter the ice blocks before they hit you
Use Cryonis to shatter the ice blocks before they hit you (left), Each time you shoot a weak point, Vah Ruta will create more and more ice blocks. (right)
Vah Ruta will fight back, however, in the form of ice blocks that it will throw at you. Activate Cryonis during these sequences and break the blocks as soon as they are within range. Throughout the fight, Vah Ruta will throw both regular blocks at you, and spiked blocks, which will land in the water and track you.
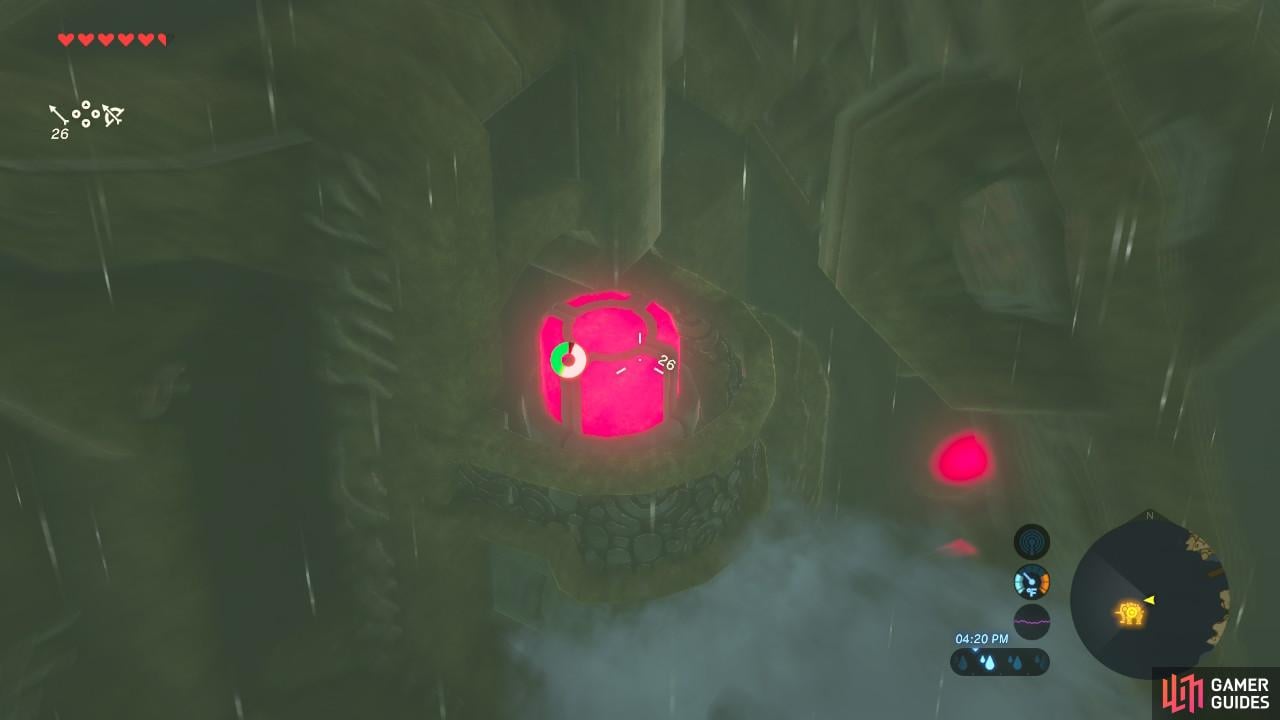
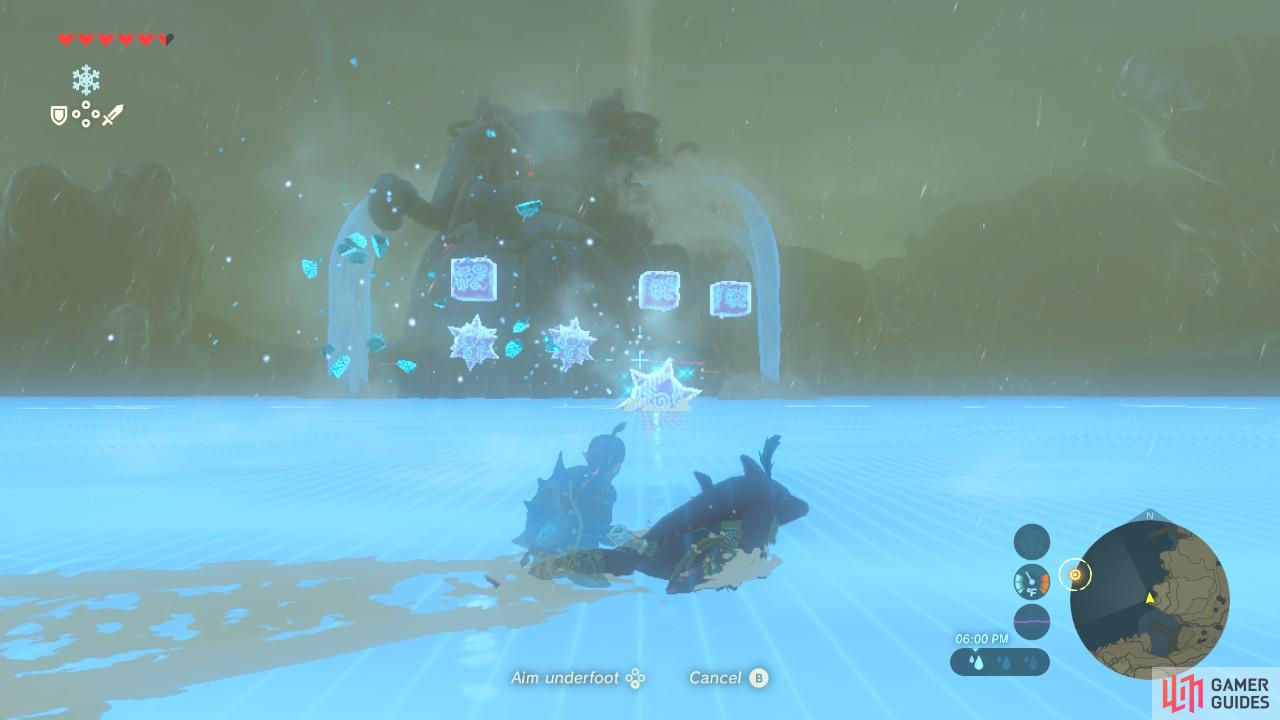
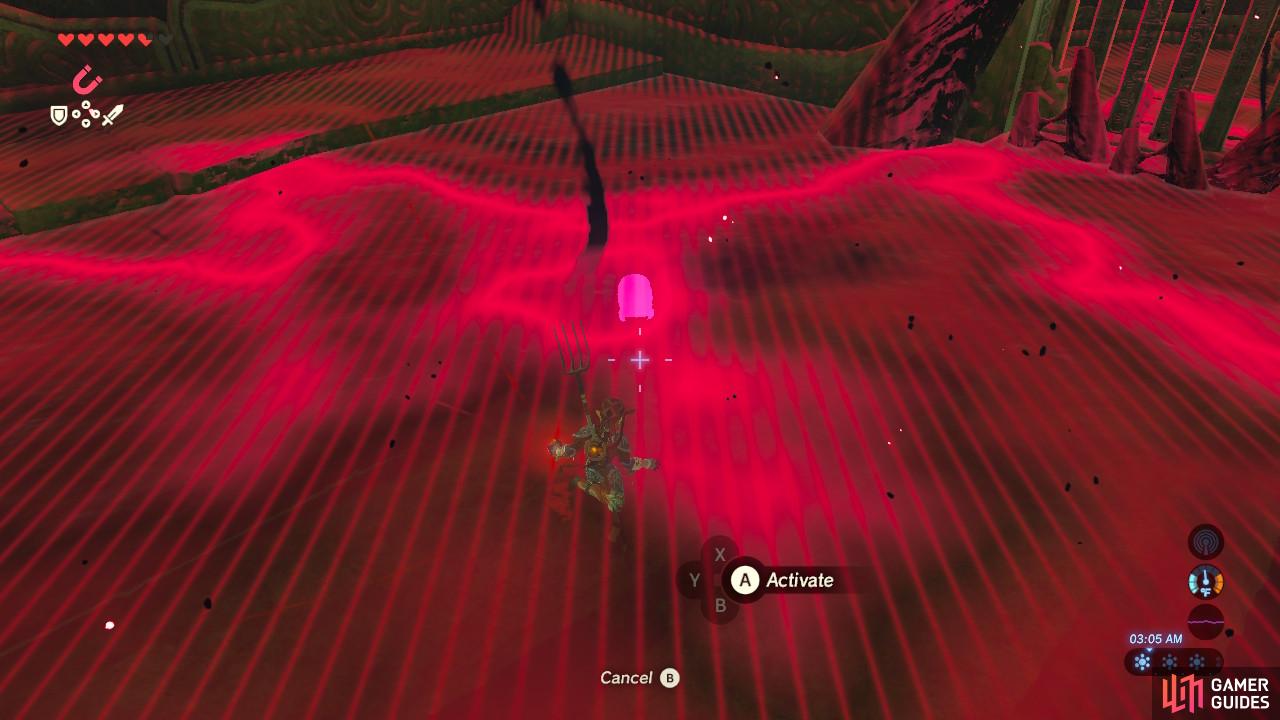
(1 of 2) These pink spots are what you are aiming for. Scope them out with your camera so that you can aim quickly.
These pink spots are what you are aiming for. Scope them out with your camera so that you can aim quickly. (left), Ride up the spouts from Vah Ruta’s back (right)
After all of the ice blocks are broken (or they hit you, dealing a small amount of damage), Prince Sidon will approach the waterfalls. He will cycle between two of them and each time he gets close to one, the prompt to climb the waterfall will appear for a brief moment in time. Press [A] the moment you can and then while in the air, shoot the glowing pink spots you see on Vah Ruta’s body by pressing the ZR shoulder button.
Be sure to press [A] once you land back in the water to Hold on to Prince Sidon’s back so that you do not drown.
You will be repeating this process six times to hit all six weak spots. Once you have finished, Vah Ruta will calm down and open up its entrance. The skies will also clear. Prince Sidon will thank you, and then he will carry you up to the entrance point for Divine Beast Vah Ruta.
Now comes the hard part: Going into the belly of the beast and wringing it back from Ganon’s control.

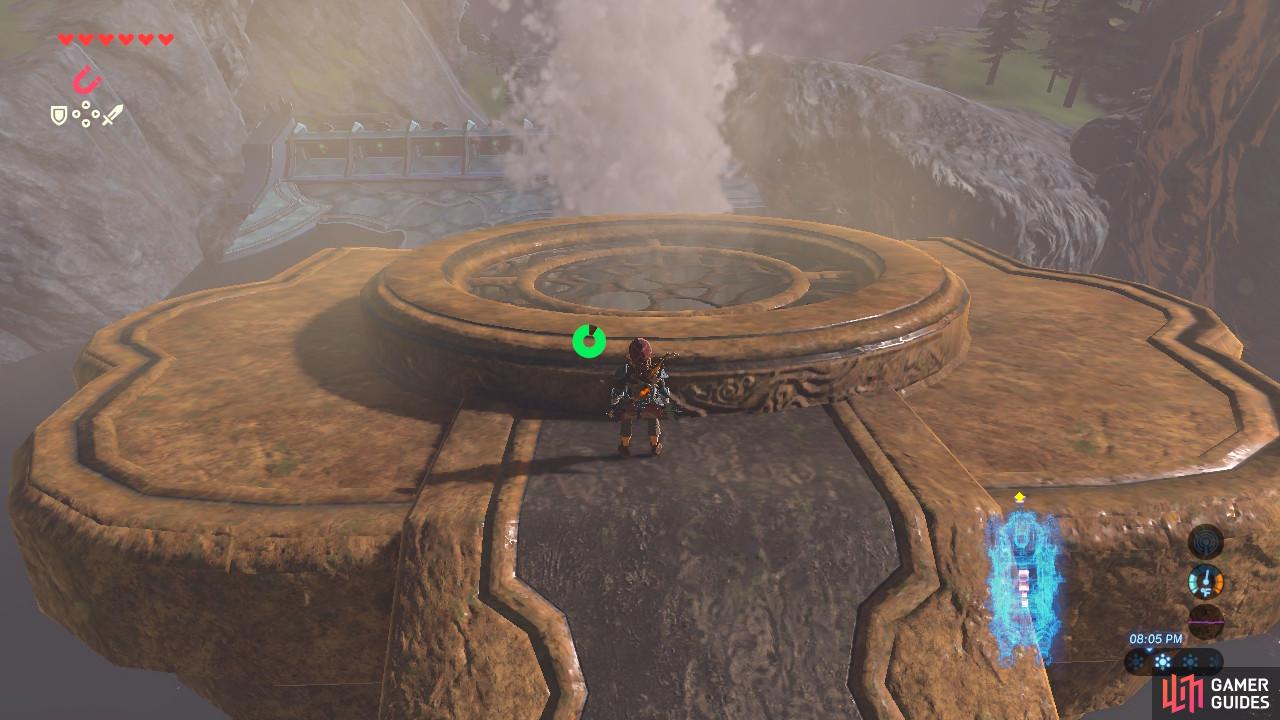
(1 of 2) Once you have completed Vah Ruta, you won’t be able to return. But for now, you can fast travel to here any time
Once you have completed Vah Ruta, you won’t be able to return. But for now, you can fast travel to here any time (left), Once you enter the Divine Beast, this will be your first goal so that you do not get lost. (right)
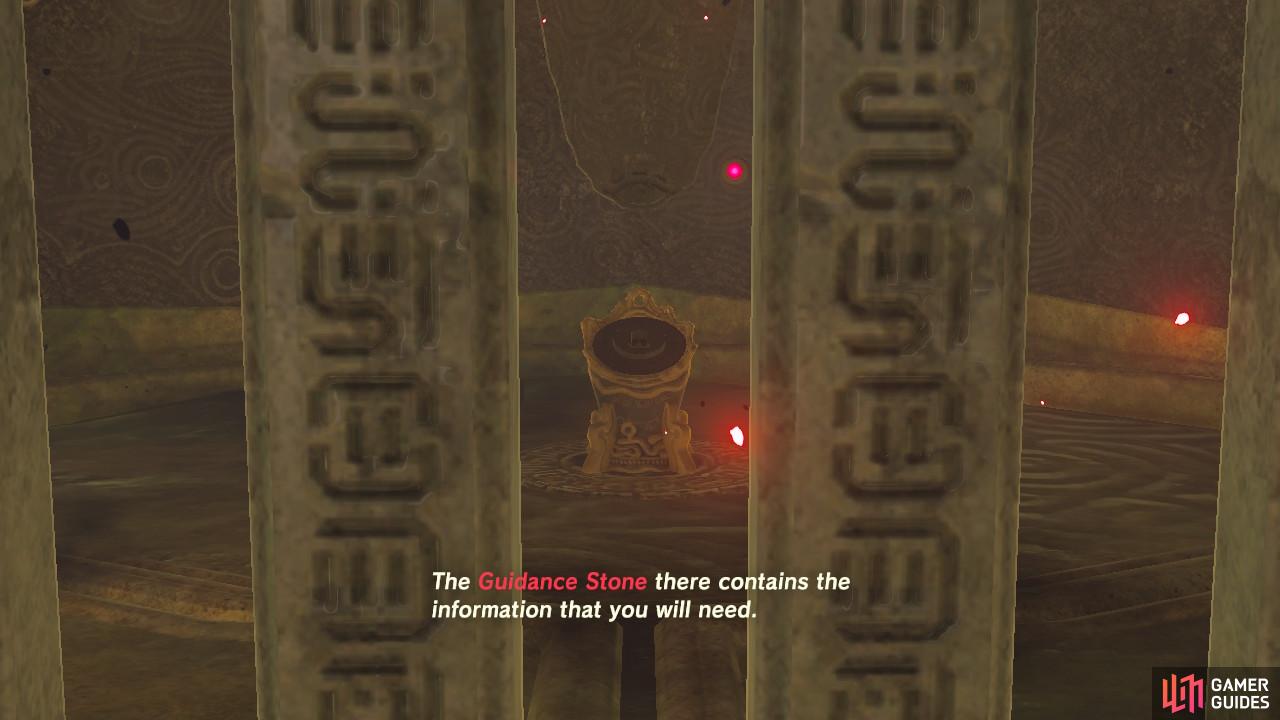
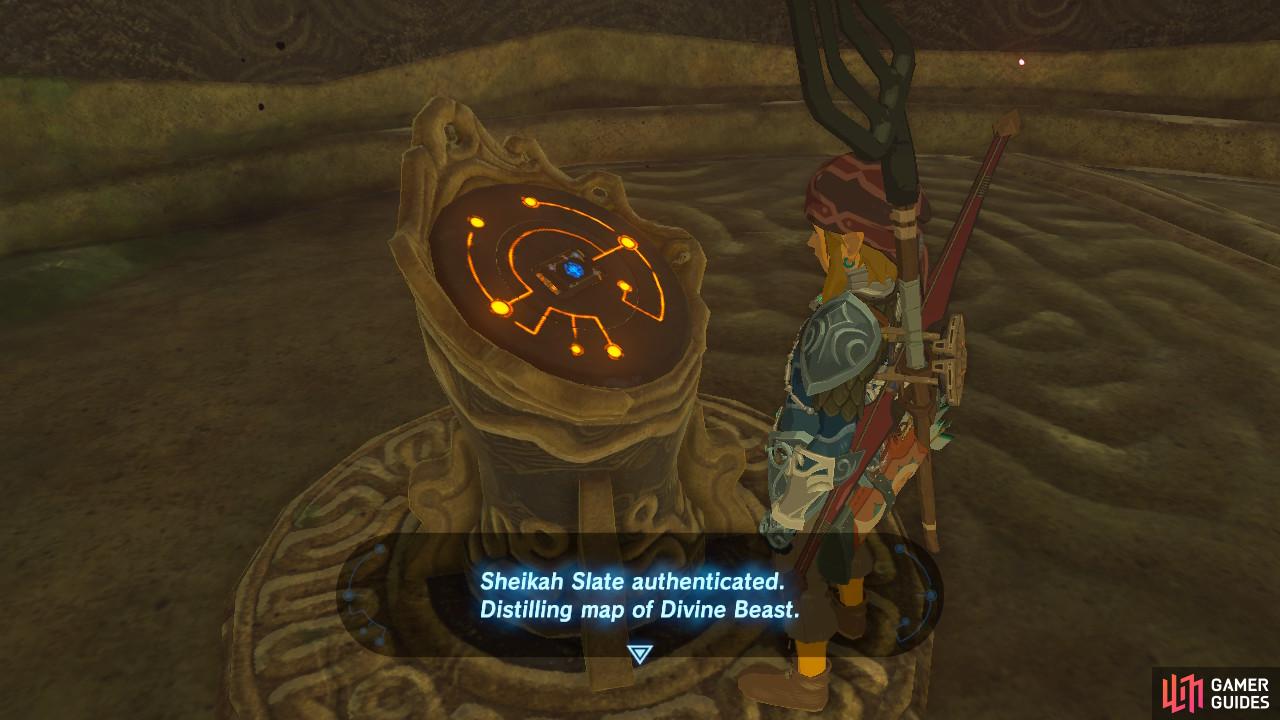
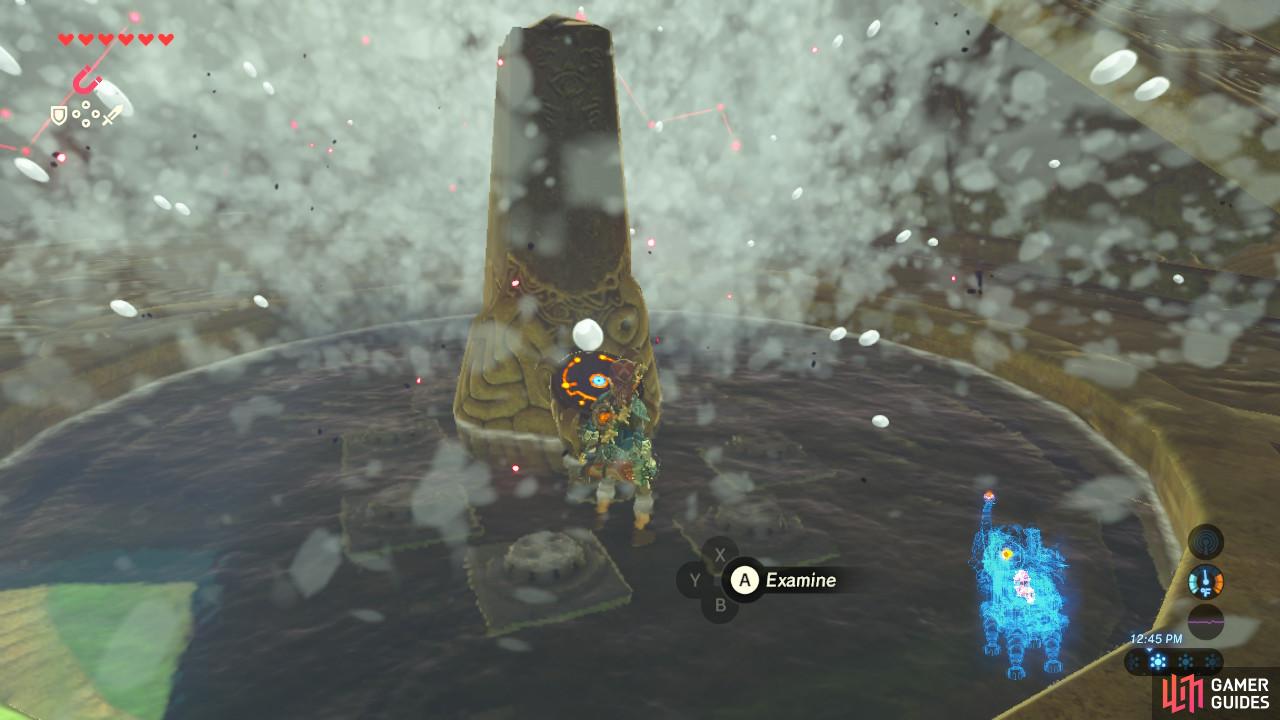
You will automatically place the Sheikah Slate in the pedestal, and this will activate Vah Ruta as a fast travel point during the time you work on completing it. Mipha’s voice will speak with you and welcome you to the Divine Beast. She will tell you that your first goal should be to get to the Guidance Stone, which will give you a map of Vah Ruta.
At this point in the game, feel free to go ahead and pack up some food and gear, especially if the Lynel fight emptied your bag.
Once you are ready, go ahead and enter.
Inside Divine Beast Vah Ruta

(1 of 2) These eyes are frequently found in all four of the Divine Beasts but are easy to destroy
These eyes are frequently found in all four of the Divine Beasts but are easy to destroy (left), This Guardian Scout has very little health, especially now that you have better gear. (right)
As you enter you will see the entryway guarded by a gross-looking eye. This enemy will show up frequently inside the Divine Beasts and is part of Ganon’s corruption. Shoot it, throw a bomb at it, or whack it with a weapon to destroy it.
Up ahead is a Guardian Scout. It has the same level of health and power as the very first Guardian Scout you fought in Oman Au Shrine; that is, it is pitifully weak and can only tickle you with its eye missile. Dispatch of it and to go your left.
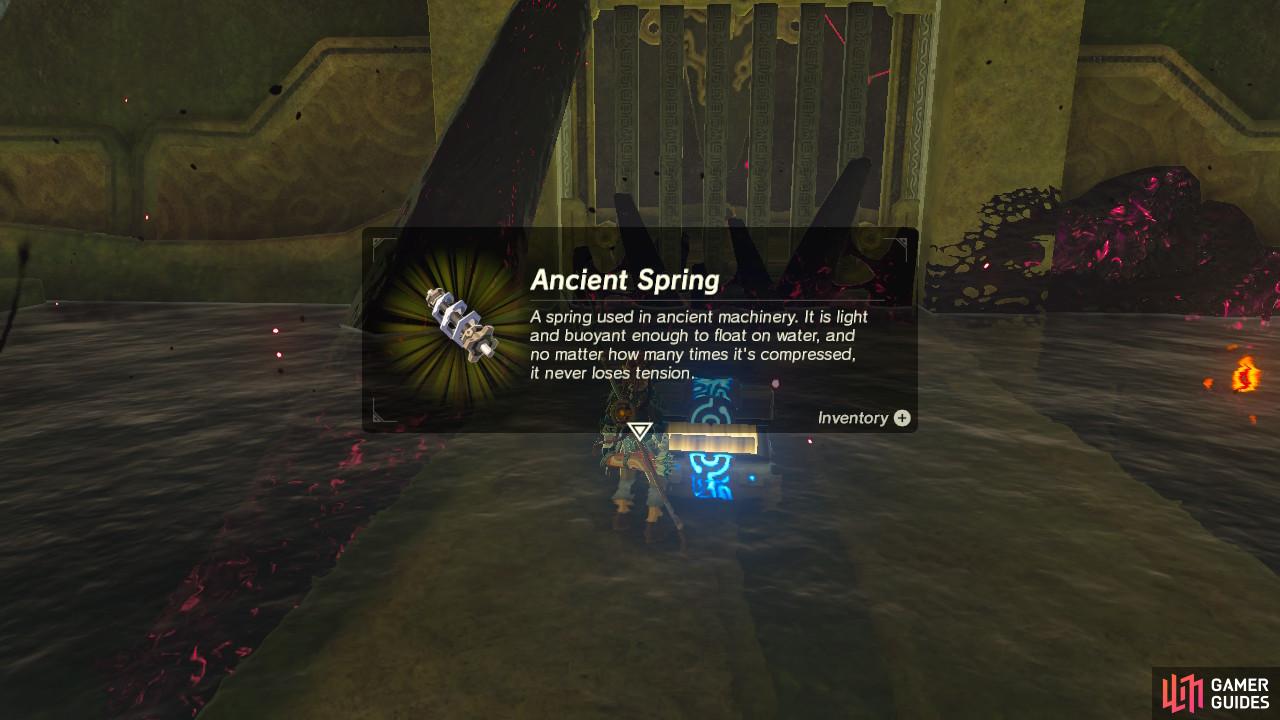
(1 of 2) Divine Beasts, like standard Zelda dungeons, are filled with goodies
Divine Beasts, like standard Zelda dungeons, are filled with goodies (left), Stock up on the Ancient parts, as they are valuable for later. (right)
You can see the Guardian Stone behind a gate. Before we go ahead and get past it though, use Magnesis to pull up a treasure chest hiding under the water. Open it for an Ancient Spring
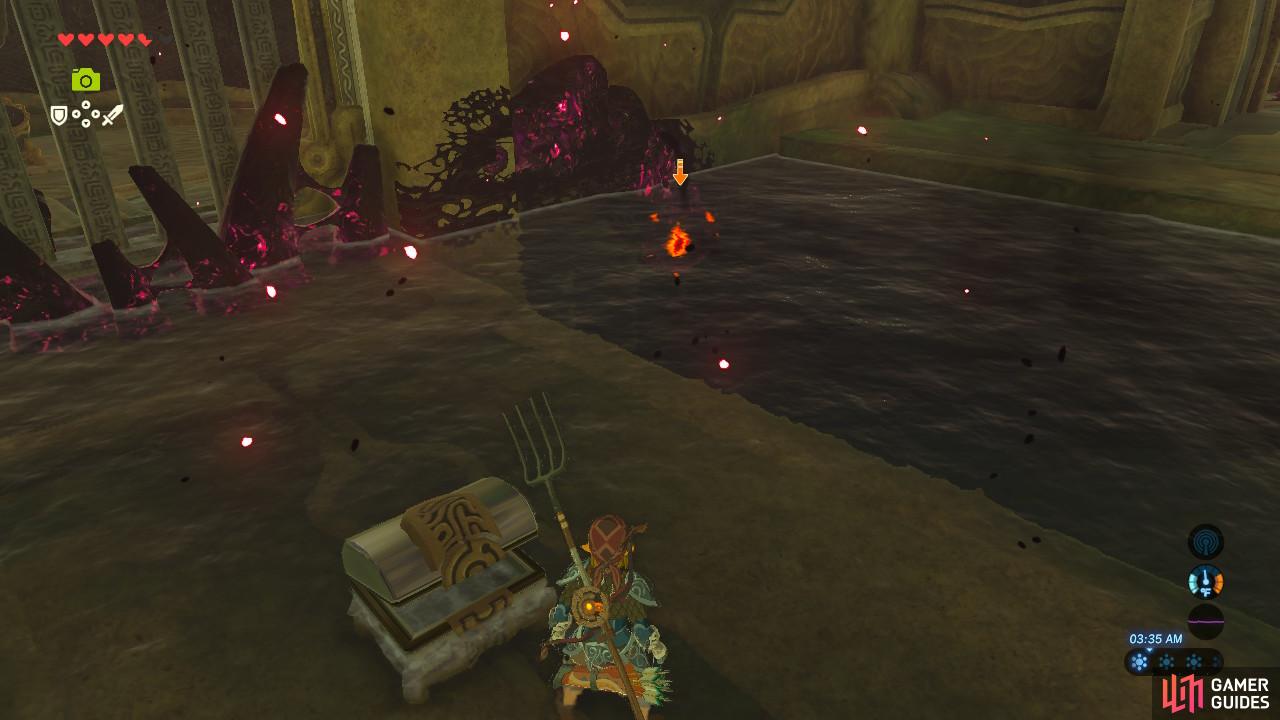
(1 of 3) The eye is underwater but can still be destroyed with something as simple as a Bomb
Destroy the eye that is above and to the right of the gate. Then go up to the gate and, just like in the Great Plateau, use Cryonis to push up the gate. Slip underneath and activate the Guardian Stone. Mipha will speak to you again, telling you that you now have a map of the Divine Beast. There are five terminals located all across the Divine Beast and you will need to activate all of them to win back Vah Ruta.
The terminals are marked on your map. We will be covering the terminals in the order of closest to furthest.
Terminal 1
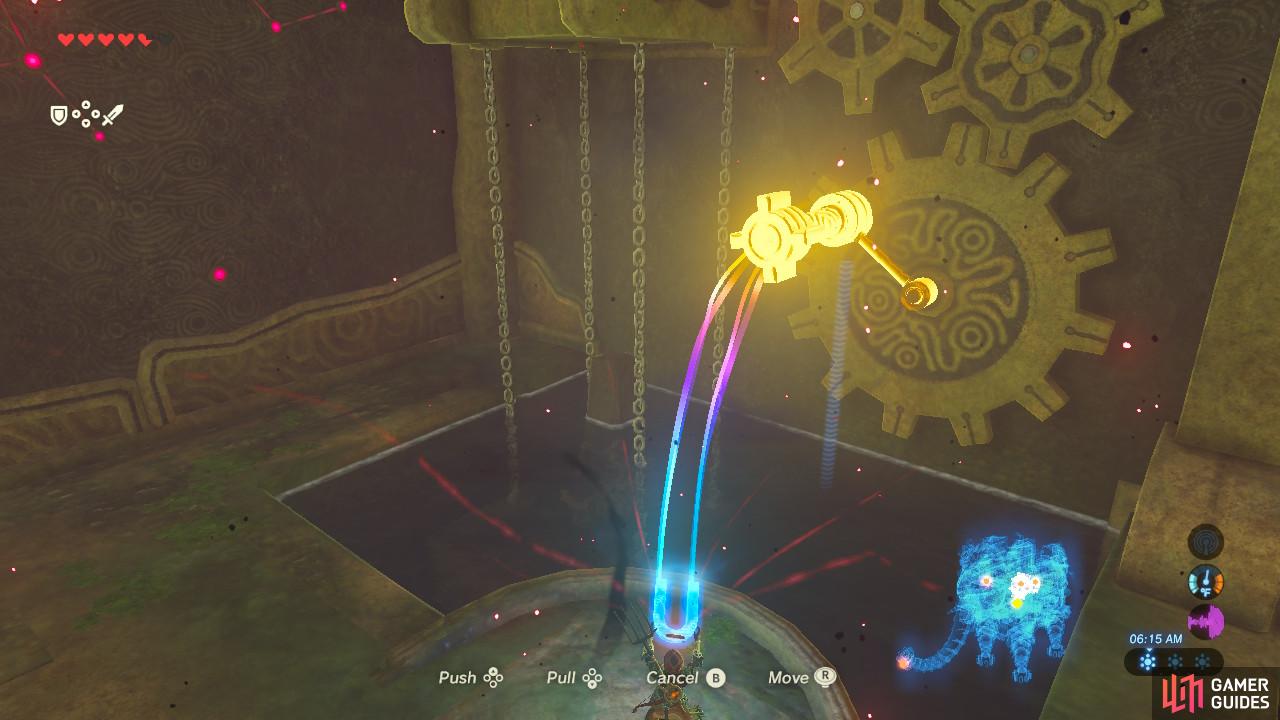
(1 of 2) Rotate the right analog stick carefully to turn the lever
Rotate the right analog stick carefully to turn the lever (left), The first terminal will emerge from the water (right)
Go back to the first room you were just in and locate the large gears on the wall. Use Magnesis to turn the lever and spin the gears. Doing so will lift the first terminal out from under the water, allowing you to activate it.
Terminal 2
(1 of 2) Don’t bump into those purple things
Don’t bump into those purple things (left), This room is home to the second puzzle for the second terminal (right)
Head outside the Divine Beast through the exit across from the entrance and go up the ramp. Inside the second floor room will be another Guardian Scout, this time equipped with a sword. Kill it and you can pick up its Guardian Sword.
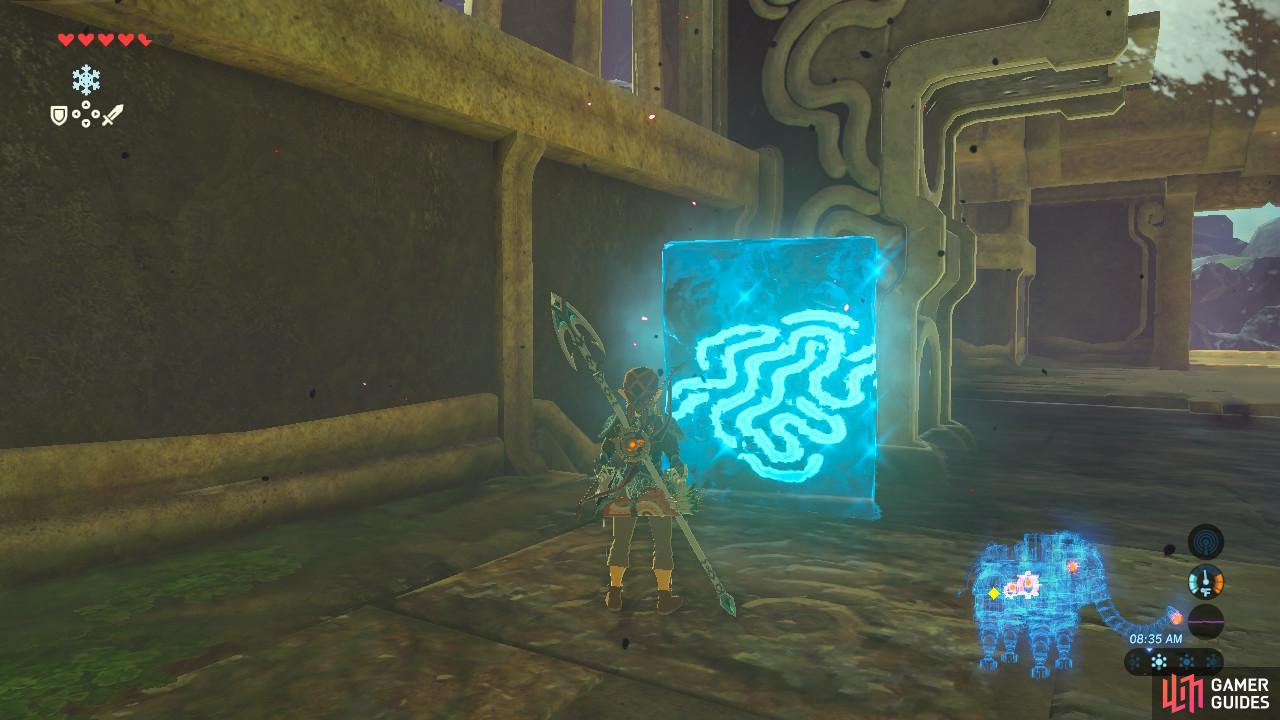
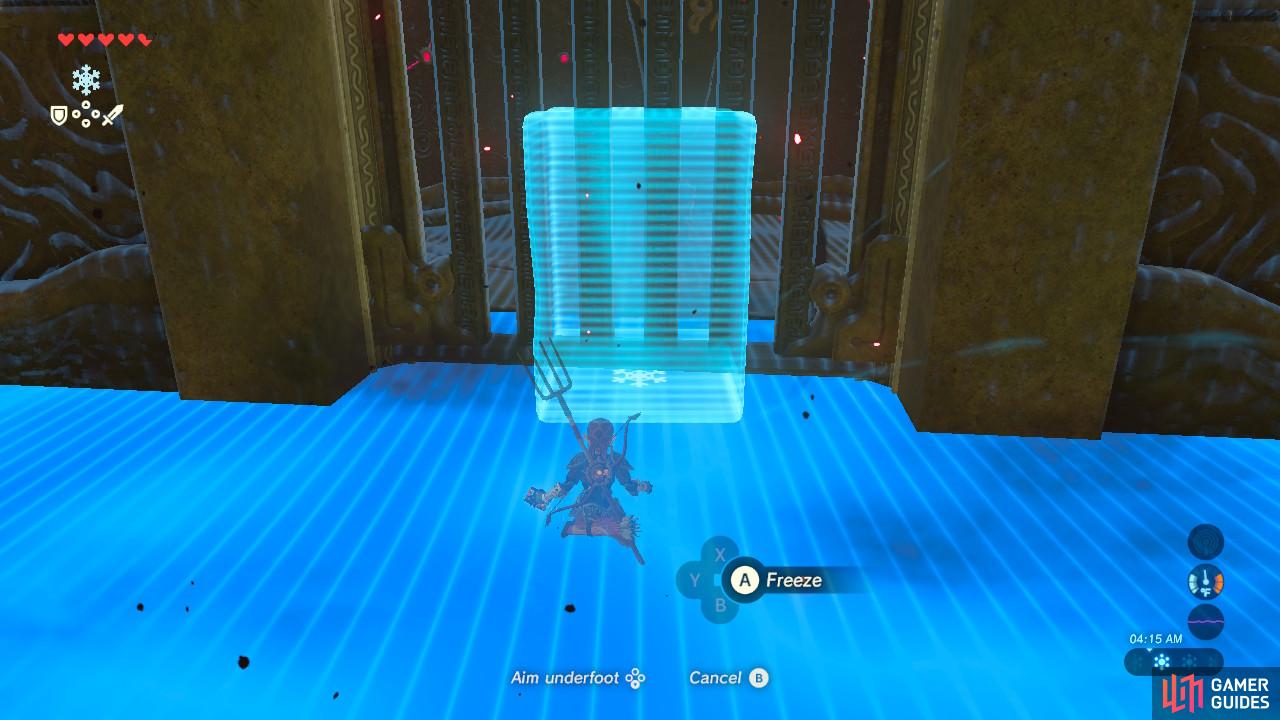
(1 of 2) Place the ice block right here as shown
Place the ice block right here as shown (left), The treasure chest is on the left side of the top of the wall. (right)
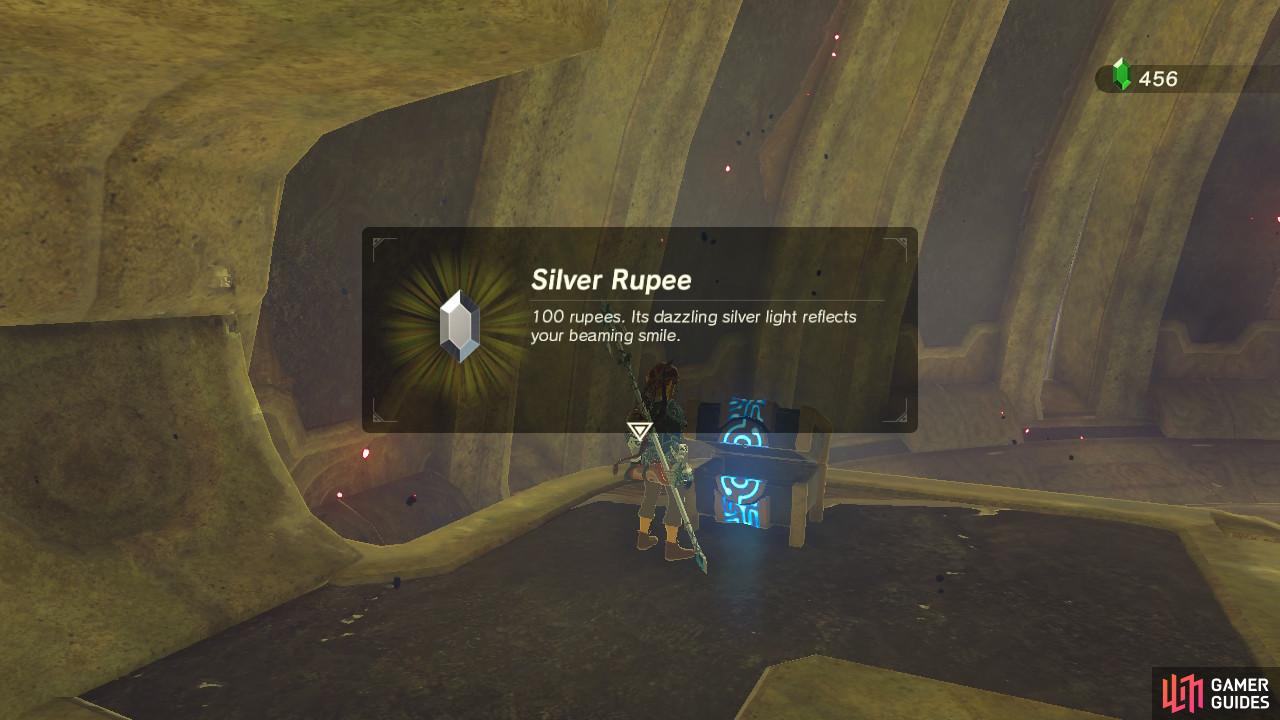
This room has two large wheels, one on the left and one on the right. The left one is the one that concerns us right now, but first let’s go claim another treasure chest. Run up to the wall and place an ice block using Cryonis right in the corner of the water pool. Climb up it and turn to your left on top of the wall for a silver Rupee worth 100 Rupees. We’re rich!
(1 of 2) You will need to be precise with your aim or else Cryonis will be unable to activate
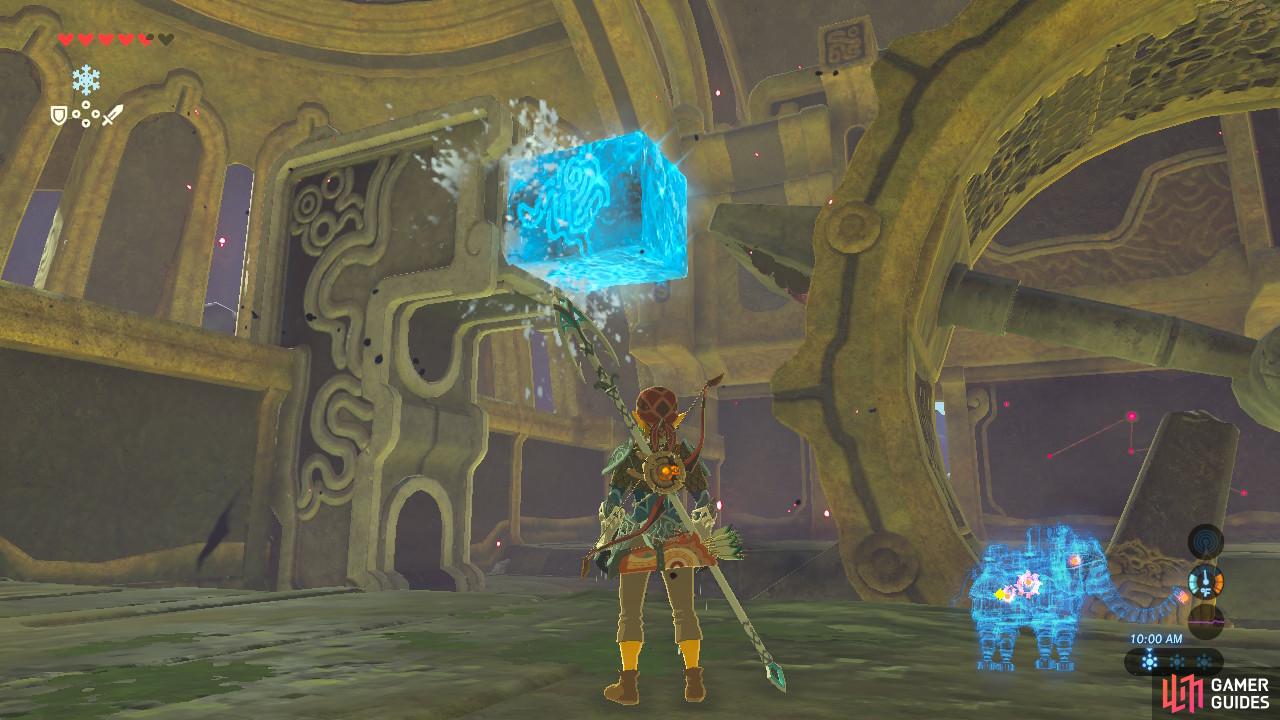
You will need to be precise with your aim or else Cryonis will be unable to activate (left), Make sure you plug the waterfall when the terminal is accessible like shown. (right)
The second terminal is actually inside the big gear. In order for us to access it, we will need to block up the flow of water right when the terminal is at the bottom of the gear. Use Cryonis to block the water flow and then walk into the gear and activate the second terminal.
Terminal 3
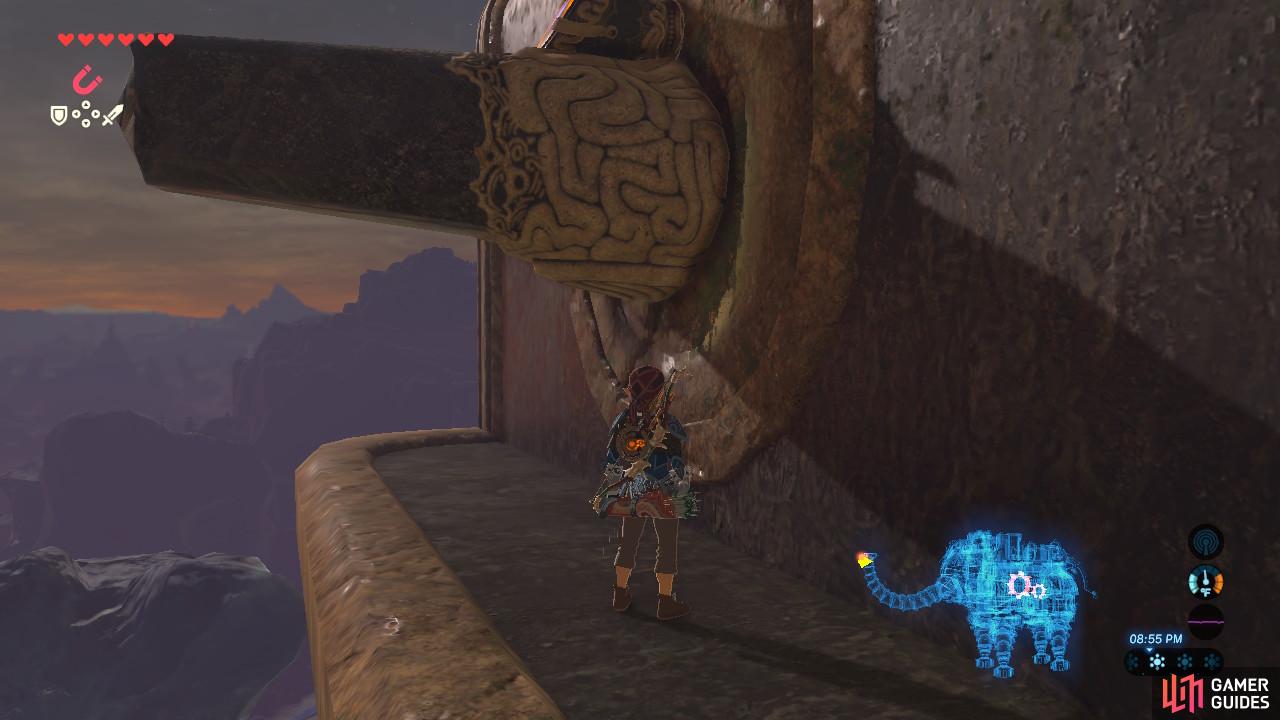
(1 of 2) You can see the puzzle from the second floor but you will need to go up to the third floor to interact with it
You can see the puzzle from the second floor but you will need to go up to the third floor to interact with it (left), Aim for that eye you see up top to destroy this entire formation (right)
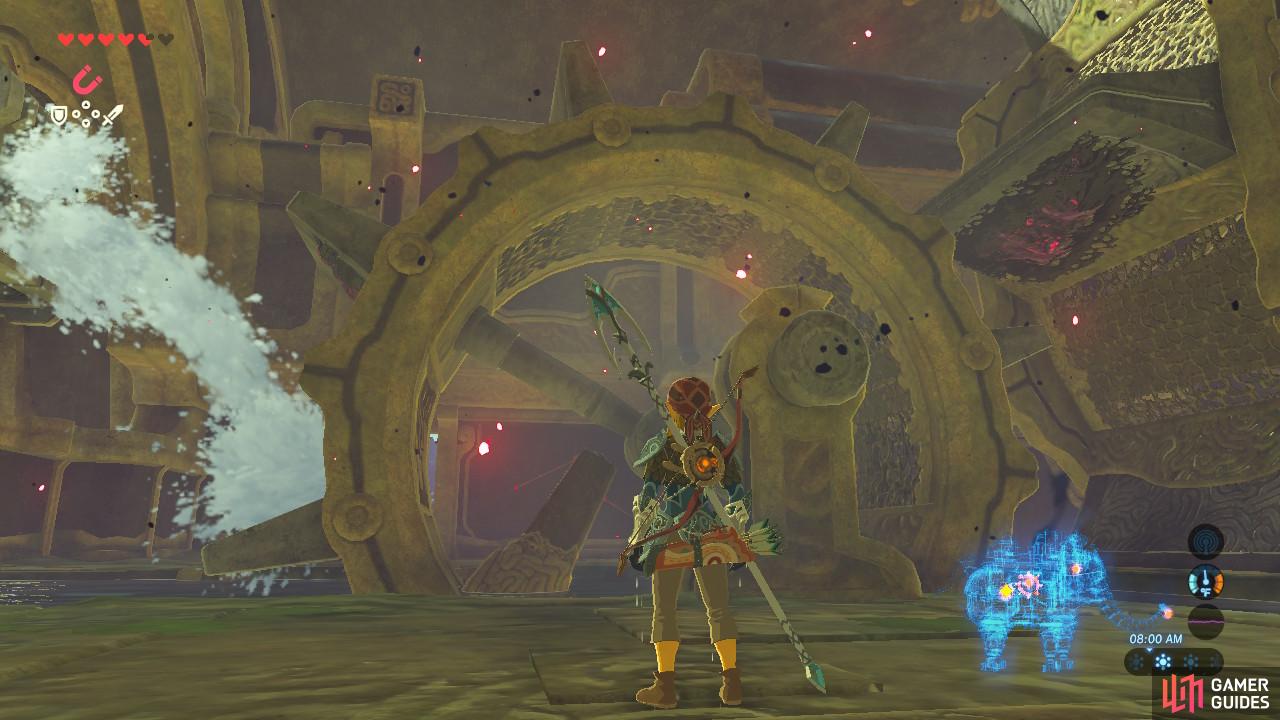
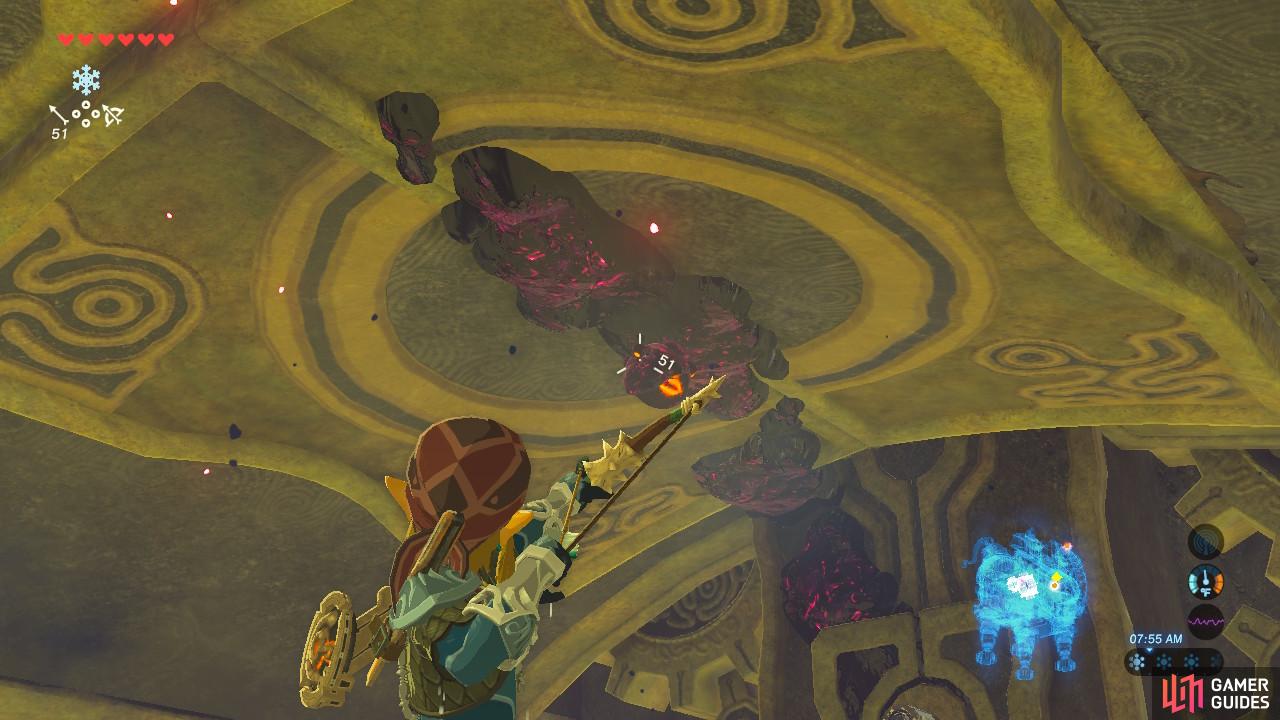
That larger wheel to the right is where our next terminal is. We can certainly see it from here, but to interact with it we will need to ascend to the third floor of Vah Ruta. Head out of the exist and work your way up the ramp.
In the middle is another bit of Ganon, this time complete with a mouth that will continually spit floating enemies at you until you destroy the eye on the top of the left wall. Shoot it and the whole formation will disappear.
(1 of 2) Now on the third floor, you can finally manipulate this puzzle
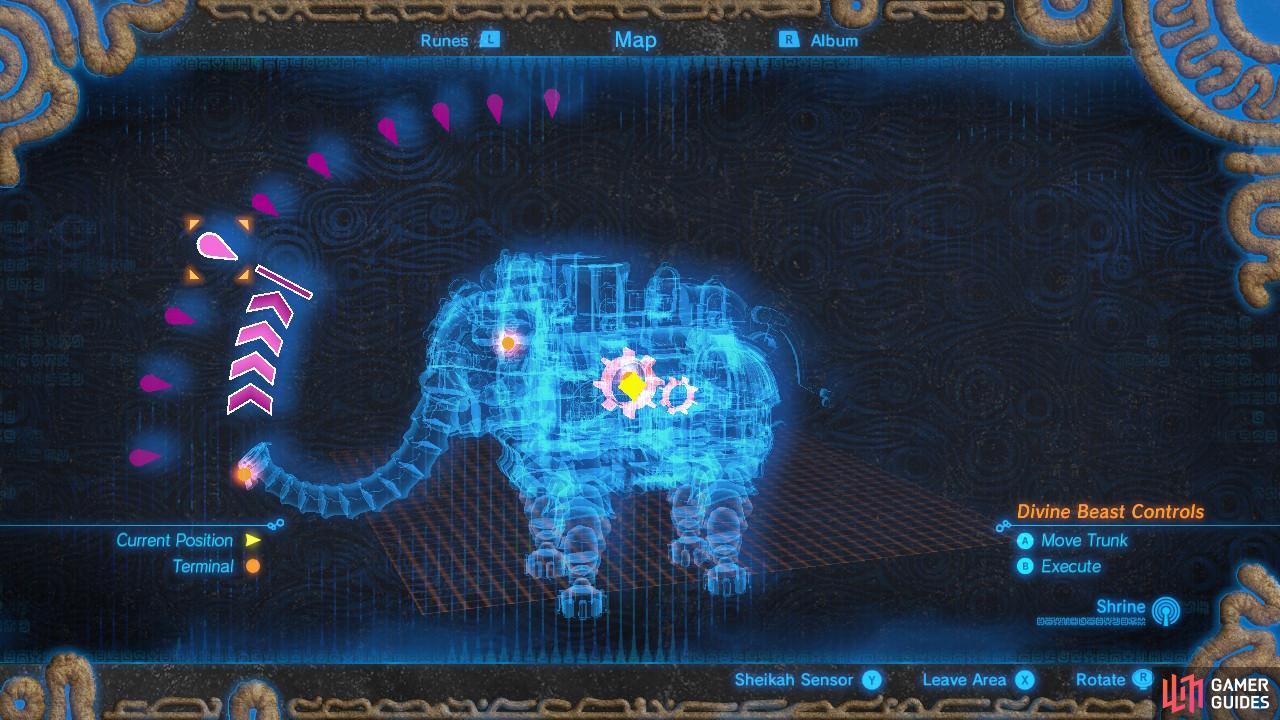
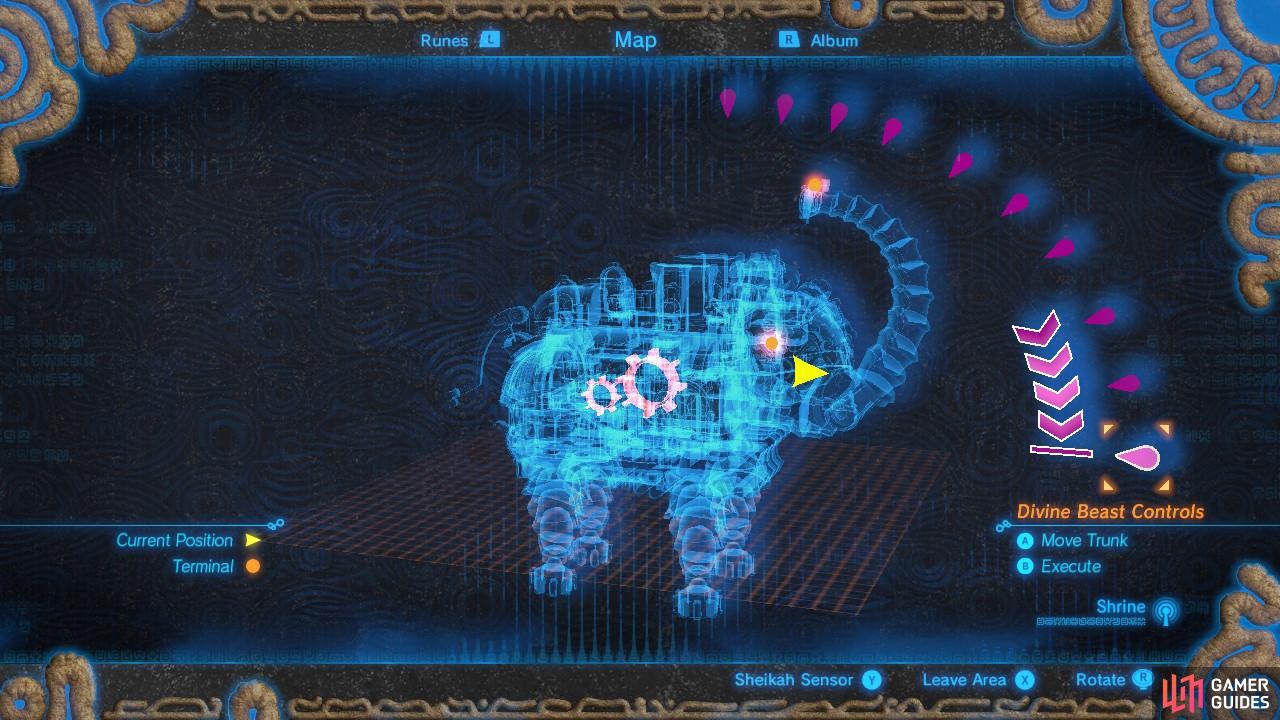
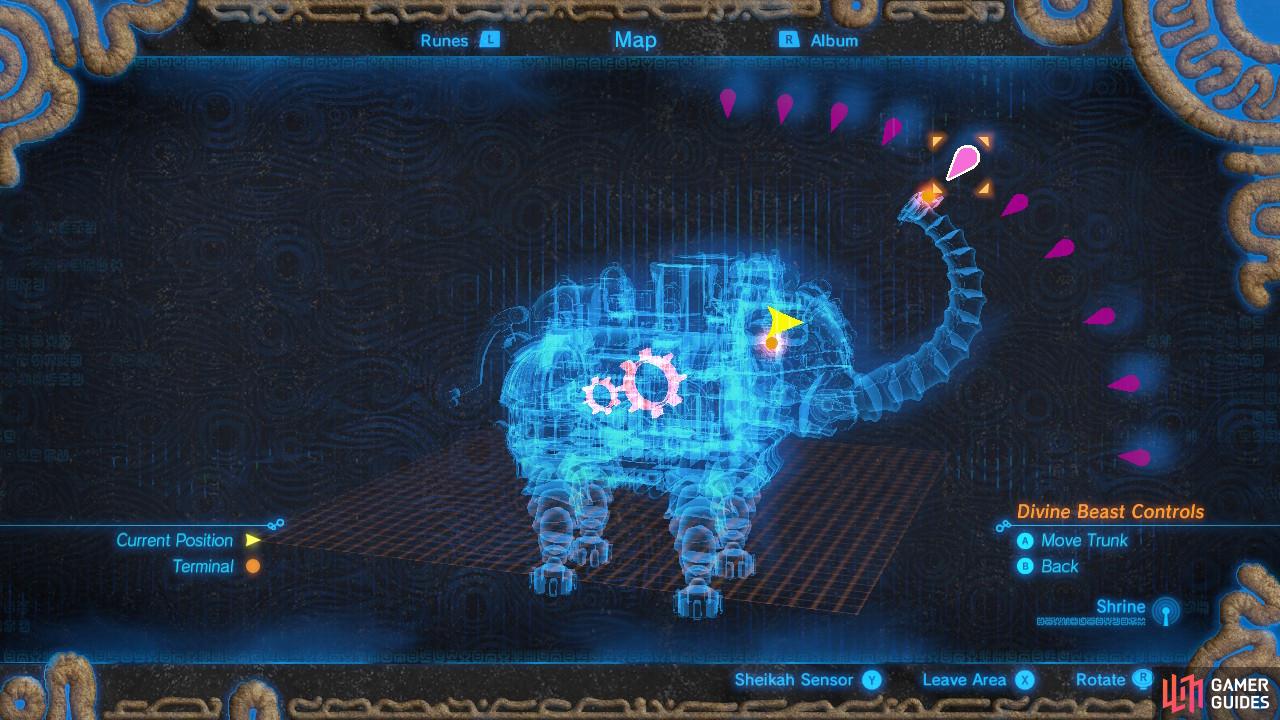
Now on the third floor, you can finally manipulate this puzzle (left), Move Vah Ruta’s trunk up to this mark, the fourth from the bottom. (right)
Enter the third floor and you can finally interact directly with the puzzle. The wheel is currently stationary, so in order to make it spin we will need to adjust Vah Ruta’s trunk. The Divine Beast is constantly spouting water from its trunk. If we can get it to spout water onto the wheel, it will move. Open up your Sheikah Slate and move the trunk to the shown mark in the image gallery above.
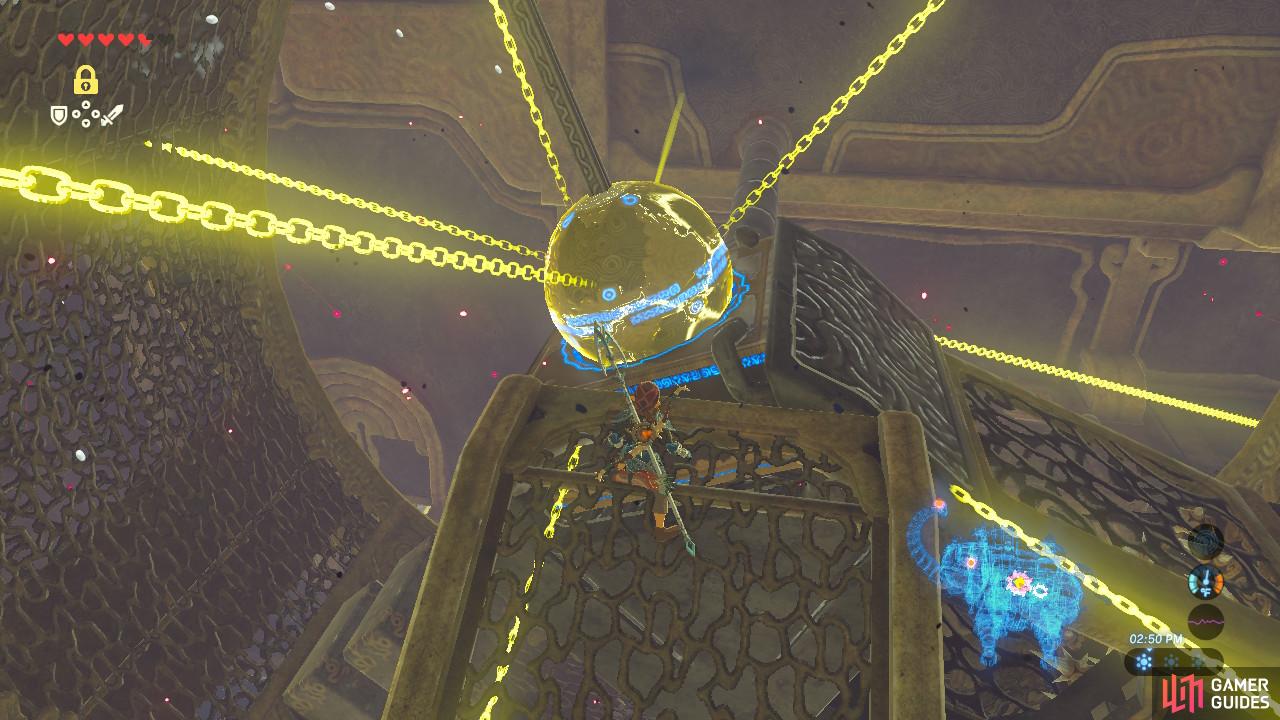

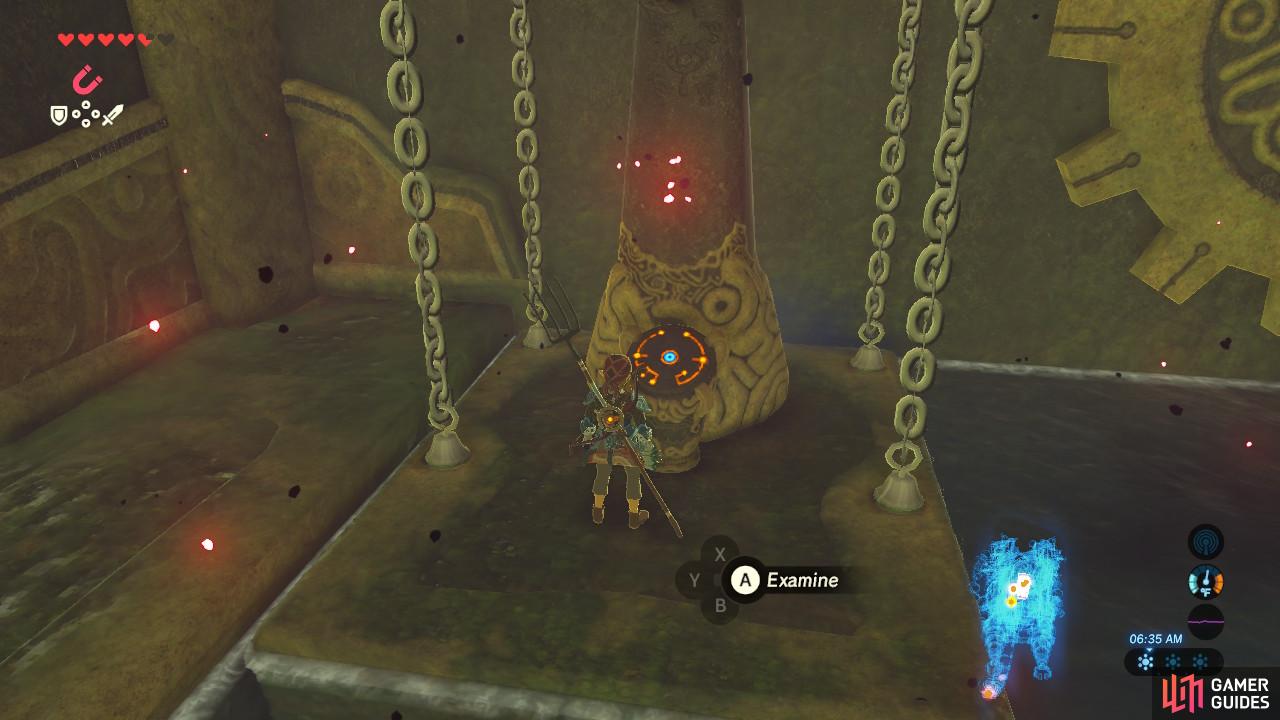
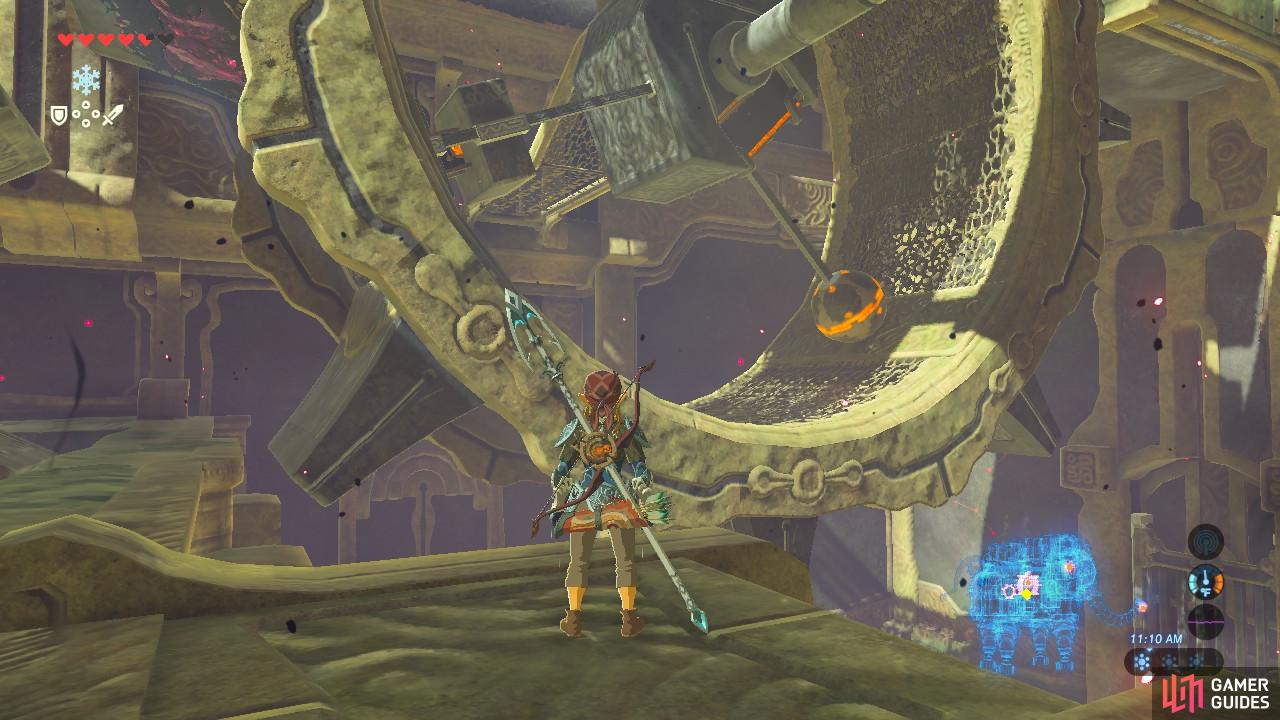
(1 of 2) Use Stasis at this moment when the ball is about to slip off the switch
Use Stasis at this moment when the ball is about to slip off the switch (left), Then go inside to the terminal housing to activate the terminal (right)
Water will pour in and the wheel will move. You will see that as the ball hits the top of the wheel, gravity enable sit to slide downward and hit a switch which opens up the gate to the terminal that is almost rotating inside the wheel. Use Stasis at the right moment and then enter the terminal. You will want to time Stasis such that you use it right before the ball will fall back off the switch, or else the Stasis will wear off before the terminal rotates up to you.
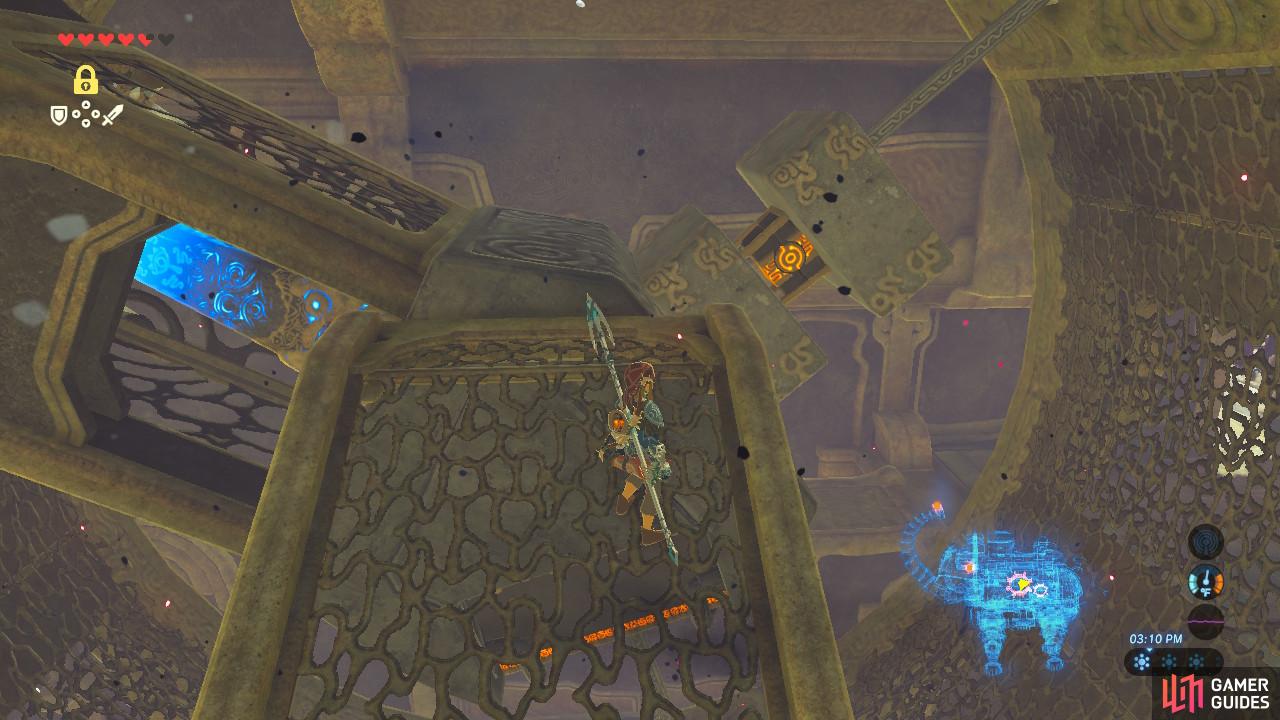
(1 of 2) You can see the treasure chest sandwiched between two blocks
You can see the treasure chest sandwiched between two blocks (left), Use Stasis on the top block so it doesn’t pin down the treasure chest (right)
Before we head to the next terminal, there is a treasure chest we can open here too. The treasure chest is sandwiched between two platforms that also slide around depending on where it is in the wheel. As the treasure chest plus its platforms slide down, the top platform takes a little while longer to settle. Use Stasis on the top platform while it has slid off the chest to open it for an Ancient Core.
Terminal 4
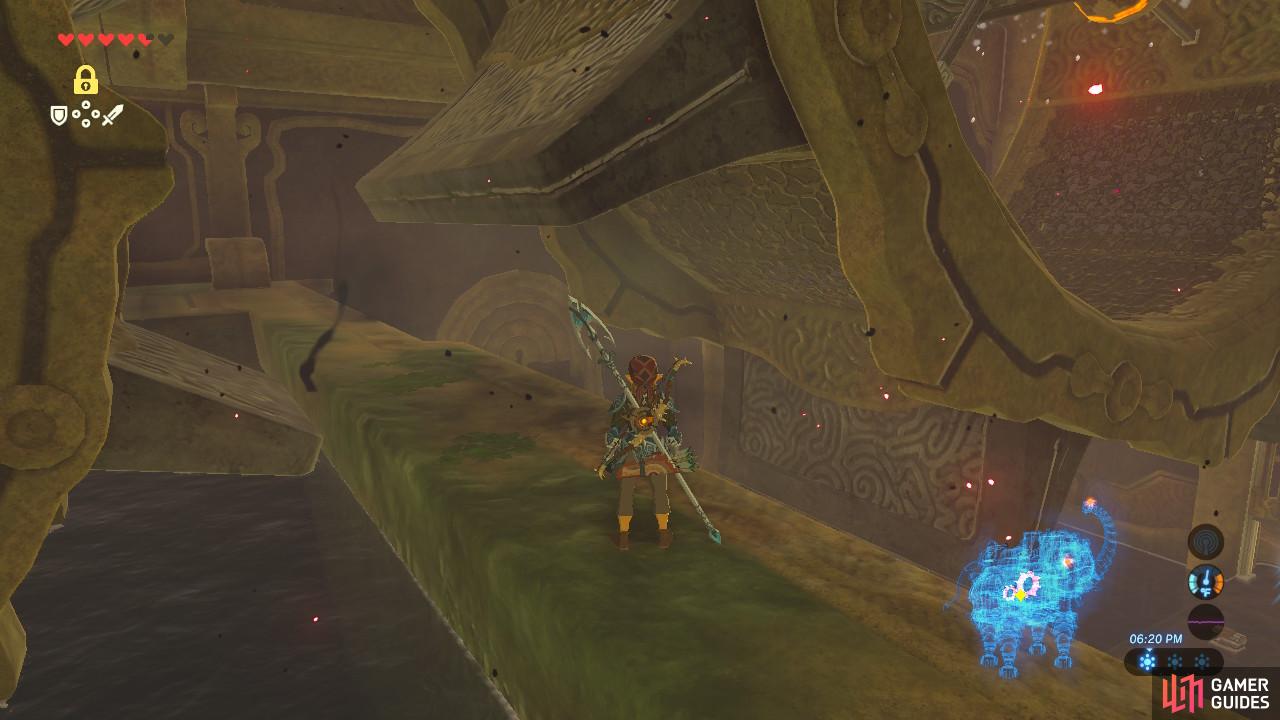
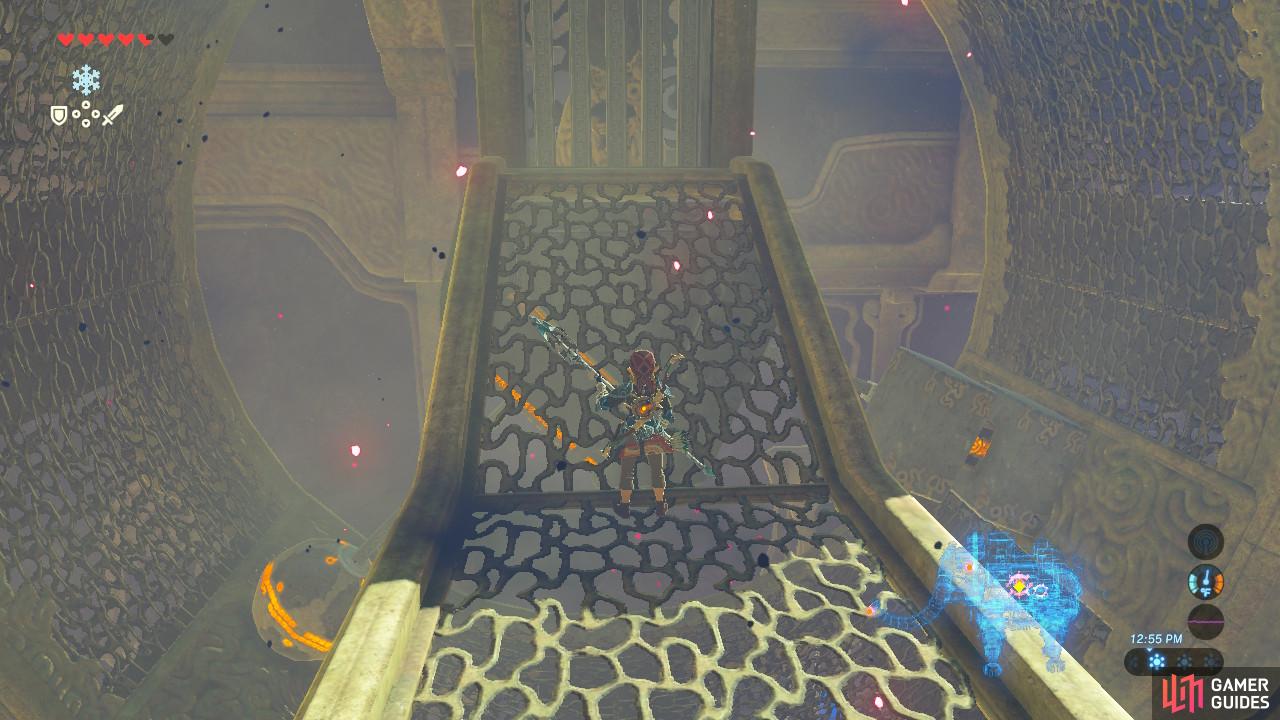
(1 of 2) Stand between the two wheels, facing the right wheel that contained the third terminal
Stand between the two wheels, facing the right wheel that contained the third terminal (left), Then jump onto one of its spokes to ride it up to the fourth floor (right)
This next terminal is a bit farther away than these last three. First, return back to the second floor and position yourself right between both spinning wheels. The Stasis puzzle wheel has a lot of wide spokes. When ready, jump onto one. Make sure it doesn’t have any corruption spots on it. There is an eyeball hanging off the bottom of one of the spokes. If you run into it, destroy it.

(1 of 2) This Guardian Scout has a bit more health than the previous two
This Guardian Scout has a bit more health than the previous two (left), Activate the orange switch to your left for a nifty shortcut to appear. (right)
Ride the wheel up the the top and then jump off onto the fourth floor of Vah Ruta. You will be confronted by another Guardian Scout, this time holding a spear with a bit more health than the last one. If it falls off, it will respawn so kill it. Unfortunately, you cannot pick up its spear.
Activate the orange floor switch to your left to create a waterfall. If you ever find yourself unintentionally dropping down to the second floor, you can ride this waterfall up with your Zora armor for a quick shortcut.
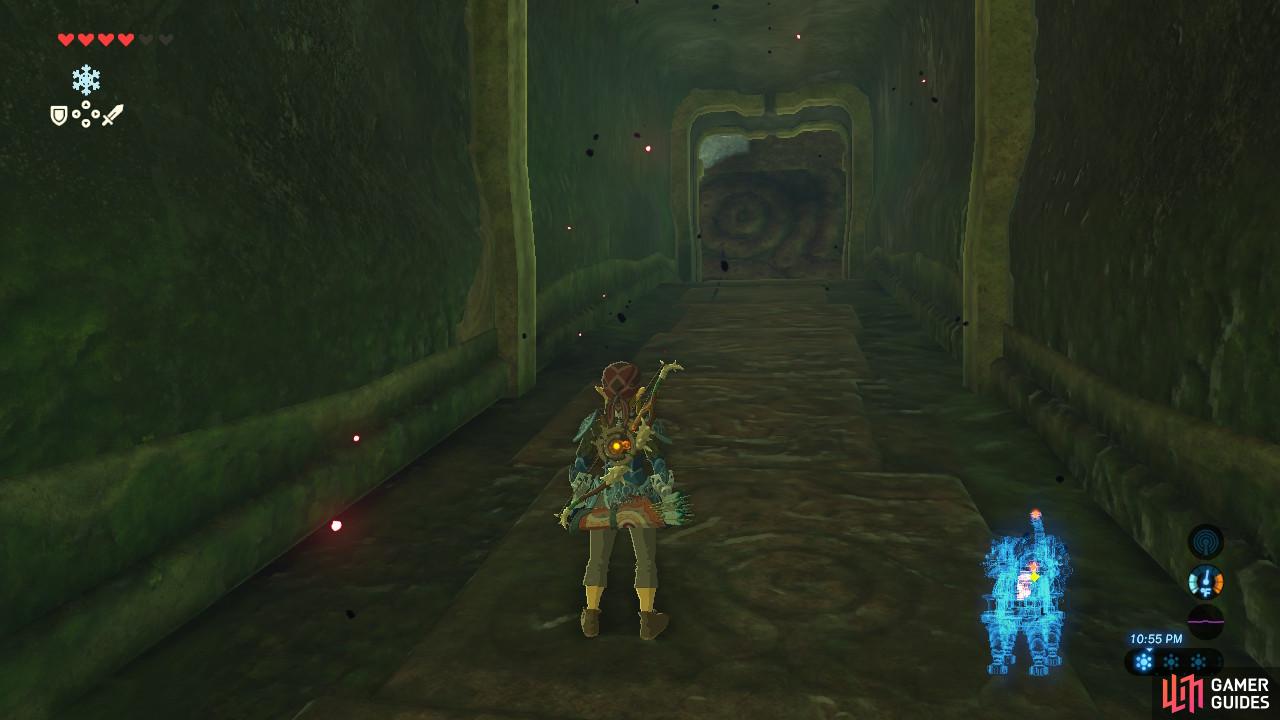
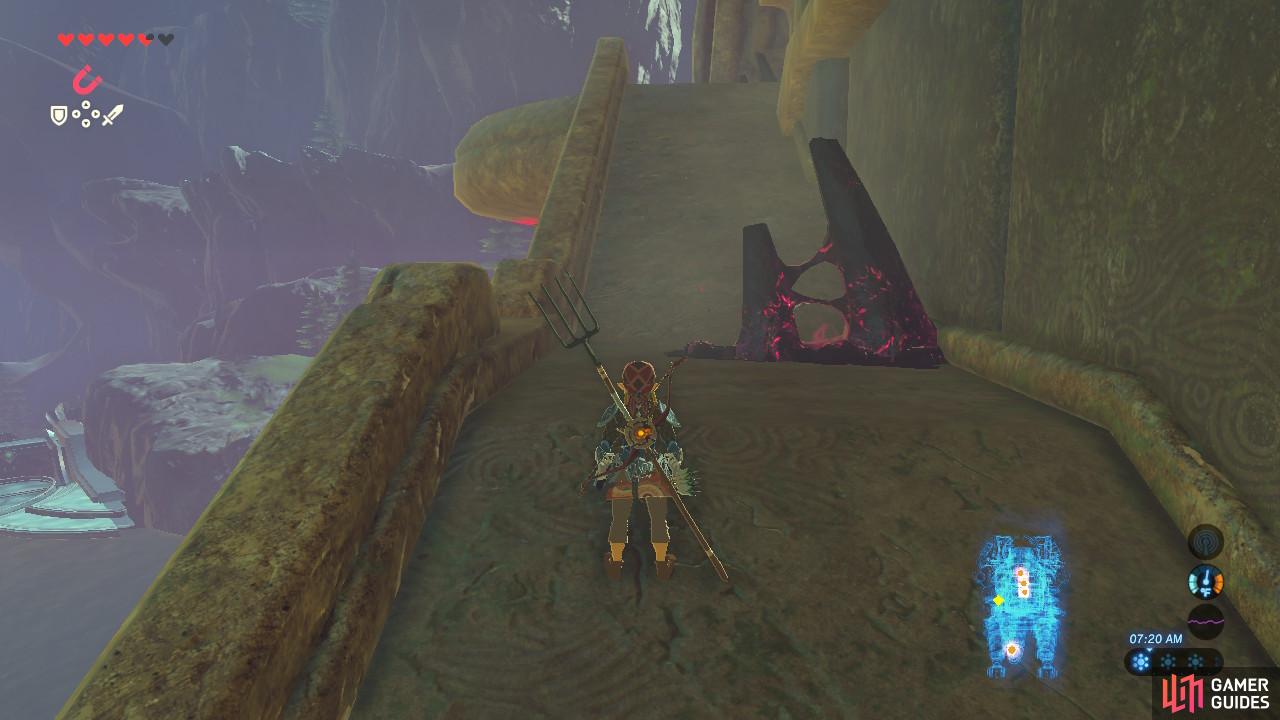
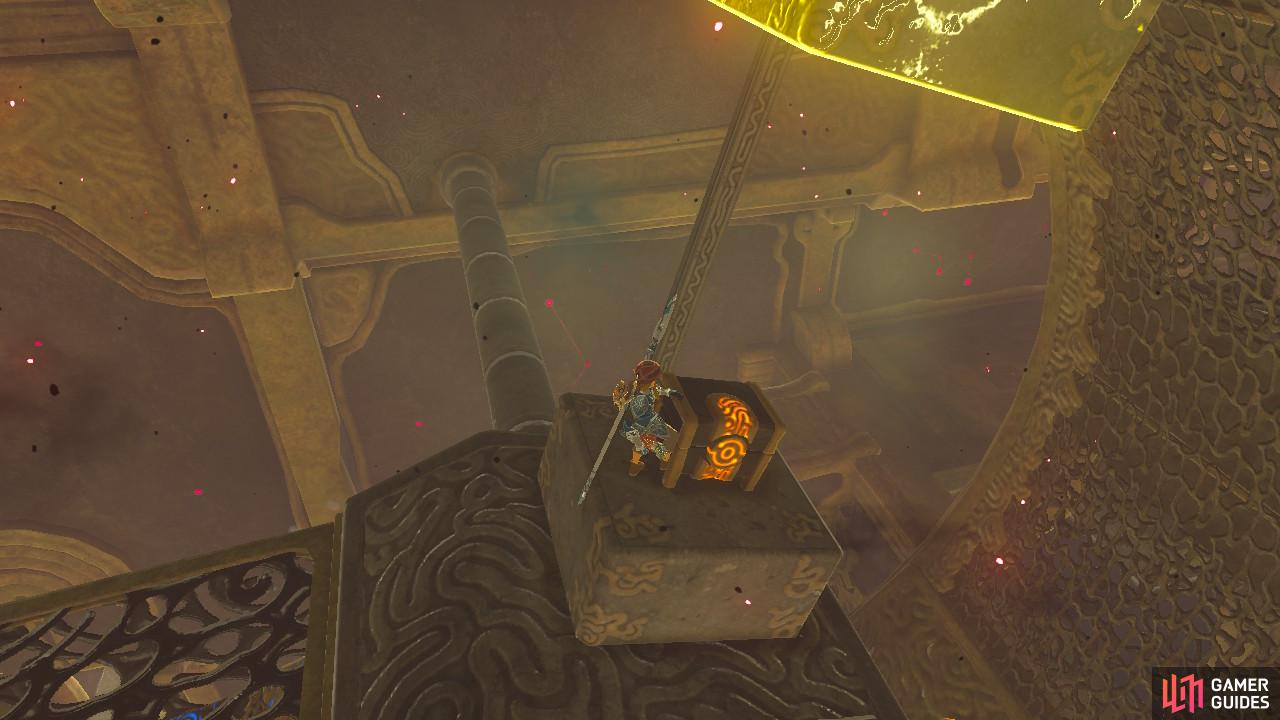
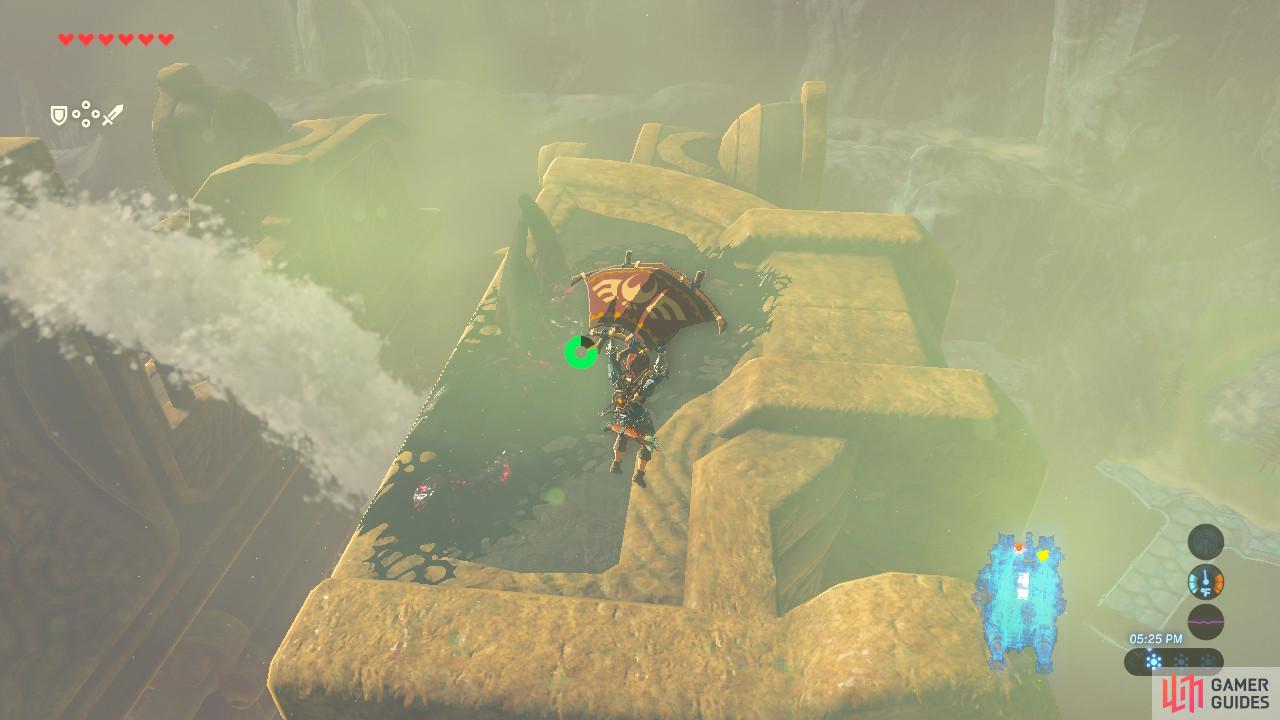
(1 of 4) Run through this hallway up ahead.
Run through the hallway and you will find yourself exiting Vah Ruta through the forehead. Move the trunk down to the lowest possible level. Now you can Paraglide down and run along it. Open up the treasure chest on the trunk for an Ancient Shaft.
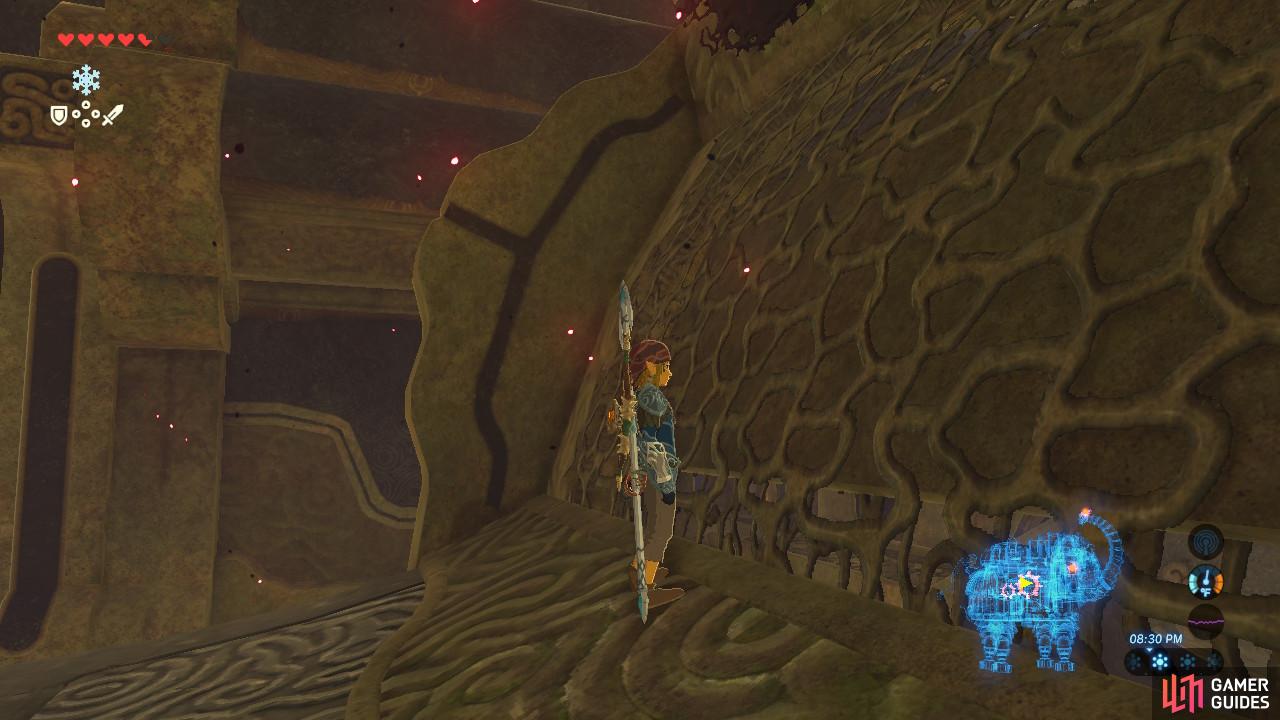
(1 of 2) Aim for this section of Vah Ruta’s forehead, where you can see an opening
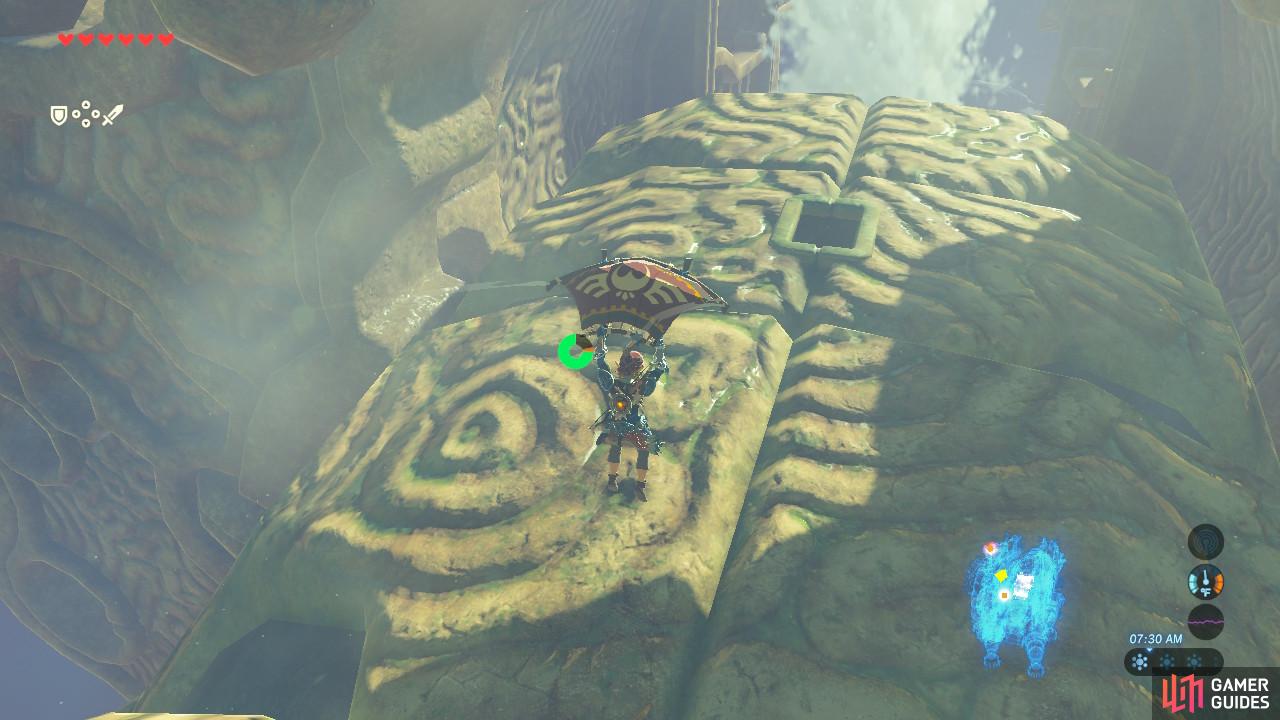
Aim for this section of Vah Ruta’s forehead, where you can see an opening (left), As the trunk raises, you will need to jump off before the platform is too slanted to stand on (right)
To get to the next terminal we need to get to Vah Ruta’s forehead area. To do this, stand on a ledge above the treasure chest, as far up as you can. Then, move the trunk up to the highest position. As the trunk moves, you will be lifted higher and higher. Jump off and Paraglide to the forehead. This might take a few tries, but you can always reset the trunk to be horizontal and try again.

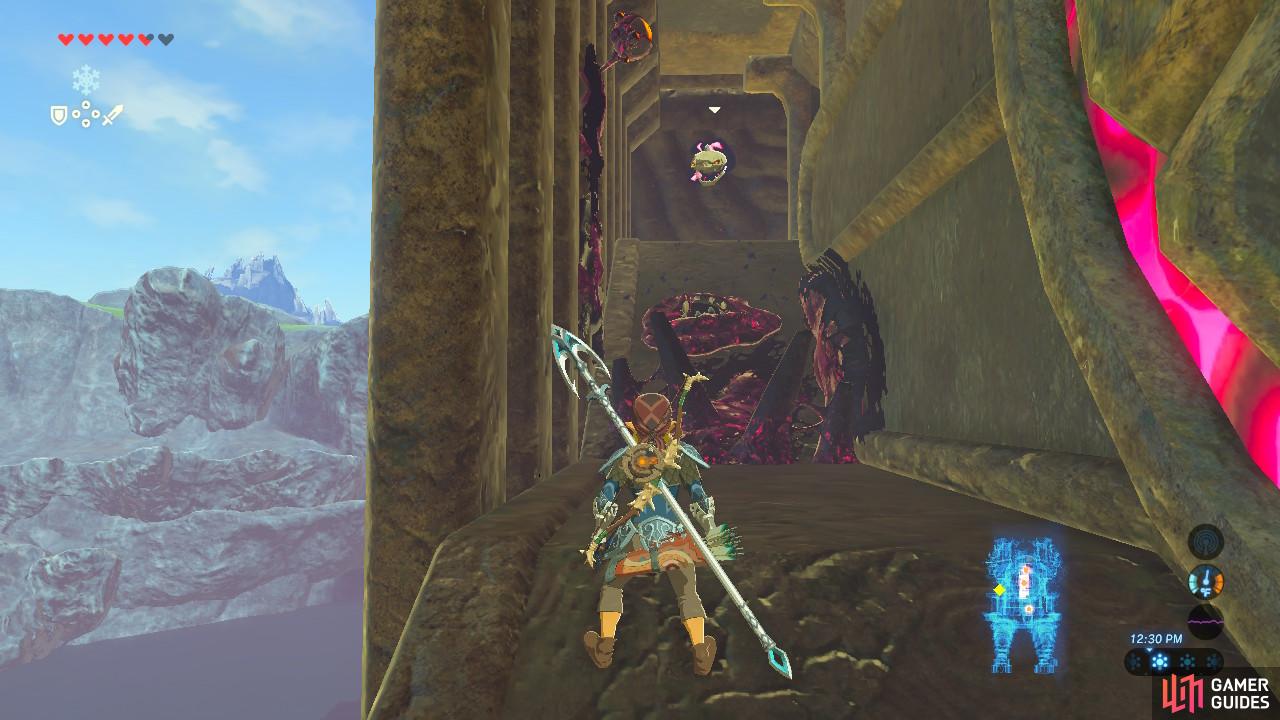
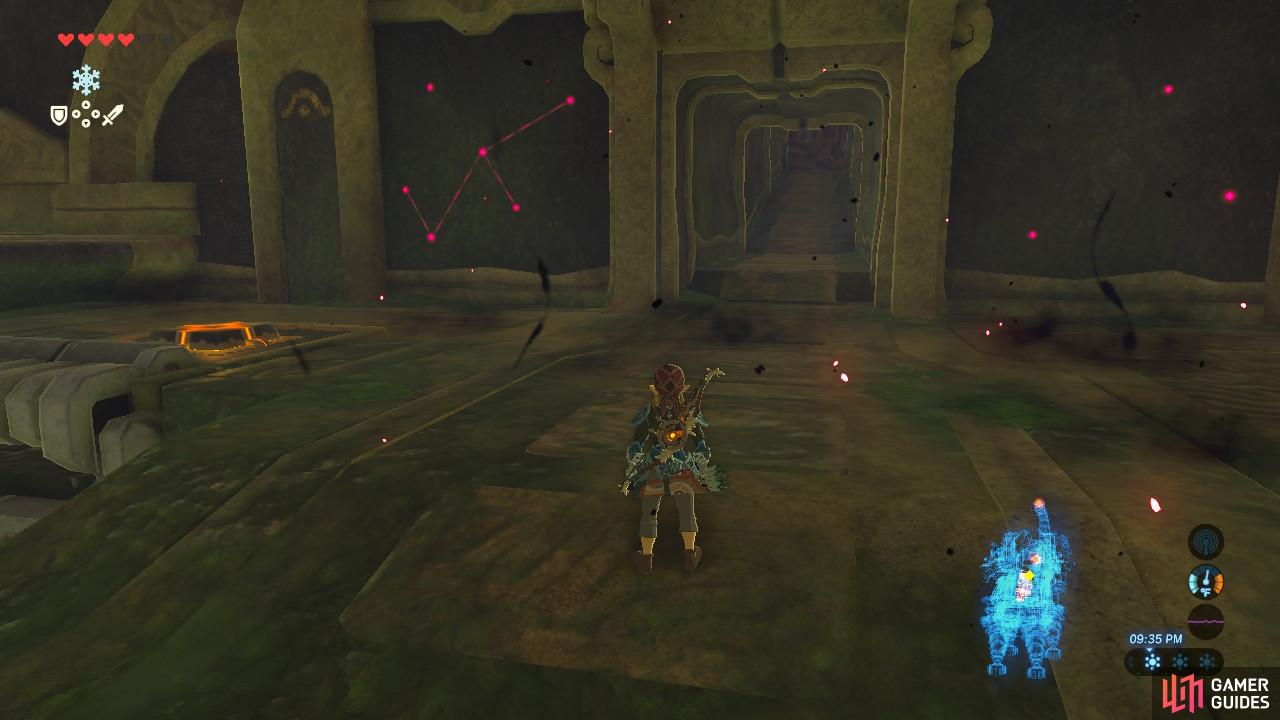
(1 of 2) Jump down this hole
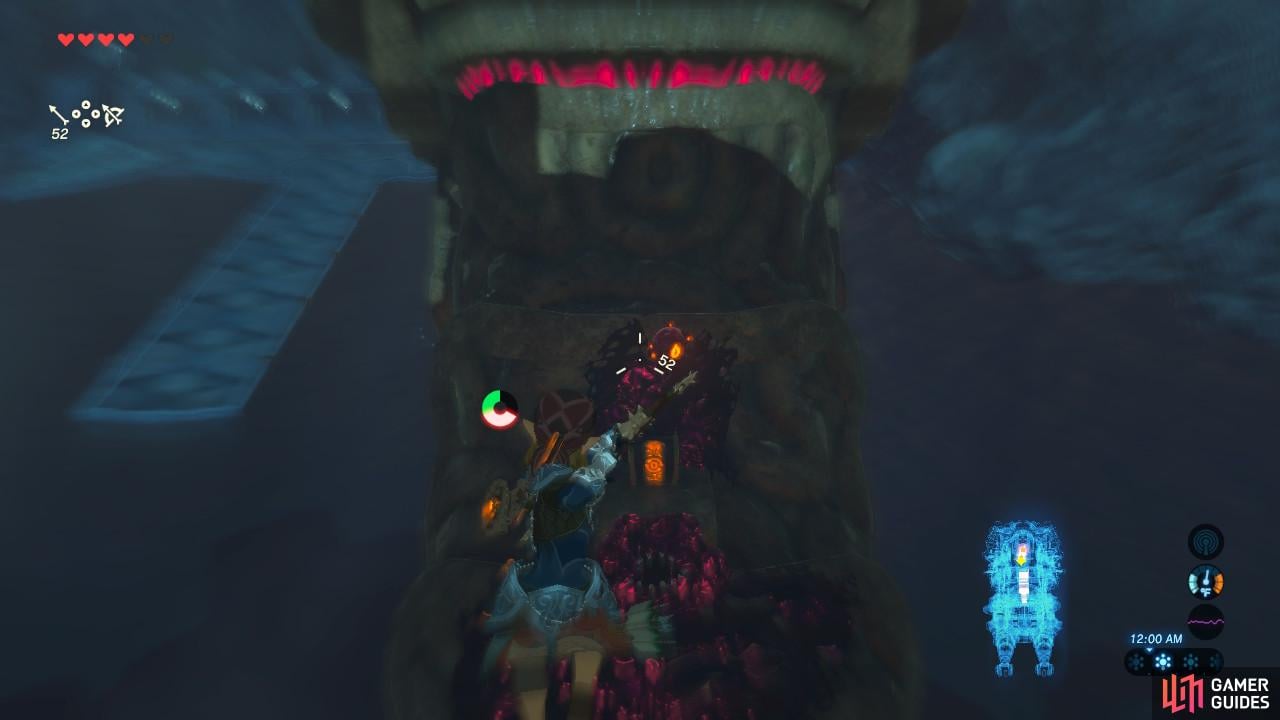
Jump down this hole (left), Another one of Ganon’s eyeballs is hanging out on the ceiling so destroy it (right)
Once you land on Vah Ruta’s forehead, drop down the rectangular hole and you will land on the upper floor inside the Divine Beast. You will see that the fourth terminal is below you and is surrounded by fire. Defeat the eyeball on the ceiling.
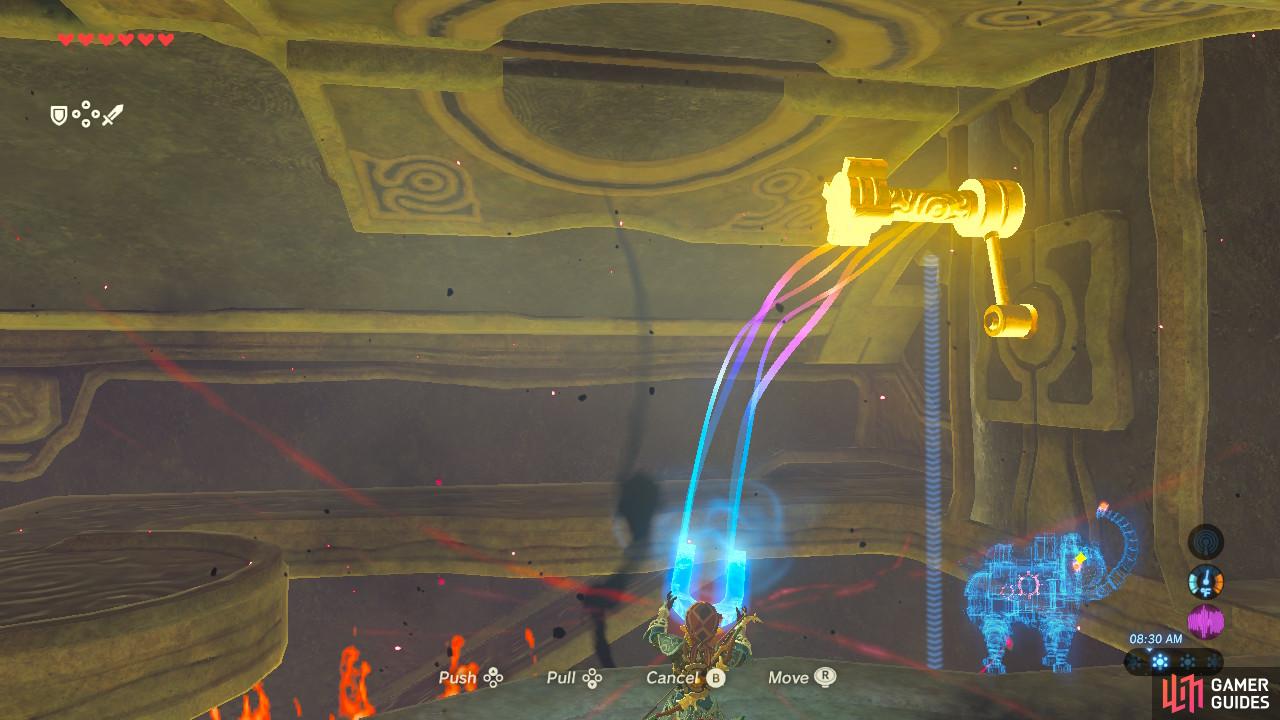
(1 of 3) Use Magnesis to turn the lever. It will rotate 3 or 4 times and then stop
Use Magnesis on the lever to spin the gears. After a few spins it will no longer spin. Then, move Vah Ruta’s trunk to the fifth position from the top. Vah Ruta’s water spout will spray directly onto the flames, extinguishing them. Drop down and activate the terminal.
(1 of 2) Go in the opposite direction the terminal is facing to reach this ledge
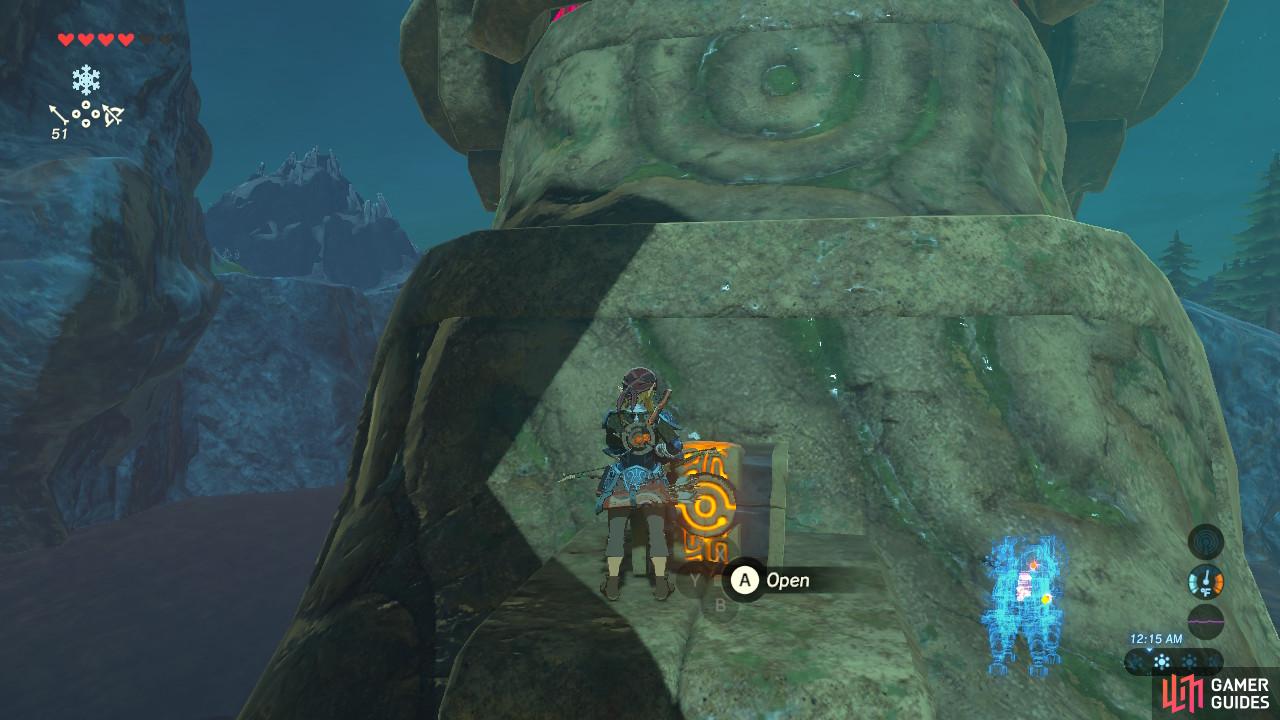
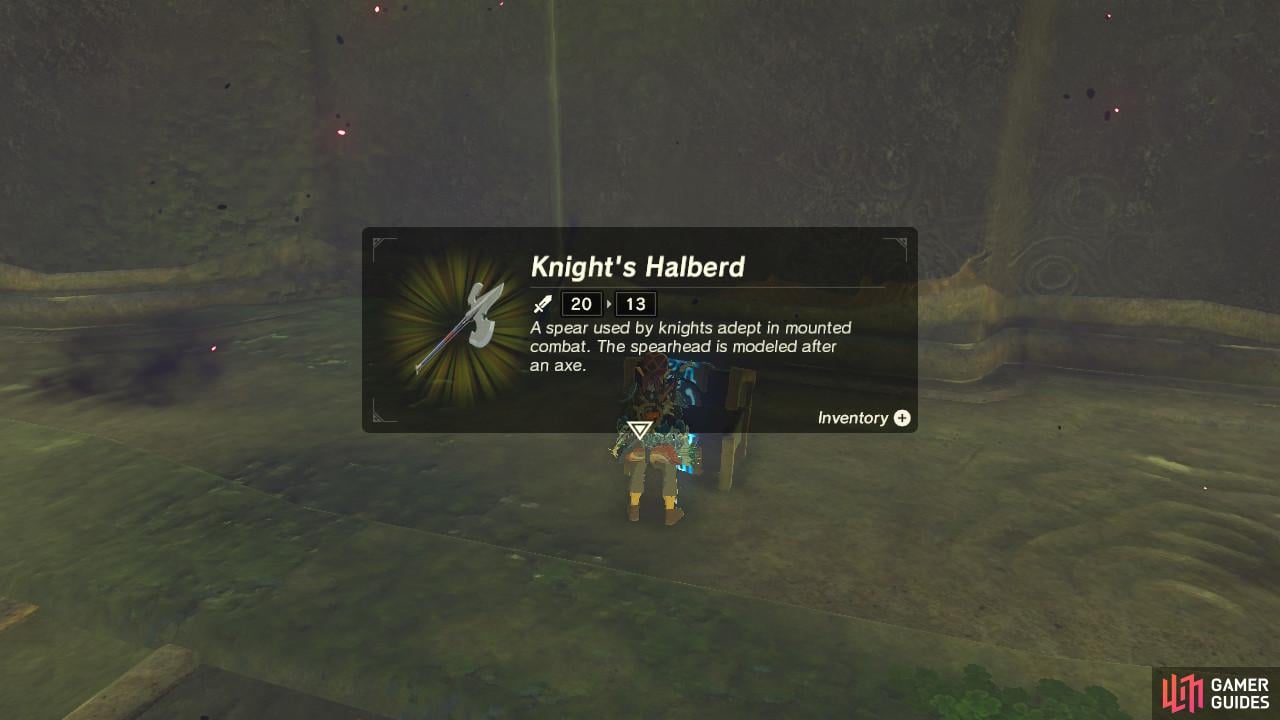
Go in the opposite direction the terminal is facing to reach this ledge (left), The Knight’s Halberd is a strong, good quality weapon to have (right)
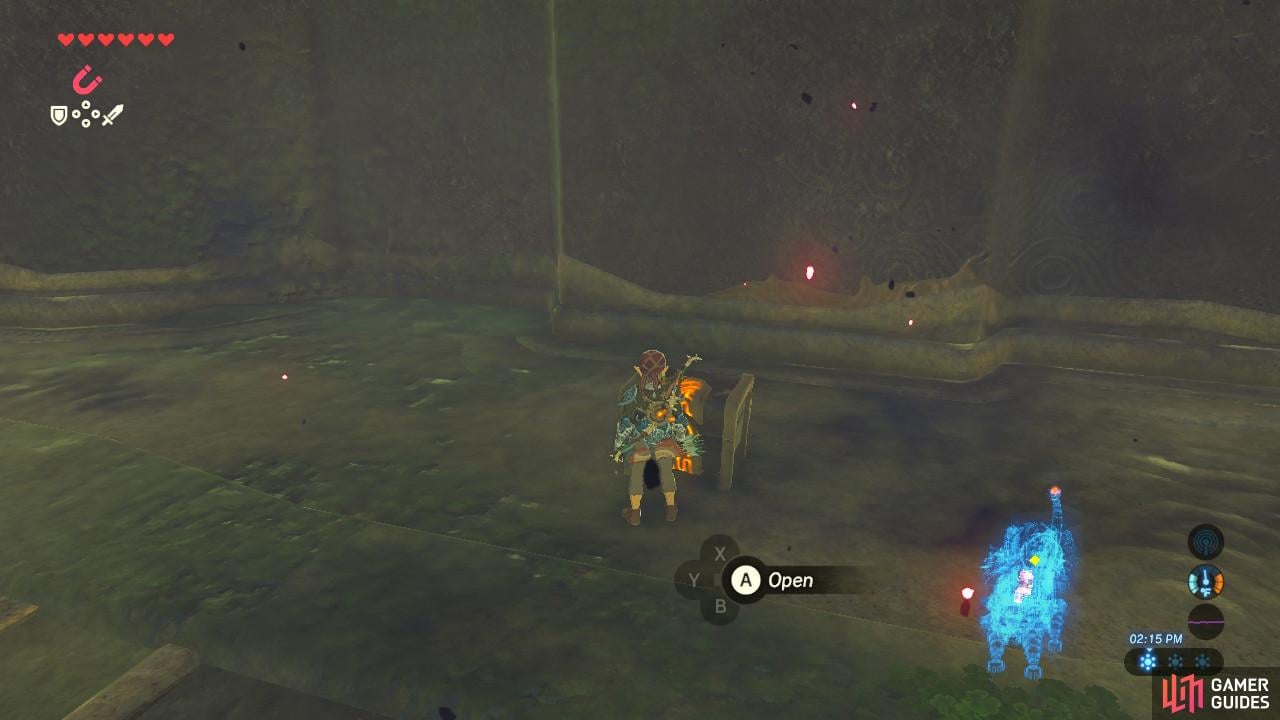
There is another treasure chest right next to the terminal so let’s grab it. Go forward from the shrine to the ledge and fall down. You will drop off onto another ledge sticking out from the wall. Open the treasure chest for a Knight’s Halberd.
Terminal 5
We finally are at the last terminal. Return to the tip of the elephant’s trunk by Paragliding from the hallway we used earlier with the trunk lowered down all the way. This time, try to land on the ledge sticking out from the trunk. We are going to take a small detour first to claim another treasure chest on Vah Ruta’s back.
(1 of 2) You can shoot at the eyeball from the sky too if you want
You can shoot at the eyeball from the sky too if you want (left), The treasure chest is on the left side of Vah Ruta’s back. (right)
Again, raise the trunk up all the way. Stand on the very top of Vah Ruta’s trunk so that you can be stable for a longer period of time, allowing you more height to Paraglide. The treasure chest is on the left side of Vah Ruta’s back, but it will not be accessible until you defeat the Ganon corruption on the right. So Paraglide to the right and destroy the eye.
You can get to the treasure chest on the left by repeating this process, and instead Paragliding to the left, or you can actually jump carefully to Vah Ruta’s crest and run across it, then use jumping and Paragliding to get to the left side. The treasure chest contains 10 Ice Arrows, so it is well worth the detour.

(1 of 2) Stand here on the tip of the trunk where the water spouts from
Stand here on the tip of the trunk where the water spouts from (left), You will see that the terminal is currently sideways and inaccessible. Who built these things? (right)
Lower the trunk again and Paraglide again to the tip of the trunk. Now, raise Vah Ruta’s trunk to the third position from the bottom. This will make the very tip of its trunk flat, so you can walk onto it. Go forward and look down and you will see the fifth terminal is sideways on the trunk!
(1 of 2) Wait for the trunk to slowly curl and rotate
Wait for the trunk to slowly curl and rotate (left), Now walk onto what is now the new floor and activate the terminal (right)
Raise Vah Ruta’s trunk to the third position from the top. As you do this, the terminal will become vertical and you can walk right up to it and activate it. Mipha will congratulate you on a job well done, and notify you that the main control unit of Divine Beast Vah Ruta has opened up. If you activate it, you can flush out Ganon and Mipha will regain control.
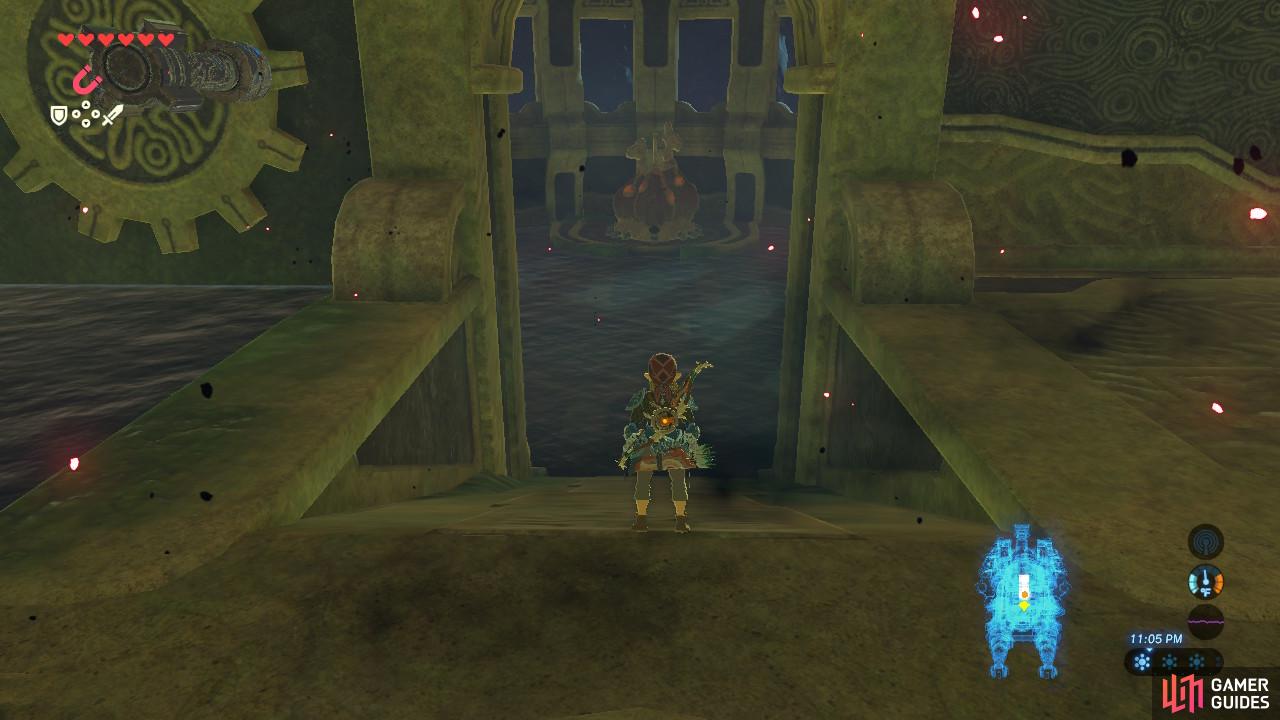
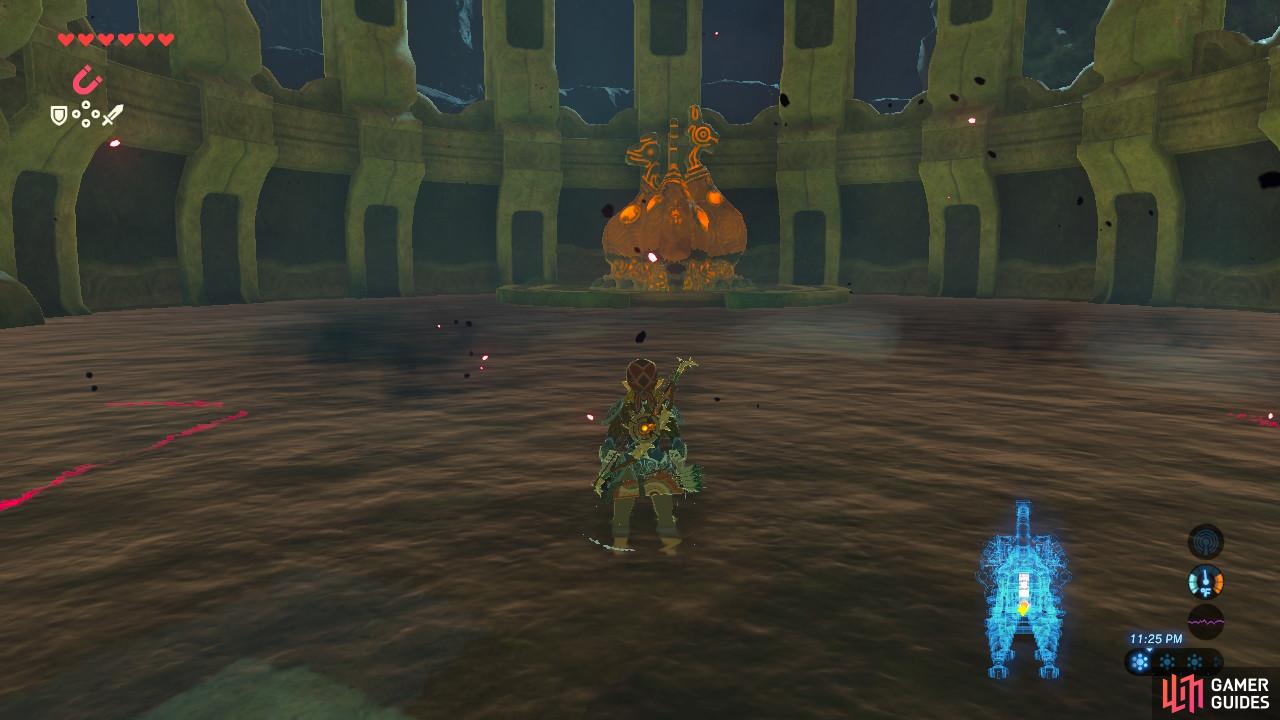
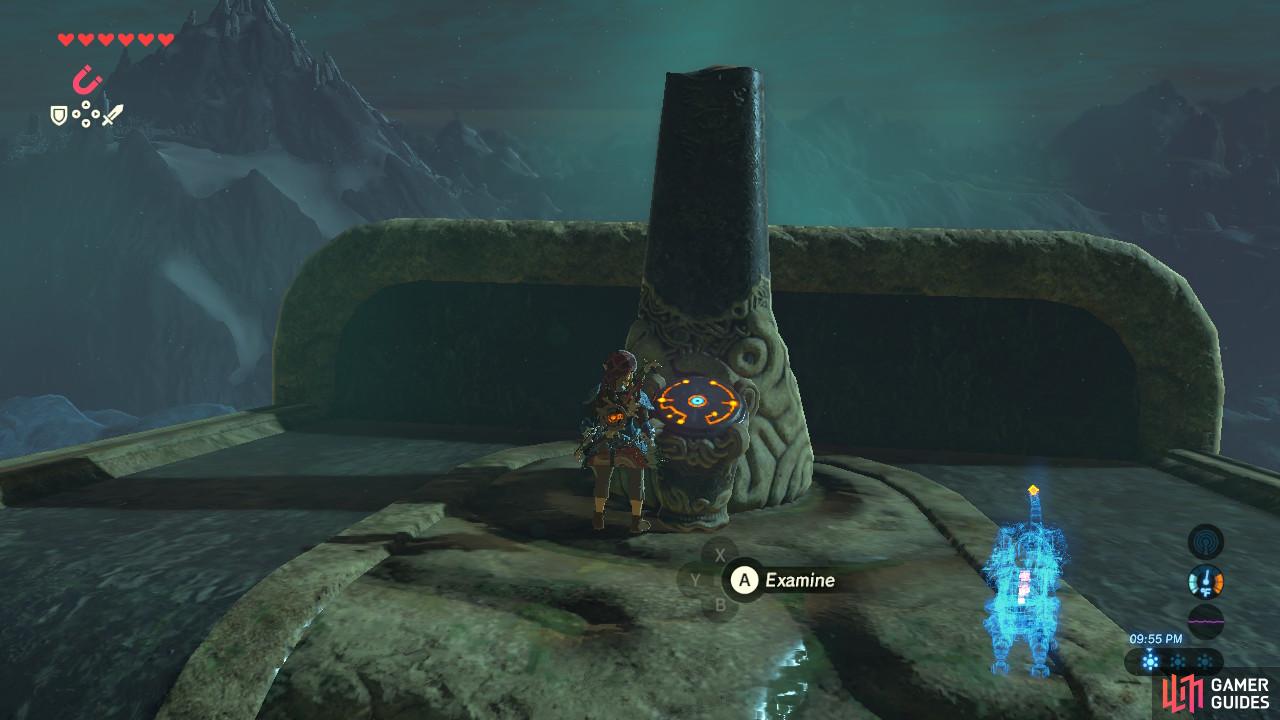
(1 of 2) Walk down this newly appeared staircase
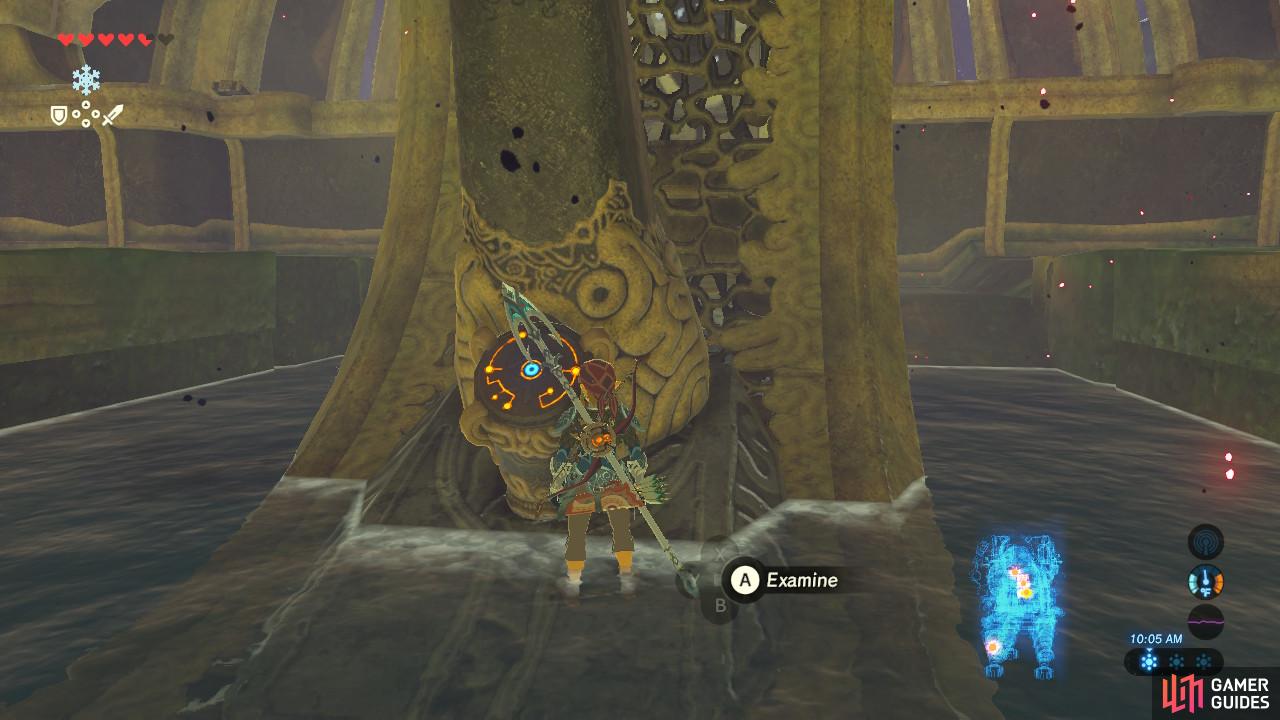
Walk down this newly appeared staircase (left), The huge orange pedestal is the main control unit of Vah Ruta. (right)
Return to the room where you first entered the Divine Beast. You will see a newly appeared staircase that leads to a wide open chamber with a larger pedestal at the end. Activate it, and…?
Waterblight Ganon
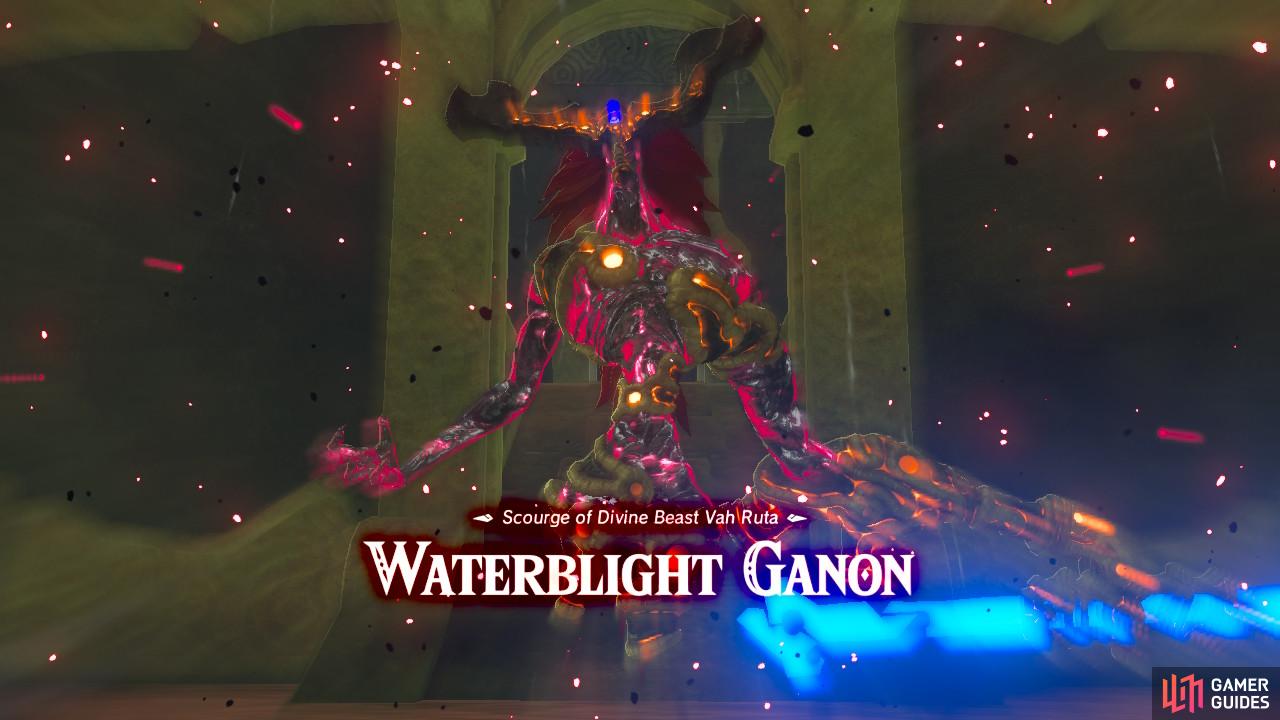
It looks like Ganon is going to make the job difficult for us. This is the boss of Divine Beast Vah Ruta, the Waterblight Ganon, and until it is destroyed you cannot activate the main control unit.
Waterblight Ganon holds a long, blue spear that he will frequently use. However, his spear attacks are clearly telegraphed, giving you time to get out of the way. Waterblight Ganon can throw the spear a fair distance, but has a long windup period. He will also do a wide swing across the room, or a forward thrust.
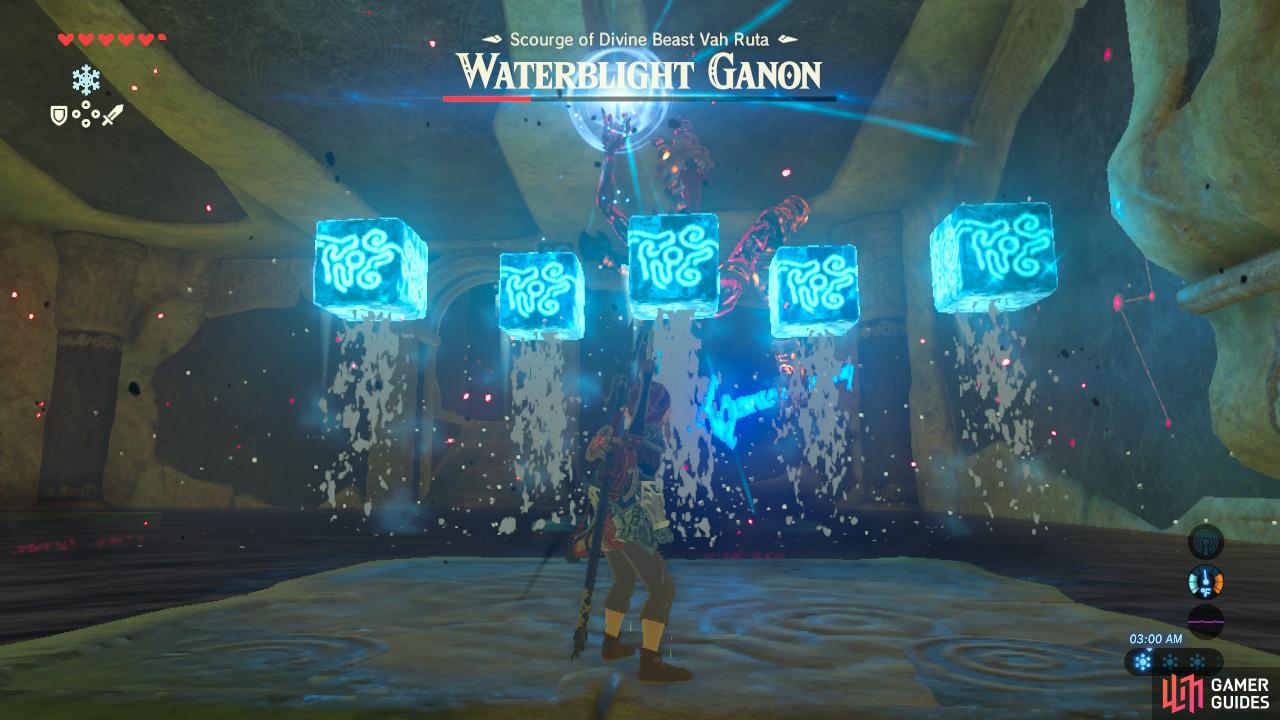
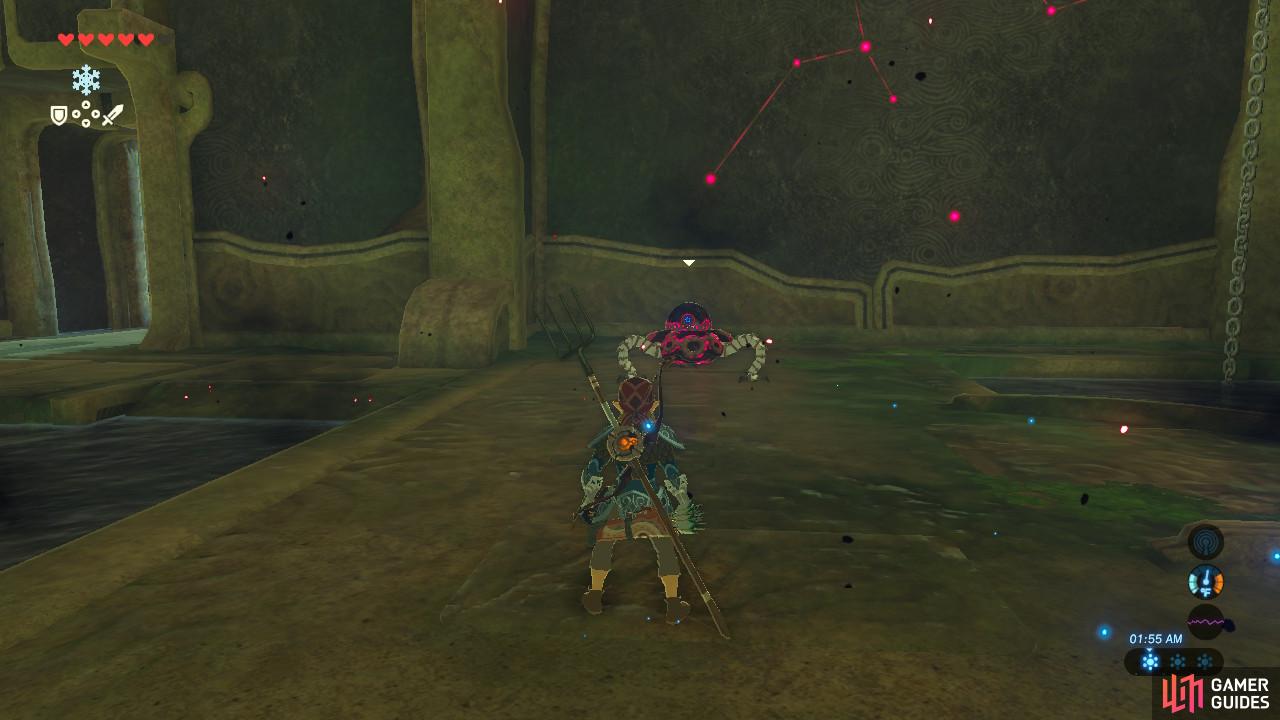
(1 of 2) At this point in the fight, you can only fight if you are standing on one of the four platforms
At this point in the fight, you can only fight if you are standing on one of the four platforms (left), Waterblight Ganon will launch either one or five ice blocks at you (right)
At half health, Waterblight Ganon will enter phase two of the fight where he will now hang around in the air. The water will rise, meaning you can only fight on four platforms. Similar to when you had to quell Vah Ruta’s water spouting, Waterblight Ganon will throw ice blocks at you. Destroy them with Cryonis and sometimes he might be stunned, during which time you can hit him with whatever weapon you have.
Once Waterblight Ganon reaches critically low health, he will use his eye to fire a laser at you, just like a Guardian. It hits as hard as a Guardian too, and is much harder to dodge. Your best chance at survival is to parry with your shield.
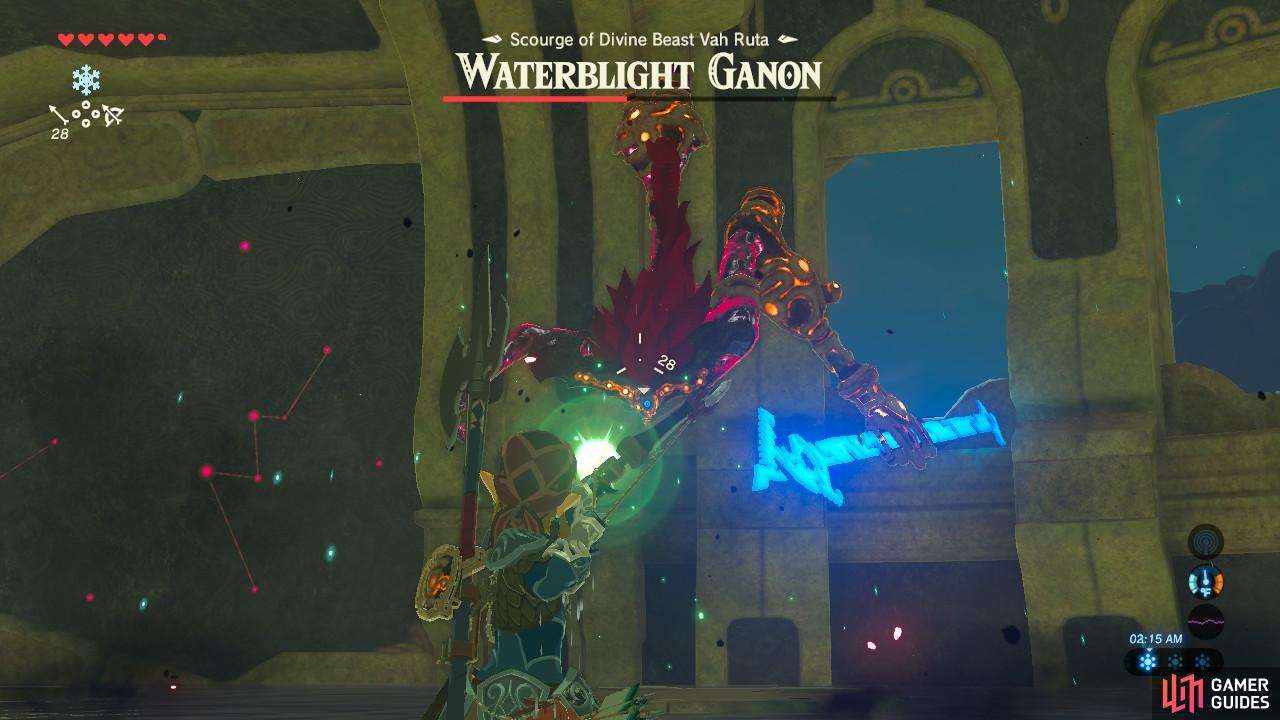
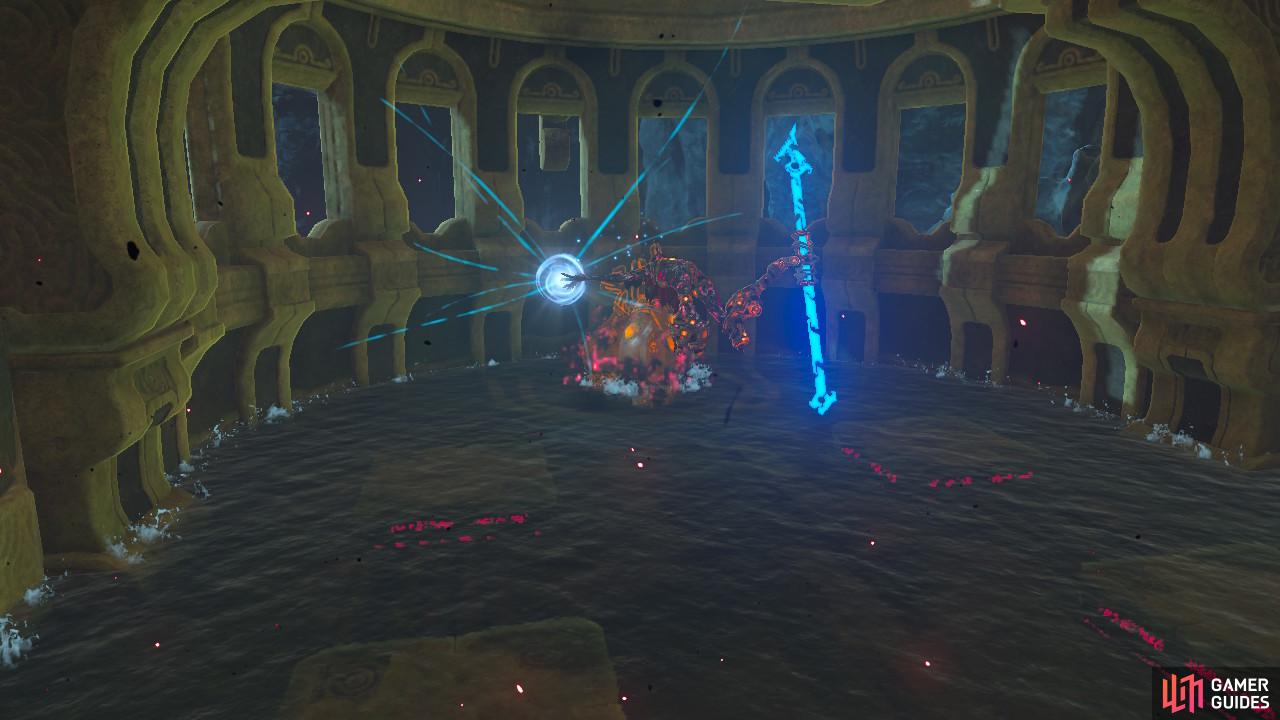
Aim for the eye!
The best, most stress-free way to fight Waterblight Ganon is to use your Shock Arrows. Being water element, Waterblight Ganon is very weak to lightning. Additionally, Waterblight Ganon will always become stunned if you hit him in the eye, which is his weak point. Shoot Waterblight Ganon, in the eye if possible, and if you stun him, whack away with your melee weapons.
Once defeated, Waterblight Ganon will be expelled from the Divine Beast and you will receive a heart container! Be sure to actually press [A] and pick it up. If you do not want it for some reason, just leave it be.
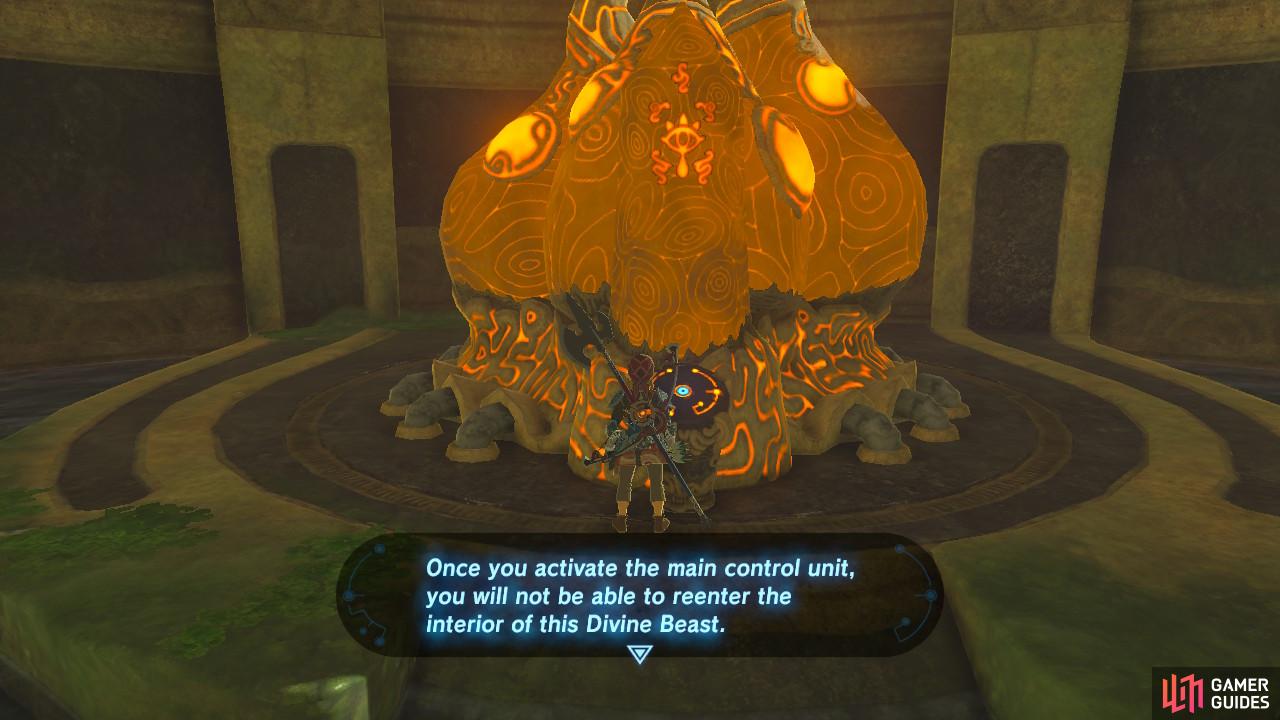
You can now finally, actually activate the main control unit. Beware, once activated, you cannot return to this dungeon. If you missed any treasure chests along the way or want to go back and explore some more, now is your chance to leave.
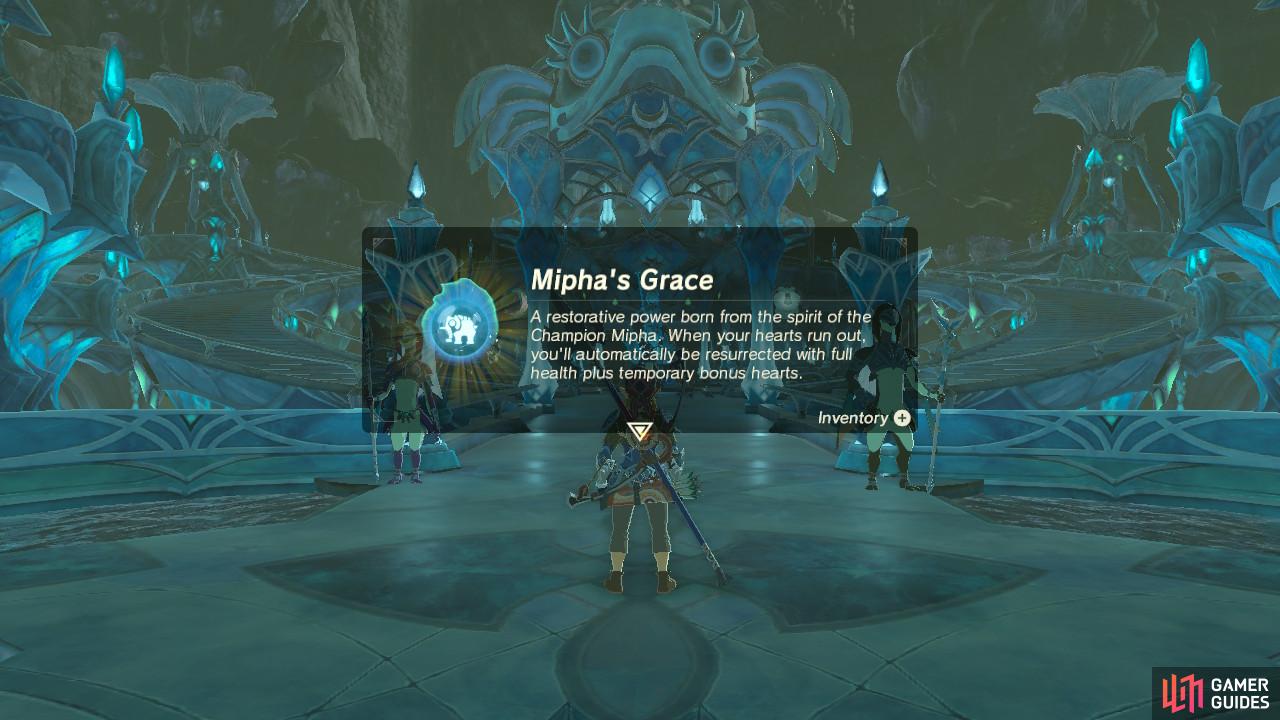
Once activated, Mipha will appear before you. She will gift you with her special ability, Mipha’s Grace. It is an incredibly useful ability that will revive you automatically once if you are killed. It essentially gives you two health bars. Once used, Mipha’s Grace will need approximately 20 minutes to recharge, but it is literally a lifesaver and will make the rest of your journey much easier.
(1 of 2) Be sure to open up this treasure chest after the cutscene
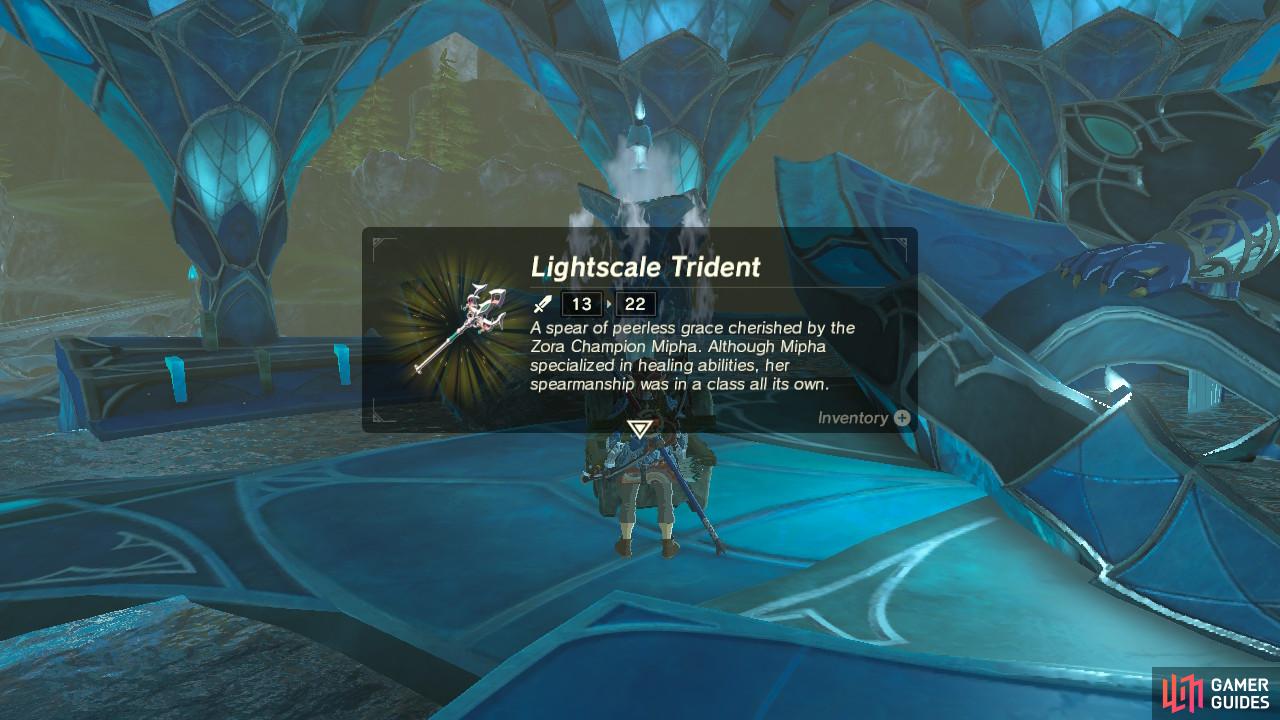
Be sure to open up this treasure chest after the cutscene (left), Save the Lightscale Trident for more difficult fights later in the game (right)
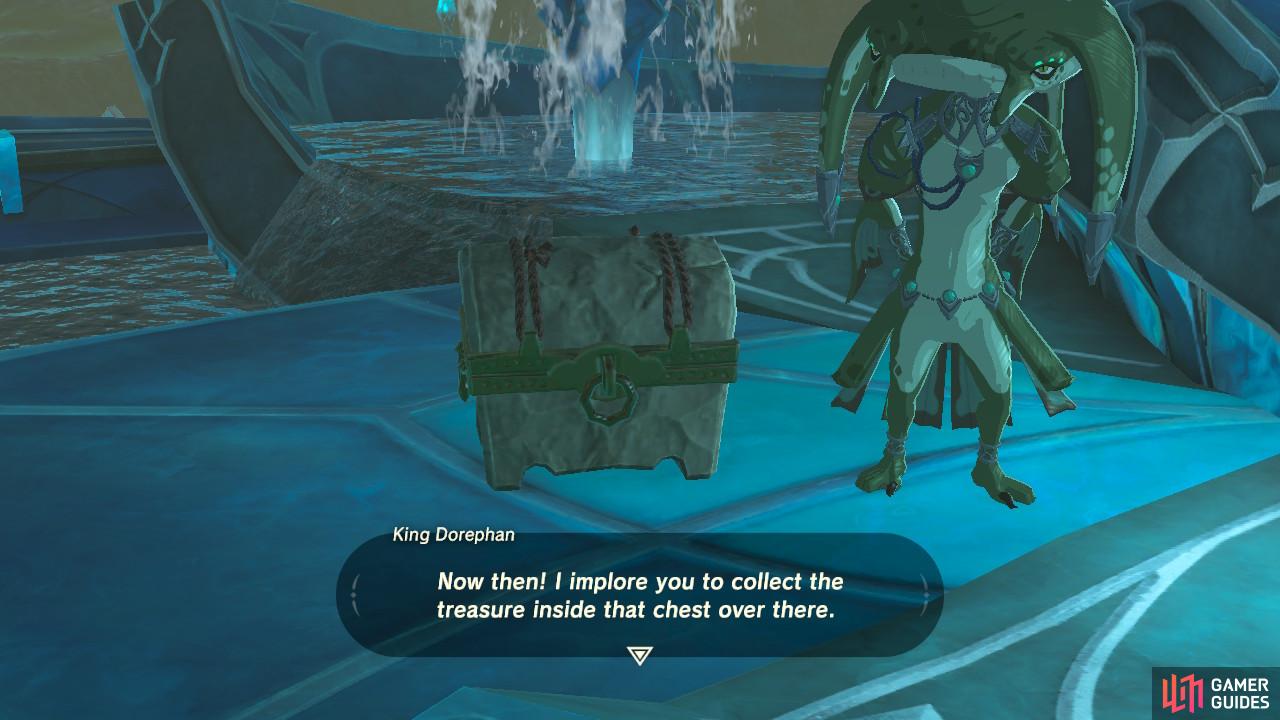
After the cutscenes, Mipha will teleport you out of the Divine Beast and pilot it to the top of the nearby mountain, where Vah Ruta will fire a laser at Calamity Ganon in Hyrule Castle. You will return to the entrance of Zora’s Domain. King Dorephan wishes to speak to you and will gift you the treasure chest near Muzu.
If you open up the treasure chest, you will obtain the Lightscale Trident. This was Mipha’s weapon when she used it, and now it is in your possession.
Congratulations, you have freed the first of the four Divine Beasts!

 Sign up
No Comments