
Afternoon Questing
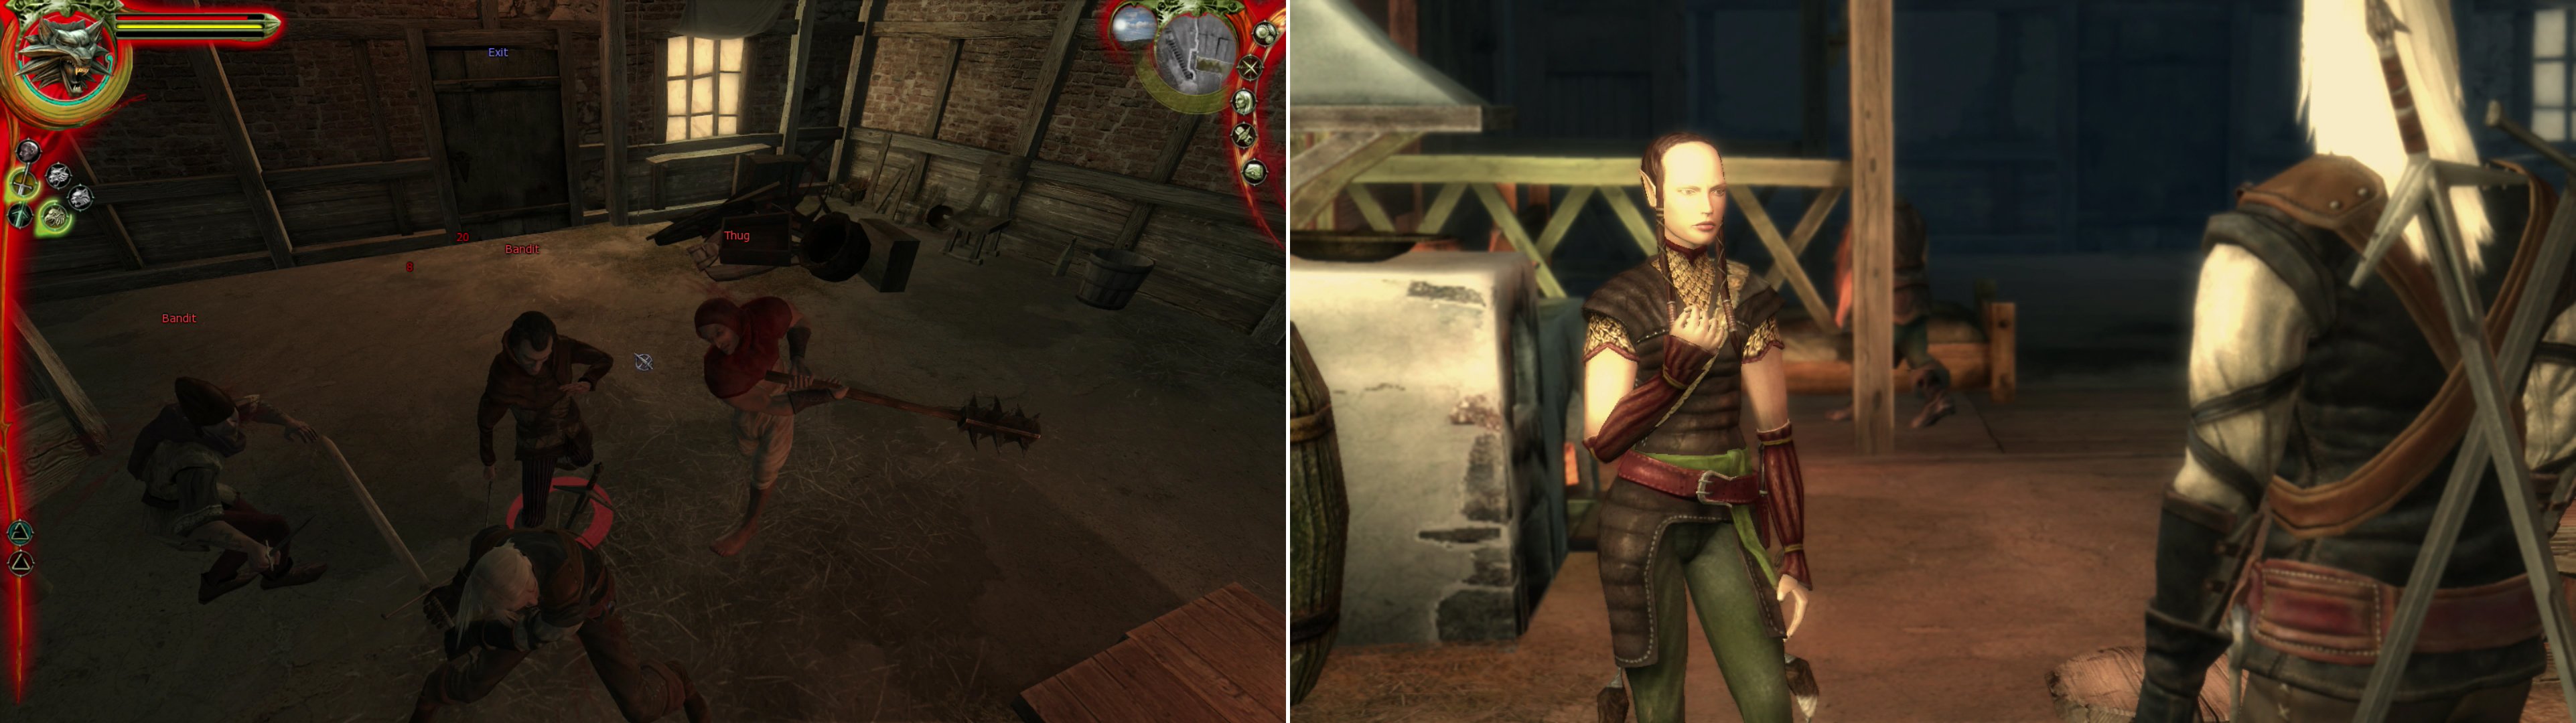
The thugs made the mistake of setting a Witcher loose on them, with predictably bloody results (left). When you’re done butchering, rescue the Half-Elf (right).
Leave the Hairy Bear and head to the “Abandoned House” in the north-western part of the Slums. Inside, we’ll discover that this haunted house was no more than a ruse to lure adventurers. Our friendly Thug apparently has a mind to rob us, although Geralt wisely critiques their choice of victims. Use the Group Steel Style to easily smite them. When they’re all dead, you’ll get a small experience reward. Loot the lead Thug for a Key, then talk to the Half-Elf, another victim of theirs, it seems. She’ll struggle to thank you, but ultimately she’ll just invite you to visit her home later so she can give you a proper reward.
| Objective | Reward |
|---|---|
| For killing the Thugs | 500 XP |
| For saving the Half-Elf | 2000 XP |
All in good time. Leave the house-and the Slums-and enter a house west of “Detective Raymond’s House”. It’ll be marked on your map as a “Well-Stocked Cellar”. On the first level you’ll be assaulted by a pair of Wraiths. Normally, they could be problematic, but at our level, we should be too strong to be affected by their sonic attack. Use the Fast Silver Style to dispose of them, updating the quest “ The Rat“ .
| Objective | Reward |
|---|---|
| For defeating the Wraiths | 500 XP |
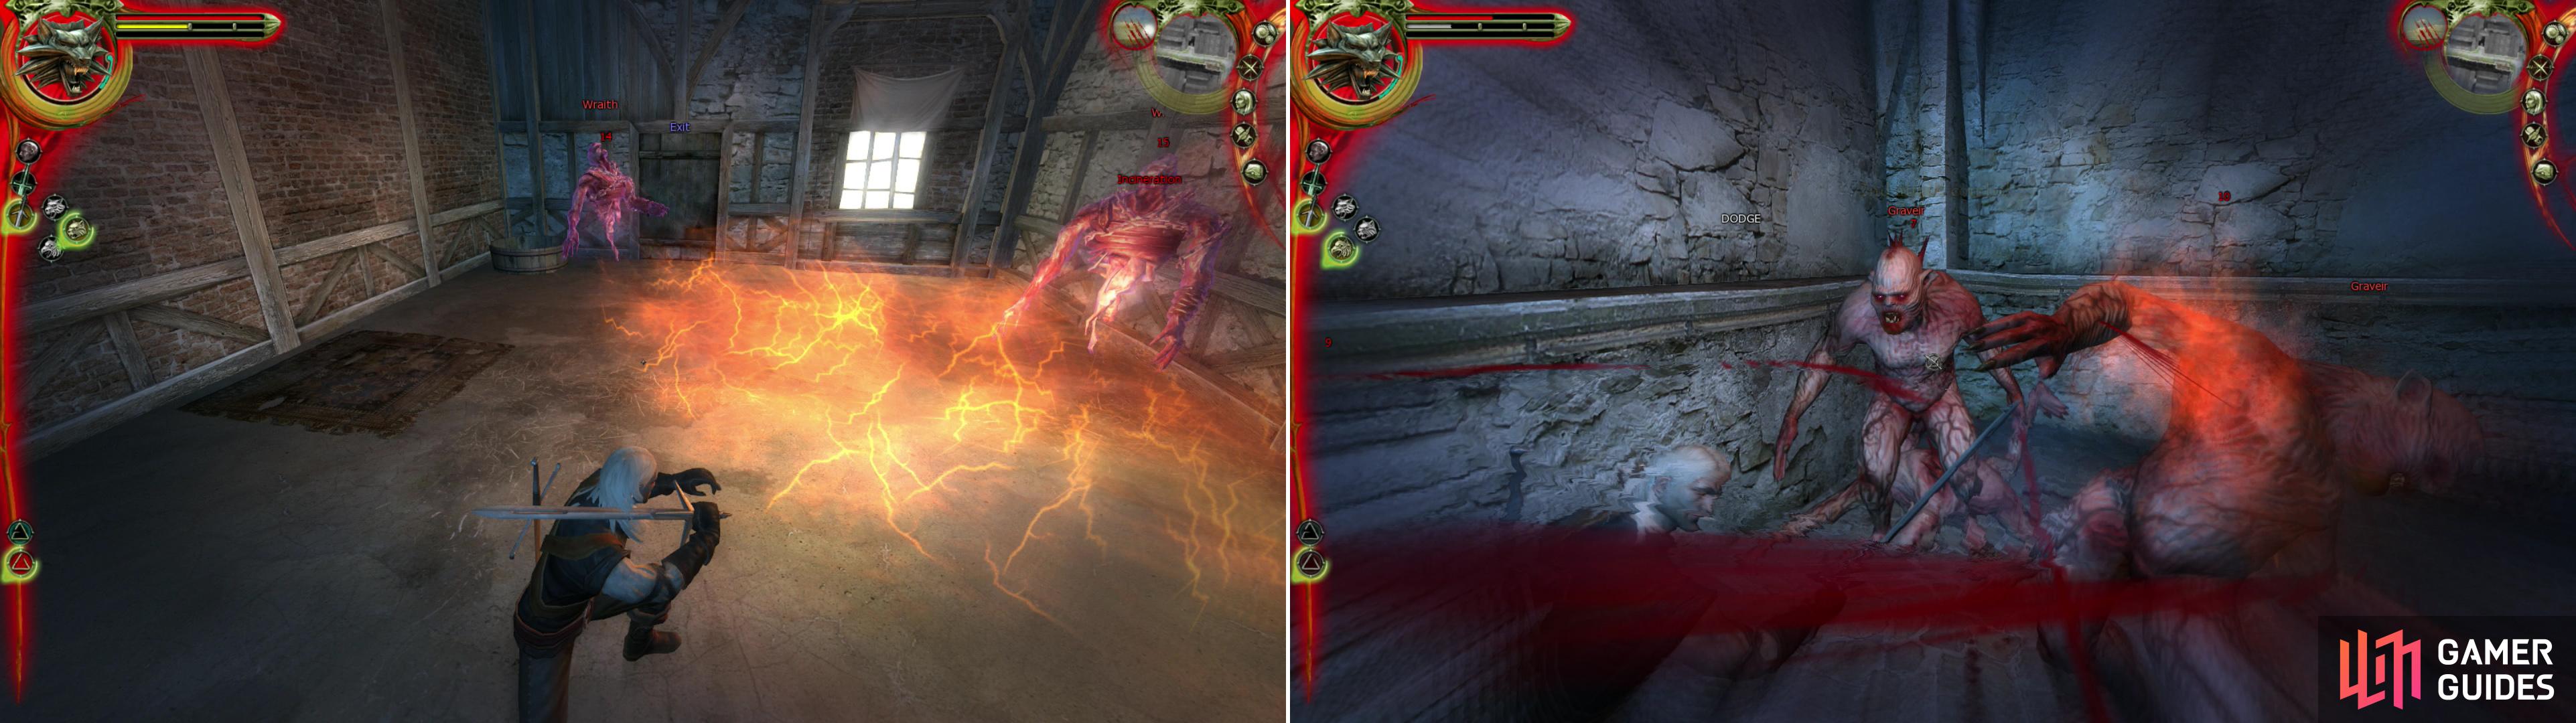
Defeat the Wraiths on the top floor to satisfy Coleman (left) then head downstairs and dismember a pack of Graviers in order to recover Conrad’s wine (right).
If you took a beating upstairs, wait for your Vitality to recover a bit before heading downstairs, and have the Group Silver Style ready. Four Graviers await, and for a lesser Witcher, this might be a problem. We, however, have been grinding four Graviers for about seven levels or so now, so it should be no big threat. Soften them with Igni, then smite them with the Group Silver Style. When done, grab the three bottles of “Very Old Wine” from the cellar and leave.
| Objective | Reward |
|---|---|
| For acquiring the Very Old Wine | 500 XP |
Return to the Hairy Bear, where you should find Conrad waiting-at least, if it’s after 17:00. Tell him that you were successful, and he’ll give you the good news that he drank all of his money away. He seems to think that somehow he’s still entitled to one of the bottles. Give him his booze, or better yet, tell him that he doesn’t get any wine if you don’t get any Orens. You can sell each bottle for 80 Orens, for a grand total of 240 Orens, if you so desire.
| Objective | Reward |
|---|---|
| For reporting to Conrad after recovering the Very Old Wine | 1500 XP |
If there’s still time before night, head over to the Half-Elf’s house. It’s the isolated building north of the Hospital, separated from the rest of the nonhuman district by a wall. Find your Half-Elven lady inside and talk to her. She’ll try to teach you the Elven language. Humor her, and you should set up getting the “Half-Elves” Sex Card . If you still have time left before nightfall after all that, go find somewhere to rest until night.
Night Questing
Now, to briefly discuss some of the enemies you may find in Vizima. Near the Cemetary (south center of the map) you may encounter some Ghouls. Fleders (a type of Vampiric undead) rarely spawn in the slums outside of the Hairy Bear, in the garden outside of the Hospital, and in a dead-end alley in the nonhuman district (north-west of the Blacksmith). More usefully, however, several assassins spawn in the nonhuman district. Not only do they carry some useful loot, but they drop weapons that can be sold. Best of all, they’ll drop Fisstech. Getting some here beats having to make some, or worse yet, buy it. All of these encounters only occur at night.
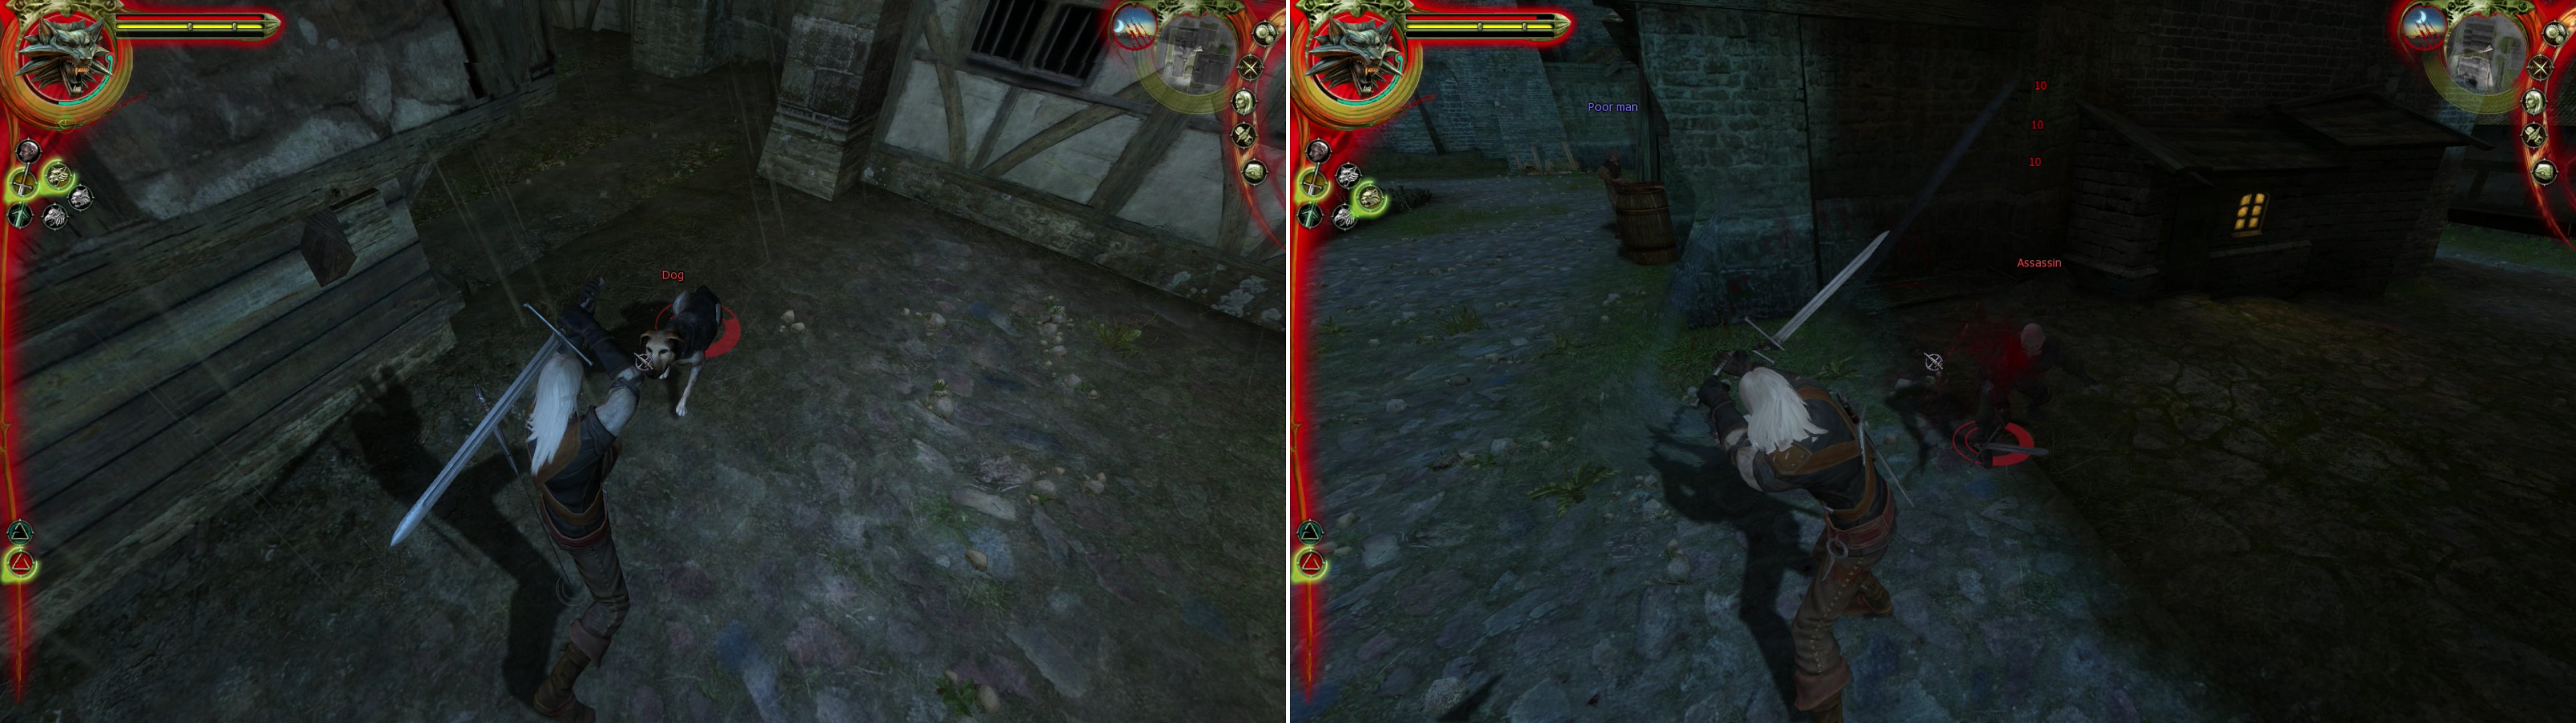
Of course, since it’s dangerous out, you can attack things at night-this is the time to start randomly killing Dogs and collecting their juicy, juicy Tallow for the quest “The Dogcatcher of Vizma” . Don’t bother hunting them intentionally, it’s a while before we’ll bother to turn this one in, but throughout your travels in Vizima by night, just keep your eye out for pooches to pummel.
| Objective | Reward |
|---|---|
| For collecting six units of Dog Tallow | 500 XP |
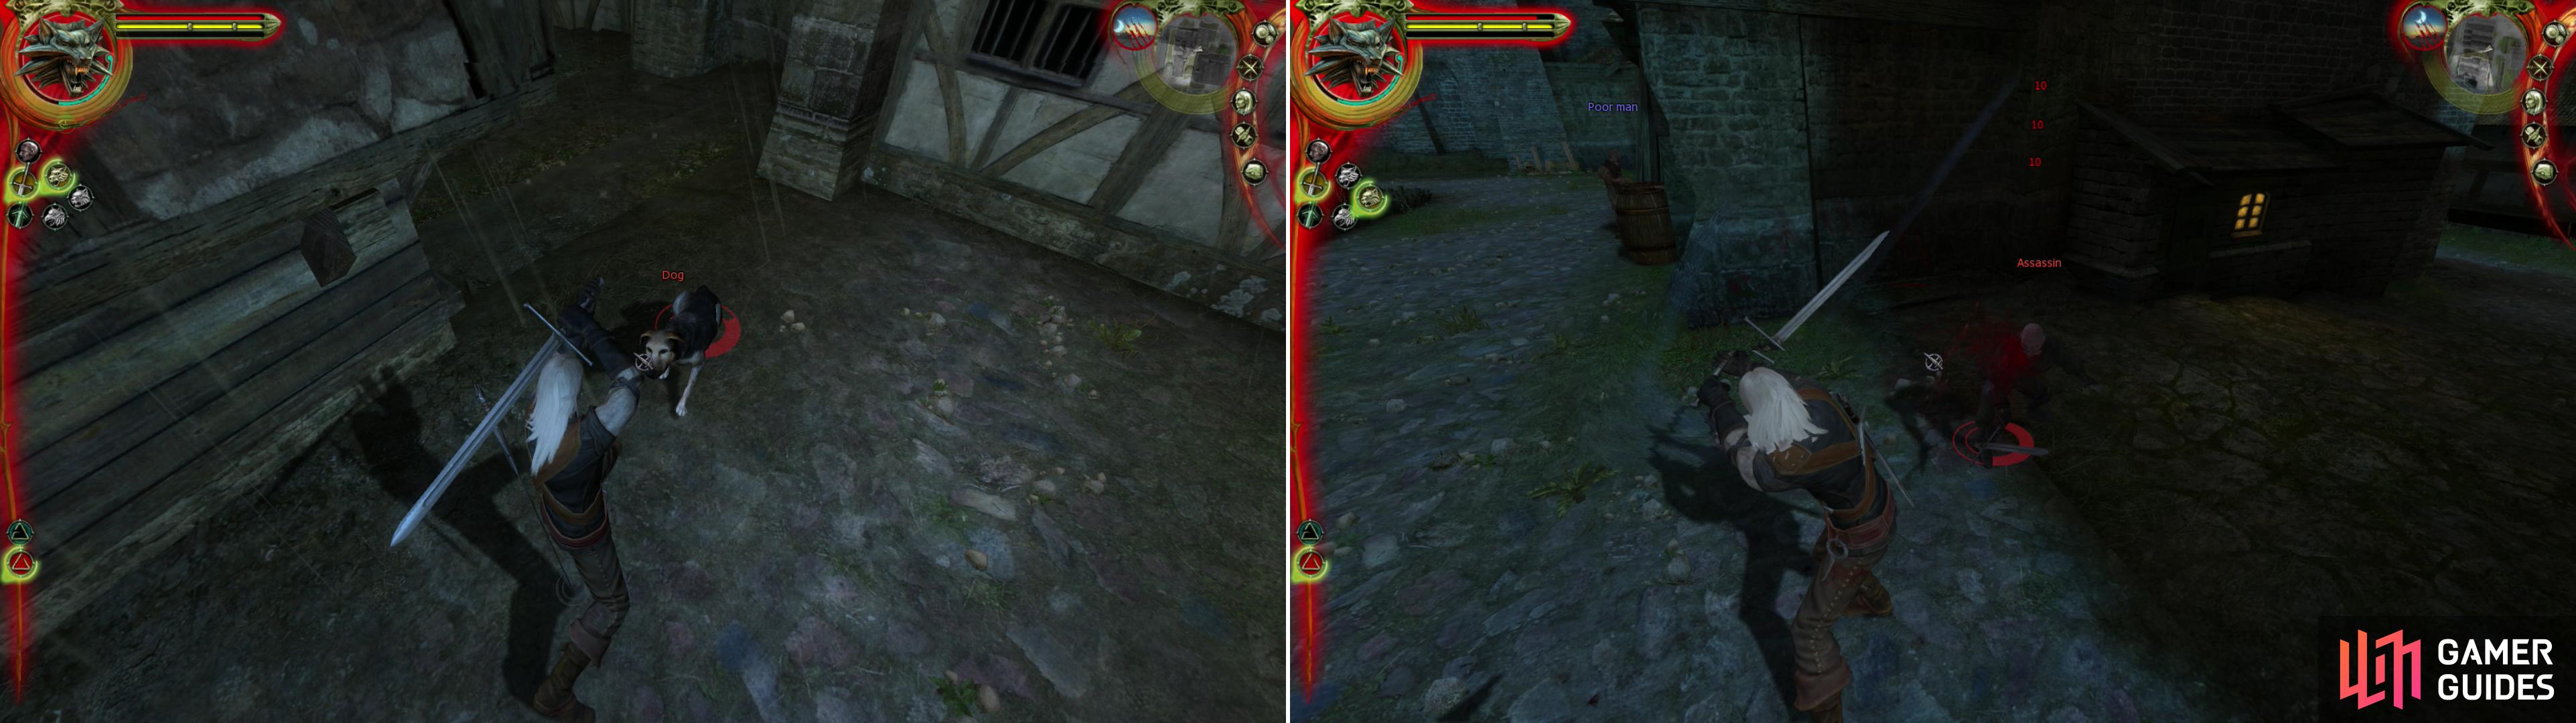
Hunt some hounds at night… it might not be work worthy of a Witcher, but… well… we need money (left). Interrupt the Salamanders accosting Carmen’s girls, and teach them some manners (right).
Now lets go save Carmen’s “little girls”. Their locations are marked on your map-there’s one in front of the Hospital, another in the middle of Little Mahakam, between Vivaldi’s and Kalkstein’s, and the last is just off Merchant Street. Here’s how it works, we approach, and exchange mean words with a group of Assassins. They get mad, we kill them with our Steel Sword, we loot them, and we go on to the next group. Some of them drop interesting weapons, so it might be worth your while to store what you find after each fight.. if you’re into collecting weapons, that is. Make sure you keep all the Salamander Pins you find in your inventory.
| Objective | Reward |
|---|---|
| For saving the three prostitutes | 500 XP |
Visit the Warehouse around midnight to find Vincent Meis meeting with Salamanders (left). Either play along, or not… words end up being replaced by swords soon enough (right).
Head over to the Warehouse-it shouldn’t really matter what time it is, so long as it’s night-time and around midnight. Inside you’ll find Vincent dealing with a group of Salamanders. Either play along with Vincent’s ruse or not, either way, a fight is inevitable (although Vincent is much more friendly the next time you talk if you play along). Dispatch the Salamanders with the Group Steel Style, then loot for what meager possessions they’ll leave behind. Don’t bother talking to Vincent just yet, either, since we don’t have enough evidence to condemn or exonerate him. Now that our nocturnal activities are over, lets return to Carmen, where we can rest and claim our reward.
You can find Carmen at the Eager Thighs Brothel-during the day she stands outside, and at night she’s inside sweeping. Pay her a visit and tell her you completed her task. as a reward, you’ll get some decent experience and your choice of either 200 Orens, or the gratitude of the prostitutes. If you choose the gratitude, you can hire any prostitute in the city by just providing them flowers (a significant discount). Or, if you get the 200 Orens… well, money is always nice too.
If you want the “Prostitutes” Sex Card you’ll either have to pay a prostitute, and they cost anywhere between 140 and 340 Orens, depending on their mood. Just keep propositioning them until their price is something you’re willing to pay. If you get the 200 Orens, there’s a chance to obtain the Sex Card and still end with a profit, but chances are we still have some flowers in our inventory from Chapter 1, which will allow us to get the Sex Card for free if you chose the “gratitude” reward. In any event, once you’re done here talk to Carmen, who will allow you to rest. Meditate until noon so we can finish up the quests we’ve started in the Hairy Bear.
| Objective | Reward |
|---|---|
| For reporting to Carmen after rescuing the prostitutes | 1500 XP and one of the following: 1) 200 Orens 2) “Gratitude” |
The Rat
Go talk to the Innkeeper and ask where Coleman is. The Innkeeper seems amused-but not surprised-that Coleman ran off after your job with him. He’ll tell you to go look for him by the dike. He’ll also ask you to go find out what Coleman is up to. Apparently we’re not the only ones Coleman has crossed.
Time to go visit the Dike, the gate to which can be found to the north-west, down the road upon which “Detective Raymond’s House” lies, quaintly named ‘Harbor Street’. If you let Siegfried hunt the Cockatrice with you, you’ll be able to pass freely to the Dike. On the other hand, if you didn’t, you’ll have to bribe the guards to get past.
Once you make it to the Dike you’ll find Coleman singing to the guard. When he realizes that he’s been spotted, he’ll tell you that he’s been helping Vincent dismantle the Salamandra organization, and he’ll beg you not to turn him in.
The decision is, in my opinion, fairly easy. Coleman is a pretty useless NPC by any stretch of the imagination, the only thing he’s good for is buying and selling Fisstech. Since many Assassins drop Fisstech in Chapter 2, you should be able to get all the Fisstech you need… and Fisstech doesn’t sell for nearly enough to make Coleman a worthwhile vendor. The 500 Orens you’ll get from the Innkeeper is more than worth the trade-off… If you let the Scoia’tael walk away with Haren’s goods in Chapter 1 you have even more incentive to turn Coleman in, as his aforementioned uselessness as an NPC is about to be exacerbated by a slight case of death.
All in all, it’s more rewarding to just turn Coleman in. If it seems like you’re hurting an enemy of your enemy-again, you shouldn’t worry too much about it, as Coleman isn’t long for this world, and him squealing to the guards is just as harmful to the established criminal underworld resisting Salamandra’s incursion as it is to Salamandra itself.
| Objective | Reward |
|---|---|
| For finding Coleman on the dike | 500 XP 100 Orens |
| For turning Coleman in to the Innkeeper | 1500 XP 500 Orens |
| For lying to the Innkeeper about Coleman | 1500 XP |
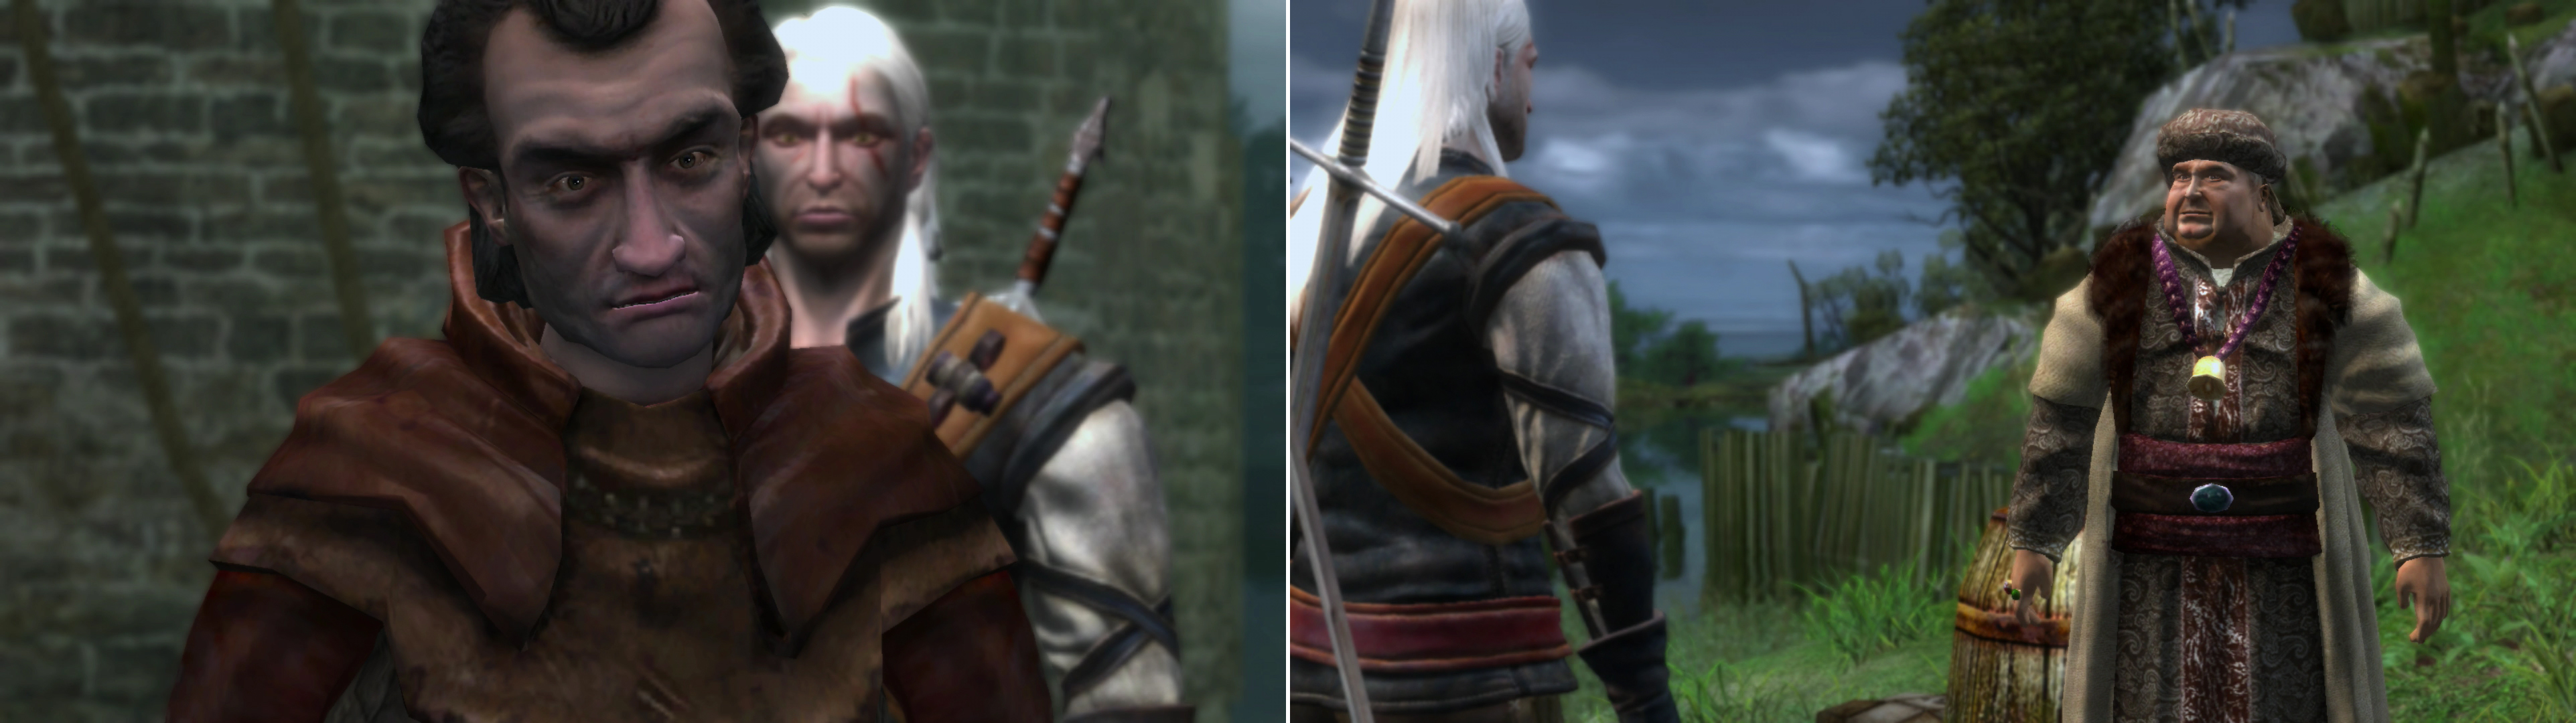
Head to the Dike to find Coleman singing to the guard (left). You’ll also find your old merchant buddy Leuvaarden, who is willing to pay for Salamander Badges (right).
While we’re here, we might as well talk to Leuvaarden. Ask him about the creatures and he’ll offer up 400 Orens for you to get rid of them. More than a fair price to exterminate some Drowners! Ask him about Salamandra, and he’ll tell you to bring him three Salamander Pins to prove you’re on the same side.. pins that you should already have in your inventory. Offer them up and he’ll pay you 200 Orens per pin! That’s 600 Orens! He’ll admit that he wants Salamandra gone, stating that they’re ‘bad for business, but other than confessing that he’d enjoy hearing of Azar Javed’s demise (and that of Salamandra as a whole) he doesn’t have too much more to say.

 Sign up
No Comments