
Upon entering the dungeon (B1 centre), you’ll be thrust into a room full of skulls on the floor. Well, that’s a very friendly welcome. Then, just as you begin to familiarise yourself with your menacing new surroundings, a shadow will begin to fall on top of Link and then–oh Gods, what is that!? It is, of course, a Wallmaster–possibly the creepiest Zelda monster ever (besides the Redead and Gibdo from Ocarina of Time and Majora’s Mask).
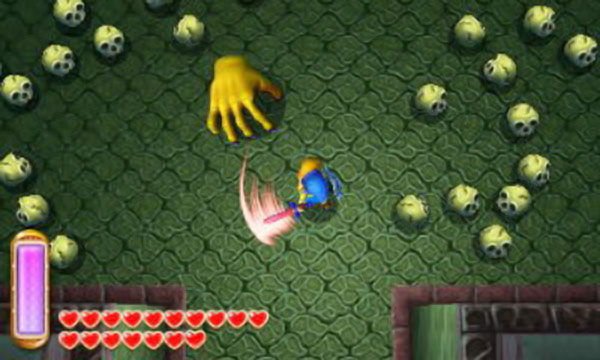
Wallmasters emerge from the ceiling and try to grab Link, taking him back to the start of the dungeon. If you keep moving, the Wallmaster will miss its target and become vulnerable to attacks, but a new one will eventually come to replace it. So basically there’s no real escape.
Dash for the door to the right to leave the room and the Wallmaster behind. The next room (B1 east) is dark, so take out your lamp. Swing your lamp at the torch block immediately below the entrance to bring light to the room. Follow the path up and take the nearest door leading up.
Here (B1 north-east), there’s a fire bar and a Gibdo; amuse yourself as the Gibdo gets set alight by the fire bar, transforming it into a confused Stalfos. Once you’ve had your fun, open the chest in the corner to claim the Compass and leave the room (to B1 east). Go back the way you came and return to the first room with all the skulls (B1 centre).
This time, take the door going left. The next corridor (B1 centre-west) is dark as well; cautiously make your way down the corridor and step on the floor switch at the very end. The door a few paces up will open and a Gibdo will appear ahead to frighten you. Through the door to the right and you’ll be in a lit room with a narrow pathway (B1 south).
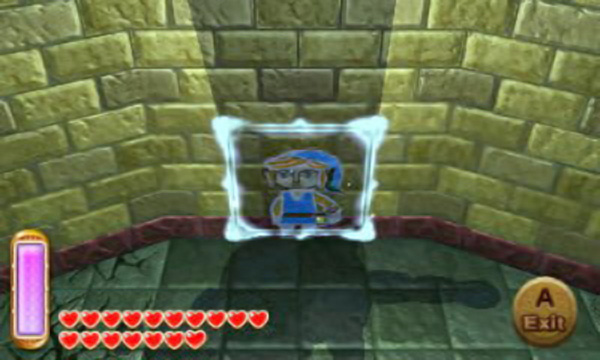
Navigate the narrow path down, minding the Gibdos, Bari and fire bars. Oh and the Wallmaster will return to creep you out; if you’re stuck between the fire bars, merge into the wall to hide. At the end, take the door leading down to exit the dungeon.
Outside, go right and follow the path up; at the dead end, drop through the small hole to return inside the dungeon. You will be back in the previous room (B1 south), but on the right side. Step on the moving platform below; around this time, a Wallmaster will probably come to harass Link. You’ll have a hard time trying to run circles on such a small platform, but there’s salvation close by–merge into the nearby wall and walk right to follow the platforms. On the other side, open the chest to nab the Small Key and exit the room via the door in the top-right corner.
You’ll back in a dark and hopefully familiar room (B1 east). Slowly make your way up, along the narrow path, anticipating a Gibdo coming from the right. Next, walk right and light the torch below to illuminate the room; now you can see the narrow path more clearly. You may also spot a Wallmaster coming in from above; carefully pace back and forth along the narrow path to avoid it.
Navigate the narrow path, minding the Bari, Gibdos and Chasupa. You can alight the Gibdos with the Fire Rod or lamp to change them into Stalfos; slash at the Stalfos to make them leap into the chasm.
Merge into the wall and continue to walk around it to dodge the Wallmaster here.
Make your way for the bottom-right corner, where there’s a locked door at the end–open it and go through. Next (B1 south-east), head down the corridor and exit the dungeon. Outside, follow the path up to find a hole in the ground; leap into the hole to return to the dungeon. Back inside (B1 north-east), open the nearby chest to claim 100 rupees , then drop down below.
You’ll be back in the room with the Gibdo and fire bar. From here, go all the way back to the point before you leaped down the most recent hole. This time, continue left from the hole and head down at the first junction.
Cut down the bushes to reveal a hidden hole and jump in. Back inside the dungeon again (B1 north-east), walk down and take the door to the left (to B1 north). You will be walking on top of a metal railing; to the top is a cracked floor tile that you can bomb or lead a Wallmaster to smash.
Drop down the hole in the railing and go down; step on the floor switch to open the way left. Go left, up the stairs, then head up. Here, there’s another cracked floor tile–smash it like before and drop down the gap to grab a Small Key from the nearby chest. Step on the floor switch to reveal a platform to the right, bridging the chasm.
Return to the bottom-left corner and pass through the locked door. You will back in the first room (B1 centre), but on higher ground. Go right and yank the pull switch to lower the middle platform, revealing a secret set of stairs going down. When ready, drop down and descend down the stairs. Downstairs in Floor B2, merge onto the wall to the right and walk right to cross the gap.
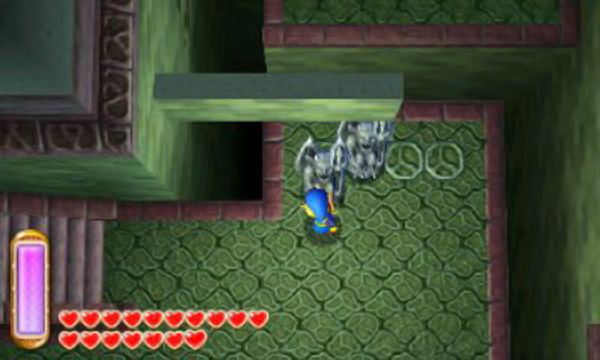
On the other side are a couple of rag-tag monsters and two gargoyle statues. Also the Wallmaster is back, so don’t stop moving. Just above the statues are four floor tiles that when stepped on cause protruding walls to appear ahead.
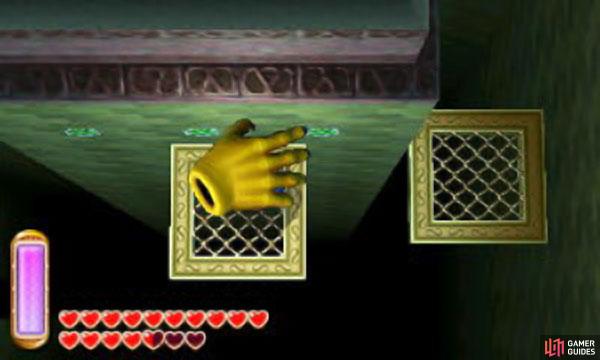
Luring the Wallmaster into hitting a metal meshed fence above you will stun it for a few seconds (although if you charge a spin dash and release it as the Wallmaster attempts to grab you; you can kill it outright buying you a lot more time before it reappears again).
When it’s safe, grab the gargoyle statues with A and drag them onto the two left-most floor tiles; you should see two protruding walls meeting together ahead. Go left up the stairs and merge into the wall ahead, then walk right across the protruding walls to the other side.
Pull the pull switch to reveal a staircase below for easy access back, then take the door to the right. Here (B2 south-east), the Wallmaster will make an unwelcome return. Head down and step on the floor switch to start the moving platform nearby, then merge onto the platform and use it to cross to the right.
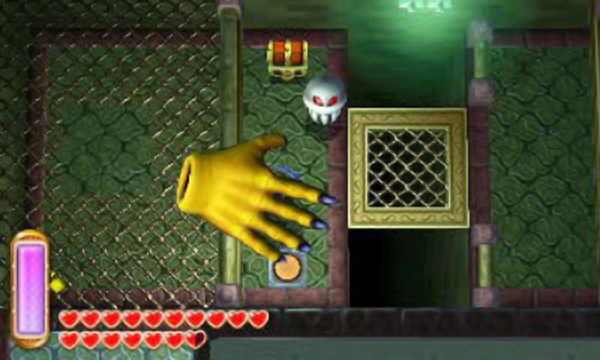
After emerging, you’ll be standing below a metal railing. Stand still and wait for a Wallmaster to drop down–it will painfully slam into the railing. Go up until you see a floor switch on the railing above and stand directly under it, then wait for a Wallmaster to drop in and press the floor switch for you. That’s a good monster… The moving platform on the right side will begin moving; merge into the platform and let it take you up, then emerge above. Step on the nearby floor switch to remove the barrier to the left, allowing for easy access back here. Then go through the door ahead.
The next room (B1 east) will lock. Head for the top-left and top-right corners to find monsters dancing about on the metal railings above. You could kill them with the Ice Rod or bombs, but there’s a Wallmaster in this room that you can lure to quickly kill them. Next, step on the floor switch in the middle to let loose the remaining three monsters, then slay them normally.
Stand below the metal railings if the Wallmaster is too intimidating. Once all five regular monsters are dust, a warp zone to the entrance will appear and the doors will unlock; take the door leading up (to B1 north-east).
Set the two statues together on the left to line up the wall panels above you.
Step on the platform ahead and it will begin moving left. Around this time, a Wallmaster will begin to descend from below; also watch out for a swooping Chasupa. As soon as the platform touches the stationary platforms above and below, quick run down and left.
At the end, step onto the moving platform; you will standing below the railing so don’t worry about further Wallmaster attacks. Ride the platform right and open the chest at the end to claim a Small Key . Take the platform back left and then go through the locked door you passed earlier.
There aren’t any lights in the next room (B2 centre-north), so take out your lamp. Cautiously make your way left along this eerie corridor; the fact that everything is quiet may be a little unnerving. At the end, light the torch block to reveal two Gibdos, then cut down them down to open the door ahead (to B2 north-west).
Head up the corridor to find stairs leading up and two scary eyeball pillars on either side. Upstairs in Floor B1, merge through the iron bars below to proceed. To the right are two eyeball pillars, except there aren’t any eyeballs on them. Gee, I wonder what you need to do next?
Quickly go right, to outrun the Wallmaster, and merge into the wall to cross the gap. Pick up the eyeball ahead with A and press A again to chuck it left, across the gap. Cross back over the gap and throw the eyeball onto one of the eyeball pillars–a big chest will reveal itself in the middle of the pillars and a platform will appear below, bridging the chasm. At the moment; you can’t reach the big chest yet, so head down the new platform. Navigate the twisting passageway down, merging into the wall or using the moving platforms to cross the gaps.
At the end, merge through the iron bars below and exit the dungeon down. Outside, head left and go down to find a chest containing 50 rupees. Next, follow the path up. Past the skeleton tunnel, turn right and mow down the bushes at the end to reveal a hidden hole, then leap down it. Back inside the dungeon, you will be in the previous room (B1 north-west), on higher ground. Merge onto the wall below and walk right to cross the gap. On the other side, there’s an eyeball next to you and opposite, ahead, on top of the wall is a big chest.
You might be thinking, “aww man, I have to carry the eyeball through that twisting passageway with all the monsters and gaps… and I have to avoid the Wallmaster too!” You could very do that, but there’s a little trick to make your life easier. Pick up the eyeball and don’t drop down; stand at the very edge of the platform, facing up. Look ahead and make sure you’re standing well away from the big chest and then throw the eyeball ahead–the eyeball should land on top of the wall, to the right of the big chest.
Next, merge back across the gap and go right. Merge onto the wall again and walk left until you’re standing on top of the next wall, then emerge. Walk left, along the top of the narrow wall, then go down across the wire mesh overpass. From here, continue left to find the eyeball and big chest. Pick up the eyeball and carry it right, then up the overpass and right again. At the end, throw it upward and you’ll have gotten the eyeball to the end with minimal effort. Before dropping down to fetch the eyeball, return back to the big chest and open it to claim a Master Ore .
$$$item 3953
If you’ve been following the dungeon order in this guide, you will have collected every Master Ore and will able to get the final Master Sword upgrade. However, if you remember, the Blacksmith in Hyrule said he can’t possibly make the Master Sword any better… but what about the Blacksmith in Lorule?
Return to his house and head down the steps; he’ll then inquire about your sword. Talk to him and he’ll be so impressed by your sword that he will offer to upgrade it. Hand over the last two Master Ores and you’ll get the Master Sword Level 3 , a golden blade with no equal.
Return to the eyeball and carry it up, towards the eyeball pillars; throw it onto the remaining pillar and the big chest will become fully accessible–open it to obtain the Big Key . When you’re ready, return to the long dark corridor two screens ago (B2 centre-north), where you fought the Gibdos–the big door, which leads to the dungeon boss, is located halfway along the corridor. Before you enter, you may as well visit the Lorule Blacksmith’s to upgrade your sword and make the coming boss battle easier.
Boss: Knucklemaster
Just fantastic! After all the creepy Wallmasters, you now have to fight a gigantic armoured one; talk about chilling… Before the battle, the boss will briefly reveal its palm, where a menacing eyeball sits. Remember Zelda 101? Boss with eyeball: eyeball = weak spot. Begin the fight by immediately running in front of the north-most wall (there’ll be no cracks on the ground here); then merge into the wall before the boss throttles you. Succeed and the boss will crash into the wall instead of you, stunning itself in the process.
While the boss is dazed, pop out of the wall and give it a good bashing around with your sword (which–if you’ve been following our guide–should be the fully powered up golden Master Sword). Now, there’s a trick to making the rest of this fight super easy. Run back to the north-most wall and every time you see the boss getting ready to slam down, merge into the wall and then immediately emerge after it pounds. Following this procedure will minimise your energy gauge usage.
Quickly repeat this trick two more times and the boss’ll come down for a fourth slam, at which point just stay in the wall. Next, the boss will repeat its slamming cycle one more time (so keep popping in and out of the wall) before it’ll attempt to dash-punch you in the face again. Merge into the wall and, after it’s stunned, emerge and then slash away. Now it’s really just a case of repeating the above steps until it’s dead (it will speed up each time it takes a bashing, but not so fast that you don’t have enough time to react).
With the above strategy you can easily beat this boss without taking a single point of damage. And we prove this with our HD boss-fight video below (with added audio commentary). Once you’ve trumped the boss, pick up the heart container and take the exit leading up to go outside the dungeon, where Seres’s Painting lies.

 Sign up
No Comments