
We hope you brought your winter clothes because you’ll be in this chilly dungeon for a while. In the first room (1F), there’s a massive ice cube blocking the way. As if the frozen gargoyle statue obstructing the dungeon entrance wasn’t already a give away, you’ll be needing the Fire Rod a lot in this dungeon.
Cast the Fire Rod ahead to melt the ice cube and proceed. Ahead of you are two stationary blue platforms with a fancy design; past the platforms is a statue of a face with a tongue sticking out. Go up to the statue and yank its tongue backwards with the A button.
The platforms below will now move and cycle around, creating an elevator of sorts; step on the left platforms to descend and the right platforms to ascend. Before going anywhere, step on a descending platform; then just before it descends past the current floor, walk down to go underneath the stairways where you first started.
Succeed to find a hidden chest containing a whopping 300 rupees . If you miss your chance, step on an ascending platform to the right and try again. When you’re done, use the platform elevator to descend two floors, to Floor B2.
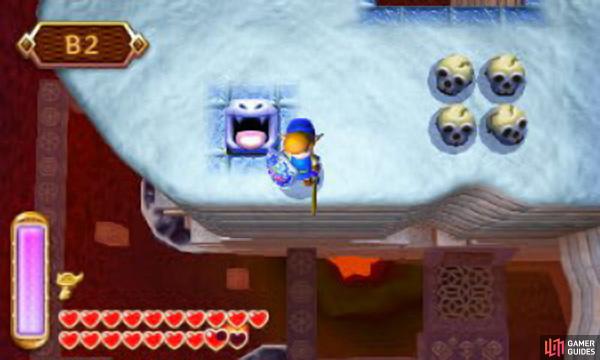
Here (B2 centre), there’s a bunch of ice and an Ice Bubble bouncing around the room–use the Fire Rod to melt them all. In the bottom-left corner, grab the Small Key after melting the chunk of ice it was sitting on.
Next, step back onto the elevator and descend to the next floor, B3. Open the chests below to claim a measly 1 rupee and a Monster Horn; be warned that Wizzrobes will materialise after opening the chests. From here, return to the elevator and descend two floors, down to B5, and open the big chest immediately in front of you to obtain the Big Key.
Well, wasn’t that just the quickest-to-obtain Big Key ever? Stay on the elevator and let it take you up. Pay attention to the floor indicator in the top-left corner of the top screen and get off when you reach Floor B1, one floor below the top-most floor.Watch out for the Wizzrobes staking their turf and make your way up.
Past the large platform with a fancy design, open the locked door at the end and head on through. In the next room (B1 north), there are two tongue statues on the far sides of the room and two ice coffins in the middle.
Freezors are freaky ice men that emerge from distinctive ice coffins without warning. They’re impervious to all attacks, save for the Fire Rod. Exercise caution when you see an ice coffin and have your Fire Rod prepared for a sudden ambush.
Go up to the statue in the top-left corner and pull its tongue back to open the next door. As you head right towards the door, a Freezor will emerge from the coffin to the right–blast it with the Fire Rod. Through the next door and you’ll be in a slippery room (B1 north-east) where a bunch of Pengators are ice-sliding in formation.
When the coast is clear; light the four torch blocks in the centre with your lamp or Fire Rod to make a Small Key appear on a narrow ledge, out of reach. For now, head down to exit the room.
You will now be outside the dungeon (B1 south-east), kind of. Walk quickly to avoid the smiley face blocks that shoot ice or raise the Hylian Shield in defence. Head right and open the chest near the edge to obtain the Compass . Next, head down and walk onto the narrow pathway.
A bouncy Hardhat Beetle will approach from below–don’t hit it carelessly or you’ll fly off the pathway; instead attack from a distance or when there’s a strip of pathway directly behind you. Follow the pathway up, to the previous screen (B1 north-east); at the end, merge into the wall and walk left to claim the Small Key from before.
Follow the narrow pathway down to find a locked door waiting at the end. Through the locked door and you’ll be back in the elevator room (B1 south), above the metal railing. Head up and merge onto the wall to continue past the gap. Emerge on the other side and open the chest to earn a rather low 5 rupees.
Next; merge back into the wall and head left, across the gap. On the left side, pull back the statue’s tongue to lower the large platform nearby, then drop down right into the new gap. Down below (B2 centre), take the door immediately to the right.
The next corridor (B2 east) has more ice and another dangerous Ice Bubble. Melt the chunk of ice jutting out, just before the stairs up. Then go up the stairs and merge into the wall from the right; walk right to find an area with fairies to replenish health.
Next; head down and melt the ice pillar at the end to reveal a hidden floor switch–step on this to unlock the door in the top-left corner. Exit the room from the new door. The next room (B2 north) has nothing of note, besides a gap in the railing–be brave and drop through.
When you land (B4 north-west), be careful of the nearby Keeleon. Head left to find a weird moving platform that rotates as it moves. From the platform’s right-most position, stand on its top-right corner. As soon as the platform moves, grab a bomb and chuck it forward at the four round switches ahead. If you manage to throw the bomb in the centre, all four switches will trigger within the time limit and a chest will appear in the top-right corner, containing a generous 100 rupees . You can also use the upgraded Ice Rod.
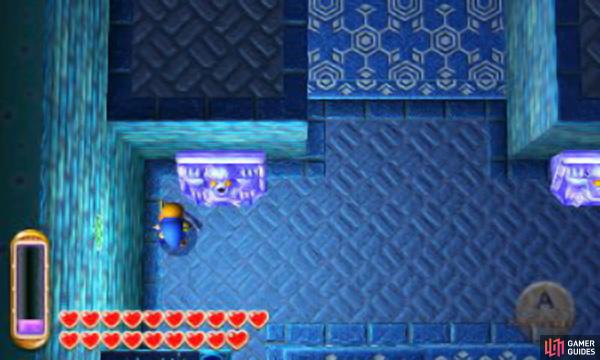
From the moving platform, go left and then down to reach the next screen. Here (B4 south-west), there are two giant moving ice platform; ride them down, while batting away the bothersome Chasupas. Halfway down, there’s a torch block to the right–stand on the right edge of your platform and cast the Fire Rod right to alight it. A platform lift will appear in the top-left corner.
Be careful when casting the Fire Rod while on the giant ice platforms, as the fire will melt the platform, shrinking it slightly, should it touch. Exit the screen right to find a chest containing one Monster Guts in the next screen (B4 east).
When you’re done, ride the giant ice platforms back up and take the new platform lift up. Upstairs in Floor B3, head down to the next screen (to B3 south-west). At the end of the narrow path, step onto the moving platform when it arrives from below. At the end of its destination, drop down left to reach a chest containing 50 rupees (B4 south-west).
Return back upstairs to the point before you last leapt down. This time, step right to reach the next moving platform. At the end, head up, across the rising platform, and take the door leading up. Here (B3 centre), you’ll be standing in a closed ledge; to the right are a whole bunch of giant ice cubes.
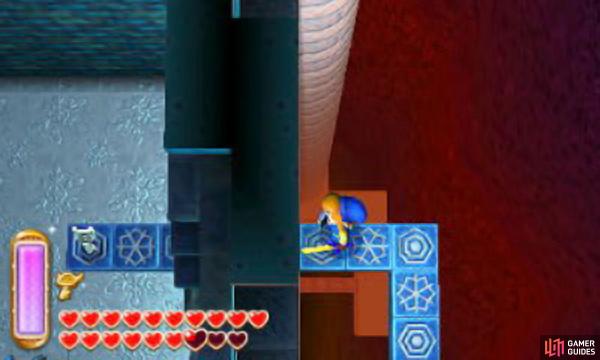
Point your Fire Rod diagonally top-right, then let loose a fireball, melting most of the ice cubes below and revealing a round switch. If you’re feeling skilled, chuck a bomb diagonally top-right to trigger the round switch from here; otherwise, you can hit the switch when come back around to this room again.
Go all the way back round to the platform lift that you used to reach this floor (B3 west). Then, from the top of the lift, take the door leading right to return to the room with the ice blocks (B3 centre).
Merge into the wall and cross the gap to strike the round switch. A new platform lift will appear towards the left of the switch; ride the platform up. Upstairs in Floor B2, there are more smiley face blocks shooting ice and some Eyegores. Again; move like crazy or raise your shield to avoid getting frozen; you can also freeze the face blocks with the Ice Rod. Head for the left edge and break the skulls to reveal a hidden floor switch–step on it to open the door to the right. Before going through the door, head down.
At the edge, merge into the nearby wall and walk right, emerging on top of a narrow ledge. Stand on the left edge and look down; towards the left you may notice a distant torch block. Cast the Fire Rod left and watch a bit of magic happen–the fireball will plummet down, alighting the torch block, opening the door leading right, below.
For now, return up, back across the gap, and take the door leading right. You will be back in a familiar room (B2 centre), hopefully. Pull the nearby statue’s tongue and the large platform to the right will descend further. Leap down the hole left behind.
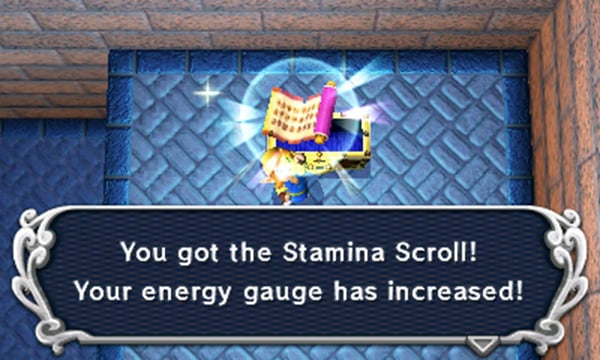
Downstairs (B3 centre), open the big chest just ahead to obtain the Stamina Scroll; with this parchment, the size of the energy gauge will increase. Now you can remain merged into walls for longer and expend more item uses in a given time!
Before you get too excited, be prepared for an ambush after opening the chest. Drop down left, where the giant ice cubes were, and take the nearby platform lift back up to Floor B2. As soon as you return upstairs (B2 west), merge into the wall to the right and walk left. Be prepared to walk for a long, long time.
Without the Stamina Scroll, you’ll fall off the wall before long, but with it you can just about reach a distant ledge. Enter the down leading down (to B2 north) to find a chest containing a generous 100 rupees. Then make your way back to the platform lift (B2 west). At this point, it’s very easy to get lost and not know where to go next. From the top of the lift, go right to the point just before leaping down to the Stamina Scroll chest (B2 centre). This time, merge into the wall and cross the gap to the other side, then exit the room to the right.
Back in the long corridor (B2 east), head up, up the stairs, and turn left into the door. You will be back in the room with a gap in the railing (B2 north), except now there’s the large platform underneath, so you can’t fall down to the next floor. Drop down the gap in the centre and head up. Pull the statue’s tongue and the platform will descend; drop down the hole it left behind.
You will be in a slippery room (B3 north) with an Ice Bubble. Cautiously make your way up and begin heading for a door. The doors will lock and the wall above will subside to reveal a nasty surprise. Slash like crazy to exterminate the small Pengators, then watch out for the giant one incoming.
Once all the monsters are dead, the doors will unlock and a warp zone to the entrance will appear. Take the door leading left. Here (B3 north-west), there’s a narrow path ahead, with more bouncy Hardhat Beetles skulking around. Take care not to stand on hexagonal platforms for too long, or they’ll crack under Link’s weight. Our favourite tactic is to pick up a bomb, then walk left and chuck it ahead to shatter the platforms and send the monsters plummeting to their doom.
You can also use the Fire Rod for similar effect. Once the coast is clear, wait for the ice platforms to regenerate, then slowly–but not too slowly–make your way across, as the path is slippery. Pull the statue’s tongue at the end and the giant platform from earlier will move to the next room to the right. Head right, back across the narrow path, and return to the slippery room where you fought the Pengators (B3 north).
Next, take the door to the right. Here (B3 north-east), the floor is slippery too and there are a bunch of ice coffins; no doubt, some Freezors will come to surprise you. In particular, the right-most coffin in the first row and the left-most coffin in the second row contain ambushing Freezors.
In the centre of the room, point the Fire Rod at the elevated torch block to light it, opening the door ahead. Through the door (B3 south-east), watch out for Wizzrobes. When it’s safe, step on the floor switch to the left to open the door to the left.
Merge into the platform below to cross the gap and reach the other side, then head for the bottom-left corner. Leap down the small gap in the railing to find a chest below (B4 east), which contains a Small Key . Drop down below and follow the narrow path left, to the next screen (B4 south). Step on the floor switch at the end to bridge the chasm, allowing you to reach the central platform elevator ahead. Ride the elevator up to Floor B2 and exit right to return to the long corridor (B2 east). Head all the way up and pass through the locked door leading up. Here (B2 north-east), there’s another big gap in the railing–drop down near the top.
Down below (B3 north-east), you’ll be back in the room with the freaky Freezors, but now on higher ground. Use the Fire Rod to melt the giant ice block obstructing the door above. A giant wind current will appear from the door–step into it to be blown all the way down. At the end (B3 south-east), pull the tongue on the nearby statue to make the giant platform descend further still.
Drop down above and return to the ice coffin room (B3 north-east). As soon as you step into the room, point the Fire Rod ahead to melt the final Freezor. Then drop down the new gap.
The route to the ledge that looks impossible to reach is here. Drop down to the walkway below (be quick before you’re frozen mind) and you can now light the torch at the end.
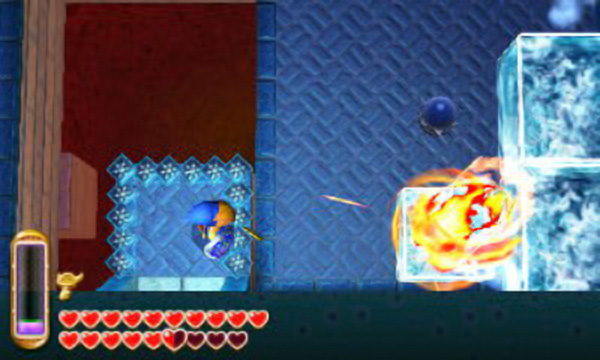
Below (B4 east), follow the narrow and slippery path up, using the Fire Rod to melt the ice blocks in the way. At the end, watch out for a Wizzrobe and a Keeleon–shoot arrows to nail the Wizzrobe. Once the coast is clear, head down the ice platform path; you will need to melt another ice block at the end of the path. After crossing the platform path, there will be another Keeleon–wait until it hovers over land, then blast it with the Fire Rod. Next, there’s another ice platform path ahead.
Step on the edge and cast the Fire Rod ahead to light the distant torch block; it may be easier to do halfway along the path. Succeed and the chasm will be bridged further ahead. Watch out for a Wizzrobe nearby; use the Hylian Shield to block its magic. Having crossed the platform, follow the narrow path left, then immediately up.
Pull the statue’s tongue to move the giant platform in front of you. Stand onto the giant platform and go left to find the big door, leading to the boss. In the boss room, drop through the gap in the railing to begin the battle.
Boss: Dharkstare
This guy is presumably a relative of Kholdstare from the prequel, Link to the Past. Like its predecessor, it’s a giant eyeball monster encased in ice. As soon as Dharkstare appears, blast it with the Fire Rod to shrink its ice barrier. The boss will then hover quickly away, at which point you must give chase, along the dangerous, slippery arena.
Every now and then; the boss will fire its three frozen eyes to surround Link and a triangle pattern will appear between the eyes. When this happens, run out of the way or use the Tornado Rod to avoid getting hit and frozen by its triangle attack.
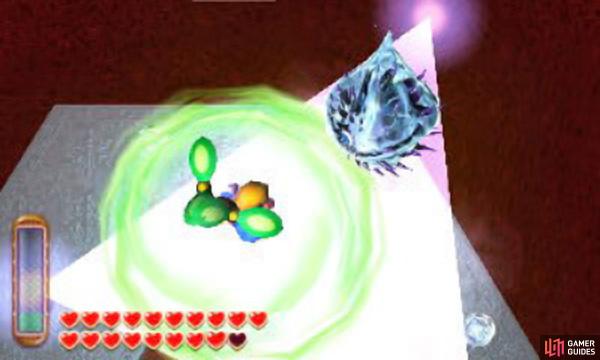
Use the Tornado Rod to dodge his ‘triangle-of-doom’ attack.
After the boss attacks, it will pause for a moment–a good opportunity to shoot the Fire Rod its way. Once the boss has taken a good few blasts, its ice casing will completely vanish and the boss will slowly hop around the area, vulnerable to attack. Chase the boss and give it a good pounding with your sword or the like.
Next; the boss will regather its ice casing and gain three more frozen eyes. Now its triangle attack will become larger and harder to avoid. It will also shoot all six eyes a short distance ahead; keep away or block with the shield.
Just follow the same strategy as before, aiming the Fire Rod after the boss does its triangle attack. Here, the Tornado Rod will become more important in evading, due to the bigger range. After melting the ice and pummelling the boss a second time, the boss will move around faster and its eyeball firing attack will get increased distance. However it still fails against the same tricks. Once the boss melts into oblivion, grab the heart container and head across the new platform ahead to obtain Rosso’s Painting .

 Sign up
No Comments