Part 1: Locate
Once you have started the mission, proceed through the small cave in front to enter a large jungle-type area. We’ll need to get to the green search zone on the map in the distance, but if you’ve got your speakers turned up you will no doubt here those whispers and that can mean only one thing – stalkers!
Most of them are at ground level, but if you choose to take an upper path, you will bump into a few of them there as well. Basically, the tactics for these guys remain the same, as soon as you hear the whispers, flick on your Eagle Vision and try to locate them. Then either kill them if they are in the way or avoid them as you see fit.
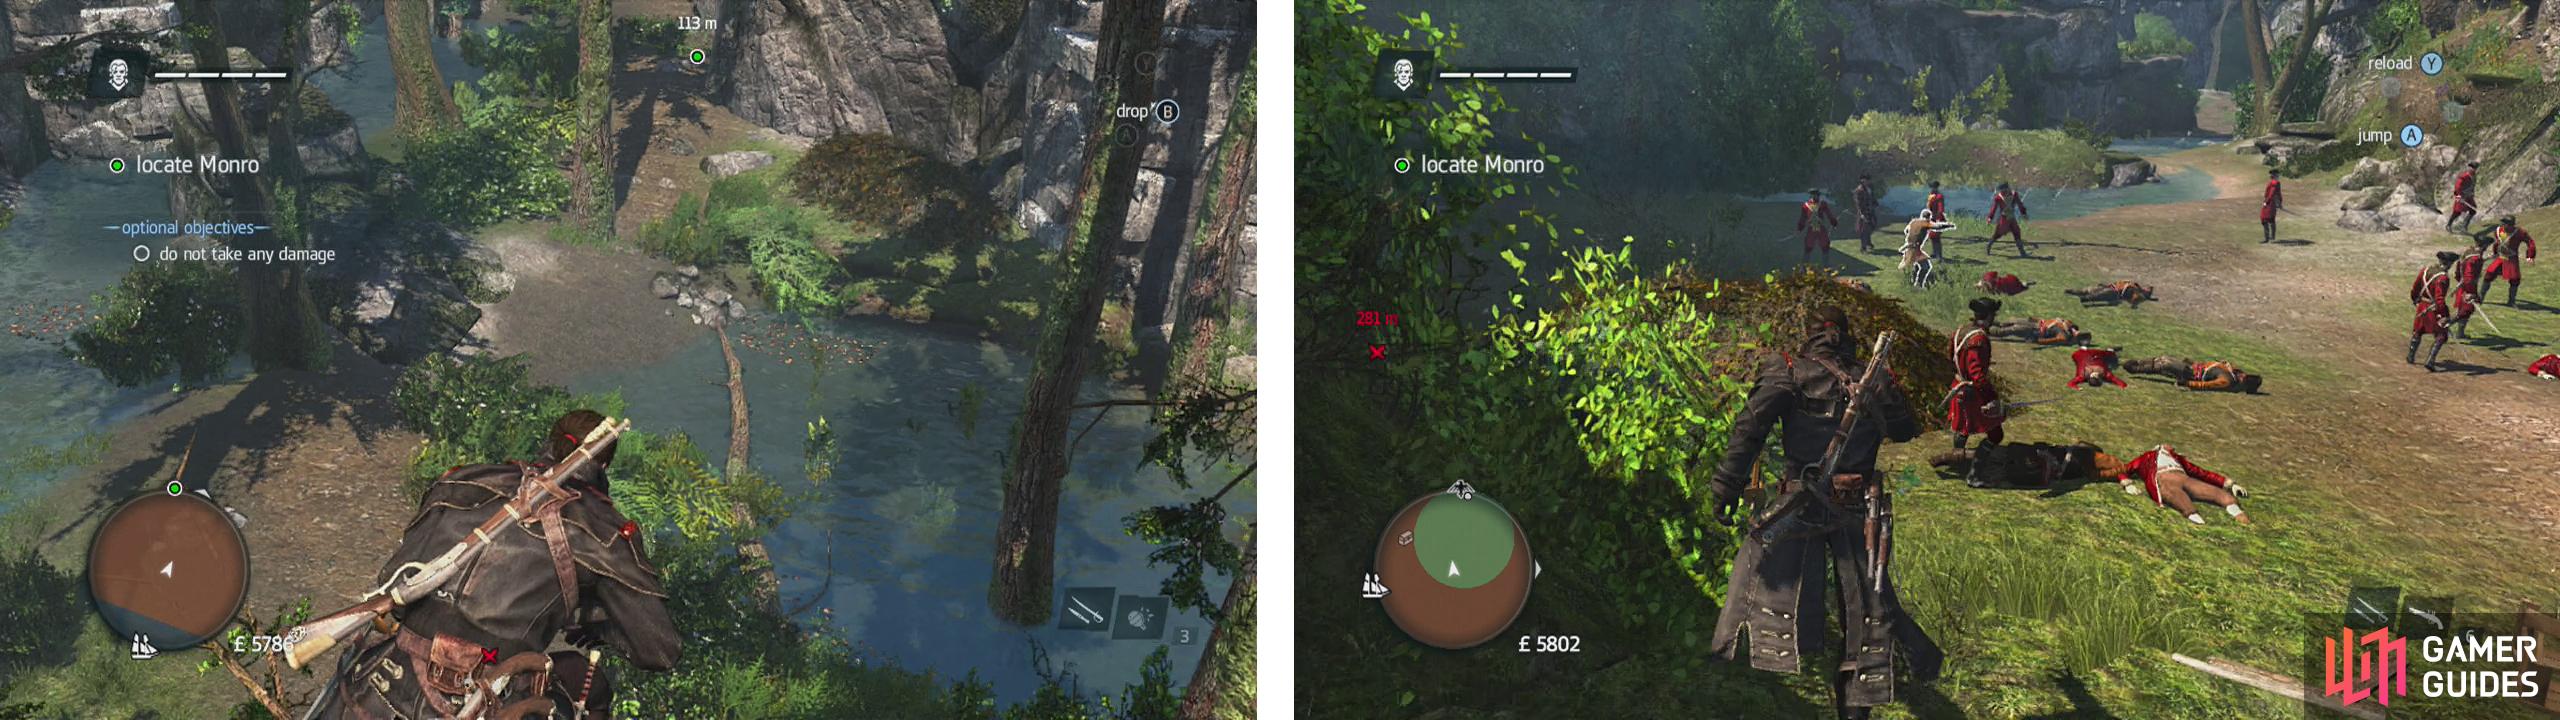
There are plenty of stalkers hidden here (left) - be careful! When you reach the British, help them fight off the aggressors (right).
I would recommend using the trees immediately in front of us and following the pathway to the raised area directly across from our starting point. Note that there will be a stalker in the bushes as soon as we jump across, so use an airgun tranquiliser to put him to sleep. Enter the bushes and as you work your way through them, look up to the left as there is often another stalker on the ledge above who will try to jump down on you. Sleep him or counter him as he attacks and continue, there is one more stalker hiding in the bushes here.
Take the tree at the end of the ledge down to the next area where you’ll find an ambushed wagon and some bodies. Head around the next bend in the road to find your friends. Help them fight off the attackers here.
Part 2: Escort
Follow your newfound friends through the valley until a scene plays. Once it is finished, a health bar will appear on the left side of the screen – we need to defend our allies and help them fight off the attackers that appear.
Afterwards, the objective marker will update, so scale the cliff indicated nearby and synchronise the viewpoint up here whilst you are at it. From here, our objectives will update once more – we need to kill the 9 snipers in the area ahead, there is also an optional objective at this point do perform the elimination task without getting detected.
There are four along the Cliffside to our left, one on the raised rock area to our right (he is our main concern to begin with as he’ll patrol with a viewpoint on what we are going to do shortly), three on an adjacent raised area to this and one final sniper on the ground at the western end of the area. There are multiple ways to approach this area, and several climbable cliffs, trees and vine walls that will let you pretty much eliminate them in the order of your choosing. I found the following strategy to be easiest.
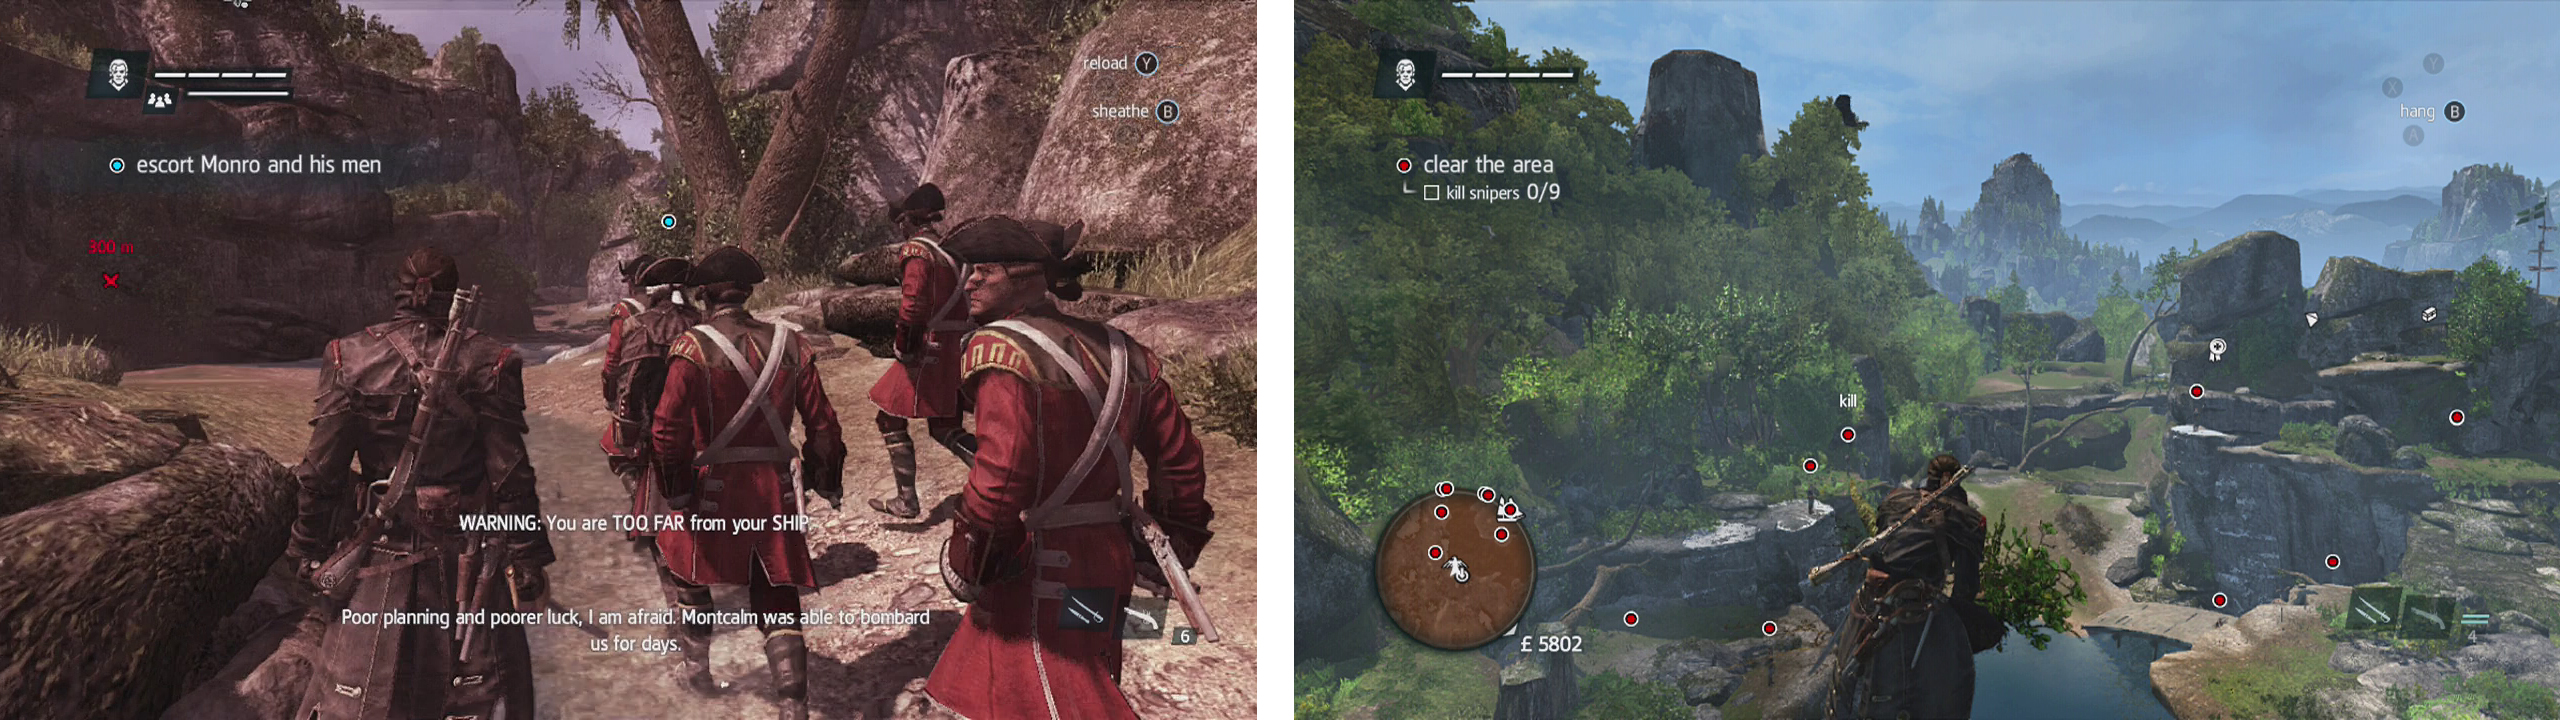
Escort the crew a short distance and repel the ambush (left). Climb the cliff and clear out the snipers (right).
Return to the cliff the viewpoint is attached to and wait for the closest sniper on the raised rock island to look away before air assassinating the guard [1/9] on the ledge below. Immediately enter the bushes nearby and move up to the edge of the ledge. You’ll see the next sniper on a lower section of the cliff below – again wait for the sniper opposite to turn away before assassinating the sniper [2/9] below and then climbing the wall ahead. Enter the bushes at the top.
Sneak up and kill the next sniper [3/9] here and enter the bushes behind. You’ll have no doubt heard the whispering by now, which means a stalker! There is one in the bush over by the trees behind the fourth sniper. It is a good idea to tranquilise the stalker if you can so that it does not attack you and void the undetected optional objective. Alternatively, you could just hug the edge of the cliff, kill the fourth sniper [4/9] and then dive into the water below.
Once you hit the water, you’ll get spotted by the fellow on the bridge nearby, but if you immediately go into a stealth swim, he should not detect you. Swim over to the bridge and climb up behind the guard to eliminate number five [5/9]. Quickly turn around and jump to the scalable wall next to the bridge and start climbing.
There is a guard at the top of the wall who will have been alerted by your actions down below. Wait until his target icon returns to normal and then pull him over the ledge for a ledge assassination [6/9]. Climb up and enter the bushes. You’ll see a pair of guards up ahead. Again wait for the patroller to look away from your current position and slowly, hugging the wall to the left sneak up behind them to perform a double assassination [7-8/9].
Drop down to the river below and look for a series of dead roots that we can climb up to the raised rock island. Climb this (be sure to wait for the patroller to not be looking!) and enter the bush at the top. Wait for the sniper to walk past one more time and assassinate his brain off [9/9]. At this point, if you have remained undetected, you should complete the optional objective.
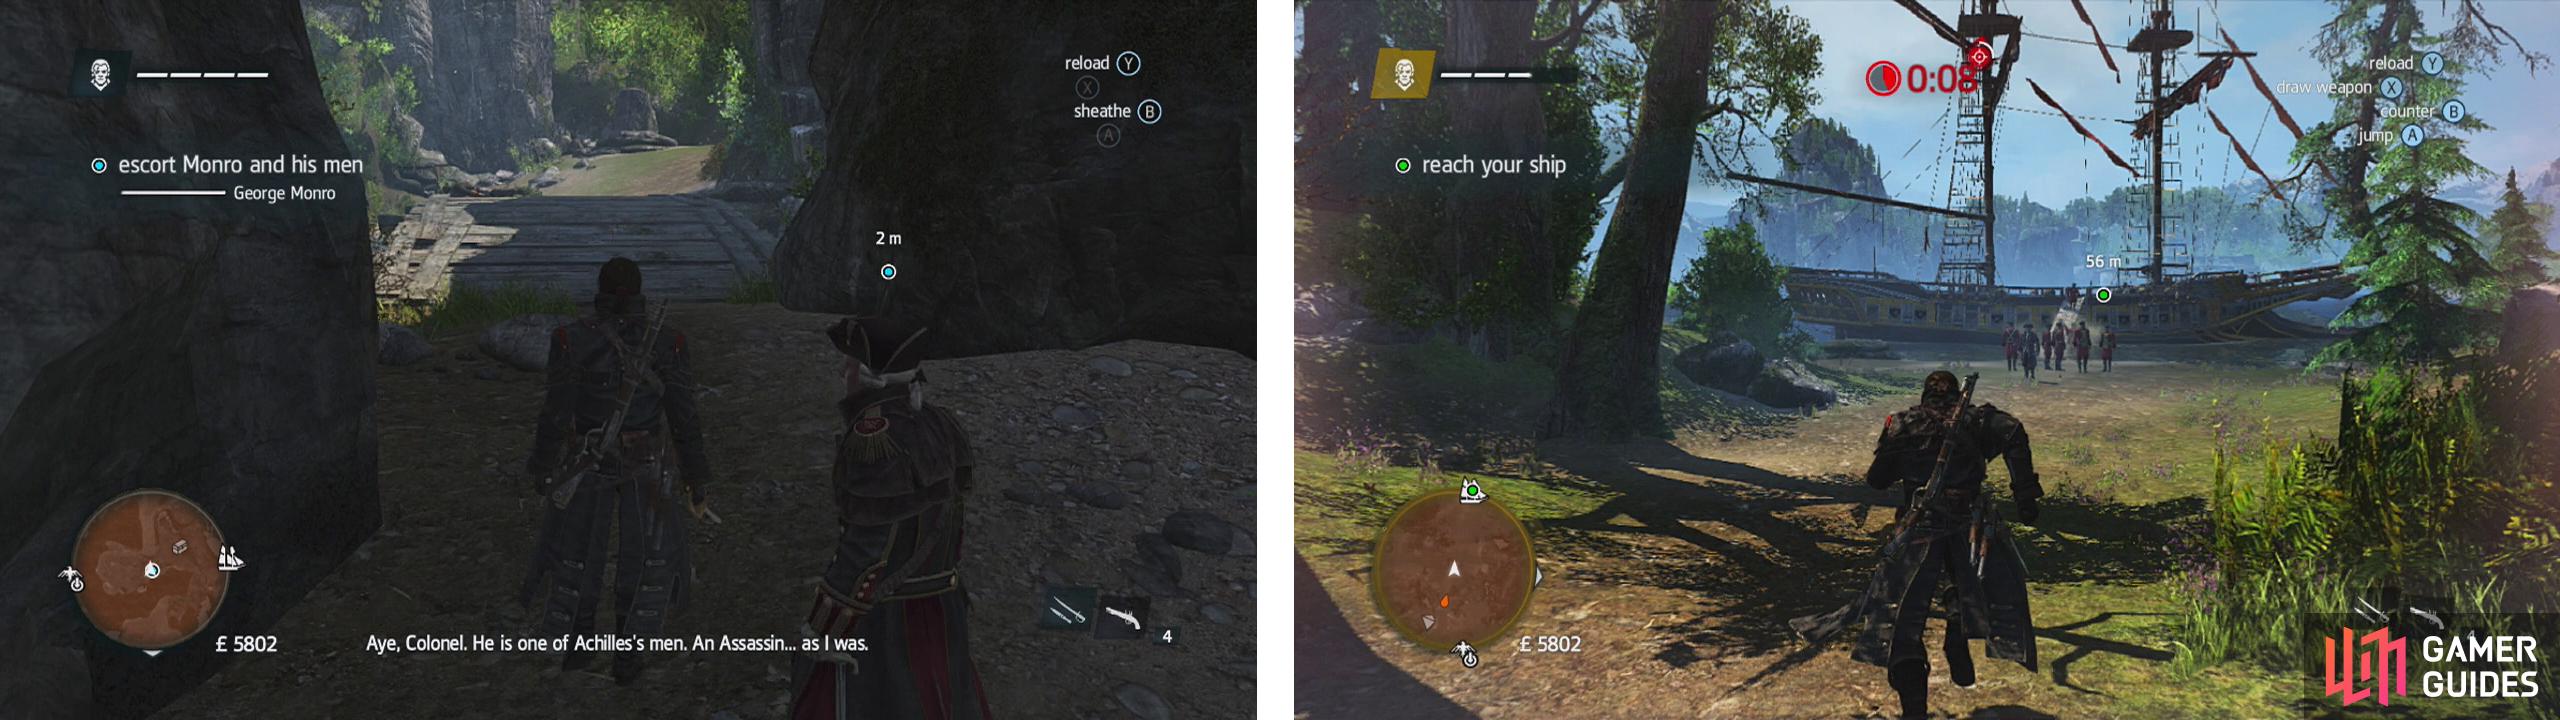
After killing the snipers, regroup with your friends (left) and make a run for the ship (right).
Regroup with your friends down below. Follow them through the next valley area and keep running when you see the enemies – once your friends reach a certain point a scene will play to end the mission.

 Sign up
No Comments