
Suggested Level: 20
The Hyena, like the other members of the Order of Ancients, is anonymous, so you can’t just go out and kill them, and like The Scarab, you have a lead in the person of Mered, one of Apollodorus’s contacts. This Mered can be found in the Giza province, south of the Great Sphinx, and if you completed the quest “ Precious Bonds “ you should be able to fast travel right there. If not, it’s a fair treck south, southwest from Letopolis.
When you arrive, head to the market amidst the ruins to find the Mered, who, while he may be Apollodorus’s contact, isn’t working for free. Pay him the 100 Drachmas he wants (if you somehow don’t have the cash, knock over a military transport) and he’ll tell you what he knows… at least, a bit of what he knows, divulging a name - Khaliset - and otherwise only telling you that The Hyena is a woman. For more information, you’ll have to do the merchant a favor, namely recovering his stolen horse from the Depleted Quarry Hideout in the south.
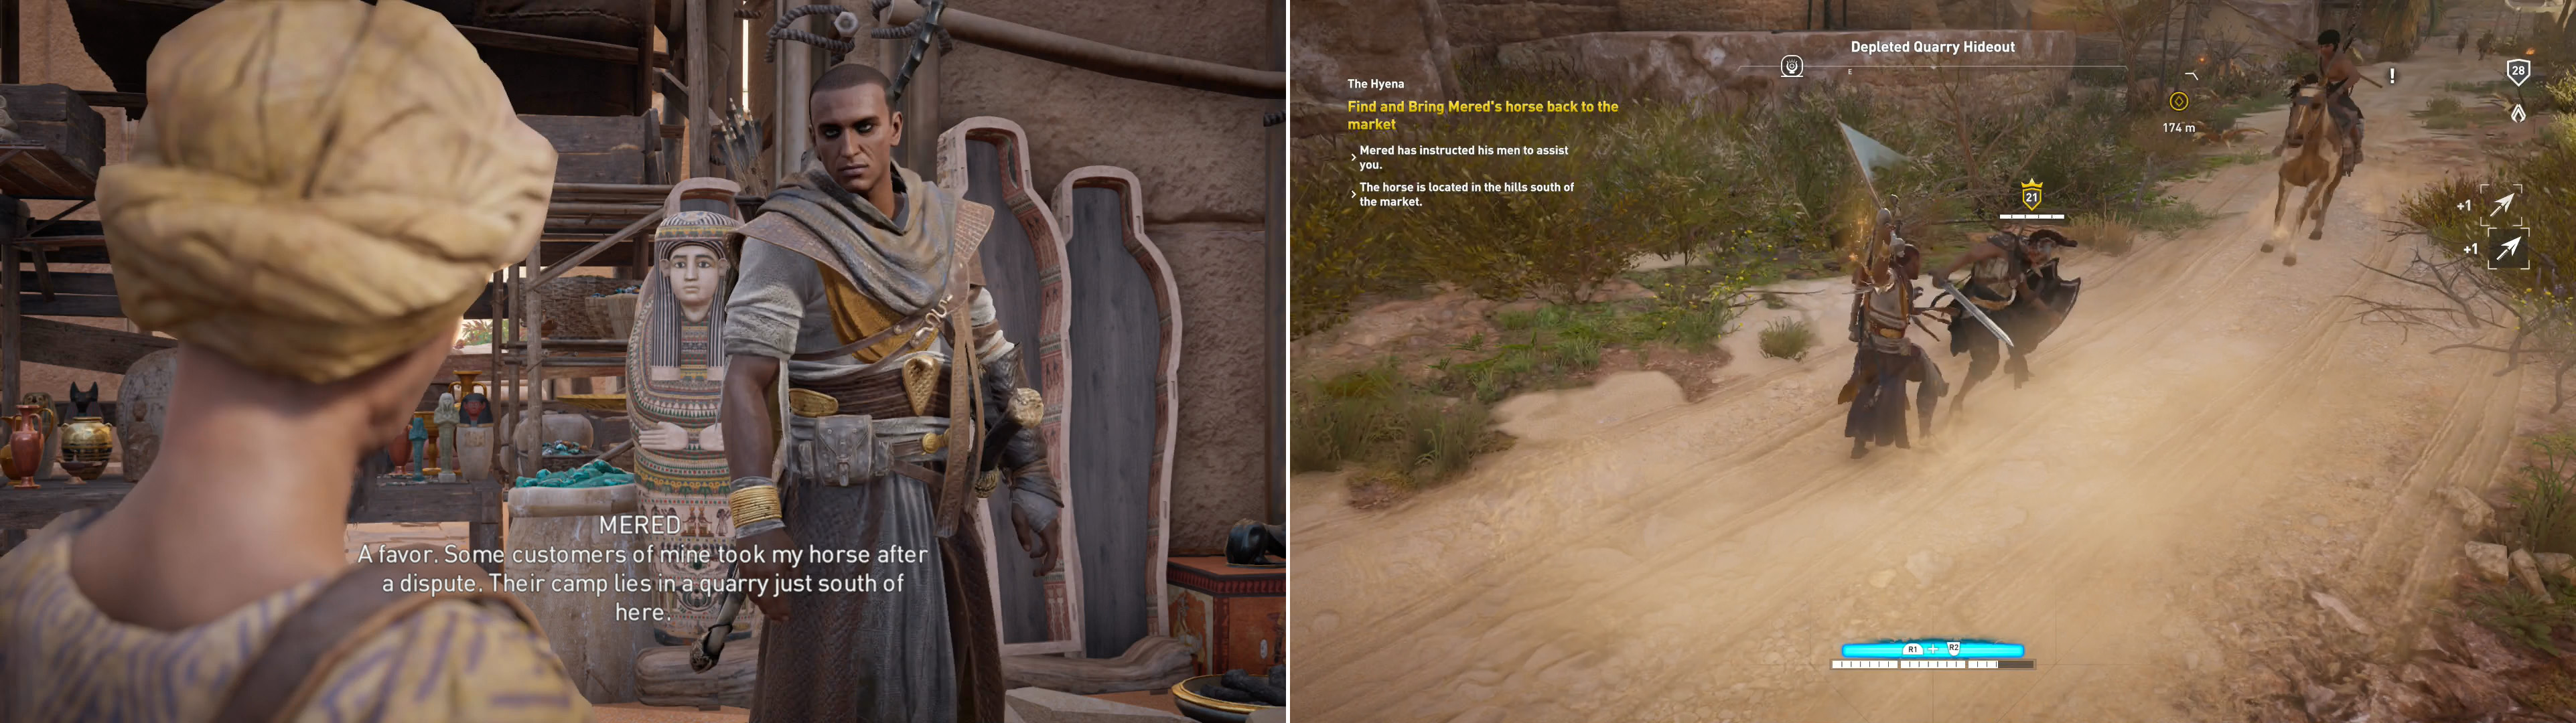
Find Mered near the sphinx, who will send you on an errand (left). Don’t charge into the Depleted Quarry Hideout - the road will only lead you into conflict (right).
Depleted Quarry Hideout
Well, you knew it couldn’t be simple. Looks like Bayek will have to pay in deeds to make up for Apollodorus’s poor choice in allies. Rendezvous with Mered’s men, one of whom at least will join you on your trip, then follow a road southwest along the coast until you hit a four-way intersection, at which continue southwest - then southeast - into the mountains until you reach the search area enveloping the bandit hideout. There’s no obvious restricted zone, but as bandits, they’ll attack on site, and given the size of the enemy camp ahead you may want to deploy Senu earlier than usual to avoid getting spotted by bandits.
With Senu, note the layout of the hideout ahead. As a quarry, there are no walls save the mountains around the hideout itself, which consists of a long ravine whose sides are cluttered with tents, scaffolding, and sheer, cut stone cliffs. Just about the worst route you could take is to ride down the floor of the ravine, as you’ll simply be spotted by most every bandit in the place, many of which are all too eager to give you arrow-shaped gifts. There a cave in the cliffs on the north eastern side of the ravine which leads through some treasure-stuffed chambers before eventually exiting near the road to the north (just west of the Lost Village point of interest), but it really doesn’t help with the task at hand, so you can safely ignore it.
The terrain is an obstacle, but also presents opportunities, as you can take the high ground on either side of the ravine and work your way south, picking off vulnerable enemies on whichever side of the ravine you’ve chosen, then focusing on foes on the opposite side of the ravine, and finally in the ravine below you. It’s as good a strategy as any, as it’ll give you the high ground and lessen the likelihood of unfortunate surprises. The more foes you scout out with Senu, the easier this will be. Arguably the most frustrating part of this quest is having to deal with Mered’s “assistance”. Your companion will try to be sneaky… sometimes, but will often pick ranged fights with enemies you don’t intend to engage yet, and since he usually sticks close, he can draw unwanted attention your way. Your best best is to hide while he fights and hope he gets killed so you can attempt to finish the place off with a bit of finesse.
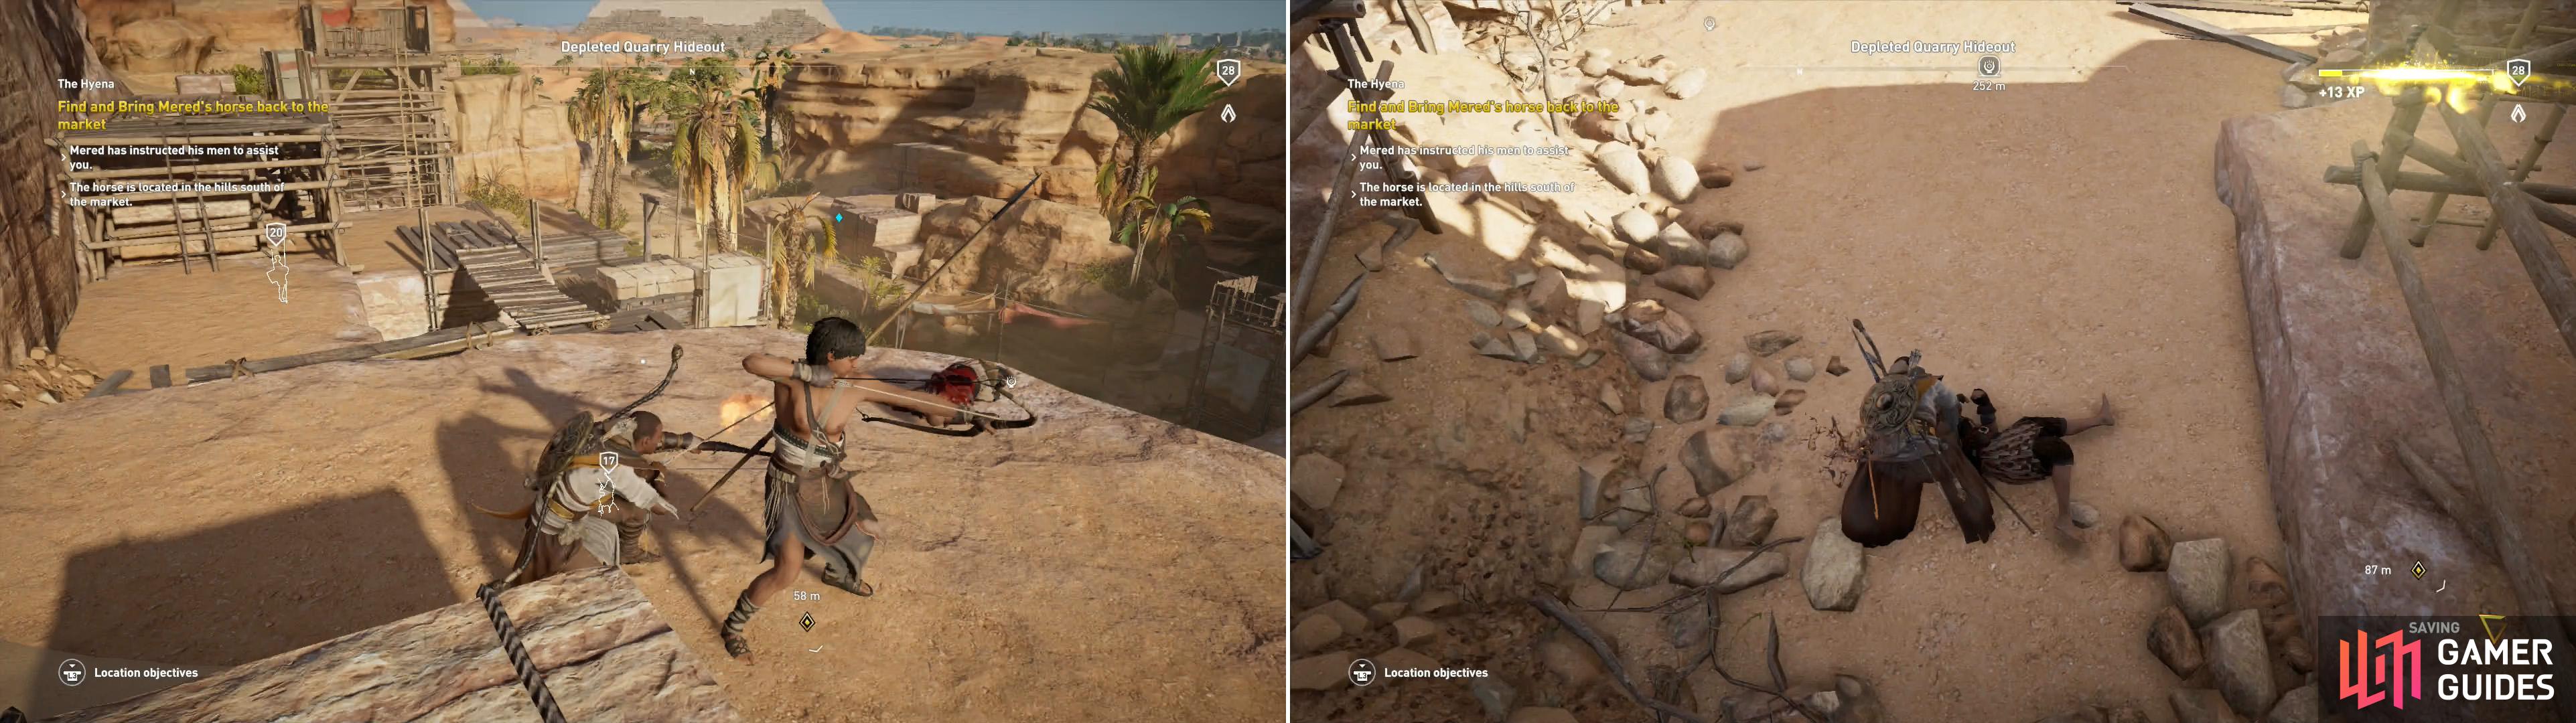
Mered’s man will only serve to blow your cover (left), you’ll be better off when he dies. After he’s gone, you can go about the business of clearing the enemy camp more sneakily (right).
Most of the lesser bandits (levels 17-20) shouldn’t be too much trouble, but keep an eye out for the captain (level 21) and commander (level 22) whose levels exceed this quest’s own suggested level by a fair margin. Also be sure to follow Senu’s reticle to find where Mered’s mount is located, as well as this area’s two treasures.
When all the bandits are dead, seek out the aforementioned cave along the eastern cliff face in the northern part of the hideout. Once inside, follow the linear passsage beyond, drop down three ledges, and when you reach the treasure-filled lower level, explore southwest to find a passage that ultimately leads to a small treasure room complete with a white chest you can loot. Leave the cave the way you entered and head to the southern end of the ravine, where Mered’s horse and a variety of tents are set up. In the large, northern-most tent you’ll find a red chest, and assuming you’ve killed both the captain and the commander here, this should complete the area’s location objectives.
| Reward: For completing the Depleted Quarry Hideout |
|---|
| 600 XP |

Search The Hyena’s former camp to find out where she went (left) and talk to a captive to learn what horrors she’s involved in (right).
Khalisets Camp
Now that this area is done, find Mered’s horse, mount it, and ride back north near the Great Sphinx and dismount at the appointed location. Bayek will immediately talk to Mered, who admits lying to you - at least in two different ways - and sending you on this little hunt in order to enrich himself, rather than right a wrong. Just as Bayek is fed up with the merchant’s duplicity, however, he’ll spill the beans about Khaliset, who lairs in the hills west of the pyramids.
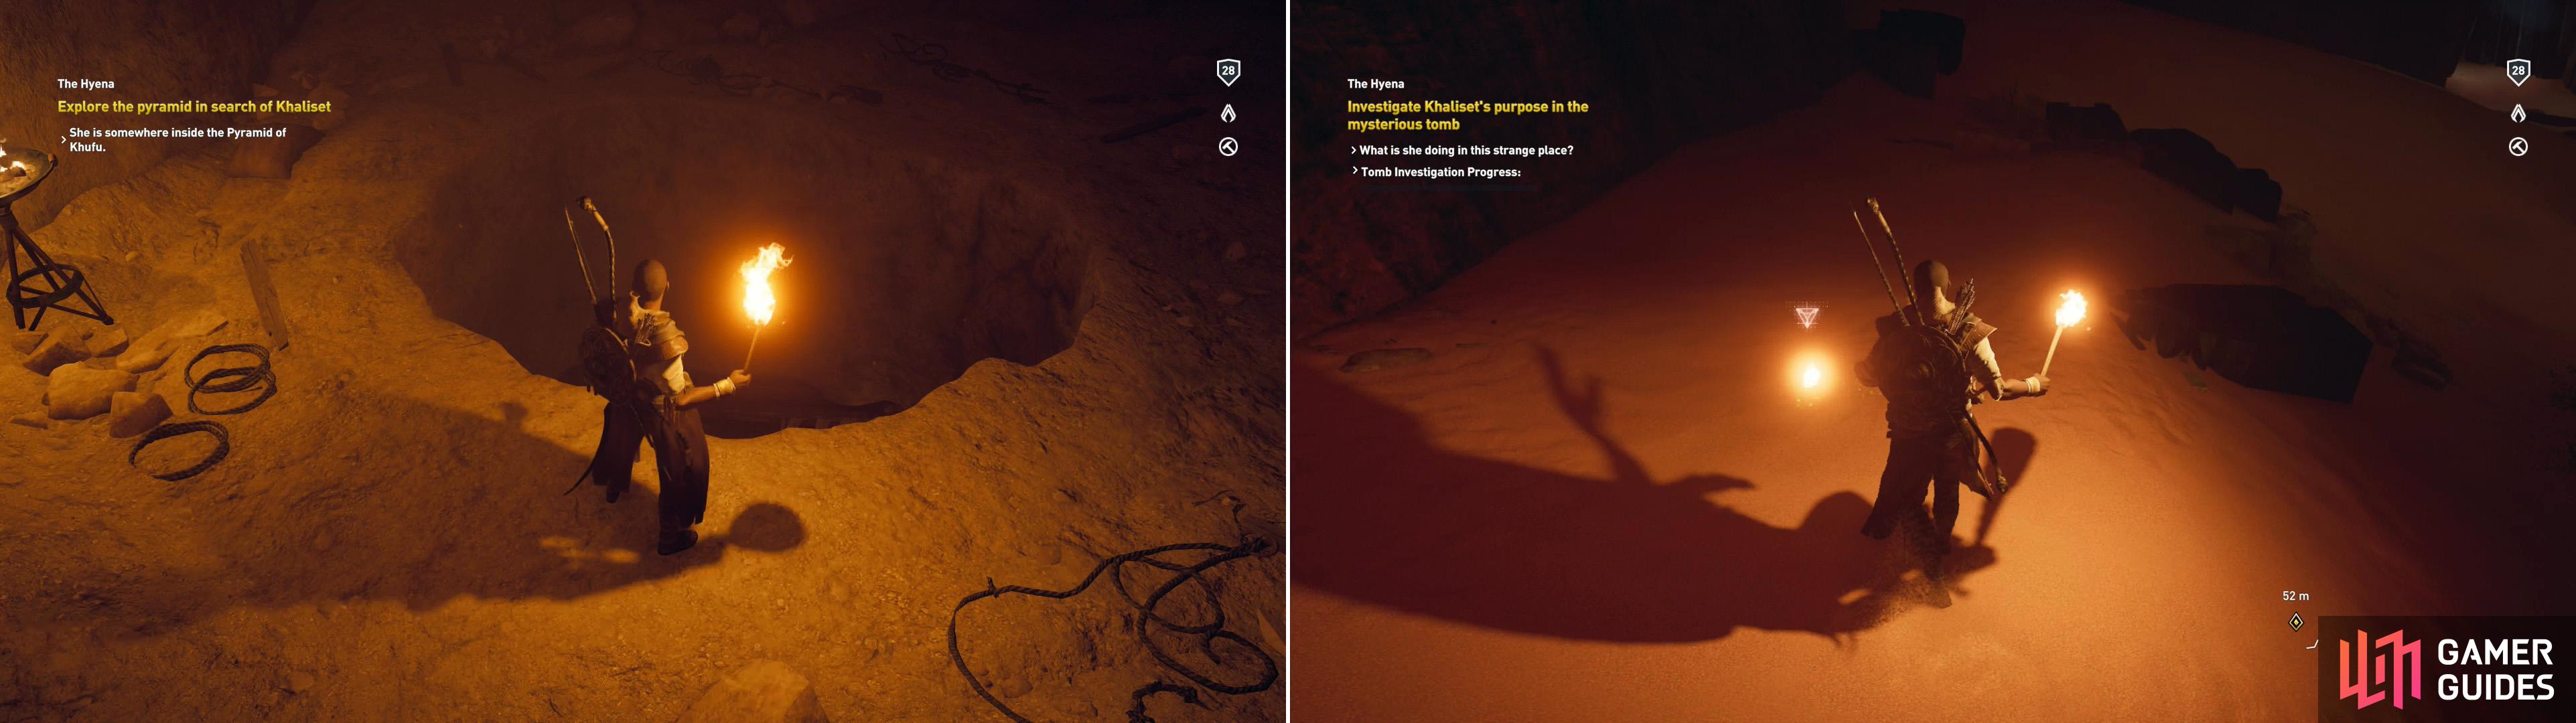
Check your map and you’ll find a search area near the Hyena Lair you may have cleared earlier, during the quest “ Precious Bonds “. Follow the road (or rather, sandy trail) west from the Great Sphinx and ride past the pyramids and into the hills until you near the Hyena Lair, at which point deploy Senu and note that the objective she spots is the elevated camp east of the depression in which most of the hyenas dwelt. Follow the road until you find a ladder leading up to the camp, kill any hyenas up here (there should only be around four or so), then note the investigation area you find yourself in.
The Hyena may have once occupied this camp, but no longer - Bayek will have to perform some good, old-fashioned detective work to find his prey. From the ladder leadingup to the camp, make your way northwest across a short wooden bridge and turn left (southwest) to find a chamber housing a campfire. Use your Animus Pulse to find two spots to examine, “ A Message to Khaliset “ and her lotus-adorned bed. Leave the chamber and continue uphill to the northeast to hear one of Khaliset’s minions, screaming from within a cage. Free him, if for no better reason than to shut him the hell up, after which talk to him to hear about the bloody business Khaliset is up to. Finally, search an animal pen to the south, wherein you’ll find a hyena that needs slaying. Once vanquished, search a stone in the back of the cage to obtain Khaliset’s Drawing , which details the Great Pyramid of Khufu… and dispels all doubt as to where you’ll find Khaliset.
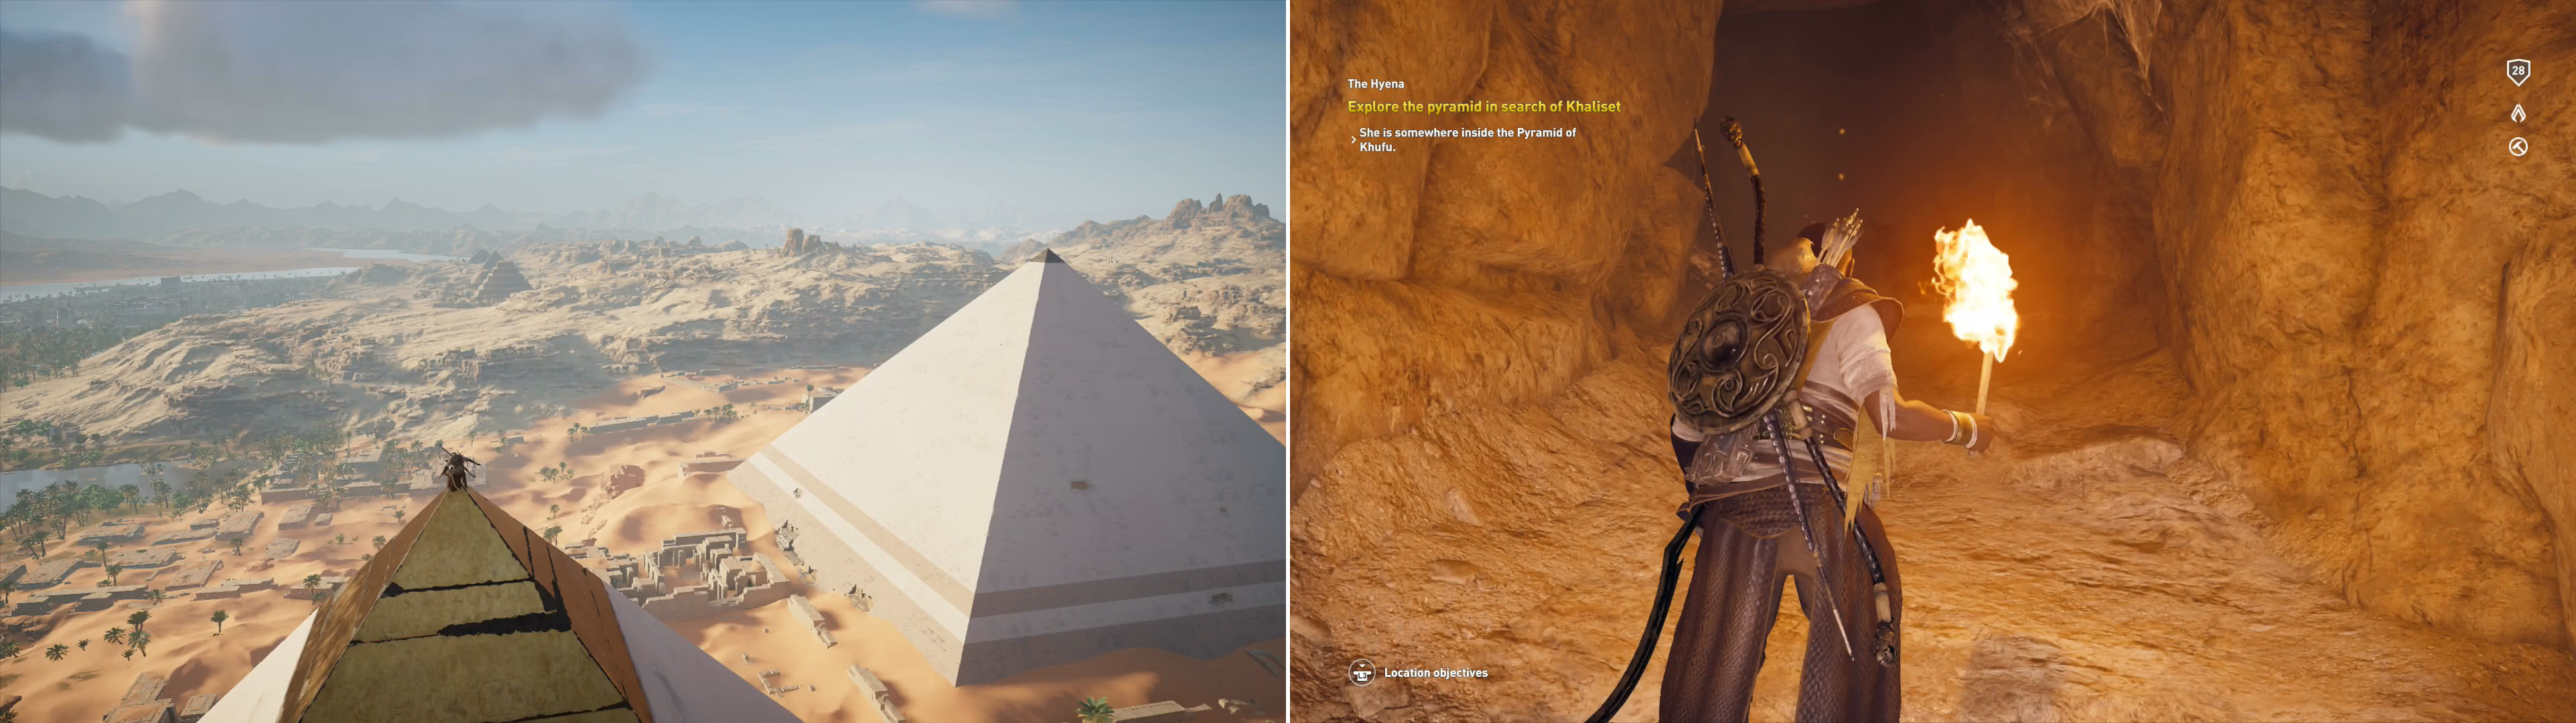
The top of the Tomb of Khufu is a fast travel point… and also a hell of a view (left). After synchronizing with the pyramid, enter the darkness of the tomb (right).
Tomb of Khufu
Now that you know where to look, fast travel back to the Great Sphinx and travel northwest to reach the Tomb of Khufu, which one of the great pyramids at Giza is a monument to. Outside Bayek will spot some hyenas, which, he supposes, means Khaliset must be inside. Before you make the relatively easy climb to reach the entrance to the pyramid’s interior, you might as well scale the pyramid and synchronize with the fast travel point atop it. Not only is this worth some experience, but it’ll allow Bayek to spot an odd camp in the ruins to the south, providing a map marker for the quest “ What’s Yours is Mine “.
This quest can wait until your business with Khaliset is done. Slide down the northern face of the pyramid and aim for the entrance to the tomb (marked by the quest marker), then head inside.
As you enter, hold [Right] on the directional pad to draw your torch and dispel the darkness that premeates the place. Khaliset’s voice will ring out in the darkness, and given her generous offer, she clearly doesn’t understand Bayek’s motivation. Continue uphill until the path ahead splits. You can veer left and continue following the main shaft uphill, or squeeze through the crack ahead.
Smash some seals to open a passage (left) then read the Ancient Tablet (right).
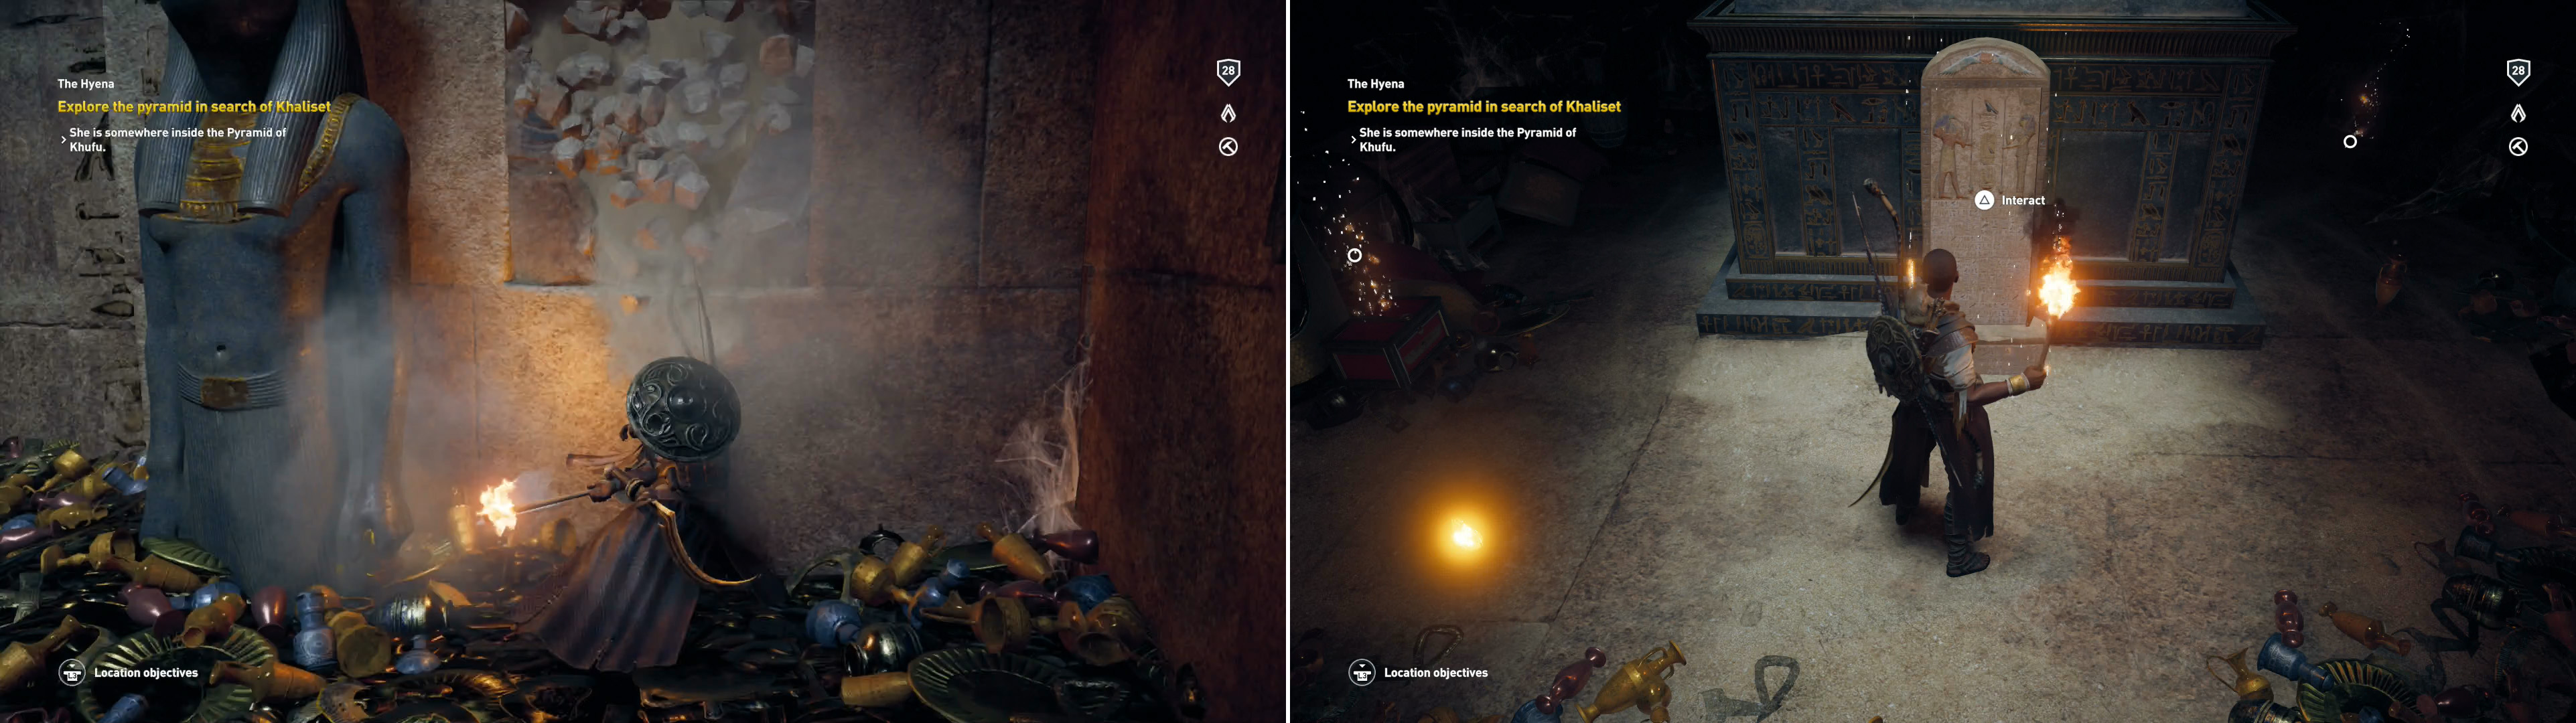
Go left first and follow the passage uphill, turning right when you reach a fork until you reach a larger passage with two ramps leading up, flanking a small hole directly ahead. Crouch and press on through the hole to reach a small chamber wherein you can find a hunk of Silica in a basket and a red chest, along with some junk you can read. Return back to the chamber with two ramps and ascend the ramps until you find another small hole you can crawl through, which also leads to a chamber. Grab the Silica on the ground in the corner of the room, then find a passage hidden behind a false block to the north, beyond which is a treasure-filled chamber.
Despite all the glittering loot beneath your feet, very little can be looted here. Instead, continue north to find a door flanked by two statues, which can be opened by smashing the winged seals on the wall next to each statue. Break both seals, then climb up the wall between the two statues to reach the now-opened passageway above. Continue north through a small chamber then slide down a pile of loot to reach room holding a sarcophagi. Grab the Silica on the ground, loot the three glittering treasure chests around the sarcophagi, then interact with the Ancient Table to complete the area’s location objective and gain a juicy, juicy Ability Point.
| Reward: For completing the Tomb of Khufu |
|---|
| +1 Ability Point |
Now that you’re done in this room, crawl through a hole in the northern wall, slide down a ramp, slide under another opening in the wall, then loot the Silica on the floor in the room beyond. Return back south to where you slid down the ramp and climb the wall to the east or west to reach a ledge to the north, which houses a passage to the north. Head through the passage, turn right, then follow the linear path ahead, jumping over the odd obstacle in your way and looting containers as you go. Slide under a wooden barrier, burn through a spider web and continue on until you slide down another ramp, beyond which a cleft will lead to daylight… on the southeastern end of the pyramid.
Find a pit in the pyramid (left) and be sure to collect Silica as you explore! (right)
The Ritual of the Dead
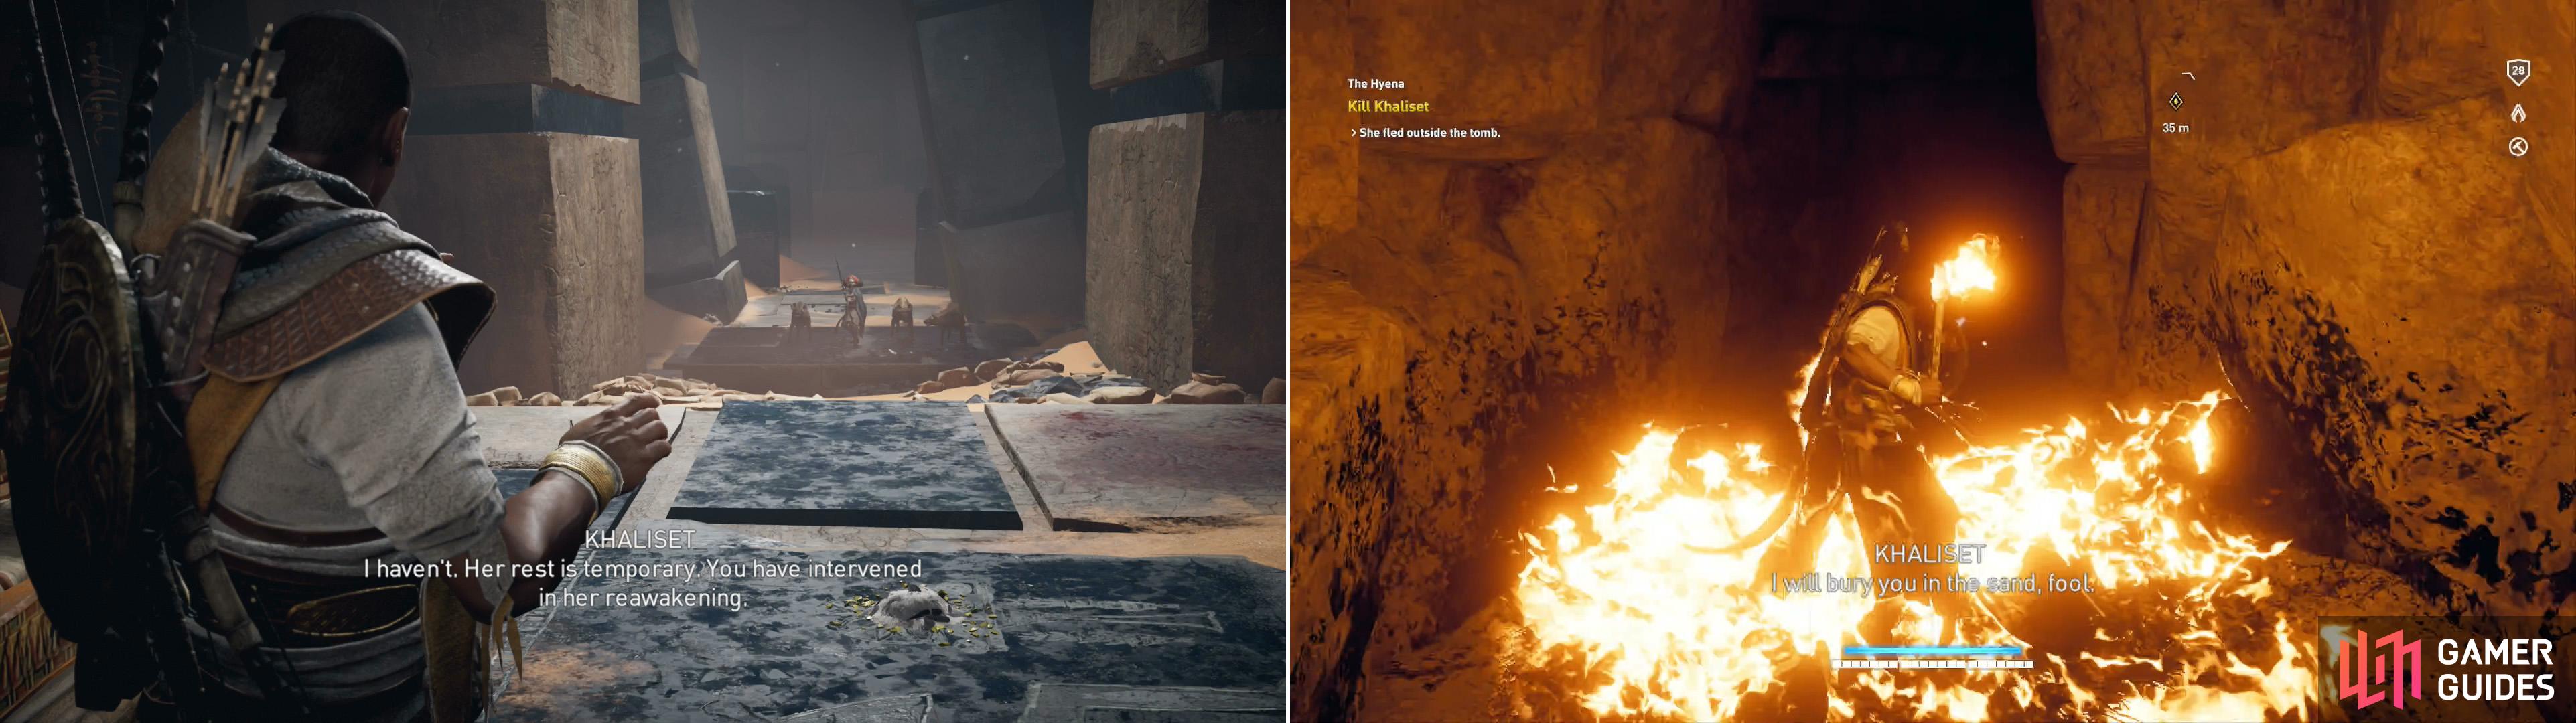
Well, the loot was worth the trouble. Circle back around to the northern end of the pyramid, enter the tomb again, and this time at the fork squeeze through the narrow cleft and follow the linear - but winding - passage beyond until you reach a fork. Turn right (east) at the fork and descend deeper into the pyramid, as Khaliset boasts of her supernatural powers. Sure thing, crazy lady. Just beyond the tunnel will lead to a chamber with a pit in the ground. Loot around the place, then descend into the pit and follow the tunnel beyond. Khalist will scream threats at you before you finally reach a massive, underground chamber, or as Bayek muses, a tomb within a tomb.
Put on your detective glasses and drop down to the sands below. Don’t head straight to the quest marker, however, as although that’s where the Animus Pulse will mark objects to investigate, there’s Silica lying elsewhere in the chamber - a whopping eight pieces in total. Run around the sands, using your Animus Pulse periodically. If it has a white triangle over it, it’s probably silica.
Once it’s all be gathered to your satisfcation, head to the quest marker and examine the objects that are marked with a yellow triangle courtesy of your Animus Pulse. Examine the corpse, the offerings to Osiris, the symbols and finally the sarcophagi, after which Bayek will piece together Khaliset’s ritual. Before chasing Khaliset, turn east and examine the glowing obelisk to get a rather… out of place-seeming recorded message.
Bayek will encounter Khaliset - The Hyena - in the depths of the tomb (left). Chase after her, but be wary of her traps (right).


Listen to the long-winded, cryptic babbling, then open the sarcophagi you examined earlier to provoke Khaliset and learn her motivations. She doesn’t stay long, however, vanishing courtesy of a smoke bomb. Head to the western end of the chamber, where you’ll find a false block of stone concealing a hidden passage.
Go through the hidden door and make your way up the tunnel beyond. Get your shield out, as Khaliset will take some pot-shots at you from ahead, ultimately vanishing again when you get close. Advance again, this time being wary of her next trick, which is to shoot some oil jugs in the hallway ahead of you. Dash through it and get near her to make her flee, then roll if you’re on fire to put the flames out. After your health has recovered, if necessary, continue on to reach daylight.
Climb the walls of the pit to reach a chamber where you’ll find some arrows, should you need to replenish your stock, as there’s a good chance this will largely be an archery duel, then climb the nearby wall to begin the fight with Khaliset.
In the beginning of the fight, you can locate Khaliset by following her fire arrows (left). She’s hard to come to grips with in melee, but archery will suffice (right).
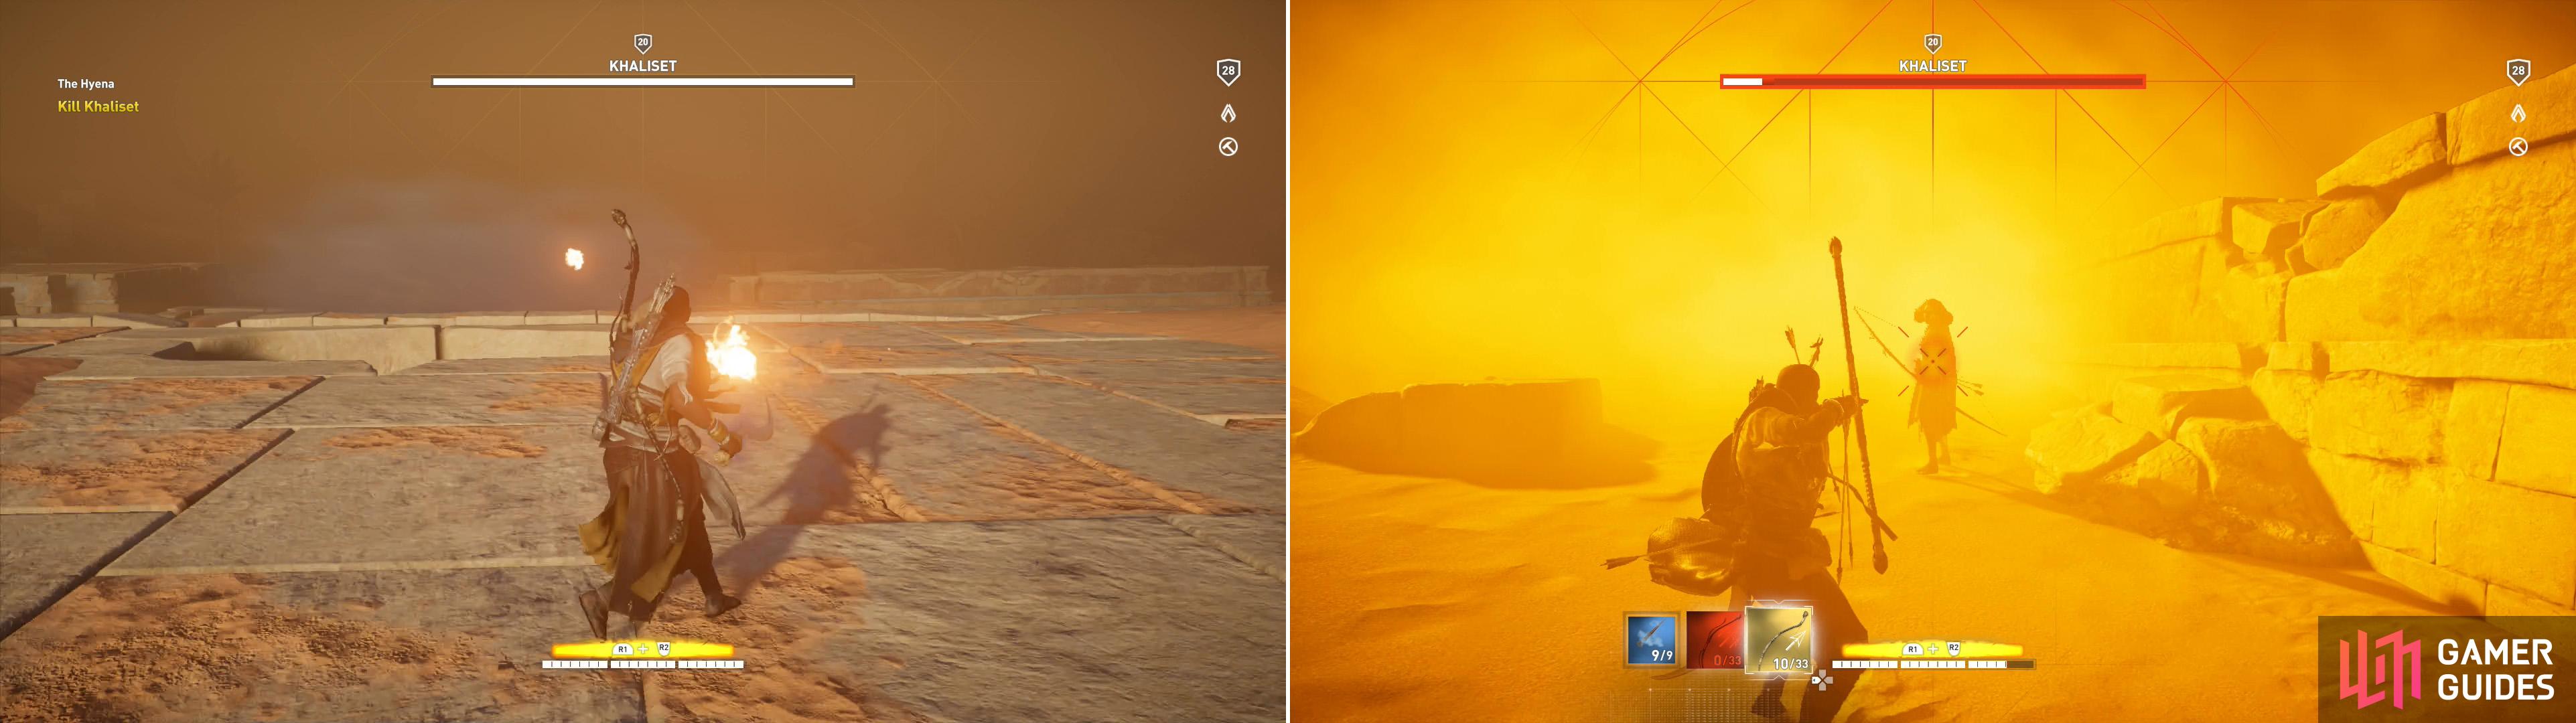
Boss Battle - Khaliset
Unlike the battle with The Scarab, Khalist is a proper, set-piece boss battle. No easy assassinations here, and the only foes other than Khaliset are her pet hyenas. The stage of the battle are the ruins outside west of the Tomb of Khufu, and to further complicate matters, a sand storm will rise to obscure your vision. This doesn’t seem to bother Khaliset somehow, as she’ll merrily pelt you with arrows from beyond the veil of the sands.
Your goal is to close the ground between the two of you, and when you do, either return fire with arrows of your own or attempt to get into melee range. The Warrior Bow is your best friend here, as it can do great damage at pretty much any range where you can actually see Khaliset. Finding her is another matter, only easily achieved at first by following her arrows. At first she’ll use flaming arrows, which are easy enough to follow, and while you can probably block one with your shield without much trouble, don’t soak too many of them, else you’ll catch on fire, which will do more damage to you than the arrows themselves.
The biggest threat in the battle, however, are her pet hyenas, which typically prowl the low-ground of the ruins and are pretty easy to evade by staying atop the ruins… which opens you to fire from Khaliset. It’s not an ideal choice, but staying atop the ruins is probably safer, are her hyenas are higher level (level 26) and will leap on you and maul you if they get close. They can be killed well enough with overpower attacks and arrows, but your supply of both is finite, and unless you’re over-leveled, they’re a real nuisance.
As Khaliset takes damage, she’ll flee at regularly intervals, and as her health plummets, the sand storm will intensify and her tactics will change somewhat. After she’s below about half of her health she’ll become more mobile and stop shooting fire arrows, making her harder to track, but also making her arrows much easier to block. It’s not all bad, however, as when she vanishes via smoke bomb, you’ll be able to recover a good bit of lost health.
Follow her arrows, whittle down her health, and avoid her hyenas until you’re victorious, after which examine her corpse to confirm the kill and end the quest.
| Reward: For completing the quest “The Hyena” |
|---|
| 2,500 XP |

 Sign up
No Comments