| Optional Objective/s |
|---|
| 1. Do not touch the River Thames. |
| 2. Sabotage two contraband containers at once. |
| Reward/s | . | . | . |
|---|---|---|---|
| Money: | 660 £ | Bonus: | 100 £ |
| XP: | 350 XP | Bonus: | 125 XP |
| Gear: | Schematic: Black Leather Gauntlet |
Part 1: Infiltrate the Barges
As we begin the memory an objective marker will appear in a restricted area covering several barges on the far side of the River Thames.
To get to the target area, we’ll need to time our jumps between the assortment of boats travelling both up and down the river as well as pallets, poles and any other floating objects that we can use. The key to getting across safely without touching the water is patience. Don’t make your next jump unless you are sure you can make it! If you use the floating pallets, you’ll also want to watch out for incoming vessels as they will cruise right over the top of them.

We’ll need to cross the river to reach the objective (left). The easiest way is to use the Rope Launcher between ship masts (right).
Alternatively, you could just use your Rope launcher to zoom between masts until you get close to the target location and then move up to it careful like.
Part 2: Destroy the Contraband
Once you have reached the objective area, use your Eagle Vision to locate the three contraband crates that we need to destroy and be sure to tag the 8-9 Thugs guarding them.
Use your usual tactics to down the bad guys here. They are spaced far enough apart and patrol/stand in such a way that you should be able to sneak up and assassinate or throwing knife the lot of them. To make things a little easier, there is a fire barrel you can use a hallucinogenic dart on close to the furthest contraband crate from the entry point.
If you do get spotted, try to stay put as doing this will increase the chances are you’ll only attract one or two enemies rather than the lot. After clearing the area, it’s time to get to work destroying the contraband.
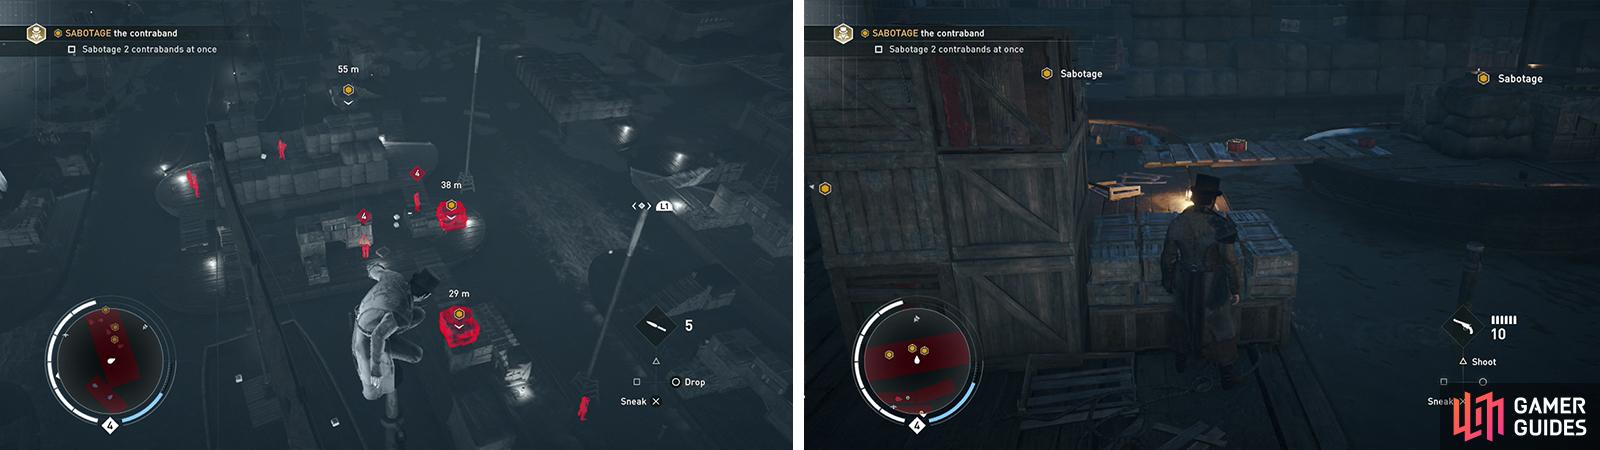
We need to destroy the contraband (left). After clearing the guards, place the explosive crates as such (right) to destroy two at once for the optional objective.
Completing the second optional on this mission sounds tricky but is actually easy enough if you know what to do. Note how there is a ridiculous number of dynamite crates lying around – pick around 4-5 of these up and place them in a line between the two target containers that are closest together. Once you have a nice little line, retreat to a safe distance and shoot one of the center crates to deal with both at once.
Now we just need to take out the third and final crate of contraband with a final dynamite crate and our objectives will be updated.
Part 3: Assassinate the Target
Our assassination target will now appear in a restricted area located on the far side of the river. This area is heavily guarded at ground level, so it’s a good idea to climb one of the nearby poles/masts near the contraband barges and using your Rope Launcher to stay up high.
The assassination target himself will patrol slowly from one end of the restricted area to the other and there are plenty of high locations that he’ll pass directly under that are perfect for an air assassination. These include:
- the building in the center of the zone,
- the collection of raised metal pipes in the south-east corner of the zone,
- the rope strung between the tall poles in the center of the area and
- the water tower.
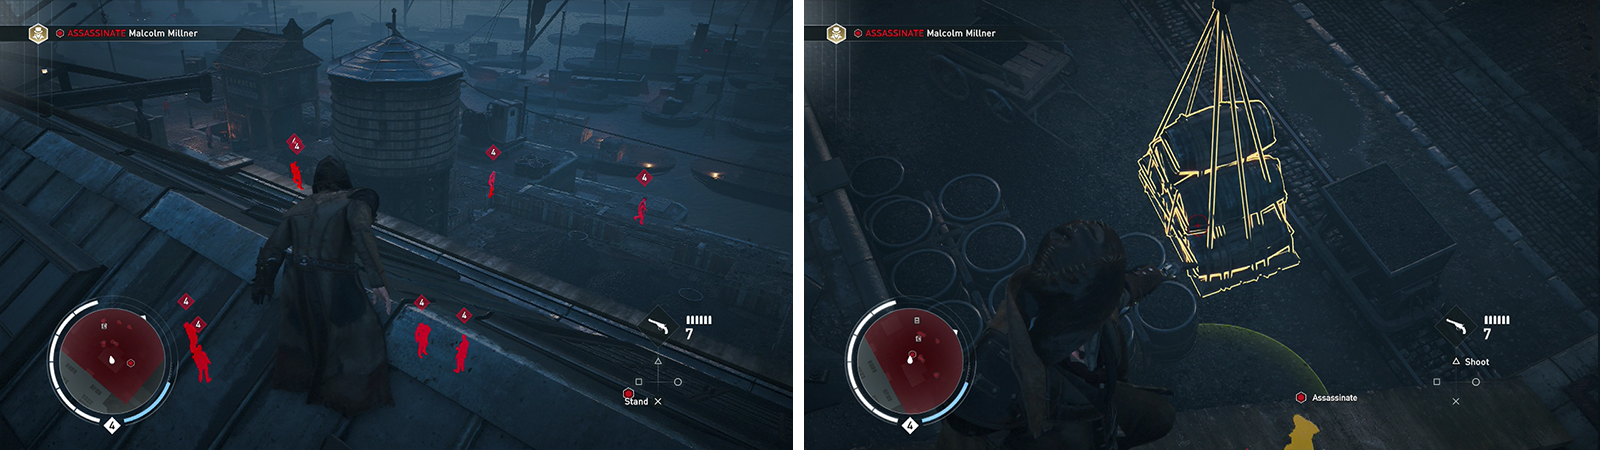
The area is heavily guarded so its best to assassinate from a rooftop (left). You can also use hanging barrels (right) to kill the target.
If air assassinations aren’t your thing, he’ll even pause beneath the hanging barrels by the water tower allowing you to crush him with those if you want to do him in that way!
Once you have killed the target a scene will play.
Part 4: Locate the Target
Return across the river to find your partner. She’ll be in the ‘Warehouse’ building marked by the green objective indicator. Use your Rope Launcher to climb up to the open window on the top floor and proceed inside. Move down the stairs until a scene plays.
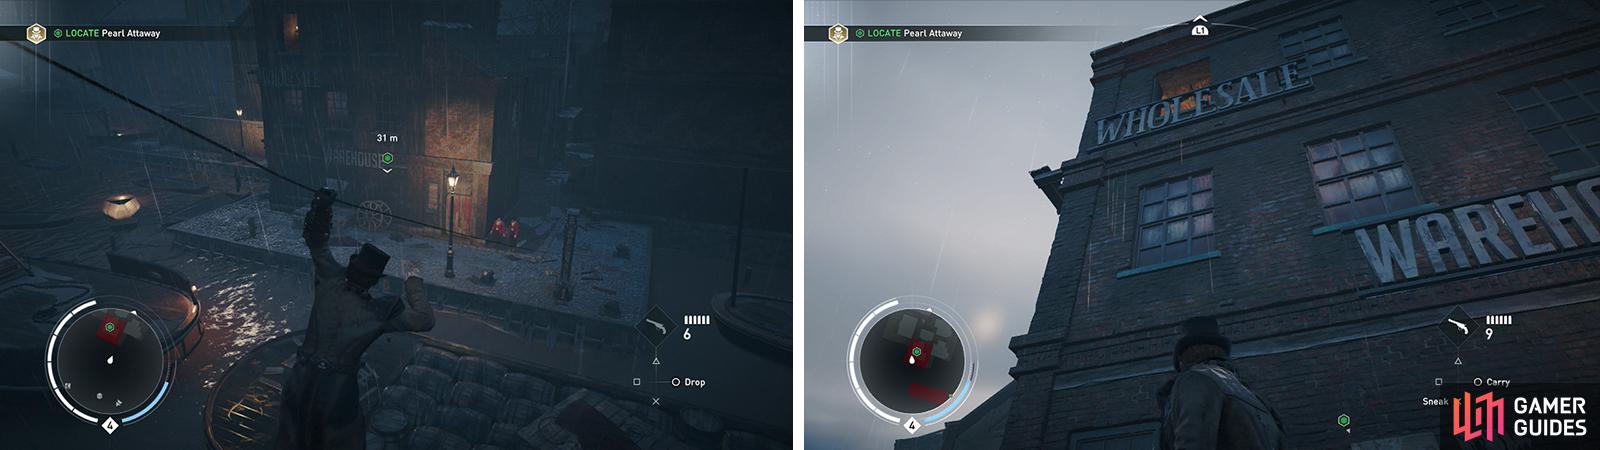
Return across the river (left) and enter the target building through the open window (right).
After the scene we’ll need to leave the restricted area. Either stand and fight the three enemies in the building before exiting, or return upstairs and jump out the window we came in. Either way, once we have escaped the building, we’ll then need to leave the red restricted area on the map.
Upon exiting the restricted zone the memory will be complete.

 Sign up
No Comments