The Black Throne
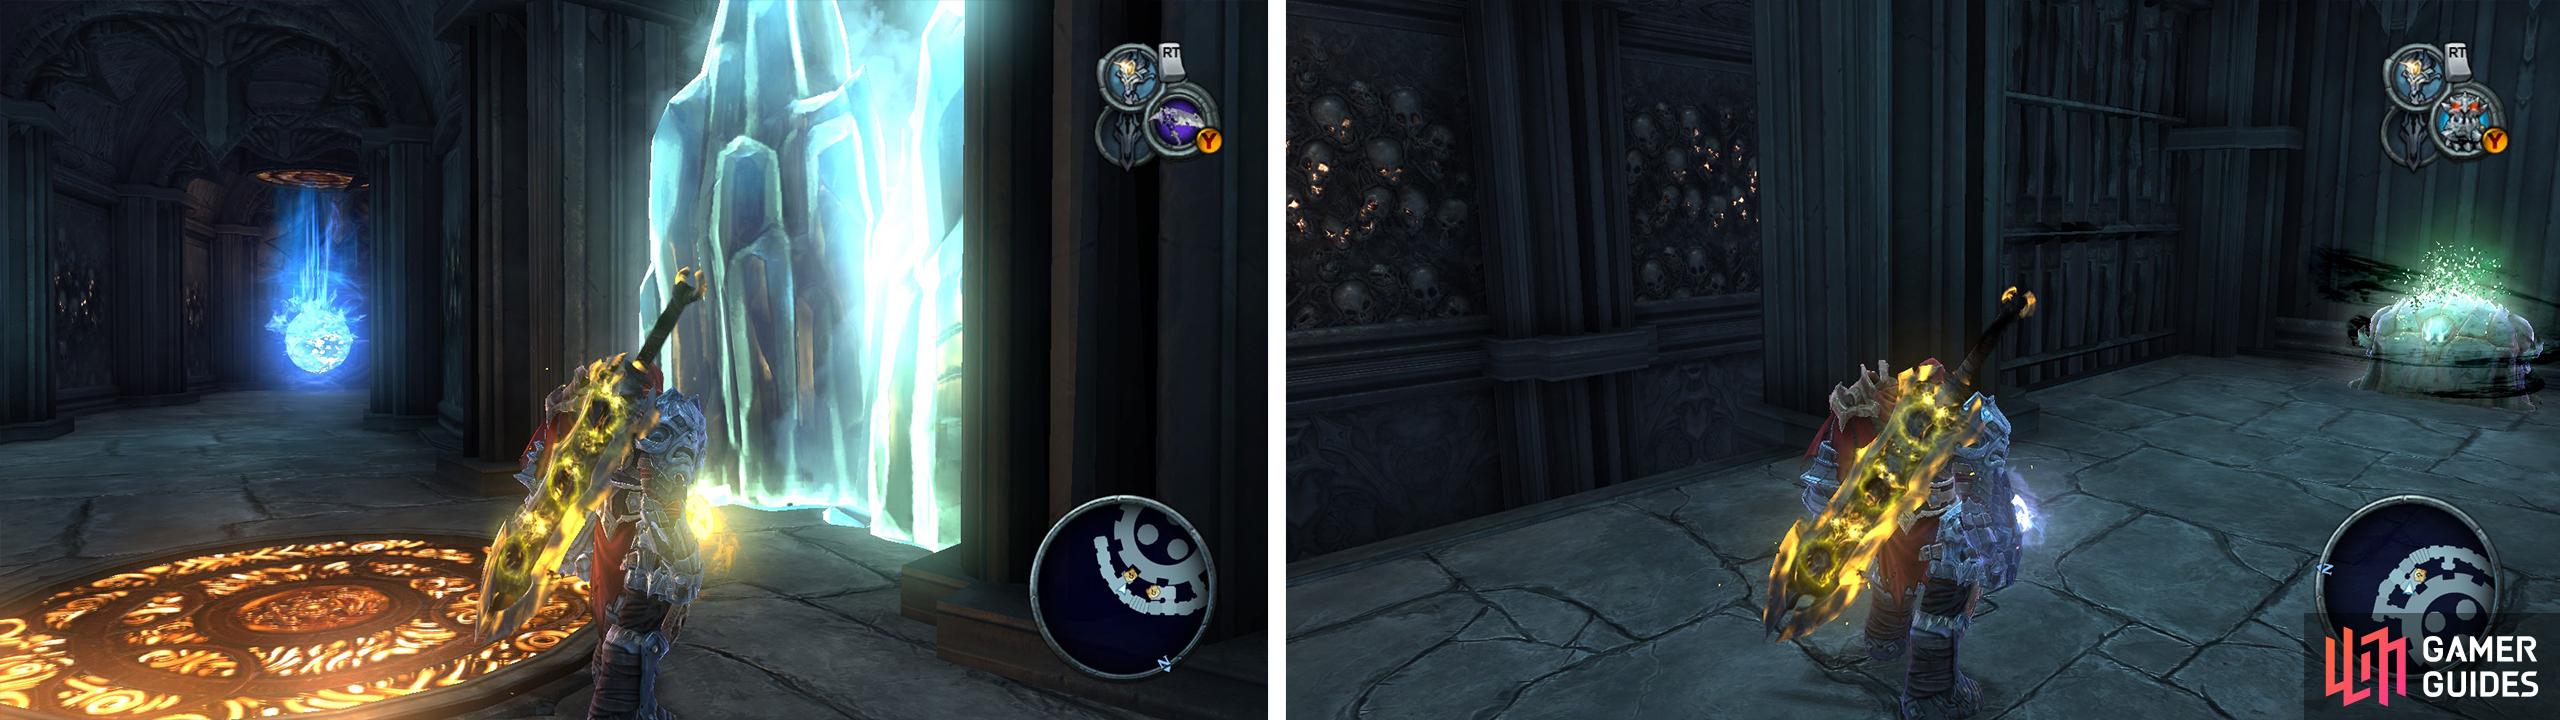
After a quick scene the room containing Azrael will change dramatically. Head to the north side of the area and have a look around to find two portal pads adorning the walls here. Get onto the highest of the three ledges here using the Voidwalker and the various orange pads.
Create a charged portal using the teleport symbol on the ground nearby, walk through a portal and float up to the higher platform. Facing away from the locked door you will see the rotating cylinder of rock. Wait for the lowest section of the rock to reach your position and double jump on to it. Climb to the very top of the rotating structure and jump across to the unlocked door to on the east side of the room.
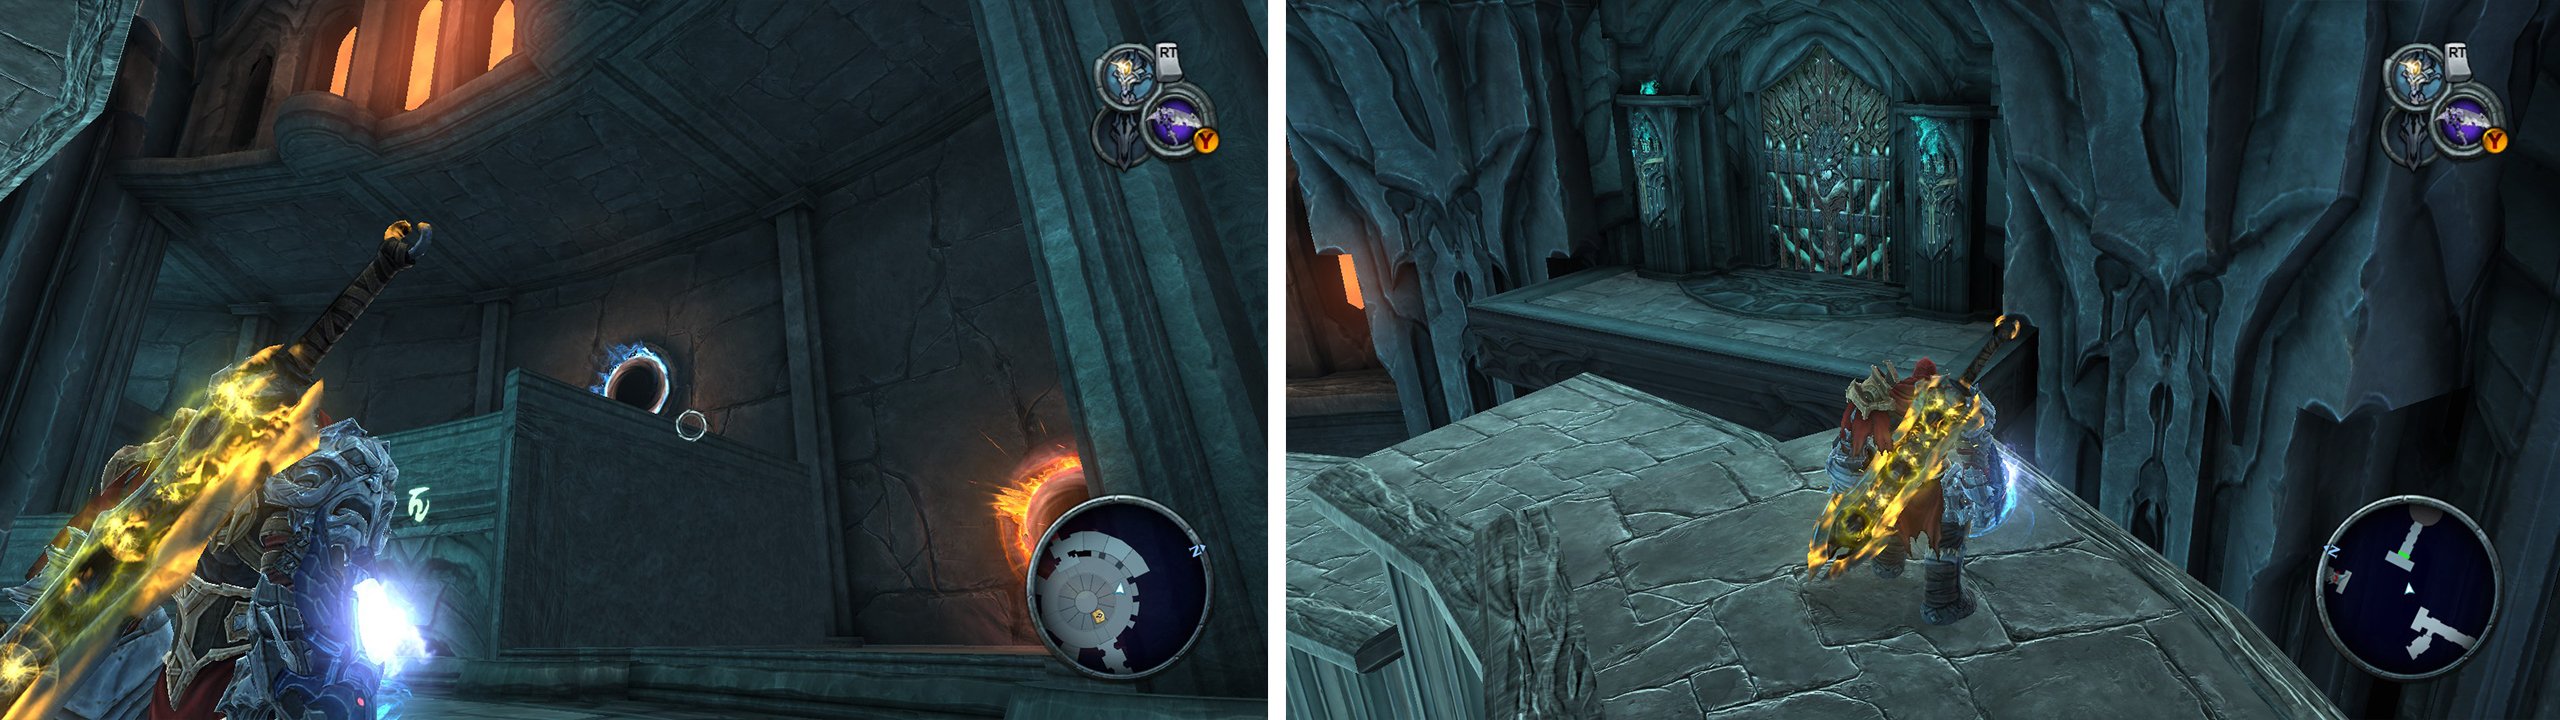
Use the portals to reach a higher platform (left). Climb the rotating ring and from the top jump to the next door (right).
Follow the hallway to the end and activate the elevator here. As you do some Demonic Soldiers will spawn into the lift with you so you will have something to do in the minute or so the elevator takes to reach the top. Once it stops and the enemies are all dead, the seal will vanish allowing you to get into the hallway beyond.
When you reach the main room, you will see a rock bridge moving around the area slowly. When it is closest to the right of the room, jump on it and follow it until you reach the first solid platform. At this point you’ll need to defend yourself from the blue Duskwings before using your Voidwalker to activate the portal on the other rock pillar nearby and the second on the other side of the pit near the exit. Wait for the floating path to make another round of the room and follow it all the way around and through the portal. When you exit onto the balcony, slay any remaining Duskwings.
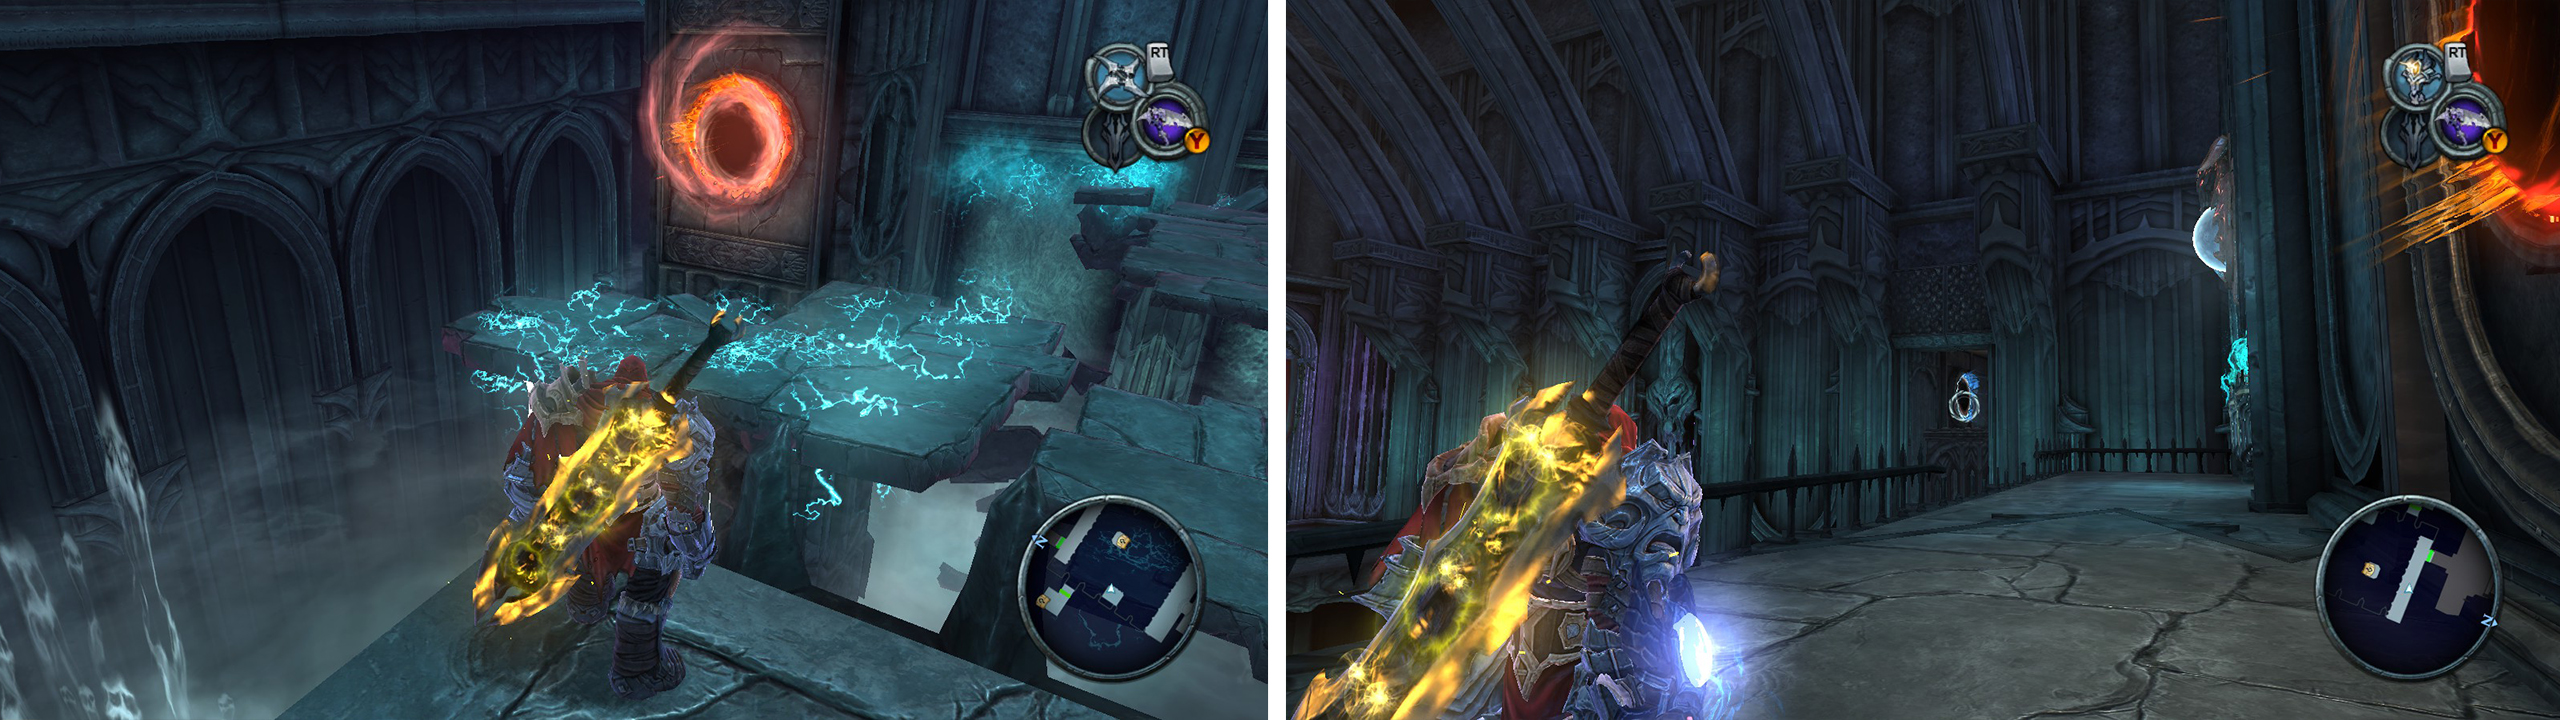
Hop through the portal on the central pillar (left) to reach the far side. From here, look for an alcove in the west wall for another portal pad (right) leading to a Wrath Shard.
Before entering the door here, from the balcony look slightly to the left of the exit door to see a teleport pad in a small alcove above the room. Activate this then double jump into the nearby portal to find a chest containing a Wrath Shard and a switch which will open a nearby door which will let you jump back onto the roaming rock path again. Re-activate the portal on the stone pillar in the middle of the room and the portal next to the exit. Pop out the door to continue.
In the subsequent area there is a giant chasm with two giant rotating blocks floating above it. Both of these blocks have teleport pads attached to them so this is our ticket across. When the first block reaches the platform closest to you, activate the portal on it, then turn to the right and activate the portal on the wall nearby. Wait until the two blocks come together in the middle and you will be able to see the teleport pad on the second block though the portal. Fire your Voidwalker through the portal to activate it. Jump through when the block reaches the far end of the chasm.

Shoot a portal through a portal to hit the far column (left). Jump through and kill the enemies waiting for you on the far side of the chasm (right).
As you reach the other end of the cliff the area will seal up and you will now need to face off against another couple of waves of baddies to proceed. First up you will encounter a Minotaur with a few Demonic Soldiers in tow, following this will be a Wraith or two and before finally one more Minotaur. Note there are two Green Soul Chests to the left of this area and a Yellow Soul Chest to the right if you need to restock at any point during this encounter.
When you have stomped their collective ass into oblivion, cruise through the door here.
Head down the stairs and open the chest here, a short clip will play showing parts of the floor falling away before you are attacked by a group of Spined Minions. Kill them to have a group of Demonic Soldiers and a Wraith will appear, if you are quick you can run to them as they spawn and use a Blade Geyser attack to send a few of them into the holes in the floor for a quick insta-kill.
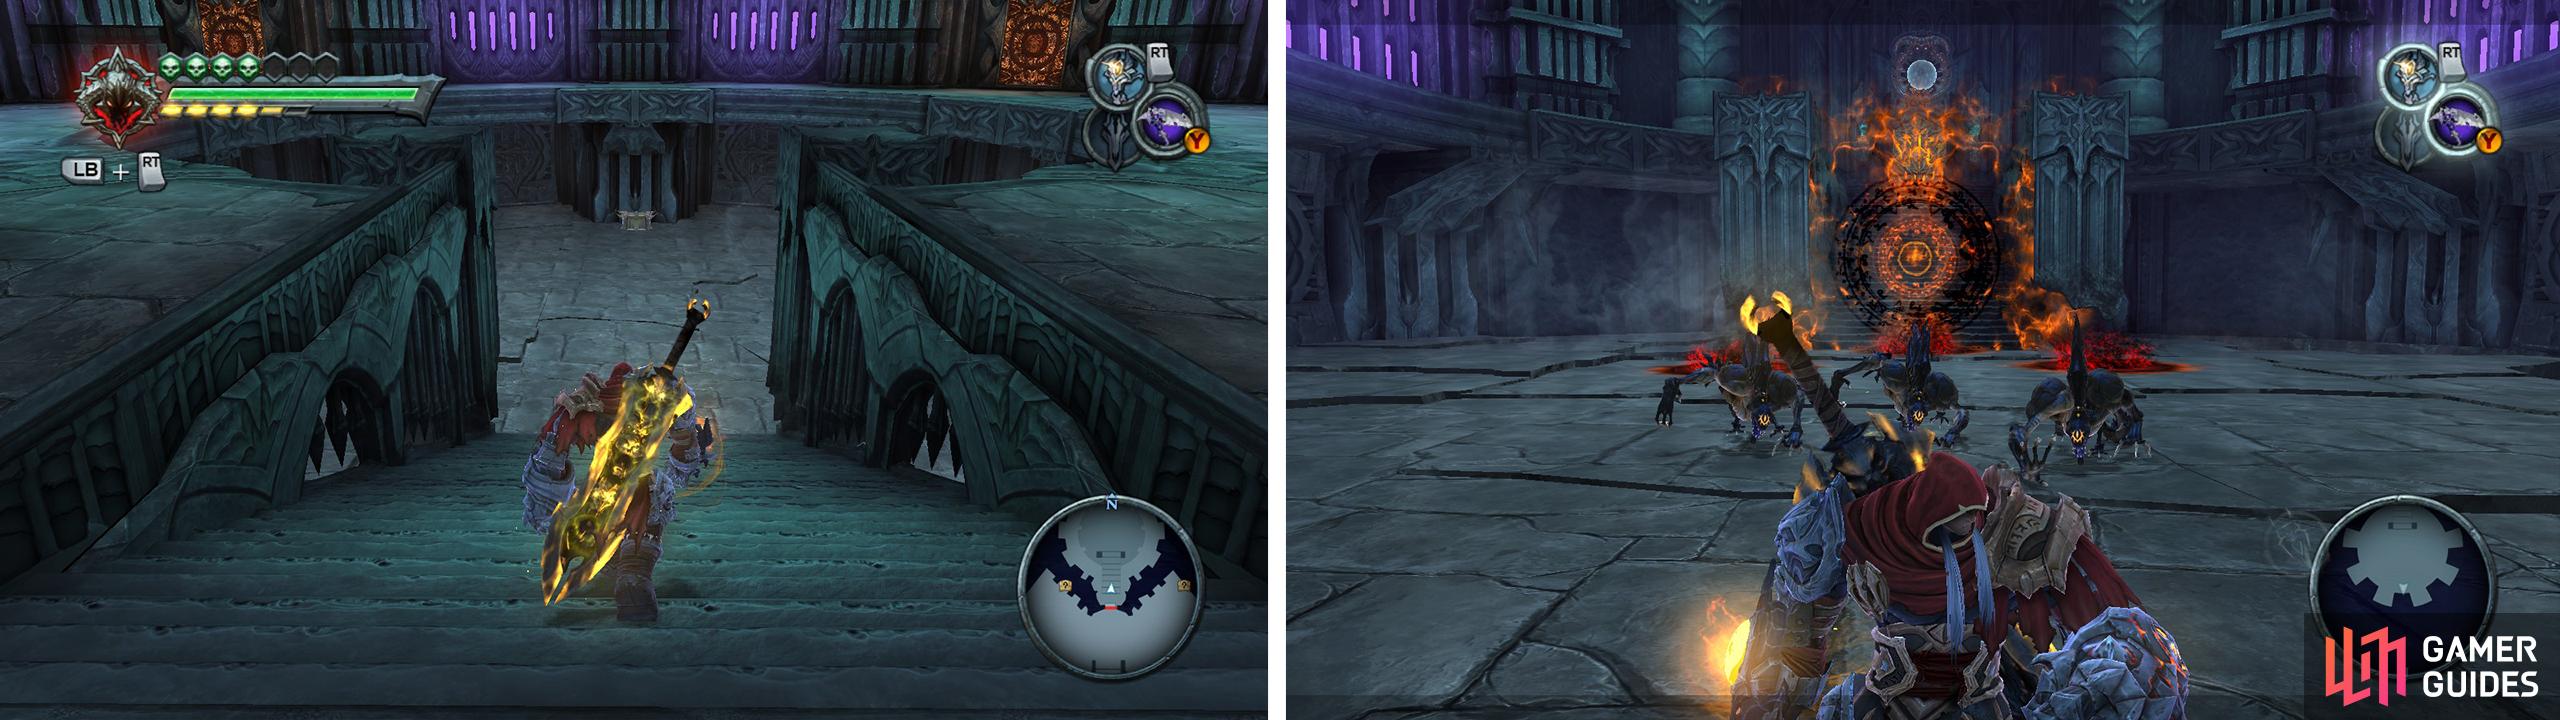
Open the chest (left) to trigger waves of enemies to kill (right).
After clearing the area, climb the stairs for another quick clip. Three hanging platforms will appear in the centre of the room and two blocks will spawn on the circular ledge. Huzzah – its puzzle time!
This puzzle can be quite tricky so have a read below before attempting it. First you need to fire a portal to the top of the lowest hanging platform, next drag one of the blocks to the teleport pads on the main level, activate it and push the block through. This will bring the platform down.
Dismiss your portals and fire a new one just beneath the box on the lowest platform here. Jump on top of the lowered platform and chill out next to the purple chain. From here you should see the highest of the three platforms to your left. Fire the second portal to the top of this platform to drop the block onto it. The platform you are on now will start to rise, look to the right and shoot a portal into the roof of the middle platform and when you are at the highest point, fire a portal beneath the block on the highest platform before quickly jumping on top of it. This will take you to the top.
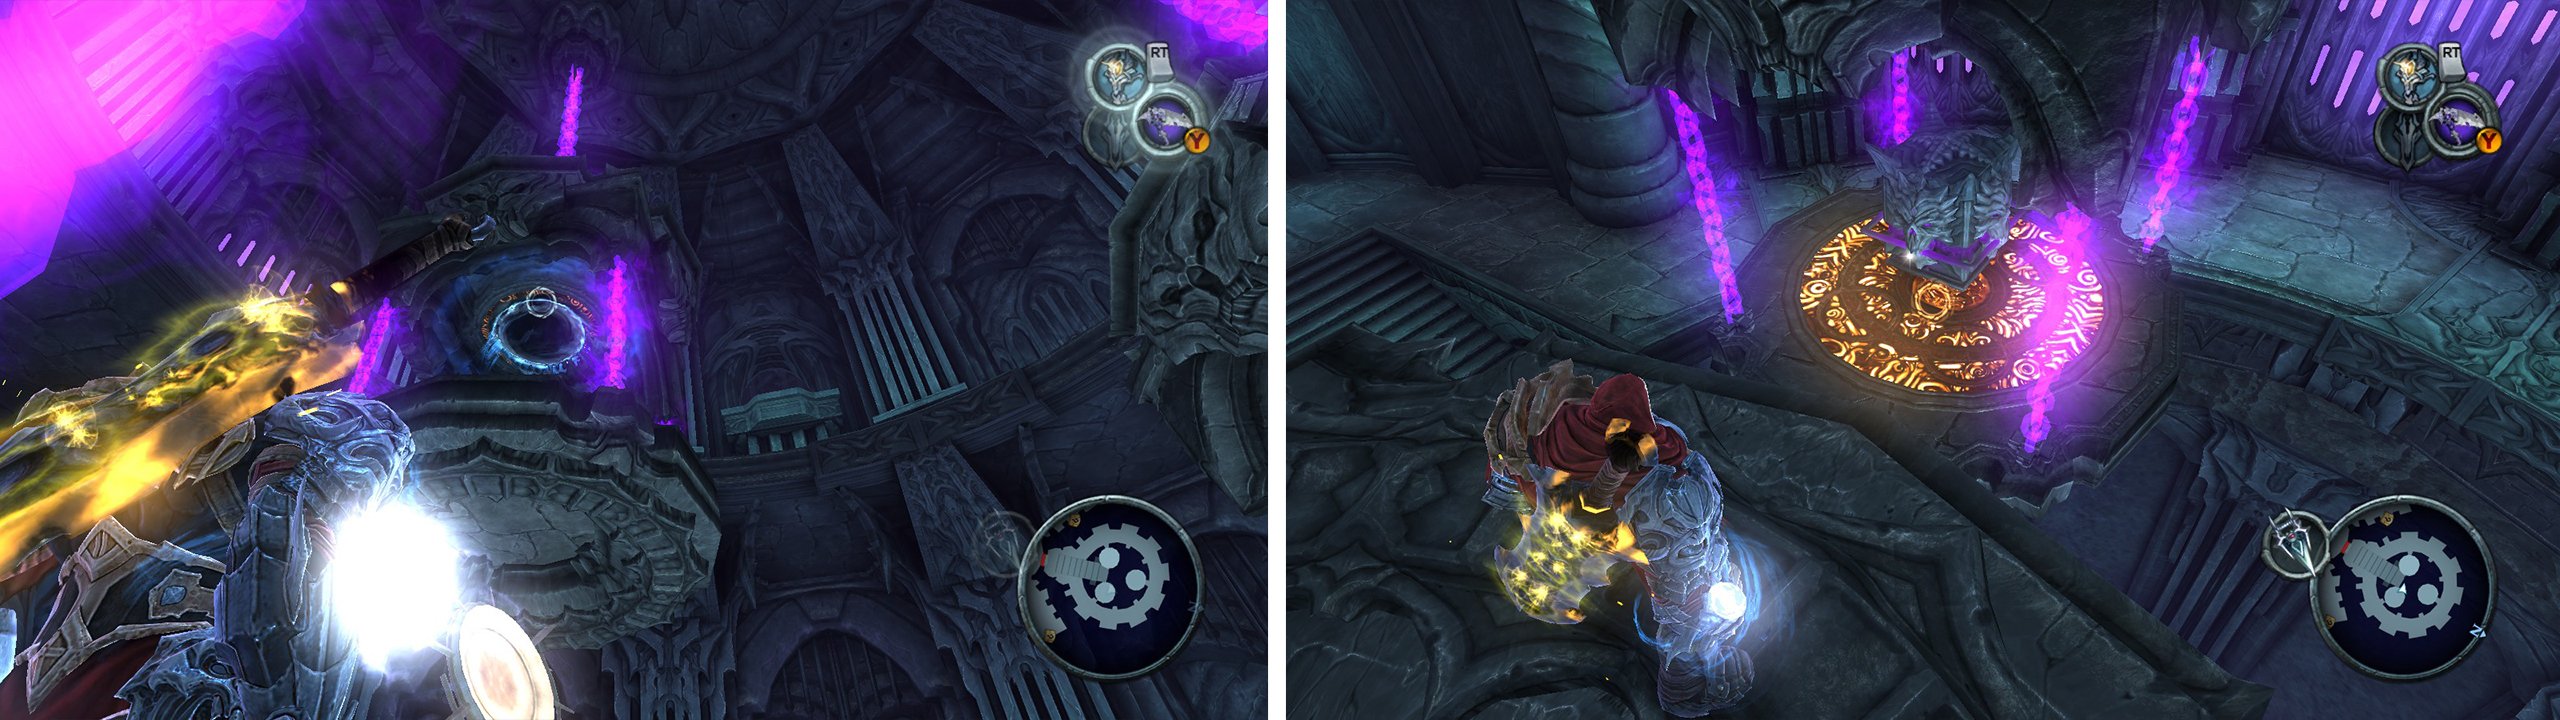
Use the portals on the top (left) and bottom portal pads to move the block (right) between the platforms to solve the puzzle.
At the top here, replenish your health and wrath using the Green Soul Chest and Yellow Soul Chest provided and open the door.
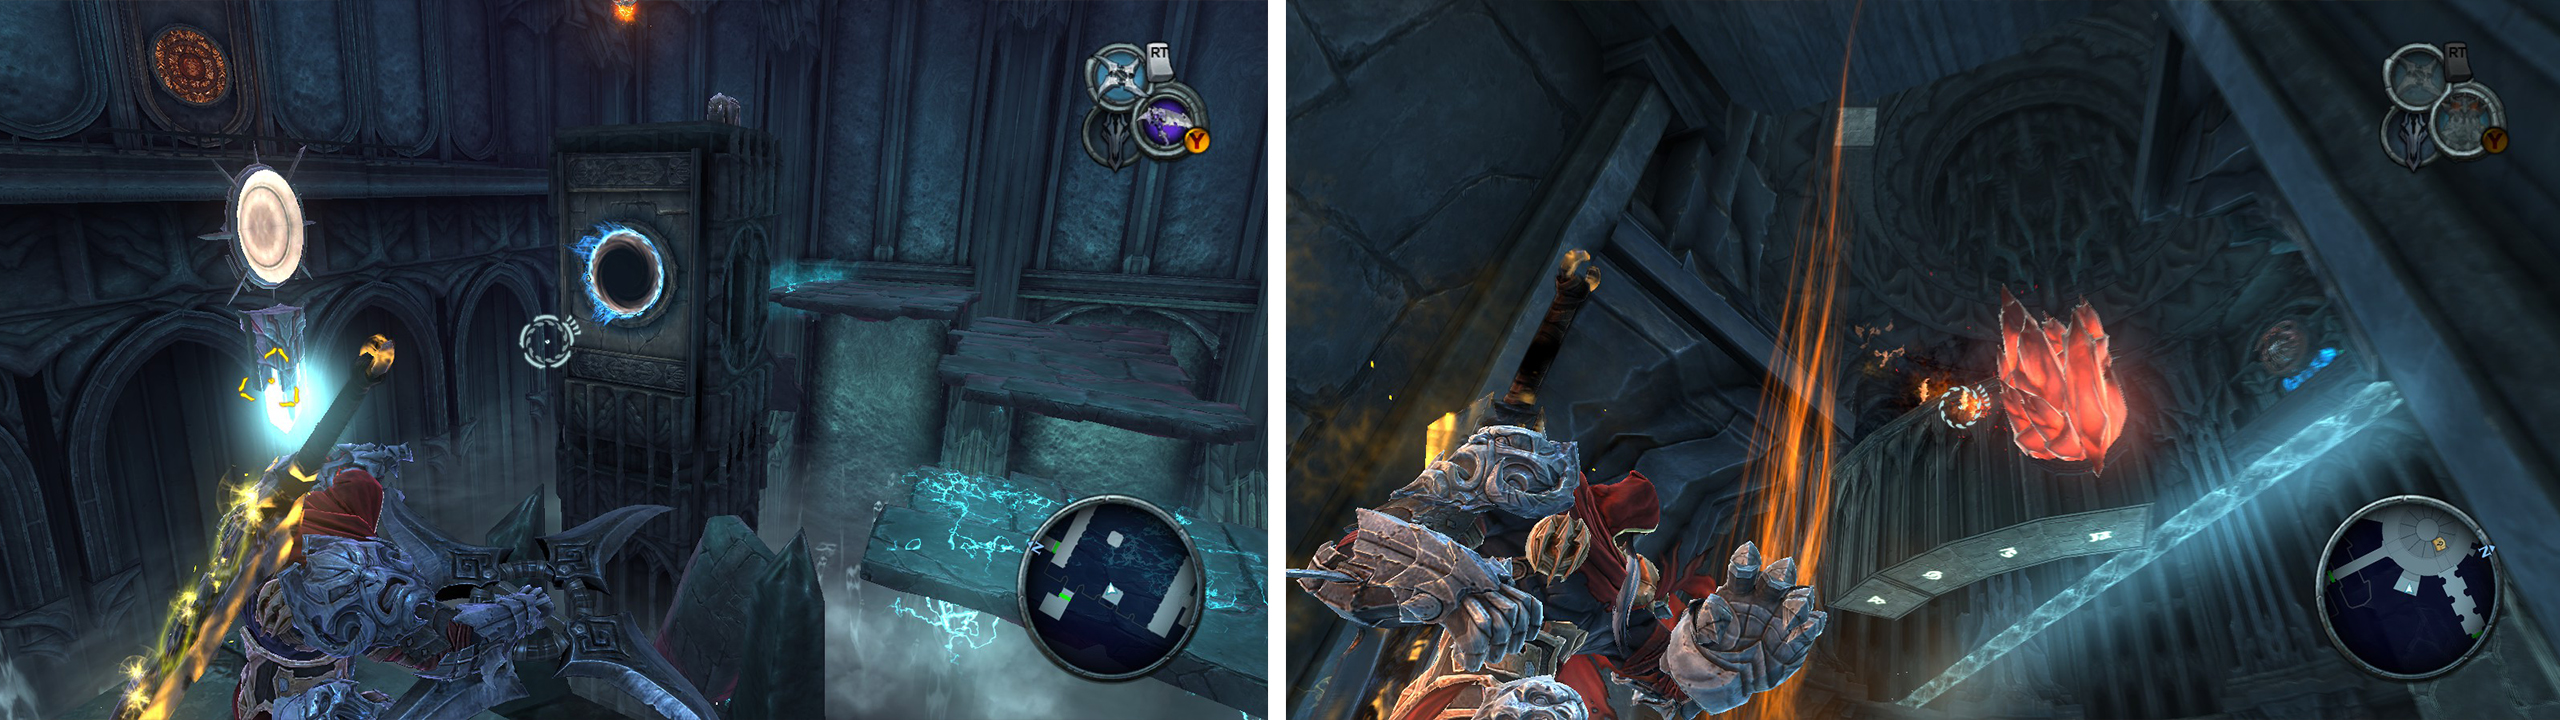
Use the shadow flight geyser here to reach the platform above. Follow the tunnel around until you see a blue crystal, smash it with your Gauntlet and grab the Hoard Seeker Trinket from the chest inside. Activate the portal on the floor and head to the top of the stairs nearby, look upwards to see another portal pad up here activate it, return to the previous portal and step on through. Jump up to the nearby ledge and open the chest for a Life Stone Shard .
Drop down and continue along the tunnel until you reach the next shadow flight geyser, above it is a portal pad. Activate this and then use the Voidwalker to create a charged portal on the ground next to where we destroyed the blue crystal. Jump through the portal and fly on up. Glide over to the southern ledge for a Blue Soul Chest , then make your way to the northern ledge and follow the passage here.
Destroy the blue crystals (left) and use the portal pad above the top of the stairs to reach a Life Stone Shard (right).
Boss: Tower Guardian 02
This is the second of the three Tower Guardians that we need to fight. All three have the same attack patterns, but the environment in which we take them on will differ. This fellows attack moves include:
| Attack/s | Description |
|---|---|
| Overhead Smash | The boss will slam his chain down into the ground. This will cause a significant amount of damage if it hits you, so be sure to dash at the last second to avoid it. |
| Whirlwind | When the boss takes damage, it will stand up and swing its chain around in circles quite quickly. This can be quite painful, so try to keep a lot of room between War and the Guardian. |
Combat Strategy:
Look to the ground to see several large portal pads which are protected by a portal nullifying metal grate. To utilise these pads, you will first need to lure the Guardian into performing an overhead smash attack on the grates to destroy them. Once the pads are freely usable, repeat the strategy as before.
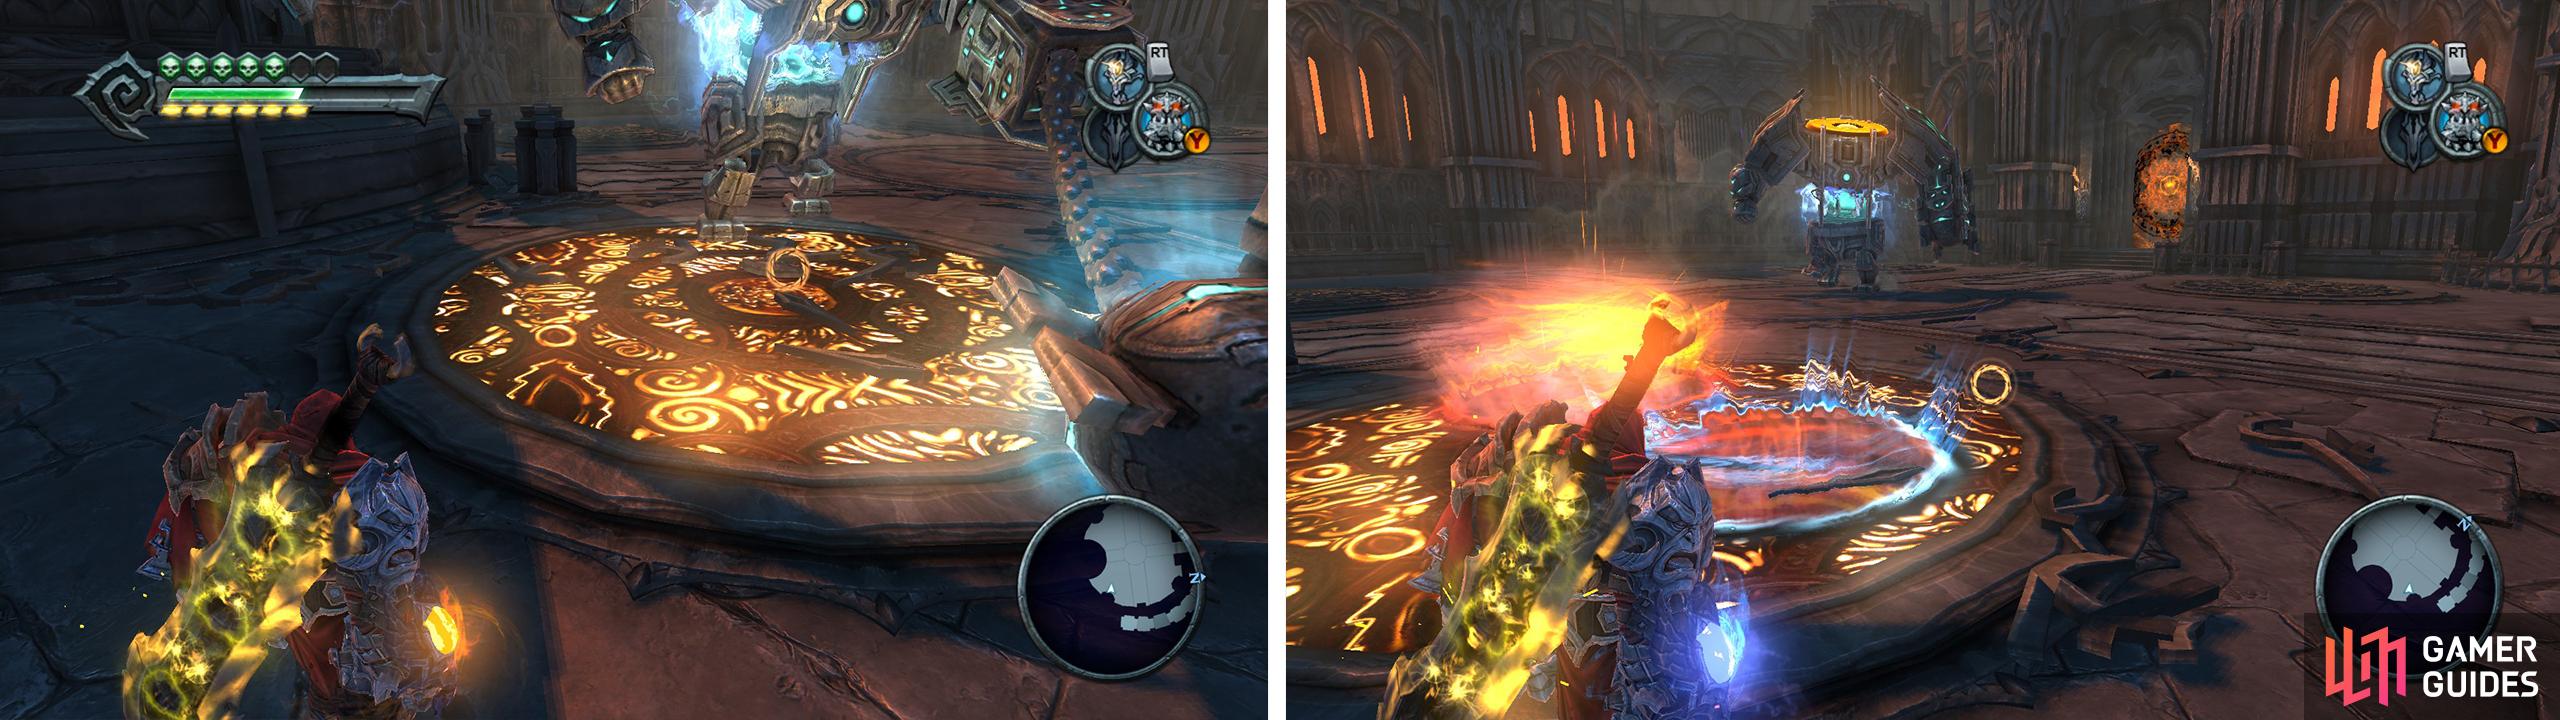
Have the boss destroy the grates covering the portal pads (left) and then use them (right) to launch yourself up to the boss’s head again.
You need to create two portals on any one pad with the second being a charged super portal. Wait for the boss to do the overhead smash. Following the attack, the boss will become immobilised for a few moments, use this opportunity to drop through the portal and glide over to land on his head. Use the action button to damage him. He will falter, so head in and smash him a few times until he regains his footing.
Once he gets up again, your portals will disappear and he will start his whirlwind attack, stay away from him until it stops. Then repeat the process until you can hit the action button to finish him off.
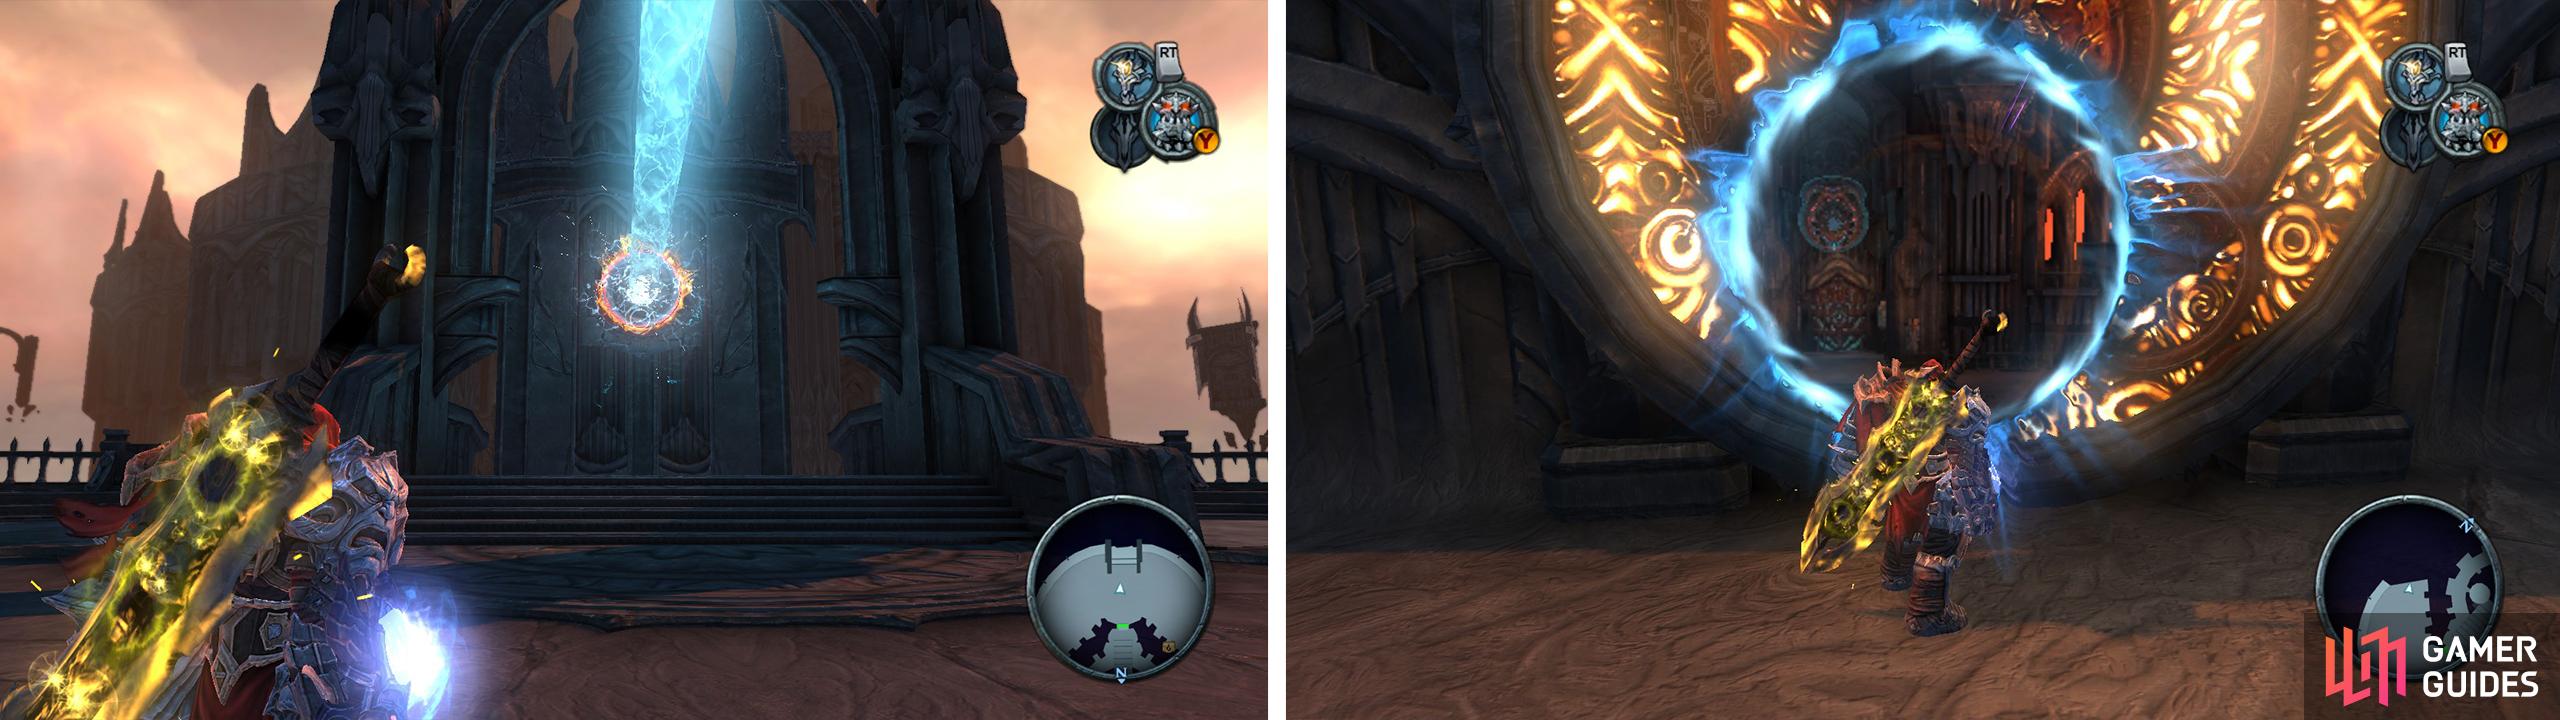
As with the previous boss, we will now have to direct the beam of blue light all the way back to Azarael.
Return to the elevator and use a portal on the pad behind the beam. Ride it back down and use the second portal on the pad here. This will light up all the mirrors in the next room. Head down the stairs and pick up the Green Soul Chest here if you need a bit of health. The three mirrors down the bottom do not line up with those above, luckily they have crystals beneath them, so pull out your cross-blade and lock on and hit all three simultaneously to activate the nearby switch, use the elevator here to ride down.

We’ll need to re-direct the beam again (left). When you reach the room with the crystals, hit all three with your cross-blade (right) to progress.
As you step off the lift, you will see a wall open on the far side of the room. The blue beam will hit the portal pad here, remember its location. Jump down into the room with the three suspended platforms and the two blocks. Return to the floor and using the Voidwalker, you will need to place the two boxes on the highest and lowest platforms – this should line up the mirrors on the bottom of the middle/high platform. Jump onto the top of the lowest platform and then into the highest one, from here look up to see the blue beam. Activate the pad it is touching, and then return to the spot where the blocks were and activate the teleport pad on the eastern side of the room to have the blue beam hit the mirrors to open the door. Head outside.
Use the Voidwalker to activate the teleport pad on the rotating column closest to you, then head right and activate the portal here. When the two columns meet in the middle, fire through the portal and activate the second columns teleport pad. Return to the entrance and once more activate the first column’s teleporter, wait for them to join in the middle to see the door unlock.
When the first spinning blocks returns to you again, dismiss the portal, then use the pad on the right to create another portal and jump out of the portal on the opposite pillar to float down to the other side of the chasm. Enter the door here.
When you arrive outside (left). Activate the first pillar’s portal, then activate the second pillar’s portal pad through the portal (right) before re-activating the first pillar again.
As you enter this room, several mirrors will rise up and the grapple points on the east side of the room will become useable. Use these to grab the Blue Soul Chest on top of the column here and continue to the opposite side.
To the right of this area is a teleport pad, activate this, and then activate the second pad on the stone column in the middle of the room. Use the grapple to jump back on top of the stone column with the chest.
When the moving path appears next to the portal on the column, jump down and throw your cross-blade at the closest crystal, then jump through the portal. Rush back to the main area and use your cross-blade to lock on and hit the two crystals nearby. Next target and activate the portal pad on the far wall, then return and re-activate the portal to the right behind you to activate the lift a little further down the corridor. Take the lift down and exit into Azrael’s prison chamber.
You will need to activate all three crystals at once (left) to exit the room. When you are back in Azrael’s prison, find the bomb plant (right) and destroy the red crystals.
From here, jump onto the rotating rock walls and look around the edge of the room for a small alcove with a bomb plant in it. When you see this jump down and land on the platform. Look up and find the very top piece of the rotating structure, there is a red crystal attached to it. When you are able, pick up the bomb and stick it. When the bomb explodes it will reveal a portal pad.
Activate this, then jump to the floor and activate a second portal pad within the stone cylinder. When the blue beam makes its way through the top portal, a scene will play.

 Sign up
No Comments