
At the beginning of the mission, follow the main path until you come to V’s pets, who are waiting in an open area. After a little banter between Griffon and Dante, Shadow and Nightmare will run off, leaving you to do battle with Griffon. Now, Griffon will not be any different than when you had him with V, so you should have an understanding of all of his moves. If not, then he can fire the normal projectiles at you, as well as perform the Round Robin maneuver; Round Robin is the giant sphere of electricity that surrounds Griffon. In addition to this, there’s the lightning that he can summon and push forward, and the little orb that splits bolts of lightning that move in and out.
Try and get in attacks every now and then, making sure you’re aware of when Griffon gets stalemated and goes into the orb form, as this will be your chance to deal some major damage to him. Once you get his health to a certain point, Griffon will leave. There are some Red Orbs and health on a nearby ledge, so grab them and take care of the two Hell Cainas that appear near you. Continue along and take the Bloodstream at the end of the path to arrive in a new area. Follow the main path along to another open section, where you will have to do battle with Shadow this time.
Shadow Fight
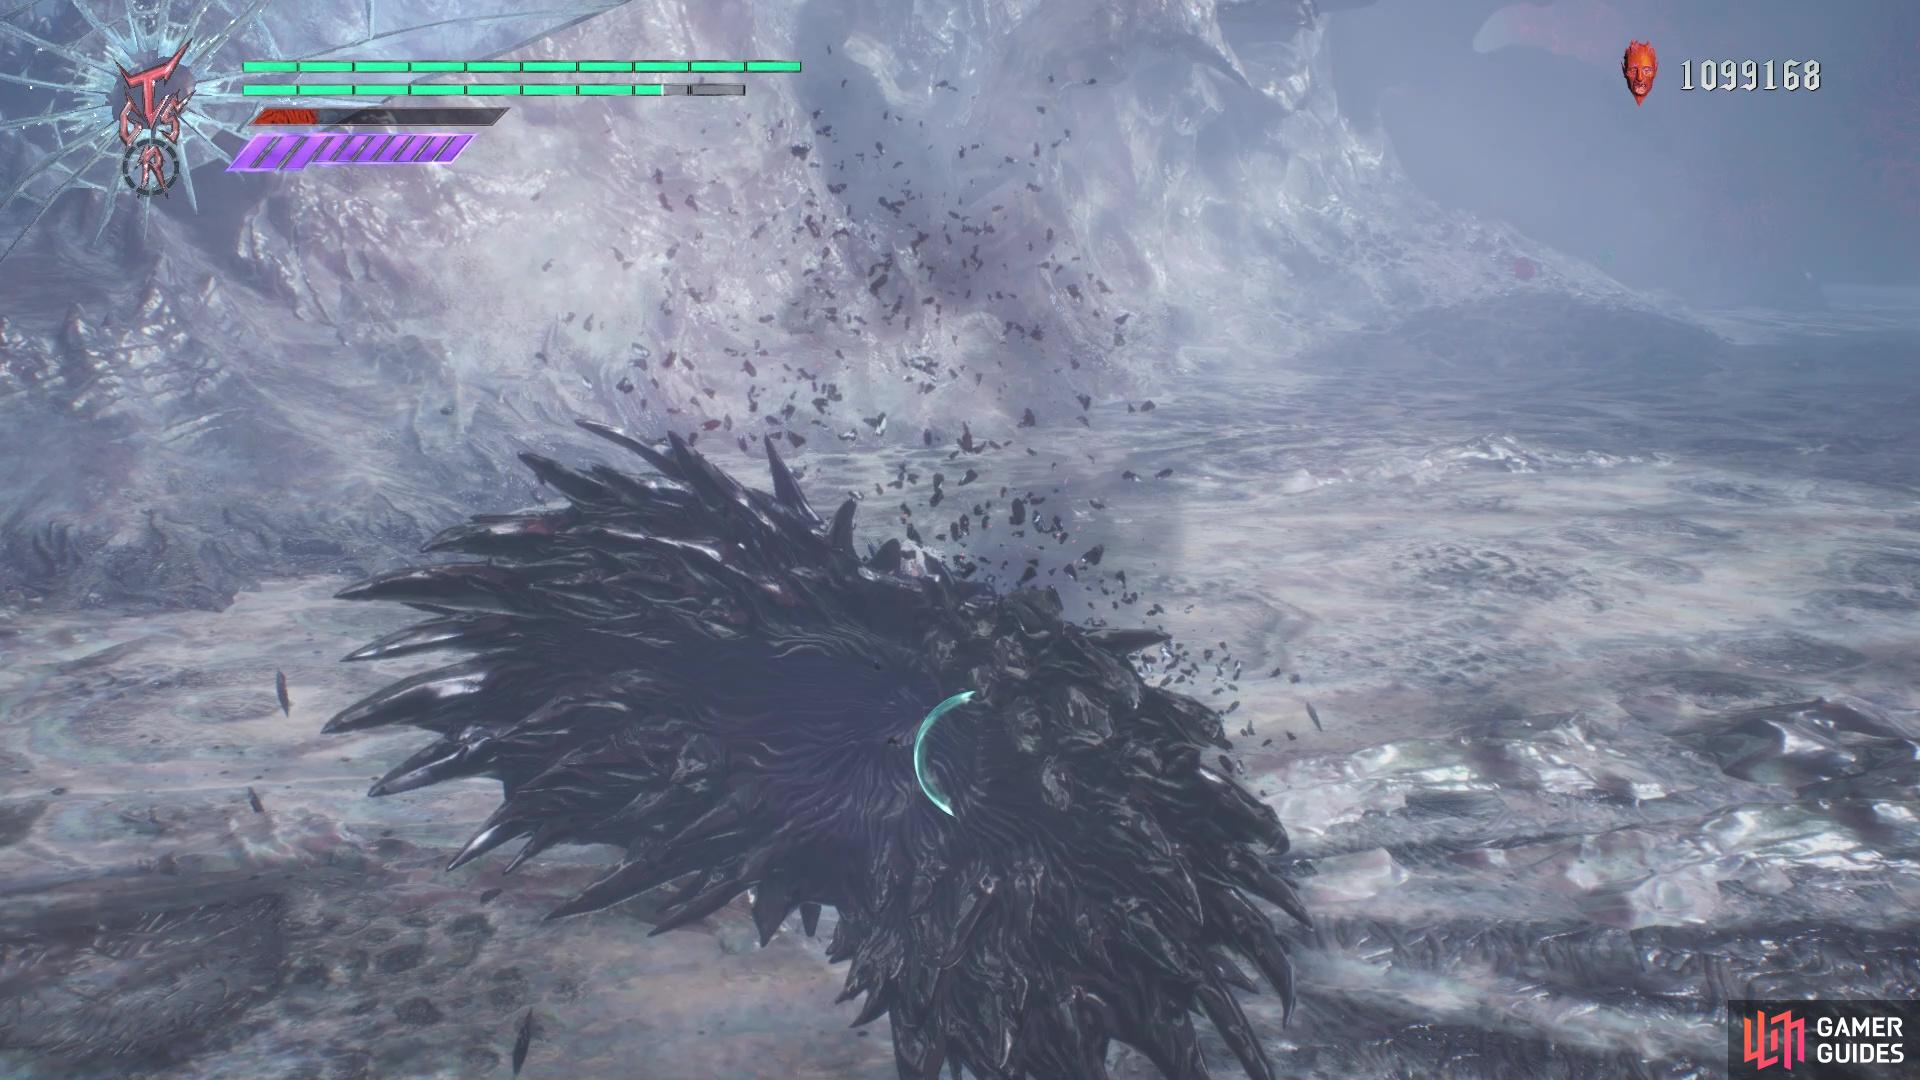
While Griffon relied on ranged attacks, Shadow will be punishing you in melee range. He will use most of the moves from when you had him with V, but they’re a little more mixed up than usual. He has the same basic two-hit combo, but Shadow can follow this up with the launcher or the one sweeping attack. If you get launched, Shadow will use the buzzsaw attack while you’re in the air. One of the more annoying abilities that Shadow will use is the “biting” attack that can follow during the normal sweeping attack combo. However, instead of doing it just once, Shadow will do it three times in a row while tracking you, so move away from this.
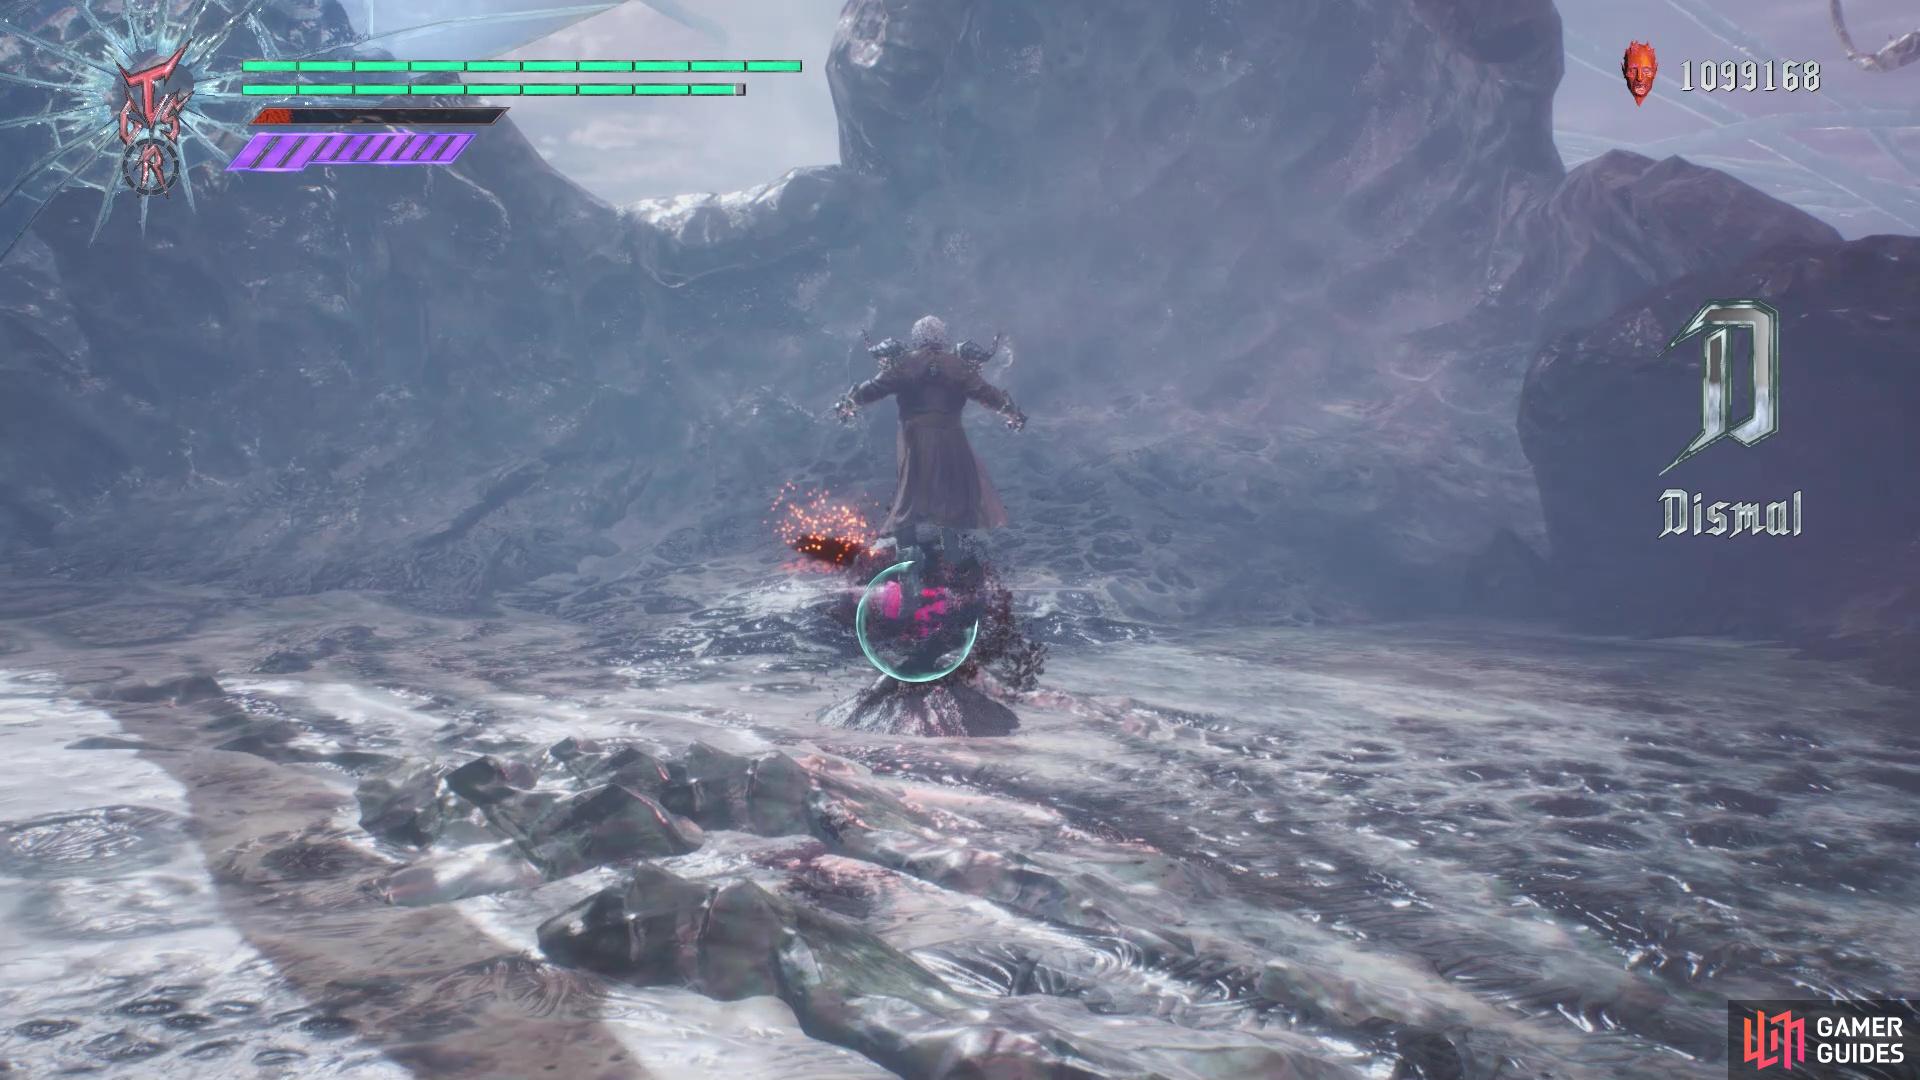
(1 of 2) You can sometimes send one of the pets into a stalemate state
You can sometimes send one of the pets into a stalemate state (left), Shadow can perform the above maneuver three times in a row (right)
Similar to the fight with Griffon, you can actually stalemate Shadow, so make sure you pile on the damage if he does go into that state. Once his health reaches a certain point, he will run off and you can continue the mission. Move ahead to find an Empusa, as well as some ledges with another Empusa. Jump up to the next landing, where three Red Empusa will appear. If you wish to get the final Blue Orb Fragment, then you will have to make sure to defeat all three Red Empusas. If one manages to escape, you won’t be able to respawn them by going to the checkpoint, so you will have to restart the mission from the beginning. Defeat them and grab the Blue Orb Fragment that spawns. If you’ve bought the ones from the shop and found every other fragment, this will be the last one.


Climb the rest of the way and in the next open area, you will have to do battle with both Shadow and Griffin at the same time. Concentrate on one and get their health low enough to make them both retreat. Up ahead will be another Bloodstream, so take it to a new area and use the Divinity Statue to purchase anything you might need. When you reach the open section ahead, it will be time to face all three of V’s pets at the same time.
BOSS - V’s Familiars
Having three enemies to deal with can prove to be a little difficult at times, but Nightmare won’t always be in the battle, as he will retreat now and then. Also, the boss’ health bar on the bottom of the screen will only go down from attacking Nightmare, as both Shadow and Griffon do not contribute to it. Whenever Nightmare goes away, concentrate on the other two and whittle their health down. While it is possible to take Shadow and Griffon out, it is only temporary and Nightmare can revive them by charging up and placing both fists on the ground. As for Nightmare’s attacks, you have the ones he does from being with V.

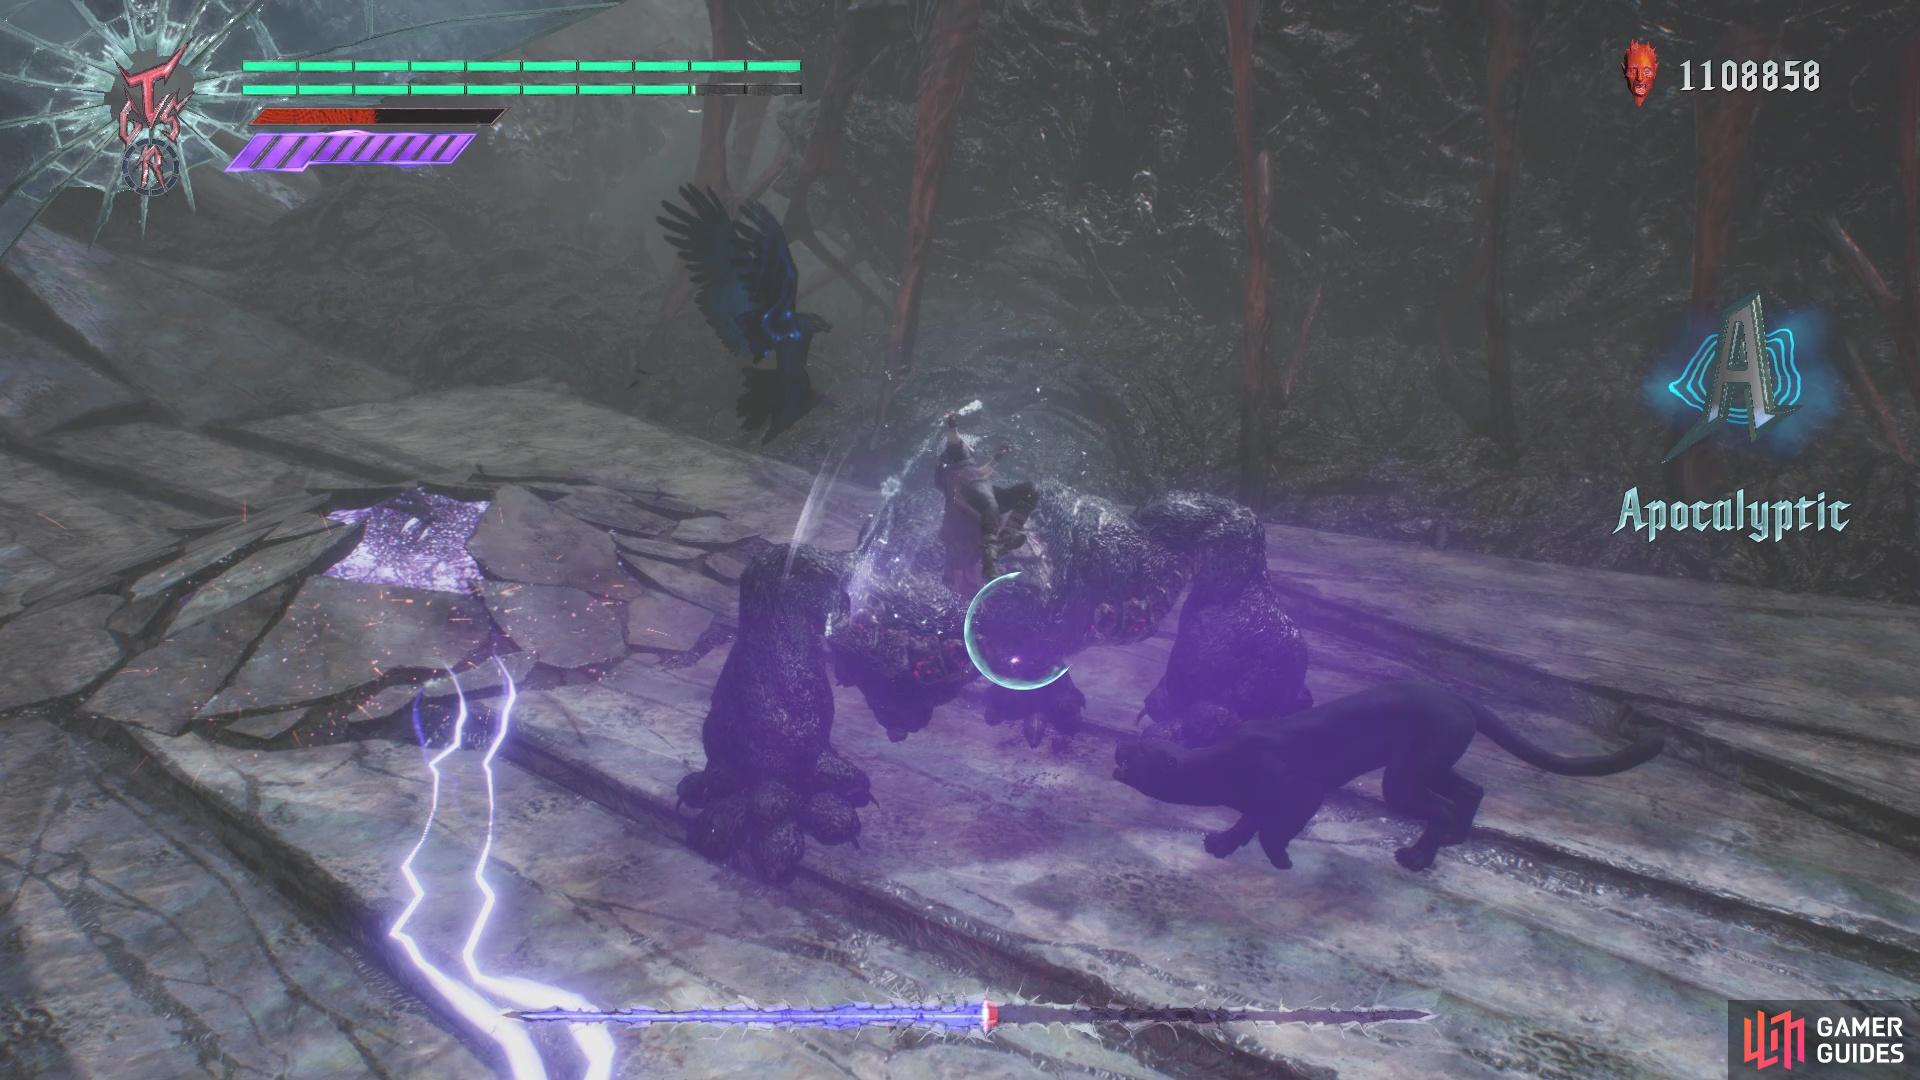
(1 of 2) Be careful about Nightmare’s fist slamming attack
Be careful about Nightmare’s fist slamming attack (left), Nightmare can actually revive the others by putting both fists on the ground (right)
There are the melee attacks, as well as the laser explosions, but there are a few more you might not have seem. He can spin around with his arms stretched out, as well as jump into the air and smash the ground with his fists together. All of them are pretty easy to dodge, but keep Trickster on just in case you need to dash out of the way at the last second. Knocking either Shadow or Griffon out (depleting their health bar) seems to bring back Nightmare when he escapes, which is your chance to concentrate solely on him. Overall, it’s not a difficult battle, as long as you can keep everything in check.

 Sign up
No Comments