
The next mission will have you playing as V again, although things might be a little more challenging that you got to use him a little bit. There is one trophy/achievement that you should be aware of that spans over the entire mission. This trophy/achievement, called Pet Protection, basically involves you completing the mission with neither Shadow nor Griffon getting stalemated. This might be a bit difficult on a first playthrough, as you don’t know what to expect, but you can always try for it. If you don’t get it, you can always replay this mission on Human difficulty once you’ve acquired the two health upgrades for your pets.
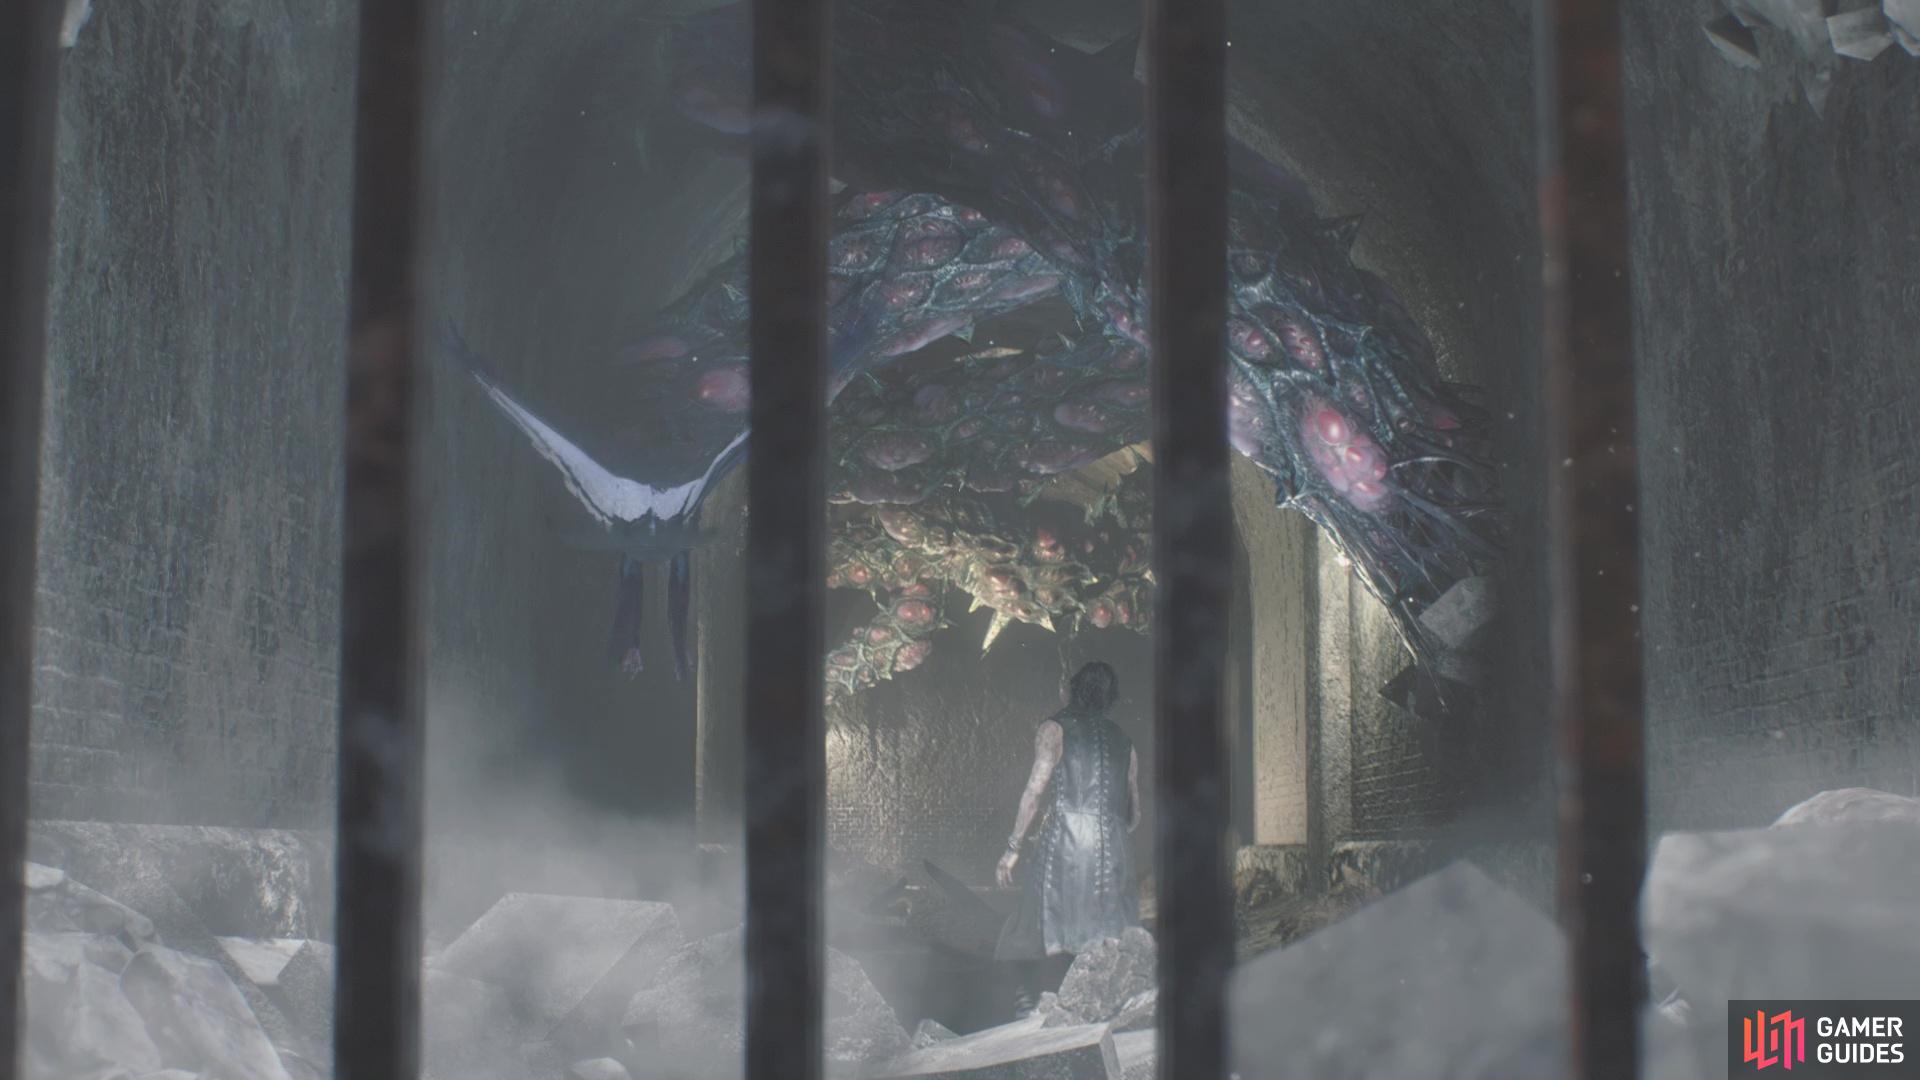
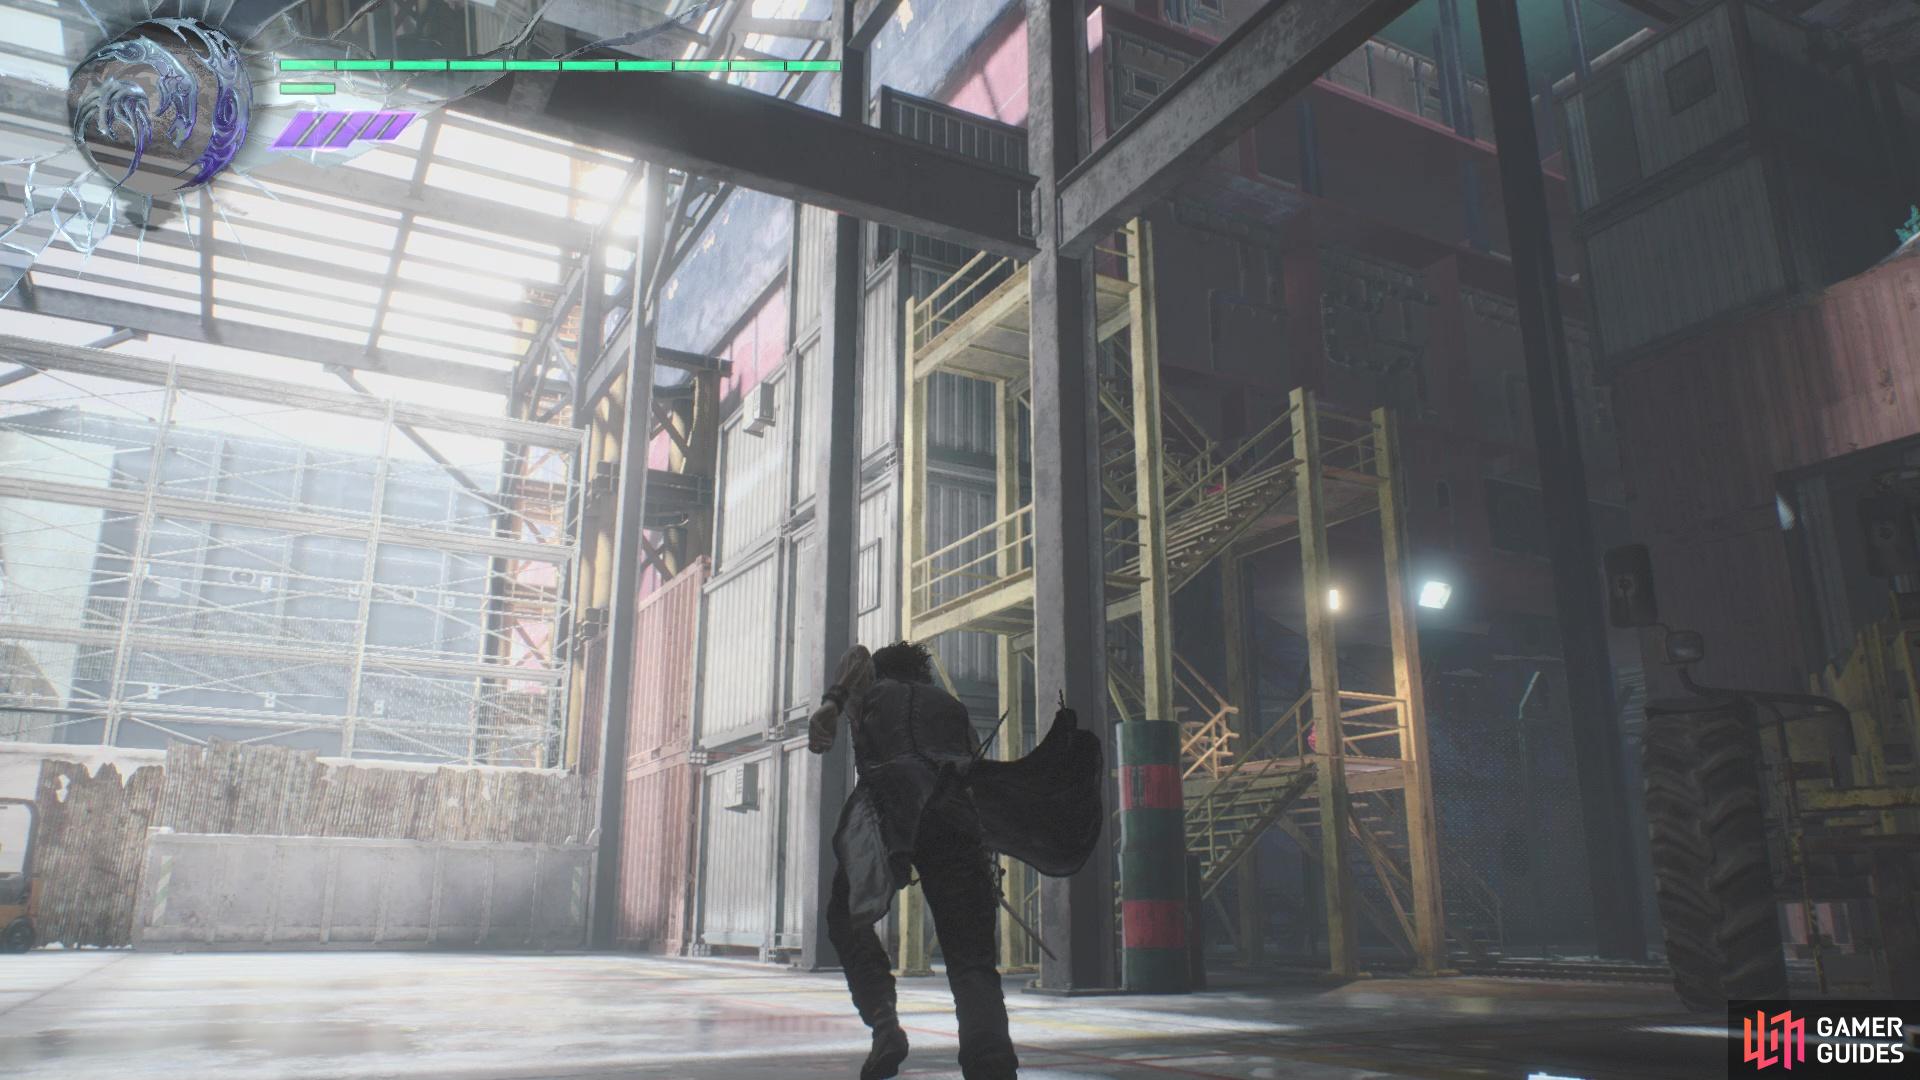
Run forward at the beginning of the mission, until you get into a fight with some Hell Cainas in a small tunnel. It might be a little tight, but keep moving to avoid getting trapped against a wall. After the battle is over, continue to the end of the tunnel and destroy the blood clot to gain access to the pipe you passed, which leads to a warehouse. Once inside here, go to the opposite end and use the wood to jump to the blood clot. However, wait on destroying the blood clot, as it seems something is breaking through the ceiling.
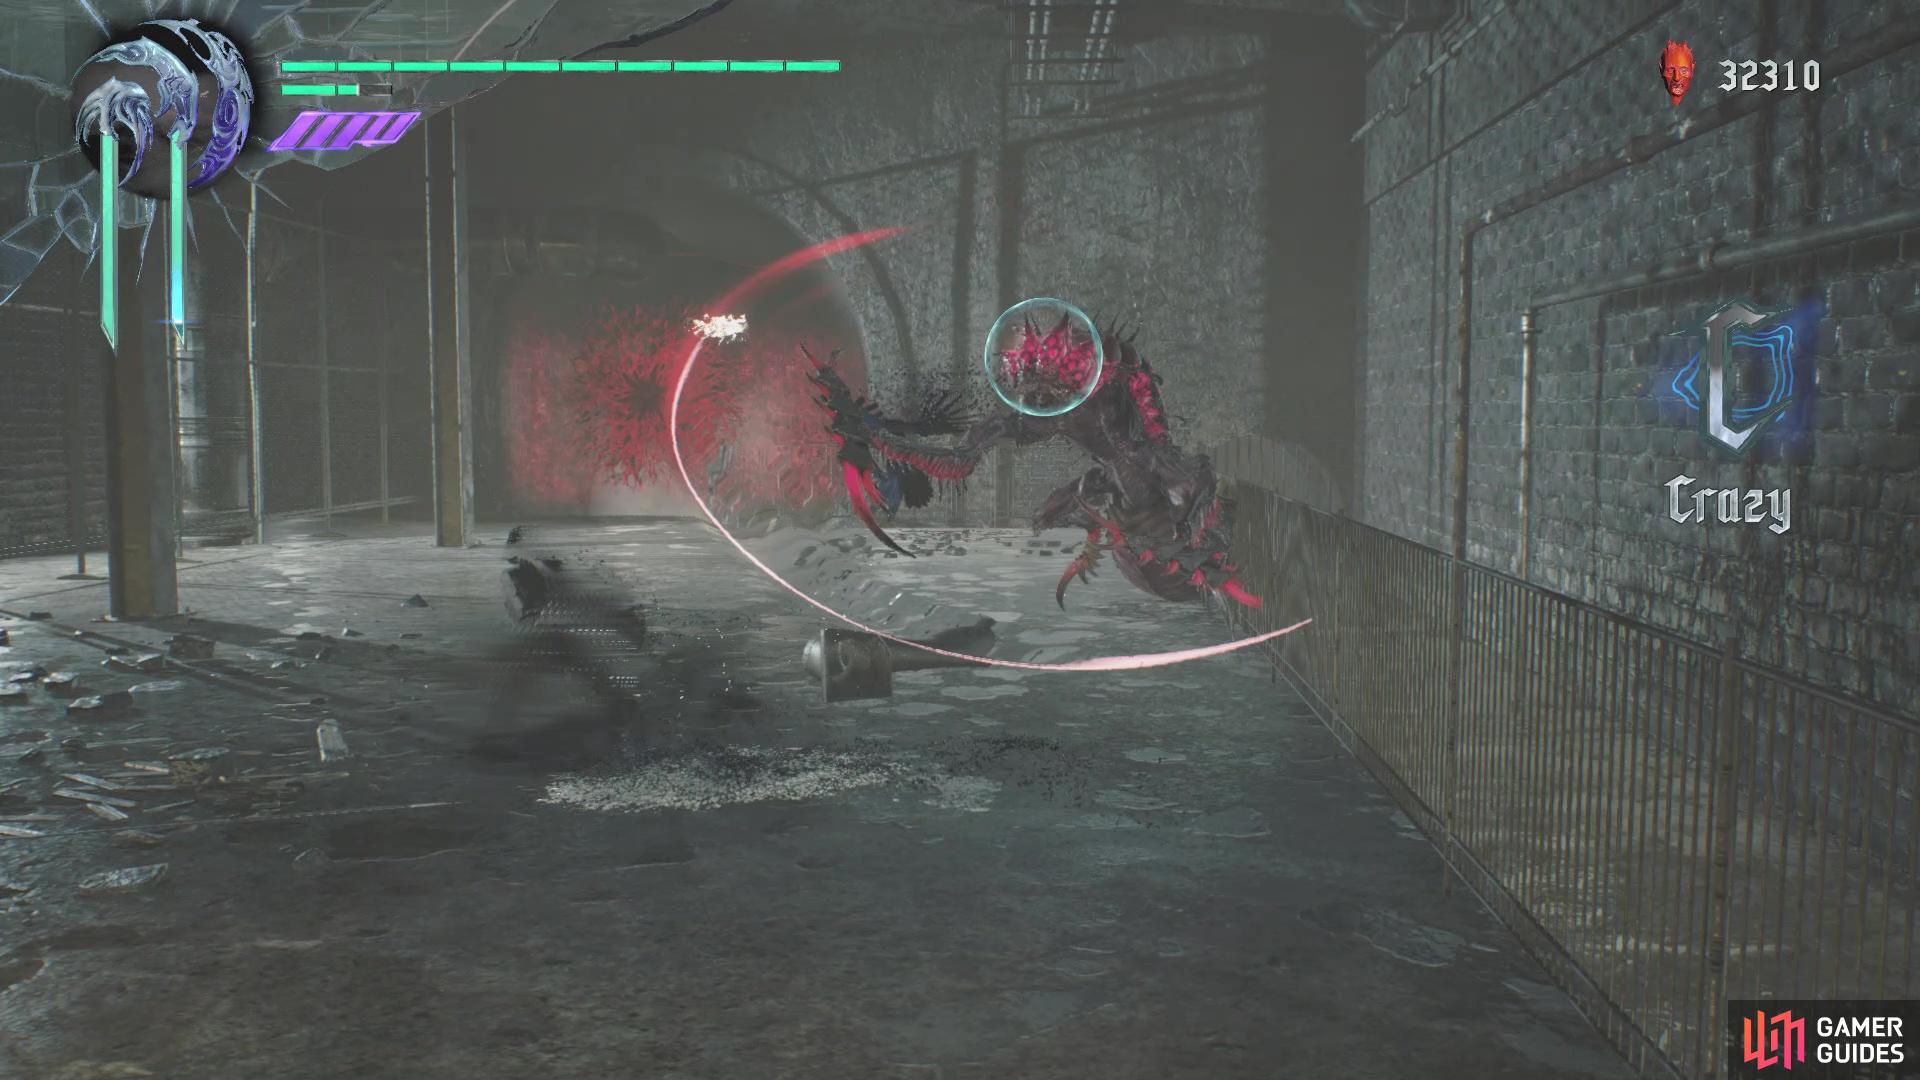
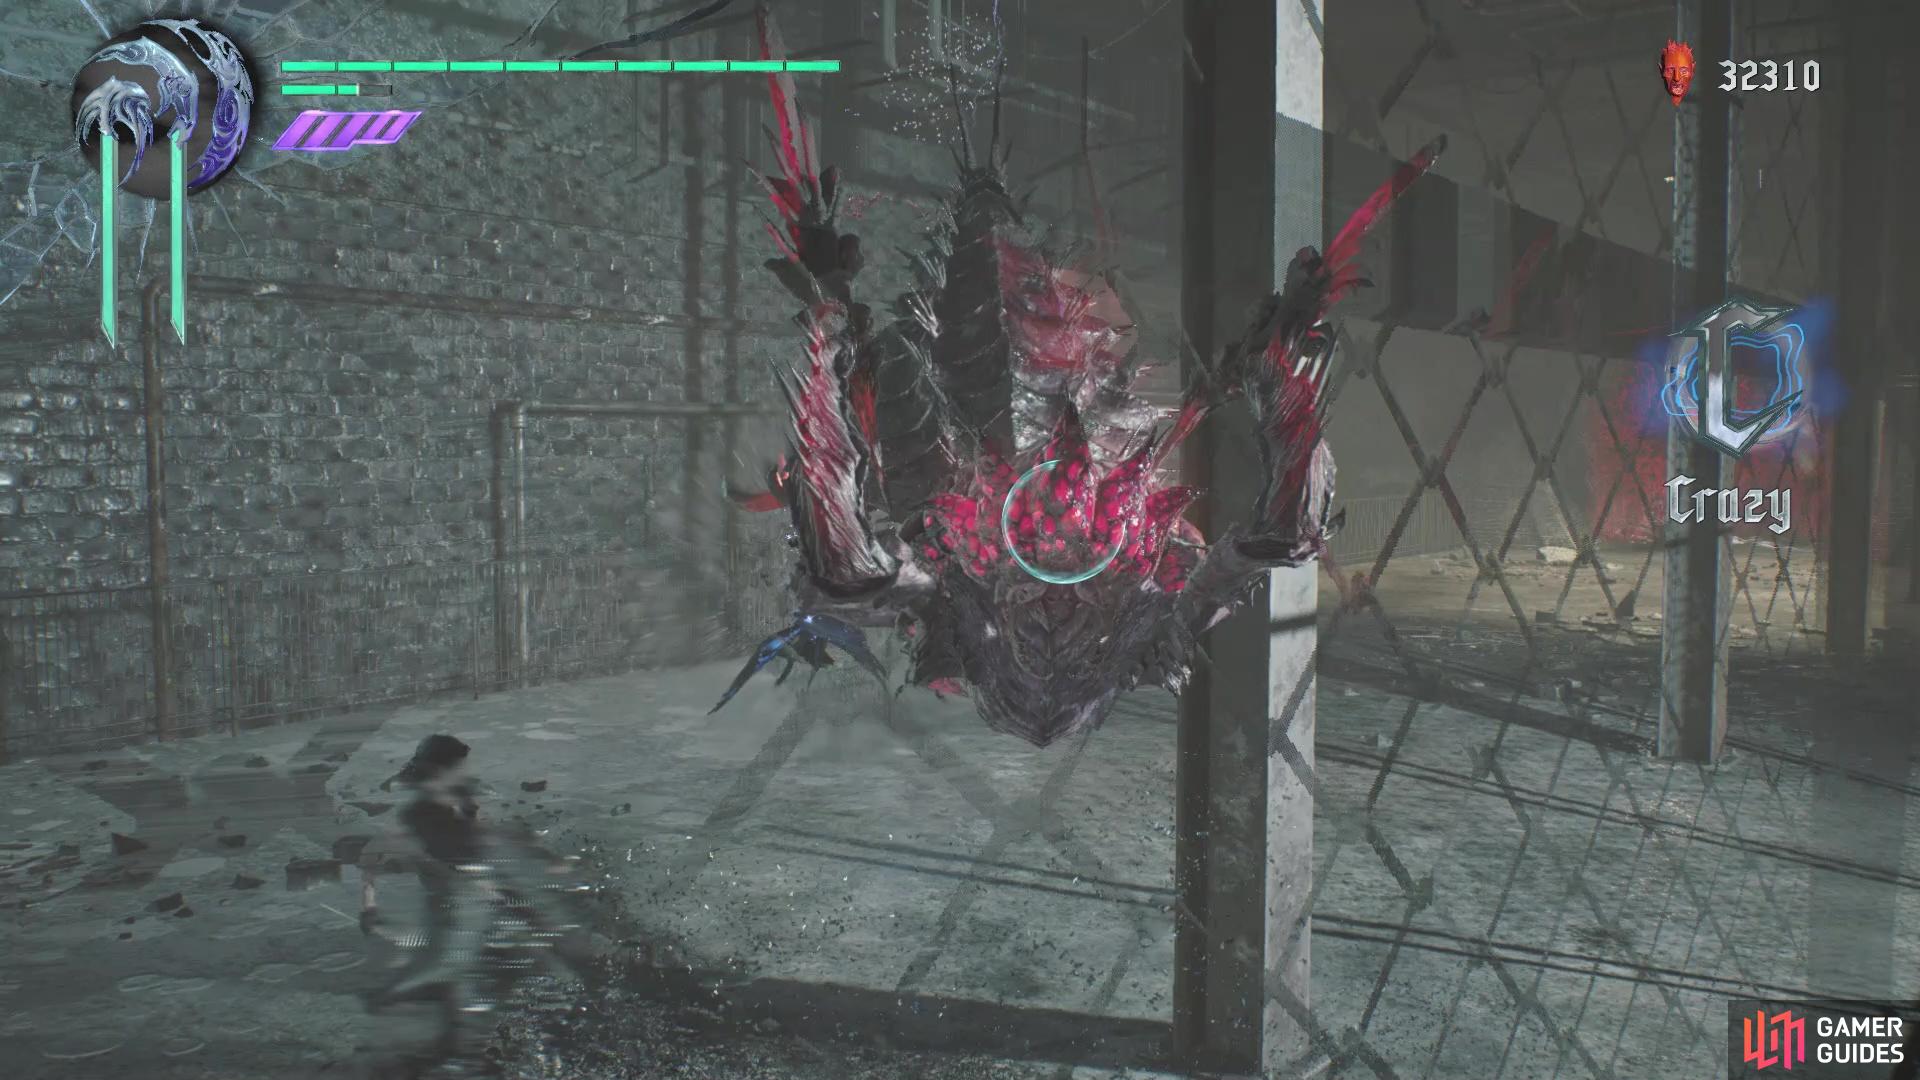
This is a leg, or something similar, of that large creature you saw at the end of the previous mission, and it actually is related to a trophy/achievement. You just need to deplete the health of this leg in order to unlock the trophy/achievement. Your best bet is to just stay away from it and unleash as many moves as you can with Shadow and Griffon. If you don’t get it right now, you will have two more opportunities during this mission, plus you can always come back later for it, since it’s pretty early.


Destroy the blood clot after the leg goes away, if it wasn’t already nixed during the battle. Drop down and carry on, jumping up to the next section, where another battle will take place. You’ll have some Hell Caina to clash with, as well as the giant leg from above, which decides to show up again. If you didn’t get the trophy/achievement on the last one, try it here; otherwise, ignore the leg and it’ll eventually go away after some time. A Hell Antenora shows up after the leg leaves and once that is gone, a pair of Pyrobats fly in to annoy you. Drop down into the next area and as soon as you do, turn around and look for the opening near the wall to find a hidden area that’ll contain a Blue Orb Fragment.
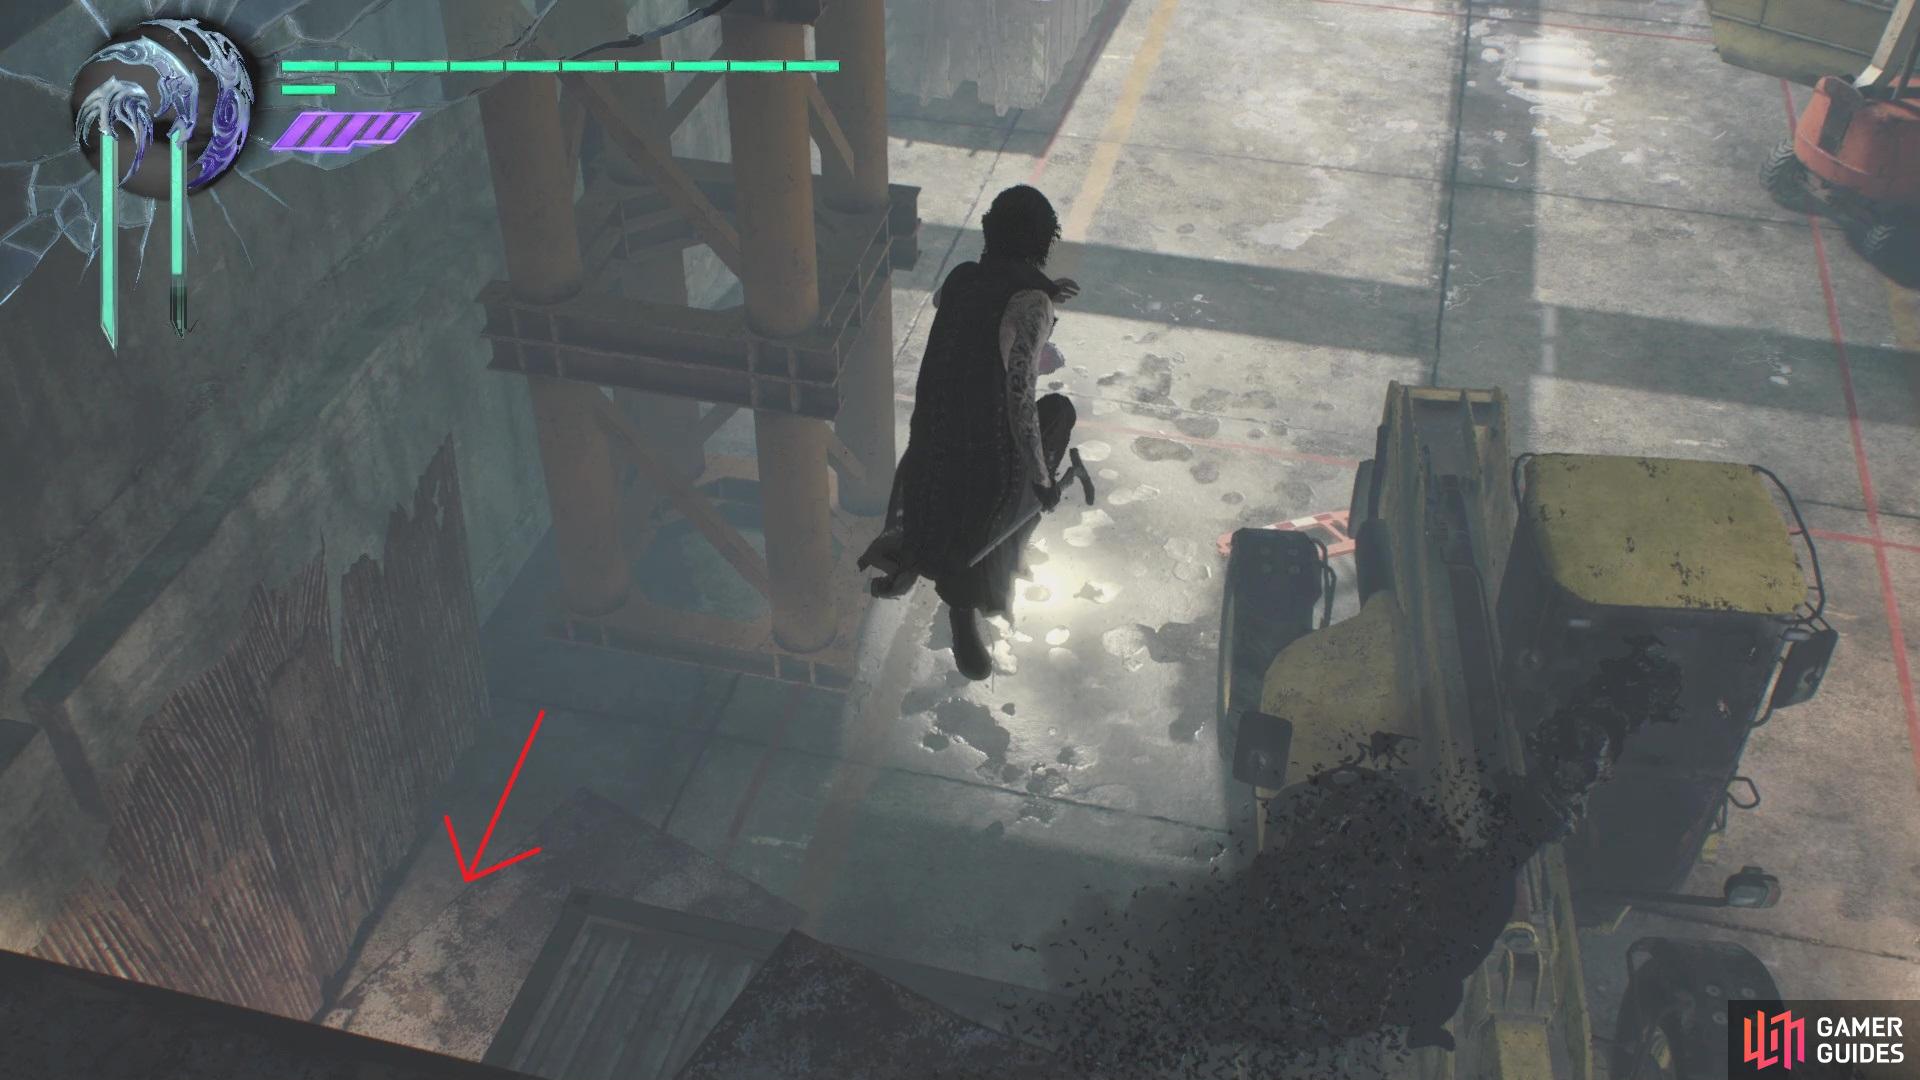
(1 of 2) When drop down here, head in this corner to find a secret area
When drop down here, head in this corner to find a secret area (left), where you’ll find a Blue Orb Fragment (right)
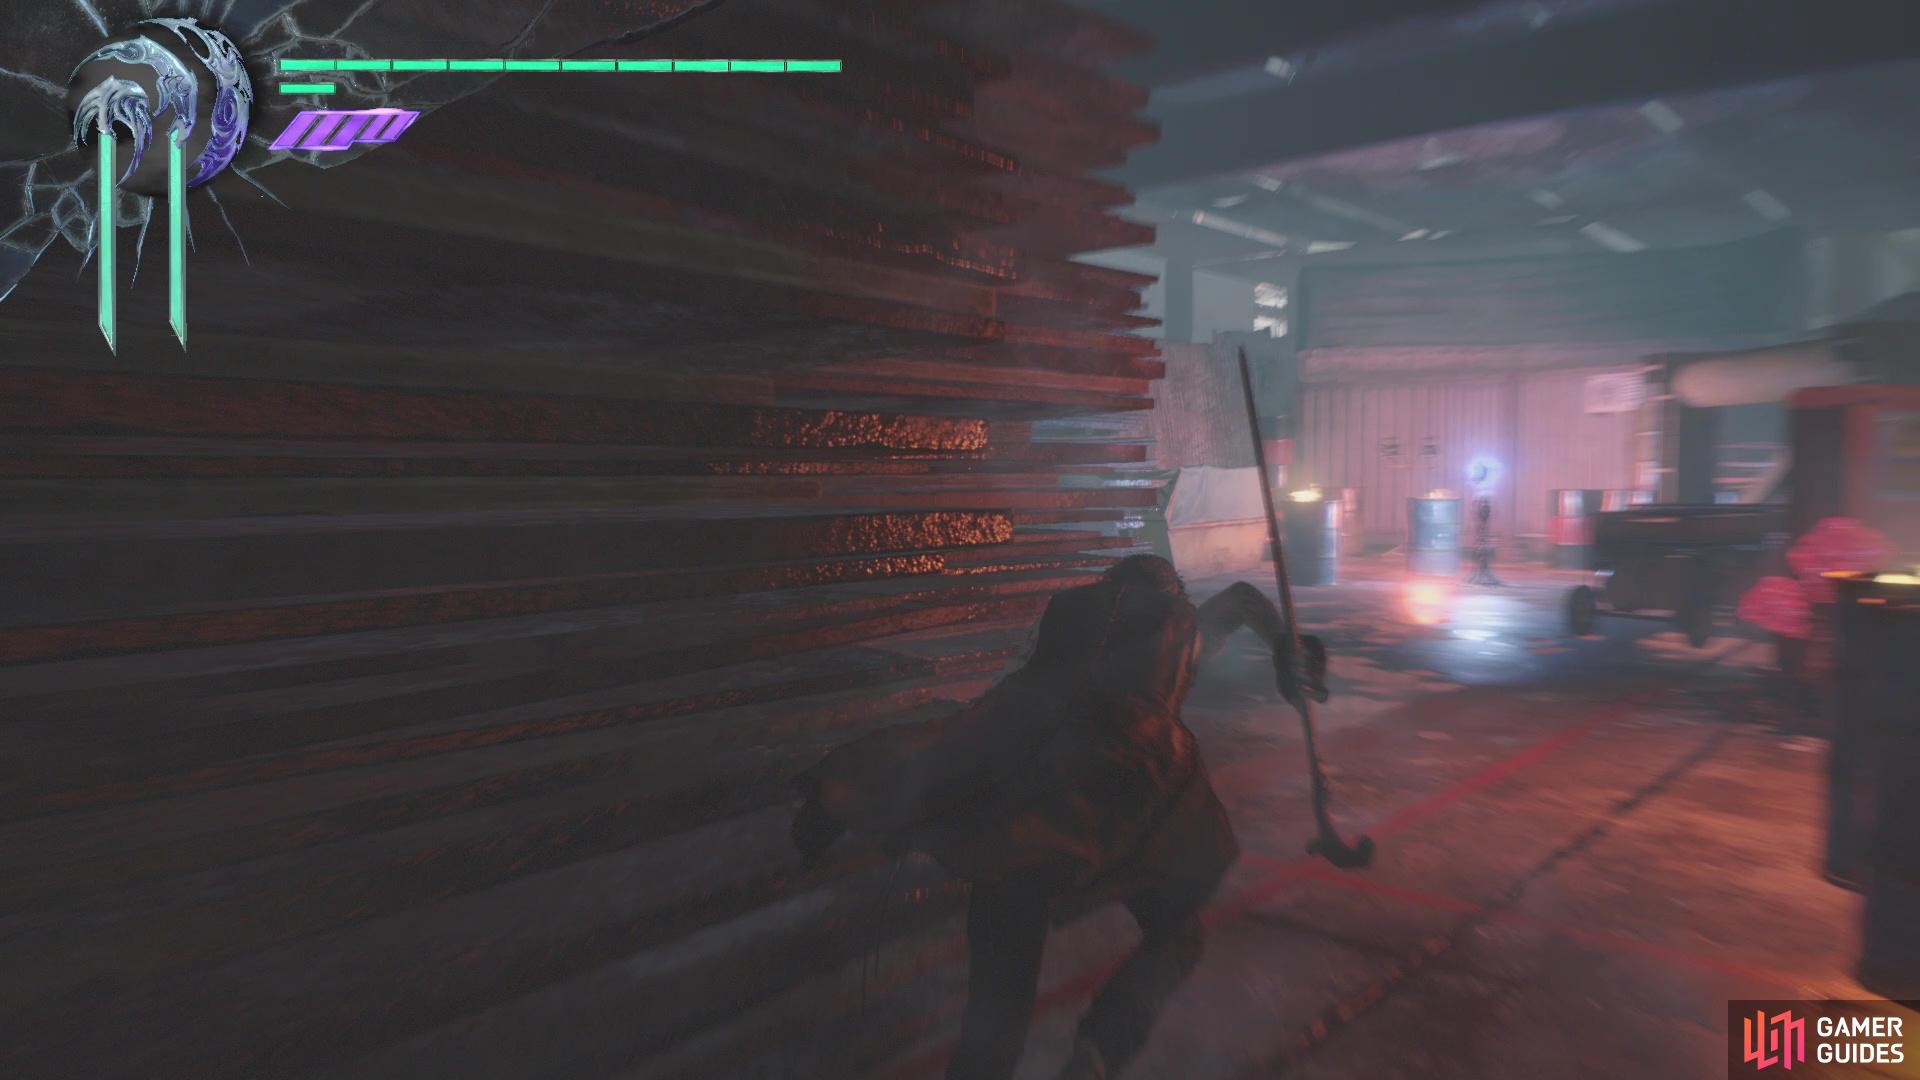
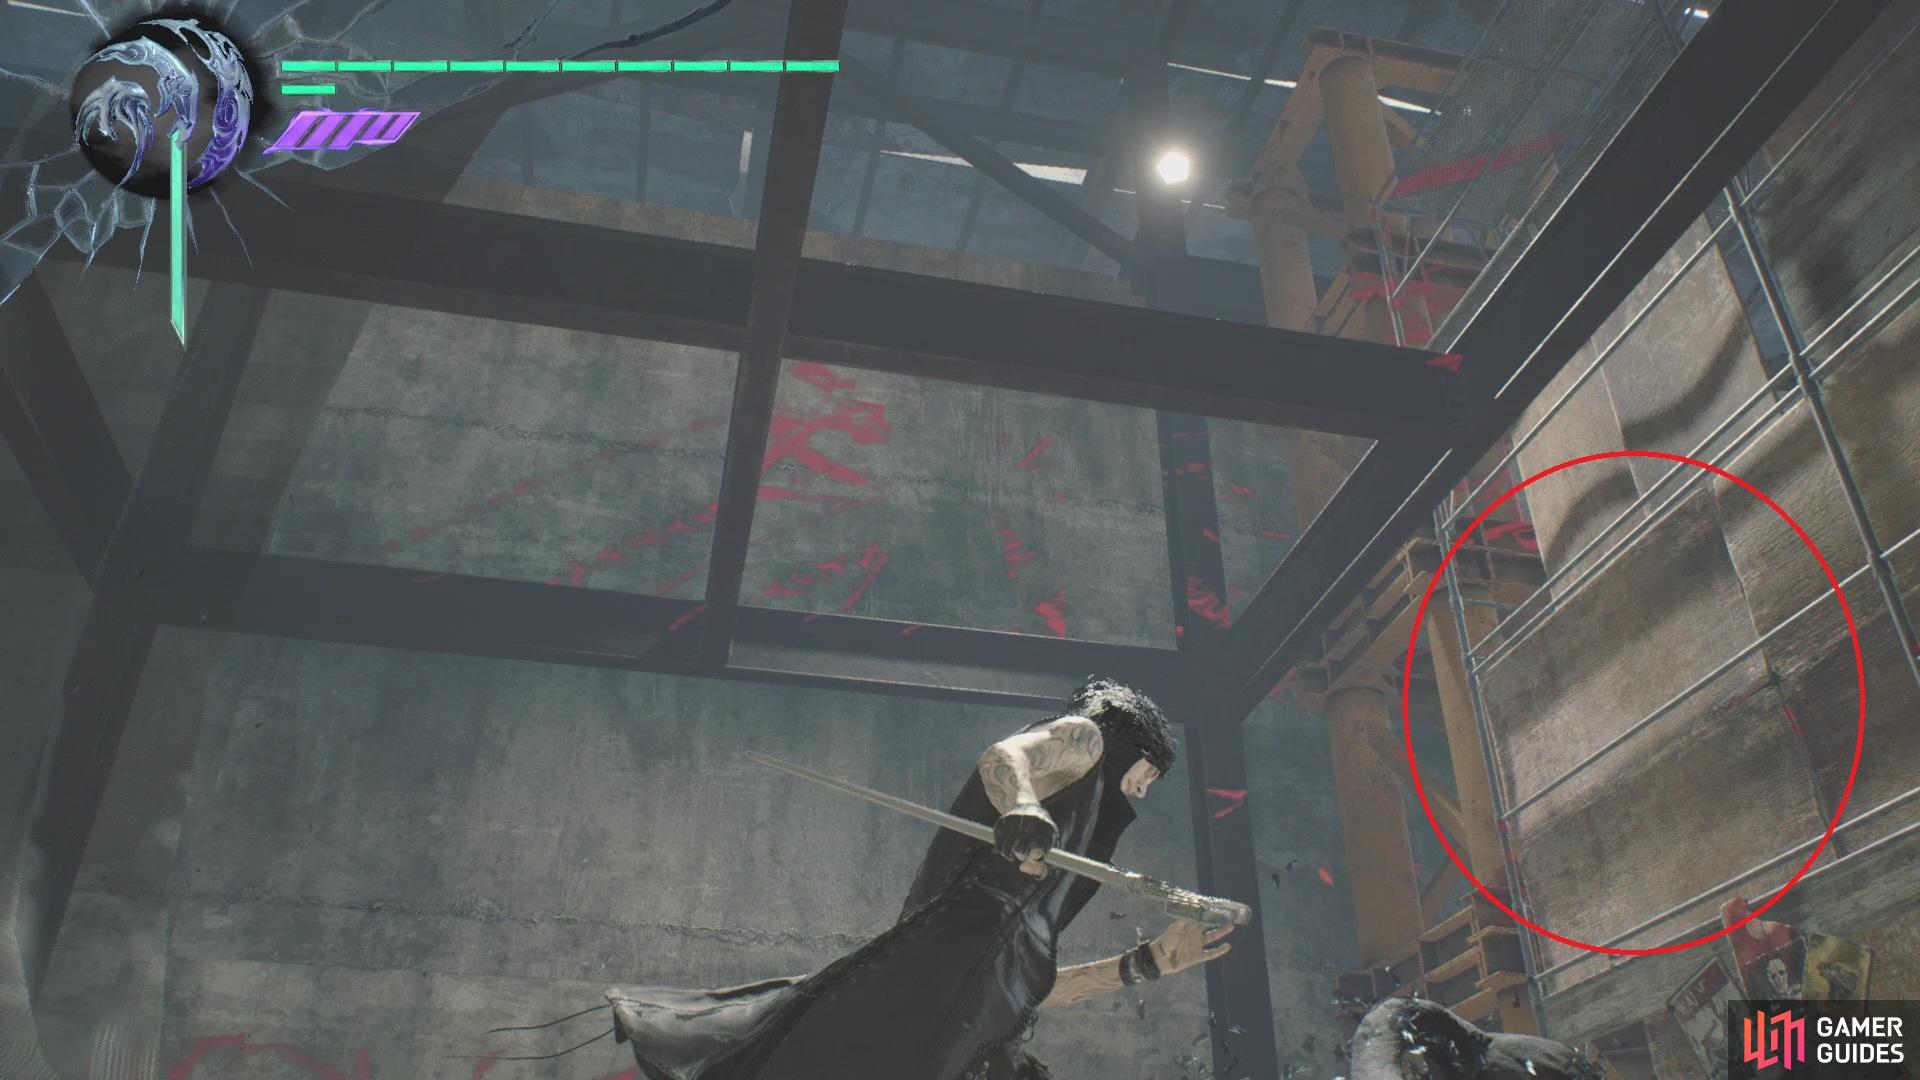
Back in the main area, with your back to the spot where you dropped down, look at the wall to your left and you might see something on it. Summon Nightmare here to have him bust through the one wall opposite of where you dropped into this area. Head into this hidden area to have a fight with some Empusas, of all the varieties. Once you’re done, climb the stairs left of where the game showed the barrier going down and at the top, you’ll find the spot to stand to activate the Secret Mission.
Secret Mission 04
There’s no ifs, ands or buts about this Secret Mission being difficult, as you have to kill all of the enemies without V getting hit a single time. It wouldn’t be so bad if you were up against Empusas and the like, but you’ll be fighting Hell Cainas and Hell Antenoras, all within a pretty small space. One of the best strategies for doing this mission is to have the Promotion ability, which lets you ride Nightmare when he’s summoned. You are invincible while riding him (press Circle/B to attack), so you don’t have to worry about taking any damage.
If you don’t have Promotion, then things can get a little hairy. At the beginning of the Secret Mission, only a single Hell Caina spawns, so you can take care of it on your own. However, you need to be quick, as two Antenoras drop by to say hello not too long within the mission. As time goes on, things get even crazier, as more of each will spawn, leaving you little room to do much of anything except dodge for eternity. Your best bet is to summon Nightmare when the first two Antenoras show up, as he should help weaken them. Trying to get rid of the Antenoras first will help a lot, as the Cainas aren’t too much trouble on their own. As usual, you will be rewarded with a Blue Orb Fragment for completing the mission.
(1 of 2) Summoning Nightmare here will have him break through this wall
Summoning Nightmare here will have him break through this wall (left), Climb to the top of the stairs here to find the spot for the Secret Mission (right)
After returning to the main mission, hop up to where the green orbs are and jump down to the next area, where a new enemy awaits you, the Empusa Queen.
It’s best to study the Empusa Queen at first to see what kinds of attacks she does. Playing as V, it’s easy enough to keep away from her, so you won’t be grabbed, but Shadow or Griffon might. You can easily counter this by dodging to bring them back to you; if you’re grabbed, use your Devil Trigger to escape. This can be a challenging enemy at first, even moreso if you’re going for the Pet Protection trophy/achievement, so keep an eye on their health often (especially Griffon, as he’s kind of weak). Trying to get behind her is a good strategy, as her attacks will always come from the front.
With the Queen dead, follow the path that opened up and jump up the pallets immediately in front of you. As soon as you do, turn around and you should see a good behind you. You can jump on the thing to the side to reach the Purple Orb Fragment in the little alcove. There are some Red Orbs to grab above you, a little further ahead, then there will be another blood clot. Destroy this and find the hole that appeared to return to the sewers.
Back to the Sewers
Follow the tunnel to an open room, where you’ll do battle with more demons. Wait for the central ones to spawn before shooting the explosive tank on the ground, which should get rid of almost all of them. Clean up the rest of them to have another Empusa Queen appear, along with some other Empusa and Green Empusa. Although your focus should be on the Queen, you want to get rid of the Green Empusa first. Deal with her the same way as before, then follow the tunnels that open up afterwards. They appear to be maze-like, but there’s really only one way to go, although you will find a bunch of Empusa impeding your progress.
(1 of 2) The Empusa Queen’s attacks are quite fast
The Empusa Queen’s attacks are quite fast (left), Be aware of her pounce attack (right)
When you’re finished, look for the ramp that leads back outside, to a pretty big area. There’s no enemies here, thankfully, but you will find a few Red Orbs here, as well as refills for health and your DT gauge. You will also find a phone you can use to call in Nico for any upgrades, if you want, like Promotion or anything else you need. Walk/run into the next section to begin a boss fight.
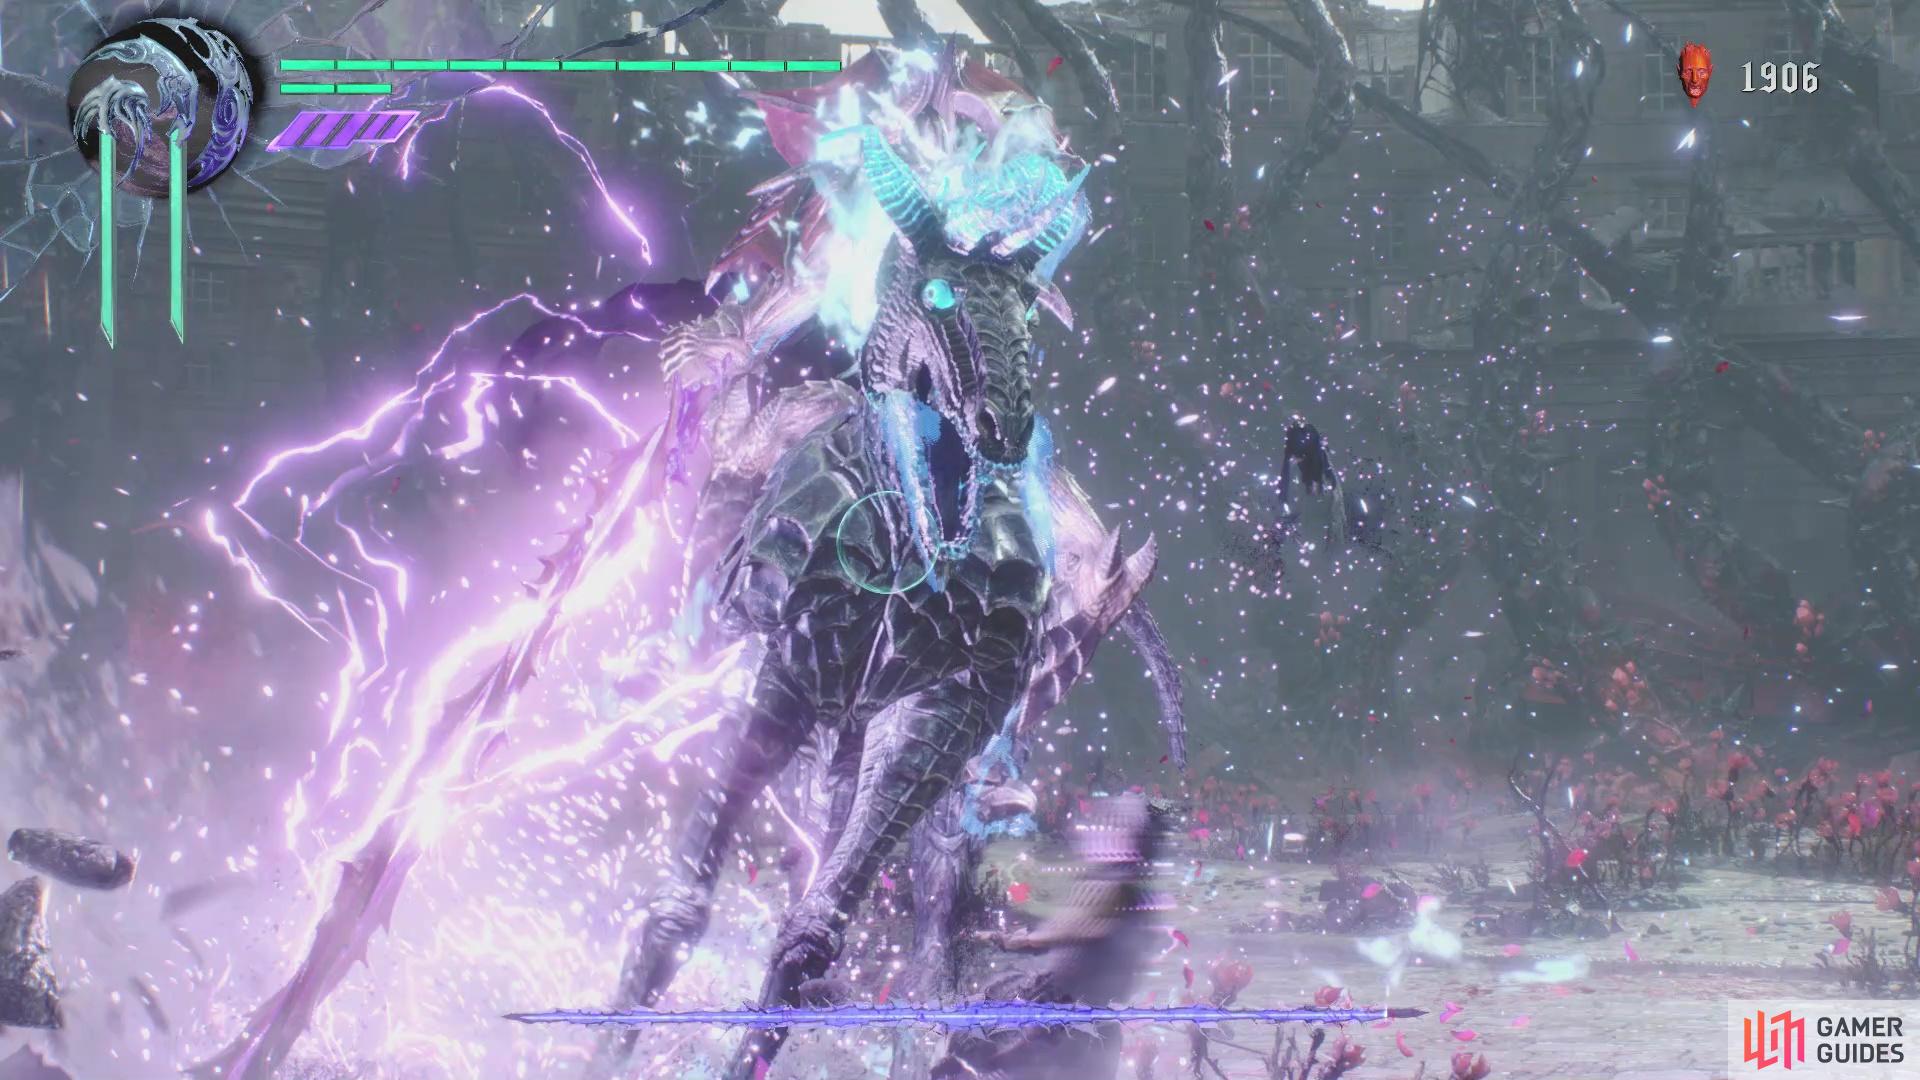
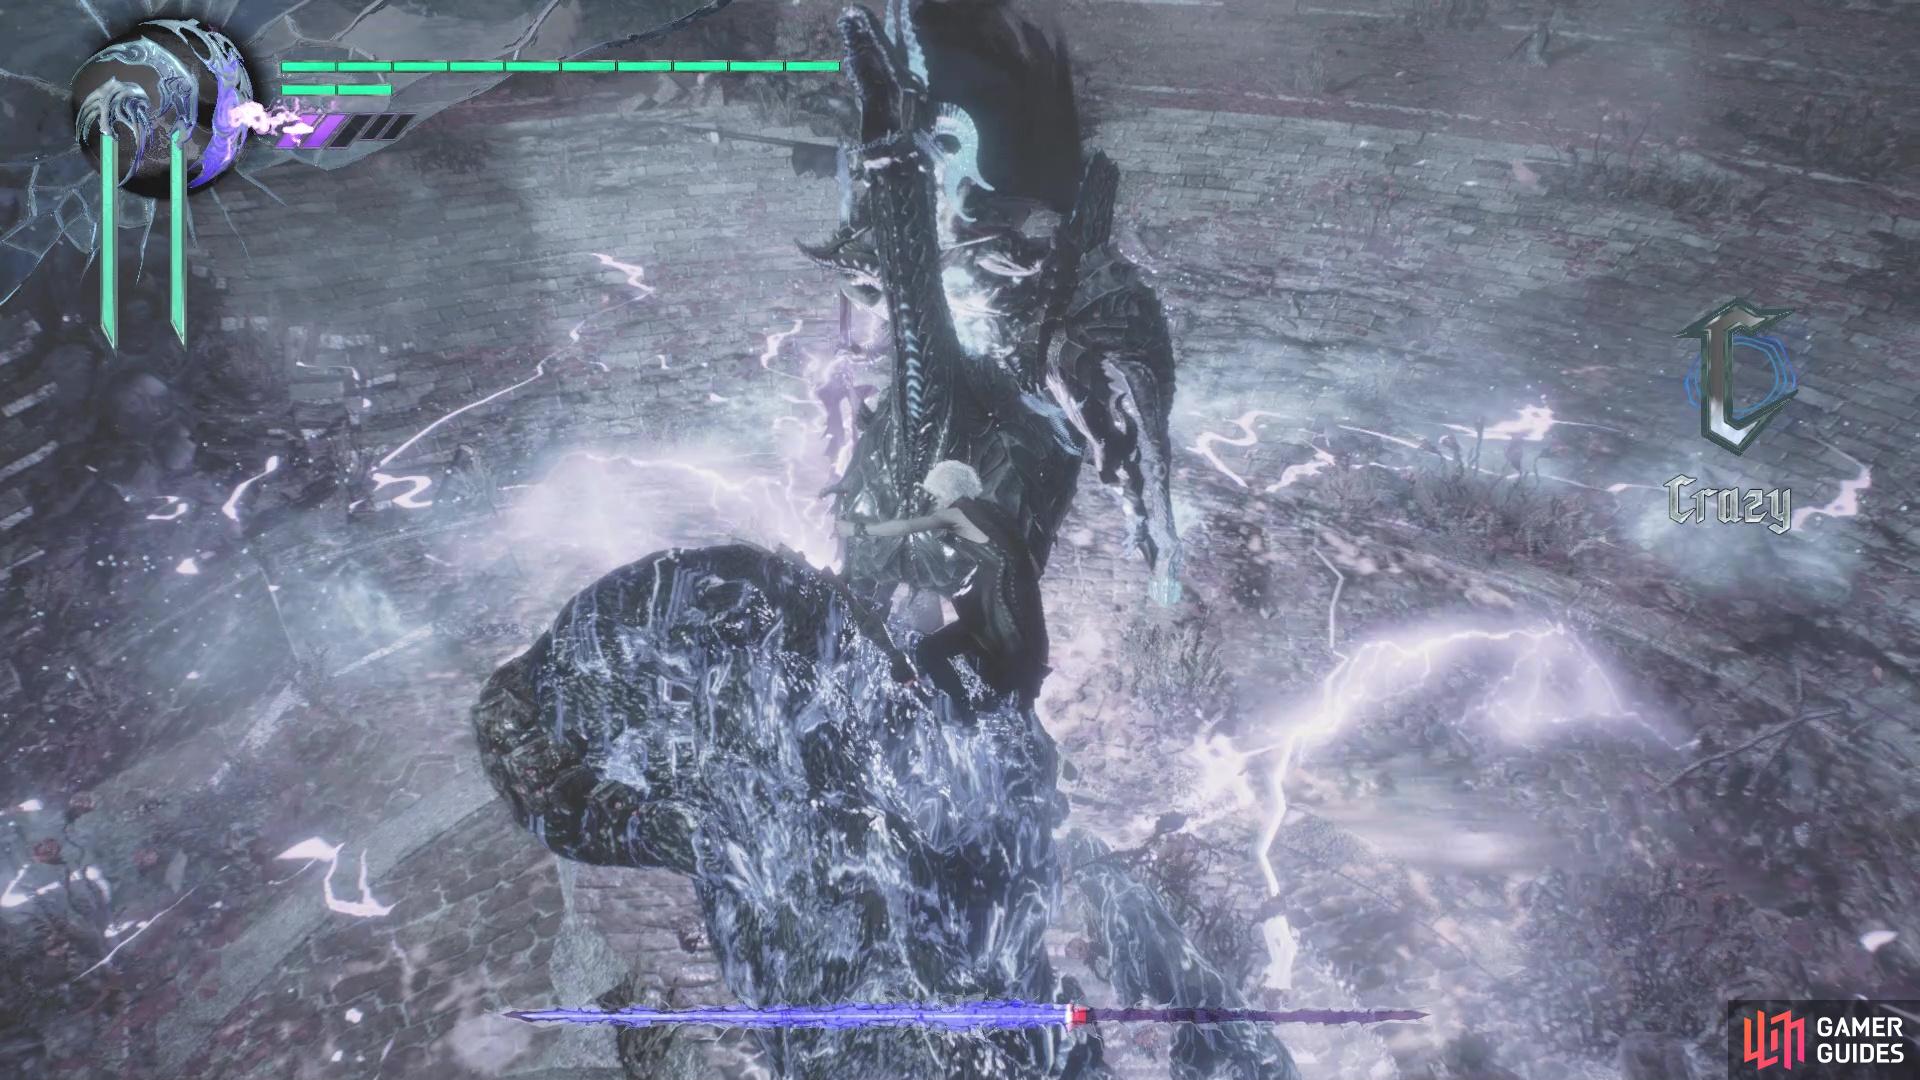
BOSS - Elder Geryon Knight
The Geryon Knight is definitely a boss that doesn’t like to sit still, considering he’s on a horse and all. He will be moving around a lot, so getting hits in on him will prove to be annoying at times. The demon will also like to charge at you quite often, usually trying to take a stab at you with his weapon. He can also take some swipes at you or your pets, as well as stay back to fire some electrified projectiles. All of these are fairly easy to dodge, either by dodging to the sides or backwards.
At some point during the fight, the Knight will head into the middle of the arena and look like he’s charging up for something. What he’s really doing is creating an aura/bubble that slows down time for you while inside of it. While this is active, he will look he’s teleporting behind you and trying to slash at you. If you can see the edge of the bubble, then simply getting out of it will make him go back to normal. At around 50% health or so, the Geryon Knight will begin stabbing the ground with his weapon, producing a small electric field around him on the ground. He can also charge up his weapon, while holding it in the air, then release the energy around him, like lightning bolts.
(1 of 2) A quick side dodge will help you avoid damage from the charge attack
A quick side dodge will help you avoid damage from the charge attack (left), With Promotion, you will be immune to damage when riding Nightmare (right)
That about sums up the moves of the boss fight, so let’s go over some strategies to help in defeating him. First and foremost, keeping Shadow and Griffon alive is definitely important, not just for the trophy/achievement, but also because you’re going to want to keep them around for dodging. So, whenever you see the boss about to do some moves, it might be wiser to play a bit on the defensive side. It only takes a one or two fights for Griffon to get stalemated, with Shadow maybe taking up to three or so hits. Remember that summoning Nightmare will help tremendously, as Shadow and Griffon are invincible and that’ll be extra damage.
 Sign up
No Comments