
You will unlock a new major distraction at the beginning of this episode, which is the Chara World. Unlike the previous games, Chara World is now a board game and only the character you intend to power up may enter. Test it out and see how it plays, but be warned that the enemy level for the lowest difficulty is around 24, so if you don’t have a character around that level, then it’s a good idea to stay away from it.
You can find the free chests at the following locations:
- On a lamppost in the area by the Curry Shop
- On the platform right above Christo
- Next to the fountain in the middle of the Netherworld
Zeroken will join your party upon starting the first map in this area.
Isolation Camp
| Enemies | Equipment | Evility |
|---|---|---|
| Lv. 25 Izuna | Counterfeit Medal, Round Shield, Ninja Tabi | Good Fortune |
| Lv. 25 Genin (x3) | Knight’s Sabre, Massager, Magical Vest | Mirage |
| Lv. 25 Genin (x4) | Massager, Knight’s Sabre, Magical Vest | Mirage |
| Lv. 25 Chunin | Orb Scepter, Magical Vest | Mirage |
| Lv. 25 Exorcist (x3) | Sky Hunter, Magical Vest | Bushido |
Right off the bat, you will be facing a boss enemy in this chapter. Izuna is nothing but a Nine-Tail Fox, whose Evility you will see increases her stats by 5% for each level of the Bonus Gauge there is. That means that you don’t want to perform combos and just do single attacks, executing them after you input the commands. This limits the Bonus Gauge for you, however it also limits the stat increase for her. In addition to that, she has access to both Fire and Mega Fire.
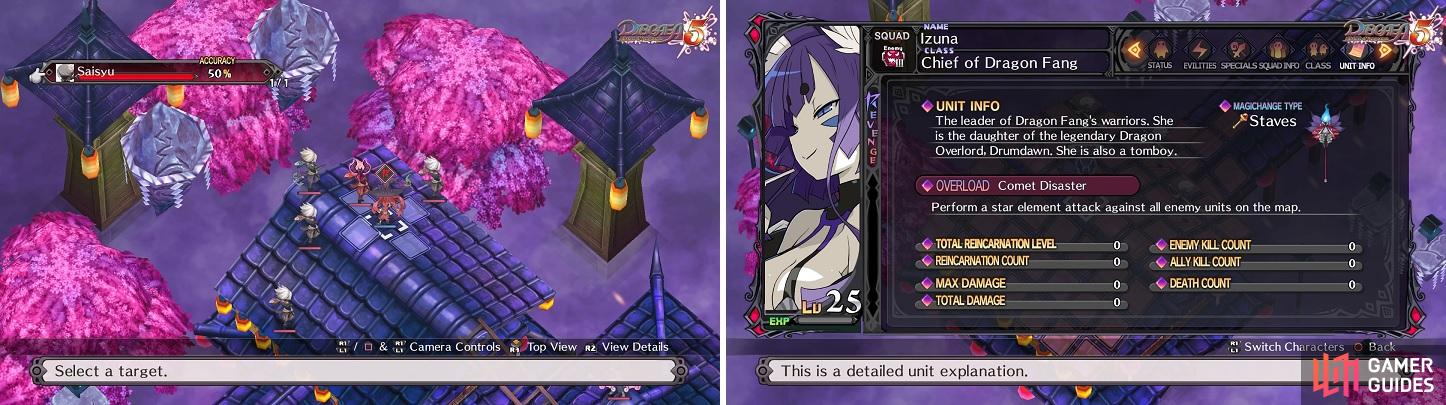
Use ranged attacks on the Ninja to avoid them dodging it (left). While Izuna is pretty much a normal Nine-Tail Fox, she does have an Overload skill (right).
The Genin on this map are probably your first encounter with enemies that utilize the sub-weapon system, with these enemies having both fist and sword skills. Their Evility makes it so you have a 50% chance of hitting them when you are next to them, so it’s best to hit them with ranged attacks. The Exorcists have an Evility that strengthens their attacks if they’re only targeting one person, so they are one enemy you actually want to group your characters with, to minimize the damage.
Demon Mansion
| Enemies | Equipment | Evility |
|---|---|---|
| Lv. 25 Diabolist (x3) | Knight’s Sabre, Magical Vest | Bushido |
| Lv. 25 Chunin (x2) | Massager, Magical Vest | Mirage |
| Lv. 25 Chunin (x3) | Orb Scepter, Magical Vest | Mirage |
| Lv. 25 Diabolist (x3) | Sky Hunter, Magical Vest | Bushido |
| Geo Symbols | Geo Effects |
|---|---|
| Red | No Entry |
| Red | No Entry |
| Null | Enemy Boost +50% |
This can be a troublesome map, especially if you don’t take care of the Enemy Boost +50% Geo Effect near the beginning of the battle. However, it’s behind sections of the map blocked off by No Entry effects, so you’ll need to get rid of those first. Before you do that, though, take care of the three Diabolists with swords that are isolated from the other enemies near your Base Panel. With them out of the way, head towards the first No Entry symbol and destroy it, knowing full well that the corresponding Geo Panels on the pathways are now Enemy Boost +50% panels.
It’s also likely that the Diabolists with bows and the two Chunin will move forward to start attacking, so defend with any other characters for now. Move towards the next symbol and destroy it, while trying to stay alive, then move towards the Enemy Boost symbol to get rid of it. Once you do that, it’s just a matter of cleaning up the remaining enemies.
Relaxation Shrine
| Enemies | Equipment | Evility |
|---|---|---|
| Lv. 27 Chunin (x4) | Pixie Staff, Round Shield, Ninja Tabi | Mirage |
| Lv. 27 Mythic Fox (x2) | Counterfeit Medal, Round Shield | Good Fortune |
| Lv. 26 Chunin (x2) | Shadow Howler, Round Shield, Ninja Tabi | Mirage |
| Lv. 25 Chunin (x2) | Pixie Staff, Round Shield, Ninja Tabi | Mirage |
| Lv. 25 Chunin (x4) | Large Naginata, Round Shield, Ninja Tabi | Mirage |
| Lv. 20 Warcat (x8) | Wolf Fang, Round Shield, Energy Belt | Weakening Aura |
The map is essentially split into two sides, with “bridges” connecting both in two places and the same amount of enemies on either side. On the enemies’ first turn, the Mythic Foxes will Magichange with the Chunin next to them. The best thing to do is to send all your characters to one side, so as not to attract too many enemies at once or split your own forces. Since it’s highly likely all of the enemies will start coming towards you at the beginning, it’ll take some time for the one side to get to the other, giving you ample opportunities to taking out as many enemies as possible. The Warcats, although high in number, are decently handicapped by only being level 20. Remember to try and use ranged attacks on the Chunin, so they don’t have the chance to dodge them.
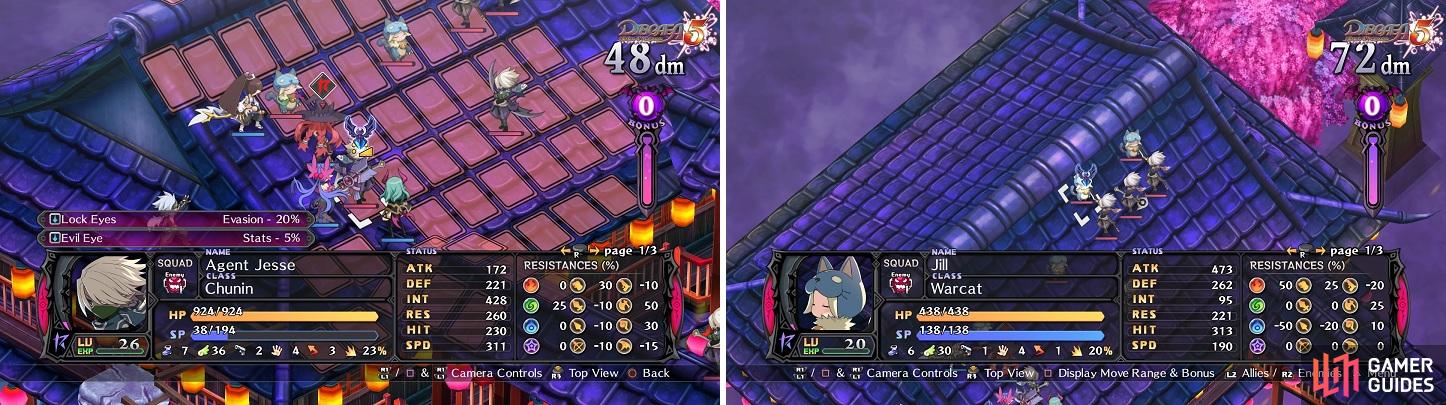
Sticking to one side will allow you to concentrate on a lesser number of enemies and keep your party all in one place.
Sharp Fang Shrine
| Enemies | Equipment | Evility |
|---|---|---|
| Lv. 28 Lost Elite Officer | Wolf Fang, Round Shield | Immortal Body |
| Lv. 27 Orc Captain (x7) | Wolf Fang, Round Shield | Group Strategy |
| Lv. 27 Mischief (x4) | Counterfeit Medal, Round Shield | Bullying |
| Lv. 28 Thunder Fist | Power Knuckles, Round Shield | Rapid Movement |
| Lv. 28 Wind Spinner (x2) | Power Knuckles, Round Shield | Rapid Movement |
| Lv. 28 Izuna (Neutral) | Counterfeit Medal, Round Shield, Camo-Clothes | Good Fortune |
| Lv. 25 Diabolist (x2; Neutral) | Shadow Howler, Round Shield | Bushido, Self-Sacrifice |
| Lv. 25 Chunin (x4; Neutral) | Civilian’s Jitte, Round Shield | Mirage, Self-Sacrifice |
| Geo Symbols | Geo Effects |
|---|---|
| Red | Movement +1 |
| Null | Movement +1 |
Despite the warriors of Dragon Fang being neutral in this battle, they will still attack you should you get too close. All of the non-Izuna units have Self-Sacrifice as a common Evility, which boosts the others’ Revenge gauge by 20% should they perish in battle. That means if five of them die, then the remaining two Dragon Fang warriors will have a full Revenge gauge. As for the Lost Army, the two enemies you need to watch out for are the Fight Mistresses and the Horseman.
Fight Mistresses, as you might know, have Rapid Movement, which increases their evasion rate the more they move during their turn, so be prepared in case one of your attacks miss. They also have an incredible amount of counters, so try to get them with ranged attacks. The Horseman has an annoying unique Evility of cutting all physical damage in half, so if you have a magic user (especially with wind), then make them go after him.
You do not need to worry about a Game Over or anything should all of the Dragon Fang guys die, as nothing will change. It should be said that by the time you get to everyone else, though, Izuna will probably be the only one left alive. As you will notice at the beginning of the battle, there are a lot of Geo Panels with the Movement +2 effect, making it a bit easier for your characters to join in the battle. Of course, unless your characters have at least 29 Jump, then there’s only path you can go on to reach said enemies. Depending on what the Lost Army and Dragon Fang guys do, there shouldn’t be too many enemies left for you.
Prison of Sacrifice
| Enemies | Equipment | Evility |
|---|---|---|
| Lv. 35 Bloodis | Power Knuckles, Round Shield | Fighting Aura |
Bloodis is a very strong enemy, not only being level 35, but also with an annoying Evility that limits your movement to one if you’re within 3 panels of him. Despite him having access to a lot of skills, he can only use the fist ones and Dark Rosario, which hits in a cross-shaped pattern directly in front of him; it can inflict Weaken on your characters and is of the Star element.
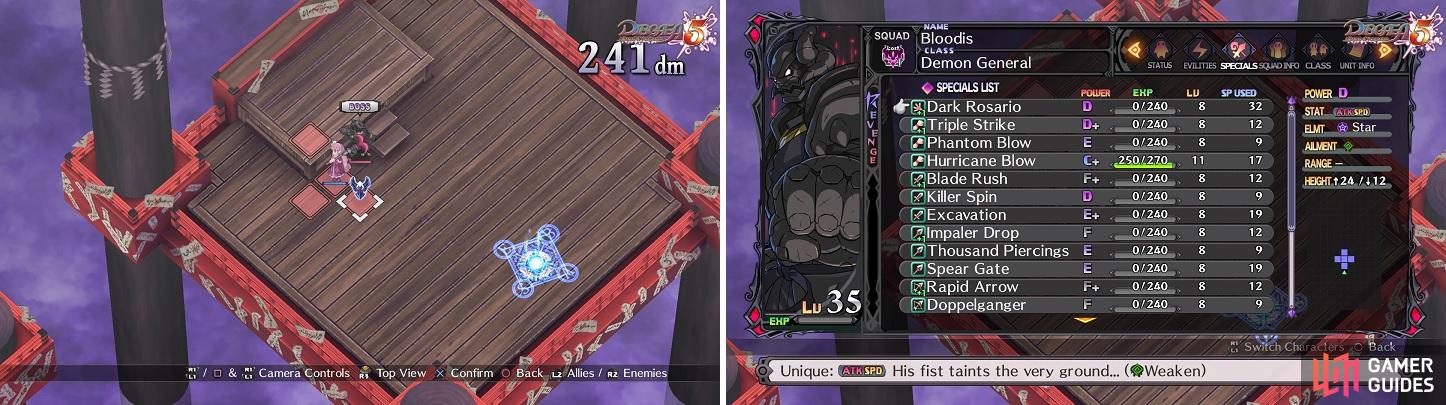
Bloodis’ Evility limits your movement to one panel when you’re close enough (left). Although he has access to many skills, he can only use his Unique and Fist skills (right).
Hopefully you’ve been eating your Wheaties or have a decent number of strong party members, preferably some with ranged attacks so you don’t have to deal with Bloodis’ Evility. The most troublesome thing about this battle is his Overload skill, which buffs his stats by 100% for two turns, making him even stronger. There’s no real trick to the battle, as it’s pretty much a head-on battle, so either defeat Bloodis before he manages to get a full Revenge meter, or be prepared to lose a few troops in the process.


 Sign up
No Comments