
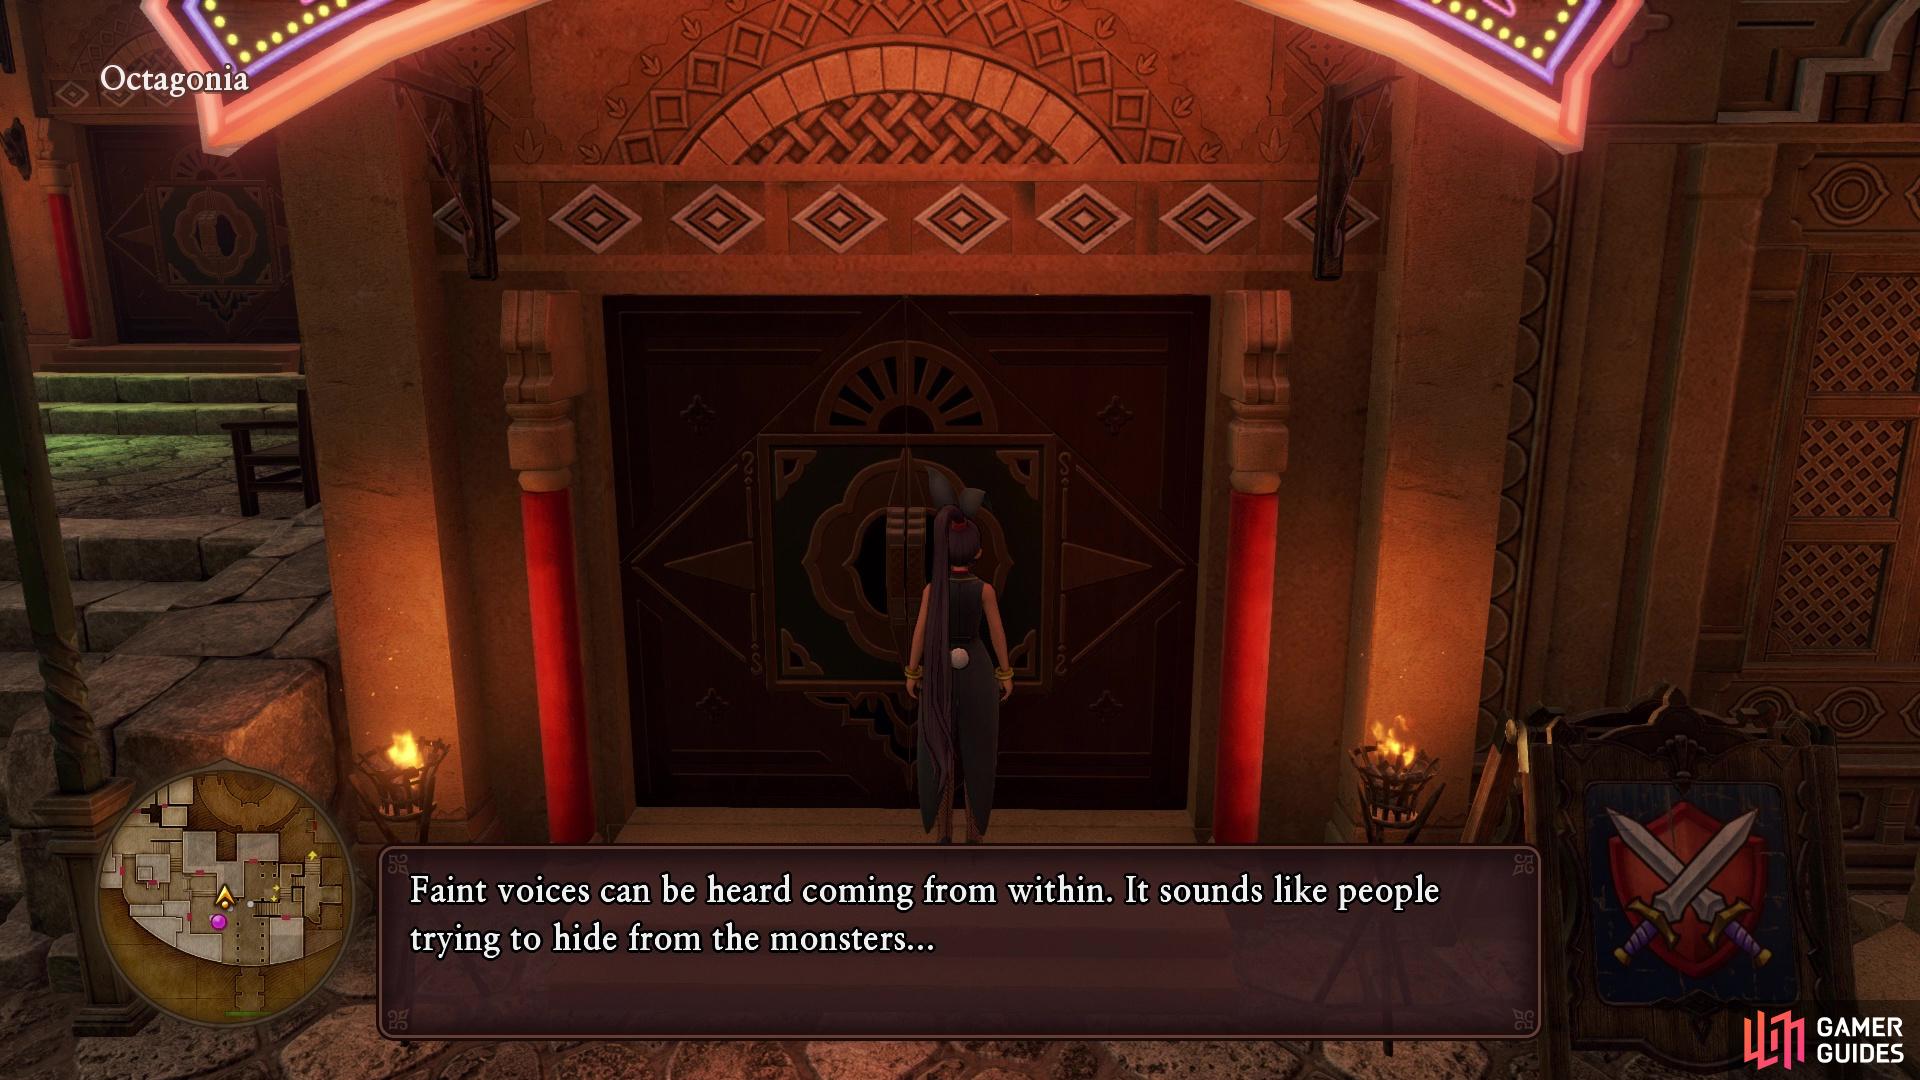
The second interlude will belong to Jade, as is evidenced by the title of it. She arrives at Octagonia, a place you should be familiar with, although she is warned that things aren’t exactly the same as they used to be. Outside of the town are some Vicious Great Sabrecats and while you can fight them, it’s probably better you didn’t. Plus, they aren’t missable, since you will be able to come back later on to get their bestiary entry. Head inside Octagonia now and you will see that the town has been overrun by monsters.

Jade journeys forth
You aren’t really going to do any fighting right now, but you decide to help out someone who is being harassed by some monsters. The monster who took over the town, Booga, is on the third level, so that is where you will be going. Note that you can’t purchase anything in town, since all of the doors are closed, since the people are hiding from the monsters. That means there’s nothing for you to do, except go to the third floor and meet up with this Booga. Feel free to use the Goddess statue to save, then take the exit near it that’s just up the stairs.
There’s nothing to do on this floor, either, so continue to Booga. If you get lost, locate the monster with the pink bubble and use the path right next to him. Proceed up the stairs when prompted, and you will finally meet the monster in charge. He’s taken a real shine to Jade and wants her to wear a special suit, although it takes a little coercion to make her wear it. Of course, being an evil monster and all, he goes back on his word and at the end of the scene, you’ll be sucked into another dimension.
All of the shops are inaccessible while you’re here
Limboo
When you regain control, head straight forward for a scene, where you witness what is truly going on here. Continue forward after the scene has finished, heading to the Cells area. You can find a few things here, so head towards the row of cells, and enter the southeastern one first. Break the pots here to find a Rockbomb Shard, then smash the pots in the north-central cell for a Special Medicine. The big guy in the northeastern cell will act as a church, so make sure to save your game. None of the other cells have anything and to continue the story, go into the southwestern one.
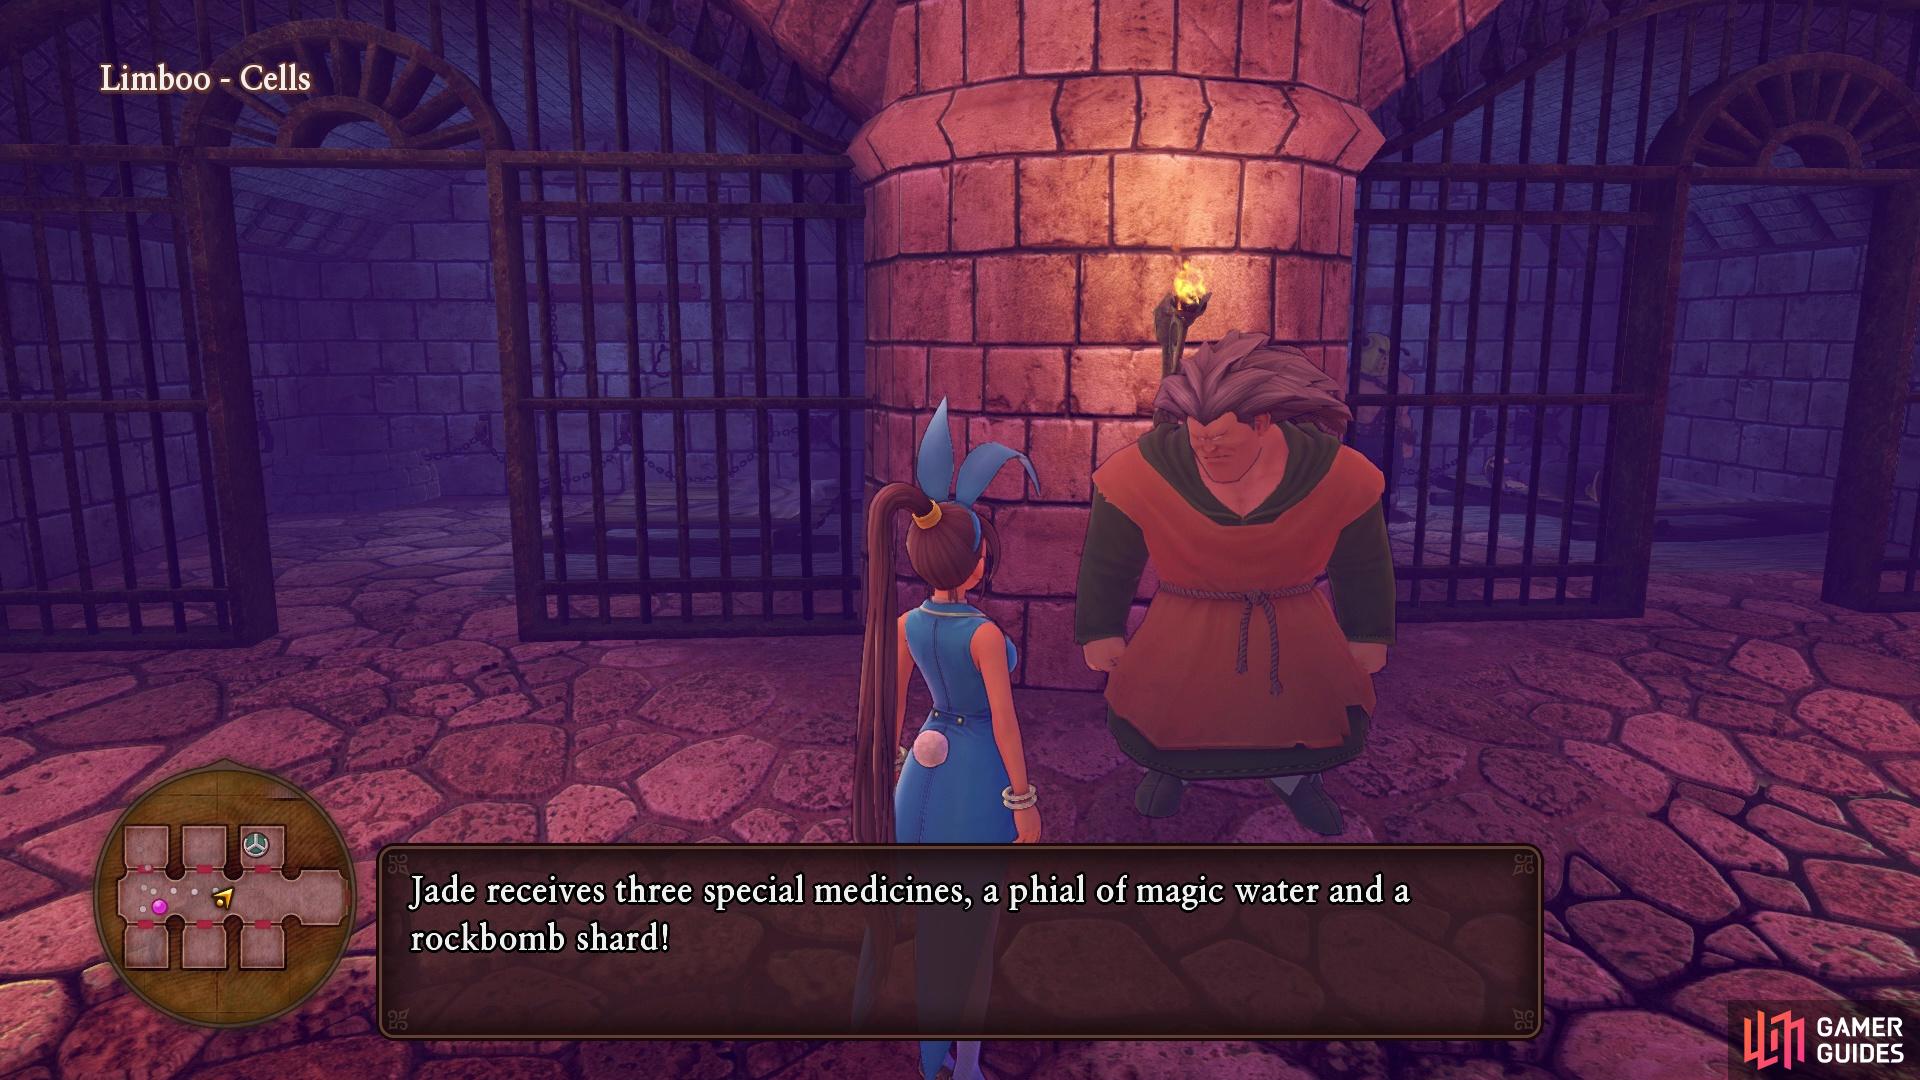
You will meet up with fighters from the tournament, including Vince. You learn about what’s happening in this dimension, as well as the monster running it. When someone comes to take one of the participants to “pay their debt,” Jade volunteers to take his place. Start walking to the entrance and along the way, one of the prisoners will give you 3 Special Medicines, a Magic Water, and a Rockbomb Shard. If you’re planning on using these, make sure to place them in Jade’s inventory, but you cannot lose the following battles, due to a certain suit given to you. When you’re ready, speak to knight monster guarding the exit to start the gauntlet.
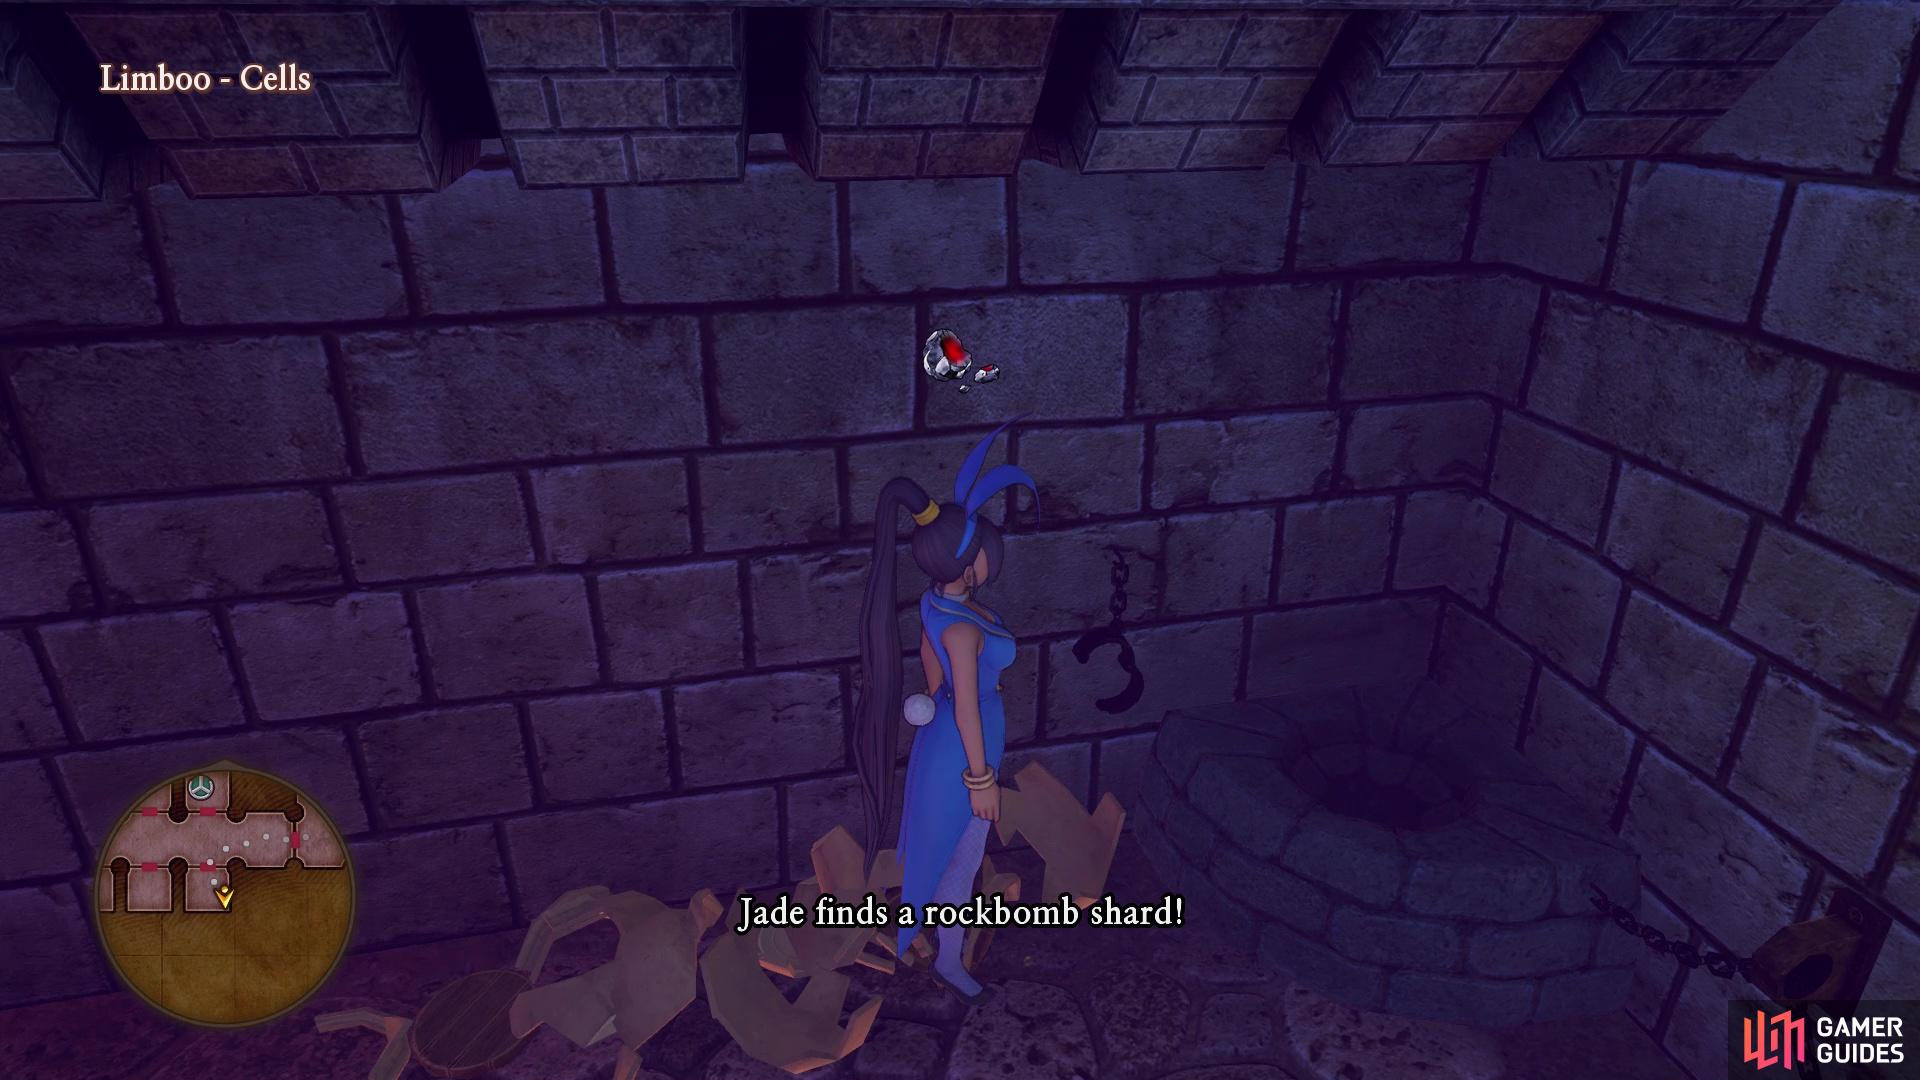
(1 of 2) You can find some items in the cells
You can find some items in the cells (left), This NPC will hand you some free items before you go fight (right)
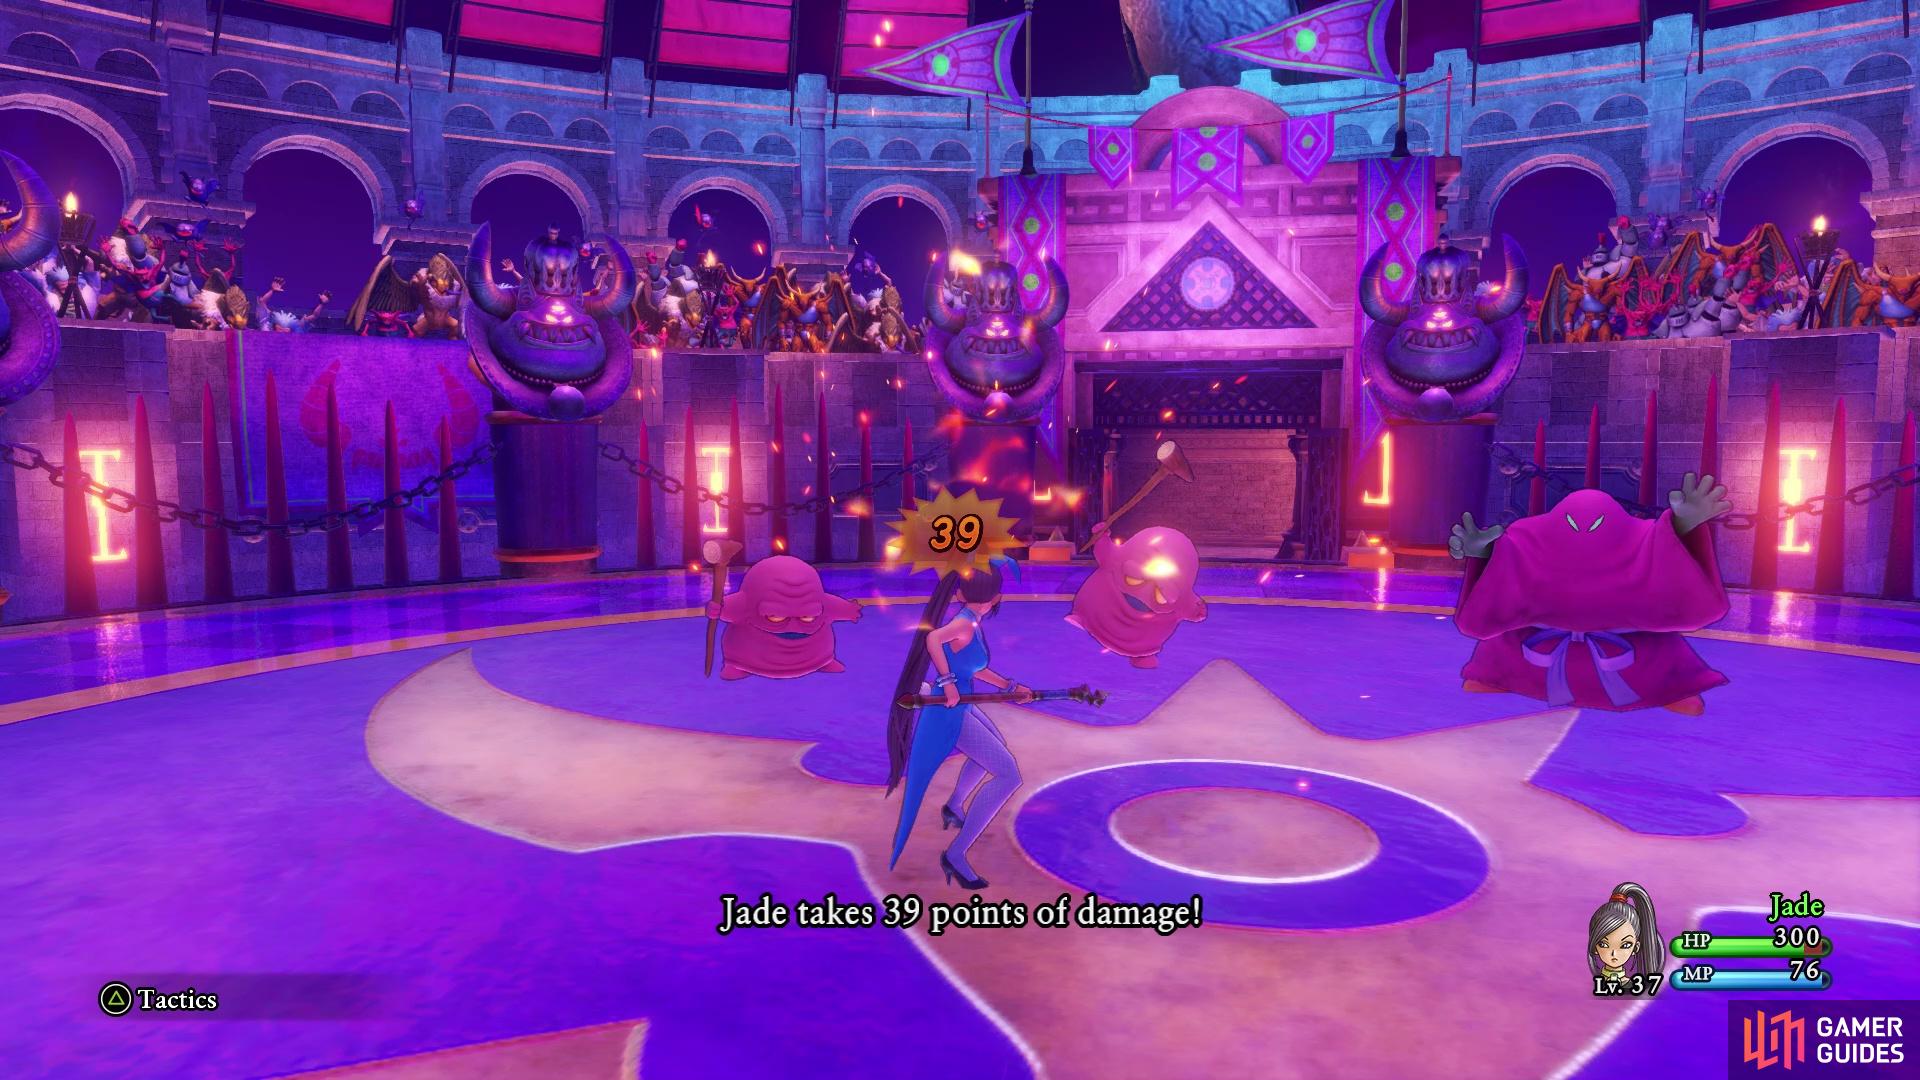
Fight 1 - Boodiful Hoodlums
All three enemies here are physical attackers, who will usually either do a normal attack, Fizzle, or use Muster Strength to have a stronger attack on their next turn. As previously mentioned, if you get defeated in battle, the Hare-Raising Suit you have on will automatically revive you, causing the enemies to flee. However, you probably want to win these battles, as Jade will gain experience. If you headed straight for Multithrust, then you should have Party Pooper, so use that to hit all three enemies at once.
The second fight will start immediately.
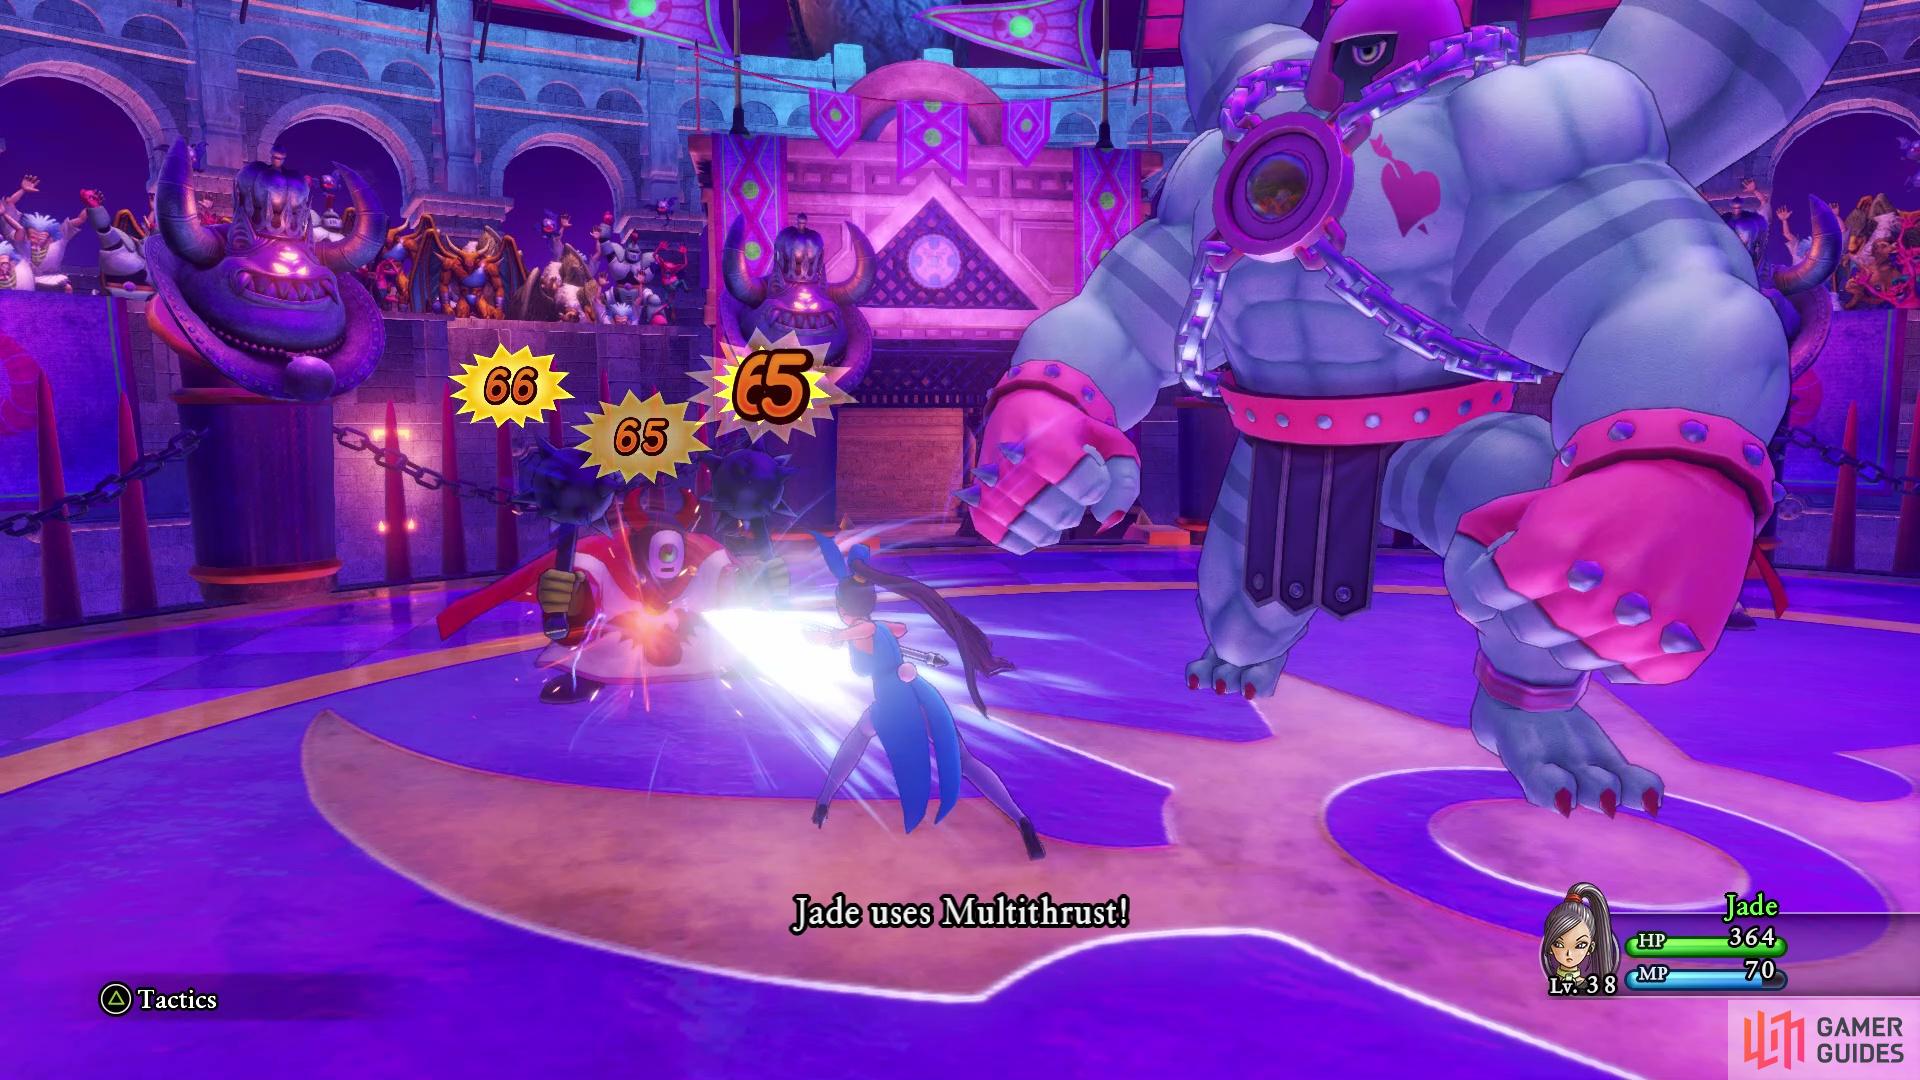
Fight 2 - Boodiful Wizard, Boodiful Hocus-Poker
The second fight will have you against magic users. The Hocus-Poker can use both Boom and Anathematise, the latter of which will reduce your resistance to magic. The Wizards, on the other hand, can use Frizzle, Decelerate, and Kasap. Since their physical prowess should be limited, Kasap won’t be a problem, and you will always get a turn in each round, no matter what. Frizzle does do a bit of damage, in the range of 60+ damage. Therefore, it’s probably better to concentrate on the Wizards first.
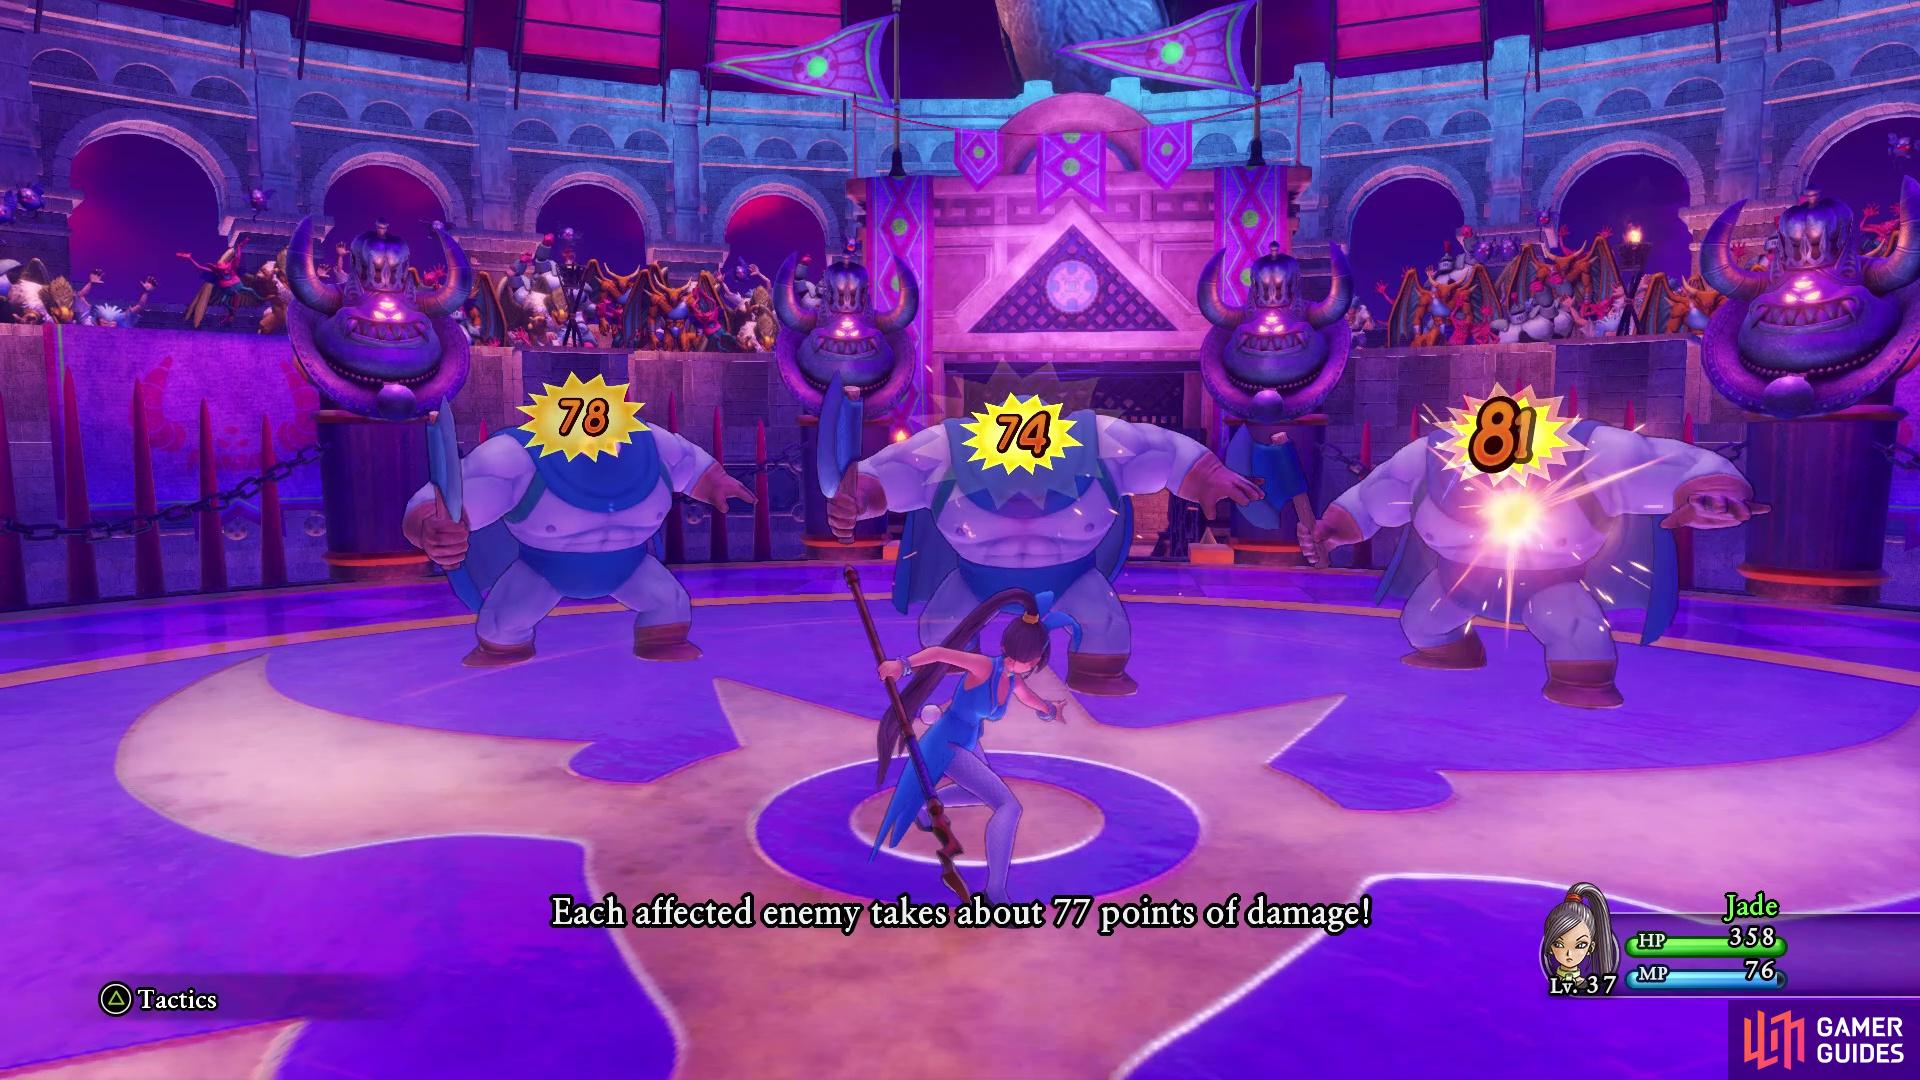
(1 of 2) Party Pooper is a great attack against enemy groups
Party Pooper is a great attack against enemy groups (left), The Wizards should be first priority during the second fight (right)
Fight 3 - Boodiful Sootbonce, Boodiful Smogbonnet
The Smogbonnets have an attack that can poison Jade, so you will need to be careful about that, although there’s really nothing you can do about the poison. Their physical attacks are pretty weak, but it can add up a bit, since there are six enemies. The biggest thing you want to prevent is them being pepped up, as one of each can perform a maneuver together called Just Claws. While you still can’t be defeated, you can simply eliminate one set of enemies as soon as possible.
There will be a scene after the third fight, with you having to fight Boodica herself. Thankfully, you will have some help here, in the form of the former tournament fights, including Vince.
BOSS - Boodica
Boodica is joined by her Right-Hand Man and Left-Hand Man in this battle. Both of them have around 350 HP and use the same spells, which includes Acceleratle, Kasap, Kabuff and Boom. If you plan on making this fight over in a flash, you should take them both out quickly. Since you can’t control your companions, just use Multithrust on each of them and hope your friends focus fire on them to bring them down. Boodica has a few more attacks up her sleeve, other than a normal attack that you probably know is strong, considering her size and all.
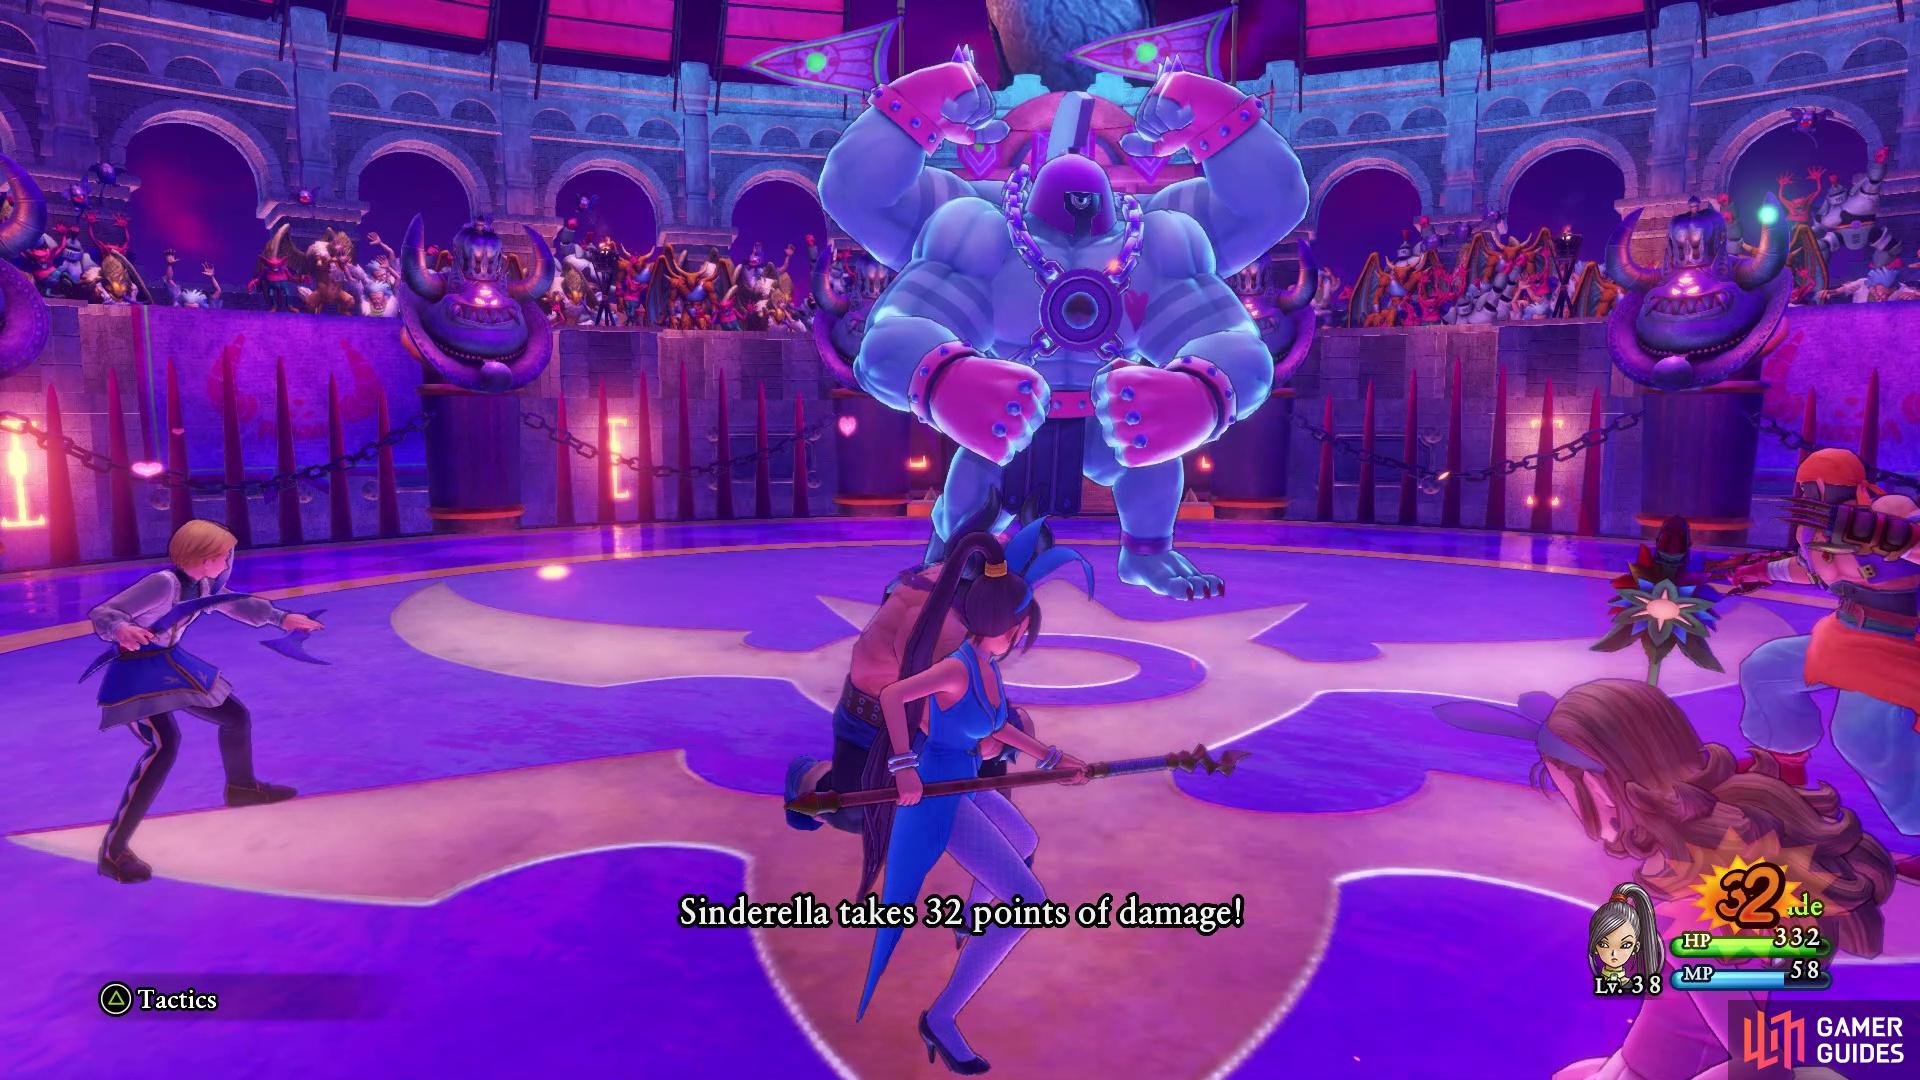
(1 of 2) Go after the lesser enemies first
Go after the lesser enemies first (left), Boodica’s flexing can charm some of your comrades (right)
She has around 1600 HP and can act twice per round. Boodica also has a chance to pep up during combat, which comes with all of the usual increases in stats/damage. Whenever she flexes, your characters will either be mesmerized or all of the enemies will have their attack increased. Boodica also has a multihit attack with her fists, dealing a good bit of damage. There is also a boulder she can toss, doing upwards of 100+ damage to the entire group. Thankfully, Sinderella can use Midheal to keep you fresh, plus she also has access to Oomph to increase the power of your Multithrusts.
Once you finish Boodica, watch the events that follow, bringing an end to Jade’s interlude.

 Sign up
No Comments