
First thing everybody should want to do is stash all the junk they found in the Everfall… and note that the Everfall will not be plagued by tentacles if you should wish to visit it again in search of loot.
Masons Midnight Mission
Near the Gran Soren Union Inn, Mason, your stalker from when you first entered Gran Soren, has a job for us. Apparently Salvation, a cult you’ve heard precious little of up until now, might have an inside man in the castle. Your job? See who this person might be. This quest will begin automatically if you approach the castle at night, so naturally, it’ll be put off for as long as possible.
Devyns Barber Shop
Instead, lets explore into the bowels of the city. Starting at the ‘Fountain Square’ head to just outside of ‘Arsmith’s Alehouse’. There are two roads that head south-east from the Fountain Square, and you should follow the southern-most one. Head down a ramp, and the first house immediately in front of you is ‘Devyn’s Barber Shop’, where you can make minor cosmetic changes to your Arisen and Main Pawn for a small fee. If you aren’t pleased about the aesthetics of your character, you can change your hair color, eye color, hair style, skin tone, and voice if you’re willing to pay for it. That’s one skilled barber! Don’t worry, though. Capcom covers by having her say she was a doctor before she was a barber. Cosmetic surgery in the medieval era, who knew?
The Black Cat
Leave the shop and continue south-east over a bridge. Follow the road you’re on as it turns east, and at a fork, continue east downhill, then down stairs… then down some more stairs leading north. Immediately at the bottom of the stairs turn east again, then take the next north to reach… The Black Cat. The owner, Mountebank, has some… interesting things to say about the Duke. More importantly are his services.
First, here is where you’ll find quest items, should you happen to, ah, misplace them. Getting them back will not be free, however. You can also buy rarities from him-as you complete Arsmith’s quests and receive ‘gold’ weapons, Mountebank will start selling them, He’ll also sell genuinely useful things, like Skeleton Keys (which allow you to open locked doors, required to get some treasure and resolve some quests… but a few can be found in respawning chests for free), Ferrystones (allow you to fast-travel, at 2,000G each, with limited teleportation destinations, these will be more useful later in the game, as you’ll need to find more Portcrystals in order to set up more fast-travel hubs), and a ‘Set of Lady’s Garb’, which seems pretty useless… but if your Arisen and/or Main Pawn is male, donning these clothes will allow you to complete a quest later. JRPGs sure get a kick out of cross-dressing, eh?
In subsequent playthroughs Mountebank will also sell Portcrystals, which can then be placed around the world to make customizable fast-travel destinations… but again, only in subsequent playthroughs. Do not, however, buy his Wakestone Shard, as it’s over-priced and you can find plenty of them later in the game.
Most importantly, however, is Mountebank’s ability to forge items. In a few rare cases this affects some quests, and it will be pointed out when forging items is an option that affects quest solutions… although forging items tends to give sub-optimal results. A better use of forging, however, is it will allow him to dupe ‘Materials’ you’ve collected-for a price, sometimes quite hefty. You use many materials to upgrade weapons and armor, and honestly, some of the rarer materials are much, much easier to forge than to farm. Again, this is a late-game convention, as there really isn’t any point in upgrading any of the gear you currently have access to, nor any gear you’ll find any time soon. It’ll come up, however, so keep Mountebank and his very, very handy forging abilities in the back of your mind.
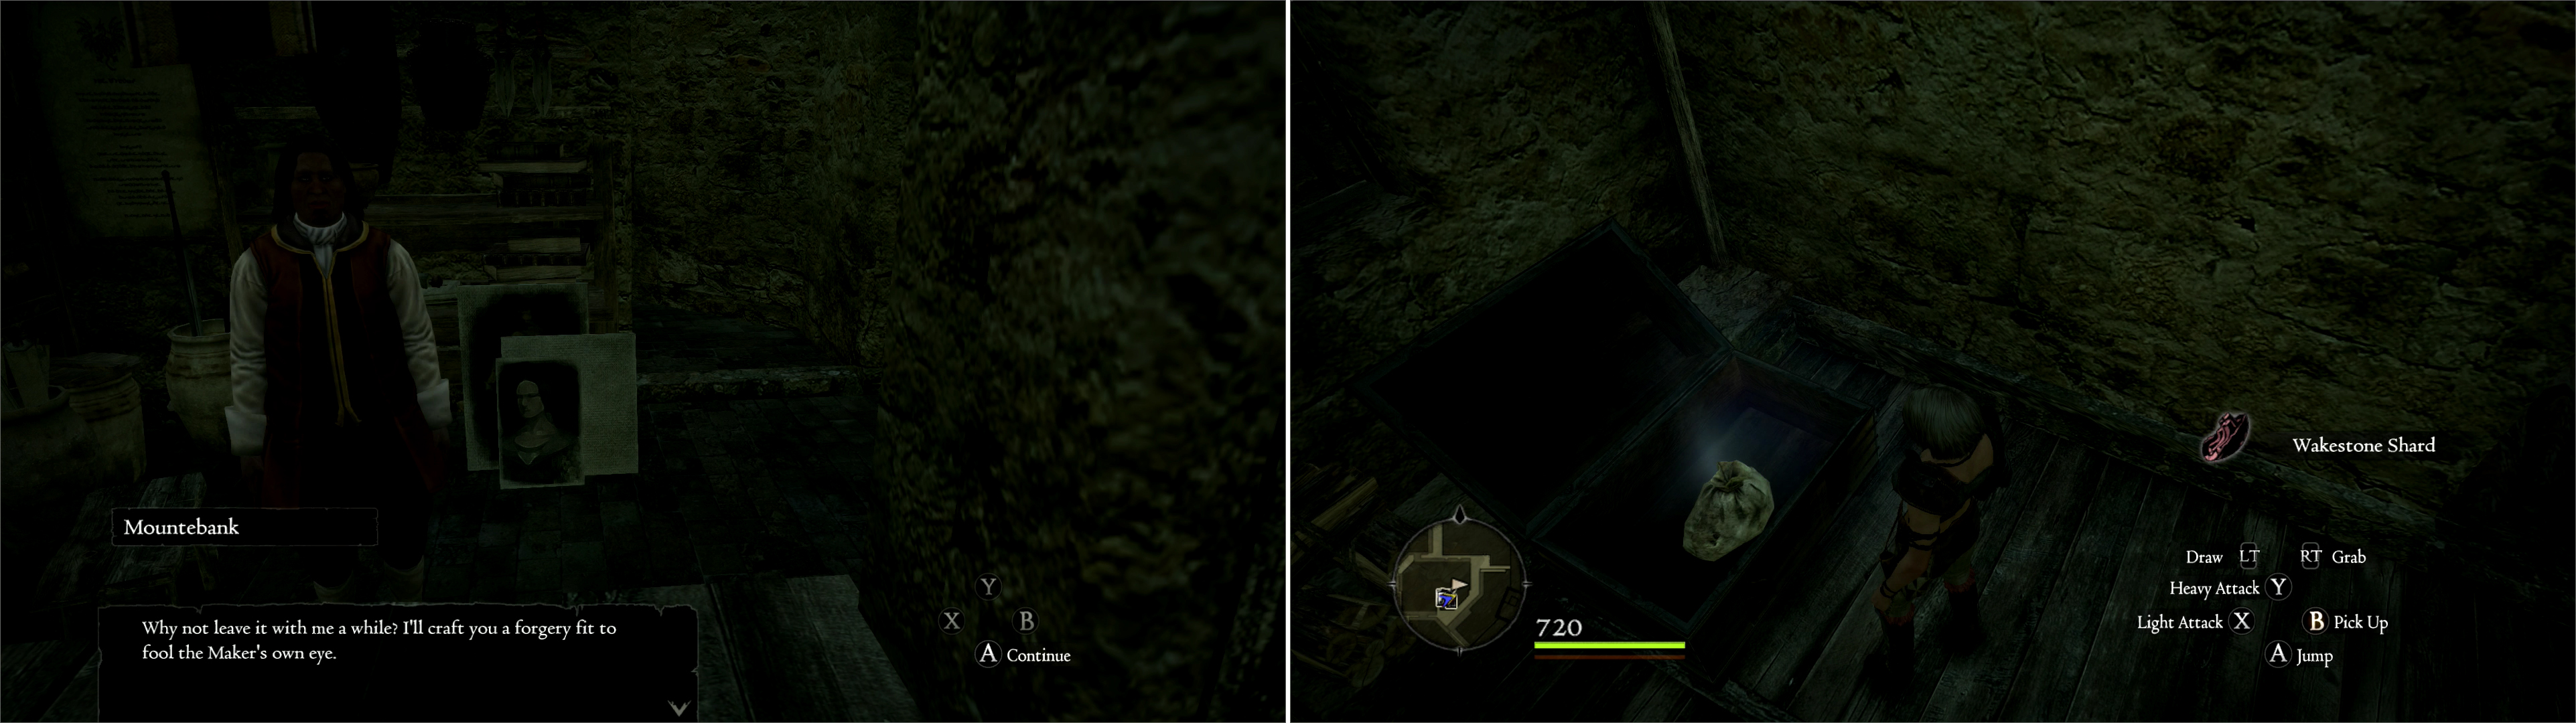
Mountebank, the proprietor of the Black Cat, can forge almost any item in the game, creating a perfect duplicate… often at a hefty price (left). In the attic above his shop you can score such a forgery; a non-functional Wakestone (right).
Looting the Urban Quarter and the Venery
Now, for some treasure. From The Black Cat, head to the east. You’ll see an empty shop you can explore, which will become more… inhabited soon. Follow the road outside this store to the north and go up some stairs along the northern side of the store. From there, jump on a low roof to the north, then turn around and jump onto the roof to the south. Head to the southern end of the building you’re on, and jump from this roof over the road and onto the lower roof of The Black Cat (across the street to the north). You should see an open door you can go in, wherein resides an Ornate Chest containing-at least this first time-a Wakestone Shard. Alas, it’s a forgery… but nabbing it still grants you the achievement/trophy ‘The Knave’. Good on you.


Yes, there are all kinds of chests around here, usually on balconies or in the towers along the wall… but most of it is junk that’s not worth pointing out. You want junk loot, you can find it well enough on your own, but first, there’s still some good stuff left to find. Head back outside onto the lower roof and jump onto the higher roof (either to the north or west). None of the jumps you’ll have to make here require you to have Double Vault or Levitate, so no worries. Head to the north-western corner of this building to find a small… uh… tiled roof-bridge connecting this roof to the roof of a building to the north. Once on the northern building’s roof, head west to find a flat section of roof, which has a ladder leading down on its western end. Take the ladder down to find an enclosed area with a rounded chest, which in turn contains the Third Journal Entry . Be sure to store this when you get the chance.
Now for a freebie, just because. Climb back up the ladder and travel south past a chimney to reach the edge of this building’s roof. Just south of you, across a small gap, you’ll see a diagonal section of roof. Jump on it, then up to a higher ledge to the south. Continue south to the apex of the roof and turn west to spot a doorway in another roof. Enter the attic beyond to find a rounded chest for your looting pleasure.
| Rounded Chest |
|---|
| Quilted Jerkin |
| Shoulder Cape |
Leave this attic and immediately turn north, where you should see the inter-building hole with the ladder you climbed down earlier. Jump back onto that northern roof, head north past the chimney, and continue to another chimney to the north to reach the eastern end of this building’s roof, where you’ll find a damaged section of roof over-looking a balcony. Drop down onto the balcony to find a square chest that almost certainly contains garbage. If you look off the balcony to the north you’ll see the city’s sewers looming below. Just note their location for now, you’ve no need to climb down into the muck just yet, but when you need to head to the sewers later… well, here they are. Now return to the Fountain Square, there’s still a little to point out in the Craftman’s Quarter… you know, where the Pawn Guild is?
From the Gran Soren Union Inn, head up the road to the north-west and take some stairs into a tower to the north. Head up to the top of the tower and go out a door to reach the battlements. Head north, jump on the battlements, and then down onto the stairs below you. To the north, the stairs run into another tower. West of the doorway is a ledge sandwiched between the doorway and the battlements, on which a rounded chest resides. Get a good running jump to reach the ledge and loot the chest, which will always contain a Skeleton Key. Try to search this chest once in a while, as you can stock up on Skeleton Keys without spending money or combining crap.
Tragedy in the Craftmans Quarter
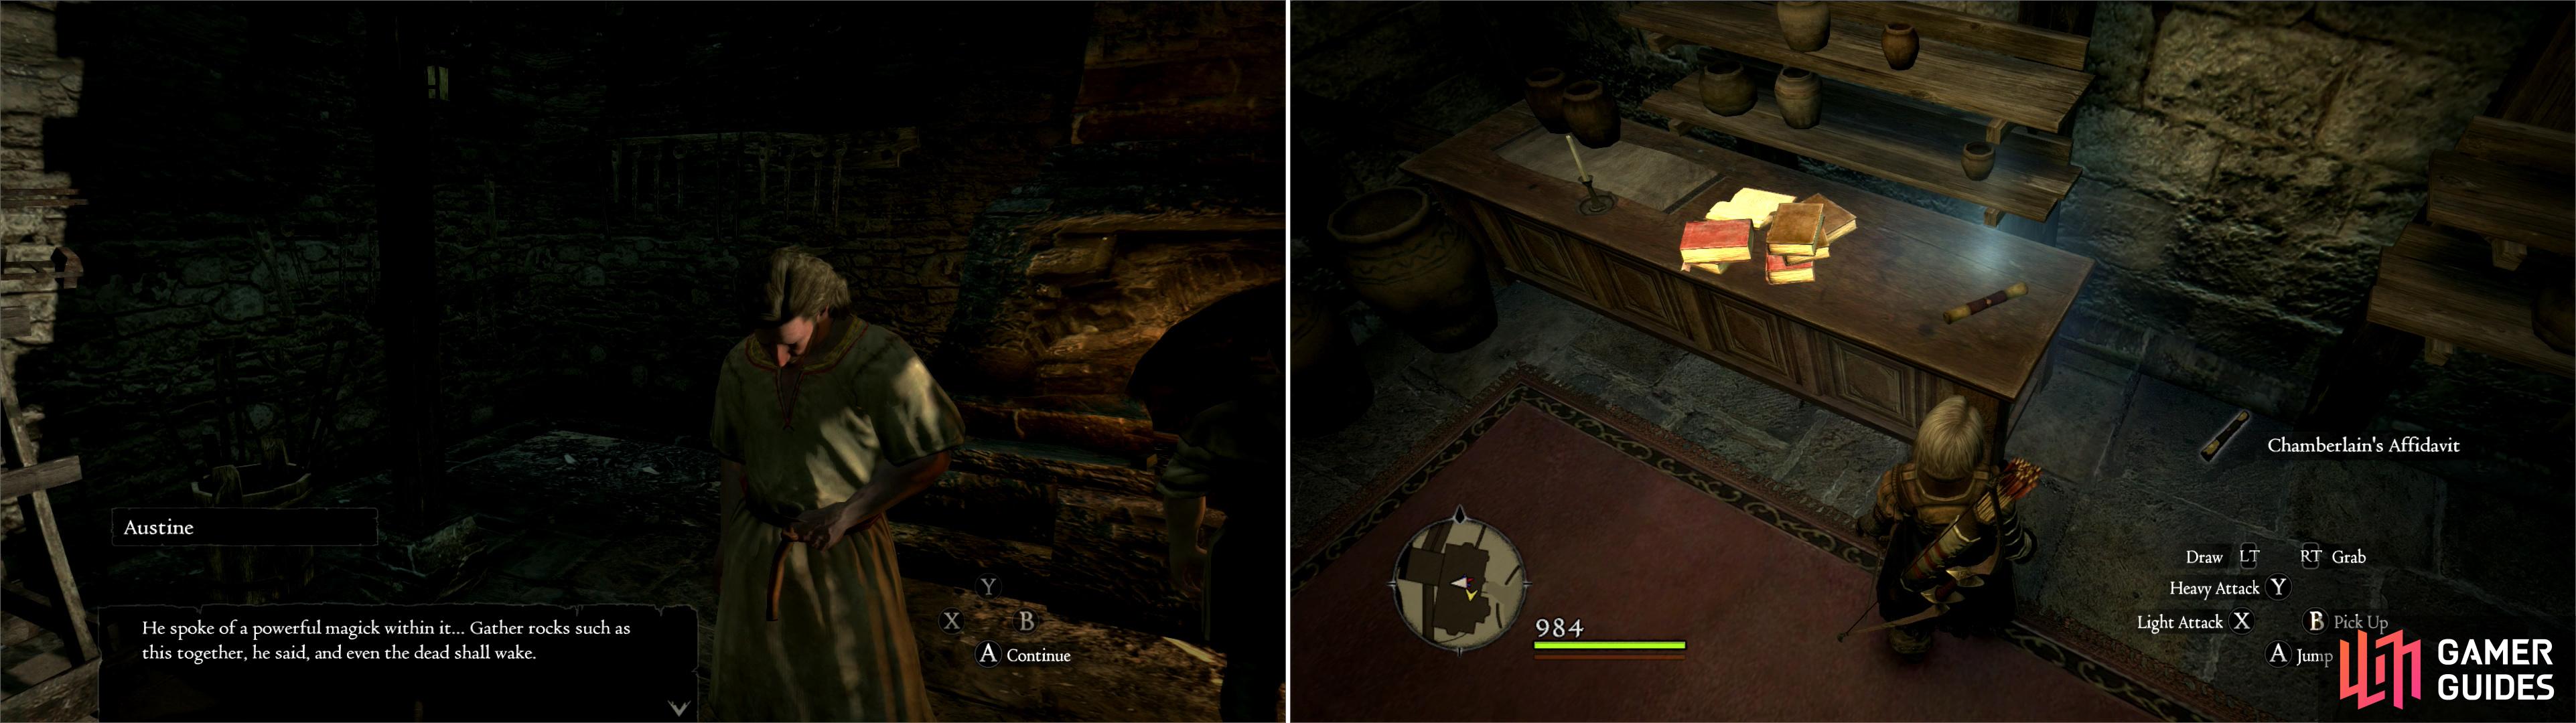
Go down the stairs and open a door to reach the Craftsman’s Quarter. Head downhill to the south-west and at the Pawn Guild turn north and head into an open smithy. Inside you’ll find some wussy crying over a dead guy. Talking to Austine (aka: Ser Wussington) and he’ll explain the situation if you let him. The dead guy is Austine’s son, born with a heart condition that condemned him to an early death. Life sucks, and Austine is willing to grasp at straws to bring back his son… whose death he anticipated by buying some Wakestone Shards, which, if enough are collected, supposedly have the power to bring the dead back to life. He’ll give you these shards (two of them) and ask that you find enough to complete a Wakestone, with which his son might be brought back to life… aww… Anyways, cue hate-mail for marginalizing the death of some video game character, and his father’s grief. Some people are just too damn sensitive.
Anyways, you’ll be bothered with a Wakestone tutorial, but since games are all vague and sneaky-like, here’s the score. Three Wakestone Shards make a Wakestone. Wakestones can be used to bring back dead Pawns… which can just be re-recruited anyways. More importantly, if you have a Wakestone in your inventory when you die, you’ll get the option to use one to bring yourself back to life - and full health and Stamina - right where you died. You know, like Yellow Orbs in Devil May Cry? Essentially, they’re extra lives, continues, whatever you want to call them, and like consumables, they go a long way towards making this game trivially easy. They can also be used to revive dead NPCs… in case you get angry at one and accidentally stab them in a face a bunch. Too bad you can’t get many of them, yet, and since you’ll need the first one you score for this quest… yeah. Don’t worry, you’ll find a third Wakestone Shard shortly, so just keep this quest in mind, keep the Wakestone Shards in your inventory, and don’t use the Wakestone when you get it.
Listen to Austine complain about his ill-fated son (left) then make your way to the Fournival Manor in the Noble Quarter, where you can find the Chamberlain’s Affidavit (right).
Treasure in the Craftmans Quarter
Now, for some loot. Head north over/around a wall to find a building due north of the last one you were at. This building has a balcony. This balcony has a square chest on it. This chest has loot in it. This loot belongs to you. A good running jump can get you up there. To score another square chest with loot identical to the one you just plundered, head back up to the Pawn guild. North-west of it is a building marked on your map as the ‘Smithy’, which has seen better days. Climb the remains of the northern wall of the smithy, then jump onto the red-tiled roof to the west. Head to the northern end of said roof, then climb atop a wooden balcony to the west to find out second dose of crappy Craftsman’s Quarter loot.
| Square Chest | Square Chest |
|---|---|
| Leather Shoes | Leather Shoes |
| Short Pants | Short Pants |
Before you head off anywhere, let’s just go over the rest of this area real quick-like. To the north is the northern gate of Gran Soren, which you’ll become more accustomed to when you start exploring that part of Gransys. There are also towers that can be explored, and which link all the way around back to where you found the Skeleton Key, if you care to explore them… since this is a good way to introduce the Noble Quarter (and score some loot), it’s what you’ll do next. So, head over the gate to the north, past the field, and into the tower south-west of the gate.
There are plenty of chests to loot here if you want/need War Bugles, various banners, and other junk you might need to complete various Notice Board quests. Go upstairs, cross to the north-eastern tower, climb a ladder, and go out a door to the north-east to reach the battlements. Jump onto a higher ledge and continue to the east, then south-east into a tower. Go up some stairs to reach the upper level of the tower, then out a doorway to the south-east to reach a round tower. There is a rounded chest on the lower level of this tower, and an ornate chest on a hill outside of the tower and south a short ways… but they contain junk. Do what you will, but once you’re in the upper part of the round tower go up some more stairs and out another door to reach the upper battlements around the Noble Quarter.
The Noble Quarter
You are presently along the wall surrounding the northern part of the yard around the Fournival Manor. Quests and loot await… but first, a note-if you’ve started ‘Chasing Shadows’ and don’t wish to pursue it yet, make sure it’s not night time. Since this quest kind of interferes with this whole “show you around Gran Soren” bit the guide is doing, avoid it for now. Look over the wall on the eastern side-you know, the side without the battlements?-and drop down onto some wooden platforms, then into the yard, itself. In the southern corner of the yard by the manor you’ll find a square chest, inside of which lies some goodies. Now climb some more woodwork on the smaller, eastern wall to get over and into the Noble Quarter proper. Head inside the Fournival Manor since you’re here and all (if it’s day) and search the table in the room you enter for a Chamberlain’s Affidavit-required for an Arsmith’s Alehouse Notice Board quest.
| Square Chest |
|---|
| Leather Chestguard |
| Scholar’s Coat |
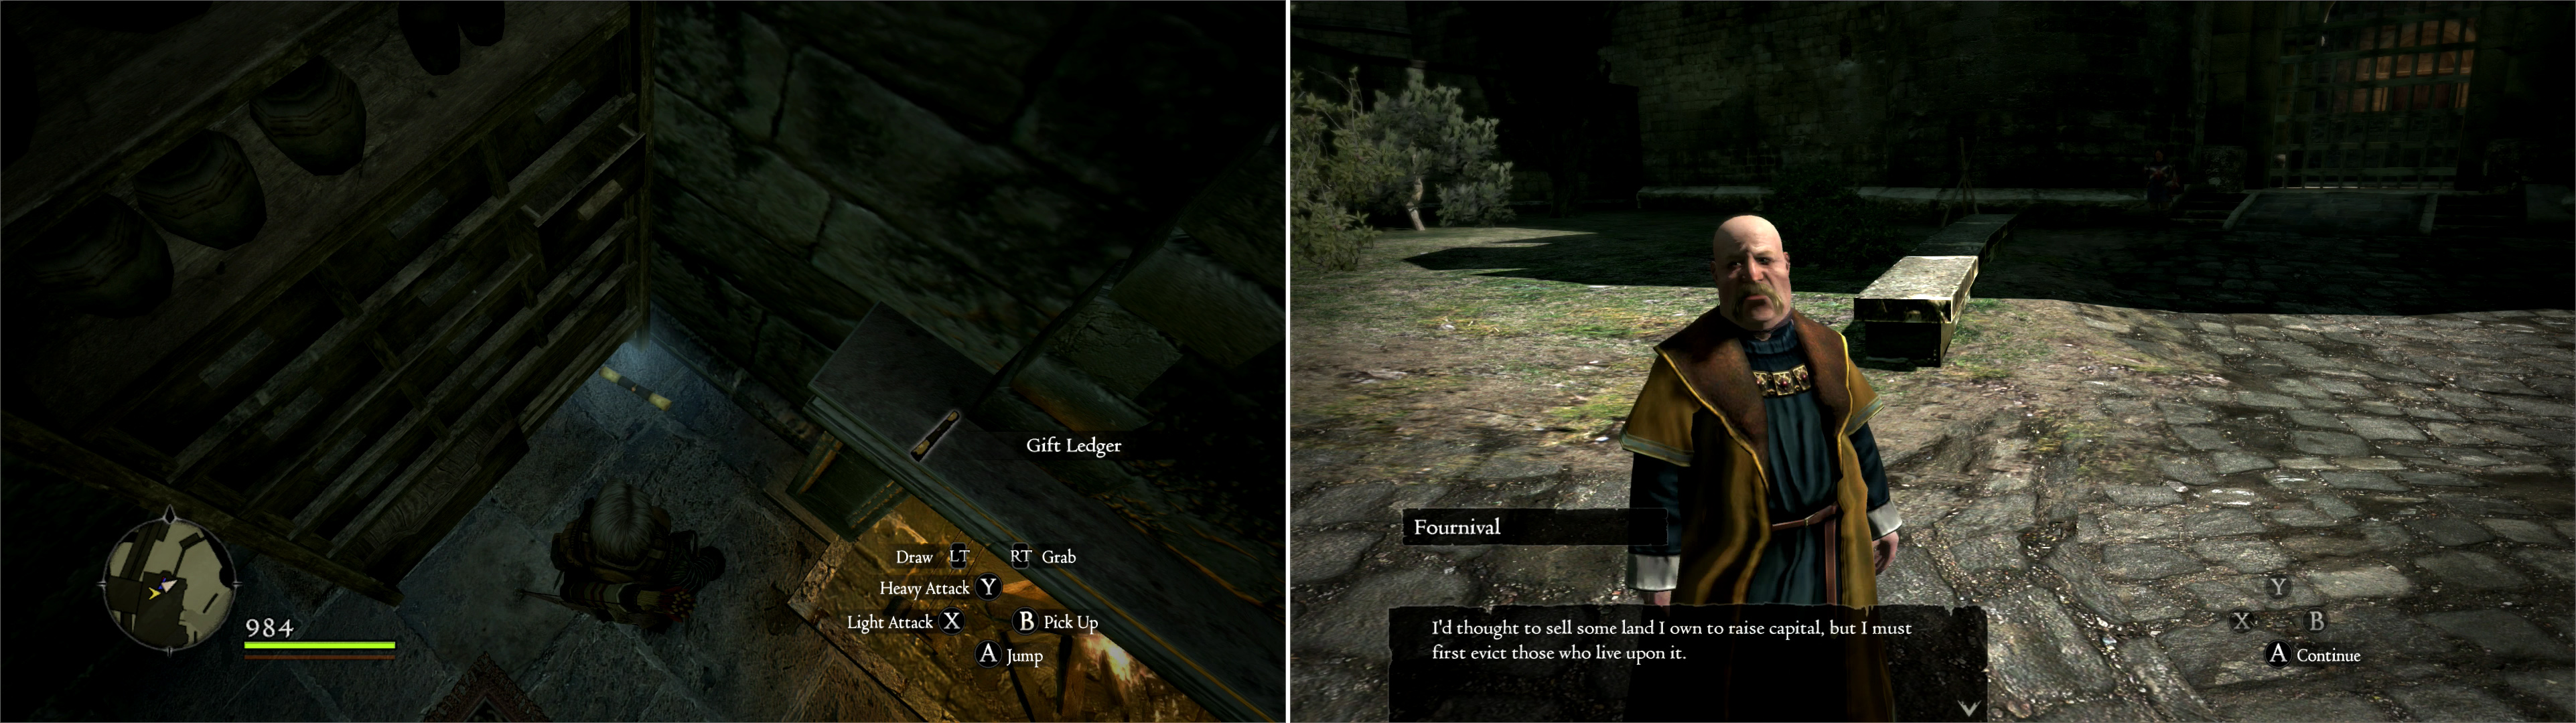
Head upstairs and into the northern room to find Fournival and his daughter, Symone, eating breakfast… at least, if it’s early enough. Talk to Fournival to score a quest. The poor fat merchant find himself in a ‘situation most dire’. See, he wants to sell some land to score cold, hard cash for the rough times that lie ahead. You never know what opportunities… err… what difficulties will arise in the next few months. The Dragon could, say burn down a number of farms and leave that land open to exploitative… or rather, opportunistic… or was it predatory?… no wait… uh… well, stuff could happen where money would be useful. The only problem? Some greedy, lazy-ass peasants won’t get off the land he wants to sell, so he wants you to use your clout as Arisen to convince them that Fournival’s greed… err… financial security… is more important than them not being homeless. Put on your friendly capitalistic hat and agree to help Fournival smash the age-old paradigm of the poor oppressing the rich by daring to exist.
Anyways, you can purchase crap from Fournival, so let’s cover what he sells, or at least the interesting stuff. In the ‘Tools’ section you’ll find various Periapts, which can be used to boost your stats briefly. The most interesting of these are the Conqueror’s Periapt and the Demon’s Periapt, which boost Strength and Magick, respectively. Pop one of these on and enjoy the damage boost… good for any tough fight, and at 1500 gold each, they’re not too expensive, in the grand scheme of things. He also sells the ‘Maker’s Finger’ arrow, an item some people rave over, but 300,000G is a rather steep price to pay for something that just speeds up what you can do just fine on your own. Essentially, it kills whatever it hits instantly, save a few select bosses. More interestingly, he sells a limited number of Ferrystones for half the price of Mountebank at The Black Cat, so be sure to buy ‘em whenever he’s got ‘em. He also sells a wakestone Shard for half the price of Mountebank, but… you’ll find one soon enough, so save your money. Before you go, search under the dresser in the north-eastern corner of the room to score a ‘Gift Ledger’, another item wanted by one of Arsmith’s clients.
Be sure to also pick up the Gift Ledger from the Fournival Manor (left) before talking to Fournival himself, who wants some muscle to help with an eviction (right).
Leave the Fournival Manor and you should spot a red-and-orange clad man with a quest marker over his head. This is that Ser Maximilian you’re supposed to see about the Wyrm Hunt… when you’re done exploring, that is. Head south from the Fournival Manor, then turn west to explore the road between it and the ‘Knight’s Manor’ to the south. Standing by the gate you’ll see a kid named Pip. Talk to him, and he’ll react rather poorly to the whole becoming homeless thing, then run off. Well, this wouldn’t be any fun if you didn’t get to pick on kids, right?
Before you pursue Pip, however, there are a few more bits of loot to get, so follow the main road running through the Noble Quarter from the Fournival Manor to the south-east. You should see a massive walled cathedral to east, which, like most churches, has nothing interesting or useful inside. Jump on the small wall outside the church, however, and follow it east until it connect to a larger wall with battlements. Jump onto the larger wall, then onto the battlements to the south. Look down and you should see another stone wall connecting to the lower part of the one you’re one-jump onto the part perpendicular to the wall you’re on, then turn east to see an enclosed space between the walls, wherein sits a square chest.
| Square Chest |
|---|
| Leather Chestguard |
| Scholar’s Coat |
Jasper will follow his family’s lead regarding Fournival’s eviciton (left), while Sara will waste your time by requesting you let her think it over (right).
Land of Opportunity
Believe it or not, you’re done exploring. Now you’ve just got to wrap up several unresolved quests, and you’ll be good to go. First, let’s deal with Fournival’s peasant problem. Jump back onto the larger wall, then follow it east until it reaches yet another large wall. Jump up onto it, head south a ways, then jump onto… yeah, yet another elevation in the wall to the east. Head north into a tower (search upstairs to discover a round chest with junk loot inside) and head out a door to the west. Follow this wall west until you’re near the Knight’s Manor again, where the wall will be low enough to safely jump down from. Return to the Fountain Square.
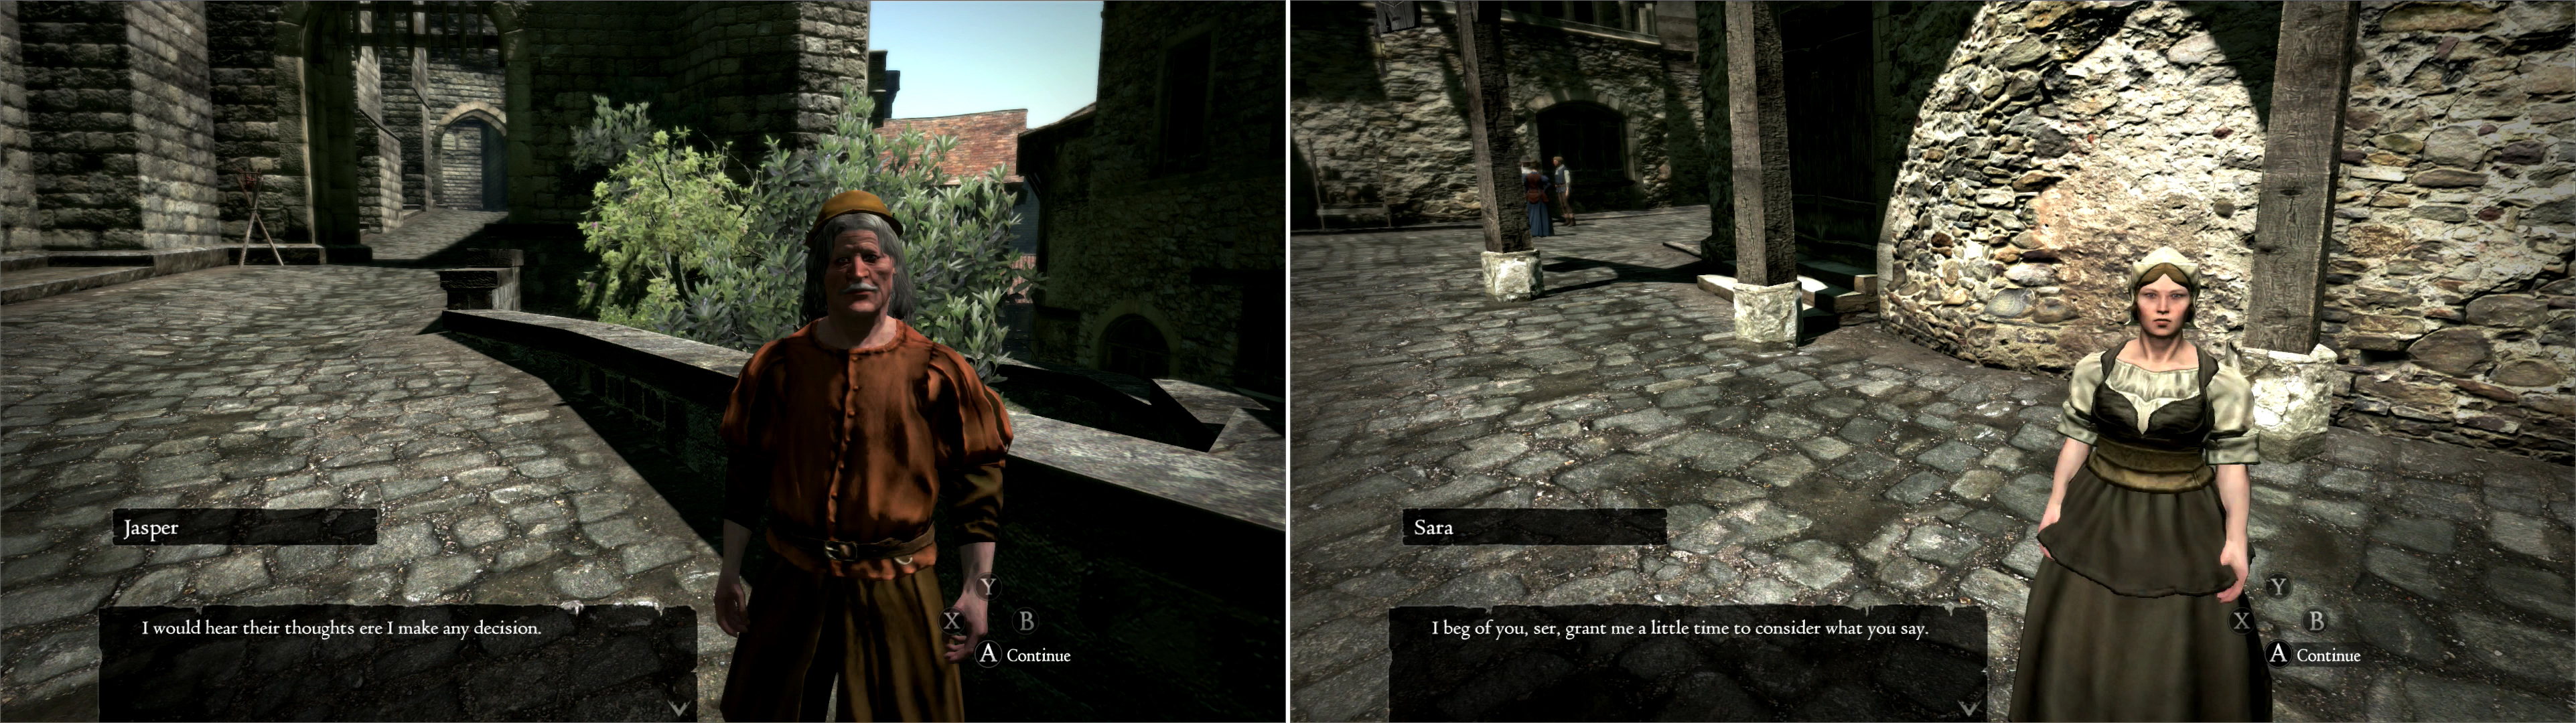
Just north of the Gran Soren Union Inn you’ll find a crier named Jasper, who is screaming doom and gloom about the Dragon. He also happens to be Pip’s dad, and hence the primary person you need to convince to move off Fournival’s land. Talk to him and he’ll ask you to get the consent of his family before he’ll make any decision. What a… wonderfully mundane task for an Arisen.
Now head to Arsmith’s Alehouse, where you’ll usually find Sara (she might also be around Fountain Square shopping.) Talk to her and she’ll ask for… time. Time to consider the request. Whatever, it’s not like you have a choice. In the meantime, let’s go deal with Pip.
Return to the Craftman’s Quarter again, where Pip happens to be hiding. But not in plain sight, no, that wouldn’t be so annoying, instead the little bastard is hiding on a roof. There’s a house west of the ‘Field’ that occupies half of this quarter, adjacent to the wall, whereupon you’ll find Pip. You can reach this roof by climbing on top of the roof of the building south of it-again, you do not need Double Vault or Levitate. Talk to Pip, and the little bastard will run off again.
Back to Fountain Square for you, take the road south-east of Arsmith’s Alehouse like you did earlier. When you reach the bridge over the sewers, however, jump down onto a lower level (not into the water, obviously.) You’ll see Pip run off. This time it’s a straight run-and-catch affair… which is really annoying, but not as bad as chasing Pike was. Attempt to run into Pip and knock him off balance, after which he can be grabbed. Unlike Pike, however, do not shoot him full of arrows unless you want to end up in the dungeon. Once you catch him, Pip will concede defeat before whining about his shattered world view. Aww… life sucks, kid. Get used to it.
Pip must be confronted three times, and during the third of these encounters you must physically apprehend him (left). While you wait for Sara to make up her mind, head over to the Noble Quarter at night to spy on a clandestine meeting (right).
Chasing Shadows
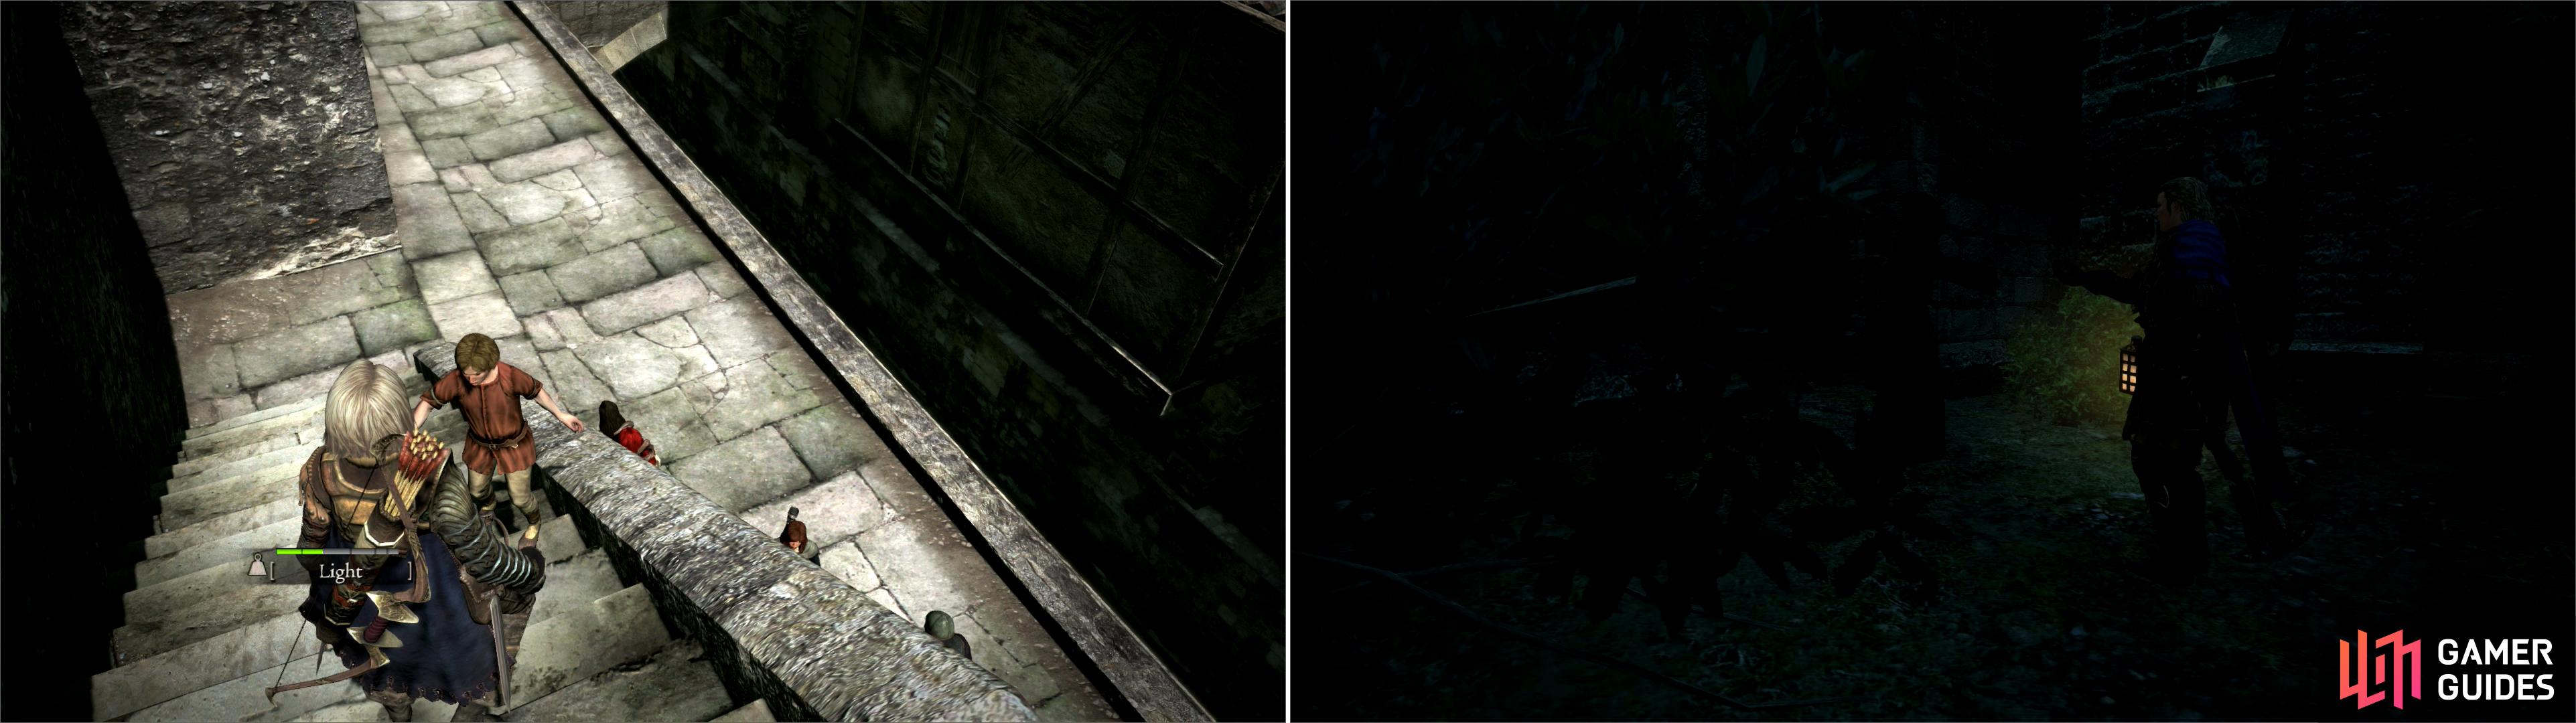
With that, ‘Land of Opportunity’ just needs some time. Might as well go and do Mason’s request now. Head to the Gran Soren Union Inn and rest until night, then head up to the Noble Quarter. Once you get even remotely near the castle gate, a cutscene will occur, where a shadowy figure will hand a note to an armored man with a badass shield, who then proceeds to walk away. And the hunt is on! First, some ground rules. This game only has a very basic ‘stealth’ element, so when games try to wedge sneaky missions into systems not designed for them, it either ends up maddeningly difficult, or stupidly easy. This is the latter. Stay around thirty feet or so away from him at all times, and watch corners. He will stop for no good reason a few times along his trek. If you make sure to watch him, and follow at a safe distance, while walking a steady pace, you should be fine.
Follow him through the gate-but don’t rush. Once in the gatehouse, watch him go down the stairs. Once he’s no longer in site, walk down the stairs yourself. Do this until he reaches the bottom, at which point he’ll go through a door and disappear. Follow him out the door without concern to see another checkpoint updating his position.
Quickly establish a line of sight again, then follow him slowly through the Fountain Square. This whole thing is based on proximity, nothing else, so keep that in mind. He’ll leave Fountain Square by the northern of the two south-eastern roads, but he’ll turn left and vanish again before he reaches the bridge over the sewers.
Follow him quickly and you’ll be updated on his position yet again. After the cutscene, establish line-of-sight hastily again and close to within the safe following distance. When he goes around the corner to the south, do not speed up to re-establish line of sight, as he pauses at the end of the road. This is the one ‘tricky’ part of the quest, because you instinctively want to get him back in sight, which, if you’re not careful can lead you to be discovered. Walk steadily up to the corner of the building he turned at and turn your camera to spot him. when he heads east, follow him down the alley at a safe walking speed. He’ll turn south again, and as long as you don’t get over-eager and sprint after him, you should be fine.
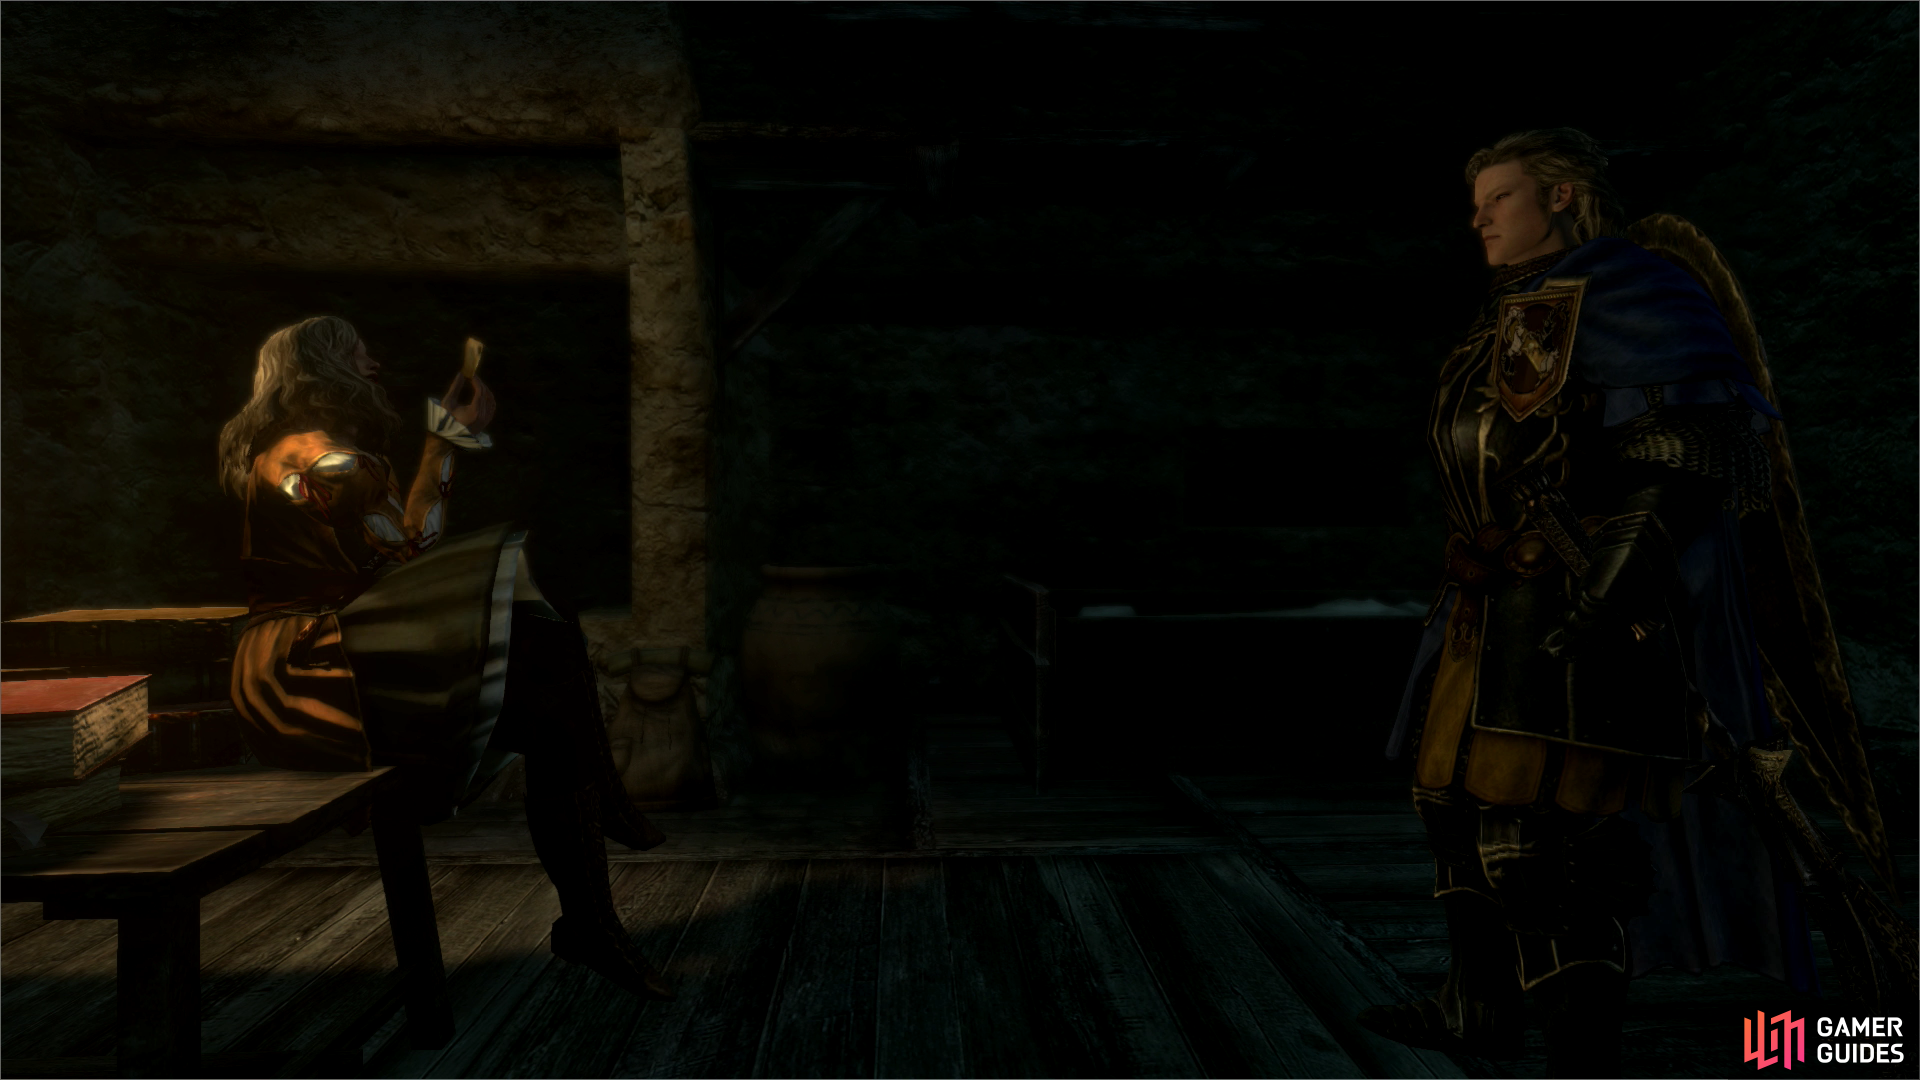
When you reach the point where he turned south, you’ll get a cutscene of him entering a building, at which point this quest is, for all intents and purposes, done. Head south to trigger another cutscene, where you’ll spy Madeleine flirting with him. Her womanly wiles aren’t up to the task, however, and the man rudely bids her good day.
And… the quest is done, you just need to talk to Arsmith again to cash in. It should be noted, however, that the building occupied by Madeleine in the cutscene (south of The Black Cat) is now her shop. She will not be found wandering around Fountain Square anymore, so if you need to see her, you know where to look. She sells a variety of new goodies now-including some much-needed weapon updates… at least, if you have the good sense to use Daggers, Staffs, or Bows. She also sells Demon’s Periapts and Conqueror’s Periapts, although in much more limited quantity. Anyways, talk to Arsmith and collect your reward. Oooh! Political intrigue! Whatever. Go rest until morning at the Gran Soren Union Inn.
| Objective | Reward |
|---|---|
| For successfully tailing the Salvation suspect | 4500 XP, 10 Rift Currency, 7000 Gold |

Finalizing the Eviction
Now, to finalize the eviction. Sara and Pip are easy enough to find, it’s that layabout Jasper that takes a while to make it to his traditional spot north of the Inn. Talk to Sara and she’ll agree to do whatever Jasper decides. One day must have been enough time to make such a decision.
While you wait for Jasper to show up, let’s discuss another option, as there are two ways to end this quest. If you go talk to Fournival now, he’ll ask if you’d rather just buy the land off him. He gets his money, and the family gets to stay. Shame there’s no option to be a jerk and kick them out of your new property, eh? Oh well. If you decide to go this route, Fournival will ask for 80,000 gold in exchange for the land, a hefty sum. On the other hand, if you wait around until Jasper shows up, he’ll agree to move out… if you cover their moving expenses. This time it’s a mere 30,000 gold. Yeah, they’re playing you for chumps. Either way, you end up paying. If you talk to Jasper after buying the house from Fournival, however, he’ll call you a hero and give you an ‘Antique Panoply’, a very rare… if not terribly useful item.
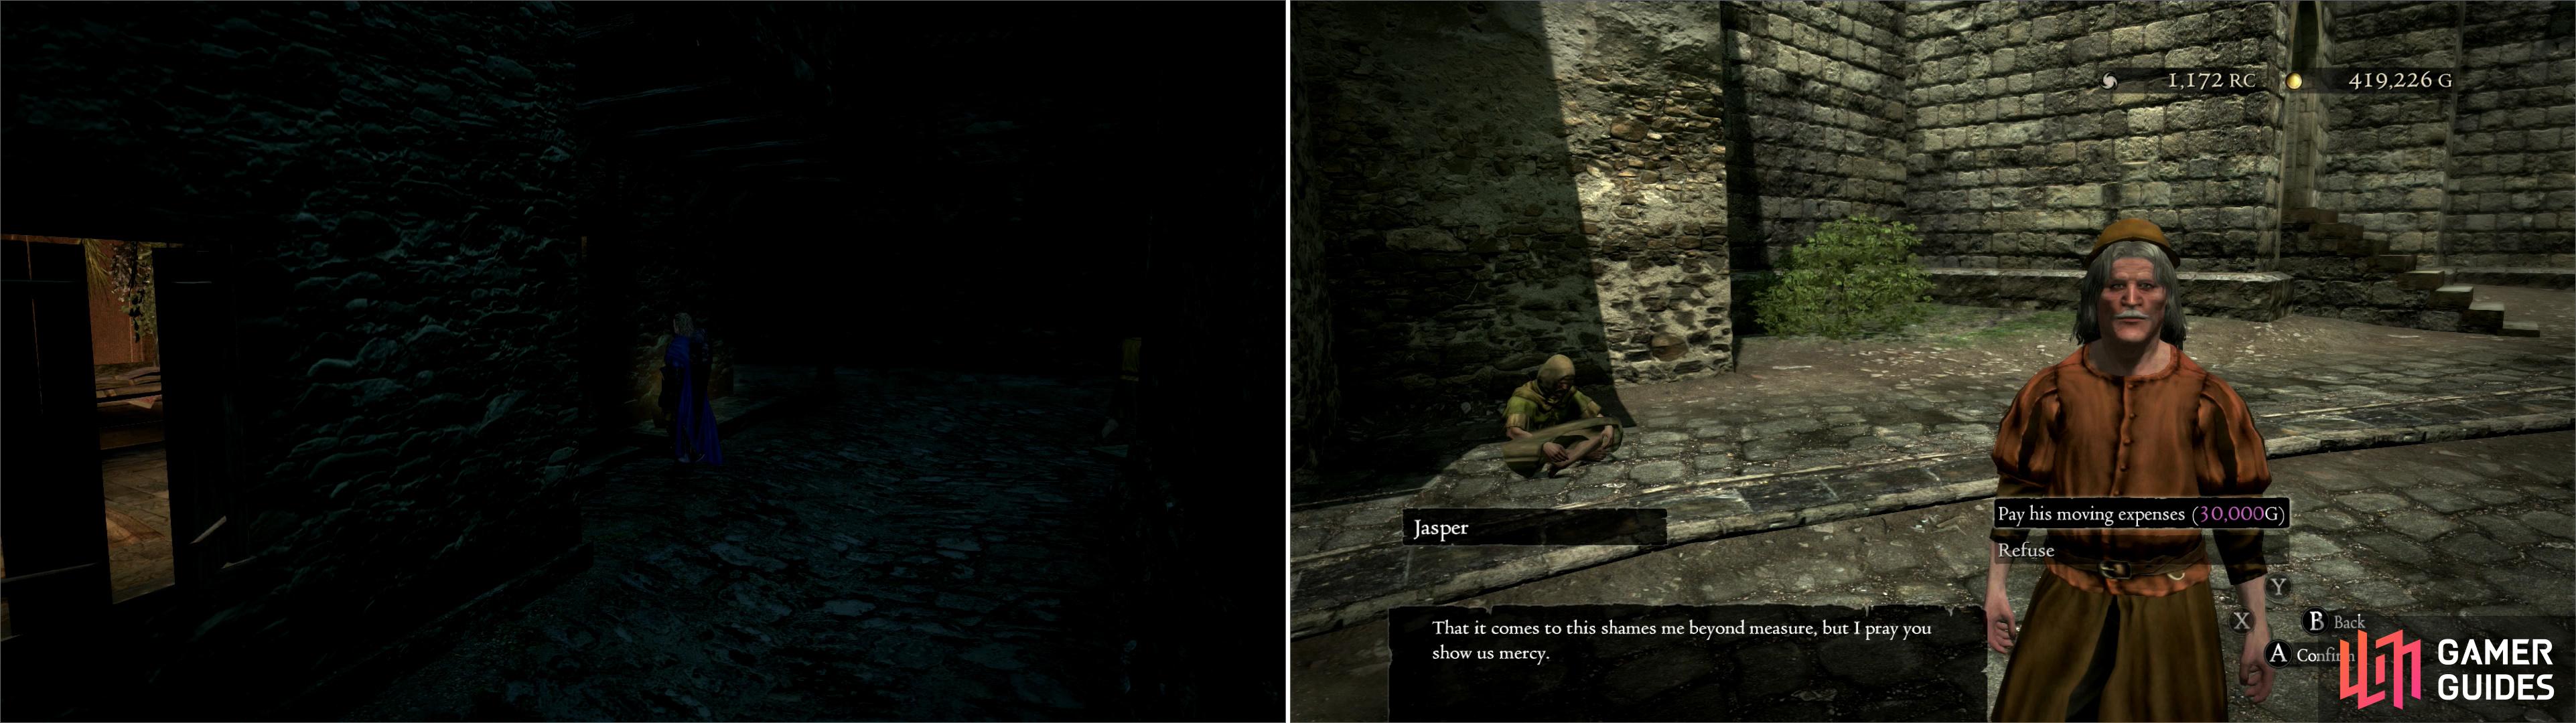
Keep your distance and tail the suspect until he arrives at his destination (left). After spying, rest until morning, collect Sara’s decision, then finish things up with Jasper (right).
Make whatever decision you wish, the rewards are listed below. Just note that your choice here will affect the family in the long-run… it’s inconsequential, gameplay-wise, but worth noting, nonetheless. Do what you will, but once the deal is made with Fournival - or Fournival is notified of their decision to leave - this quest is over.
| Objective | Reward |
|---|---|
| For buying the land from Fournival | 5000 XP, 10 Rift Currency, Antique Panoply |
| For negotiating the eviction | 5000 XP, 10 Rift Currency, 40,000 Gold |
Escort Duty
Unfortunately, you’re not done with Fournival yet. If you’ve completed ‘Land of Opportunity’ and ‘Lure of the Abyss’ he’ll have another quest ready to go for us. First step of this quest involves preparation-it can be a somewhat touchy quest, and considering the rewards involved… well, it merits a trip to the Gran Soren Union Inn. Stash all the crap you don’t use so you’re relatively unencumbered. Withdraw one Flask of Water, and rest until morning, which will serve the dual purpose of setting a Checkpoint Save and making sure it’s early enough in the day for Fournival to offer you the quest (if it’s too late in the day, he won’t offer the quest). Once all that’s done, return to the Fournival Manor.
Talk to Fournival and he’ll admit to being in ‘dire straights’ over a matter concerning his daughter. Hear him out and he’ll elaborate-he’s got a business meeting to attend, but he also promised Symone that he’d spend time with his daughter today. Like any corrupt capitalist crook, he’s willing to hire out a babysitter for the latter task, while he personally sees to the former, more lucrative one. He’ll generously call his daughter a ‘spitfire’ and foist the quest upon you whether you like it or not, leaving you to talk to his daughter.
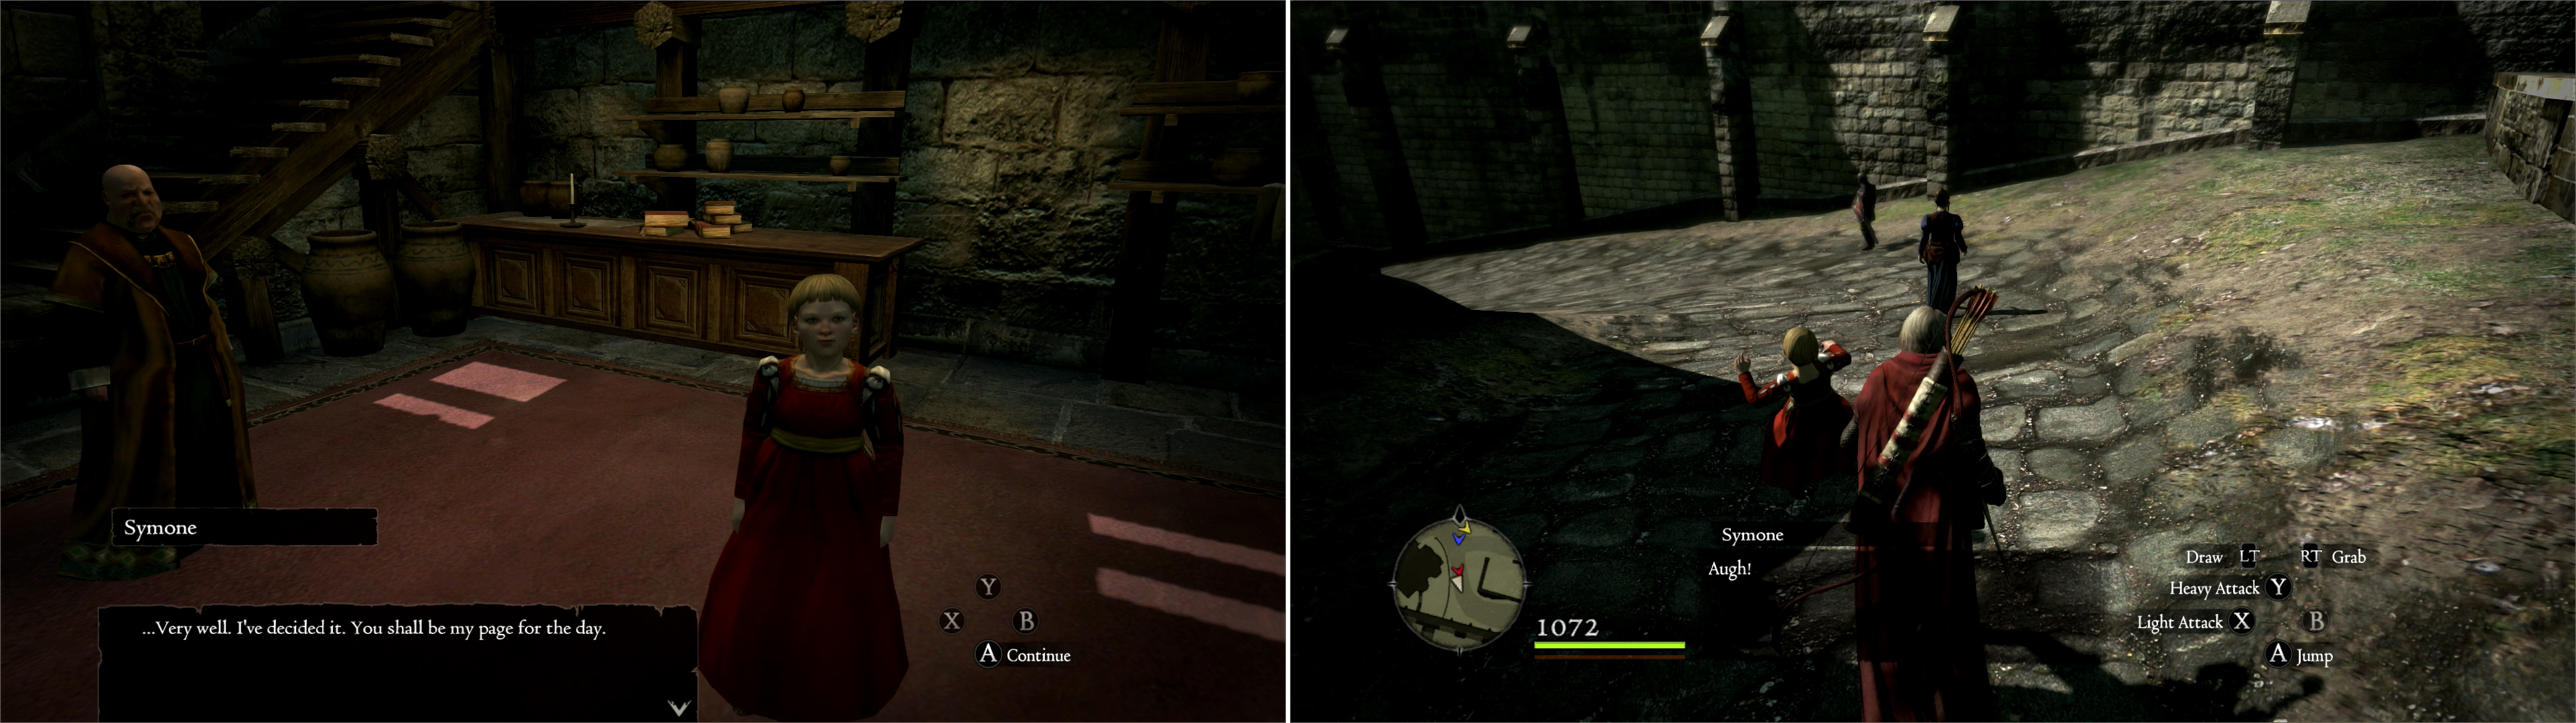
Now talk to Symone, the little girl in the red dress. If you were hoping for some sexy merchant’s daughter… well, look at Fournival. Nothing good can come of those genetics. And so you have Symone, the pre-teenish, bowl cut bearing, aristocratic snob of a child as your charge. If you don’t hate her after talking to her… well, give her a few minutes. At least she’s smart enough to dislike her father. Accept to be her ‘page’ and do her bidding, and she’ll announce that the first stop is the Fountain Square.
Take up fathering duties for Fournival for a day (left) and stay nearby Symone to earn her approval when she takes a tumble (right).
This quest can be a chore; the reward is nothing short of an item that will determine the quality of one of Gran Soren’s merchant’s stock for the rest of the game (either Caxton or Madeleine). The task, however, is to please Symone, which given her demands can be difficult to the unwary. First, you must avoid pissing her off-do not run into her, pick her up, start or complete new quests while this one is in progress, or get too far away from her… these should be obvious things to avoid. You’ll also have to escort her around and complete a few tasks, which will be covered as they occur.
First up, you’ve got to escort her to the Fountain Square, an area you should be well familiar with by now. Stay close to her-about ten to twenty feet away at all times. After getting out of the house, she’ll sprint off ahead. Follow her closely (an Arisen with a ‘Very Light’ encumbrance should be able to pace her sprint just by walking fast) and when she trips rush up to her. She’ll pick herself up and continue down hill-if you weren’t negligent in seeing to her, she’ll say “not bad” as she walks away. Continue to follow her out of the Noble Quarter, to the Fountain Square. Along the way she’ll babble about all sorts of inane things concerning being an Arisen and the Dragon.
Just before you reach the Fountain Square, she’ll decide that just walking around is awfully dull, and challenge you to a game of hide-and-seek. Of course, You don’t get to hide, nor do you get to turn her down. Finding her quickly is key to appeasing her, so of course, knowing where she’ll be hiding ahead of time (or dumb luck) is needed to successfully complete this phase of the quest. Fortunately for you, you’ll get the former, and need not the latter. Head over to Arsmith’s Alehouse, head inside, and continue south-west past the Bounty Board to reach the alley out back. Turn south-east immediately after heading through the doorway to the back lot to find Symone hiding in a corner. Approach her and talk to her to end this game, success will be indicated by her saying “My, ser. I am impressed.”
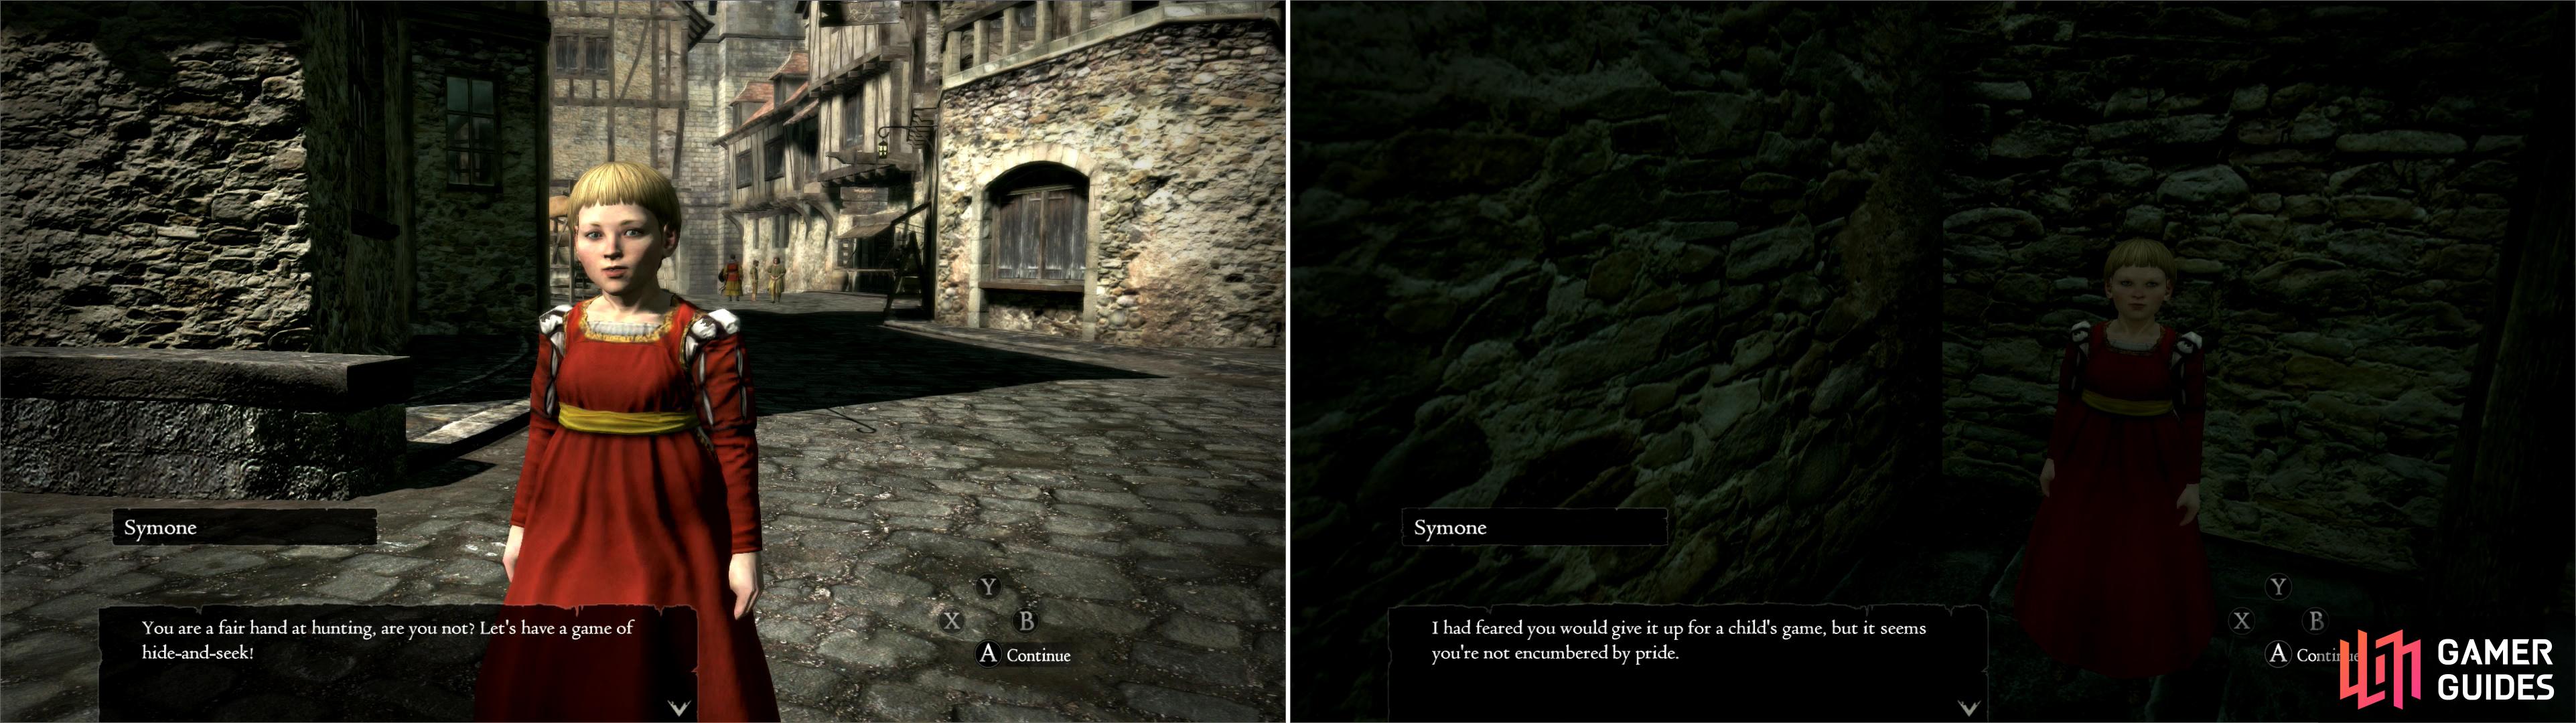
When you reach the market, Symone will challenge you to a game of hide-and-seek (left). You’ll find her hiding behind Arsmith’s Alehouse (right).
Talk to her again and she’ll announce she’s tired of this place; it’s time to go to the markets. This phase is pretty simple, just follow her back out into the Fountain Square and follow her around while she inspects the wares of various stalls. Enthralling stuff. She’ll screw around for untold amounts of time without actually buying anything, making sane folk wonder why anybody would go shopping if they didn’t plan to buy anything?
Eventually even Symone gets bored and waddles off to the gate leading to the Craftsman’s Quarter. Talk to her once she stops and she’ll complain about being thirsty, before demanding water in a proper flagon. If you were hoping you’d need that Flask of Water to douse her after she spontaneously caught on fire… sadly, no. Immediately talk to her again and give her the Flask of Water. Good thing you were insightful enough to bring one ahead of time, no? She should comment- after getting the water she needs-about how it’ll be a shame when you get eaten by the Dragon, considering what a fine page you make.
One more task to complete; Symone, drunk on water and eyeing the open spaces of the Craftsman’s Quarter decides she wants to race the Arisen. The race is from the gate to the Craftsman’s Quarter to the northern gate leading out of Gran Soren. She wants to you give her a serious race… but she also wants to win, something that she fails to mention, but by now should be implied. Simply put, you need to stick close to her without beating her to the finish line… again, an unencumbered character can match her pace just by walking quickly. Stay within about ten feet of her (three meters, for the sane parks of the world that use the metric system). Just be warned-the cutscene showing her run off is deceptive; she does, in fact, start near you without a head start, so don’t immediately sprint to catch up, as it can result in you running into her. Also keep in mind that she doesn’t follow the path the whole way, but feels compelled to take a shortcut through the field. Pace her, by stay behind her, and talk to her when the race is over. She should exclaim “I won! I bested the Arisen!” before mocking your speed.
Finally, she decides the day is over, and demand you escort her home. Capcom has a sense of mercy here, and does this for you automatically. You’ll find yourself back at the Fournival Manor, and if you did everything well, Fournival will applaud your effort, saying “My thanks, ser, and well done. I knew you were the one to ask! My daughter sang your praises. It seems the Arisen commands more than the hearts of just Pawns.” Yay! You’re good at babysitting! If you did less-than-optimally, he’ll suggest that perhaps this isn’t quite the field for you. Yeah, says a guy who ditched his daughter to get drunk with merchant friends. Anyways, a quest reward ensues. For the real reward, however, talk to Symone and she’ll give you a token of her esteem-the Golden Idol, which is what this is really all about. Unfortunately, successful completion of this quest boosts her affinity for you, as well. Oh well, you can worry about it much, much later. As for the Golden Idol, stash it away somewhere. You’ll need to significantly advance the main story in order to put it to use.
| Objective | Reward |
|---|---|
| For baby-sitting Symone | 7500 XP, 10 Rift Currency, 15,000 Gold, Golden Idol |
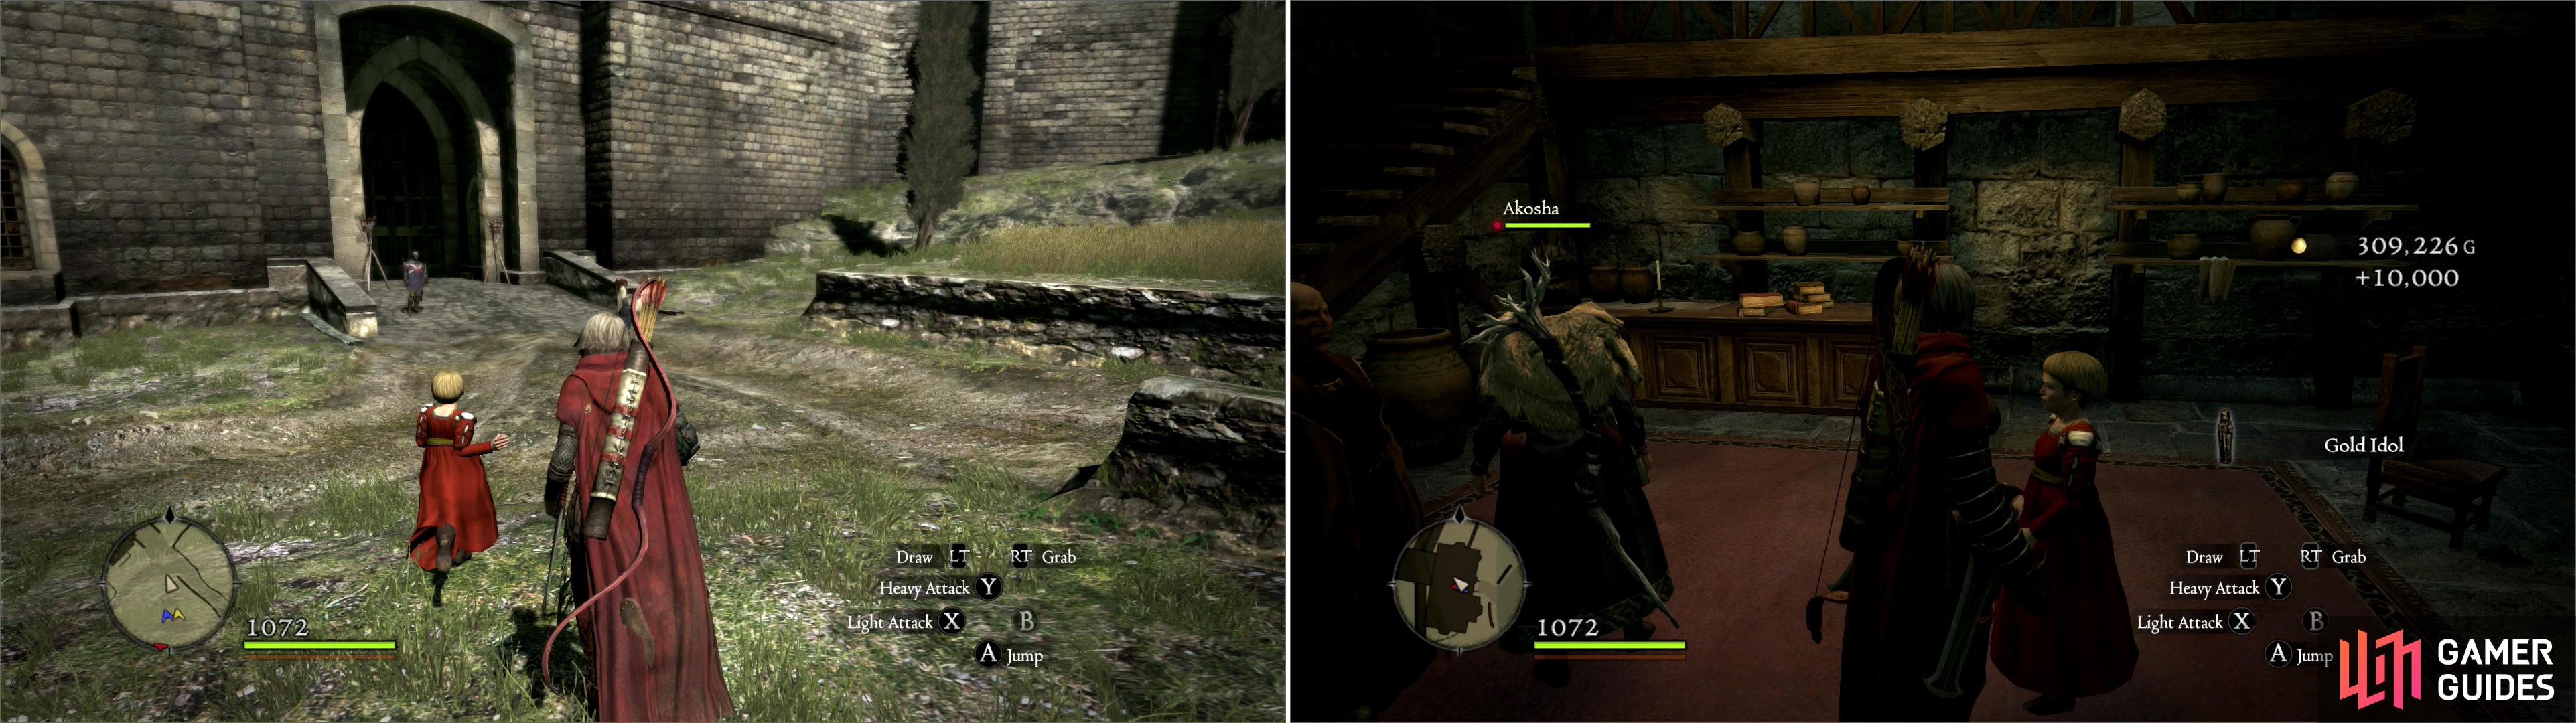
Induldge Symone in a “race” and let her win, but keep it close (left). If you appeased Symone during the day, she’ll reward you with the coveted Gold Idol (right).
The Wyrm Hunt Begins
Huzzah! You’re done messing around in Gran Soren for a while. Now it’s time to head up back to the Noble Quarter and talk to Ser Maximilian near the castle gates. Be sure you have your Wyrm Hunt license on you, or you can’t start any new Wyrm Hunt quests. Yes, it needs to be in your inventory. He’ll waste some times with some formalities before finally getting down to business. Note that he says he is supposed to lend ‘all Arisen’ any reasonable aid ‘they’ may require. Formality, or are the other Arisen active? Whatever. He’ll finally get to showing you the current charges for the Wyrm Hunt, which are pretty vague:
‘Decipher a text’, ‘Rout a monster infestation’, ‘Investigate a cult’ and ‘Aid a research team’.
Which to choose? Well, it doesn’t really matter so much, although the ‘rout a monster infestation’ arguably requires the strongest party to handle. Starting with ‘Aid a research team’ isn’t a bad idea, as it’s not terribly difficult, and involves exploring a dungeon back by the Waycastle. It’ll allow you to stay in southern Gransys, gain some gear and experience, and… well, heading off that direction provides you with an excuse to subsequently do more chores around Cassardis (yes, there are more quests there) and complete ‘A Troublesome Tome’. You are, of course, free to do whatever you wish, just consult the correct walkthrough section if you wish to do them in a different order.

 Sign up
No Comments