
Chasing Clues in the Castle
Talk to Aldous and pick the task to ‘Recover Stolen Item’. Apparently an heirloom was stolen from the castle recently-the Wyrmking’s Ring. It’s no petty trinket, and was stolen under heavy watch, which leads Aldous suspect it could be an inside job. So, you’ll need to be sneaky, keep your intentions hidden, and watch who you talk to so they don’t know they’re being… wait? You just need to go around talking to people? Just flat out ask potential suspects about the stolen ring? Okay… not very subtle,after all. Aldous will finish by exaggerating how important the ring is before finally leaving you to your own heavy-handed devices.
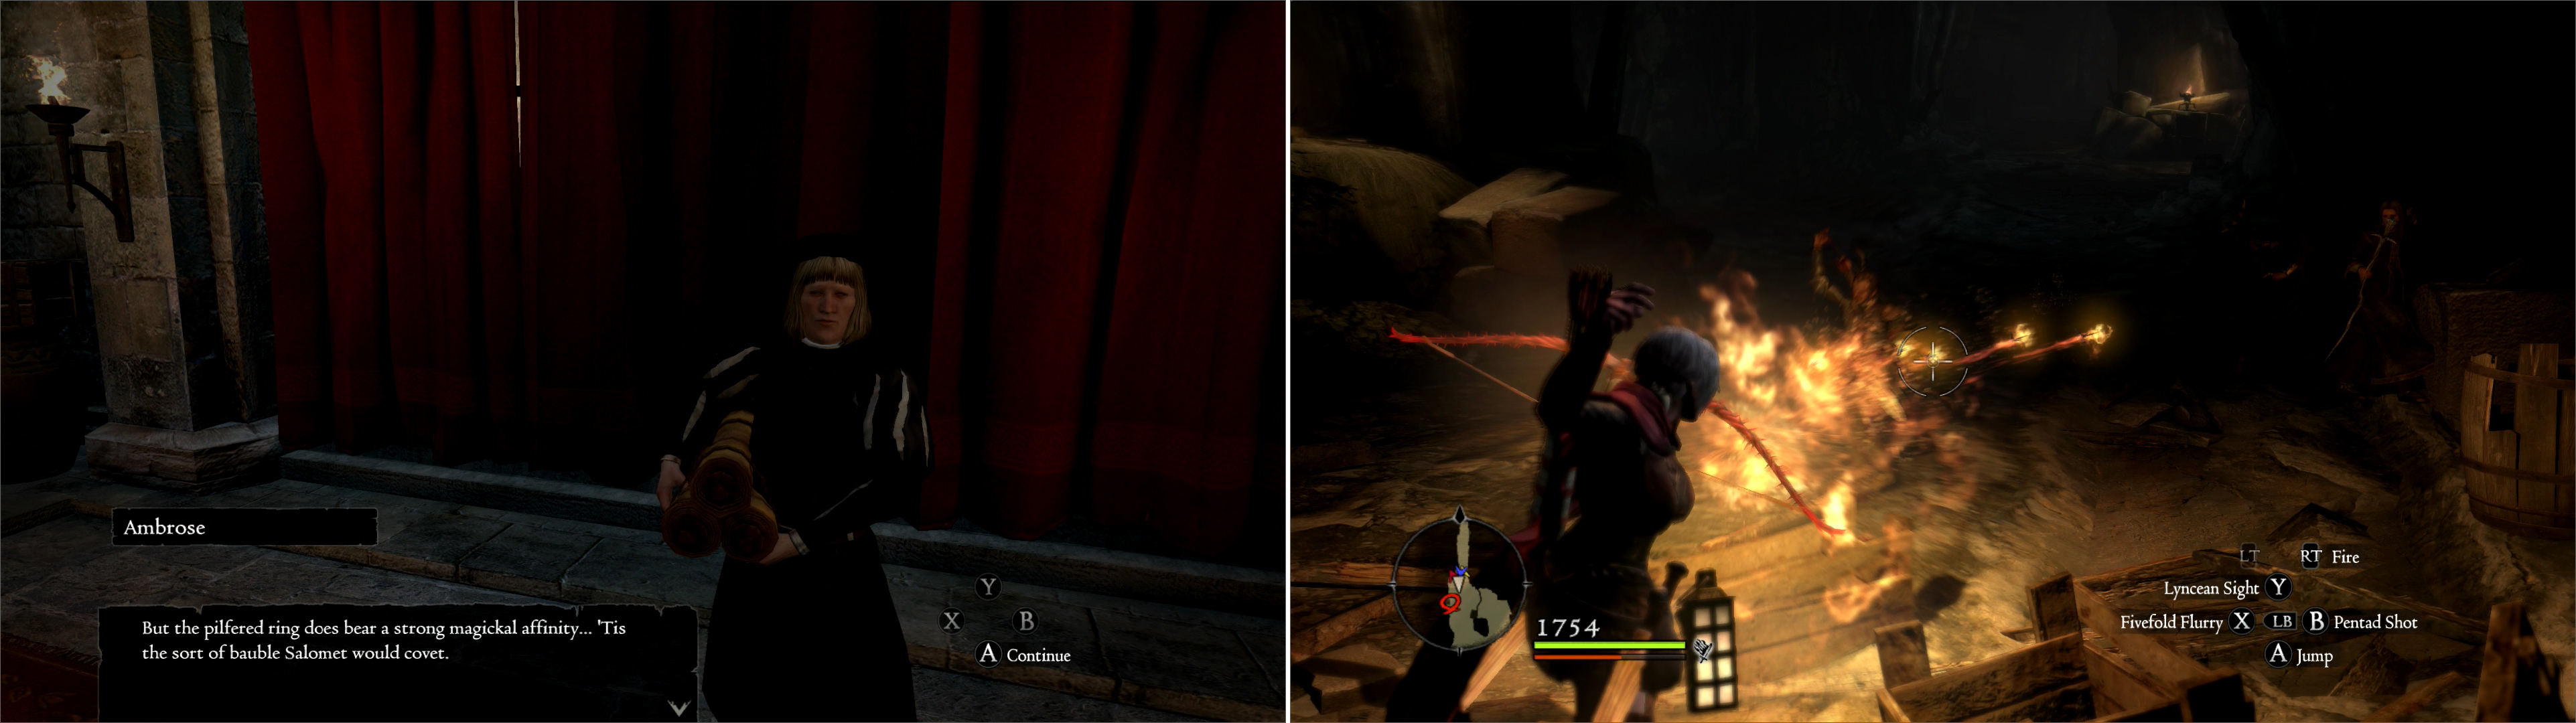
Okay… let’s begin by talking to the servants around here… this involves little more than following quest markers, but it’ll be discussed just so this guide is all complete-like. First, talk to a pleb named Pering, who merely confirms that, given the super-awesome layout of the castle, the thief must have been in the know. Now seek out a guard named Ser Gyles, who will confirm that there was an ‘unfamiliar man’ seen within the castle’s walls, one with the look of a Sorcerer about him. An unfamiliar Sorcerer who yet knew the castle well? Hmm… Finally, find a scribe named Ambrose… hey! It’s the guy who read out Fournival’s verdict! Anyways, talk to him and he’ll put the pieces together for you-the only Sorcerer insider who fits the bill is Salomet… you know? He’s got potions named after him? You gave his book to Steffen? Anyways, Ambrose suggests that the ring-being magical in nature, is just the thing that Salomet would covet. Hmm… Time to report back to Aldous.
Aldous knows of Salomet well enough. Back in the day, when the duke was more ambitious, he had a council of magick scholars who… well, did the sort of magicky stuff such experts are supposed to do. Salomet was the boss of this little enterprise, but was apparently only involved for his own gain. Whatever research the council gain, Salomet made off with, killing his colleagues in the process.
To find the next clue, head into the city and find an aristocrat named Mellard, who will inform you of a ‘queerly dressed man skulking about the quarry.’ You now have your lead, time to head out to the Ancient Quarry. You should have no trouble making your way there on your own, by now.
Resisting Arrest
Enter the Ancient Quarry and, from the entrance, head south until you trigger a cutscene. Salomet stands ready with a host of bodyguards. He’ll babble a little before attacking. Kill his pathetically weak bodyguards before going after Salomet… who is also laughably weak. Once they’re dead and Salomet is injured, he’ll admit you’re more competent than the duke’s guard (meager praise, indeed) then he’ll teleport away, using a Comestion to cover his escape. Time to report back to Aldous, but… well… since you’re here, it wouldn’t hurt to loot the Ancient Quarry again, would it? Whatever, do what you wish.
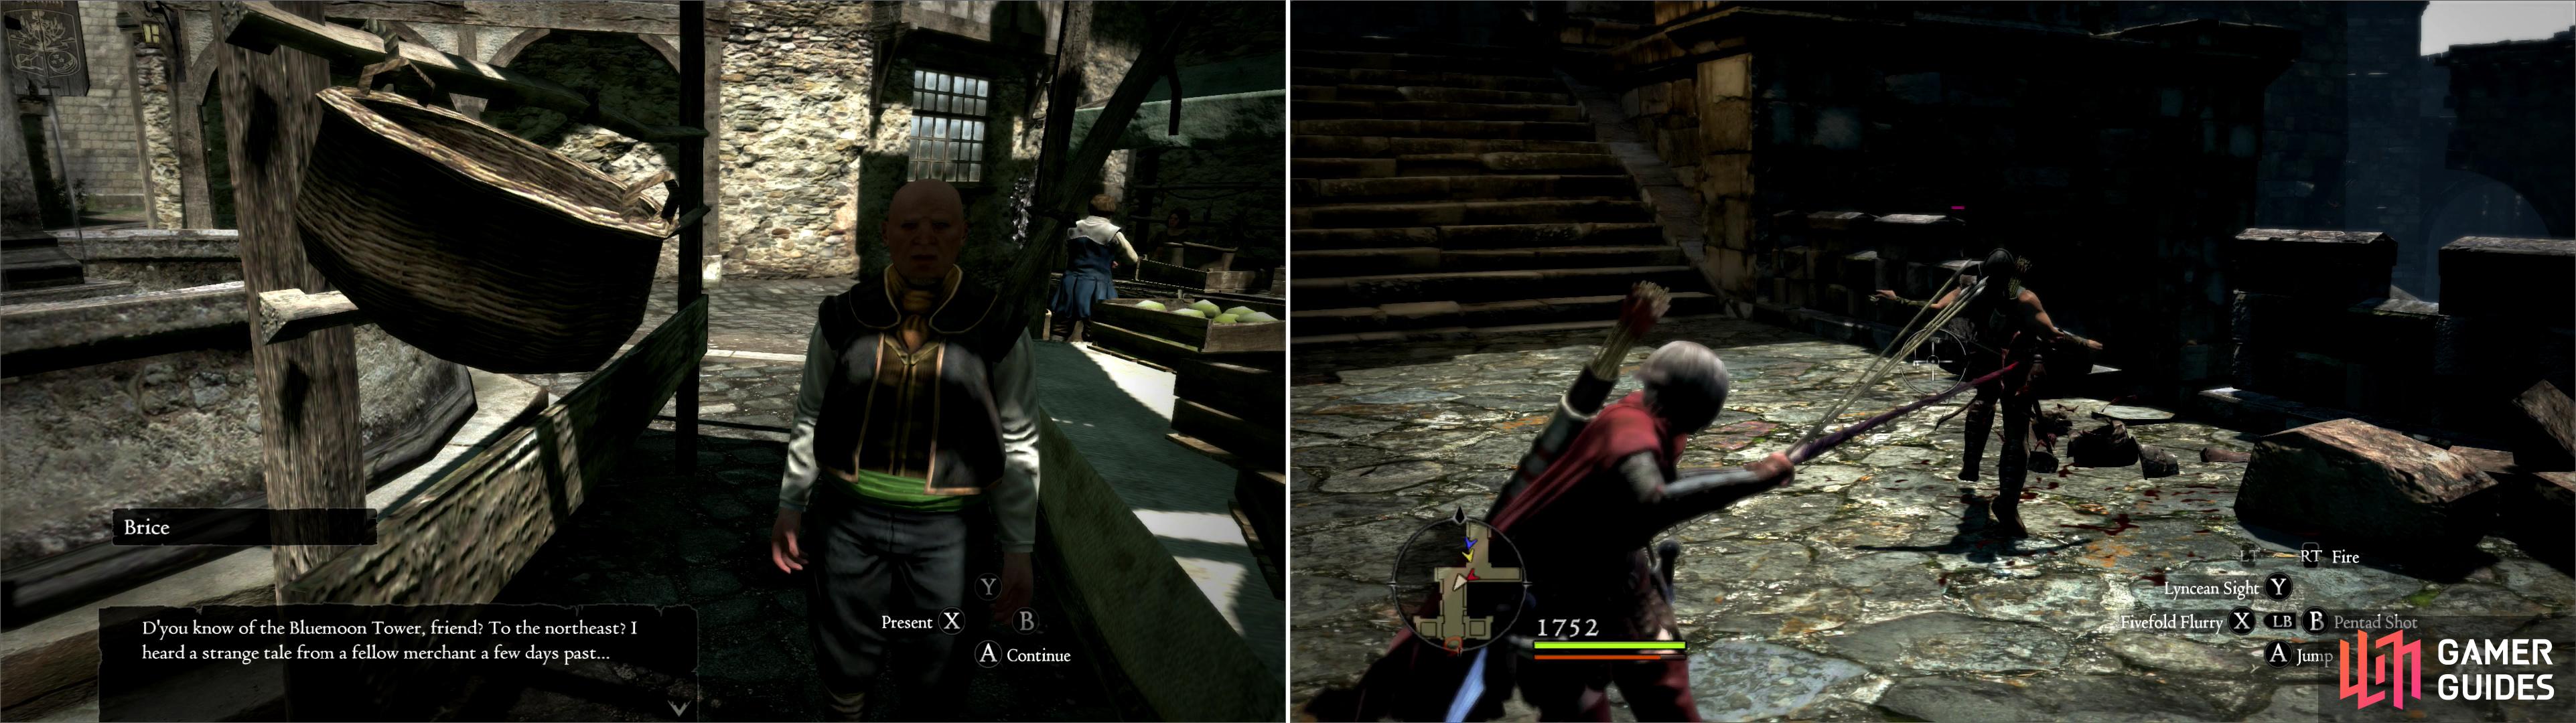
Talk to Aldous again, and select the option ‘Recover Stolen Item’ once more to prompt him to talk. Just running Salomet off was, of course, not enough-you’ll need to track him down and finish what you started in the Ancient Quarry. Where could he have gone, though? Leave the castle and talk to a merchant in the Fountain Square (again, follow your quest marker) named Brice-the guy whose intriguing about Selene started the quest ‘Witch Hunt’. He’ll mention Bluemoon Tower; apparently a merchant friend of his has seen a man coming and going ‘round there of late. He cast spells to drive off the beasts, and, Brice suspects that this man just might be the sorcerer that stole some bauble from the duke. Yeah. They’re not being subtle here-they might as well has hit you on the head and shouted ‘He’s in Bluemoon Tower!’
Talk to the inhabitants around the castle to learn about the stolen right (left). Track the thief to the Ancient Quarry and take down Salomet’s goons (right).
Back to Bluemoon Tower
The trip back to Bluemoon Tower is as arduous as you’ve made it on yourself. If you followed the advice given earlier and dropped the Portcrystal there, it’s just a Ferrystone away… although it wouldn’t hurt to run through Pastona Cavern again to score extra loot and experience. In any event, you know the way there, and you’ll get there however you wish.
Once you make it back to Bluemoon Tower, you’ll discover that Brice’s information was correct-the old foes have been evicted and replaced with Bandits. Don’t let Salomet’s petty cronies in the Ancient Quarry fool you-these are some of the strongest Bandits around-on par with those out in Pastona Cavern. Groups of asshole Rangers are especially frustrating, as they’re quite powerful and love knocking you and your Pawns around with their Longbows. Considering the many pitfalls here, it’s a recipe for grit teeth, swearing, and flying controllers (this is one of many times where a Sorcerer-build character shows their limitations…) Your goal is to head back to the arena where you fought the Griffin, but the Bandits are even worse along the northern grand staircase leading to the arena, where archers have positioned themselves on high ground-unless you can shoot back with a bow, you’re going to be at a great disadvantage. All things considered, it might just be easier to take the route you used when you came after the Griffin… and of course if the loot here has respawned, go out of your way to grab it.
A merchant in town will give you a clue as to where Salomet fled (left). At Salomet’s home base you’ll find mighty mercenaries (right).
Showdown with Salomet
Once atop Bluemoon Tower you’ll confront Salomet, who comments on how much time you waste pursuing him and calls you a coward for chasing after him rather than the Dragon. Thankfully, he won’t go on much longer, opting to fight it out. Salomet is far less troublesome than his Bandit henchmen were, he only really has a few attacks-he’ll summon up some Skeleton Knights or Skeleton Lords-two at a time, either sword and shield or longsword-wielding knights, and he’ll replenish them as you kill them. He’ll also use a rather potent Comestion spell, as well as High Ingle or High Frazil. If you approach him, he’s fond of teleporting away. If you have any sort of ranged attacks, killing him is quite simple-just shoot him to death and ignore everything else. If not, you must work your way through his minions while dodging his spells-he can only summon aid so many times, after which point he’ll stop teleporting around and take the beating he deserves. Once he’s smote, he’ll fall off the eastern edge of the arena, hopefully to a watery grave. Head over to where he fell and recover the Wyrmking’s Ring. Just north if it, along the ledge, is a Ferrystone. The trip back isn’t going to be so terrible, after all…
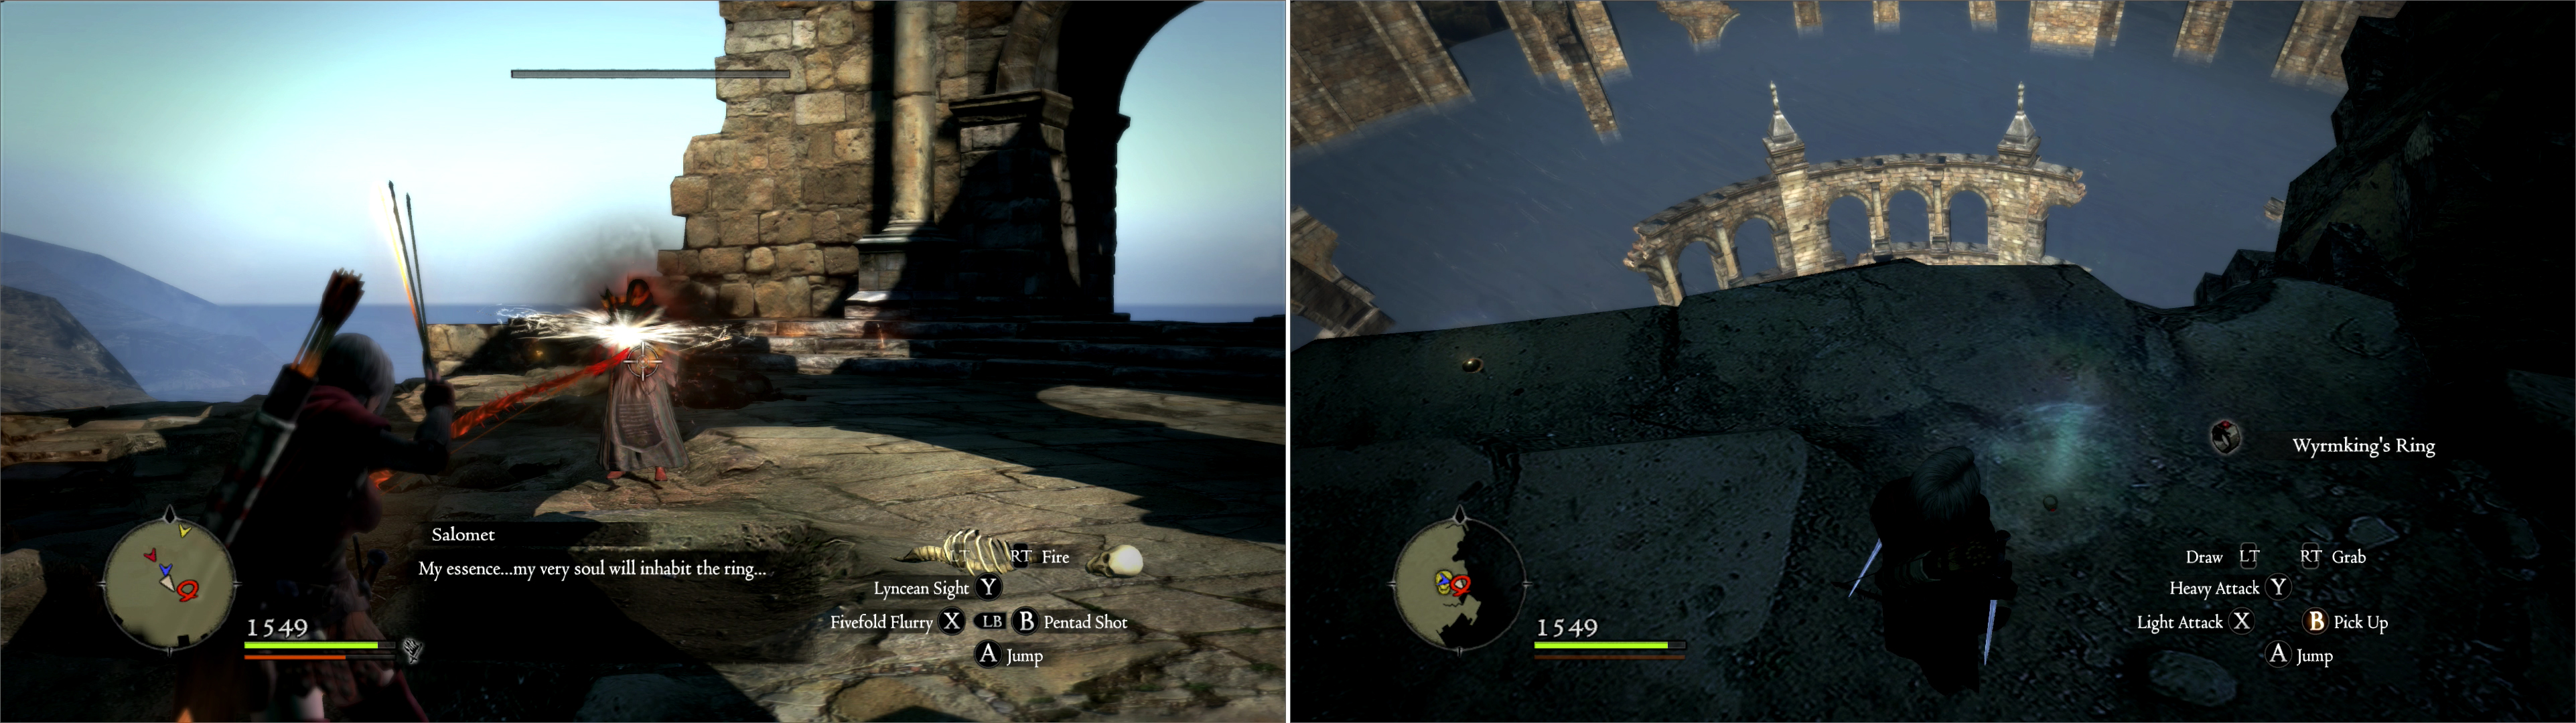
Salomet will babble, cast spells and summon undead to defend him (left). Once he’s smote, recover the Wyrmking’s Ring (right).
The Wyrmkings Ring
Make sure you have all the loot you care to grab here (the Bandits, if any were left, will vanish once Salomet is vanquished) and leave Bluemoon Tower. Return to Gran Soren, where you’re faced with a bit of a dilemma… You should probably return the Wyrmking’s Ring to Aldous, as… well, that’s what your job is, but it’s a fairly potent magical item. Just having it in your inventory reduces the casting time of spells-an indispensable accessory for any Mage or Sorcerer.
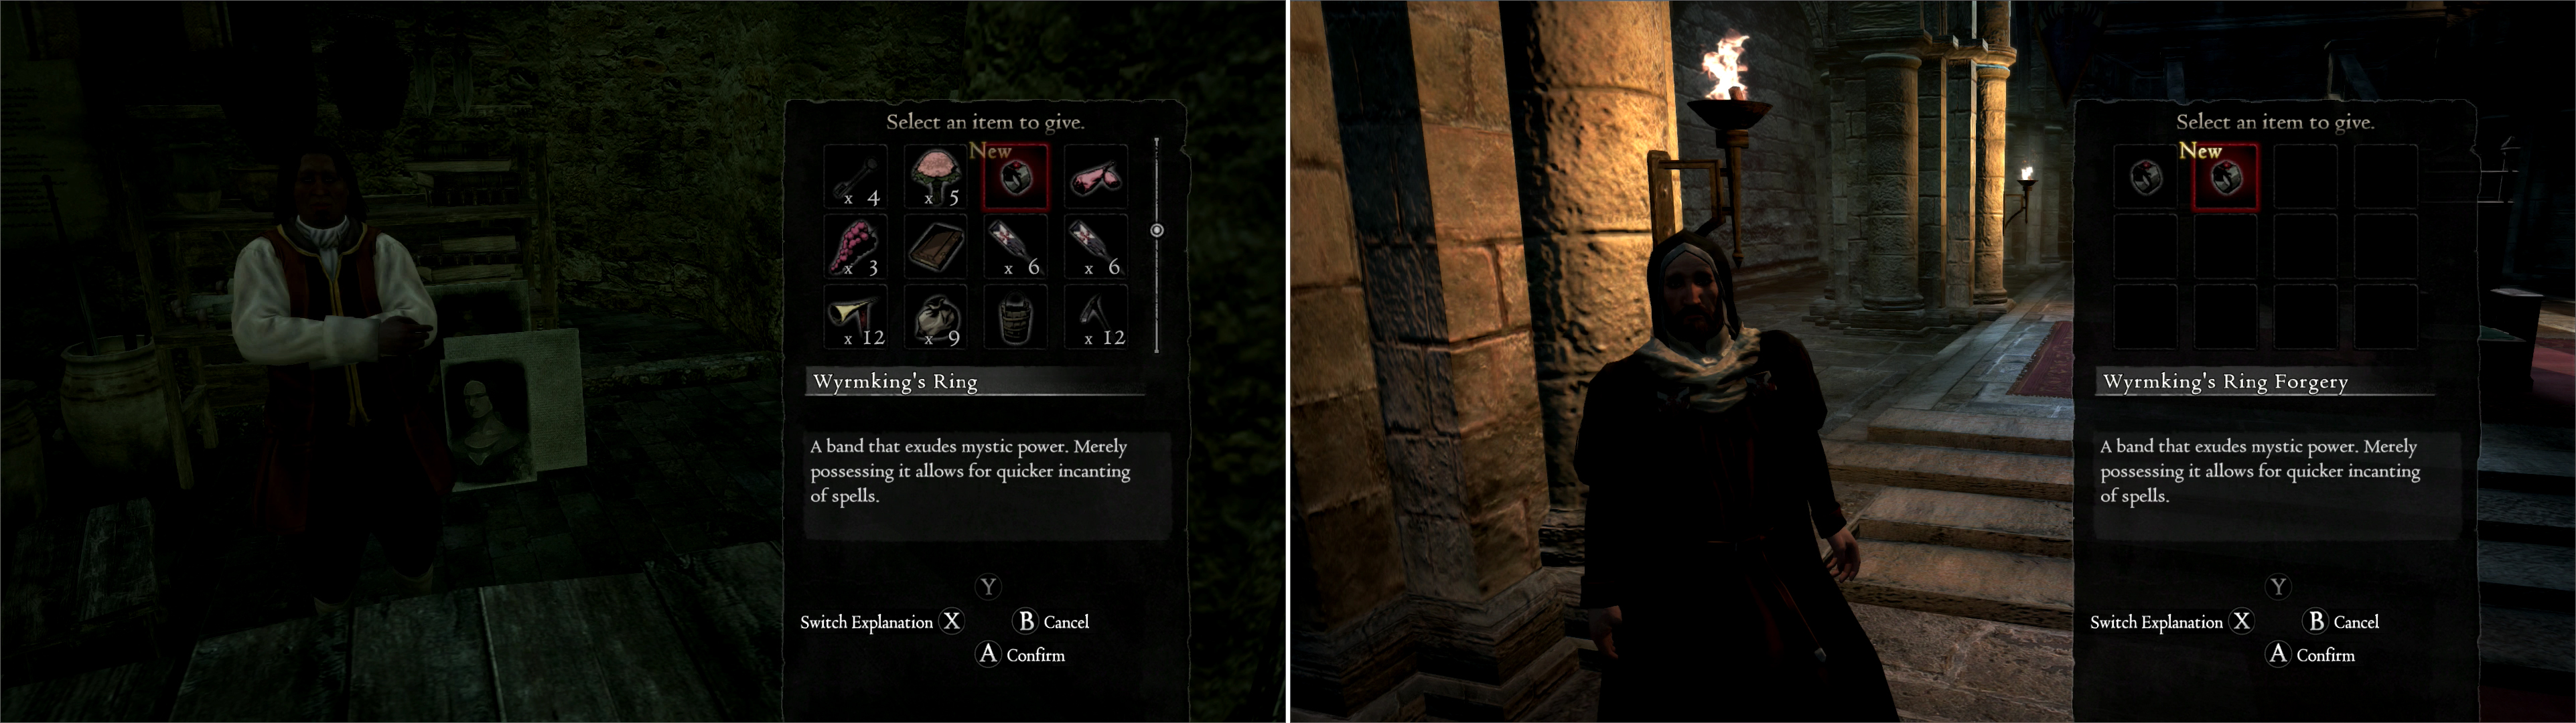
If you want to appease Aldous and keep the Wyrmking’s Ring for yourself, make a forgery (left) and give Aldous the bogus copy (right). This may cost you some treasure later, however…
Once again, Mountebank is the answer; he’ll forge you a copy of the Wyrmking’s Ring (99,990 G). You can give the forgery to Aldous, which will fool him well enough, and keep the original for yourself. Doing this will cost you a reward later, but it’s a worthwhile sacrifice. What, exactly, does this ring do? According to the description, it ‘allows for quicker incanting of spells’, like the Augment ‘Articulacy’. In fact, it seems to do the exact same thing Articulacy does, and the two effects stack. By calculating the base casting times of three spells, their casting times with Articulacy or the Wyrmking’s Ring, and finally the casting times with both Articulacy and the Wyrmking’s Ring, it seems that both reduce casting times by 10%. Shaving a second (or less) off the casting time of most spells might not be worth an Augment slot for you, but certainly it’s worth bearing an inventory weight of .75.
Anyways, when you’re good to go speak to Aldous again and give him the Wyrmking’s Ring (or the forgery) and get ready to accept the duke’s next directive.
| Objective | Reward |
|---|---|
| For recovering a stolen item | 30,000 XP, 40 Rift Currency, 35,000 Gold |

 Sign up
No Comments