
1) Highway Hike
From Megaton, head west to find an elevated highway… yeah, you remember this guy, we followed this highway south to reach the Fairfax Ruins. This time, though, we’re going to follow the highway north-west. Do so until you find a smaller road on ground level that clearly used to run under our landmark highway. Follow this road westish until it forks in front of a billboard. At this juncture turn north-west and follow this road until it hits another billboard. You’ll also find a ilitary truck with some metal boxes in the back, and some ammo boxes outside near a barricade. Not much of a haul, but it’s more of a landmark, anyways. Continue along this road as it leads north, passing an overturned truck whose spilled radioactive barrels are contaminating a local water supply, and further on, an overturned bus. Keep going west along the road from this bus to find the Jury Street Metro Station.
Before we explore the Metro Station, there are a few things to do first. There is the Gold Ribbon Grocers north-west of the metro, Hank’s Electrical Supply west of the metro, and a Drainage Chamber south, south-west of the metro.
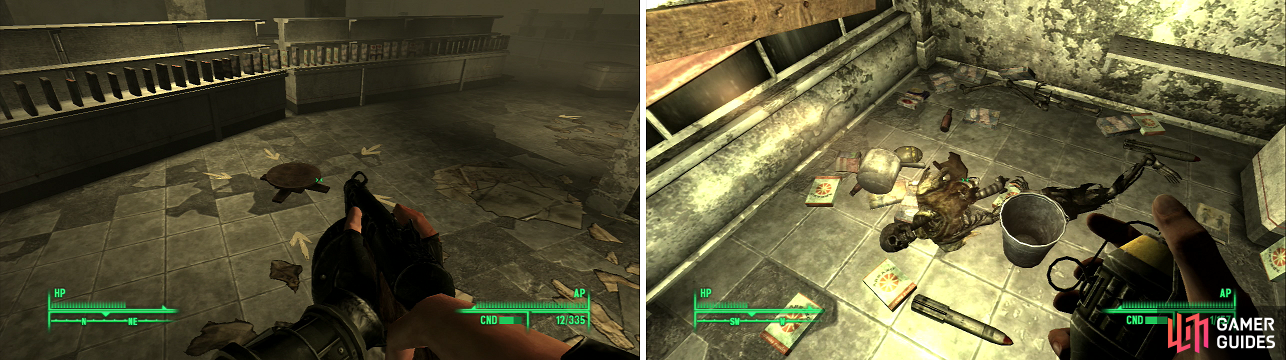
Step on this pressure plate (left) to set in motion a sequence of events that should force a skeleton from its hiding spot (right).
2) Gold Ribbon Grocers
Book - Nikola Tesla and You
Book - Tumblers Today
Follow the arrows to find a pressure plate. The other traps in this place won’t be as easy to find. In particular there’s a bear trap leading to the register, a grenade bouquet near the coffee machine, and a pitching machine in the corner opposite the counter. Together, these elements conspire to create a pretty devious chain reaction that should be seen at least once. The safe place to stand and witness it? The pressure plate all the arrows point to, of course. The purpose of this Rube Goldberg Machine is to knock a skeleton through hole in the roof in the south-western corner of the store. With it you’ll find a Mini Nuke, a Missile, a copy of Nikola Tesla and You , and a copy of Tumblers Today . When you’re done looting head to Hank’s Electrical Supply. Although there are two entrances, let’s assume you’re polite and use the front door.
3) Hank’s Electrical Supply
Hank’s Electrical Supply is home to several Raiders, one of which is armed with a Missile Launcher. There’s some minor loot here, including a full condition Sledgehammer and Baseball bat, as well as some ammo boxes and first aid boxes. In the back is a safe with a Stealth Boy inside. You can climb a ladder in the north eastern corner of the map to reach the roof, but there’s really no reason to. When you’re done head south to find a radio tower.
4) Radio Signal Oscar Tango
Book - Big Book of Science
The radio tower is behind a locked gate [Easy]. Coerce it open and activate the electrical switch to find Radio Signal Oscar Tango. Head north to find a Drainage Chamber. Once in the Drainage Chamber follow the tunnel to find a room with some goodies on it. On a desk is a Big Book of Science , and near it is a Pre-War Book. Hit an electrical switch to open up a staircase in the floor. At the bottom you’ll find some alcohol and corpses, and you might get attacked by Raiders while you’re down there. When you’re done, head to the Jury Street Metro Station.
5) Jury Street Metro Station
Book - Dean’s Electronics
Head west into the metro tunnel. Behind a partition you’ll see a Work Bench, on which is a copy of Dean’s Electronics . Head down the stairs and go south into some tunnels. You’ll find a bunch of beds for the Raiders milling about. Loot the ammo boxes and take the drugs off the table before continuing south. Pass by a door leading to the Jury Street Tunnels, past a derailed train. When you get to a break in the fence head to the other side of the tunnel and travel north. You’ll eventually come across a table and shelf with goodies on it. When you’ve taken everything you want, head back south and go through the southern most door to the Jury Street Tunnels.
6) Ryan Brigg’s Research
Head east, looting the chems on the desk and the metal boxes on the shelf. Go east some more until you reach a tunnel leading south. Loot the ammo boxes before continuing south, killing the Raiders you find before turning east, the south, then east again. Go into the first room you find to your right. You’ll eventually come into a room with Ryan Brigg’s Terminal [Very Easy], which contains information about Ryan’s experiments with Mole Rats.
7) Mole Rat Massacre
Continue until you meet back up with the main tunnel and head across the rails to the north into a natural cavern area. Continue north up a ramp to find another section of the metro. Turn west and loot some ammo boxes behind a concrete barrier and head north up the western tunnel. You’ll find plenty of dead Mole Rats, some triggered bear traps, and Raiders behind a barrier. Go through the door behind the barrier and continue up the next tunnel heading north. Take the first door on the right when you see it to find Ryan Brigg and his research room.
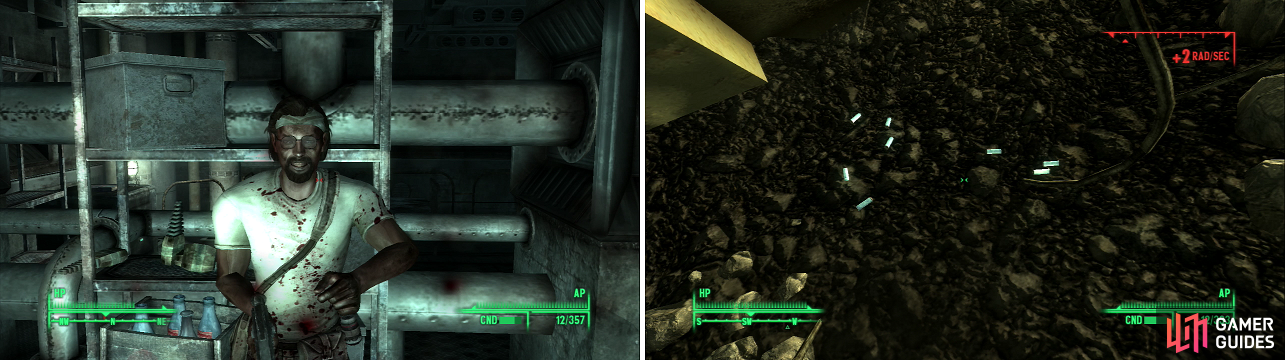
Ryan Brigg is none too happy that you interrupted his ground-breaking research on Mole Rat Wonder Meat (left). The Alien Power Cells this truck was carrying (right) make this a worthy detour.
8) Mole Rat Wonder Meat!
Book - Lying, Congressional Style
You’ll find a Nuka-Cola Quantum by Ryan Brigg’s Terminal [Easy]. In the middle of the room you’ll find a bunch of Mole Rat Meat, some Mole Rat Wonder Meat, and the “Wonder Meat Maker”, where you can combine a Wonderglue and Mole Rat Meat (worth 10 and 4 Caps, respectively) to make some Mole Rat Wonder Meat (worth 20 Caps.) It’s a minor increase in value, but honestly… it’s probably better to keep the Wonderglue for schematics. In the corner you’ll find Ryan Brigg’s safe [Hard], which you can pick or open with Ryan Brigg’s Safe Key. Ryan Brigg also has a Bandana on him.. a somewhat difficult item to find, surprisingly. On top of Ryan Brigg’s safe you’ll find a copy of Lying, Congressional Style . Head north west to find the exit back into the metro station and leave Jury Street.
9) Crater Robbing
From the Jury Street Metron Station head west along the road running in front of Hank’s Electrical Supply. The road will fork after a collapsed telephone pole. Remember this intersection, we’ll be coming back here in a second. Anywho, follow the fork to the north, north-west. It’ll won’t run very far before it disintegrates, but keep heading downhill in the same direction. Pass a big rock and shortly thereafter you’ll see a trench ripped into the ground. Head west, south-west down the trench and it’ll eventually open up into a crater. You’ll catch some Rads from some radioactive barrels here, but the treasure is worth a bit of heat. Continue west into the crater, where you’ll discover a dead Wastelander, a locked safe [Easy], a personal footlocker [Easy], and an overturned army truck. On the ground under the truck is a treasure trove of Alien Power Cells-about 96 of them, in fact.
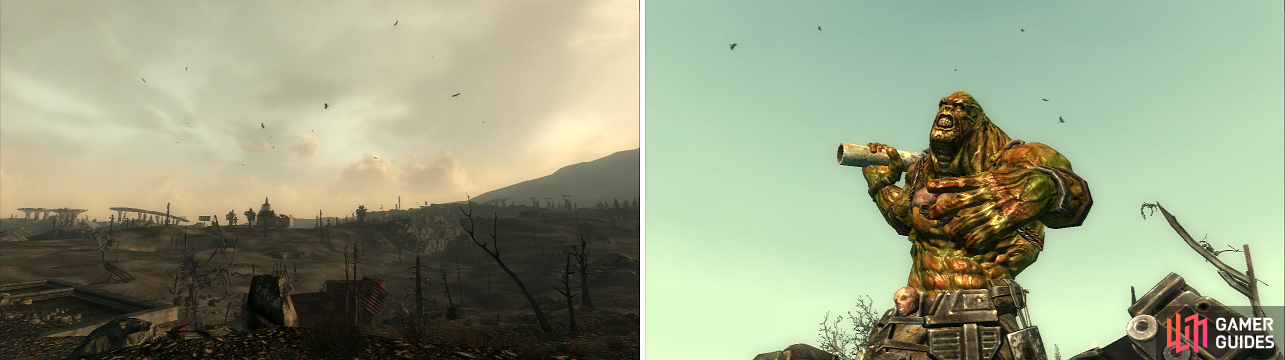
Vultures circling in the distance (left)… has to be a good sign, right? The Super Mutant Behemoth is a massive and powerful foe (right).
10) Something Wicked This Way Comes…
Super Mutant Behemoth
Make sure you’ve got plenty of health and ammunition on hand, then backtrack to the intersection you were told to remember from earlier. From the fallen telephone pole head along the road to the west, south-west. To the south of this road you’ll see some trains, near which Super Mutants lurk. Head down there and clear them out. Once all is quiet, hang around for a few moments. Eventually, a Super Mutant Behemoth will show up. What’s a Super Mutant Behemoth? A twenty foot tall monstrosity that uses a fire hydrant on the end of a sewer pipe as a bludgeon. They hit hard, and they’ve got an absurd amount of health.
On the plus side, Paralyzing Palm works just fine on them, but if it fails you’ll have to go about it the old fashioned way, and expend a whole bunch of ammo into it. When it dies, loot it for a veritible inventory-full of goodies. Head along the train tracks to the south-west.
11) Evergreen Mills
Ah, Evergreen Mills. You’ll find some landmines scattered along the tracks, and plenty of Raiders milling around. This place isn’t horribly dangerous at your level, but you should still take care not to provoke more than a handful of Raiders at a time. And you still need to be wary of taking incidental damage. Although any one Raider isn’t likely to kill you, they can wear you down over time. Make your way through Evergreen Mills, killing all the Raiders you find.
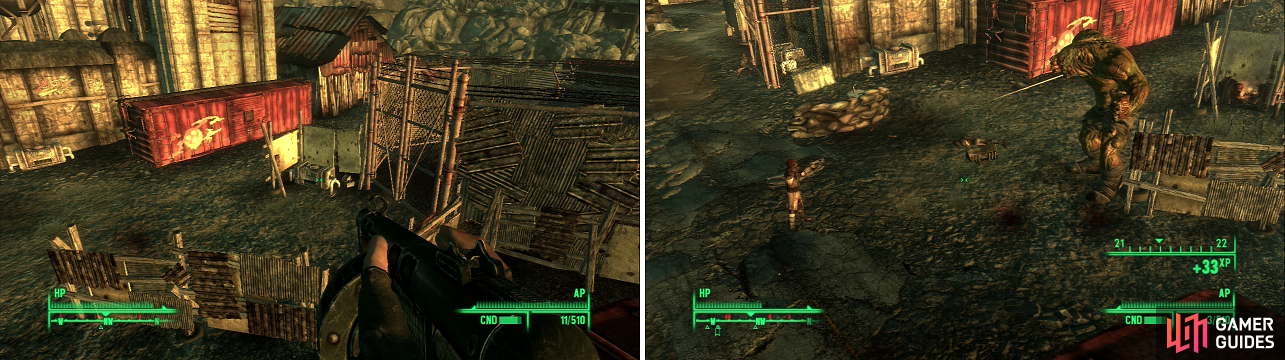
Shoot the generator near the Super Mutant Behemoth’s enclosure (left) and watch the resulting carnage (right)! (But seriously, don’t.)
12) Unleash the Krakhemoth! (But Seriously, Don’t)
Super Mutant Behemoth
There are some things you can do before you head into the Evergreen Mills Foundry. First, to the north of the train tracks you can free some slaves by picking some locked gates [Average], or by using the Evergreen Mills Slave Pen Key you can get from a Raider. There’s also a Super Mutant Behemoth in a large electrified fence. Yeah, two this close together. Crazy. You can shoot the generator outside of the door to turn off the electricity and free the Super Mutant Behemoth. This is always fun if you do it from the cliffs south of Evergreen Mills, which allows you to watch as the Behemoth goes on a rampage, slaughtering plenty of the Raiders. Surprisingly, however, the Raiders tend to win the war of attrition. Or… you can leave the Behemoth alone until the Raiders are dead, then safely shoot it through the fence, hence ensuring that you claim the experience for killing it. Also, if you don’t actually kill the Behemoth you might not get credit towards the achievement, so you’re better off just putting it down yourself. Go up the ramps near the slave pen to reach the Guard House on the northern cliffs.
13) Guard House
Inside the Guard House you’ll find the typical Raider goodies. Ammo boxes, meds and junk hidden in wooden crates, a fridge full of food, and in a locker in near a bed the Evergreen Mills Slave Pen Key, if you didn’t already get one. You can also sleep in the bed to heal yourself if you’ve taken a beating.
14) Northern Shack
When you’re done in the Guard House head down the cliffs to the south west to find the Northern Shack. Inside are two Raiders in a bed, one of which is wearing Sexy Sleepwear. Making baby Raiders, no doubt. At least somebody can get it on in the world of Fallout 3. And no, that thing with Nova doesn’t count. Loot the place and leave.
15) Southern Shack
Book - U.S. Army: 30 Handy Flamethrower Recipes
There’s one more shack on the southern side of Evergreen Mills, aptly named the Southern Shack. Inside is a rather aggressive Raider with a Flamer. In addition to the typical Raider loot you’ll find a copy of U.S. Army: 30 Handy Flamethrower Recipes on a shelf, and a Missile Launcher on the bed. Now head into the Evergreen Mills Foundry.
16) Evergreen Mills Foundry
There are plenty of Raiders in here, too. Kill the Raiders that are an immediate threat and loot the ground level. There are several refrigerators, a safe [Average], and plenty of Turpentine and Tin Cans lying around, if you care to gather some components. When you’ve got it all head up the stairs north of the door to the Evergreen Mills Bazaar.
17) Up the Ramparts
On the first door to the right will be two Raiders in a room with some minor loot. Kill them and keep heading on the ramparts until you find another door to your right. Inside will be a Raider with a Missile Launcher. Head west to find a room with a safe in the wall [Average] with a Stealth Boy inside. There’s also a Nuka-Grenade on the work bench, and in the bucket nearby are several Frag Grenades. In the desk you’ll find the Storage Room Key, which opens the door to the east [Average].
18) The Storage Room (And Other Loot)
Book - Duck and Cover!
In the storage room you’ll find some drugs on the shelf by the cabinet. In the gun closet will be a surpsingly well-maintained Laser Rifle. There’s also a first aid box, ammo box [Easy], wall safe [Very Easy], and a Fat Man lying on the counter. Leave the storage room and continue east to grab the last bit of loot in this level. Now head back down the stairs enough to spot a metal roof beneath one of the stair cases (along the western wall). Jump down from the staircases above to land on the roof to find a copy of Duck and Cover! next to a multilated body. When you’re done, head through the door on the ground level that leads to the Evergreen Mills Bazaar.
19) Evergreen Mills Bazaar
If you thought there were a lot of Raiders outside over Evergreen Mills.. .well… you were right, but there are just as many in the Bazaar. Go down a ramp and head east, up another ramp and explore the bar. In a wooden crate behind the counter you’ll find a Nuka-Cola Quantum. Continue up the ramps until you find two paths splitting near a pool table, one leading east into a tunnel, and one continuing along the wooden bridges north west.

Smiling Jack, the Raider trader, is willing to business with us on the hush-hush (left). The Bobblehead - Barter is a fitting possession for such an opportunistic businessman (right), but it’ll serve us even better.
21) Brothel Raid
Book - Nikola Tesla and You
Continue to the north-west/west until you find some stripper poles. These Raiders REALLY know how to party! There’s plenty of beer and food around for your looting. Up a ramp to the west you’ll find a building with more Raiders inside. Kill them and loot them to find the Madame’s Key on one of the females. Apparently the Raiders were using this place as a brothel… which explains the naked Raider behind the locked [Easy] door. There’s a locked safe [Average] and a register [Average] with some minor goodies inside. In the locked room where the Raider lady was, you’ll find a copy of Nikola Tesla and You on one of the beds.
We are now thankfully done with Evergreen Mills. Time to return home, rest up, stash loot, and prepare for one more voyage to the south-west, this time to Tenpenny Tower. All of you evil kids may have already opted to go here, if that’s the case, it’s time to quest around Tenpenny Tower.

 Sign up
No Comments