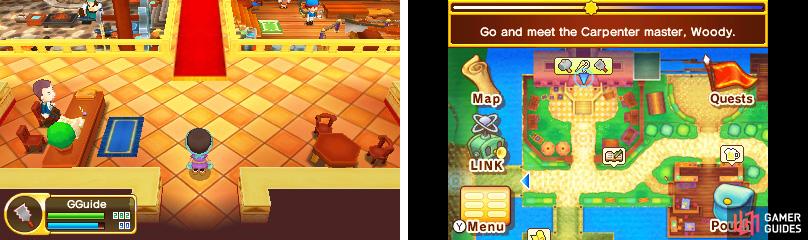
Go and meet the Carpenter master, Woody
Carpenters share a busy workshop with Blacksmiths and Tailors.
Before you can carve a name for yourself, you must meet Woody the Carpenter master in the Royal Castele Workshop and follow in his footsteps.
Without further ado, head turn towards the central plaza and then take the east exit into the Castele Artisans’ District. The Royal Workshop is located directly to the north when you arrive.
Inside, Blacksmiths, Carpenters and Tailors labour day and night, crafting all the things the citizens of Castele need for a better life.
Today you’re a Carpenter or you will be when you speak to Woody , the man with the glorious afro standing in the Carpenter’s workshop along the east wing. He’ll hand you a Makeshift Saw before cowering in fear.
Speak to Sawyer, the Carpenter-in-training
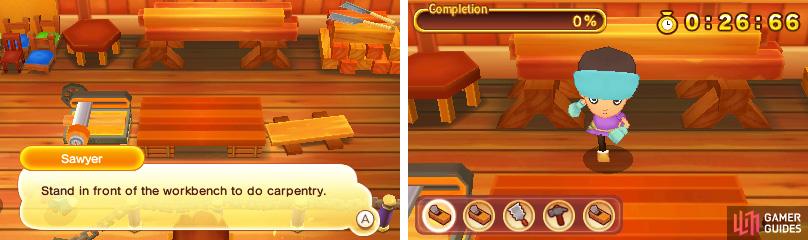
So much for learning from the master… Luckily there is one other person who can teach you how to use a saw and that’s the appropriately-named Sawyer who’s standing below the crafting table.
Speak to Forrest the Woodcutter in East Castele
Sawyer teaches you the recipe for Oak Beams and suggests you try and make one as your first assignment. Oak Beams don’t make themselves though, so you’ll have to ask the local Woodcutters for some Oak Logs.
Exit the Royal Workshop and run east along the streets into East Castele . Once there, continue east across the bridge, then follow the path south until you spot the entrance to the woods on your right, as indicated by a signpost with a tree drawing.
Head north into the woods and you’ll find Forrest standing in front of a large archway. Since you’re a Novice Carpenter, he’ll give you two Oak Logs free of charge.
Go and see Sawyer in the workshop
You’ve got enough Oak Logs to make a Oak Beam, so return to the Royal Workshop, going back the same way you came. Then speak to Sawyer to find out what you must do next.
Use your skills to make an Oak Beam
Once you’ve tried one crafting Life, you’ve essentially tried them all.
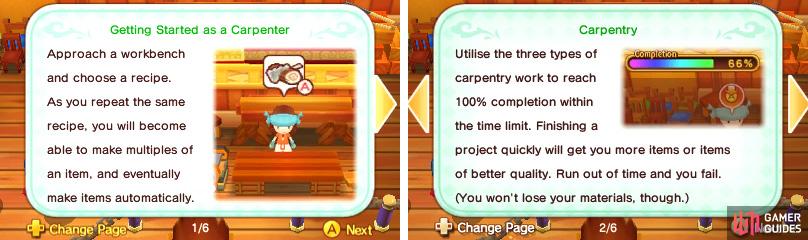
You will be taught the Carpentry skill; at this stage, you now have all the necessary tools, so get that sawdust ready!
First, equip your Makeshift Saw by opening the Menu and going to the “ Gear “ section. When you have a tool in your hand, inspect the workbench in the middle of the room to begin crafting, selecting the Oak Beam as your crafting recipe.
There’s always a first time for everything; if this is your first time in a crafting Life, heed our instructions.
Your crafting table is divided into three sections:
- Left: Hold the A button to slice the wood with your guillotine .
- Centre: Mash the A button to pound with your hammer .
- Right: Press the A button when the moving cursor is in the centre (over the A button icon) to use your saw .
At the beginning of each new project, you’ll start in the centre and you can move to different sections by pressing Left or Right on the D-Pad or the L or R buttons.
To make your item, you must follow the instructions shown in the bottom-left corner of the top screen, going from left to right. The instructions are random and typically look something like Saw, Hammer, Guillotine, Saw.
In this example, you would move right, press the A button with the correct timing, move left and mash A, move left again and hold A, then move right twice and time the A button. If this sounds a bit complicated, it’s much easier when you try it.
When you’re just starting out, there may be only one set of instructions to complete your project. However as the items get more complex, there will be more and more steps that you must complete before you’re done.
To view your progress, refer to the Completion gauge in the top-left corner. Once it reaches 100%, your item will be ready to hit the market!
After graduating from a Novice, you can make multiple and high-quality items too.
One last thing: you have a time limit as shown by the timer in the top-right corner. Should you fail to reach 100% completion before time runs out, you will fail to make anything. You won’t lose any materials; just your time and effort.
If all that went over your head, like Woody’s afro, don’t fret and just use your instincts to make that Oak Beam. With luck, everything will slot into place.
Go and see Sawyer
Nice work! Show Sawyer your finished product and see what he thinks.
Head to Woodys house in the Artisans District
The Oak Beam was easy, but you’re not done yet as it’s time for your proper assignment! For this, you’ll need to visit Woody’s house in the Artisans’ District.
Leave the Royal Workshop once more and head east, stopping just before the exit to East Castele. This time, head south across the bridge and enter first house on your right.
Woody will be well surprised to see you and, in panic, teaches you Weapons Carpentry and Tools Carpentry .
Speak to Goodwood at the furniture shop
For your next assignment, you’ll be helping craft a special piece of furniture and what better place to begin than with the request-giver himself?
Leave Woody’s house and return west to Castele Square, then make your way towards the west exit. Just above the Guild Office you’ll find Goodwood standing next to his outdoor furniture shop.
After a bit of convincing from Woody’s sister, Cherry, Goodwood will teach you the recipe for the Custom Wooden Chair .
Speak to the merchant in the Artisans District
Later, you can buy wood or gather your own as a Woodcutter.
You’ve got the recipe, so it’s time to begin gathering the ingredients. With Cherry in tow, return to the Artisans’ District and head south from the Royal Workshop, towards the merchants’ stalls.
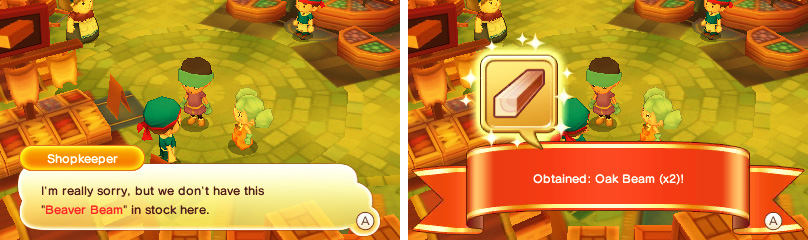
On this occasion you need to visit “Fine Woods and Leather”, the woods and leather stall in the bottom-left corner. The shopkeeper doesn’t have the Beaver Beams you need, but he does have some more Oak Beams .
Speak to Taylor the Tailor in West Castele
Next, you need some Dandelion Cottons; Tailors often keep them lying around.
Go back to Castele Square and take the south exit into South Castele. From there, continue south until you reach the crossroads with a Save crystal nearby, then turn left towards West Castele .
Upon arrival, head north towards the choir hall and talk to Taylor the Tailor (how punny) just outside. She will give you Dandelion Cotton , so you can cross that off your list.
Meet Beavy and Beavo in the Artisans District
You almost have everything you need, but those Beaver Beams continue to elude you. At this moment, Cherry suddenly remembers a clue from her grandfather Marimo that might help.
A clue’s better than nothing, so make your way back to Woody and Cherry’s House in the Artisans’ District to check out Marimo’s pets. It’s a trek and a half, but you need to exercise those legs, not just your arms!
Talk to Beavy
Hmm, Beavy and Beavo seem to be more capable than just “pets”. First, speak to Beavy on the left to see if you can learn anything.
Give Beavo the Oak Beams
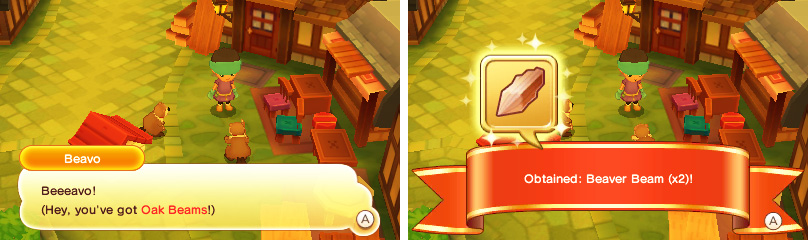
This is the only time you get Beaver Beam, so enjoy them while you can.
According to Beavy, beavers can turn Oak Beams into Beaver Beams; makes sense. Beavo’s already volunteered to do the job, so hand over those Oak Beams. Ta-da! You’ll receive two Beaver Beams .
Go and see Woody at the workshop
Having gotten all the materials, head back to the Royal Workshop and speak to Woody to let him know your progress. You’ll be taught Furniture Carpentry , completing your skill set and allowing you to make the chair.
Make a Custom Wooden Chair
Finally, all the pieces have come together. Approach the workbench like earlier and select the Custom Wooden Chair from the Furniture section as your recipe.
There are more steps to making the chair, but nothing particularly fancy; just make it like you made the Oak Beams. They’re both made of wood, after all!
Report back to Woody
Well, isn’t that just a lovely looking Custom Wooden Chair? It looks good to us, but you should let Woody have the final say.
Actually, Goodwood is here too and he’s pleased with your product, offering you 500 Dosh as payment. Now Woody has no excuse not to recognise you as a Fledgling Carpenter !

 Sign up
No Comments