
The Calm Lands is a vast, open area, where you will find the starting point for some of the game’s biggest sidequests. Upon first entering the area, you will witness a cutscene, then you will be able to explore. As you go down the large hill at the beginning, you will find Maechen on the side, overlooking the plains. Speak to him, if you wish, to learn more about the Calm Lands. At the bottom of the hill, a hovercraft will approach you, which is just a shop for Rin’s agency. Some of the equipment is nice, but some of the equipment is a bit on the pricey side, so use your discretion if you purchase anything.
Chocobo Training
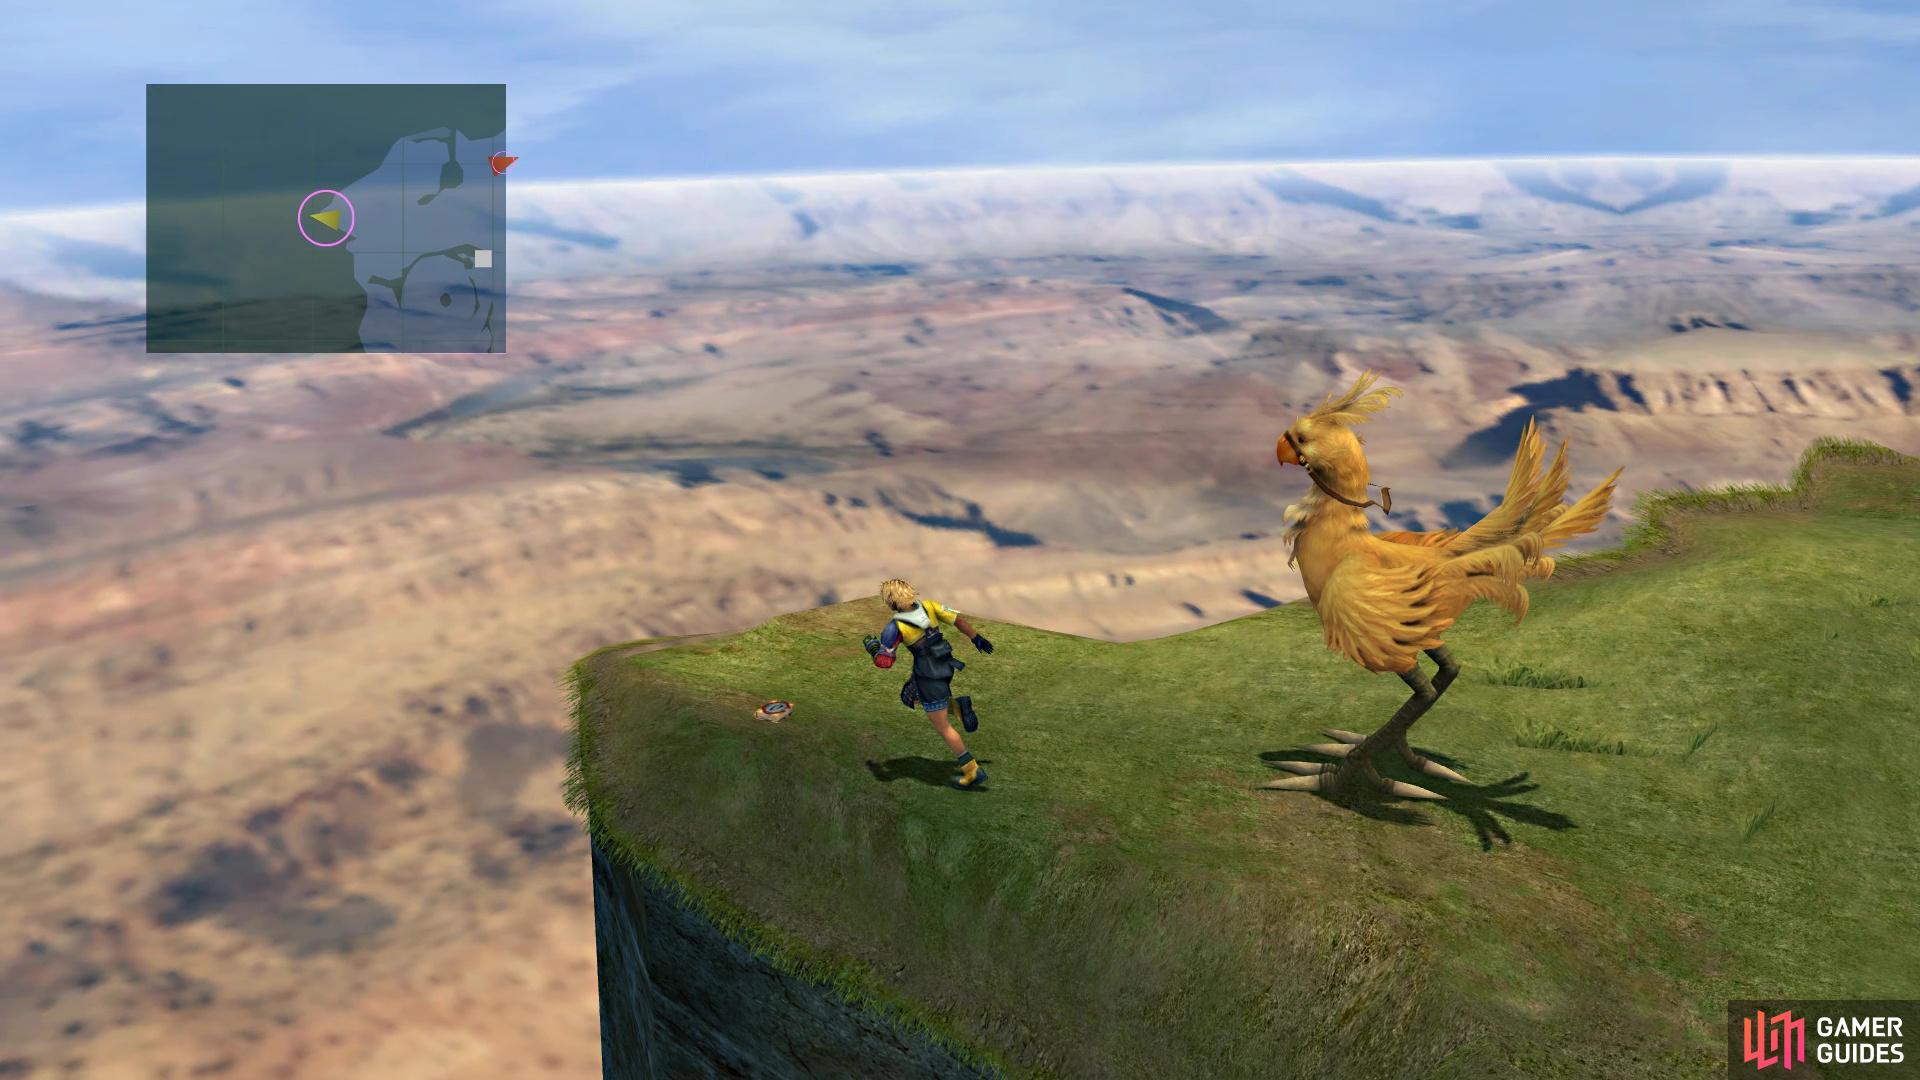
Straight north from Rin’s Traveling Agency, on the northern edge of the map, is a NPC riding a Chocobo. Speak to this NPC and she will remark about crossing the Calm Lands on foot, to which you should respond with wanting to ride a chocobo. Tell her after that you want to train a chocobo, starting the actual Chocobo Training little sidequest. The first training exercise is called Wobbly Chocobo, where you simply need to reach the finish line in 12.8 seconds or under. Controlling the chocobo is a bit daunting, as well as a bit aggravating, since it will steer left or right whenever it wants. The best thing to do is correct the direction by tapping left or right on the directional pad, as opposed to the analog stick.
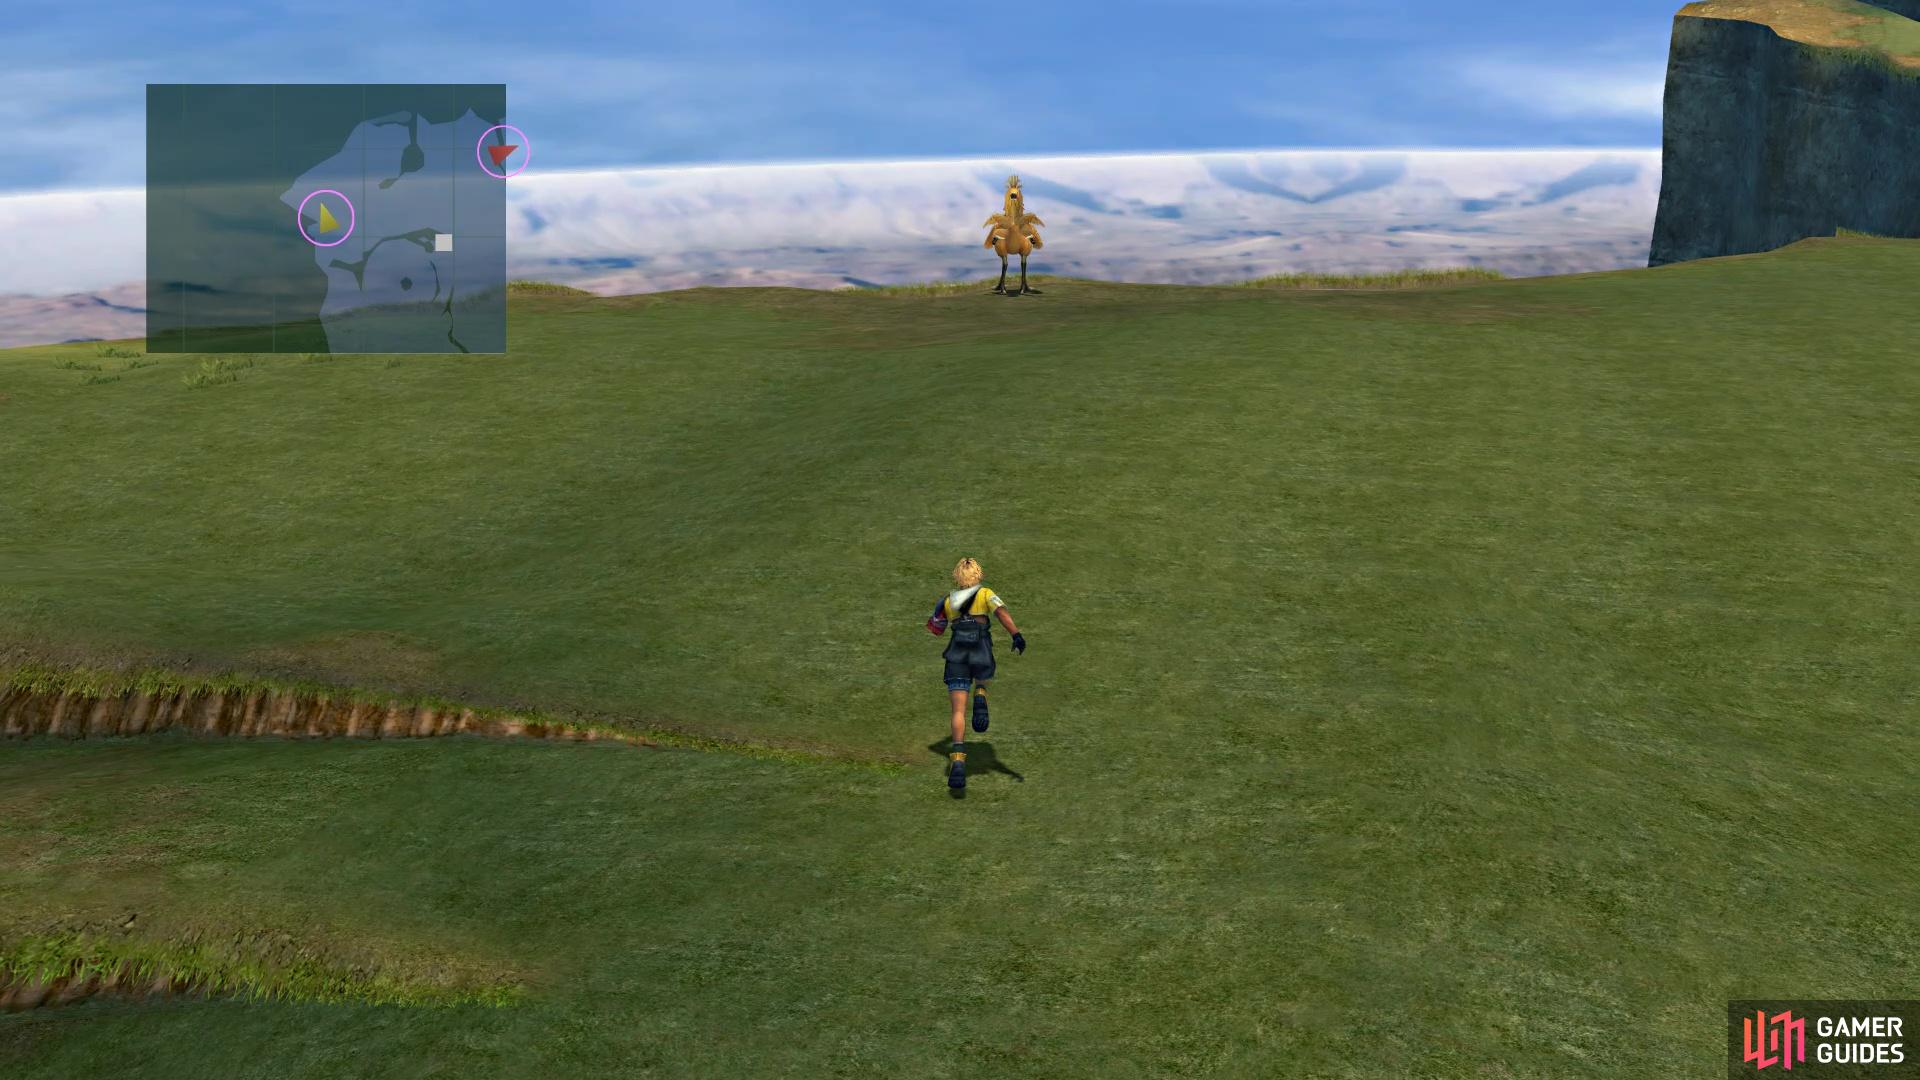

(1 of 2) Look for this NPC to begin the Chocobo Training
Look for this NPC to begin the Chocobo Training (left), The courses will get progressively more difficult (right)
Completing the first training session is the only one you need to do in order to ride a chocobo on the Calm Lands. However, there are three more pieces of training left to do, which get progressively harder. Your reward, should you do it now or later, for completing the final one and getting the bonus is the Sun Sigil, one of the pieces of Tidus’ Celestial Weapon. The following are the other three courses for Chocobo Training:
Treasures of the Calm Lands
Once you complete the first Chocobo Training course, you can speak with the NPC and ride a chocobo around the Calm Lands. This will allow you to quickly get from one end to the other, without fear of random encounters. So, with the chocobo in your possession, you can nab some treasures on the Calm Lands. Start off by going to the southeast corner of the map, where you should find two chests, one with 10,000 Gil and the other with 5,000 Gil. Now, head to the building in the central portion of the Calm Lands, where you should witness a cutscene.
Look in the northwest corner of the plains for Primer Vol. XXIII
After the scene is over, you can go to the counter to find a shop. They will sell similar equipment from a while ago, but the auto-abilities/stats are a little better on them. In addition to this, the person selling you the items, Naida, can be recruited for Blitzball and is actually a good player, if you need anymore. Behind the building is another chest, this one containing a Lv. 2 Key Sphere. If you head to the northwest corner of the map, you should find Al Bhed Primer Vol. XXIII there, so pick it up. A little southwest of the building in the center, you should be able to find Belgemine. As usual, she will issue a challenge to Yuna to fight one of her Aeons.
BOSS - Belgmine’s Shiva
Since Belgemine is using Shiva, you cannot use her, but you have Bahamut to help handle things. Despite being an ice-elemental Aeon, Shiva here is not weak to fire, but she does absorb ice. She also has some pretty high defense and magic defense, so your attacks are not going to deal too much damage. However, Overdrives are going to inflict a lot more damage than normal, and Bahamut’s Mega Flare can even break the HP damage limit of 9,999. Shiva will use her normal attack, as well as Blizzara. If her Overdrive meter gets filled up, instead of using Diamond Dust, she will actually use Heavenly Strike.
Your reward for defeating Shiva here is the Aeon’s Soul key item, allowing you to spend items to boost your Aeons’ stats. Should you win, you will also receive 30 Power Spheres, although you should have more than enough of these at this point. Apart from the two bigger side content areas, you are pretty much done with the Calm Lands and can continue with the story. It is highly recommended that you visit both [Remiem Temple] for the Chocobo Racing, as well as the [Monster Arena] to unlock the ability to capture fiends.
Should you want to continue, head to the exit in the northeastern corner of the Calm Lands. Enter the next screen and cross the bridge, where some Guado goons show up and sic the next boss on you.
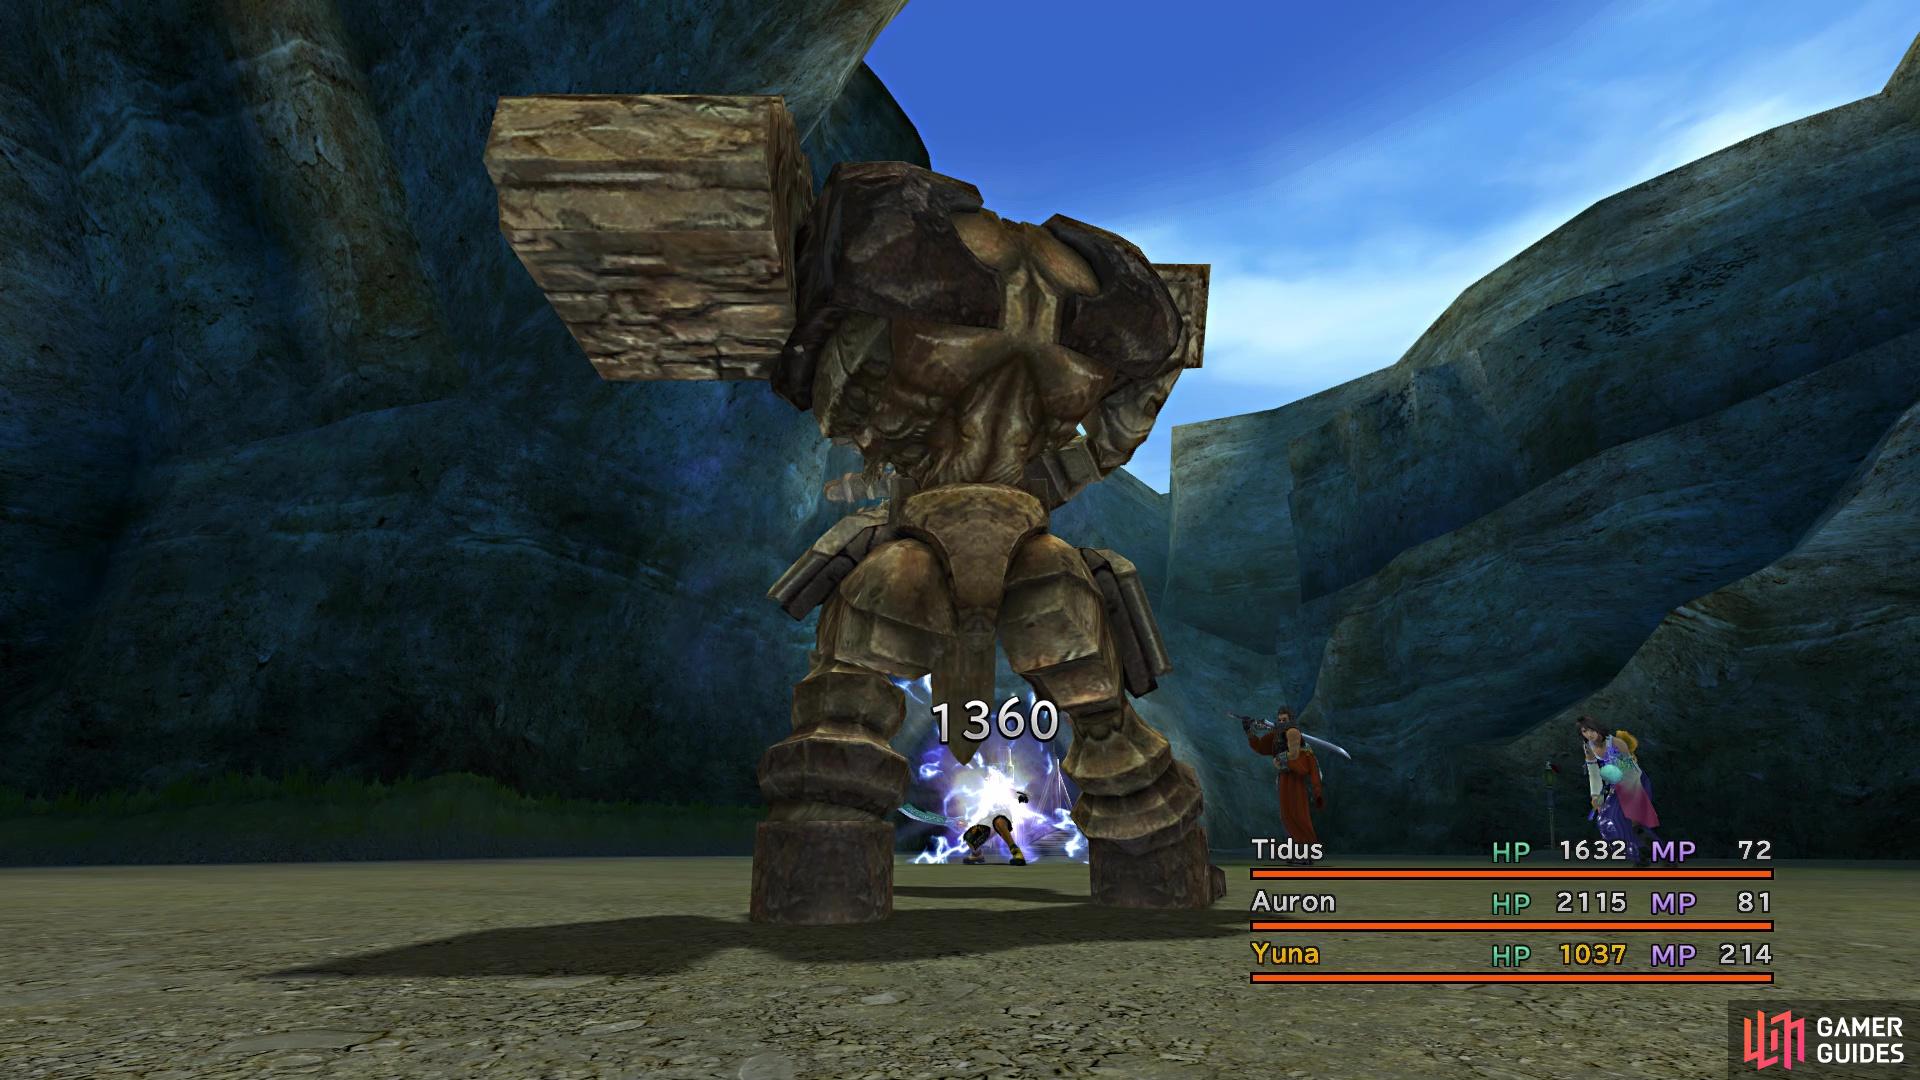
BOSS - Defender X
There’s no joking around that this boss hits hard, physically. Its normal attack can hit anywhere around 2,000+ damage, meaning you will need to be careful with some characters, as their HP pool might not be that high yet. Haymaker, another physical attack, has the potential to reach around 4,000 damage, or even more. This will probably KO anyone that isn’t named Auron, unless you’ve done a lot of grinding for Sphere Levels. It seems to use this after doing three or so normal attacks, so you can prepare for it. Another attack up its proverbial sleeves is Blast Punch, which halves the character’s HP, so it can’t actually KO them.
It will sometimes use Blast Punch as a counter, so be aware of that in case it does it right before one of its turns. Defender X does have access to Slowga, but it’s not a common occurence for it to use the spell. Lastly, once the boss gets under 16,000 HP or so, it has a chance of using Mighty Guard on itself. This will give it Protect, Shell and NulAll, which can be quite troublesome. It seems to only use this if you use Armor Break on it, which is something you will be doing. The reason for Armor Break is because Defender X is armored, so only Piercing weapons will deal full damage.
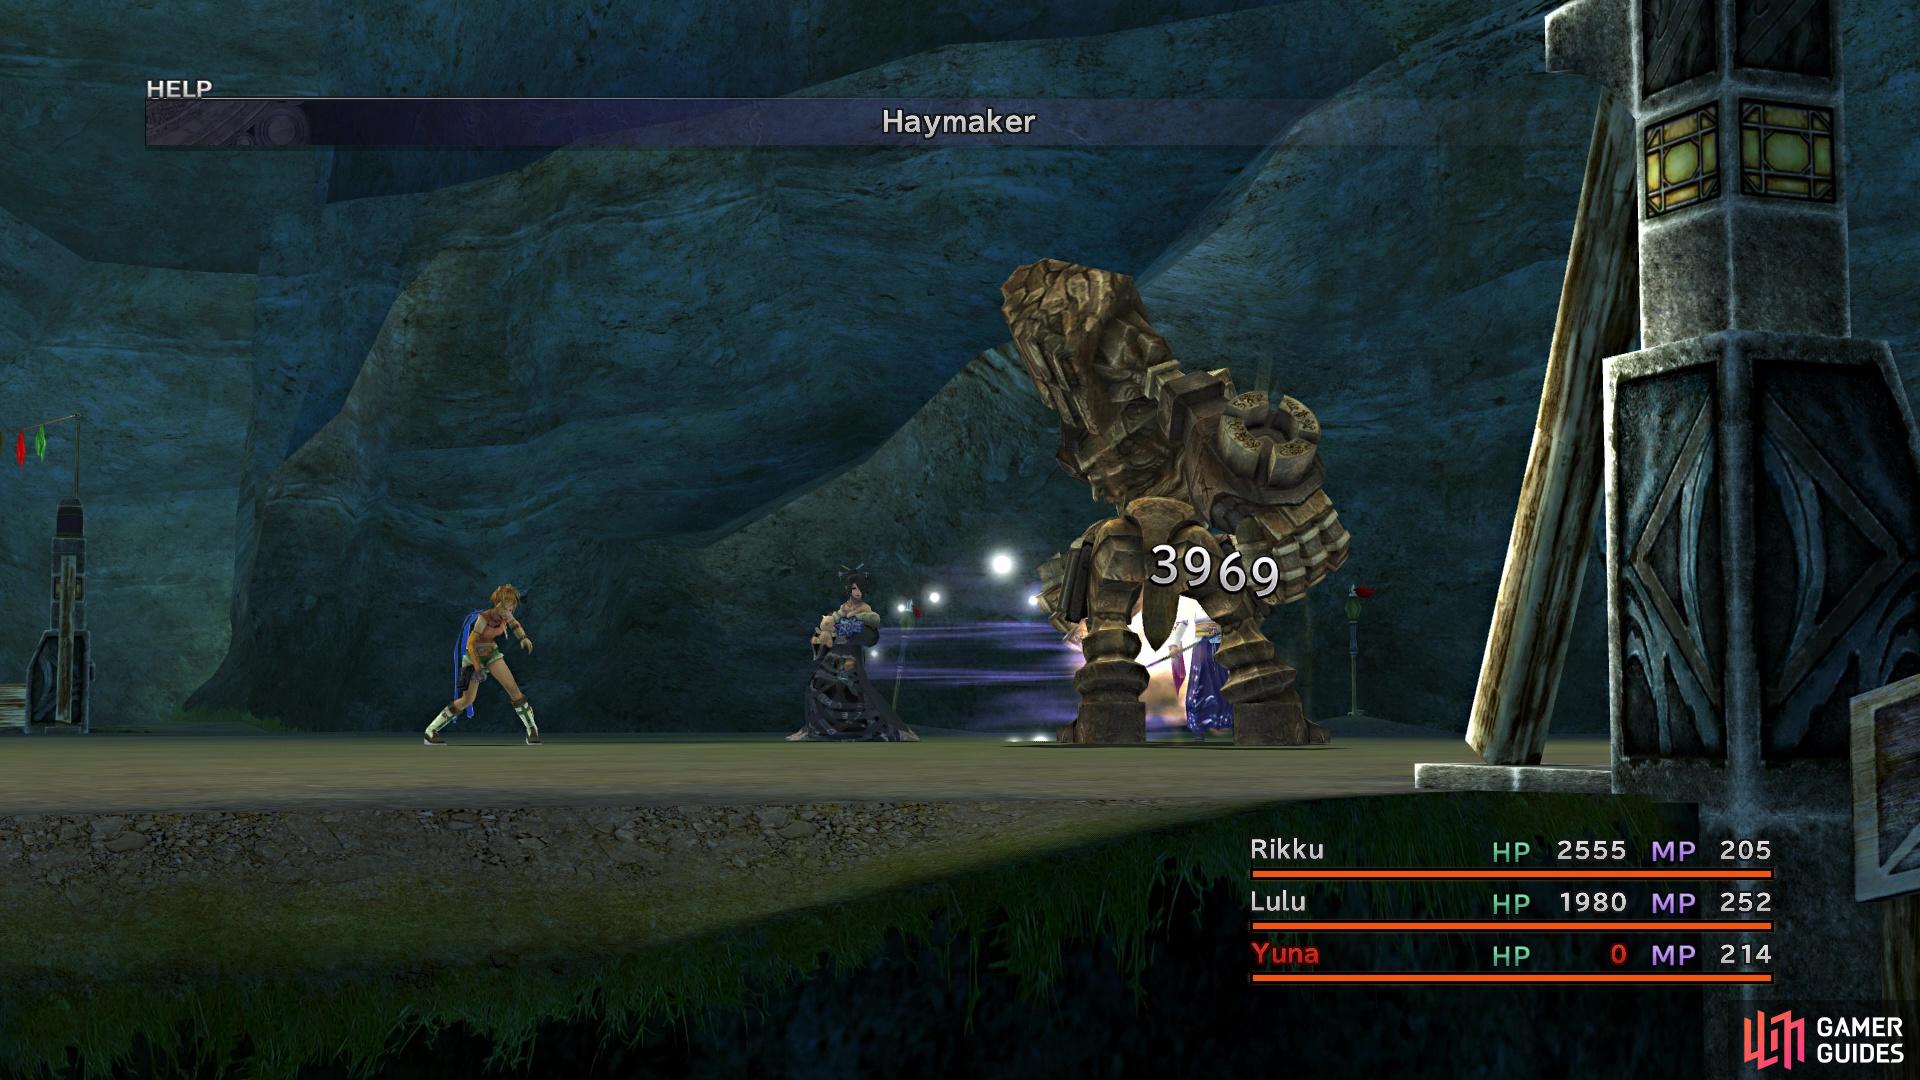
(1 of 2) Haymaker will probably KO most characters form full health
Haymaker will probably KO most characters form full health (left), Provoke the boss to make it do nothing but Blast Punch (right)
You could use Protect on your characters, since the boss really only does physical damage, but there is a much easier way of dealing with Defender X. If you happen to have Provoke, cast it on the boss and the only thing it will do is use Blast Punch on the person who used Provoke. As long as that character doesn’t die (they shouldn’t, since Blast Punch does gravity-based damage) or you don’t switch them out, this will be an incredibly easy win.
After the battle with Defender X, you should see a hill leading down into the valley. This will bring you to the [Cavern of the Stolen Fayth], an optional dungeon. Head down there, but don’t go inside (a cutscene may bring you inside), instead opting for the other path down here. In between the two rocks is a sword in the ground, so pick it up for the Rusty Sword, the first piece for Auron’s Celestial Weapon. Head topside and look for the other exit, leading you to Mount Gagazet.

 Sign up
No Comments