Local Enemy Bestiary
| Enemy Name | Notes |
|---|---|
| Aka Manah | Weakness to Holy, high HP |
| Anole | Weakness to Ice |
| Archaeothyris | Weakness to Ice |
| Armet | None |
| Assassin Bee | Weakness to Fire, Flying |
| Balivarha | None |
| Barbuta | Weakness to Lightning |
| Blue Elemental | Weakness to Lightning |
| Bolt Drake | Weakness to Water |
| Chocobo | None |
| Flan Rojo | Weakness to Ice |
| Gemini | None |
| Enemy Name | Notes |
|---|---|
| Gigas | Weakness to Gravity |
| Ironside | High HP |
| Malboro | Inflicts a myriad of status ailments |
| Spine Drake | None |
| Taromaiti | Weakness to Fire/Holy |
| Varan | Weakness to Fire |
| Watcher-A | None |
| Watcher-R | None |
| Watcher-S | None |
When you arrive, it would be a good idea to begin by first cleaning out the main portion of the Thunder Plains of their chests. In the southern half, you’ll find six Echo Screens , an X-Potion , and a Glass Buckle accessory; in the north half, there’s four Phoenix Downs , two Petrify Grenades , and a Turbo Ether . As usual, the chests are easy enough to spot.
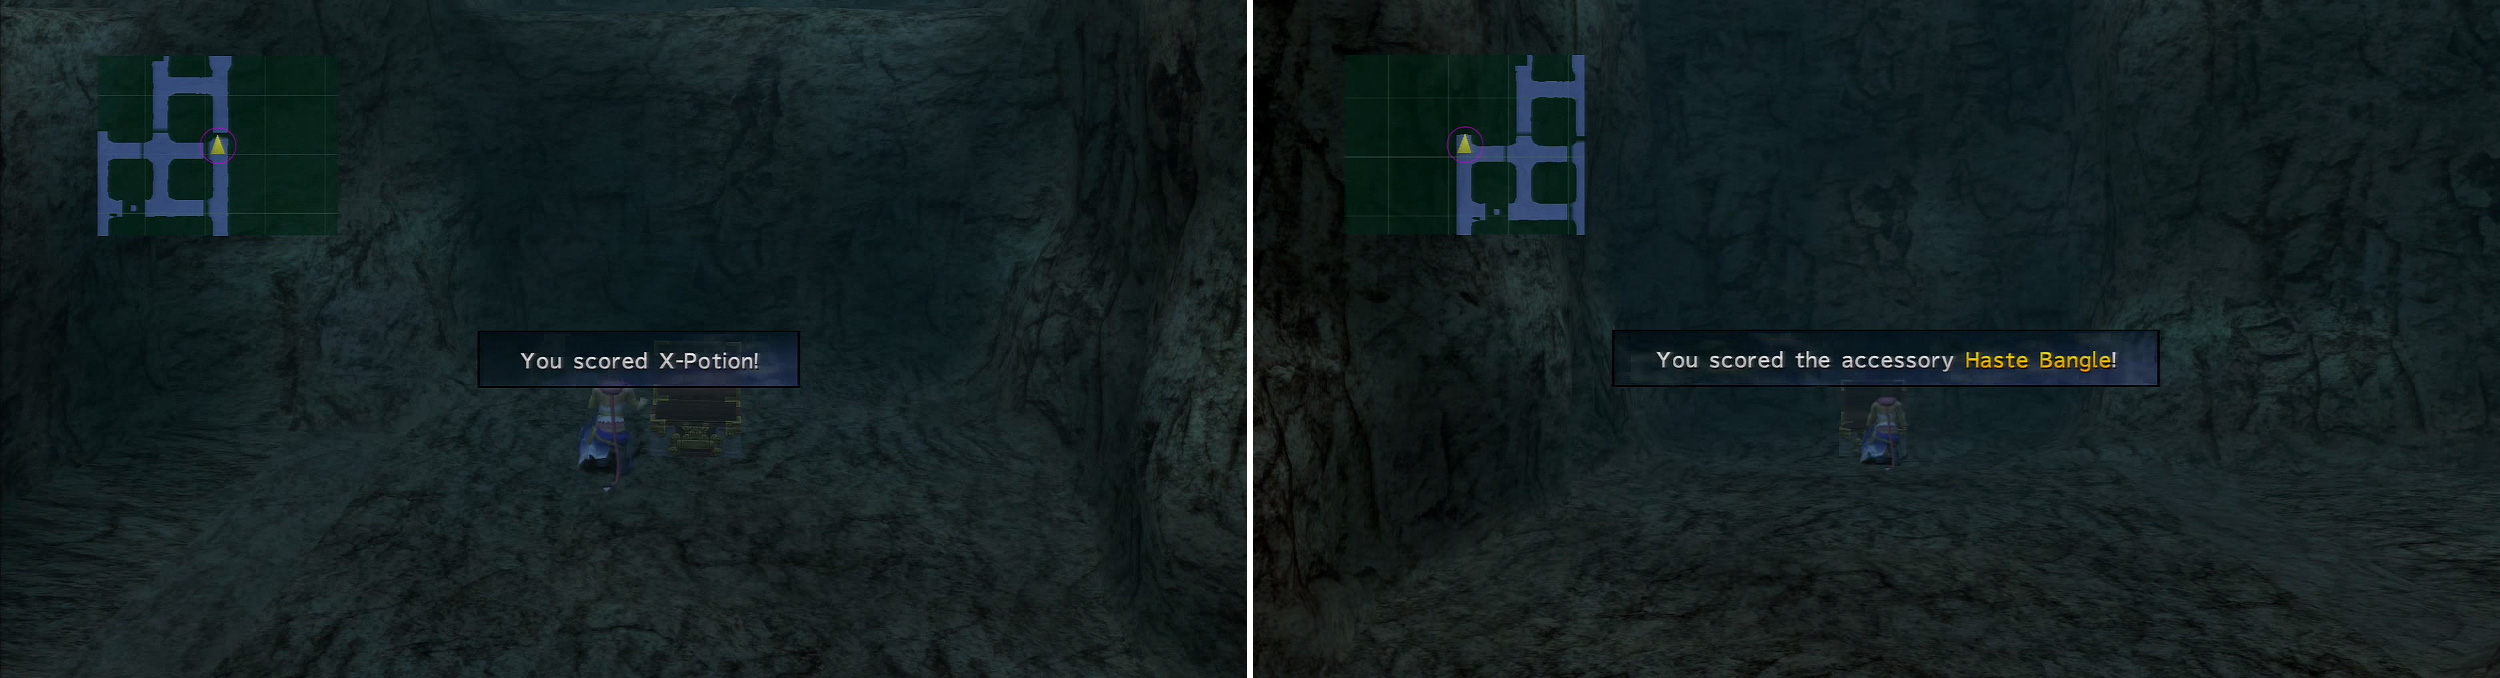
Onto business, though. Use the minimap and follow the red arrow to the entrance of the Zalamander’s dungeon. When you enter, you’ll quickly find an east/west fork; go east and north to find a chest next to a ledge containing an X-Potion . Backtrack to that intersection and go west and north this time. As you do, keep your eye to the east; you’ll see a path that we’ll ignore for the moment, but take note of it. When you reach the north side, plunder the chest for a Haste Bangle .
There are a few chests to open at the dead ends inside the dungeon.
Go back south to the path noted earlier and hop across to the platform, then to the other side of the gap. There, go north at this intersection and east at the next to reach a chest containing two Phoenix Downs . Go west to the four-way and north for a bit to another fork. Go east and north there to a small clearing where you’ll find an Elixir . Backtrack to the fork and go north. Go up the platforms here and all that to reach the next boss.
BOSS - Zalamander
| Zalamander | Details (Oversouled) |
|---|---|
| Max HP / Max MP | 12,850 / 276 (14,243 / 276) |
| Elem. Weak / Resis / Immunity / Absorb | Ice/ None / Gravity, Magic/ None |
| EXP / GIL / AP | 1,200 / 930 / 1 (2,100 / 1,300 / 2) |
| Common Steals / Rare Steals | Sublimator / None (Freezer Burn / None) |
| Common Item Drops / Rare Item Drops | Crimson Ring / None (Sublimator / None) |
The cleverly-named Zalamander has a lot of moves you’d expect by simply looking at it and knowing that it’s a dragon. It will actually have a regular attack pattern in its non-Oversoul form: Attack (250-400), Attack, Flame Breath (roughly 300 fire damage to all), Attack, Attack, and Tail Smash (removes 25% of max HP and Delays). Nothing really special, in other words; even if it is predictable, it just tells you when to get above 25% of your max HP.
The Oversouled form is considerably more difficult. It doesn’t seem to have any regular pattern of attacks, but it does retain Attack and Flame Breath, both mildly more powerful than normal. It can also take two turns of nothing before doing either Bruising Tail or Crushing Tail . Each attack will remove 3/8 (37.5%) and 1/2 (50%) of several characters’ max HP, respectively; both also dole out a Delay effect. That’s what makes Oversouled Zalamander quite hard to deal with: unpredictable loss of half your HP, with a possible Tail Smash or two to soon follow. As a footnote to this, NulBlaze Rings (buyable in Bikanel) will nullify Flame Breath.
Main Strategy: When you open the battle, Mighty Guard or Protect/Shell to everyone is a great idea; the less damage you can take the better. (Then again, 33% of the regular form’s and 60% of the Oversouled form’s offenses won’t be affected.) If you’re fighting the Oversoul form, you will want to also try to instill Regen on everyone at some point so you can avoid a Crushing Tail-Tail Smash-Tail Smash possibility (instant-KO without a quick heal) as noted above.
After that, it would be a decent idea to throw up Darkness Dance or a suitable alternate to blind the boss, as it is vulnerable to that; that will further help you stay alive. From there on out, you’ll want this support unit, whoever she is, to keep healing whenever it’s necessary.
As for your offense? DON’T BOTHER WITH MAGIC . It seems like the Zalamander is immune to magic attacks, meaning that the Ice weakness is not easily penetrated. It would be better to simply use units with a high physical prowess, like the Dark Knight or whoever you usually end up using.
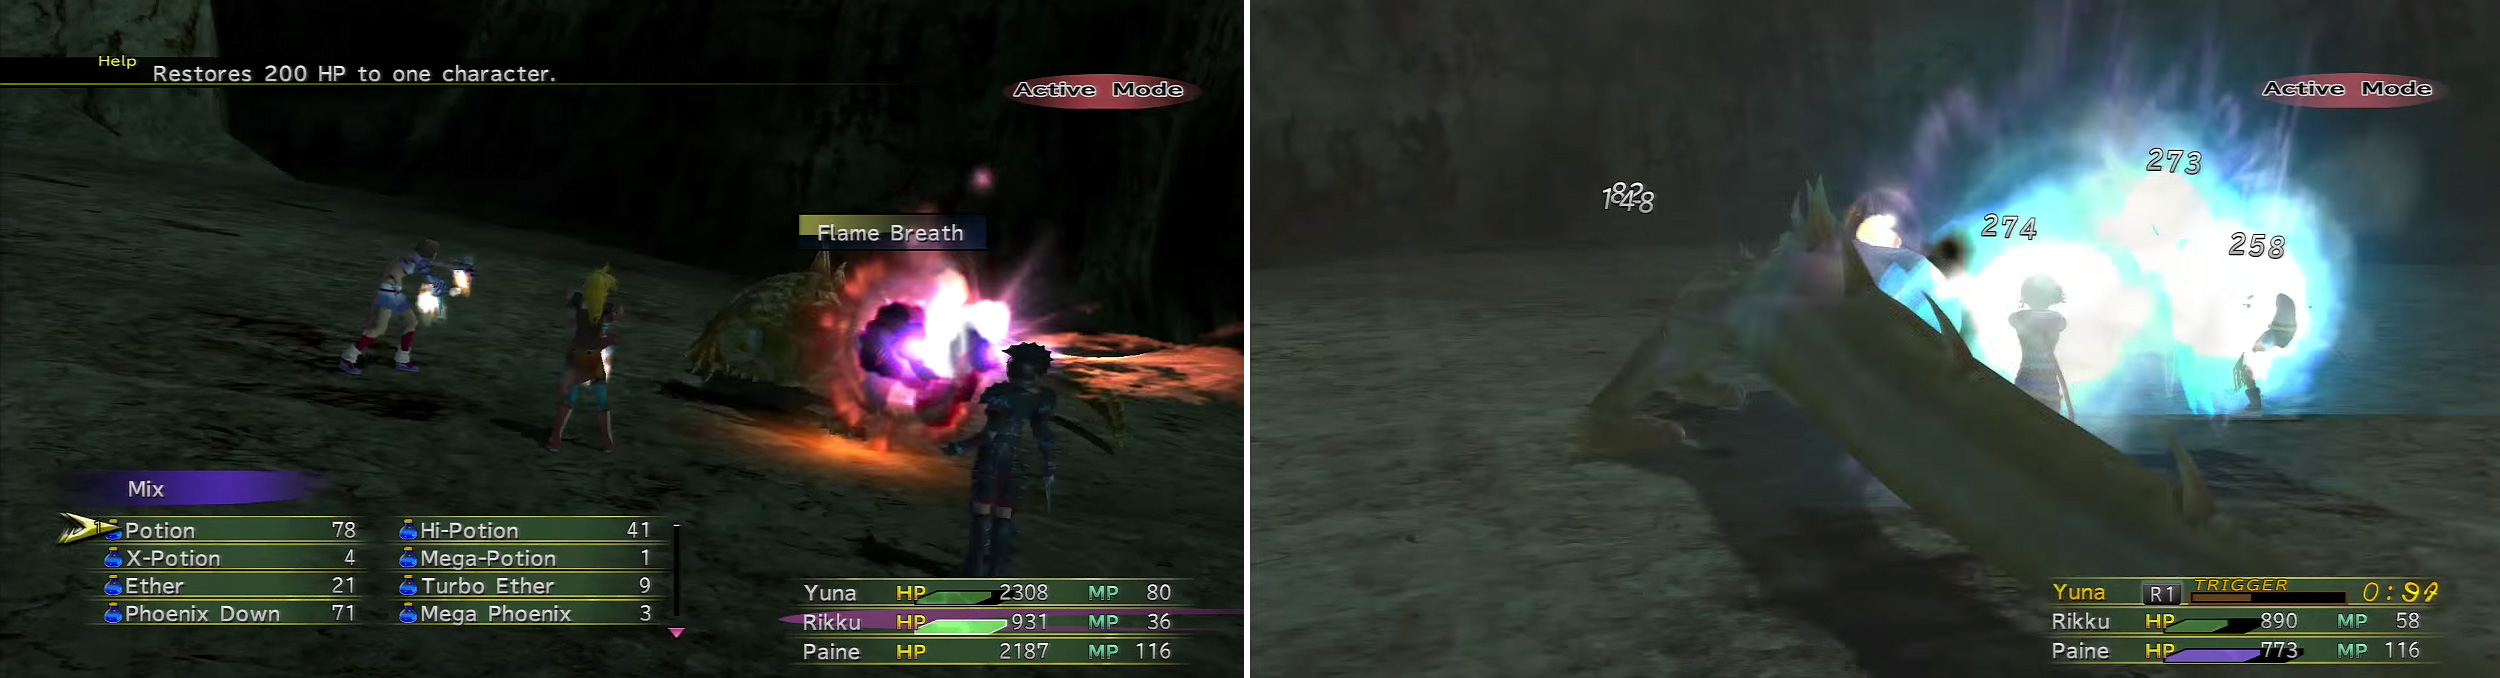
Like the Flame Dragon earlier in the game, Zalamander can use Flame Breath (left) but he he also has a Tail Smash (right). Protect is a must in this battle.
Alternate Strategy: Strangely enough, this boss is vulnerable to being Ejected; it’s virtually the same as Death, though, if not more harmful, so why the boss is immune to Death but not Eject… In any case, there are several ways to go about that. The Thief class can use Steal Will, the Berserker can use Eject, the Trainer can use Kogoro Strike (only Yuna or Paine can learn it there, though), and Mascots can use Pupu Platter (Rikku only, though). You probably don’t have the Mascot, though, except in New Game+. In any case, there are plenty of methods for being able to Eject this boss that require only a little grinding; a pretty decent way to try and get quick EXP from the Oversouled form.
After the battle, collect the nearby chest for the Black Ring , then simply return to the airship.


 Sign up
No Comments