For this, you’ll need to obtain Cyan. Next, you’ll need to head to Doma Castle; it is found on an island between the Serpent Trench and the Veldt continent.
Doma Castle
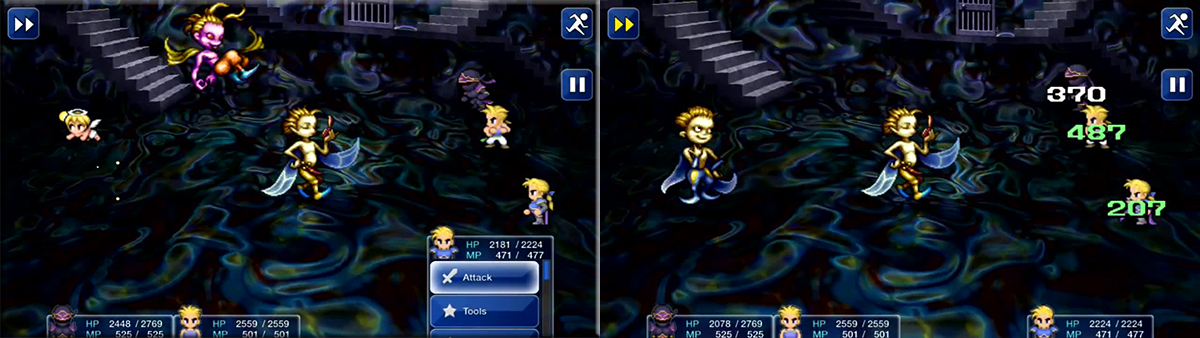
Once you arrive inside the castle, take the west, then the east door. In this room, opt to take a rest. After the day comes and you’ve consequentially been healed, everyone gets up. Cyan, however, acts a bit more oddly than usual. When you head to check on him, three creatures, the Dream Stooges, appear. They leap into Cyan’s mind and decide to screw around with you. Oh, fun.
Cyans Dream Sequence
Local Enemy Bestiary
| Monster Name | HP | MP | ATK | DEF | Gil | EXP |
|---|---|---|---|---|---|---|
| Alluring Rider | 1200 | 330 | 13 | 125 | 531 | 1323 |
| Coco | 3062 | 198 | 13 | 100 | 631 | 1410 |
| Parasite | 1000 | 230 | 1 | 140 | 461 | 455 |
| Weredragon | 3000 | 300 | 10 | 105 | 731 | 953 |
| Pandora | 1522 | 350 | 13 | 140 | 461 | 622 |
You’ll start this with the fourth character on your list – or third, if Cyan was your fourth. Hence, I began with Terra, since I knew this. Use the Save Point nearby, then go north and along the path. At the trio of doors, take the one on the left to find the character that was first in your party (for me, Locke). Speak with them to have them rejoin the party.
Go north and through the door. Upon reappearing, go north and into the northern door, then through the door on the right. You’ll meet the character was that was second in your party (for me, Edgar). Speak with them to have them rejoin. Go northwest and through the door. Upon reappearing, go north and through the door to find the Save Point. Use it again, then go through the middle door. Go west to find a door and go on through.
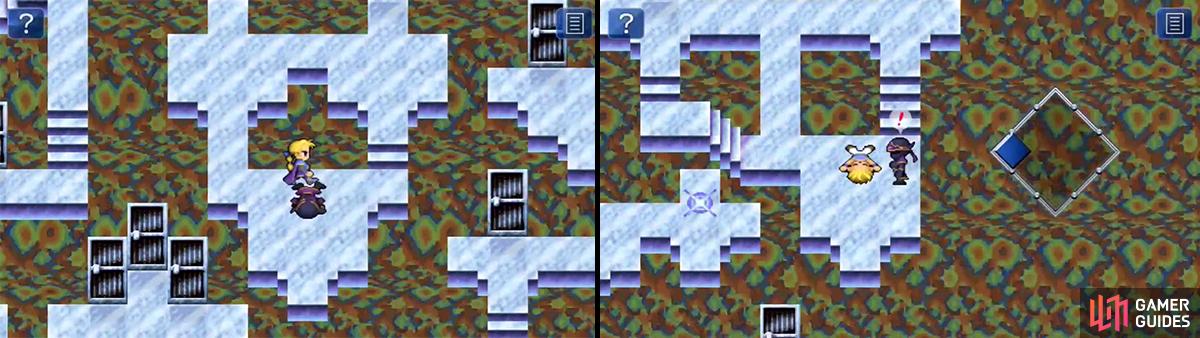
Collect your party members as soon as you can to make things easier.
Now, head south. At the door, heal up and re-equip if you feel it’s needed. You will want element-absorbing/nullifying/resisting equipment. Once you go through the door, you’ll have a boss battle.
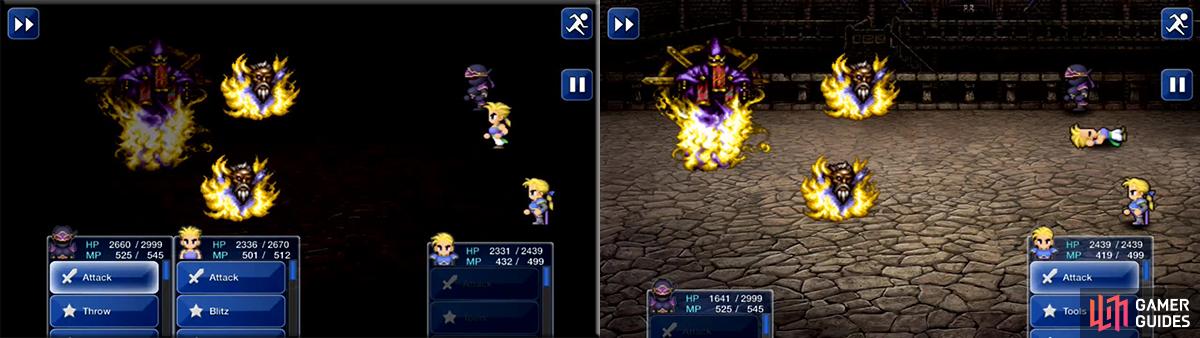
Curlax, Laragorn, Moebius
Curlax is able to use a basic attack, Hit (twice as powerful), Fira, Firaga, Delta Attack , Arise, Silence, Reflect, Stop, Slow, and White Wind. Laragorn is able to use a basic attack, Hit (twice as powerful), Blizzara, Blizzaga, Delta Attack, and Reflect. Moebius is able to use a basic attack, Hit (twice as powerful), Thundara, Thundaga, Delta Attack, Cura, Haste, Protect, Shell, and Reflect. Just as a note - Delta Attack will Petrify whoever it hits, so long as they’re vulnerable to Petrification.
It’s a good idea to start this battle by using Kirin, Fenrir, and Siren. Kirin is for the Regen; Fenrir for dodging attacks for a bit, and Siren is to stop most of the magic spells from Laragorn. Afterwards, start by trying to kill Curlax. Continually hit him with some Blizzara/Blizzaga spells and he’ll go down quick enough; hit him with the Sleep status if you have trouble. Next up is Laragorn, who should already be Silenced. His low Attack stat means that, after Silencing, you’re in the clear for him - hit him with some Fira/Firaga spells.
One of them can use Arise to ressurect his fallen comrades. Kill him first. The others use powerful spells but with sufficient resistance, they are no trouble.
Finally, focus your remaining power on Moebius. He can be Berserked to be brought into a situation much like that of Laragorn when Silenced, and is how he should be treated; Berserk him at the start of the fight if it is possible. Beyond that, simply use your best attacks, for he lacks any weaknesses, to finish him off.
After the battle, go through the previously guarded door.
Phantom Train Sequence
Additional Enemies
| Monster Name | HP | MP | ATK | DEF | Gil | EXP |
|---|---|---|---|---|---|---|
| Al Jabr | 2722 | 180 | 13 | 110 | 485 | 890 |
| Samurai | 3000 | 500 | 13 | 10 | 791 | 1545 |
| Suriander | 2912 | 228 | 13 | 105 | 435 | 1150 |
Once you arrive, go west. Head into the first car to find and use the Save Point. Continue to the west and you’ll soon find a chest and a purplish switch; trigger the latter and open the former to obtain a Genji Glove . Go west some more to find a chest blocked by an open one… Get the Lump of Metal from the chest further west and examine the open chest blocking the Flame Shield chest behind it. This will stop that damn chest and allow you to reach the Flame Shield in the chest behind it.
You’ll see six open chests here. Flip the switch and remember their positions and whether they are open or closed, I’ll give the diagram when appropriate. Go west to the next car. There, go north and around to find a switch; throw it (metaphorically). Go south and open the hidden chest to find an X-Potion . Then go along the open path, opening the chest with the Ice Shield on the way, and hit the third switch. Go back to the first switch and hit it, then trigger the third switch.
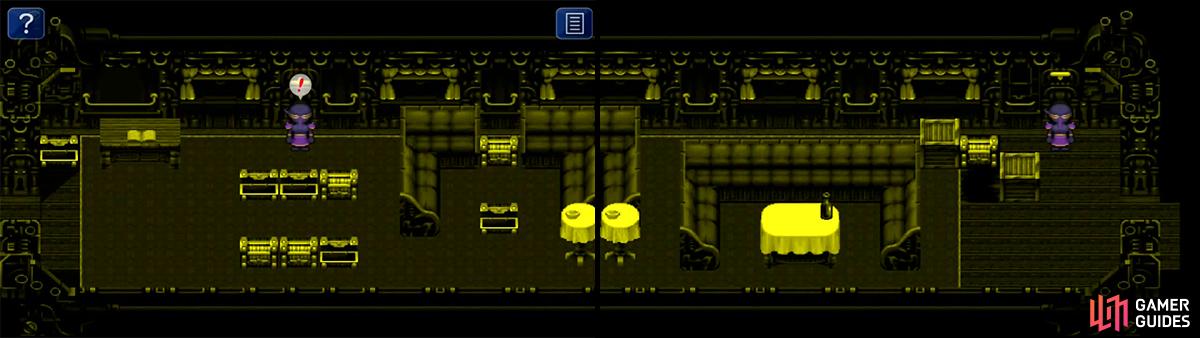
Remember these positions of the chests so you can get out again. Flick the switch at the end so the boxes are in the position shown to access the Genji Gloves.
This will open a path on the southern end of the screen. If you messed up, make sure that switches one and two are down, and switch three is up. Go west to find a fourth switch. Notice those six chests nearby? That has to do with the previous six-chest puzzle:
[ OPEN ] [ OPEN ] [CLOSED]
[CLOSED] [CLOSED] [ OPEN ]
Arrange them like that and THEN trigger the switch nearby to open up another path. Go west and exit the car. Continue to find another car with another Save Point. Use it and continue to the end of the train. Leave the room to continue to the next part of Cyan’s maniacal dream.
Cavern Sequence
Local Enemy Bestiary
| Monster Name | HP | MP | ATK | DEF | Gil | EXP |
|---|---|---|---|---|---|---|
| Io | 7862 | 1550 | 13 | 110 | 1995 | 3253 |
| Pluto Armor | 2850 | 220 | 13 | 105 | 629 | 853 |
| Schmidt | 3262 | 200 | 13 | 105 | 441 | 1253 |
When you arrive, you’ll find yourself on some Magitek Armor. When in a fight, it is recommended to only use Thunder Beam (due to enemy weaknesses) or Healing Force (to heal). In fact, get in a fight just before you leave for that exact purpose.
Walk along the path and watch the scene to find Cyan. Follow him south and, once you exit, turn around and circle around clockwise to findCyan again. Follow him off the bridge.
Doma Castle Sequence
You will end up falling into the guest room at Doma Castle; remember, where you were before Cyan got screwed around by the Dream Stooges. Once you regain control after the scene, you could go straight to the throne room and battle the Wrexsoul. If you want, though, you can side-track a little for some flashbacks about Cyan. You won’t get anything but character development, though. (And some Gil, EXP., and AP from the battles as you move around.)
The scenes can be found in Cyan’s room to the east of the throne room, and outside at the east and west edges of the moat. Afterwards, return to the room in which you arrived. Save and heal at the Save Point and proceed into the throne room. You’ll find the Wrexsoul sitting on the throne, with Cyan lying unconscious or dead next to him. Let’s return the favor.
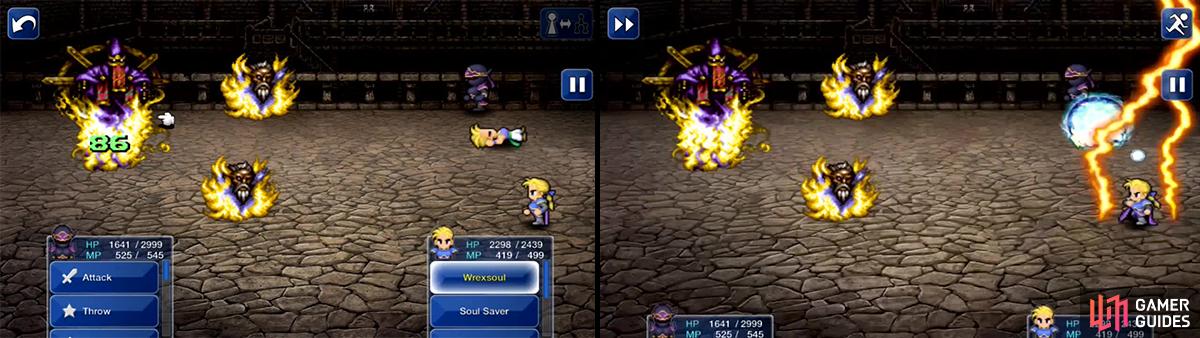
Wrexsoul, Soul Savers
The Wrexsoul can use a basic attack, Doom Strike (which can induce Doom),Thundaga, and Fury . Fury is his very first move, which will put him in one of your characters until that character is KO’ed, Petrified, or Zombified. We’ll discuss this further momentarily.
The Soul Savers can use a basic attack, Magic Drain (like Osmose, but based seemingly on physical Attack), Firaga, Blizzaga, Thundaga, Reflect, and Cure. Additionally, these cannot be truly killed, for they’ll come back almost right afterwards. So don’t expect to be able to abuse their vulnerabilities to Petrify, Doom, or Death all too well.
There is one way to abuse that weakness, though. Immediately use the spell Banish to get rid of both of them simultaneously. You never truly beat Wrexsoul despite winning, so you won’t gain the Guard Bracelet, which is useful as it puts Protect and Shell on the wearer. Otherwise…
It’s a good idea to start this battle by using Kirin, Zona Seeker, and Shiva. Maybe Kirin and the Zona Seeker’s effects will soon wear off on one character, but still, better to help two than none. If you have Hastega, throw that up, too. Note that Shiva is only mentioned as one for you to actually equip; don’t use her yet…
Wrexsoul will use Fury at the start and take over a character. It’s hard to tell which one but just test each one and when you get the right one, he will appear again.
The battle begins with the Wrexsoul taking over a character via Fury. As you may recall, Petrifying a character via Break works to get rid of it. I prefer that method and then using a Gold Needle to revive them with more HP than otherwise. However, you’ll have to do each character one by one to figure out which one had Wrexsoul in him/her.
Throughout this period of time, you’ll be subject to the Soul Savers’ attacks. Feel lucky that they often stick to the “-ga” spells for now, which are weak due to their low Magic stat. You’ll only need to worry from them about physical attacks and Magic Drain, which is used to take your MP when they’re low on their own MP. Personally, I’d just ignore them.
After the Wrexsoul is found, quickly begin to hammer him down. Use Shiva, Blizzara, Blizzaga, Throwing Ice/Blizzard-based weaponry (i.e. Icebrand), and anything else Ice/Blizzard-based you can think of; doing the magic with Terra in a Trance makes a large boost to the damage. Eventually, Wrexsoul will use Fury again to take over another character, so just repeat from the top.
The little souls will try and Cure Wrexsoul but it does nothing. The other attacks are very weak so keep pummelling away at Wrexsoul. Killing the little souls does nothing so don’t waste your energy.
After the battle, watch the scene. You’ll soon return to the real world.
Castle Doma
After the scene, you’ll return to the real world, with a Masamune in your pocket. (Personally, it’s not the best place to keep a sharp weapon.) You’ll also have all of Cyan’s Bushido skills now; his #7 is a high-damage four-hit attack, whereas #8 is effectively Death for all (who are vulnerable to it). You probably already had the other six.
Afterwards, head up into the throne room to find the Alexander Magicite. Enjoy, for it teaches Esuna, Protect, Shell, Dispel, and Holy; not to mention that it can use Divine Judgment to hit all enemies with Holy-based damage.

 Sign up
No Comments