
Final Preparations Before the Field Exam
When you’re done playing cards make your way to the dormitory (check the map near the Save Point if you forgot where it is - it’s opposite the front gate, to the right of the cafeteria). Enter the dorm and use the Save Point if you wish, then head into the right-most room and interact with the bed to get the option to change into your uniform. Before you pick “Get changed”, be warned that once you have this uniform on you’ll be under much greater scrutiny as a representative of SeeD and Balamb Garden. Doing anything - however trivial - that might reflect poorly on these institutions will count against you, and while it’s impossible to outright fail the Field Exam (unless you get a game over by dying in combat, but that should be a given…), your grade and subsequently what rank you start out as can be effected.
During the Fire Cavern, you were tested solely on how prudently you judged the time required to defeat Ifrit. This was only a small part (about 1/6th) of your overall grade that’ll determine your SeeD rank, and one that was incredibly easy to get a perfect score on. The field exam is much more comprehensive, and a vast majority of the points you can earn to determine your starting SeeD rank can be gained there. How many enemies you kill, how many times you flee from combat, how well you follow orders all factor into your review, and once you don that uniform you should avoid talking to pretty much anybody until the mission is done. You’ll be told when and who to talk to, and talking to anybody else will probably earn you a deduction.
All that said, your starting SeeD rank will influence how much Gil you earn every payday:
| SeeD Rank | Salary |
|---|---|
| 1 | 500G |
| 2 | 1,000G |
| 3 | 1,500G |
| 4 | 2,000G |
| 5 | 3,000G |
| 6 | 4,000G |
| 7 | 5,000G |
| 8 | 6,000G |
| 9 | 7,000G |
| 10 | 8,000G |
As you can see, the gap between the highest pay grade and the lowest seems considerable 500G - 8,000G. Considering that there are ways to earn infinite Gil, however, it’s not a long-term consideration, and you probably won’t be needing much Gil in the short term, either. When you account for the fact that selling a single X-Potion will earn you 2,500G (you can refine one Wedge, Biggs card into an X-Potion) you really shouldn’t be fretting over Gil.
There’s also another thing to consider - scoring the requisite number of kills for a high SeeD rank might earn you more experience than you care to gain right now. Fortunately there’s a way to augment your grade through sheer combat prowess which also allows you to avoid some of the more complex elements of the mission ahead, but it may take some grinding. All said, if you want to keep your level low and don’t want to have to rely on finesse in the upcoming mission but do want a shot at a good review, you might want to consider the following grind:
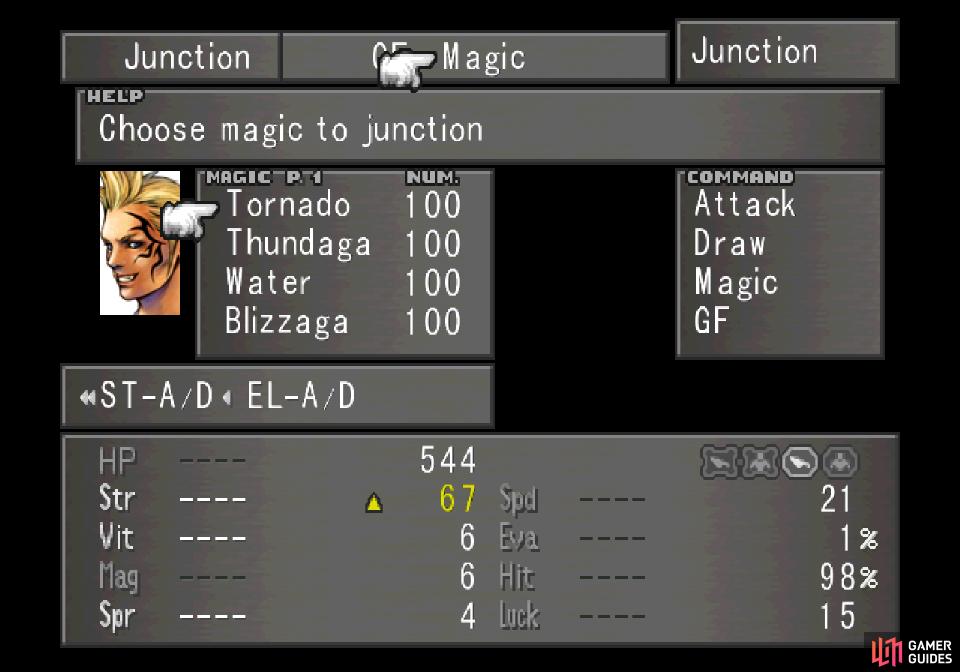
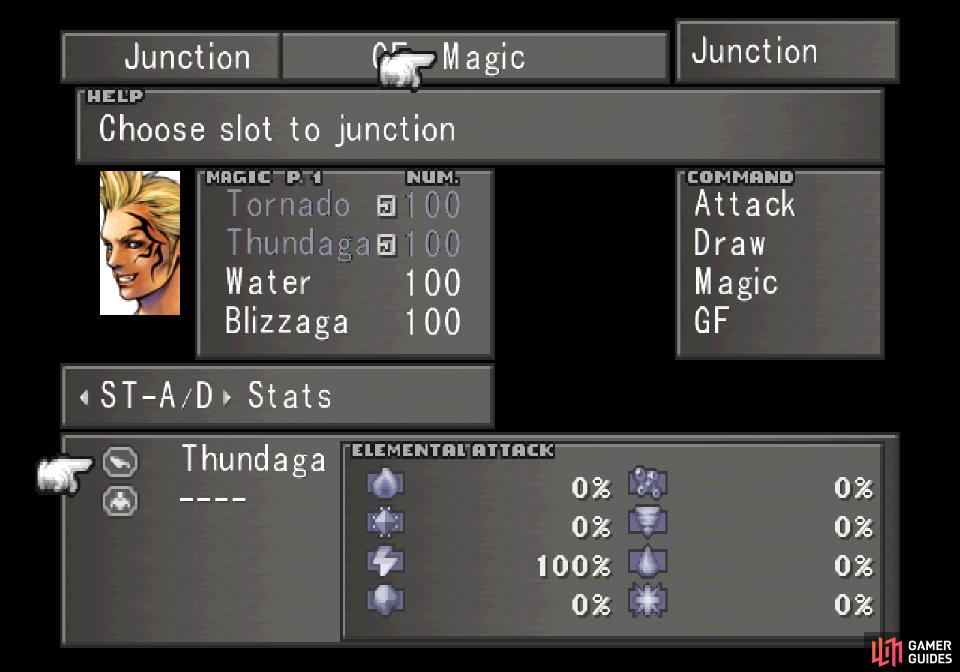
First, if you harvested magics via Triple Triad - particularly Tornado and Thundaga - you’re in good shape. In fact, if you’re not too particular about your SeeD rank and are willing to settle for good instead of great (who is going to lose sleep over a 1,000G salary difference anyways?), ensuring you have enough resources to create three stacks of Thundaga should be sufficient. Thundaga might be slower than using Quezacotl, and if you really don’t like playing Triple Triad it may be even less palatable but it’s an option. In this case, start the field exam with 100 Thundagas on Squall and make sure you have 10 Dynamo Stones (refined from the Blitz card via Card Mod) ready to go.
If you’d rather focus on Quezacotl (or if you just want to keep your options open and do both), put all the GFs on Squall and junction Tornado to your HP stat, as it being junctioned to Strength will frankly make him too strong to grind with. Next go find some poor Caterchipillar, draw Cure from it and heal yourself, which should give you plenty of HP to solo anything in the Balamb region without fear of dying. Once done, go farm Fastitocalon-Fs as normal, save this time be sure to summon Quezacotl at the beginning of every fight to damage your foes.

(1 of 2) Summon Quezacotl regularly to boost its compatibility with Squall
Summon Quezacotl regularly to boost its compatibility with Squall (left), and have it learn abilities like SumMag +10% to boost its power (right)
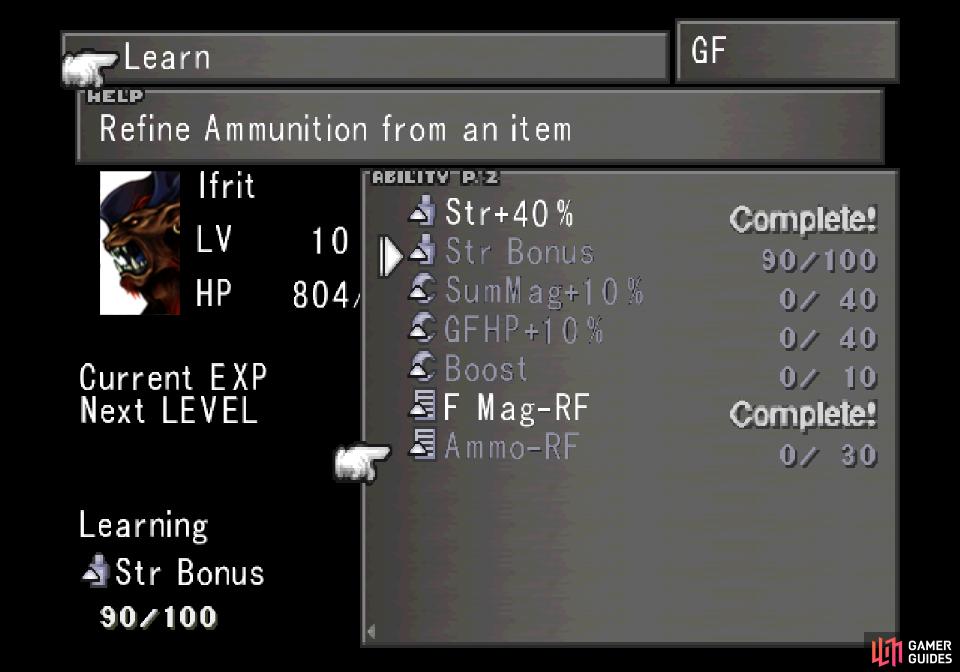
This should boost the GFs compatibility with Squall, which is half of the gains you’re after, the other half being to learn some new abilities. On Quezacotl you’ll want to learn Boost, SumMag+10%, SumMag+20% and SumMag+30%. This will cost you a whopping 260 AP, but the more of these you learn, the better off you’ll be. Meanwhile, have Ifrit learn Strength +20%, Strength +40% and, if you plan to level up throughout the game, learn Str Bonus, as this will permanently increase a character’s Strength stat when they level up, with is otherwise not guaranteed.
In fact, one of the main purposes of the low-level run is to get you through the game without squandering levels so you can get enough GFs (or one in particular, really) to boost most of a character’s stats each time they level up. It’s not super essential, as there are other (tedious, time-consuming) ways you can boost stats if you don’t keep your levels low, but it is the ideal way of going about it if you care to min-max, all things considered. Then again, it’s arguably easier to just keep your levels low the entire game and not bother min-maxing, but that’s entirely up to you.
When you’ve learned as many abilities as you care to and/or have as many Thundaga spells stocked as you care to, return to your dormitory, save your game (you might want to make two saves, so you can ensure you have a backup in case the field exam doesn’t go the way you want) then get ready to finally embark on this field exam.

To Dollet
Change into your uniform then exit your dorm to immediately rendezvous with Quistis, who will announce your teammate - Zell Dincht. After a cutscene you’ll get a tutorial on Zell’s Limit Break, which follows the old Final Fantasy tradition (now long neglected) of having multiple attacks that can be chained together via a set sequence of button inputs. If that’s too much effort, you can just select “Duel-Auto” to have the computer do it, but a player will almost certainly perform better.
(1 of 2) Be sure to avoid talking to anybody when given the chance
Be sure to avoid talking to anybody when given the chance (left), and follow Seifer’s orders to avoid demerits (right)
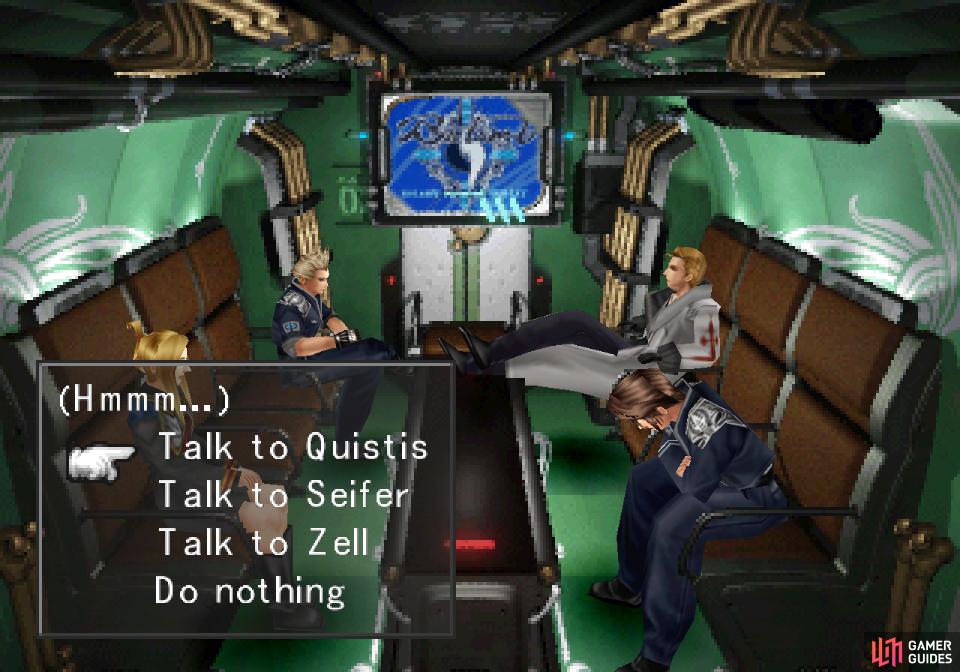
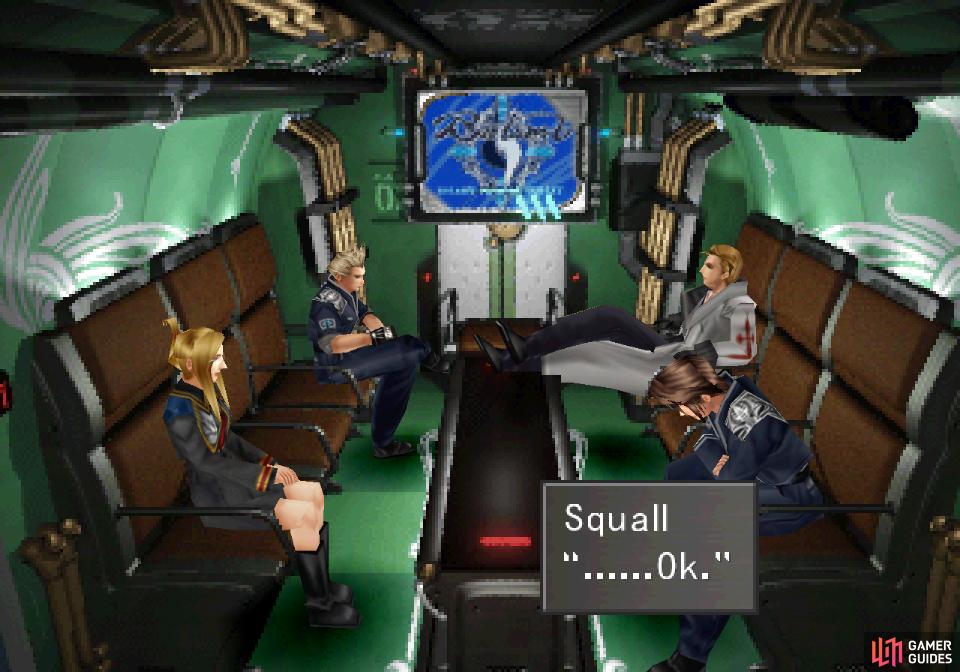
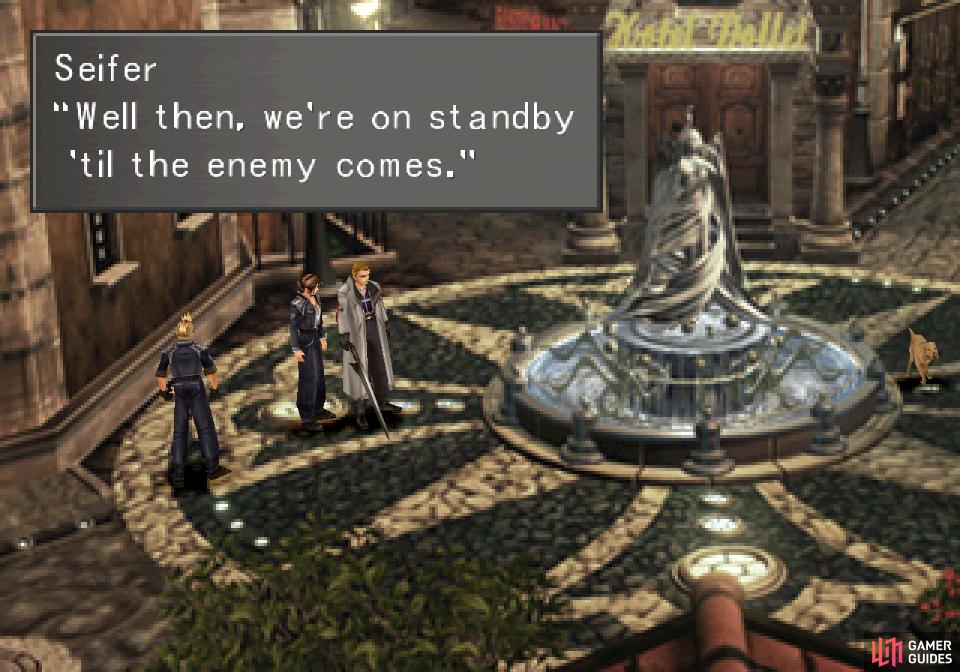
Once that’s done, Quistis will make another unwelcome announcement, you’ll get a somewhat more sober speech from the headmaster, and you’ll be free to exit the area and ride off to Balamb. When you’re on the car, endure some dialogue, then drive the car to Balamb - fortunately you’re not graded on your driving skills - and board a gunship. After your briefing you’ll be given a chance to talk to several characters, pick Do nothing to avoid a demerit for being too chatty. Afterwards, when Seifer gives you an order respond with “……Ok“ to obey your squad leader and avoid another demerit. After the epic video that follows you’ll finally arrive in Dollet.
(1 of 2) Junction GFs to your new party members, and if you have items you can refine into magic, get them some spells, too
Junction GFs to your new party members, and if you have items you can refine into magic, get them some spells, too (left), then junction this high-end magic to your stats to significantly boos their stats (right)
Once off the gunship Quistis will give you some obvious (but good) advice, which you should follow as soon as she stops talking. Junction a GF to both Zell and Seifer, then go about getting them some magic; if you were diligent about playing cards you should have enough Windmills and Dynamo Stones (at the very least) to put 100 Tornados and 100 Thundagas on both characters. If you can get Water, Blizzaga and/or Firaga on them as well… well, it won’t hurt, but it’s not really necessary. Junction what few stats you can with the best magic you have available, then leave the beach, go up some stairs, and find a welcome Save Point.
(1 of 2) Draw Cure magic from the Galbadian Soldiers
Draw Cure magic from the Galbadian Soldiers (left), then dispose of them with your (hopefully overpowered) characters. (right)
Securing the Town Square
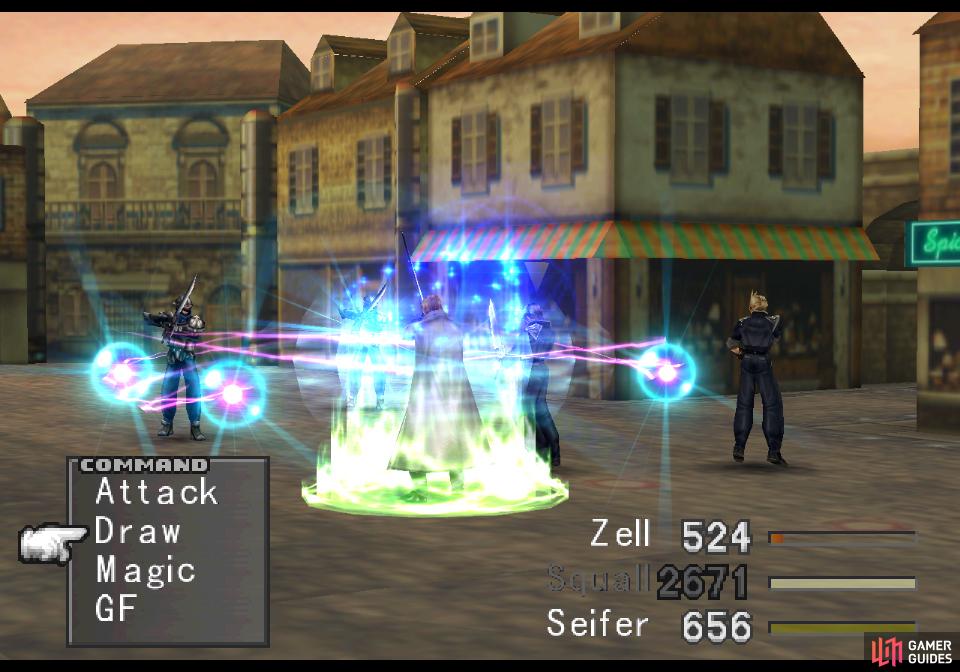
From the Save Point head up and to the left towards the tunnel, which leads to the next screen. On the way there you’ll be intercepted by two Galbadian Soldiers, giving you your first taste of combat on this mission. These puny foes shouldn’t be a threat to you no matter how much work you put in to getting high-level magics or how how much you farmed AP earlier, and ideally you should be painfully over-matched against them. They can cast Fire, which will deal modest damage (at least compared to their melee attacks) but since you can draw Cure from them, none of the damage they deal should be worrisome in the slightest. You can draw Blizzard, Fire, Thunder and Cure from them, and since Zell and Seifer both likely have no magic stocks of their own (other than what you possibly refined for them) it might be worth your time to sit around and draw magic - at least Cure, in any event.
It’s worth noting that the number of kills you gain on this mission will count positively towards your SeeD rank, with 75 kills or more earning you the highest grade and fewer than 10 kills earning you the lowest. Keeping your level low is generally worth far more than any amount of Gil in the long run, but a happy medium does exist - strive to score 20 kills during this mission for half the possible points towards your SeeD rank, which can be made up for somewhat by defeating an optional foe later on. There’s no way to avoid earning experience here, so if you’re overly fretting about it, don’t. Just avoid going out of your way looking for fights and you’ll be fine.

(1 of 4) Have Seifer take out your other party members
(1 of 2) As you work your way through the city streets, Galbadia Soldiers will ambush you
As you work your way through the city streets, Galbadia Soldiers will ambush you (left), Once you reach the town square, obey Seifer’s orders and avoid running down the street to the left (right)
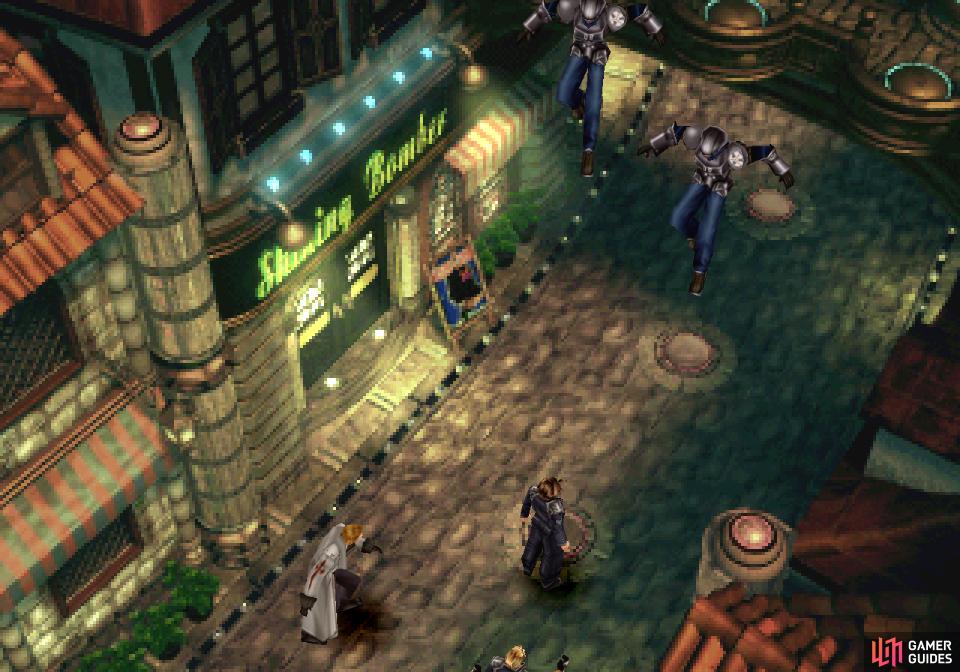
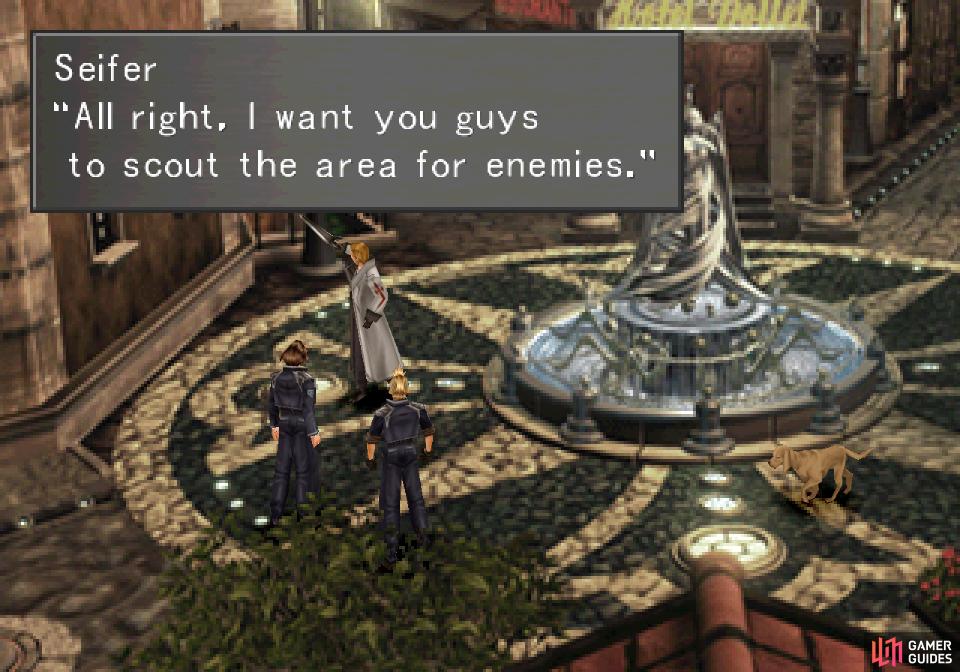
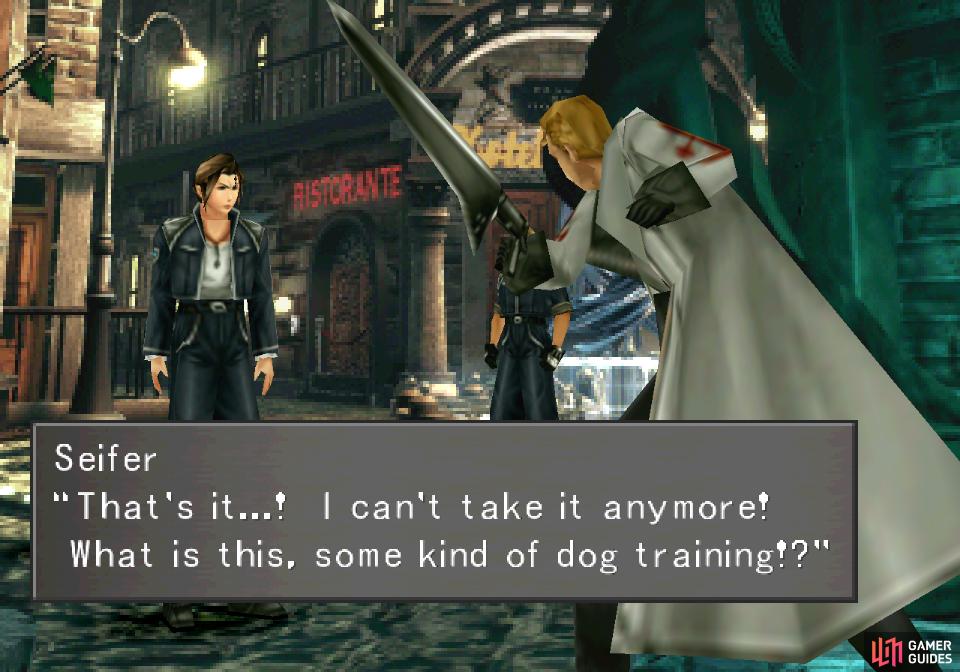
With that first battle out of the way, continue through the tunnel you were so rudely - rudely! - challenged in front of, continue down some streets until another pair of Galbadian Soldiers drop down to attack. Once this fight is over, continue down more streets until you reach the Town Square area, where one final Galbadian Soldier waits to be cut down. Afterwards, Seifer will order you to scout the area, a task you can accomplish by heading up an blocked-off street to the right the Hotel Dollet building. Smite the sneaky Galbadian hiding behind the cars and you’ll finally get a victory tune. Shame to lose that other music, though… Nobuo Uematsu’s a genius.
(1 of 3) After you defeat the hiding Galbadian Soldier, talk to Seifer - the only time you should talk this mission
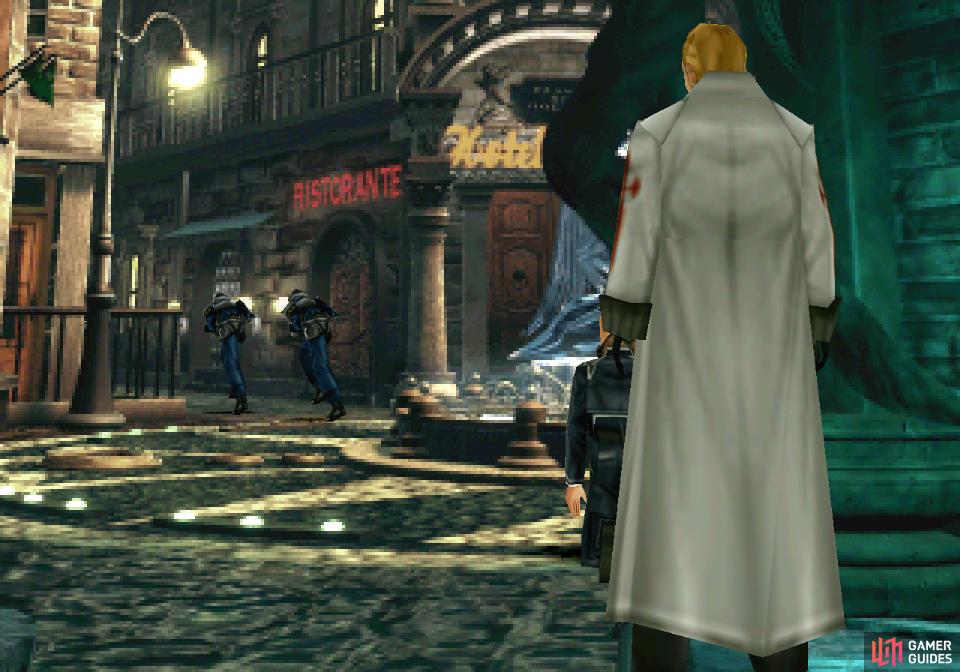
Return to Seifer and talk to him, incurring the one and only speaking demerit you have to incur, then stand around and watch silently as a few moments of tedium cracks his facade, exposing Seifer as a… less than disciplined SeeD candidate. When the camera shifts, Zell paces and Seifer fidgets, approach Seifer and he’ll complain until a large Galbadian squad appears in answer to Seifer’s complaints. Surmising their destination and anticipating the fights that lie ahead, Seifer will decide to disobey orders, abandon his position, and head towards the action.
To the Communications Tower
Follow Seifer down the street and cross a long bridge. Here’s where scripted encounters give way to random encounters, and real variations in kills, escapes, and experience earned can start to pile up. Just fight through any enemies you encounter and keep pushing forward and you should be fine.

(1 of 3) En route to the Communications Tower you’ll get intel from a Dollet Soldier
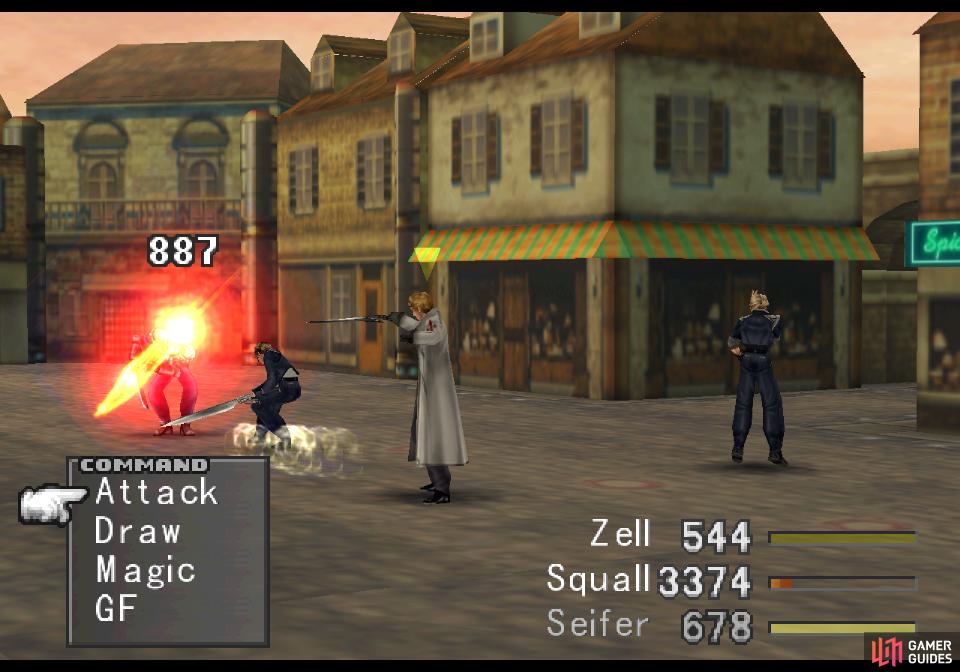
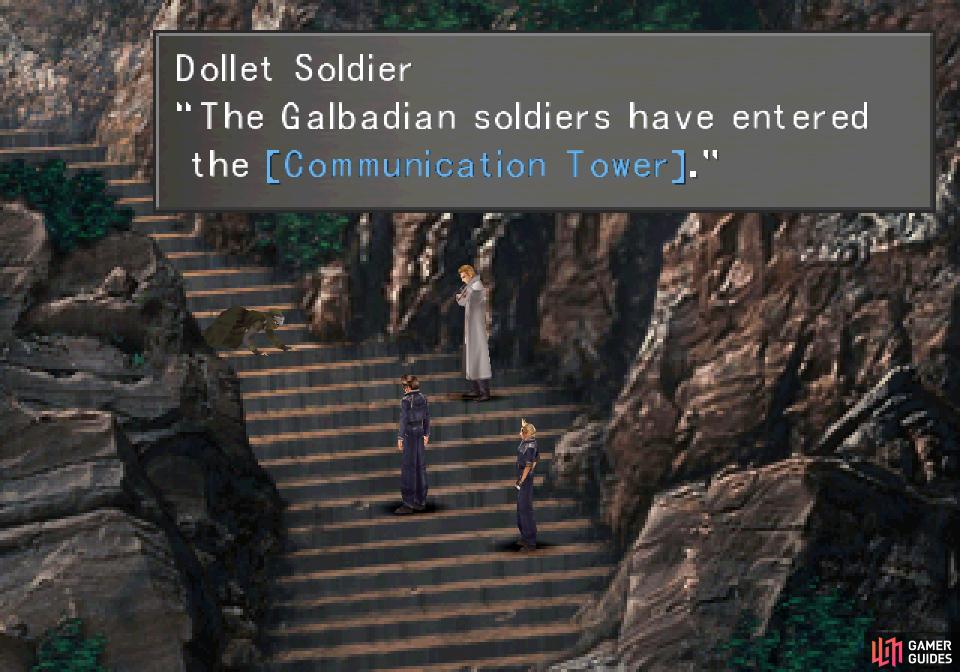
Cross the bridge to reach the mountainous outskirts of Dollet, where you’ll need to press on up some stairs. Partway up you’ll come across a Dollet Soldier who will tell you where the Galbadians are heading before being comically interrupted by a threat he sought to warn you about. This next fight is somewhat more dangerous, as the monster that interrupted your chat - an Anacondaur - can deal significantly more damage with its normal attack than any of the Galbadian Soldiers could do with spells. Its Squeeze attack is stronger still, dealing around 100 damage even at the lowest of levels. Unless you chronically over-leveled, however, it’s tertiary attack should be Dark Mist instead of the Poison Mist attack which starts to appear when Anacondaurs hit level twenty.
The Anacondaur should have Fire and Cure available to draw, the latter of which should make this fight an easy one, no matter how much damage the snake deals. During battle, Seifer will demand the last hit so he can gain more experience. This little fourth-wall breaking bit of dialogue, annoying thought it may be, does at least let you know that the character who make the killing blow earns more experience. So far you’ve either had a lack of options or the enemies you’ve faced gave so little experience as to make this a non-issue, and it’s really not something to get worried about here, either, as the extra experience gained by the characters who lands the final blow is somewhere around 12.5%. By all means, let the man-child have his experience and spare your other characters, but don’t fret too much over it - you won’t get a demerit if Squall or Zell score the final blow.

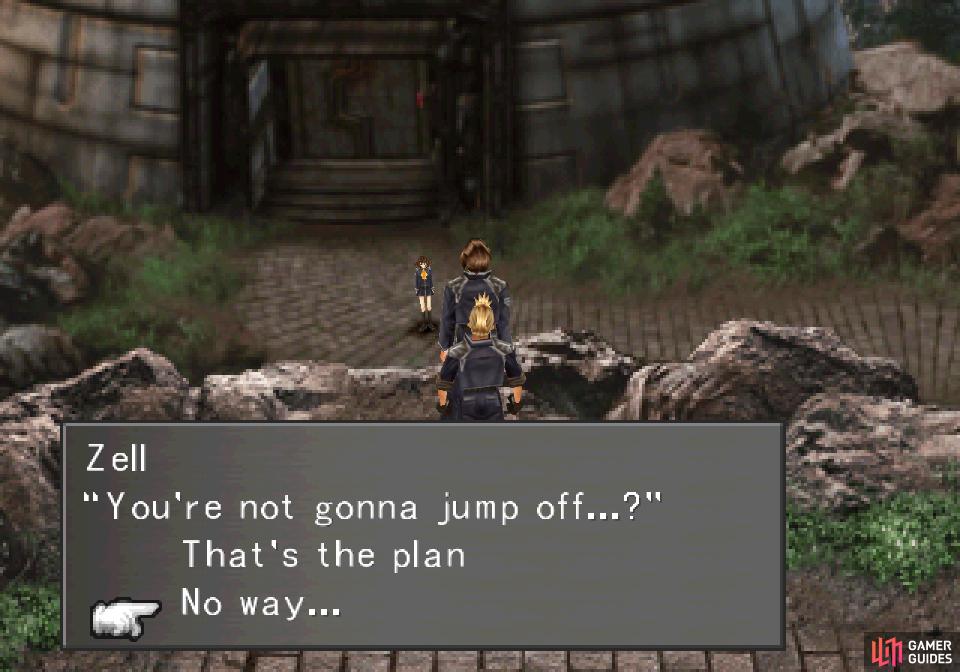
After the Anacondaur, continue up the mountain until you find the communications tower, outside of which Seifer prudently lies in wait. After some chatter Seifer will run off, leaving a vacancy in your party - one which will soon be filled by Selphie, the ditzy girl you may have given a tour of Balamb Garden to at the beginning of the game. Watch her introductory movie, after which she’ll comment on your assistance (or lack thereof) before showing that she, too, has some issues with decorum. Don’t follow her lead and jump off the cliff, as doing so will earn you several demerits. Instead, continue to the right and follow a more conventional path down.
(1 of 2) Don’t jump off the cliff like Selphie did - it’s unbecoming of a SeeD
Don’t jump off the cliff like Selphie did - it’s unbecoming of a SeeD (left), Once Selphie joins your party, junction GFs and magic to your characters, and if you can, junction Thunder/Thundaga to your Elemental Attack (right)
Reunite with Selphie outside the communications tower and she’ll helpfully remind you to make sure you have GFs junctioned. Now that Seifer has left you, his old GF is unequipped, and whatever magics he had have been transferred to Selphie. Now is when your gains (if any) from playing cards and grinding AP will pay off, as you’ll be much, much more capable in the upcoming encounters if you have stocks of Tornado and Thundaga to pass around. Give one GF to each character, and if you boosted Quezacotl’s compatibility with Squall, assign the lightning GF to him. As for the other characters, boost their Strength (if you unlocked Str-J on Shiva) with your best magic and if possible, junction Thunder/Thundaga to their elemental attack.
(1 of 2) Draw Blind from the draw point in the communications tower
Draw Blind from the draw point in the communications tower (left), If you have HP-J you can keep a character’s HP low to ensure they remain in Limit Break range (right)
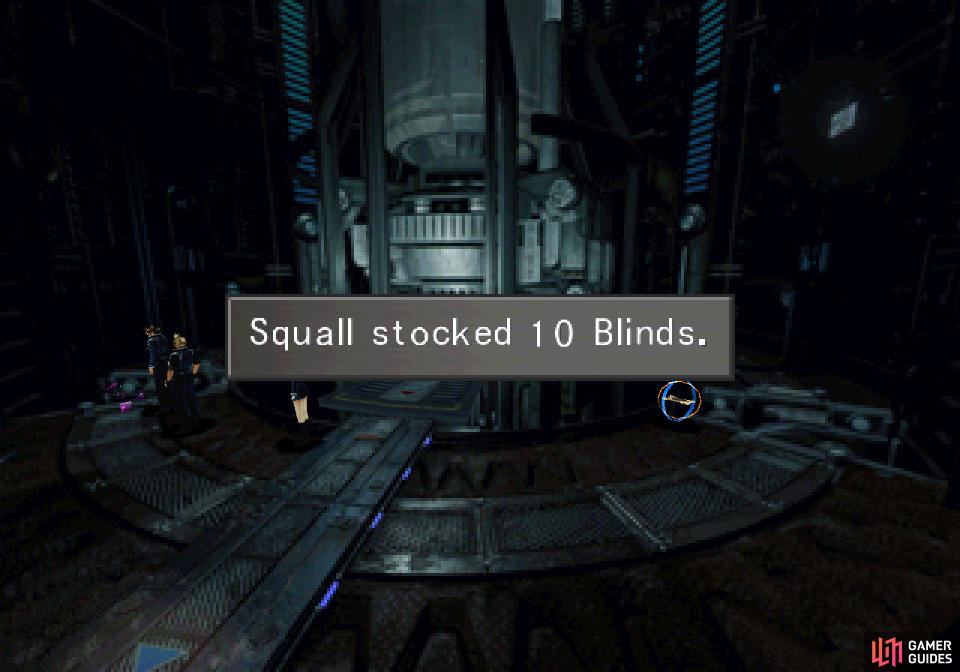
When everybody is set up, enter the communications tower, suffer through one last encounter with Seifer, then seek after your fickle captain inside the tower. On the ground floor you’ll find an elevator, a Save Point to the right, and a Blind draw point to the left. Draw your magic and save your game, as there’s a lot of fights coming up, and much can go awry. When you’re ready to proceed, enter the elevator and ride it up.
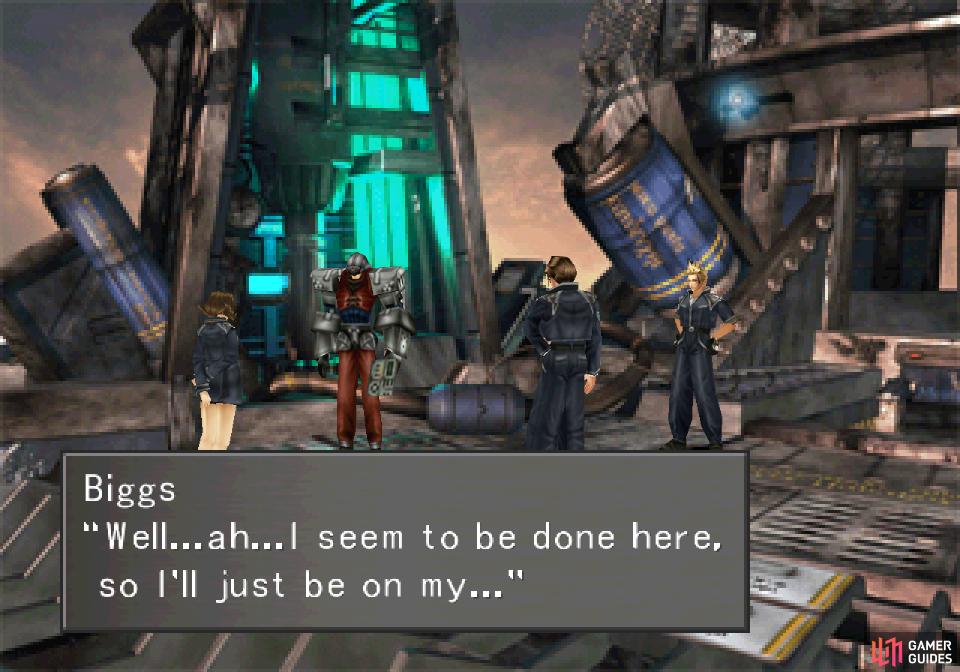
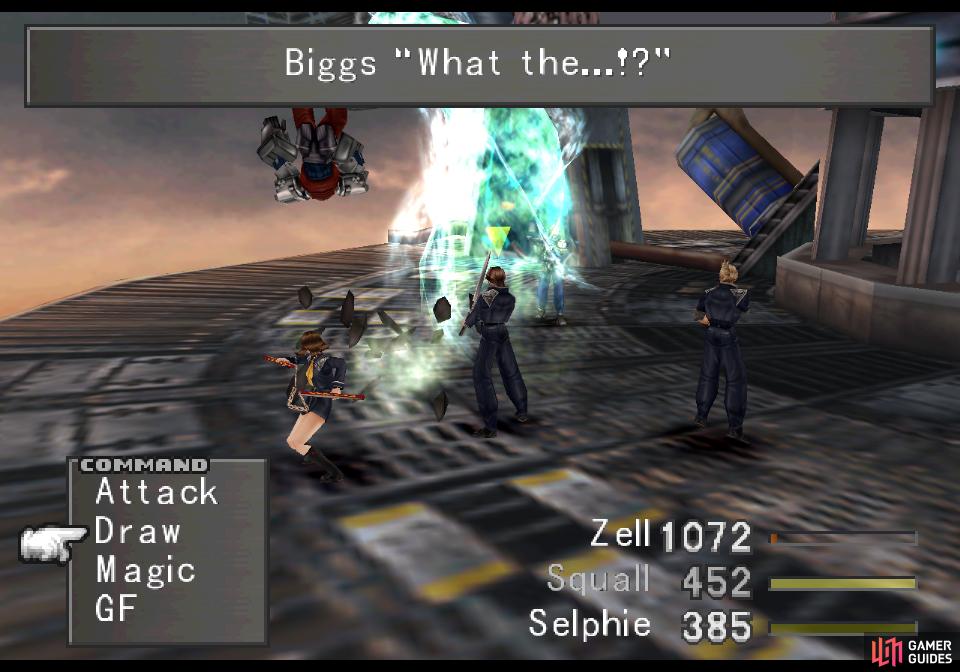
(1 of 2) Biggs will try to slink off when he realizes he’s out-matched
Biggs will try to slink off when he realizes he’s out-matched (left), shortly into the fight, Wedge will show up to help Biggs. (right)
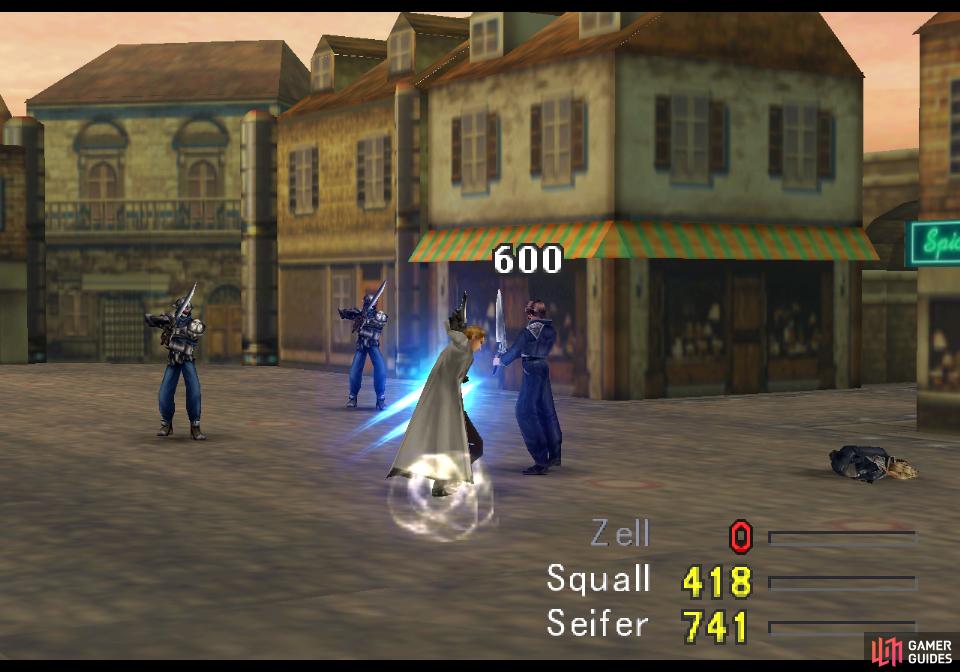
Boss - Biggs and Wedge
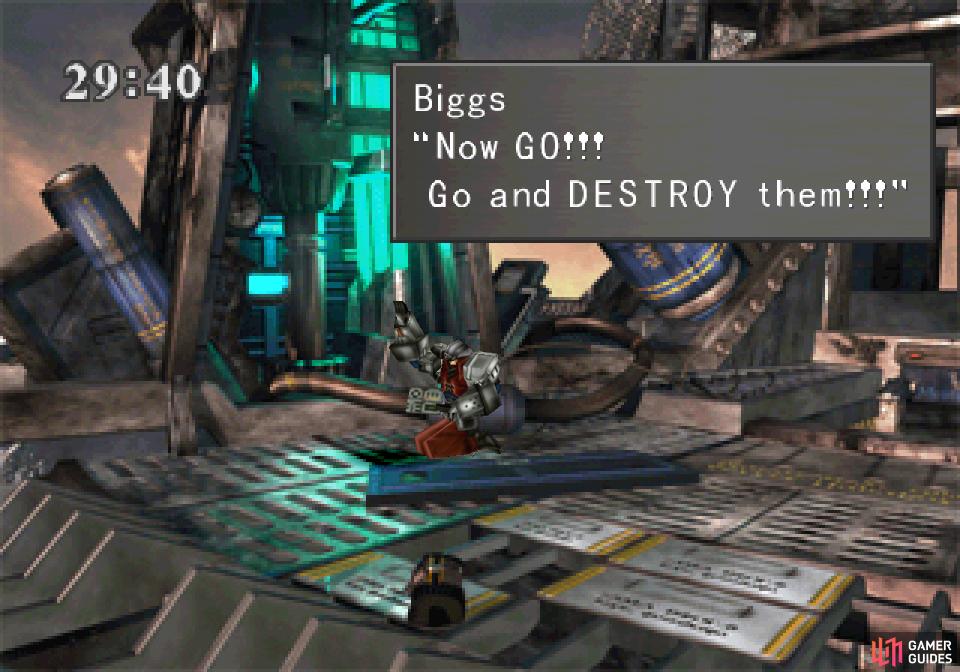
When you reach the top of the communications tower you’ll find the recurring comedy duo of Biggs and Wedge, this time cast in the roles of a Elite Soldier and a Galbadian Soldier, respectively. Watch the scenes ahead to see the communications tower spring to life, after which Biggs will become all too aware of your presence. Seifer will prevent him from slinking away, but will not get involved in the fights that follow.
:::ggtable
| Biggs | |
|---|---|
| Lv: | 1-10 |
| HP: (Lv10) | 705 |
| Weaknesses: | – |
| Resistances: | – |
| Status Resistances: | Immune to most status effects – The End 0% |
| EXP: | – |
| AP: | 4 |
| Draw: (lv10) | Fire, Thunder, Blizzard, Esuna |
| Mug: (lv10) | – |
| Drop: (lv10) | Elixir x2 |
| ::: |
:::ggtable
| Wedge | |
|---|---|
| Lv: | 1-10 |
| HP: (Lv10) | 640 |
| Weaknesses: | – |
| Resistances: | Poison (immune) |
| Status Resistances: | Immune to most status effects – The End 0% |
| EXP: | – |
| AP: | 4 |
| Draw: (lv10) | Fire, Thunder, Blizzard, Cure |
| Mug: (lv10) | – |
| Drop: (lv10) | Cottage x2 |
| ::: |
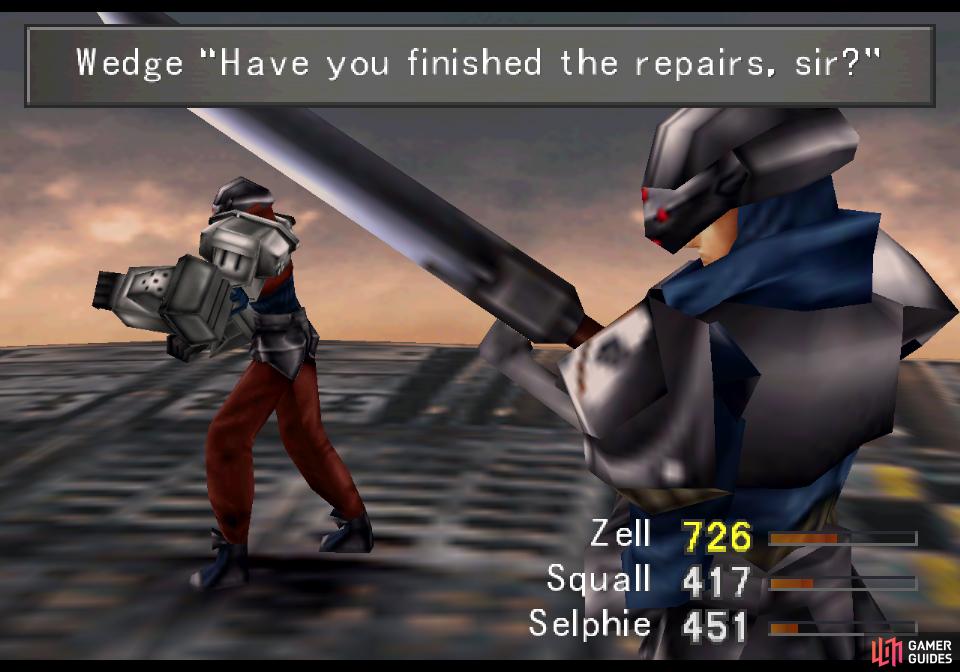
(1 of 3) Biggs and Wedge hit somewhat harder than normal Galbadians
More comedic relief and boss-appetizer rather than boss, Biggs and Wedge fight very similarly to Elite Soldiers and Galbadian Soldiers, albeit somewhat stronger. Their spells are their most damaging attacks, dealing around 70~ damage, while their melee attacks will deal around 30~. At first you’ll only be fighting with Biggs, but after a little while Wedge will show up. Biggs has Blizzard, Fire, Thunder and Esuna spells to draw, while Wedge has the typical Galbadian’s Soldier’s fare of Blizzard, Fire, Thunder and Cure. The Cure should make this battle very difficult to lose, and even then, only if you fall asleep during the fight or something.
(1 of 2) Spend time drawing Esuna from Biggs, as it’s an incredibly useful spell
Spend time drawing Esuna from Biggs, as it’s an incredibly useful spell (left), If your Magic is low, you may have trouble drawing spells from Biggs (right)
Esuna is a useful low-level curative spell, removing most negative status effects from an afflicted character. You’ll be better off if you can grab three full stocks of them, and a character with Mag-J should have no trouble with this. Your other characters, however, may struggle to draw at all from Biggs, and when they succeed you’ll be lucky to get 1-5 spells. This can make the fight drag on a bit, so it’s really up to you whether you want to bother or not.
The fight will end when either Biggs or Wedge have their HP depleted, and at 705 (Biggs) and 640 (Wedge) HP, a Tornado-junctioned party can probably end things in a single strike. A less prepared party will still have little trouble with things, but if you’re slower at whittling their HP down they may use Cure to restore themselves. They won’t keep this behavior up, fortunately, so you shouldn’t have any trouble defeating them. Once they’re unceremoniously-ejected from battle you’ll have to face the source of their peril.
(1 of 2) Deplete the HP of either Biggs or Wedge and the fight with them will end
Deplete the HP of either Biggs or Wedge and the fight with them will end (left), only for their attacker to take their place. (right)
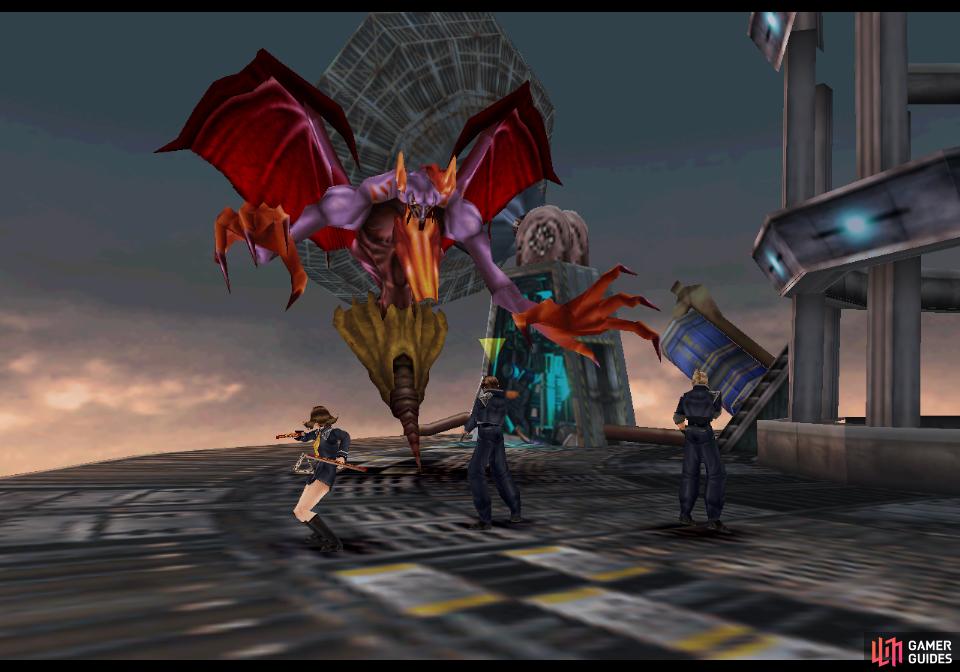
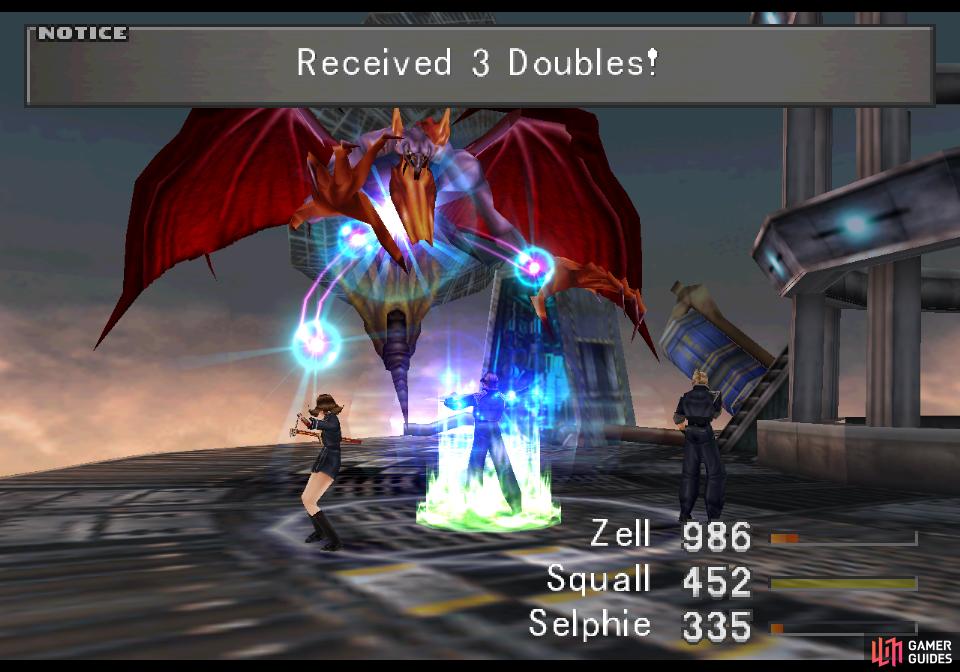
Boss - Elvoret
Seems the “monster-shaped shadow” Wedge talked about earlier exists, although one has to wonder, given the diversity of what counts as a “monster”, how you’d even identify a “monster-shaped shadow”. Also seems like soldiers from both Dollet and Galbadia would be safer if they didn’t mention monsters, as doing so seems to prompt their arrival. In any event, Biggs and Wedge will find themselves cast aside by said monster, Elvoret, which is your first proper boss battle in the game.
:::ggtable
| Elvoret | |
|---|---|
| Lv: | 1-11 |
| HP: (Lv11) | 3,523 |
| Weaknesses: | – |
| Resistances: | Poison (immune) |
| Status Resistances: | Confuse 10% – Darkness 40% – Drain 0% – Haste 0% – Reflect 0% – Regen 0% – Slow 10% – The End 0% |
| EXP: | – |
| AP: | 10 |
| Draw: (lv11) | Thunder, Cure, Double, Siren |
| Mug: (lv11) | – |
| Drop: (lv11) | G-Returner 3-6 |
| ::: |
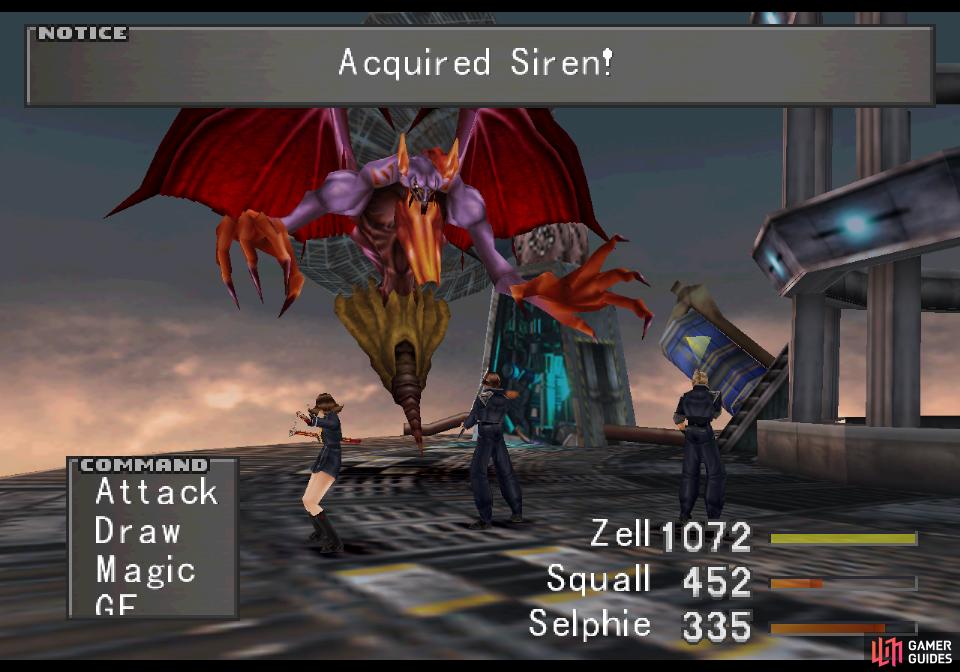
(1 of 2) Be sure to draw Sirine from Elvoret, as if you miss your chance you won’t get this GF for a long, long time
Be sure to draw Sirine from Elvoret, as if you miss your chance you won’t get this GF for a long, long time (left), You can also draw the Double spell from Elvoret, which may prove useful (right)
Before you do anything else, draw the Siren GF from Elvoret. If you don’t, you’ll be waiting a comically long time to obtain her, and having her for the vast majority of the game is obviously far, far more useful than not getting her until near the end. Once that’s done, turn your attention to Elvoret’s mystery spell, which turns out to be Double. This is another decent spell worth harvesting, as when cast it’ll allow you to choose to double-cast spells from your stock, and it won’t hurt with junctioning, especially if you don’t have Tornado or any of the -agas.


(1 of 3) Elvoret deals moderate damage with its melee attacks
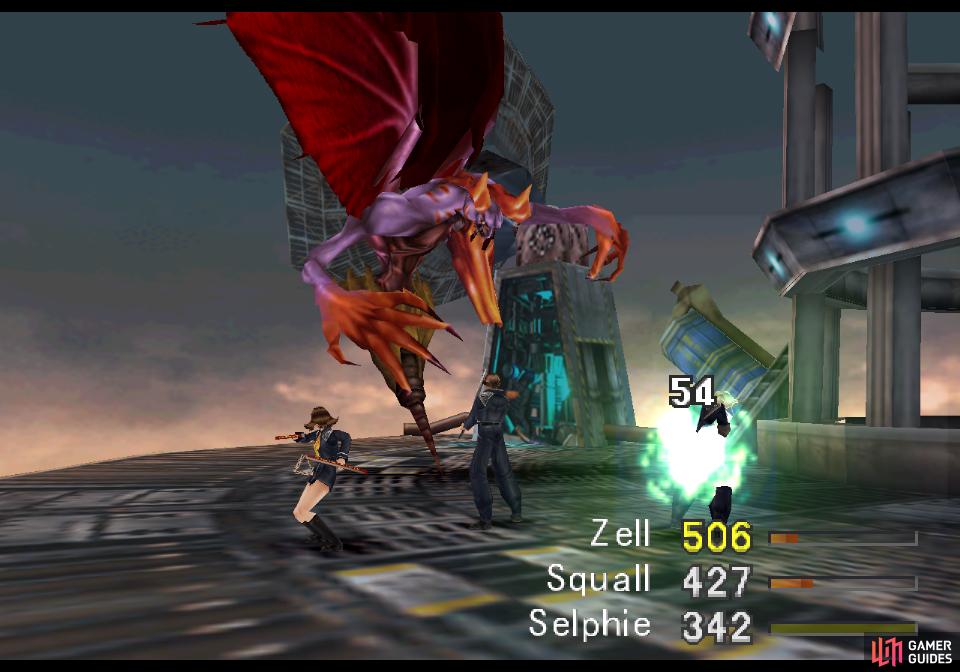
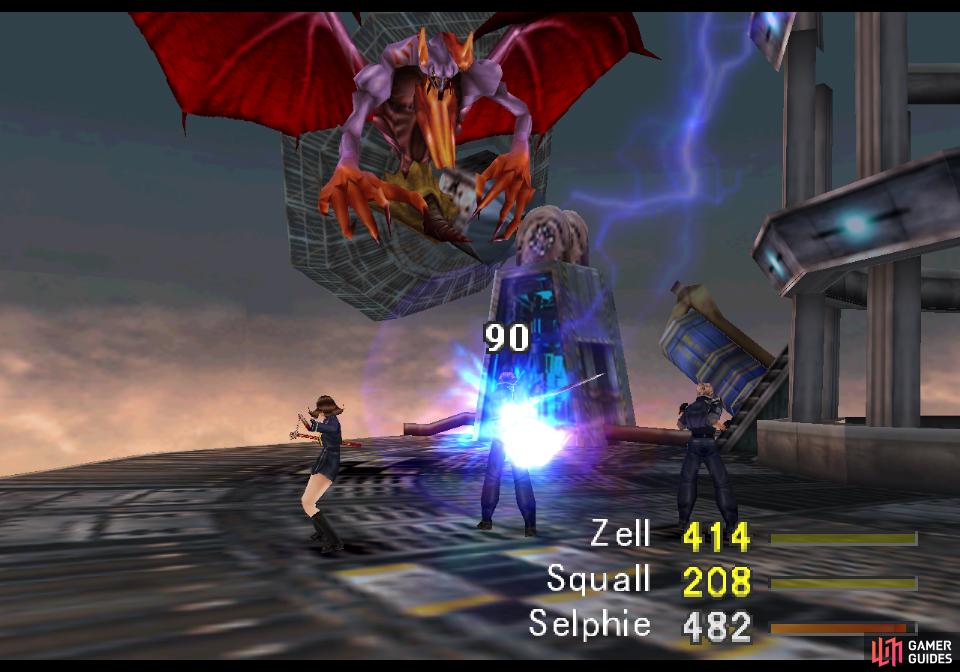
Draw Siren and Double from Elvoret, a process that should be somewhat quicker than getting Esuna from Biggs. Fortunately Elvoret also has Cure at its disposal, meaning you shouldn’t have to worry about your HP. While Elvoret can perform melee attacks and cast somewhat more powerful Fire and Thunder spells, its most dangerous attack is Storm Breath, which can hit the entire party for around 150~ HP. So long as you’re willing to heal characters whose HP fall below 200 you shouldn’t be in any serious danger throughout this fight.
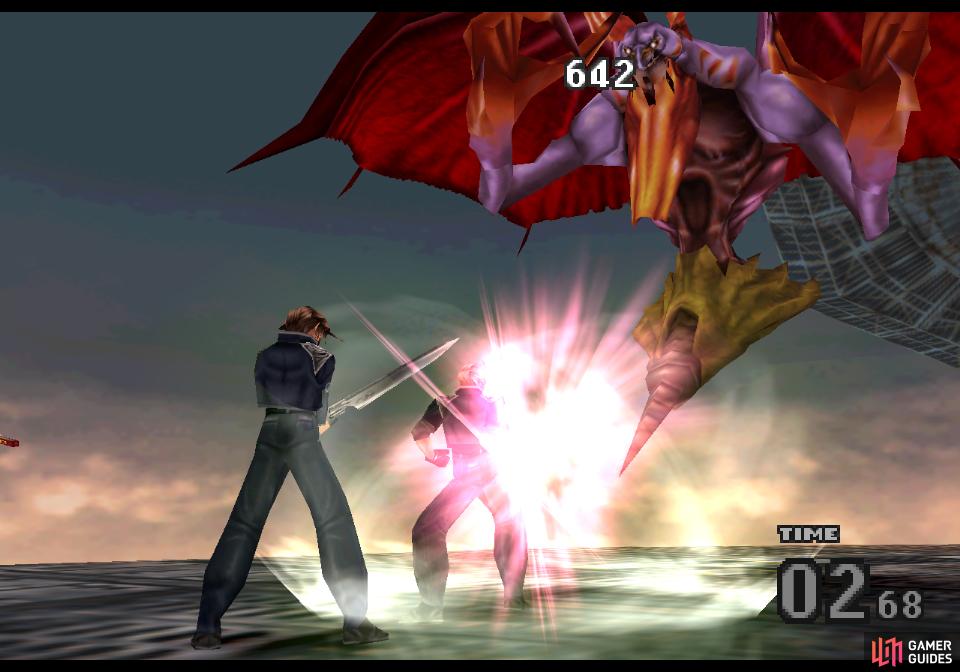
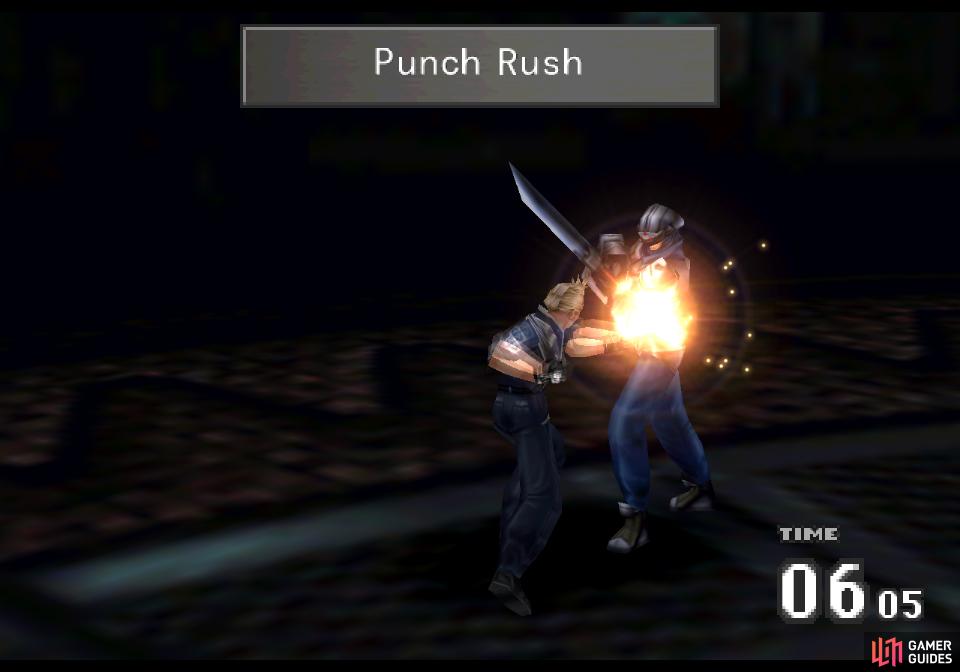
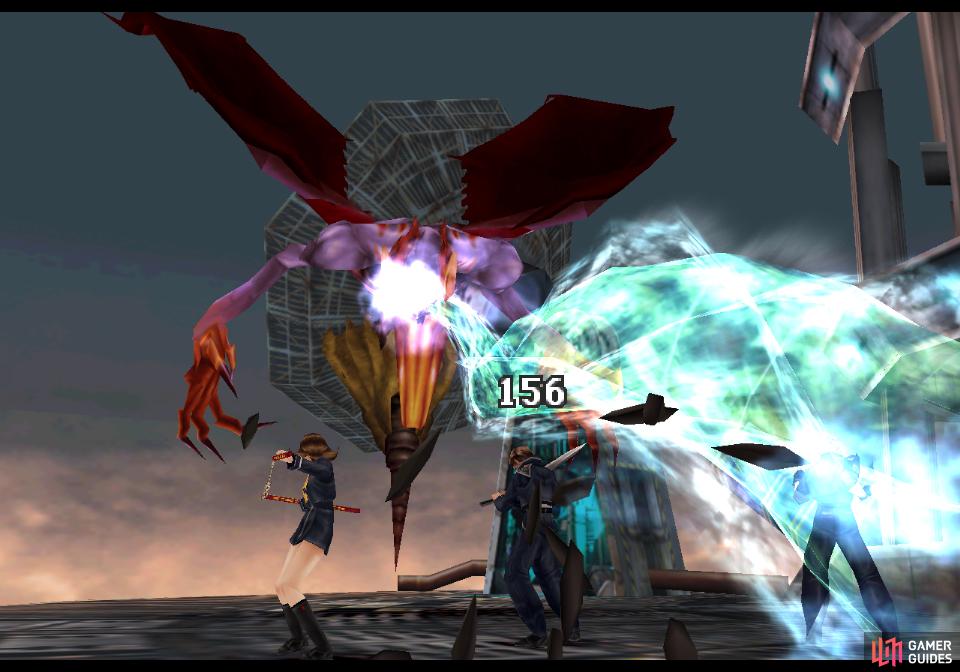
(1 of 3) It’s a good time to try out Zell’s limit, which should deal considerable damage to Elvoret
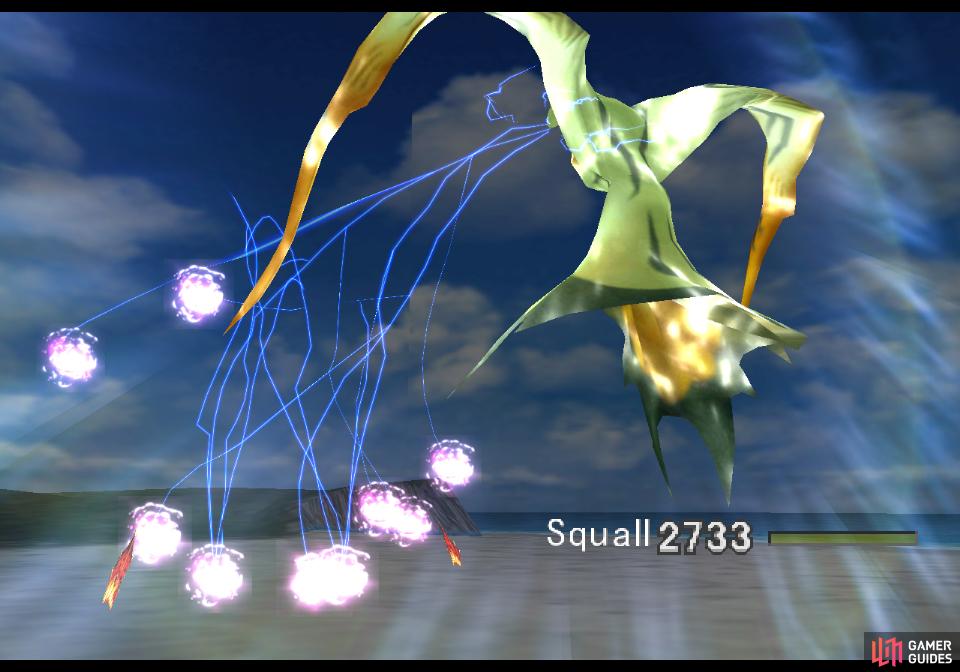
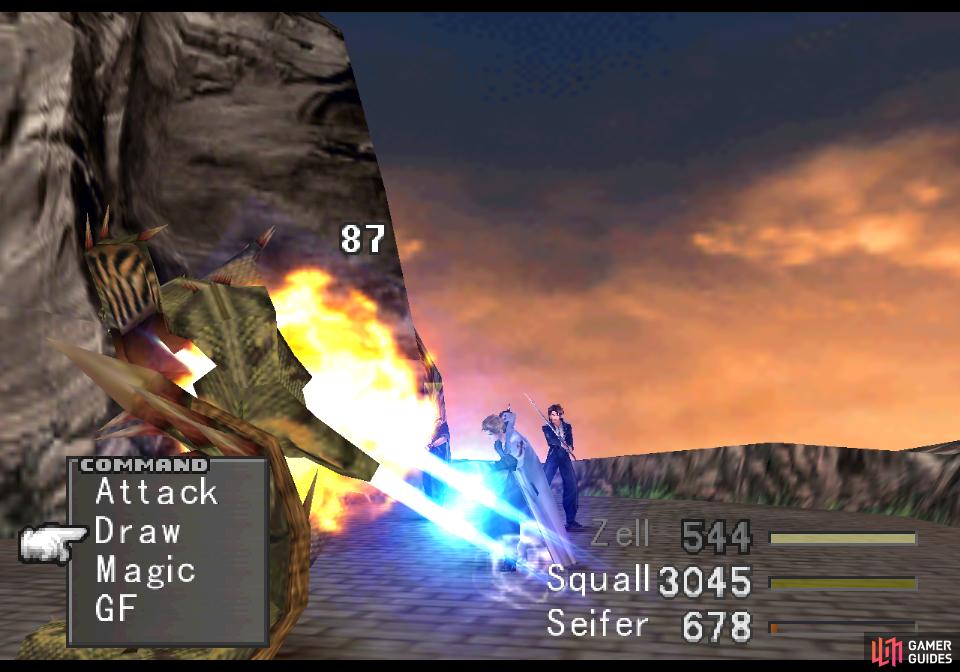
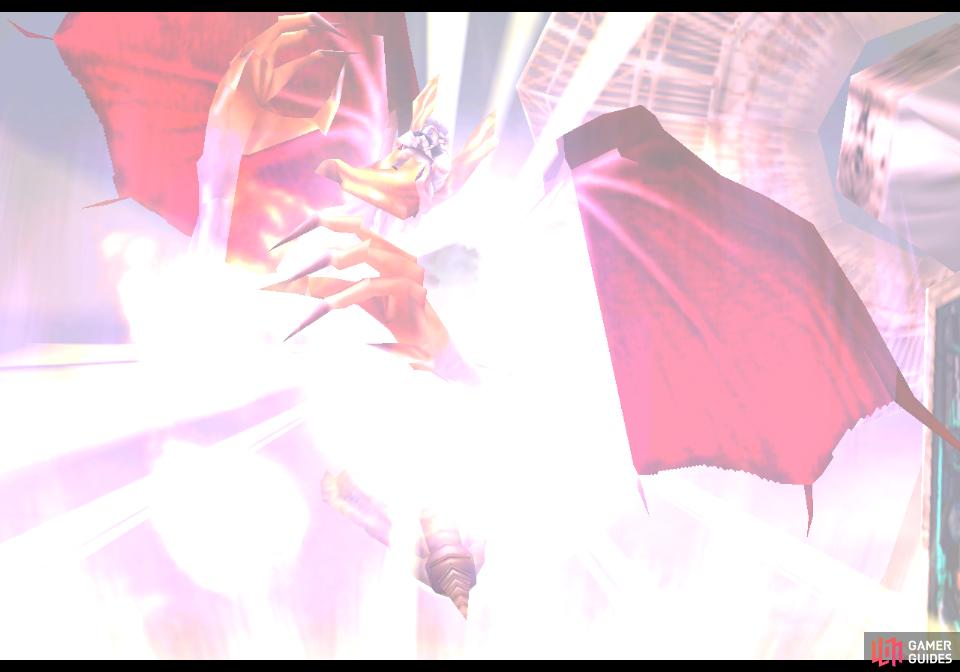
Elvoret will likely have over 3,000 HP at any level you’re likely to reach it at, so it might take a bit to whittle it down. Characters who have a higher Magic score than Strength should cast elemental magics on it, as it’s resistant to no elements save poison, which isn’t a something you have access to yet. Even better, draw and cast Double on yourself, then double-cast Thunder from your spell stocks. You can easily replenish these spells any time you wish, and it shouldn’t be an essential junction for any party. If you obtained Tornado and Thundaga stocks earlier, this battle will be a breeze, as Zell can easily kill Elvoret with a single limit break combo.
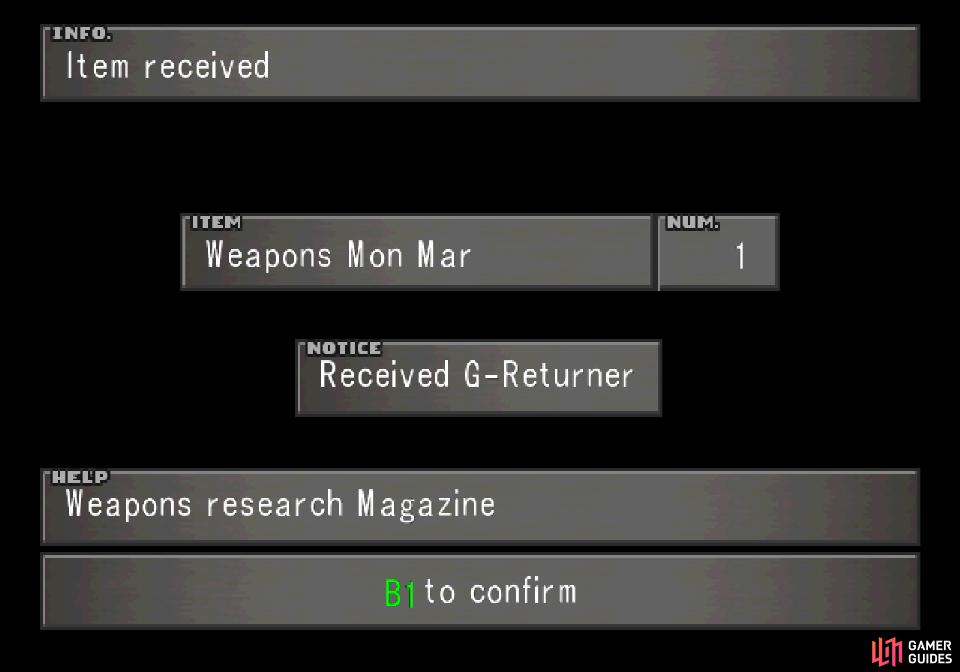
After you defeat Elvoret you’ll gain all the rewards you’re due from Elvoret and Biggs and Wedge, which will most likely include several Elixirs (fully restores a character’s HP/MP), Cottages (fully restores all GFs, only usable on the world map/Save Points), G-Returners (revives GFs from 0 HP) and a copy of Weapons Mon Mar, a weapon magazine that’ll detail how to create the Revolver, Metal Knuckle, Nunchaku and Chain Whip. You’ll can worry about upgrading weapons later, but for now, more pressing matters await.
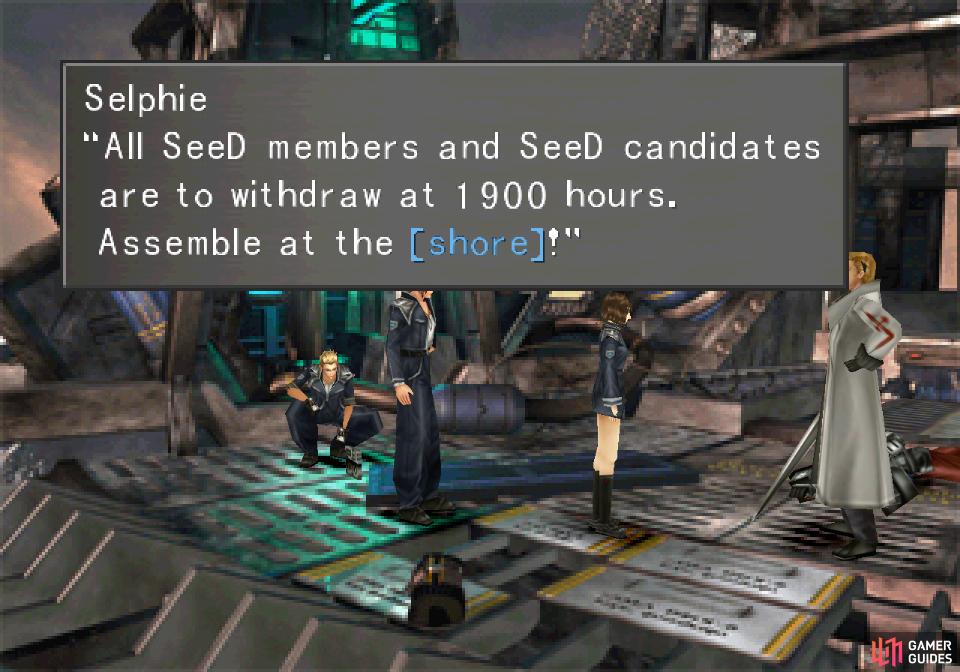
(1 of 3) After you defeat Elvoret, Sephie will inform everybody of the withdrawl order
Escape from Dollet
You’re on the clock now, so don’t dawdle more than necessary - the more time you take to escape, the lower your SeeD rank, and to get a perfect score you’ll need to effect your escape with 25:00+ on the clock. That said, there is some incentive to delay, despite the long-term effects on your wallet, but to start out head down the elevator (don’t talk to Biggs - it’s worth several demerits) and save at the Save Point. Equip Siren to a character and ensure she’s learning… something. Move-Find is a decent ability, although L Mag-RF, ST Med-RF and Tool-RF are all superior, you’ll want to pick something worth a few more AP than that.
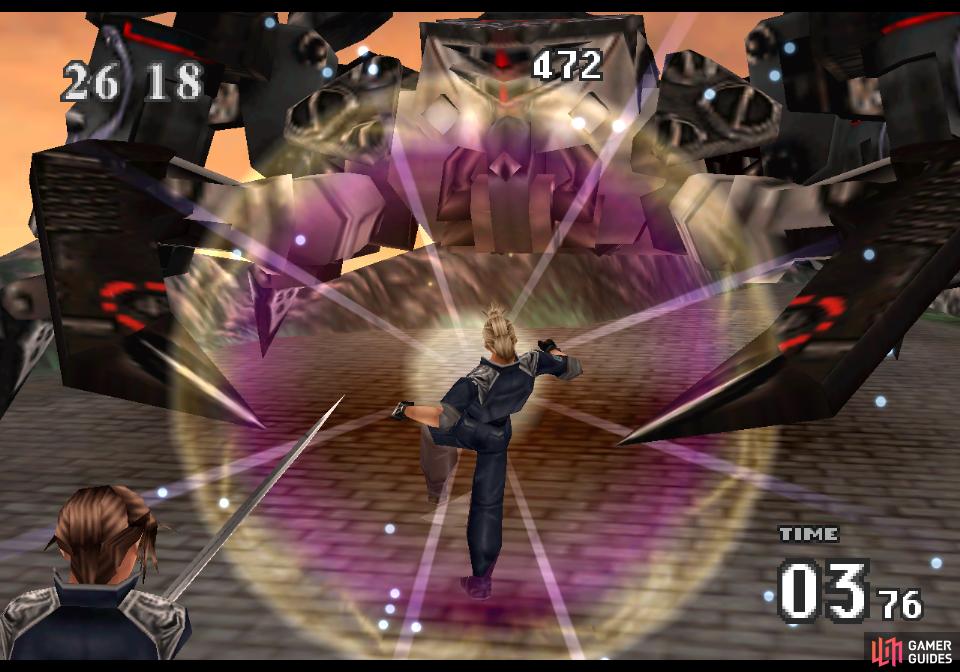
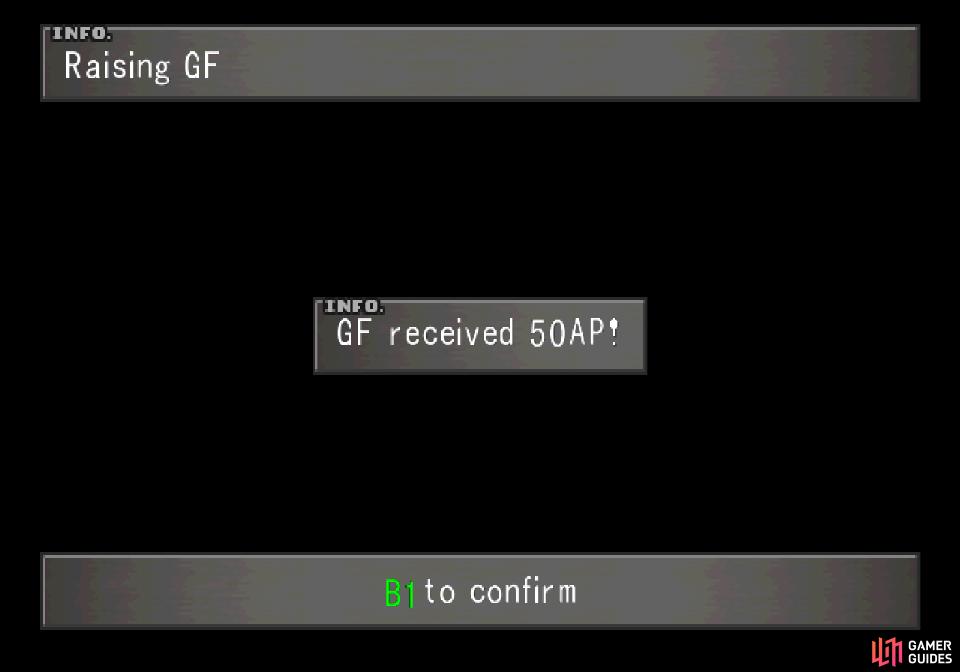
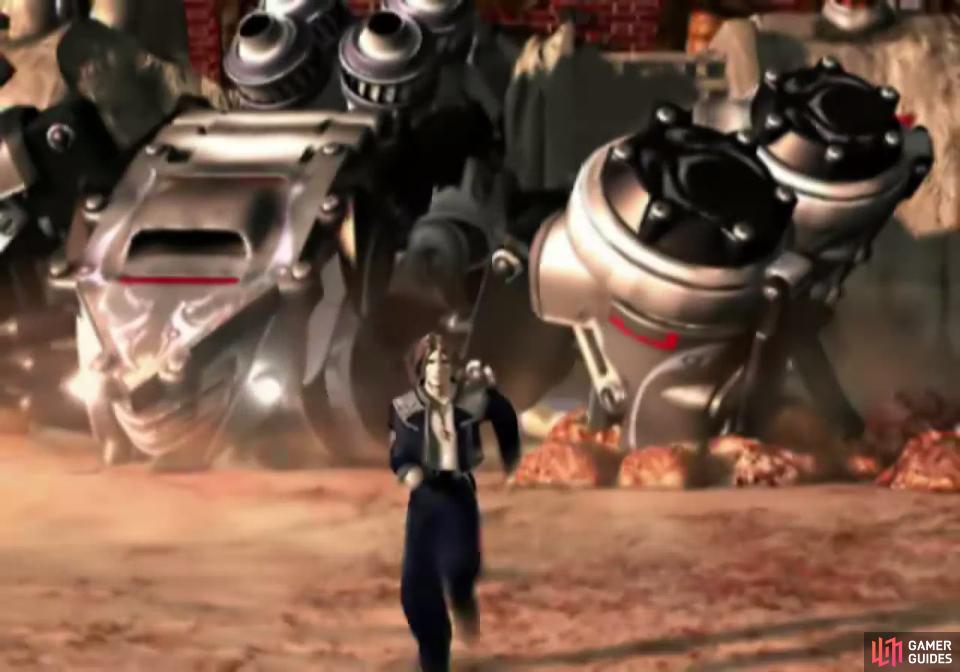
Once done, leave the tower and Biggs will test your newfound friendship by siccing a giant spider robot on you - X-ATM092. This mechanical menace will drop in on you shortly after leaving the communications tower, and will chase you through Dollet thereafter. You ultimately have two choices - evade it, or destroy it, and while the former will take less time, the latter will earn you an entire SeeD rank. Getting a slightly worse score on your field exam is probably worth the SeeD rank, not to mention the whopping 50 AP you’ll gain by defeating X-ATM092 in open combat.


(1 of 4) If you have Tornado and Thundaga junctioned, your melee attacks could do silly damage to X-ATM092
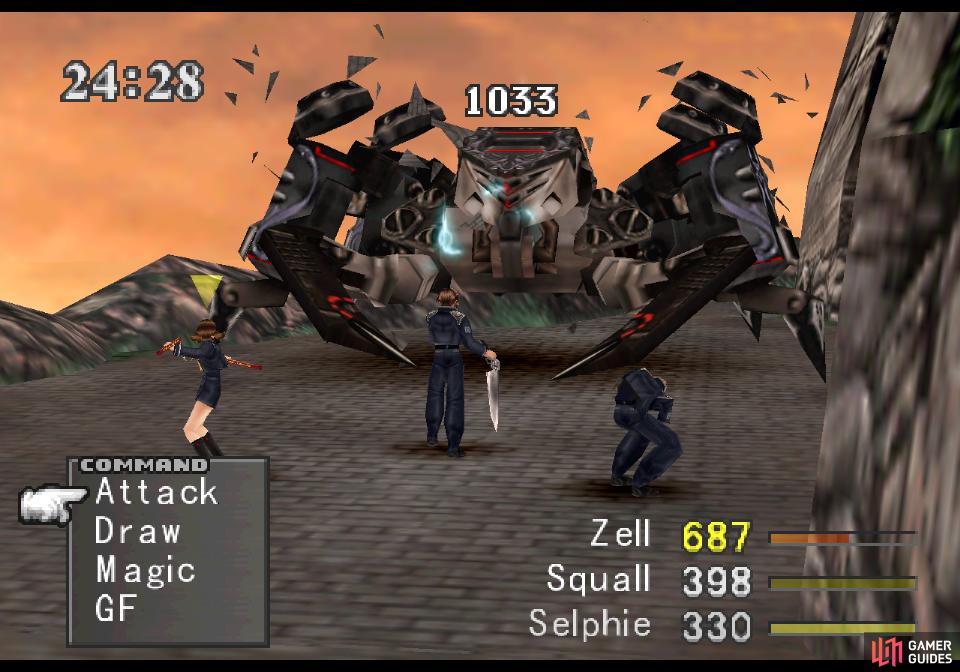
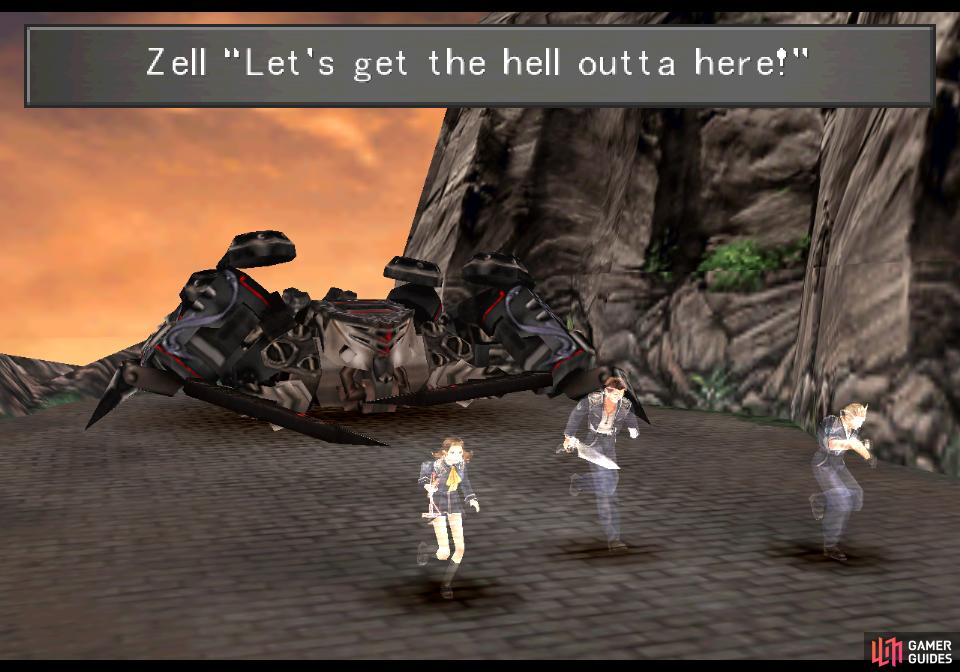
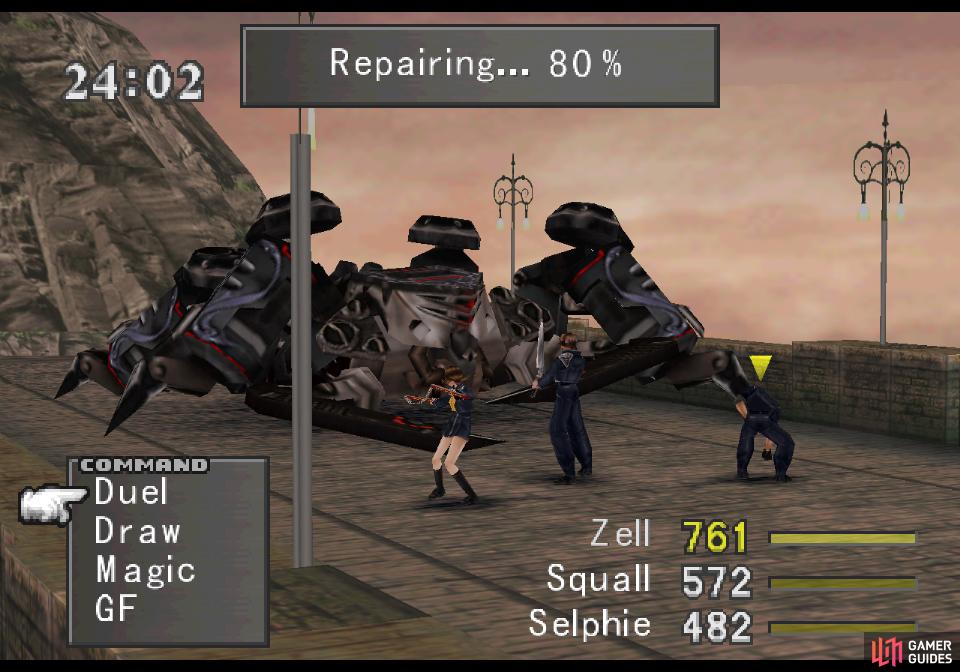
For the first fight - the only forced encounter with X-ATM092 - your options are more limited. While the robot has a whopping 5,872 HP at level eleven, you need only deal around 20% of its maximum damage to send into into repair mode, after which it’ll rise to fight again. For this fight it has unlimited repairs, so there’s nothing you can do but damage it until it drops, then flee (hold the L2 and R2 buttons by default).
It’s weak to lightning damage, so junctioning Thunder/Thundaga to your Elemental Attack will potentially increase your melee damage by 50% - a fine boost when you just need to shave off a little over 1,000 HP. If you obtained and junctioned spells like Tornado/Thundaga, your stronger characters could manage to deal 500-800 HP with a regular (lightning-infused) attack, making this fight trivial. Alternatively, a single Thundaga can deal 1,000 damage, which is in the ballpark of what a decently-boosted Quezacotl can do. Weaker parties should draw Thunder from X-ATM092 and cast it on the machine, or better yet, use the Double spells gained from Elvoret to double-cast Thunder from their own stocks.
(1 of 2) A high-powered Zell can easily drop X-ATM092 with his Limit Break
A high-powered Zell can easily drop X-ATM092 with his Limit Break (left), Which will allow you to flee and repeatedly gain 50 AP (right)
Zell’s limit break is also a good damage option, and he can easily deal enough damage in one limit to knock X-ATM092 into repair mode even if you didn’t acquire any high-end magics. For a party that does have such magics, however, Zell’s limit break can be overkill, and allow you to take advantage of an interesting exploit. If you reduce X-ATM092’s HP to 0, instead of entering its repair sequence it’ll simply stand up with full health as if nothing happened. If you flee the battle afterwards, however, you’ll gain the rewards for killing it, including that juicy 50 AP. You can gain this bonus in the first battle, and any subsequent encounters, although doing so will certainly hurt your SeeD rank, as you’ll have to flee from battle multiple times and the process of fighting X-ATM092 takes time.
That said, with Tornado or Flare junctioned to Strength and Thundaga junctioned to Elemental Attack, Zell can easily deal 5,000+ damage to X-ATM092 with his limit break, after which you need merely send X-ATM092 into repair mode as normal and flee. As much as we love grinding AP, it’s rather dubious whether this is worth your time or not, as your GFs are somewhat limited right now, and you can easily grind out all abilities that are even remotely useful on the beaches of Balamb without tanking your SeeD rank if you so desire.
X-ATM092 has a variety of melee attacks, although most of them aren’t very threatening, dealing under 100~ damage to a single character. Its Clash attack deals modest damage to the entire party, and Ray Bomb will deal around 100~ damage to the entire party. Fortunately you can draw Cure from X-ATM092, mitigating the threat to your party considerably. Other spells you can draw include Blizzard, Fire, Cure and Protect, and while the latter is a nice, new spell, you really don’t have time to harvest it. Ah well…
:::ggtable
| X-ATM092 | |
|---|---|
| Lv: | 1-11 |
| HP: (Lv11) | 5,872 |
| Weaknesses: | Thunder (150% damage) |
| Resistances: | Poison (immune) |
| Status Resistances: | Immune to most status effects – The End 0% |
| EXP: | – |
| AP: | 50 |
| Draw: (lv11) | Blizzard, Fire, Cure, Protect |
| Mug: (lv11) | – |
| Drop: (lv11) | Force Armlet, Hypnocrown, Orihalcon, Power Wrist (only one, randomly) |
| ::: |
(1 of 2) After the first encounter, you can send X-ATM092 into repair mode several times
After the first encounter, you can send X-ATM092 into repair mode several times (left), after which you’ll finally exhaust its resources and be able to destroy it. (right)
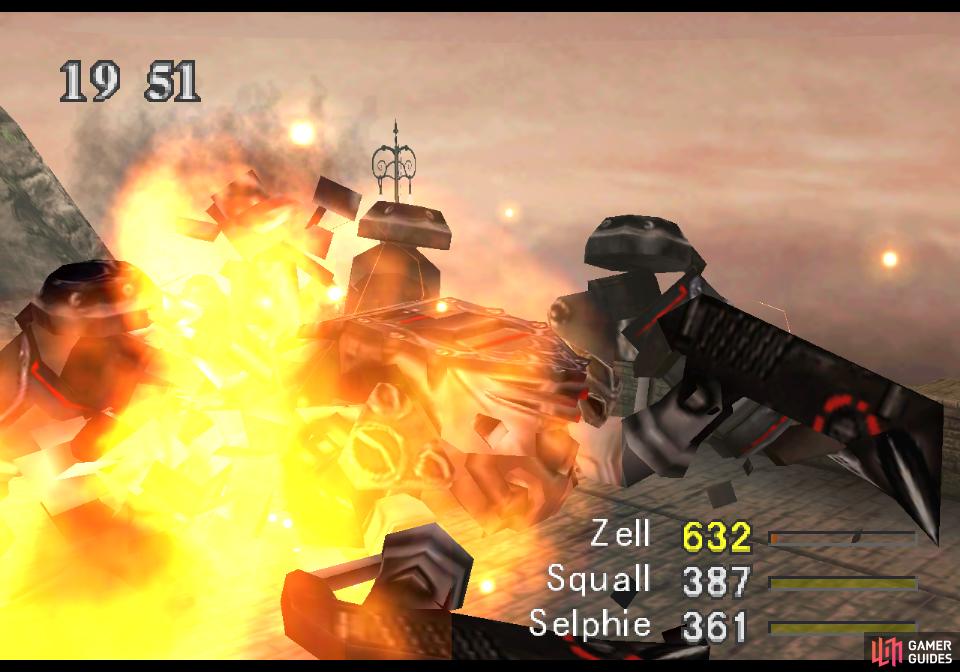
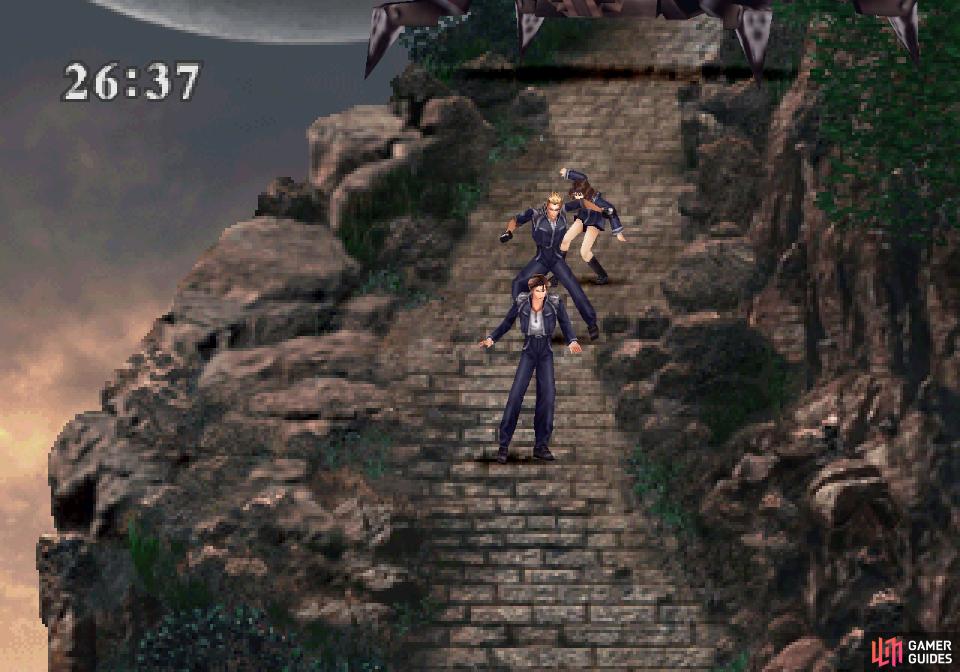
Deal over 1,000 damage to X-ATM092 to knock it down, then flee from it while it repairs and head to the next screen. From now on you can actually destroy X-ATM092 when you encounter it again by knocking it into repair mode five times, letting it recover without fleeing, and the the final time you’ll need to smash through all 5,000+ Hit Points. Its defeat is unmistakable, complete with flying debris and explosions, as all properly defeated robots do, and you’ll earn a bonus SeeD rank for defeating this foe on your own, as well as the aforementioned 50 AP. If you have Tornado/Thundaga at your disposal, two melee attacks are all you’ll likely need to knock X-ATM092 down, making this a very attractive strategy. This will allow you to avoid having to deal with X-ATM092 chasing you through Dollet, allowing you to stroll back to the beach undisturbed.
In addition to 50 AP, X-ATM092 can also drop one of four items, chosen randomly: a Force Armlet (teaches a GF the Spr +40% ability), a Hypnocrown (teaches a GF the Mag +40% ability), an Orihalcon (teaches a GF the Vit +40% ability) or a Power Wrist (teaches a GF the Str +40% ability).
If you can’t defeat X-ATM092 (at all or in a timely manner) you’ll instead need to flee from it. If it catches you, you’ll have to waste time fighting and ultimately flee after knocking X-ATM092 down, which will reduce your SeeD rank in two ways. That being the case, let’s try to avoid it, eh?
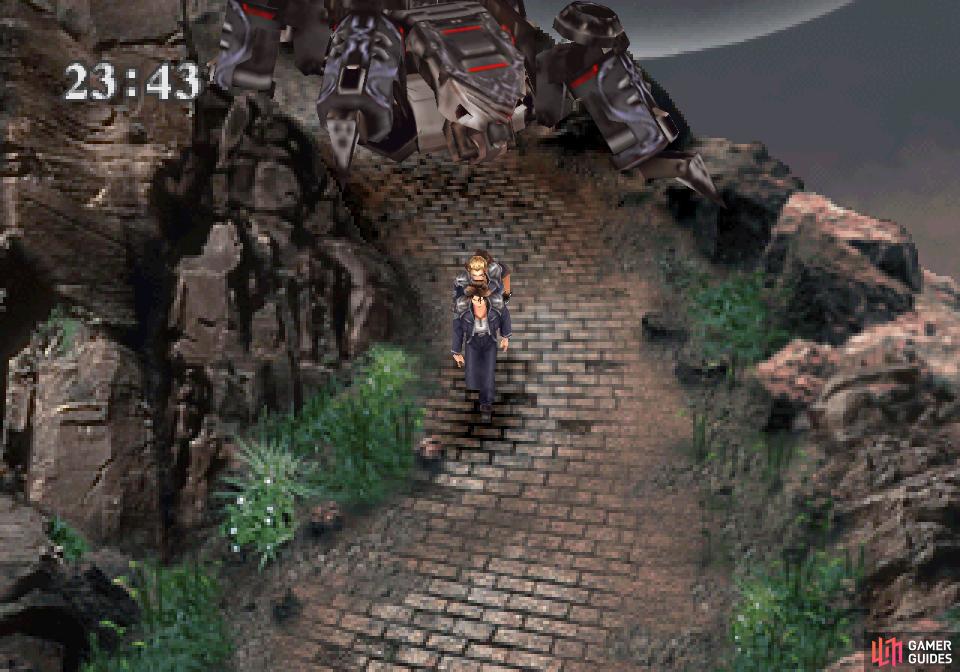
(1 of 3) On many screens you’ll simply have to outrun the pursuing X-ATM092
The first screen is easy, just run along the path until X-ATM092 shows up and chases you. You really should only get caught here if you want to. On the next screen, navigate the curved path, which can be kind of tricky with the original Playstation analog stick, but is trivial on the PC with, say and Xbox controller. If you’re playing on PC, consider using the D-Pad instead to make the turn sharper. More sharply? Whatever.
On the third screen you’ll need to do the counter-intuitive and walk for the first half of the path instead of run (you can do this by holding the walk/cancel button - Triangle by default - as you move). If you don’t, X-ATM092’s passage will shake you off balance long enough for the robot to catch up to you. By walking, on the other hand, X-ATM092 shouldn’t even show up on this screen.
Next up is the bridge, and X-ATM092 will leap over your head at some point to cut you off on the far end of the bridge. Note the decorations on the edge of the bridge and when X-ATM092 leaps over head, keep running right roughly the distance between these decorations, then turn around and run left. Failing in its ambush, X-ATM092 will leap overhead again, at which turn right again and flee to the next area.
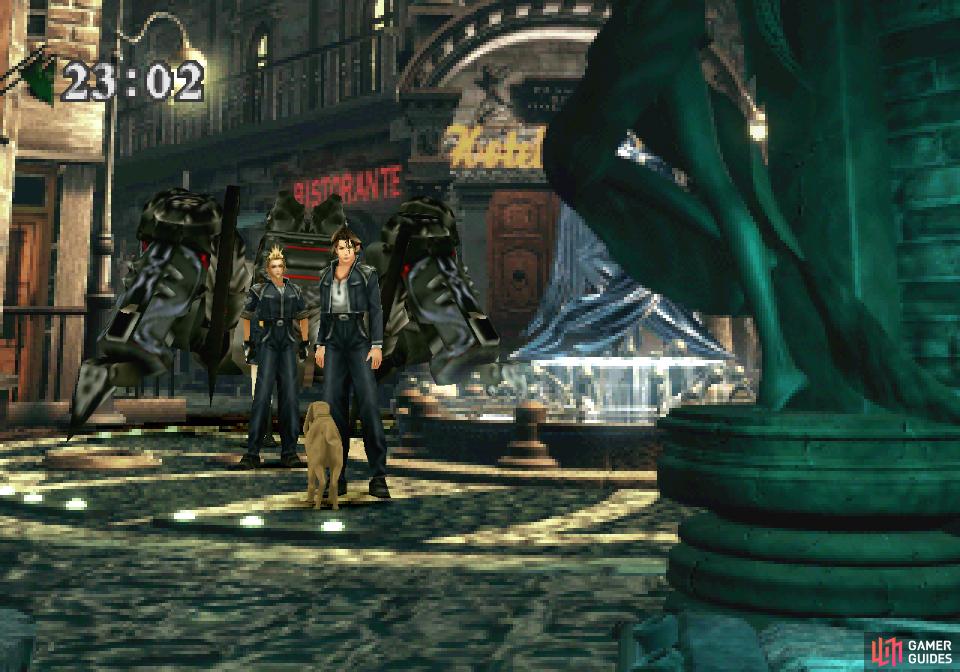
In the town square, just talk to the dog standing in your way to send it to safety. This shouldn’t take enough time for X-ATM092 to catch you, but failing to shoo the dog out of X-ATM092’s way will cost you a heavy number of demerits. Evacuation takes priority, unless a mutt needs to be saved… what a silly mercenary organization.
(1 of 2) If you defeated X-ATM092 earlier, you’ll be able to casually stroll back to the gunship.
If you defeated X-ATM092 earlier, you’ll be able to casually stroll back to the gunship. (left), if not, your return to the beach will be somewhat less dignified… (right)
From now on it’s a pretty simple matter to run to the beach. In one side-street you’ll see some other SeeDs withdraw, all you need to do is avoid taking shelter in the cafe to evade X-ATM092. Doing so is worth a huge amount of demerits, enough to significantly tank your SeeD score in its own right.
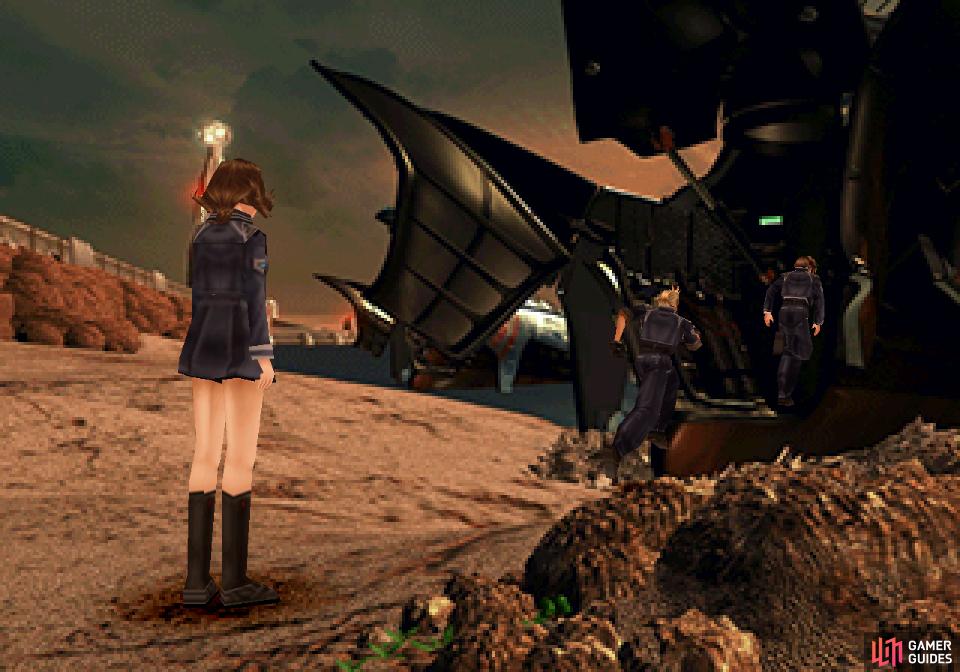
When you make it to the beach, watch a video detailing Squall’s clutch escape from X-ATM092, and Quistis’s epic moment of badassery. Gotta love a woman who can handle a ship-mounted turret. If you destroyed X-ATM092 earlier, your return to the gunship will be somewhat more anti-climatic. Either way, the mission in Dollet is over, it’s just a matter of returning to Balamb Garden and awaiting the results of your field exam.

 Sign up
No Comments