Nomad Camp - First a refresher on how the weather control device operates:
We have already activated the red Cactuar stone in Plains of Eternity, that warps you to the Nomad Camp. Make the sunny weather and then head south from the nomad settlement, towards the crystal gate in Grave Ridge. Shortly before reaching the gate, there is a big stone in the shape of a Cactuar. Behind this stone is a concealed red Cactuar stone, uncover it with Moogle Hunt, then examine it for AF??? ARCHYLTE STEPPE FRAGMENT - Azure Crystal (05/12) + 300CP !
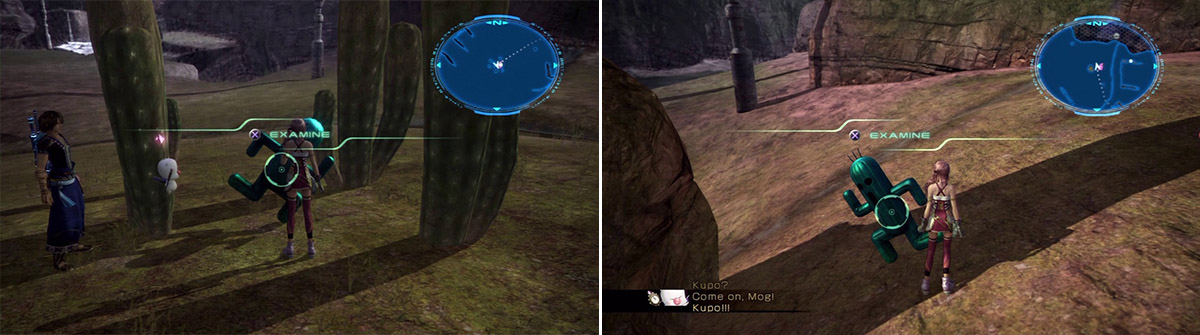
Gigantuar Stone Number 1 (left). Gigantuar Stone Number 2 (right).
Next, go southwest from the Nomad Camp to Stonestump Wastelands and look for a green Cactuar stone surrounded by cactii. Examine the green Cactuar stone to force a Gigantuar to spawn nearby, and then kill it. Two more to go.
Next, jump the gap to the west to enter Clearwater Marshes. Immediately next to the pond is a stone, and in its shadow is a concealed green Cactuar stone. Reveal it, then examine it to force a Gigantuar to spawn nearby. Kill the Gigantuar and that’s two down, one more to go.
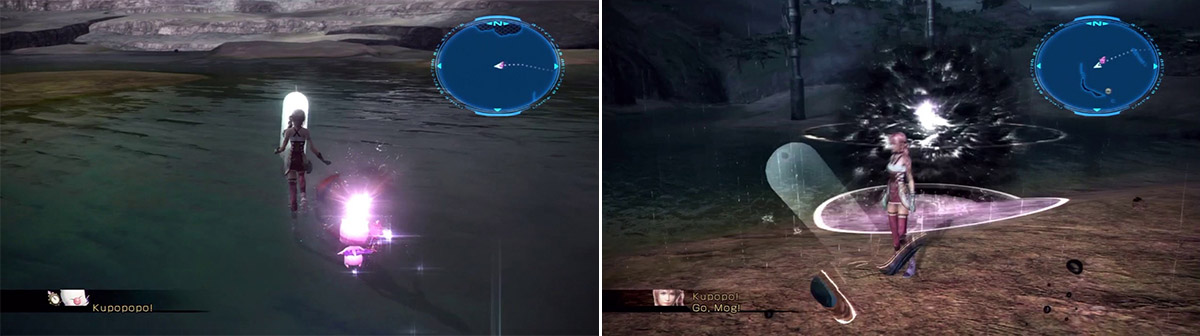
Cactuar Stone Nr. 3 - Sunny Weather (left). Gigantuar Stone Number 3. - Sunny weather (right).
Now go directly W from this green Cactuar stone until you spot a concealed red Cactuar stone in the pond. Use R1 to reveal it, and then examine it for AF??? ARCHYLTE STEPPE FRAGMENT - Amber Crystal (06/12) + 300CP!
Make rainy weather and return to Clearwater Marshes. Approximately southwest from the second green Cactuar stone you’ll find another concealed green Cactuar stone. Reveal it with R1, then examine it for a Gigantuar to spawn and promptly dispatch the latter. Killing all three Gigantuars removes the mist around the crystal gate in Grave Ridge, which can now be activated with a Wild Artefact - it unlocks the AF200 Vile Peaks timeline.

Cactuar Stone Number 4. Windy Weather (left). Cactuar Stone Number 5 - stormy weather (right).
Make windy weather, and depart for the crystal gate in Grave Ridge, then turn west. See the small tornado? Inside it is a concealed gold Cactuar stone, so reveal it with R1. Examine it to be warped to the west area of the steppe, and you bag AF??? ARCHYLTE STEPPE FRAGMENT - Forest Crystal (07/12) + 300CP !
Make stormy weather and depart to the southwest area of Clearwater Marshes. You just cannot miss the concealed, but electrified, red Cactuar stone. Reveal it with R1, examine it and receive AF??? ARCHYLTE STEPPE FRAGMENT - Violet Crystal (08/12) + 300CP ! Chocobo riding is now enabled by talking to a girl next to the chocobo corral.
Long Gui
Make sunny weather and saunter over to the enormous tortoise Long Gui in Sanctorium. Defeat him for AF??? ARCHYLTE STEPPE FRAGMENT - Long Gui Fragment (09/12) + 30000CP !
Enemy Tips :
The hated Oretoise from FFXIII returns, but this time it’s much easier to take down. Triple SEN paradigm is a must!
When battle starts, add Deprotect and Deshell on one of Gui’s forelegs and start wailing on it. When you see the caption for Ultima onscreen, switch to triple SEN. Also do that if Long Gui attempts Quake, Bay, or stomps the ground with one of its forelegs.
After you drop one leg, repeat the procedure on the other leg. With the other leg also disabled, Long Gui plummets to the ground, unable to do anything. Now inflict Deprotect, Deshell, Imperil and POISON! Poison damage will remove at least 1 million of Gui’s HPs in the long run.
After debuffing is done, switch between RAV/RAV/COM and COM/COM/COM for big damage and keep raising Gui’s Chain Gauge until the turtle is KOed.
If you take too long, Long Gui rises back up with both forelegs fully restored. In that case just repeat what you’ve been doing.
Ochu
Nomad Camp - The nomad chief Tipur offers a quest to kill Ochu. Make rainy weather and depart for the blue “!” in Clearwater Marshes to face off VS Ochu. After killing it you get AF??? ARCHYLTE STEPPE FRAGMENT - Ochu Fragment (10/12) + 30000CP !
Enemy Tips :
SEN SEN SEN - maxed Silver Chocobo or Pulsework Gladiator with Mediguard
COM COM SEN - maxed Silver Chocobo or Pulsework Gladiator with Mediguard
RAV RAV SEN - maxed Silver Chocobo or Pulsework Gladiator with Mediguard
RAV RAV SEN - maxed Silver Chocobo or Pulsework Gladiator with Mediguard
MED MED SEN - maxed Silver Chocobo or Pulsework Gladiator with Mediguard
SAB SAB SYN - maxed Yakshini
Paradigms from to is all you need to win this battle. The SEN will draw all the attacks from Microchus and the big Ochu while you drive up its Chain Gauge. If your SEN comes into trouble regarding HP, switch to to heal.
Ignore Microchus and focus solely on Ochu until it’s staggered. Now promptly defeat it, and then kill the remaining Microchus.
Immortal
Leave for the Historia Crux and come back right away. Tipur offers a quest to kill Yomi, while Myta, the girl tending the sheep offers a quest to kill Immortal. Make windy weather and depart for the blue “!” in Stonestump Wastelands to face off VS Immortal. Kill it for AF??? ARCHYLTE STEPPE FRAGMENT - Fragment of Invincibilty (11/12) + 30000CP !
Enemy Tips :
For a super easy battle grab 2x Lightning Aegis from Circuitrons in Bresha Ruins AF300. Equip one of each onto your party members to become immune to lightning damage, which is heavily employed during the battle.
Immortal will summon a Centaurion Blade at the start of battle, and you can’t prevent it from happening. Immediately attempt to stick Deprotect and Deshell on Immortal, followed by one wave of Poison (if it doesn’t stick, no worries).
With the Blade flying around (the Blade can’t be provoked) Immortal will often launch a lightning attack for heavy damage. This also damages the Blade a bit in addition to granting it Bravery and Enthunder buffs.
Sticking Deprotect and Deshell on the Blade is easier due to a lower resistance, and then killing the Blade is but a question of time. With the Blade gone, stagger Immortal and then dismantle it.
Yomi
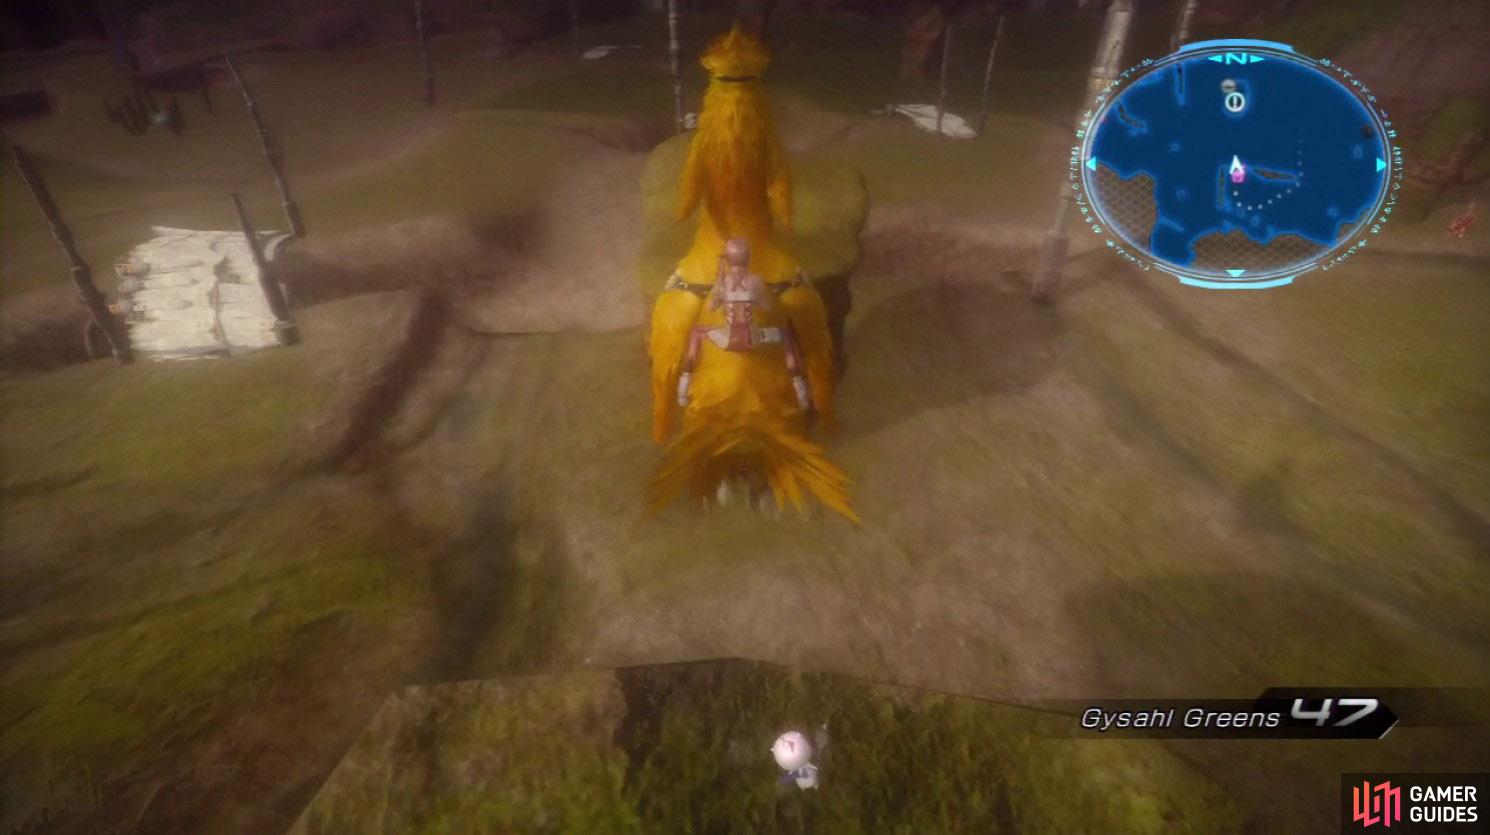
A Chocobo jump is required to reach Yomi.
Make stormy weather and grab a chocobo. In Grave Ridge, west from a crystal gate is a high pillar, on which you can jump from the ledge to the south while on a chocobo (hold Circle to glide). When you land on top of the pillar, Serah auto-dismounts the chocster. Yomi appears and the battle begins. Kill it for AF??? ARCHYLTE STEPPE FRAGMENT - Yomi Fragment (12/12) + 30000CP !
Enemy Tips :
The Vercintegorix look-a-like returns for a big battle. Poison and Chichu/a strong COM are very useful here! Chichu will be useful for Bravery and Faith Feeder abilities, and Poison will help you kill off Yomi.
As Yomi’s HPs go down, it grows more wings making it more powerful with each pair. At regular intervals Yomi also becomes invulnerable for a period of time - during this time it recovers its own HP (the lower Yomi’s HP is, the higher the amount recovered) and it buffs itself with Protect, Shell, Bravery and Faith. Bravery and Faith will be absorbed by Chichu, but Protect and Shell must be removed with relevant SAB abilities. While Yomi is recovering HP, you should do the same if you’re hurting.
Each time Yomi comes out from its invulnerability phase, attempt to inflict Poison as soon as possible. Poison will eat through Yomi’s HP. With about 50% HP lost, Yomi begins employing Wicked Whirl - for this attack switch to SEN/SEN/SEN.
Yomi can be staggered fairly easily, but then follows up with another immunity phase, thus wasting your hard work. Keep up Poison at all times and you win. It is a very protracted battle so stick with it.


 Sign up
No Comments