Enemy Encounters
| Name | Notes |
|---|---|
| Aquila Velocycle | Resistant to physical/magic damage; weak to Fire/Water; susceptible to Slow and Imperil. |
| Megrim Thresher | Fire, Lightning, physical and magical damage halved; very powerful attacks. |
| Dagonite | Uses Power Spritz like the Orobon; Rush attack knocks party members from their feet; inflicts status ailments. |
| Sacrifice | Physical damage halved; Anathema ability inflicts four status ailments on target; can instant KO. |
| Sanctum Templar | All elemental damage halved; Charging Manadrive inflicts status ailments and massive HP loss; dangerous in groups of two or more. |
| Bandersnatch | Elemental damage halved; immune to physical and resistant to magic; susceptible to Deshell and Imperil. |
| Jabberwocky | Weak to all elements but immune to magic; physical damage halved; susceptible to Deprotect and Poison. |
| Immortal | Uses Forge Blade to summon Centaurion Blade; very powerful attacks and high HP. |
| Centaurion Blade | Summoned by Immortal; cannot be Provoked and has strong attacks. |
| Wladislaus | Weak to all elements but magic damage halved; Mounting Contempt can kill an unprotected party member instantly. |
| Tiamat Eliminator | Immune to all status ailments and all elemental damage halved. |
Save at the Save Point.
- Battle: 3x Sacrifice / D
- Battle: 4x Sacrifice / D
Proceed towards destination marker for a scene. Three teleports will appear, and dungeon’s layout will be changed. Be advised that this dungeon sports very tough enemies in some of the deadliest setups you’ll encounter. It won’t be tough from the start, but as you go on…
You’ll be stading at 4-way crossing.
-
Teleport on the right leads to Eden
-
Teleport on the left leads to Gran Pulse
-
Teleport ahead will lead to the place just before final boss (unlocked later)
Turn around, go down the ramp and jump the gap, save at the Save Point and take left path to cover first optional area. If you don’t collect the goods now, you won’t be able to get them later!!! Turn right, jump down few steps, turn left and smite the foes.
- Battle: 2x Sacrifice / A
Jump down few steps for next encounter.
- Battle: Aquila Velocycle / D
Turn right and then left to reach a fork. Dart straight ahead into foe’s embrace.
- Battle: Aquila Velocycle / A
Collect the Treasure Ball with Librascope , return to the fork and take the other path by jumping up few steps.
- Battle: Megrim Thresher / A
Collect two Treasure Balls with Cherub’s Crown (Resist Death +30%) and Millerite .
Return to the central area and take the only path we haven’t explored yet, descend the ramp and check the floating statue. Two elevator platforms will appear - first take the one behind you to be transported a bit down to another optional area.
Turn right, then right at the fork and proceed to the end for a Treasure Ball with 4x Supercharger . Return to the fork and take the other path, turn right and then left.
- Battle: Aquila Velocycle / F
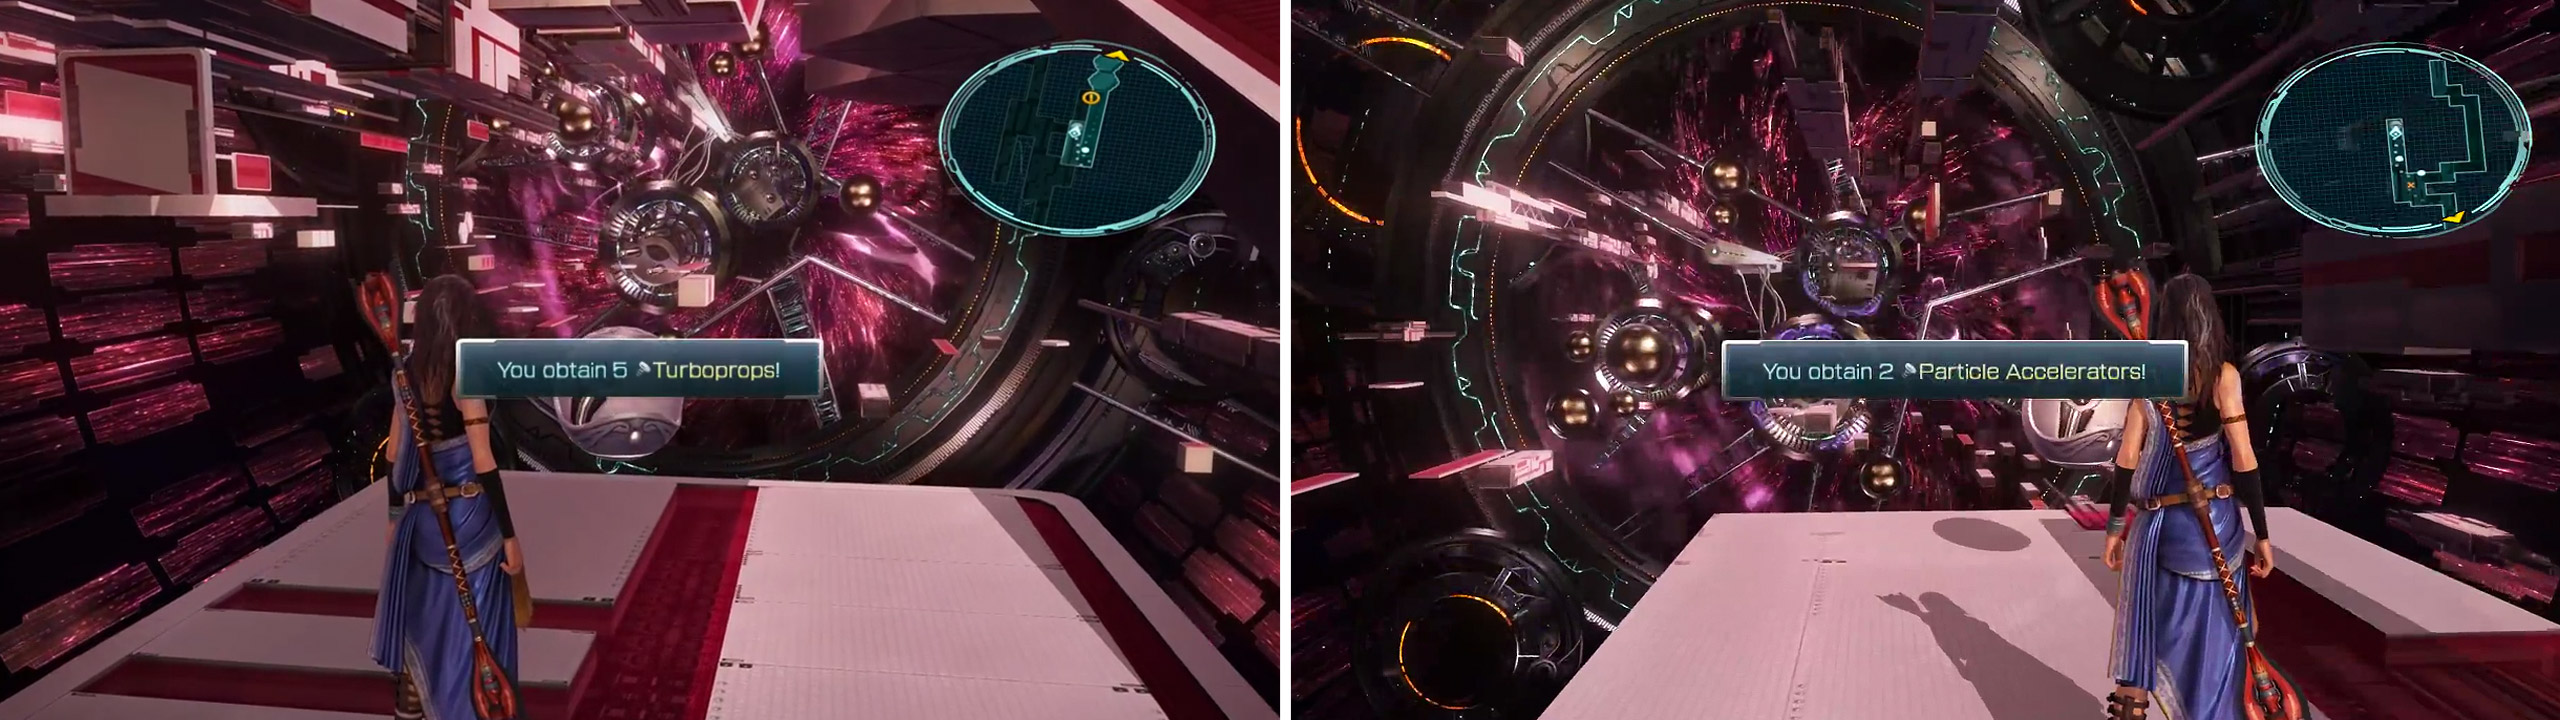
Next fork is reached - jump down the right ledge and proceed to the Treasure Ball ahead with 4x Perfect Conductor , then descend the ramp behind you for Treasure Ball with 5x Turboprop . Retrace your steps and jump up the first ledge on your right, turn right and jump up another ledge. If you now go left, you’ll run into dead end with… an enemy.
- Battle: Aquila Velocycle / D
Turn around and go in opposite direction.
- Battle: Megrim Thresher / A
Next fork is reached. Straight ahead is a Treasure Ball with 2x Particle Accelerator , and taking the other path leads to a Treasure Ball with Uraninite . Return to the elevator platform and ride it back up, then board the other elevator platform to be taken further up.
20x Seaking’s Beard / 2x Vial of Aegisols
As you step off, pop open 20x Seaking’s Beard , then carry along the path. Now the battles become interesting…
BATTLE - Dagonite / A
BATTLE - 3x Dagonite / A
You’re at 4-way cross - take the ramp immediately to your left and face another fork on the top. There’s some enemies next to you.
- Battle: 2x Sacrifice / A Check right dead end for Treasure Ball with 2x Aegisol . Return to the fork and take the other path.
- Battle: 3x Sacrifice / A
Yet another fork - left path leads to TB with 9x Tear of Woe, and right path leads to the Treasure Ball with a Gale Ring (Resist Wind +25%) . Return to the 4-way cross and proceed towards the floating statue.
- Battle: 2x Dagonite / D Check dead end to the right for Treasure Ball with Shamanic Spear (Fang weapon) . Save at SPN and check the statue to have dungeon change shapes again. Go down the ramp.

Gale Ring / Shamanic Spear.
- Battle: Sacrifice + Aquila Velocycle / F If you take the right path and overpower some enemies…
- Battle: Sacrifice + 3x Dagonite / D
…you’ll only get back to the areas we already explored. So instead take the left path and jump down the ledge. Ignore elevator platform on your left for now and proceed forward. Jump up the ledge and turn left.
- Battle: 2x Sacrifice + 2x Dagonite / A
- Battle: 2x Sacrifice + Aquila Velocycle / A
Open the Treasure Ball with Tetradic Crown (Critical Tetradefense) . Now return to elevator platform and ride it down. Save at SPN and take right path at the fork.
- Battle: 3x Dagonite + Aquila Velocycle / A
- Battle: 2x Dagonite + Sanctum Templar / F
Collect the Treasure Ball with 6x Starblossom Seed. Return to the fork and take the other path - jump down the ledge and turn right.
- Battle: Sanctum Templar / A
Go down the ramp, at next fork go left first by jumping down the ledge and nailing the Treasure Ball with 8x Black Mycelium , then take the path ahead.
- Battle: Sacrifice + Sanctum Templar / D
Ignore the ledge to the right for now and press ahead to reach dead end with the Treasure Ball containing Rhodochrosite . Return to the ledge you ignored and jump down it to lower path leading towards destination marker.
- Battle: 2x Sacrifice + Sanctum Templar / A
Save at the Save Point, toss Fortisol and Aegisol, then check the floating statue.
Boss Battle: Bandersnatch & Jabberwocky
Bandersnatch will regularly heal Jabberwocky to full health, as such it is reccomended to kill Bandersnatch first.
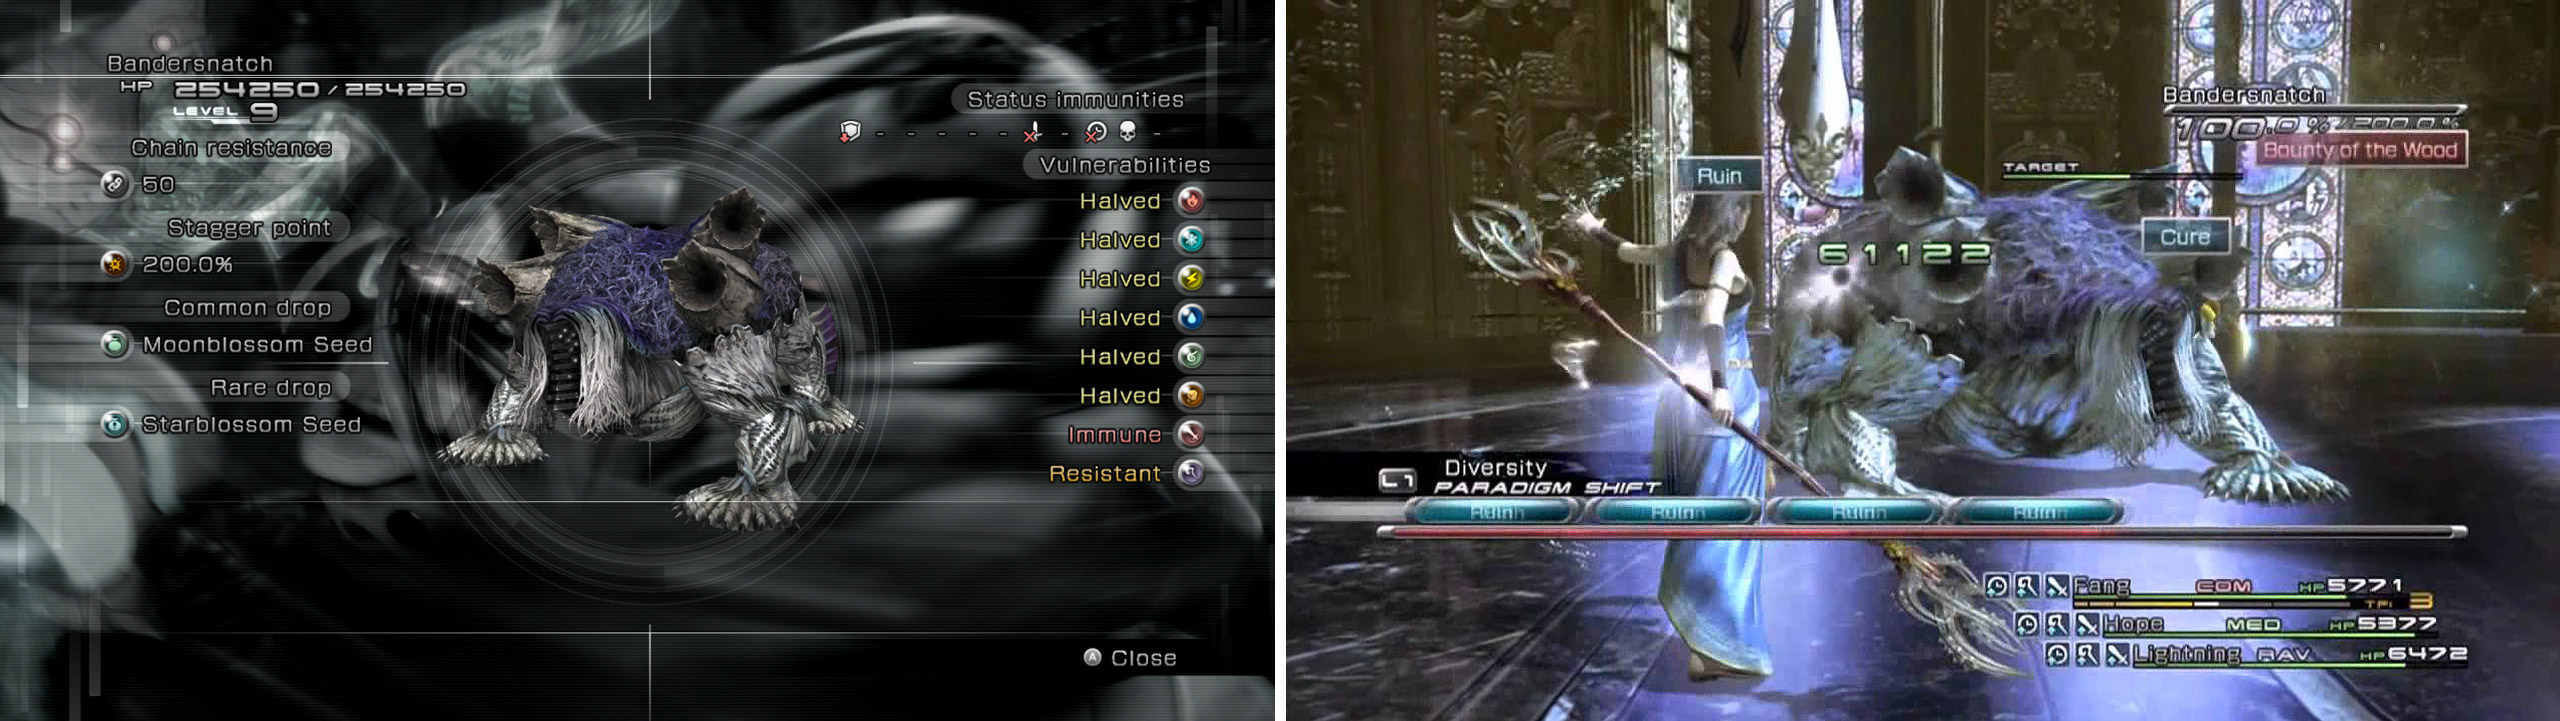
Bandersnatch is immune to physical damage and resists magic damage as well, but can be inflicted with Imperil and Deshell to deal more damage with spells.
| Bandersnatch | Stats |
|---|---|
| Level / HP | LV 9 / 254,250 HP |
| Strength / Magic | 781 STR / 781 MAG |
| Stagger / Chain Res. / CP | 200% / 50 Chain Resistance / 16,000 CP |
| Vulnerabilities | All Elem (Halved) / Phys (Immune) / Mag (Resist) |
| Common Drop / Rare Drop | Moonblossom Seed / Starblossom Seed |
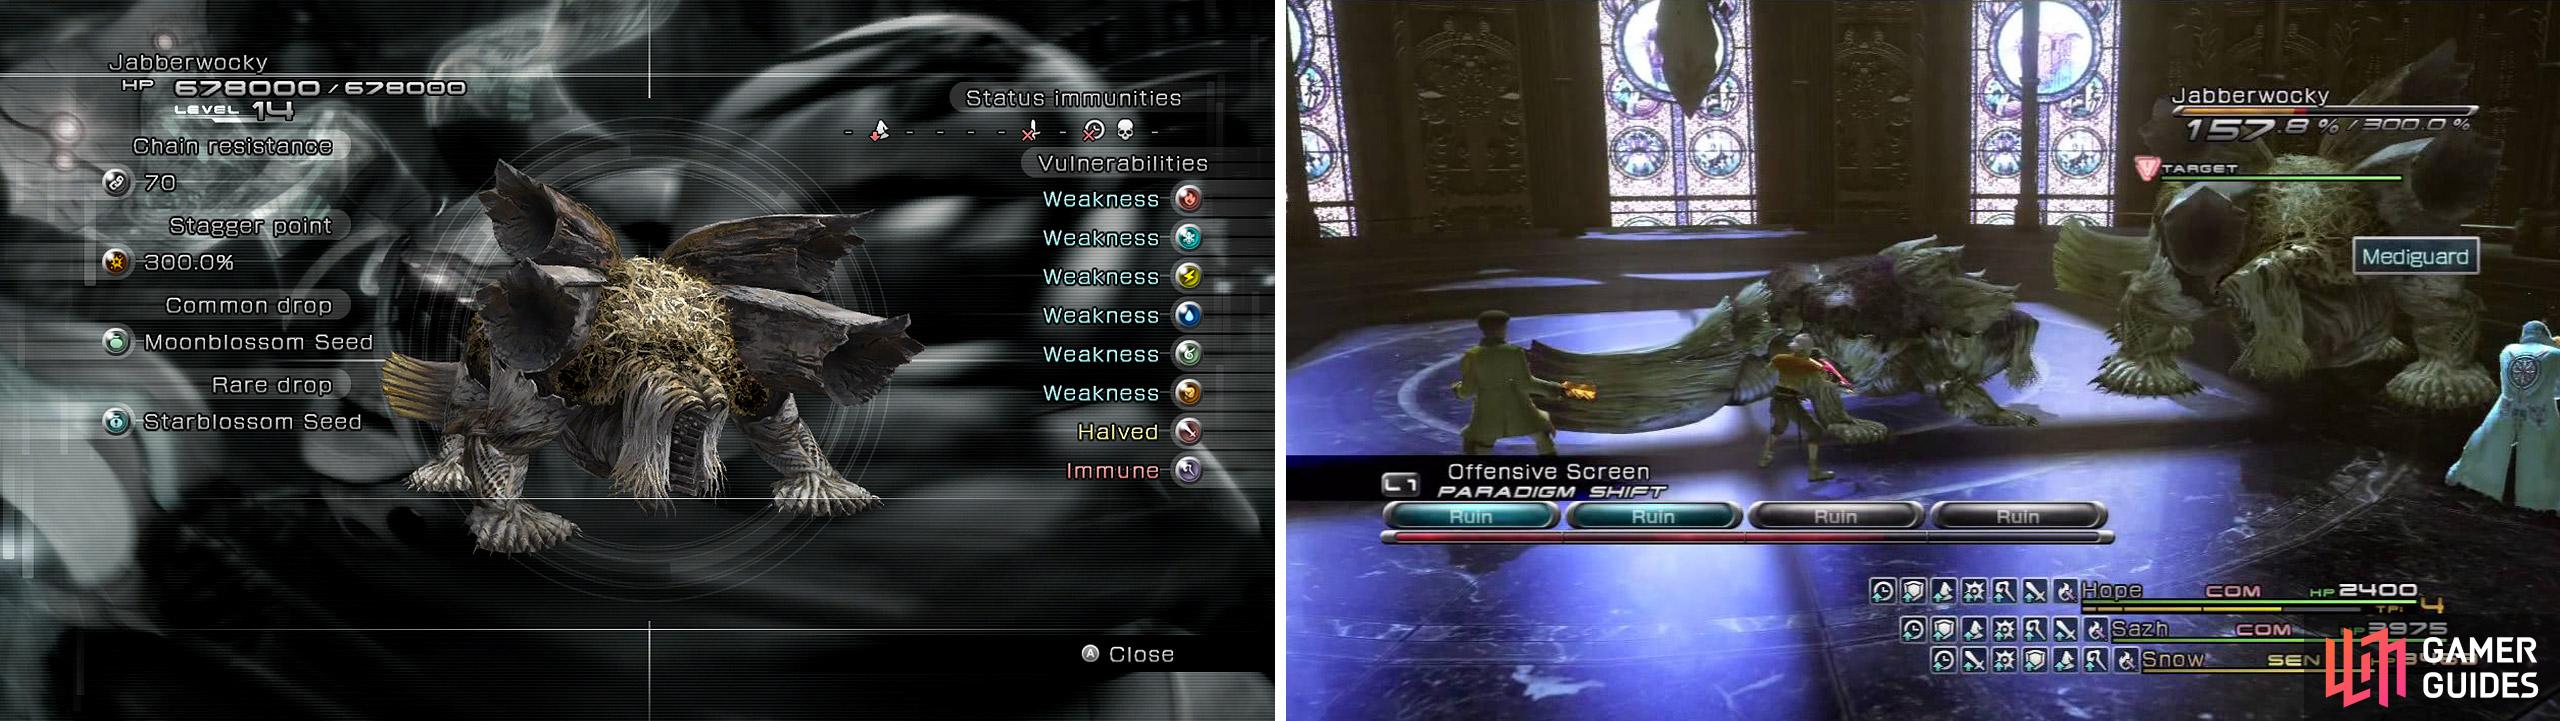
Jabberwocky is immune to magic and takes half damage from physical attacks, but can be inflicted with Deprotect, Slow and Poison. Jabberwocky is weak against all elements.
| Jabberwocky | Stats |
|---|---|
| Level / HP | LV 14 / 678,000 HP |
| Strength / Magic | 1,765 STR / 1,765 MAG |
| Stagger / Chain Res. / CP | 300% / 70 Chain Resistance / 16,000 CP |
| Vulnerabilities | All Elem (Weak) / Phys (Halved) / Mag (Immune) |
| Common Drop / Rare Drop | Moonblossom Seed / Starblossom Seed |
A duo of Woodwraiths again… First get rid of the larger woodwraith;. Start by having Fang stick Imperil on both guys, Deshell on smaller, and Deprotect on bigger one. Then switch to RAV/COM/RAV setup and smash the bigger Woodwraith to bits. Even though it has higher Chain Gauge, we found it easier to Stagger than the smaller Woodwraith. Small dude will attempt to heal big dude, but it can’t keep up due to your damage output. Once Bandersnatch is history, so is Jabberwocky.
It is possible to obtain Aegisol after battle. Go towards the Save Point for a scene, save your game, then down the ramp for another scene.
This section consists of six rings, and your destination marker is straight ahead. However, there are a couple of accessories that need collecting. You get to them by smashing the first enemy you see.
- Battle: Immortal + [Centaurion Blade RF] / D
Immortal was guarding the teleport behind it. Enter the teleport to be taken to an area with two Treasure Balls with Weirding Glyph (MAG+150) and Adamant Bangle (HP+800). Take next warp into the area with two Treasure Balls containing Scarletite and Elixir . Take final warp to return to original six-ring area. There are no other treasures to be had in this area, so carry on towards destination. Aside Immortal there are five more enemy configurations you can try to slaughter.
- Battle: 2x Aquila Velocycle / A
- Battle: 2x Sacrifice + 4x Dagonite / A
- Battle: Megrim Thresher + Sanctum Templar / A
- Battle: 3x Sacrifice + 3x Dagonite / D
- Battle: 2x Sacrifice + Megrim Thresher / A
Avoid or fight them, up to you. Tip - you can walk below the last Thresher before reaching next Save Point. Save your game, toss Fortisol and Aegisol , then check the floating statue.
Boss Battle: Wladislaus
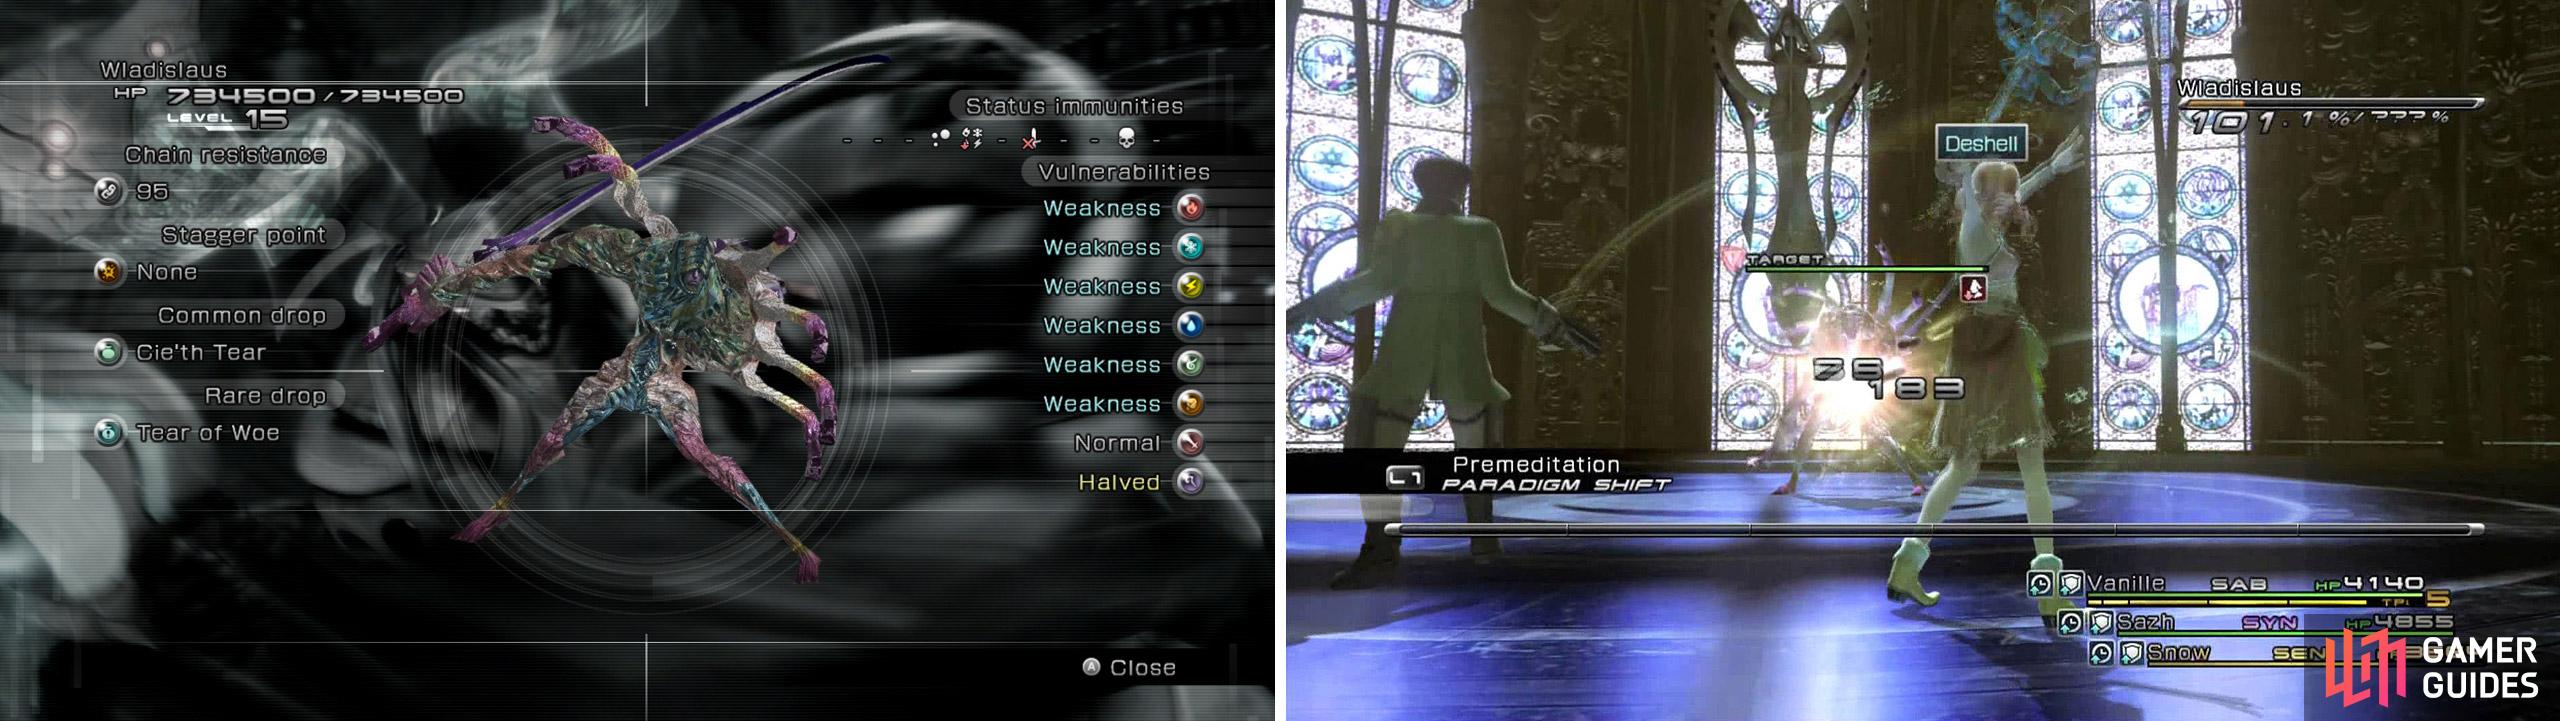
Wladislaus is weak against elements, but has a high stagger point. Wladislaus is susceptible to Daze, although the chance to inflict is low.
| Wladislaus | Stats |
|---|---|
| Level / HP | LV 15 / 734,500 HP |
| Strength / Magic | 2,735 STR / 2,735 MAG |
| Stagger / Chain Res. / CP | 999% / 95 Chain Resistance / 32,000 CP |
| Vulnerabilities | All Elem (Weak) / Phys (-) / Mag (Halved) |
| Common Drop / Rare Drop | Cie’th Tear (25%) / Tear of Woe (5%) |
Our party was Light, Fang and Sazh. Count on Random-Instant Chain synth-ability! Buy some Speed Sashes, and give two to each chr fighting. At start of battle go COM/SAB/COM so that Fang sticks Slow, Deprotect and Deshell on the bozo. This enemy has very powerful physicals - regular one swipes off about 2500 dmg, and Contempt whopping 4500 dmg. When you see it charge for the swipe, switch to setup with SEN to greatly reduce the damage. With Deprotect and Deshell going on you can easily defeat this enemy even without Random-Instant Chain.
- Battle: Wladislaus / D
Instead take the ramp up and collect 3000 GIL from Treasure Ball.
- Battle: Wladislaus + Sanctum Templar / A
Collect 5,000 GIL from the Treasure Ball.
- Battle: Jabberwocky + Bandersnatch / F
Jump up the ledge, and turn right.
- Battle: 3x Sanctum Templar
Save at the Save Point, toss Fortisol and Aegisol, then check the floating statue.
Boss Battle: Tiamat Eliminator
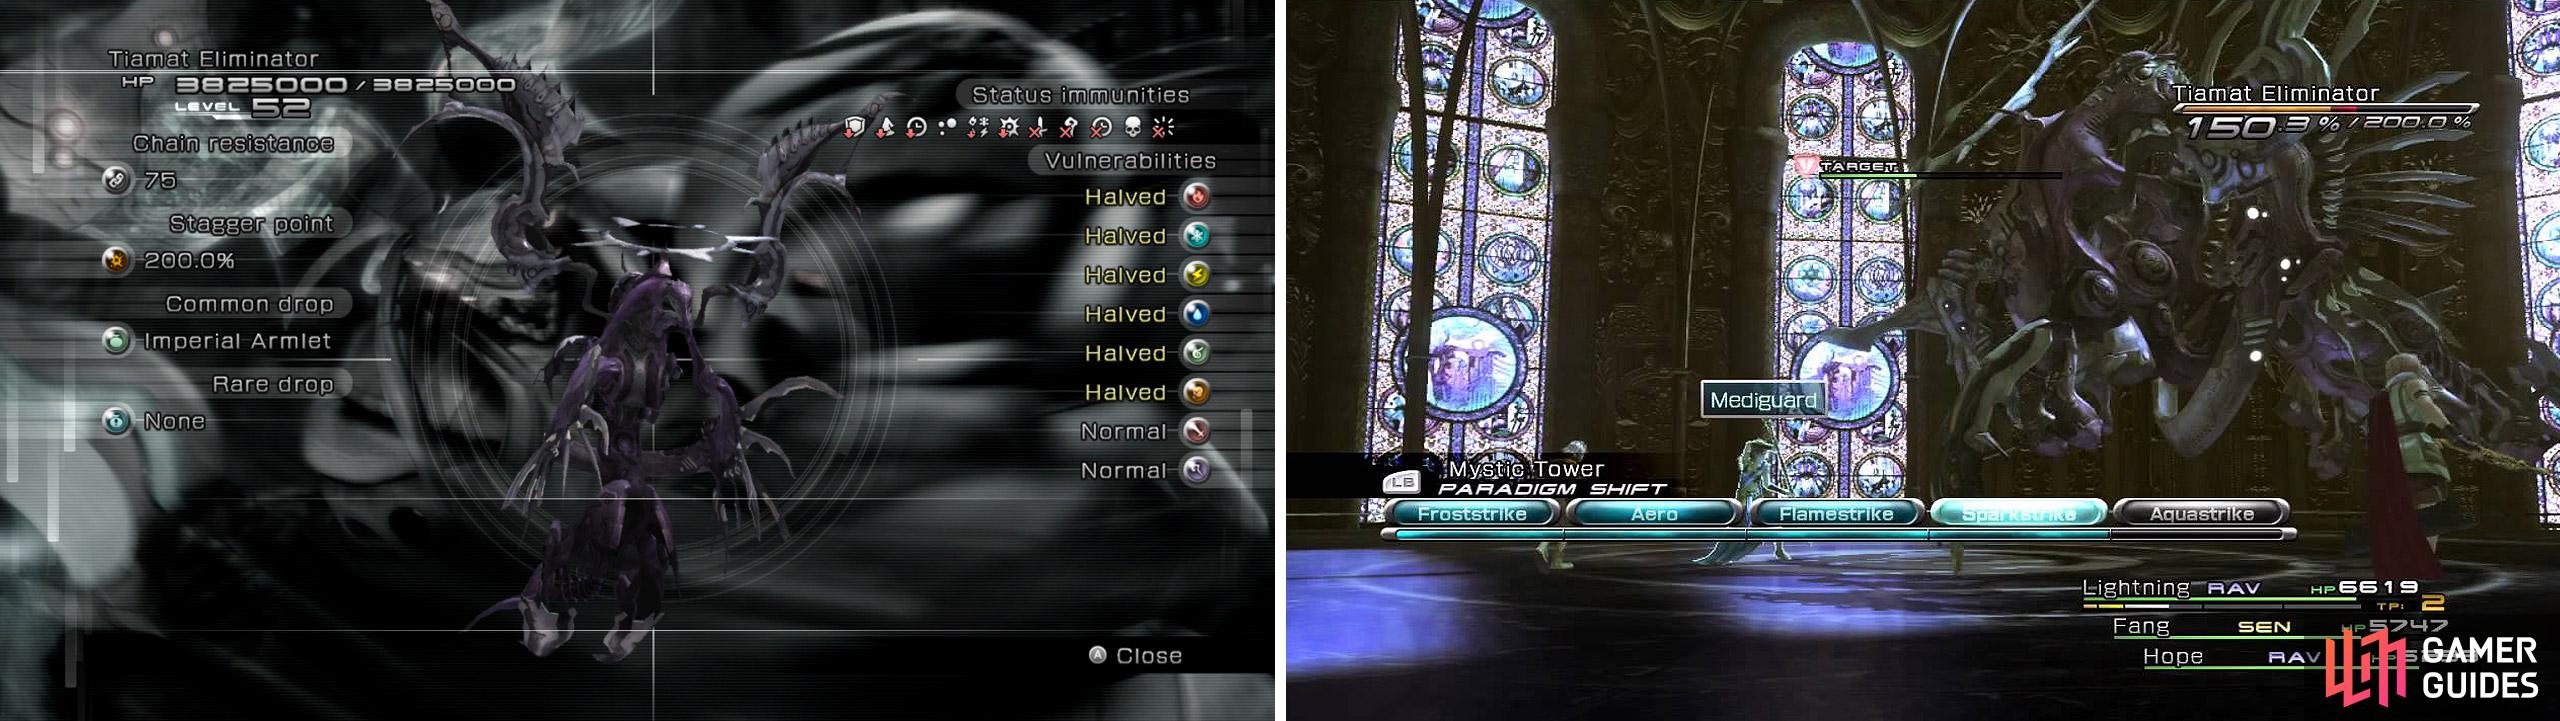
Tiamat Eliminator is similar to the earlier boss Ushumgal Subjugator, as it has most of the same abilities, with the exception of Napalm, replaced by Ice Grenade.
| Tiamat Eliminator | Stats |
|---|---|
| Level / HP | LV 52 / 3,825,000 HP |
| Strength / Magic | 700 STR / 0 MAG |
| Stagger / Chain Res. / CP | 200% / 75 Chain Resistance / 48,000 CP |
| Vulnerabilities | All Elem (Halves) |
| Common Drop / Rare Drop | Imperial Armlet / None |
Our party was Light, Fang and Sazh. This boss is pretty tame at the start, not dishing out too much damage. It’s easy for you to Stagger it and inflict some serious damage. When it switches forms by landing on the ground, some of status immunities are gone, so quickly switch to COM/SAB/HLR and have Fang stick Deprotect, Deshell, Slow and Imperil on boss (or at least first two debuffs). Buffing your characters isn’t recommended, because Tiamat has two attacks which dispel your buffs, so why waste time on that… When some debuffs are inflicted on the boss, switch back to RAV/COM/RAV, Stagger it again and wave sayonara to it.
It is possible to obtain Aegisol after battle. Examine the warp ahead to be taken to the final destination.

 Sign up
No Comments