

(1 of 2)
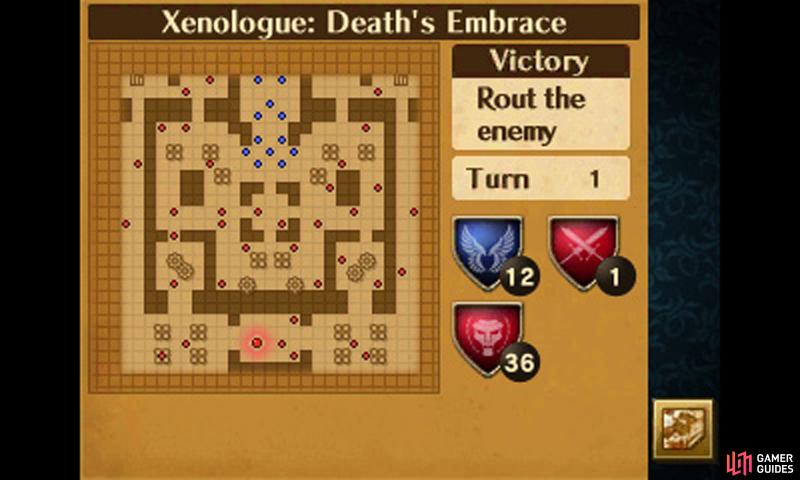
Boss
| Name | Class | Level | Items |
|---|---|---|---|
| Algol | Berserker | 20 | Silver Axe |
| Risen Chief | Soldier | 20 | Brave Lance |
New Units
| Name | Class | Level | Recruit |
|---|---|---|---|
| Est | Pegasus Knight | 5 | Defeat boss within 10 turns |
Strategies for all difficulties
For those playing by the European DLC schedule, welcome to another massive jump in difficulty. While the previous mission, Smash Brethren 3, was fairly difficult in its own right, the missions from here on are the toughest of the tough.
For a smoother progression, we recommend playing missions from The Future Past pack and Rogues and Redeemers pack first.
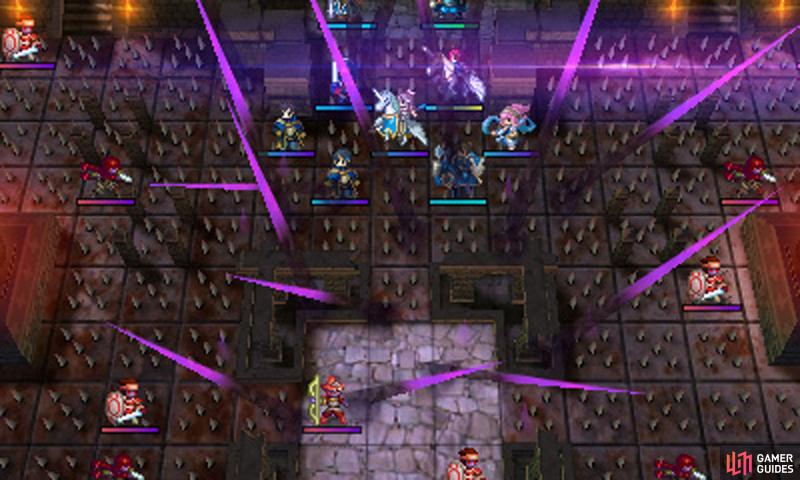
Be warned that attempting this map with conventional strategies is nigh impossible. In addition to being hard, this mission has a unique gimmick: around half of the map is filled with spikes, which reduce any unit’s HP to 1 at the start of each turn.
Naturally, your primary concern will be preventing your units from dying. Less obviously, you’ll be facing enemies with 1 HP and they can be more dangerous than you may think.
To make matters more complicated, there’s a secondary objective: to beat the boss within 10 turns. You can beat the mission without achieving this objective, but you won’t get Est.
Should you decide to attempt this challenge, don’t stress over it too much while playing; the worse thing you can do is rush in a death-trap of a level. With the right preparations and units, you’ll easily beat the boss within the turn limit.
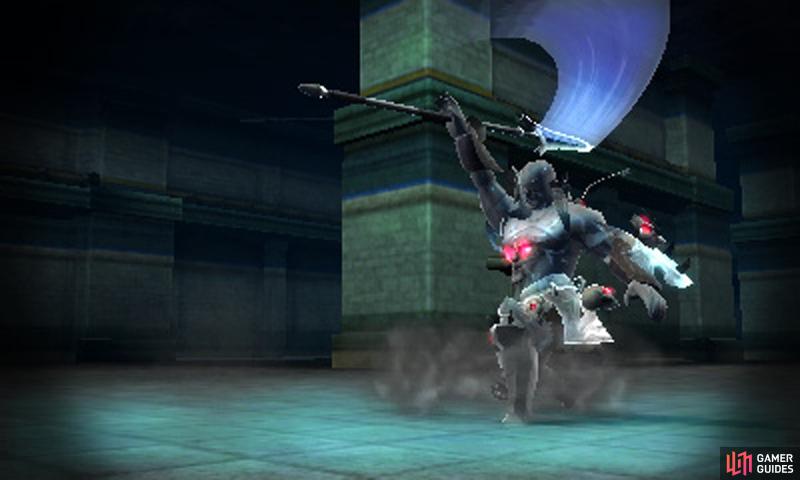
(1 of 2) Be vigilant and your units won’t face the same fate…
Be vigilant and your units won’t face the same fate… (left), (right)
Before you begin, bring at least six units with the Galeforce skill (learned by Dark Fliers at Level 15) and load up everybody with Elixirs (a set of two for each unit would be ideal).
Four units will deal with enemies on the spikes and, ideally, two of those units will be capable of wielding the Mire spell (can be bought from Gharnef or Raydrik via the Bonus Box).
The remaining two will march straight in the direction of the boss and should be loaded with powerful and ranged weaponry (e.g. forged Brave weapons) and preferably should not wield swords if going west.
For an easy battle, field at least one magic unit with Vantage and Vengeance (e.g. your Avatar or Morgan) and watch them decimate enemies while at 1 HP. Give your Vantage+Vengeance magic user(s) Celica’s Gale (can be bought from Celica via the Bonus Box) to deal damage more reliably.
Watch out for enemy Snipers with Longbow, Sorcerers with Mire and enemies with Counter, as they can kill your magic user. To avoid Mire, you can just slap on Tomebreaker yourself.
When the mission begins, you will likely have some units at 1 HP already. In most cases, it would be wise to use Elixirs or multiple Fortify staves to restore your units’ HP.
For reference, the centre of the map contains special tiles that fully restores any unit’s HP at the start of each turn. This might sound useful, but in reality its usefulness is limited–you will not want your units to be hit by the enemy in the first place and it can heal enemies.
Make sure to study the enemies carefully; besides having excellent stats, a lot of enemies have skills that you’ll need to watch out for.
Counter is always a nuisance, but the deadliest skills here will be Vantage and Vengeance. Also, take caution of the weapon “breaker” skills, like Swordbreaker–especially if it’s paired with Vengeance.
(1 of 2) Any unit sitting on the spikes on the beginning of each turn will be reduced to 1 HP.
Any unit sitting on the spikes on the beginning of each turn will be reduced to 1 HP. (left), (right)
The main strategy for the mission involves leaving most of your units by the starting position, away from the spikes, and waiting for the enemies to come to you, before sniping them with Mire and/or Galeforce hit and run tactics.
As soon as the enemy density drops and there are no enemies with Vengeance in sight, you can start moving some units onto the central area, with the healing squares. From there, you can more easily deal with the incoming reinforcements.
On your first turn, have two strong units kill the two nearby Assassins with Vengeance and then heal while up the stairs and off the spikes. On the following turns, they can continue to march around the map’s perimeter, dealing with the full HP enemies. There will be some Warriors with Counter–remember to hit them from range.
Units with Mire should prioritise any other enemies with Vengeance, as they are by far the most dangerous enemies on the map. Furthermore, they can snipe the boss and the Soldier by standing at the very bottom of the healing tiles.
Assuming your units have max stats, it should take no longer than 3 turns to kill either fiend; with Limit Break, only 2 turns may be required.
Without Mire, you’ll need to rely on the units going around the edge to deal with the boss. Don’t hesitate to employ bait tactics if there are many enemies and heal immediately when significant damage is sustained.
Near the boss are a lot of dangerous units, where skilful baiting will become important. Keep an eye for oncoming reinforcements too. You don’t want to be ganged up, as the damage will add up.
When it’s time to bait the Soldier, unequip your weapon (unless you have a bow) so your unit doesn’t suffer Counter damage.
When you reach the end, be careful not to rush–tempting as it may be–and keep calm. Only engage the boss and Soldier if you’re confident of a one-round victory; leaving them wounded, but alive, is dangerous because of their Vengeance skill. If unsure, it may be wise to wait for backup.
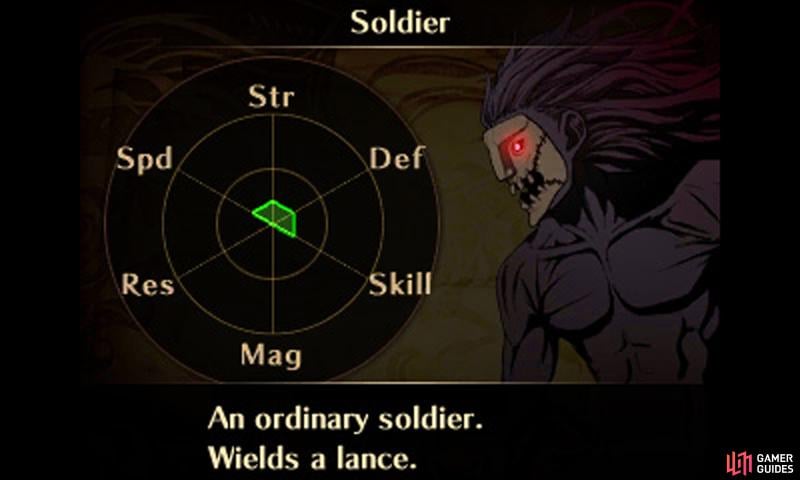
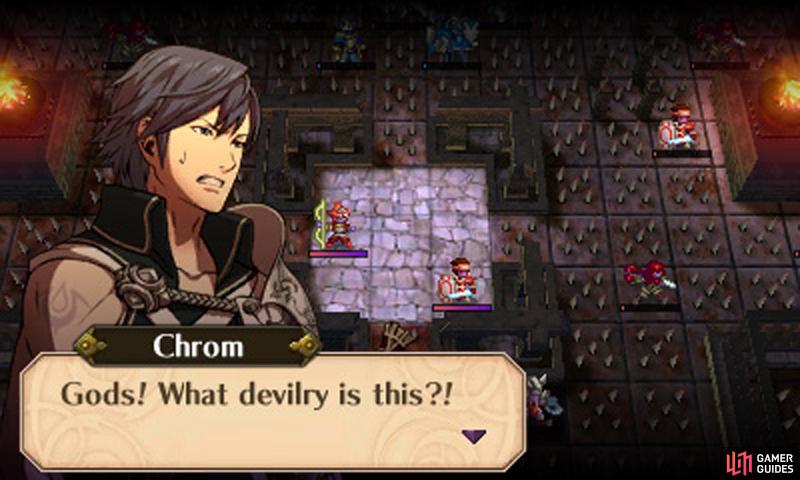
(1 of 2) Take care when fighting the Soldier; if anything, he’s more dangerous than the boss.
Take care when fighting the Soldier; if anything, he’s more dangerous than the boss. (left), (right)
As the battle progresses, a whole bunch of reinforcements will come to try and make your life a misery.
- Turn 2: 6 enemies from the Sigils (From left to right: Warrior, Sniper, Swordmaster, Sorcerer, Assassin, Hero)
- Turn 3: Same as Turn 2
- Turn 4: Sniper from north-western stairs, Sorcerer from north-eastern stairs, Swordmaster and Sorcerer with Mire from bottom two Sigils
- Turn 5: Same as Turn 4, but Sorcerer doesn’t have Mire
- Turn 6: Same as Turn 5
- Turn 7: Same as Turn 2, but Sorcerer has Mire
All reinforcements spawn during the beginning of the enemy’s turn and will march straight for your nearest units. Like with the initial enemies, blast them all away with your Galeforce and Mire units.
When the end of the battle is nigh, you may find some lingering enemies who haven’t budged since the beginning. You can snipe them with Mire or bait them with max HP units.
Should you fail to defeat the boss before the beginning of the enemy’s 10th turn, the boss will leave the map.

 Sign up
No Comments