
Messing with MyCastle XVI
Only one upgrade this time; you can upgrade your Arena to allow for three consecutive battles. That’s seriously a lot of ore if you can manage to win all three rounds.
Windmire
| Location | Objective |
|---|---|
| Streets of Nohr | Defeat the boss. |
| Enemies |
|---|
| Outlaw |
| Adventurer |
| Fighter |
| Berserker |
| Dark Mage |
| Sorcerer |
| Maid |
Going through a mysterious hidden passage near a fire waterfall full of baddies en route to the capital of the bad eternal night people… of course you’re not making it through without trouble, right? Nah, you’re fine, and your protagonist can’t help but reminisce about their childhood when they arrive. As everyone waxes poetic and makes postwar plans, they’ll realize why standing around in the bad part of town generally isn’t a good idea.
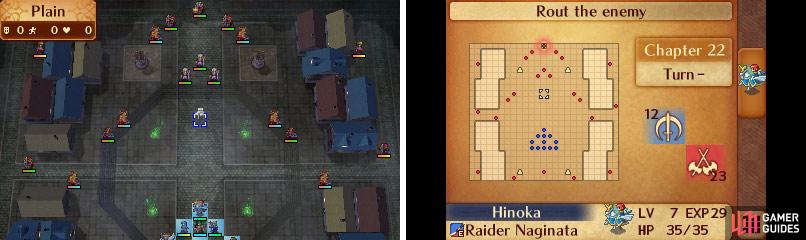
Map of Chapter 22.
This battle is, in many respects, a step back in terms of difficulty. There are no hostile terrain effects. There are, however, a pair of Ballistae to the north and a Launcher and a Fire Orb to the south. The Ballistae can be used by characters proficient in bows, the Launchers can be used by characters proficient in shurikens while the Fire Orbs can, of course, be used by characters proficient in scrolls. To use these devices, the enemy has several throwaway unpromoted (but max leveled) units scattered around, including Dark Mages, Fighters and Outlaws. Easy cannon fodder.
Not all the enemies on this map are so weak, however, as there are plenty of promoted characters, including Sorcerers, Berserkers, Maids and Adventurers. The Berserkers in particular have some pretty scary stats, including very high Attack, a hefty supply of Hit Points and a high enough Critical rate to make all melee encounters nervewracking. On the plus side, their defenses are low and their Hit rate isn’t great. Otherwise, you need not worry too much about the other units or their skills. The boss, Shura, isn’t terribly powerful, but he does have a stat boost the first seven turns, after which he becomes even less impressive.
The southern end of the map is less populated and occupied primarily by magic-users, while the north is where you’ll find a more diverse and potent collection of foes. The Dark Mage in the south-center of the map will drop a Dragon Spirit scroll, while the nearby maid will leave you one Bloom Festal richer. An Adventurer west of the central plaza possesses 5000G , a Berserker to the east will drop a Dracoshield (Permanently increases Defense by 2) and a weakling Outlaw owns 3000G more than he should. The loot is rounded out by a Maid who owns a Silver Shuriken and a Berserker with a Venge Club , both to the north. Other than this, the only noteworthy thing about this battle are the Dragon Veins near the center of the map, which will heal all units in a wide area when activated. Activate at your own risk since it’ll heal enemies too.
Start out the battle by quickly exterminating the Maid and magic-users to the south, then use a unit with high Evade to lure the three Maids from the north into striking range. Two of the Berserkers will likely move in, as will the magic-users in the corners of the map, but the latter aren’t an immediate concern. Pay special attention to the Berserkers and take them out at range if you can, and mind the movement range of the other nearby Berserkers. After those are gone, repeat the process again with the other Berserkers and Fighters, just keep an eye on the units coming around the buildings around the edge of the map.
While you do all this, don’t get complacent with the south, though, as some more Maids will show up shortly. Leave some competent units behind to clean them up. They’ll then be followed by more Dark Mages, more Maids, then more Dark Mages, and then more Maids… It’s actually not a bad place to level up, really. Of course, you can ignore them once you’re out of range of their turrets. Speaking of which, you may want to adopt a checker board formation as you advance on the boss and his minions to the north to avoid taking splash damage, and keep flying units back until the Adventurers are dead, as they’ll use the Ballistae to do heavy damage to them. The northern forces will also receive reinforcements as well. They are a one-time arrival, though, unlike the pests in the south.
Rough up the ruffians and Ryoma will have a sensible idea, almost as sensible as “don’t stand outside in a bad neighborhood at night”, before Azura has an even better one. She’ll try to turn past trauma into present opportunity, and the leader of the brigands will reveal a most unlikely connection. People in this world are overly connected to royal families that abandoned them and let their homelands get sacked into oblivion, aren’t they? The feudal system sure was awfully silly. Anyways, everybody makes nice, then Shura will permanently join your party. He is an Adventurer and so is capable of attacking with his bow, and healing with staves!

 Sign up
No Comments