

| Text Datapoints - Machines |
|---|
| M/XI Core Log 231L |
Stalking the Stalkers
Do what you can at the Sun Furrows Hunting Grounds and remember, there’s no shame in coming back later when you have better gear. When you’re done with the place, head back to the Campfire at the fork to the south, southwest and from this fork take the road to the north, northwest. Return to the fork (and Campfire) near which you met Erend earlier and from here continue north and ford a river. At the fork north of the river turn west down a road a short distance, then turn down the first road to the north you see to reach the Unflinching Watch Carja fort, which comes with a complimentary Campfire.
East of the stairs that lead to the fort you’ll find a trail leading north through the hills. It’s not marked on your map, but it shouldn’t be hard to find, and it is an awfully convenient shortcut. Dispatch any pesky Scrappers that infest these hills and continue north until you find a road, which you should follow east, then northeast to find Cauldron ZETA. Outside of this Cauldron lurk three Stalkers, and fortunately there’s enough tall grass to hide in. Once again, use Shock Arrows to stun them (focus on one at a time if you can, while remaining hidden, if possible) then finish them off with a combination of Critical Strikes and impact damage-boosted arrows.

Take down the Stalkers outside the force-field blocked entranced to Cauldron ZETA (left) then climb a nearby cliff to find a secret entrance (right).
The Secret Entrance
When they’re dismantled, find a stand-alone pillar to the south which has hand-holds you can use to climb. Reach the top of the pillar, turn west, then leap a gap to reach a ledge where a Redeye Watcher prowls. Demolish this machine, too, then continue north until you find a secret entrance to the west. So much for that energy barrier blocking the large, triangular front door. Override the door at the end of the secret passage and continue down the linear tunnel beyond until you reach a ledge over-looking a natural stone cavern, beyond.
To the Cauldron Core
Drop down the ledge into the cavern, loot a Supply Crate, then turn west to pillage another Supply Crate. A third Supply Crate lies to the north, and after you loot it turn west, jump off a ledge into some water, then swim to the western shore. Climb onto dry land and loot two more Supply Crates, then dive into some water to the west… or rather, descend carefully down some ledges, as the water’s actually not that deep. Go through a triangular wire to the south, southwest to reach the Cauldron Core chamber. Yep. Already.
Toppling the Thunderjaw
What this Cauldron lacks in complexity it makes up for in… a Thunderjaw. Small arena, no place to hide, just you and the Thunderjaw in woman-on-machine combat. You should be familiar enough with the first steps by now - rappel down to the floor, kill the two Watchers patrolling the energy bubble, climb a tower and override the Discharge Pylon to start the fight. Before you pick a fight with a Thunderjaw in close-quarters combat, however, you should strap on your Nora Protector Heavy armor, if you have any.
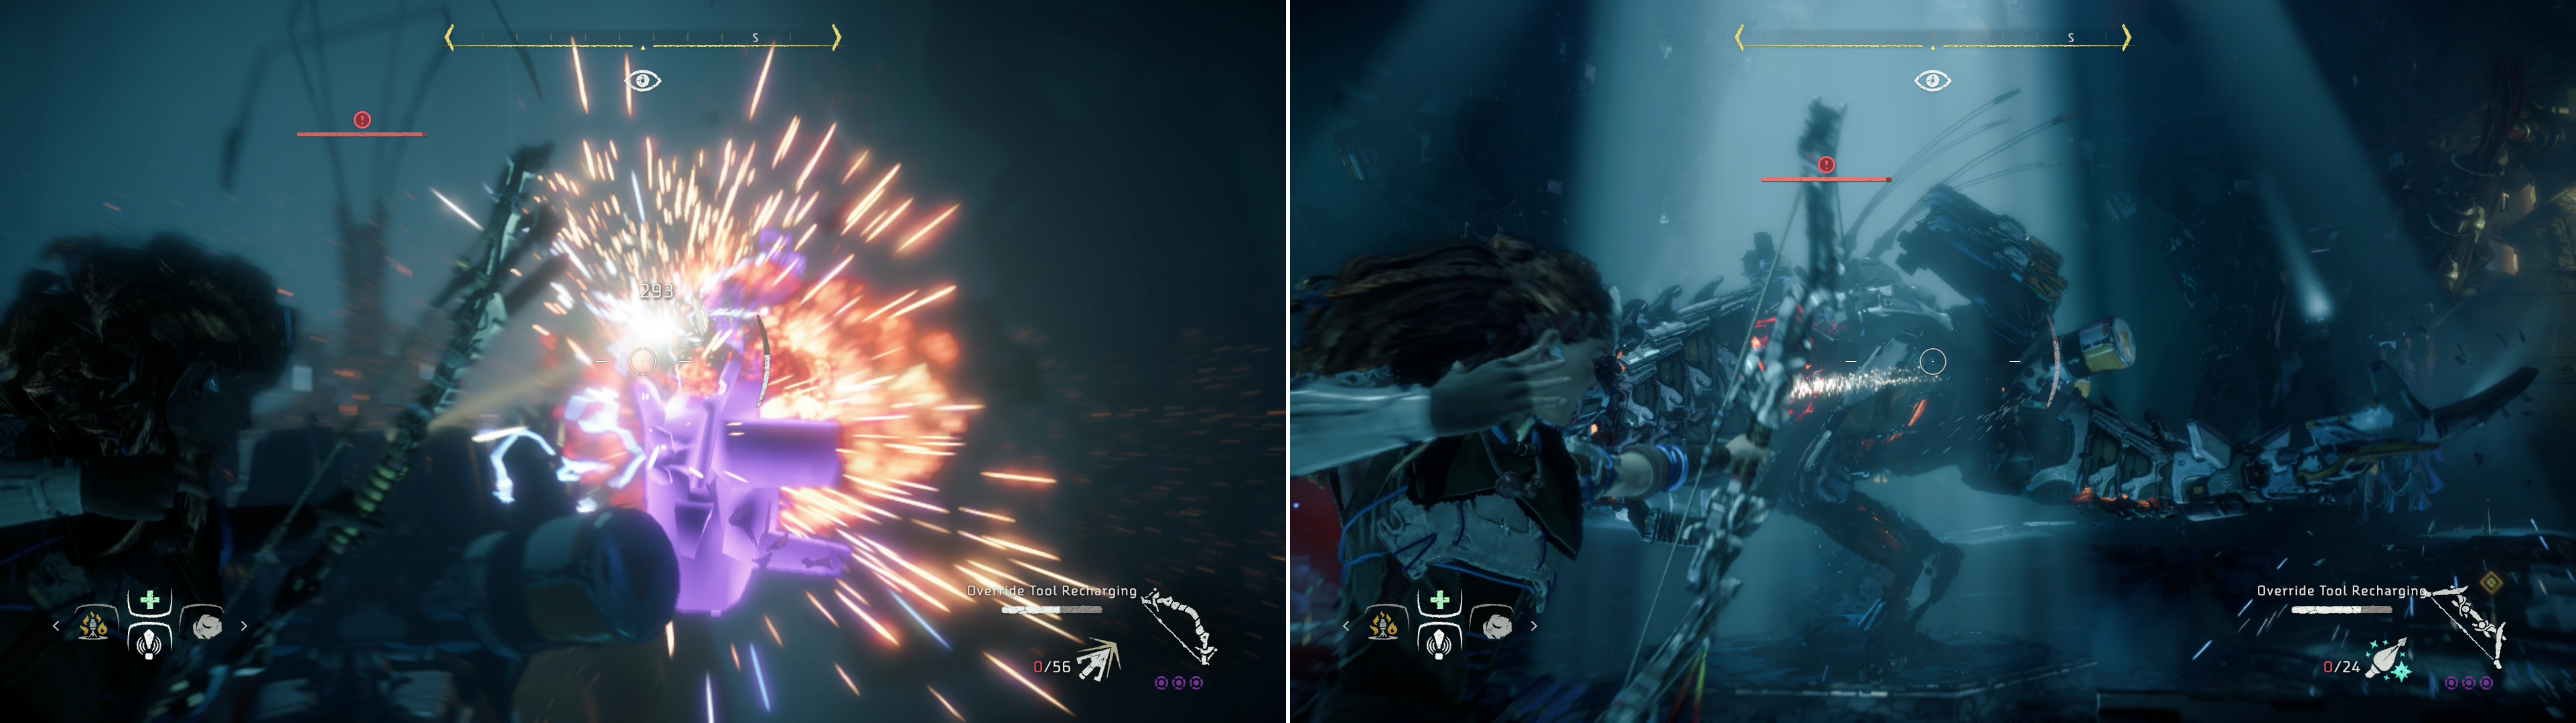
Shoot off the Thunderjaw’s Disc Launcher (left), then pelt it with Freeze Arrows until it’s frozen (right).
The basics of fighting a Thunderjaw were covered briefly during the “Sun Furrows Hunting Grounds” section, but now it’s time to go into things a bit more depth, since there’s not going to be any Ravagers to help you out, and your goal is most definitely to kill the massive machine. The Thunderjaw is possibly the most complex machine in the game - it boasts Blaze Canisters, a Data Nexus, two hip-mounted Disc Launchers, Freeze Canisters, its Heart (securely shielded behind plates on its flank), Power Cells, a Radar on its back, Cannons on either side of its face, and of course, the tip of its tail.
Not only will the Thunderjaw charge and perform tail sweeps, it can also shoot a wedge of lasers from its “mouth”. The two Cannons on the side of its head can shoot volleys of energy bolts, and the Disc Launchers on its back can perform air strikes - it you see blue laser lights, get away from them, as pain is soon to follow. In ideal situations, where you have cover and room to maneuver you’d want to start by picking off its radar. With luck, you’d stay hidden by moving from cover to cover, also taking off its Disc Launchers next, then apprehending them, shooting off its side panels, and in subsequent assaults aim for the exposed Heart for big damage.
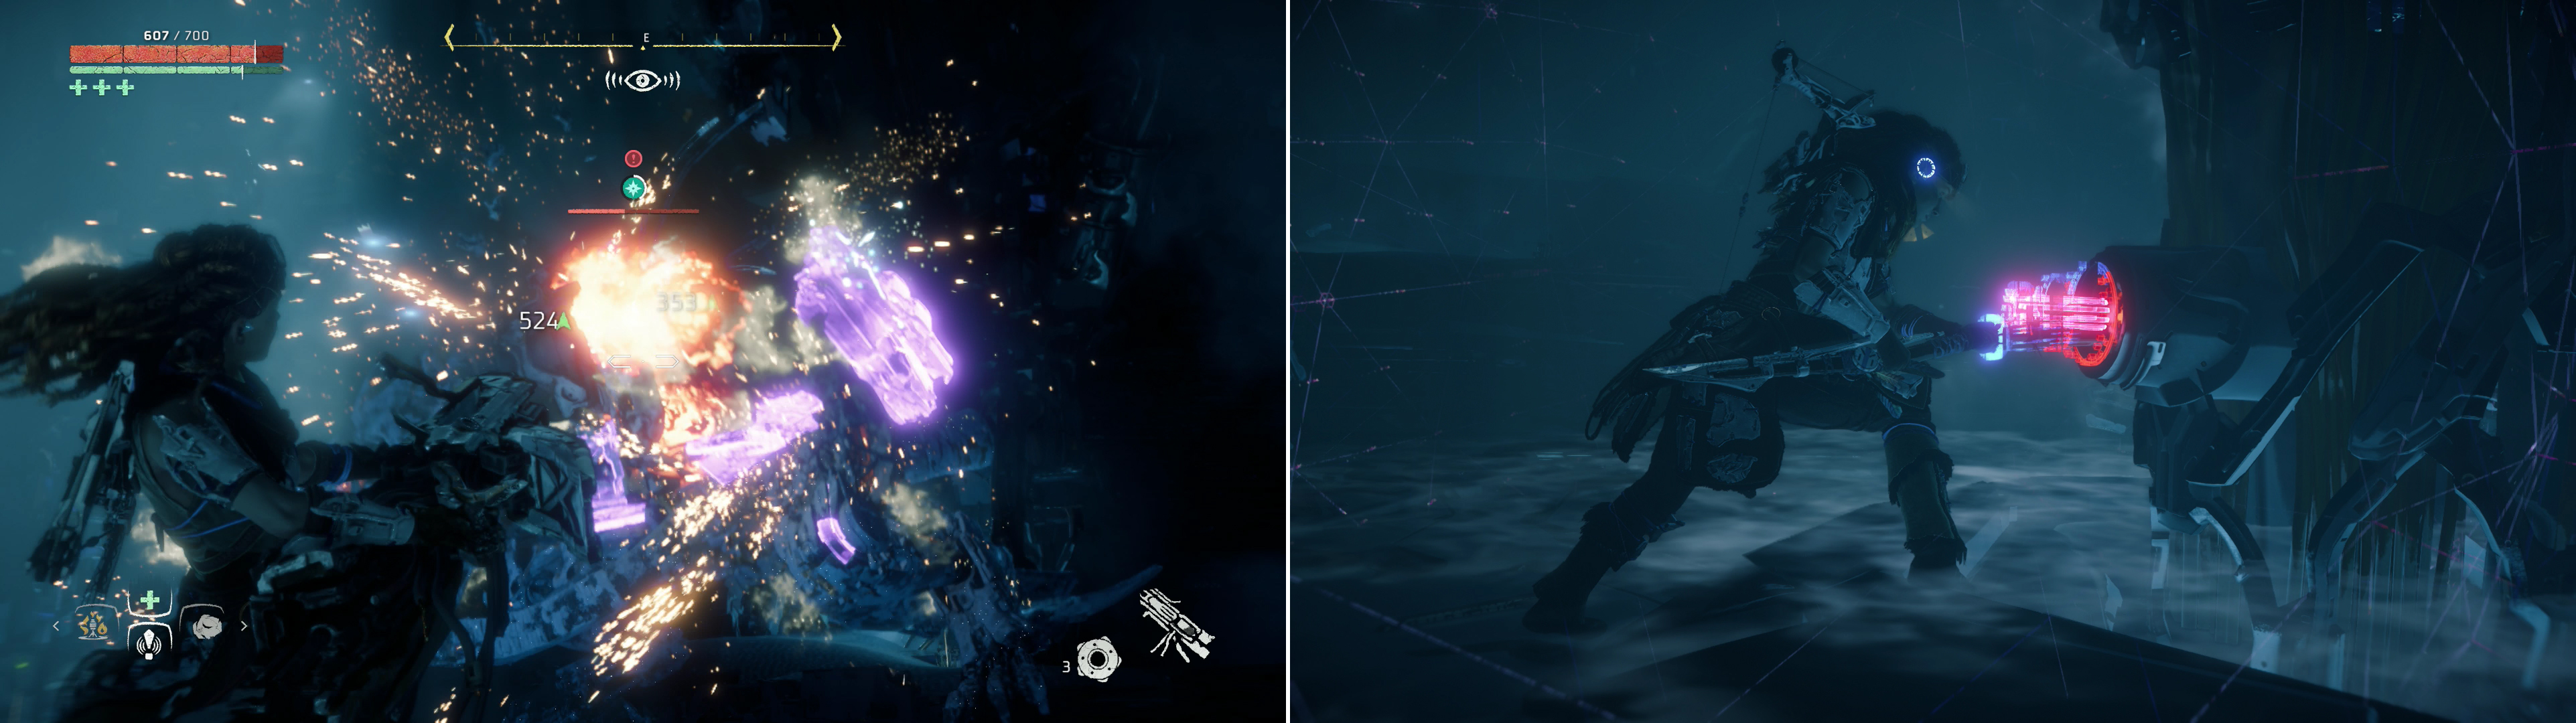
Once frozen, grab the detached Disc Launcher and give the Thunderjaw a taste of its own medicine (left) then hack Cauldron Zeta’s core (right).
These aren’t ideal circumstances, however, and you can go crazy worrying over what attacks to disable, what parts to shoot off, but the simplest tactic is this: Knock off a Disc Launcher with a Tear-damage modified Shadow Hunter Bow or Shadow Sharpshot Bow, then shoot it with Freeze Arrows (a modified Shadow War Bow should only take about six shots, or about two Triple Shots). When it’s frozen, pick up the discarded Disc Launcher and pump rounds from the heavy weapon into the Thunderjaw - hitting weak spots will score massive damage, but even body shots will leave a mark. In fact, emptying a Disc Launcher into the machine can take it down from around full health to around (or even less than, with weak point shots!) a quarter of its health.
Once it’s thus wounded, try to freeze the machine again and pick it off with normal arrow shots, or go after the other Disc Launcher. When the Thunderjaw finally falls, be sure to loot it for its customary drop, which usually includes three purple mods and a treasure trove of resources. Override the Cauldron ZETA Core and ride the elevator up, then head south through the large triangular door, which is now no longer sealed. Congrats, you can now override Rockbreakers, Thunderjaws and Stormbirds, and you’ll also have logged the Text Datapoing - Machines “M/XI Core Log 231L” .
| Objective | Rewards |
|---|---|
| For overriding the Cauldron ZETA Core | 10,000 XP / +1 Skill Point / ZETA Overrides |

 Sign up
No Comments