
With the airship and World Key in your possession, there’s a lot of things you can do. As Rhydderch mentioned, the key opens up any door or chest that has the same symbol on it. If you are thinking the same thing, that means all of those locked chests you’ve been seeing around the world can now be opened. There’s also a bunch of islands that you can reach that couldn’t before, including the first two from the beginning of the game!
Locked Chests
As already mentioned, you undoubtedly have come across chests that say they are locked whenever you try to open them. It is finally time to open them, as the World Key can unlock them. They will contain all sorts of nice goodies, from Orichalcum (will upgrade weapons to their max stats), some of the best Talismans and even some new weapons for characters.
| Location | Directions | Items |
|---|---|---|
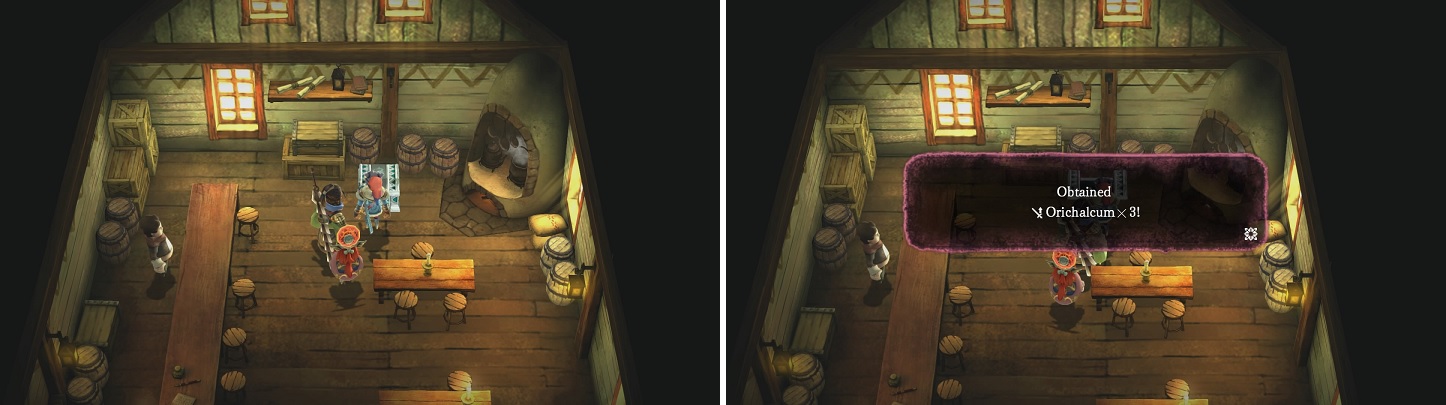
| Nive Harbor | Inside of the only house | Orichalcum x3 |
| Nive Village | On west side of village, next to some logs | Megalixir x2 |
| Dazzshire Woods | Just north of southern entrance | Brave Heart Talisman |
| Forgotten Shore | In an area not far from entrance, near chest that contains Windrider weapon | Stop Bit Spritnite |
| Serendale | Cross southern of two bridges and it’s next to the building, on the southern side | Orichalcum x3 |
| Purikka | Northwest corner | Sacred Heart Talisman |
| Frost Caves | From southern entrance, go past third encounter (three Poison Puff-Puffs) and up the incline, then left will be chest | Iokan Sword |
| Floneia Citadel | Enter town and go right to the end, where you’ll see chest in between the house and outer wall | Radiant Dagger |
| Floneia Airship | Next to save point inside | Amadeus |
It’s a very good idea to open all of the locked chests around the world, as they contain very useful items.
| Location | Directions | Items |
|---|---|---|
| Mysleigh Woods | From northeastern entrance, go up hill and as far right to find chest | Fated Memory Spritnite |
| Tenderville | Inside house on northern side | Orichalcum x3 |
| Morbrise Mountains | Near Glowy-Poly (Spritnite-Eaten Monster) | Flare Spritnite |
| Hiddbury | Inside Hydor’s hut | Lucca’s Rod |
| Twallusk Mountains | After passing through secret passage, a cutscene triggered during story; Chest is north of there | Orichalcum x3 |
| Royburg | Inside Julienne’s house | Valkyrie Bow |
| Blackwhelm Cave | Cross the ice bridge and go west, then in the next small area, head straight south to find chest | Resonance Spritnite |
| Floeberg Waters | At eastern entrance of second icy area, follow path to first split and take eastern one; chest at end of this path | Stun Bit Spritnite |
| Archimell Ruins 1 | First floor; From entrance, go east, then south and west at first split. Head south to a pair of stairs (one east and one west), taking the west pair and going straight west to the chest. | Crisis Dagger |
| Location | Directions | Items |
|---|---|---|
| Archimell Ruins 2 | On second floor, teleport to lower area and the chest will be just northwest of the teleport device | Sigtyr Spritnite |
| Gatherington | Behind house in southeast corner | Daemon Impact Talisman |
| Fridging Caves | In second area, head straight east after second encounter | Intuitive Heart Talisman |
| Fridging Heights 1 | In first area, cross third bridge and head straight east | Megalixir x2 |
| Fridging Heights 2 | In second area, in a small alcove in northern section of area after crossing first bridge | Harmonic Balance Spritnite |
| Magna Valley | Northwest corner of second area | Stoic Heart Talisman |
| Ithees Ruins 1 | On second floor, go through it normally until you reach the second bridge you can turn. Cross it going north and the chest will be to your right. | Orichalcum x3 |
| Ithees Ruins 2 | On the third floor, build the two-long bridge and cross it to the north. Head straight north to find the chest. | Brave Will Talisman |
Powerleveling
If you feel like your levels might be a little low or that you’ve been having trouble up to this point, then there are a few spots where you can grind on some enemies to boost your strength a bit. First up is the Glowy-Poly on Morbrise Mountain, which is the easiest Spritnite-Eaten monster in the game, but you’ll only get 1,000 EXP from it. The Silvara on Twallusk Mountain will give 3,000 EXP (all Spritnite-Eaten monsters only give 1k EXP a piece), and is a good one if you can manage to kill them all in one move.
However, the Rocky enemies in Floeberg Waters have less HP than the Silvara and there are five of them in the group, so you would get at a minimum of 5,000 EXP from each battle. You will find the Rockys at the beginning if you enter from the western exit, with Blowbeat being the move of choice being used here. The follow Spritnite equipped on Endir should be enough to break through and one-hit the Rockys: Combat Instinct, Resonance, and Ultimate Truth (for critical hit chance). If you’re having trouble, you can add Physical Pride in there as well.
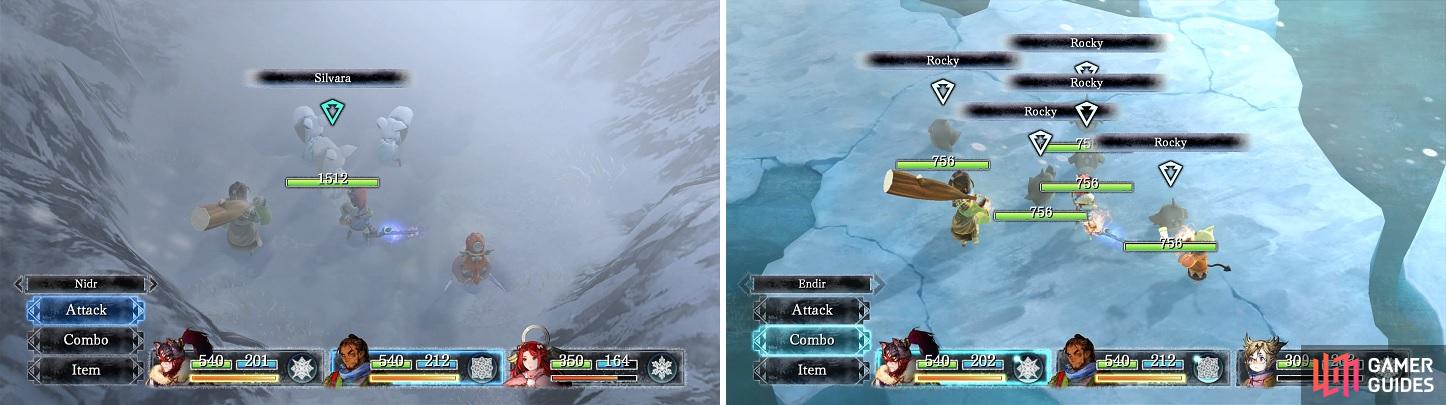
Groups of Spritnite-Eaten monsters, like the Silvara (left) and Rockys (right) are great for grinding experience.
One More Thing
In the northwest corner of the map, you will find an island with a forest on it. Enter Morthshaw Woods and you will see a portal at the dead end. Stepping into the portal will lead you to some secret place that has the developers of the game inside. Feel free to talk to them if you want, as the one just south of the front gate will buff the monsters to your level if you want. The only other reason to be here is a chest in the northern house, which contains a new weapon for Endir, called Momentum.
There are other islands across the game’s world, but none of them really offer anything new, so there is no point in visiting them. Two of these islands are the ones from the beginning of the game, Nive Island and the one with Hymncott Forest. Note that the extra islands all have unique ingredients on them, so it might be worth visiting them to grab them to get some new recipes. Also of worth are those towers you’ve seen that are locked, one of which you’ve seen during your trip so far. There are two more accessible only by airship, north and south of the Last Lands, and they only contain bosses you have previously fought in the game (although they hit harder).

 Sign up
No Comments