
Frost Caves
| Enemies |
|---|
| Pengy, Poison Puff-Puff, Skullian, Waloompa |
Enter the Frost Caves and you’ll find that there is a linear path at first, so follow it until you spot a chest in an area, which contains a new Spritnite , Provoke (it’s for Nidr). Go south and ignore the locked chest to the left, moving to the right. Keep going in that direction until you come to a big area with some enemies. Continue straight north and you’ll end up fighting a normal chest in the top left corner of this area ( Fogstone x3 ). Head back to the previous area and run west until you find a save point, so heal up, save and get ready for a boss fight!
BOSS - Primeval Tortoise
This can be a challenging fight, or a long one, as the boss has some pretty defenses during a certain aspect. It knows both Ice and Fire spells, which only hit a single character for moderate damage. The boss also has access to Ice II and Fire II, both of which hit the entire party, dealing about the same damage as their single counterparts. Toxic Breath has a chance to inflict Sap on your characters, and Sweeping Spin will hit all of your characters a few times, making it a dangerous move.
Its most annoying move is where it will hide in its shell, making it so your physical damage will do single digits. Depending on who you have in your party, you might have to wait until the boss comes out of its shell before you continue attacking it. Although Setsuna has low health, she should have access to the Lightning tech, which does good damage when the Tortoise is in its shell mode. If you don’t have Setsuna in your party, then you’re going to need to wait until the boss comes out of its shell to deal damage to it.
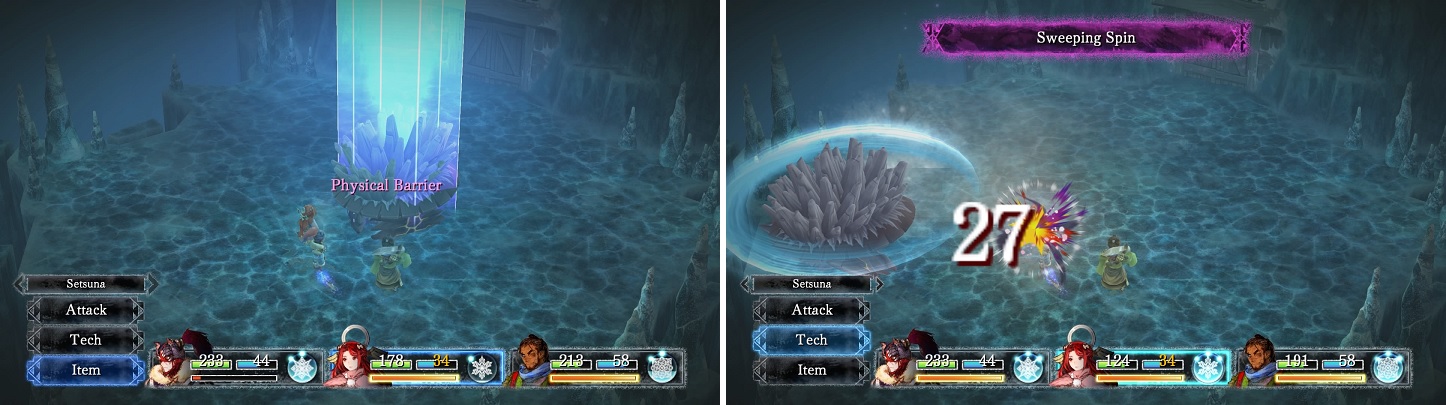
The boss has high defense when it hides in its shell (left). Sweeping Spin will hit all of your characters for decent damage (right).
Upon defeating the boss, exit the cave to the north to get back to the world map. You can explore the surrounding area, but your next objective is the Floeian Citadel, which is due west as soon as you exit Frost Caves. As you enter it, you’ll see a scene, but will be able to enter the town after you mention the sacrifice. The first thing you should do is go to the left to spot the Blacksmith in front of a snowman right outside of a house.
He’ll have some new weapons for your characters, as well as a tempering item. You can use these items (Mythril in this case) to power up weapons, making them stronger. In the house to the immediate left of the Blacksmith will be the Magic Consortium (new Spritnites), Chef and Apothecary. Back outside, you can get a new recipe ( Warm Stew Recipe ) from the Unremarkable Young Man sitting against the central structure, provided you have a Black Sweet Potato, Icicle Cucumber, Stove Asparagus, and Water Broccoli.
Head all the way to the west side of the town and to the north side, then start going east, checking in between the first two buildings to find a chest ( Mid-Potion x3 ). On the second floor of the house just to the right of the central structure will be another chest, containing the Aqua Heart Talisman . This is a nice talisman, since its bonus effect will make enemy HP visible. If you didn’t check out the new Spritnites from the Magic Consortium NPC, it might be a good idea, as you will see some new ones for some of the characters.
To continue the story, head into the castle to the north and you’ll find Avalo in the throne room. He agrees to let you use the airship, but the shipwright is missing, so you’ll need to wait until he is found. Ask around town and some people will mention Tenderville, a town that is located to the north of Floneian Citadel. However, you will need to pass through Mysleigh Woods in order to get to it. Exit to the world map and follow the path east, north and west to find the entrance to the woods just past the bridge.
Mysleigh Woods
| Enemies |
|---|
| Hoot-Hoot, Muffy, White Flapper, Woot-Hoot |
There’s only a linear path ahead of you for now, so follow it past the bridge and as it goes north. In the very first clearing as you go north, you will find a treasure chest, containing Athenian Water x3 . Continue west and as you pass underneath a bridge, you will happen up a young boy being attacked by some Pengys. Defeat the enemies and the boy will introduce himself as Kir. He’ll join you (not as a party member), so continue trekking through the woods.
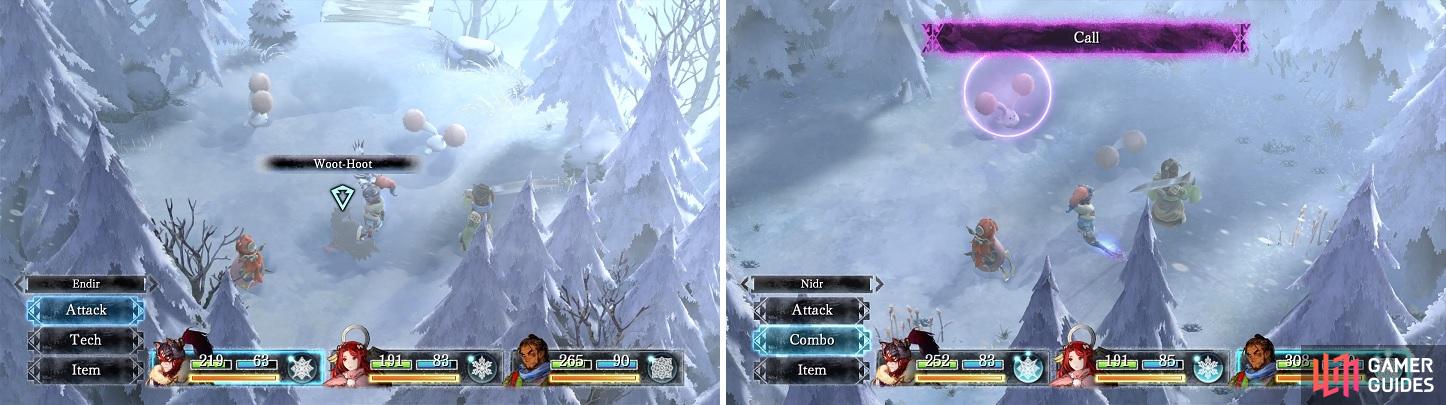
The Hoot family of enemies are rare and flee quickly (left). Muffies will use Call to bring another into battle if they are the last one remaining (right).
As you start heading north again, there will be a chest with the Spider Silk Talisman in it, in the northeast corner of another clearing. You will soon come upon a split, but the southern path just leads to a locked chest, as well as another route that brings you back to the entrance. So, keep going east and you’ll come upon the exit to the woods. Tenderville is just to the north on the world map, so go ahead and enter it.
The Administrator at the entrance to the village mentions that if you’re looking for someone, you should go and ask the old man in the furthest corner of the village. Before doing that, you will find a chest in the northeast corner of the town, which contains the Tail of Fortune Talisman . This talisman has three slots for Spritnite (all, command and support), so if you have a lot of Spritnites for a character, it might be a good idea to equip it to that person.
The old man you’re looking for is inside of the house in the southeastern corner. His name is Dinas and he says that Akash can be found in the pub in Floneian Citadel. Before you can head off, he will give you a letter to give to Akash, so it’s time to march back through Mysleigh Woods. Remember that shortcut mentioned earlier? Take it now to quickly return to the southern exit (there will be a scene on the bridge near there), then get back to Floneia.
The pub is located just west of the Blacksmith, and is where the Magic Consortium, Chef and Apothecary NPCs are located. Talk to the man in the bottom left corner, who turns out to be Akash. Talking to him normally will lead to nowhere, but as soon as you hand over the letter, he’ll agree to help you out. You just need to get permission from Lord Avalo, so go ahead and talk to him. Things take a hairy turn and you are left with just Aeterna, Endir and Nidr.
Fight off the soldiers and exit the castle, only to be confronted by more soldiers. Defeat them and go towards the port. The entrance to the port is on the west side of the town, where you’ll have to fight even more soldiers. After taking them out, Dinas will show up and coerce the lone soldier guarding the door to open it up. Ignore the other paths and go straight onto the ship, entering the door on the northern end, where you’ll find some monsters. On the second floor, you will find some more, as well as a save point. Use it to heal up and save, then go down to the bottom floor to encounter a boss.
BOSS - Wolf Baron
The Wolf Baron seems fairly easy at first, but it has a pretty annoying move that will prolong the battle more than it should. Deadly Claw is nothing more than a two-hit physical attack on a single character. The annoying move is called Deadly Bite and in addition to doing damage, it will inflict Momentum Lock on that character. What this does is makes it so you can’t use Momentum, although you will still gain SP.
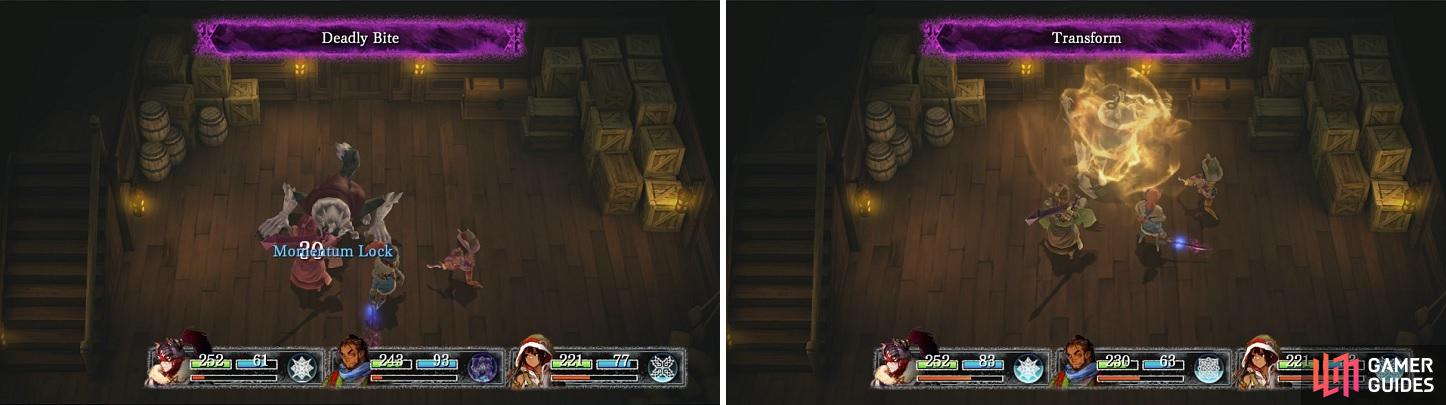
Deadly Bite can lock you out of using your SP (left). When it Transforms, all of its previous attacks get stronger (right).
At around 50% health, Wolf Baron will use Transform to make its other attacks stronger, as well as gaining a new one. Its previous attacks are renamed from Deadly to Golden, and its new attack is called Golden Wind. This attack will hit all of your characters for medium damage. Since you only have three characters in the battle, you should start with having Aeterna cast Protect, helping to reduce the damage from the boss’ attacks.
Also, using Momentum Mode on Endir’s Wall will cast it on everyone, so that will also help. Hopefully you have Aura on Endir, since that will be your only means of healing outside of items. Techs that paralyze or take the boss out of commission for a short time, like Blowbeat (Endir’s Shock + Nidr’s Provoke) is ideal here (even if that combo costs a lot of MP). You can even use Momentum Mode to boost it up, where it will lower the beast’s attack and defense.
After defeating the Wolf Baron, go through the door and rescue Kir from his magical binds. It turns out that Setsuna is not with him, so you’ll have to find her now. Luckily, she’s not too far away, so head back up to the deck of the ship, making sure you save and heal your characters, then get ready for another boss fight.
BOSS - Reaper and Spritnite Device
Depending on what you do, this can be a rather easy boss fight. Unlike the last time you fought Reaper, he has learned two new moves, but he only uses those two throughout the entire battle. Those are Helix Slash, which acts similarly to the normal scythe attack he did in the last meeting, and Dark Mist, a dark ball of energy. Both attacks will most likely hit at least two of your characters and even all three, depending on their positioning.
However, this boss fight is easy because you don’t even have to attack Reaper. Your objective in this battle is to destroy the Spritnite Device, which has around the same amount of health as Reaper. The device doesn’t do anything, so you don’t have to worry about additional attacks. If you decided to bring Setsuna into the battle, her Lightning tech does do nice damage to the device. In fact, Reaper doesn’t drop any items, so just concentrate on the Spritnite Device and the battle will be over before you know it.
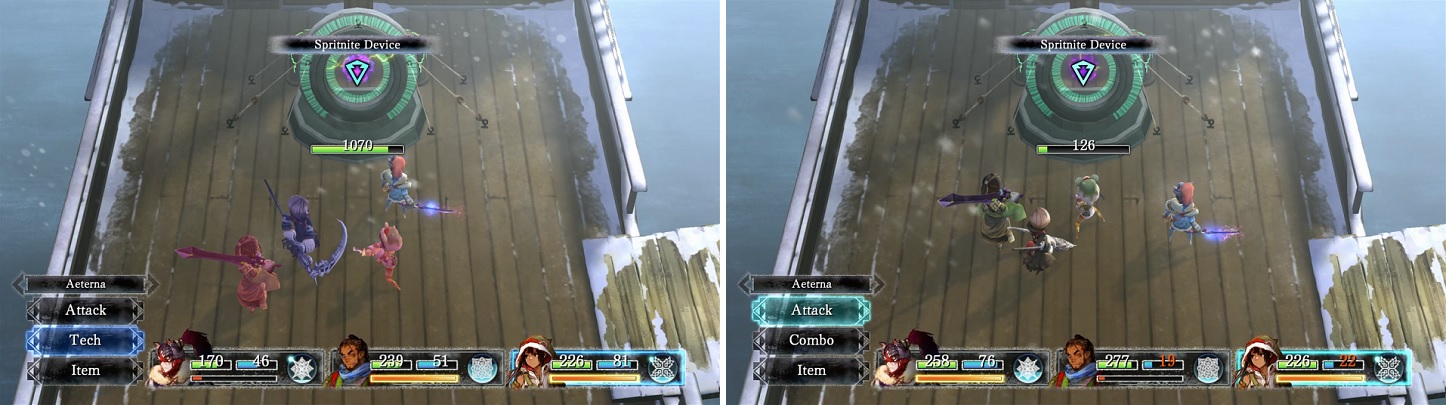
You only have to destroy the Spritnite Device to win this battle.
Upon destroying the device, watch the scenes that follow and your next objective will be to return to Mysleigh Woods. Before doing that, you will find that the blacksmith has new weapons available for your characters, so if you have the money, upgrade them and be on your merry way.

 Sign up
No Comments